

Page 1
INSTALLATION INSTRUCTIONS
** Installation recommendation: JBA recommends in most case that the vehicle be taken to a reputable exhaust shop for installation.
40-1535
2006 Dodge Ram Quad Cab 5.7L HEMI
Recommended Tools:
pry bar
ratchet
15mm deep socket
channel lock pliers
Anti-seize
spray lubricant or
penetrating oil
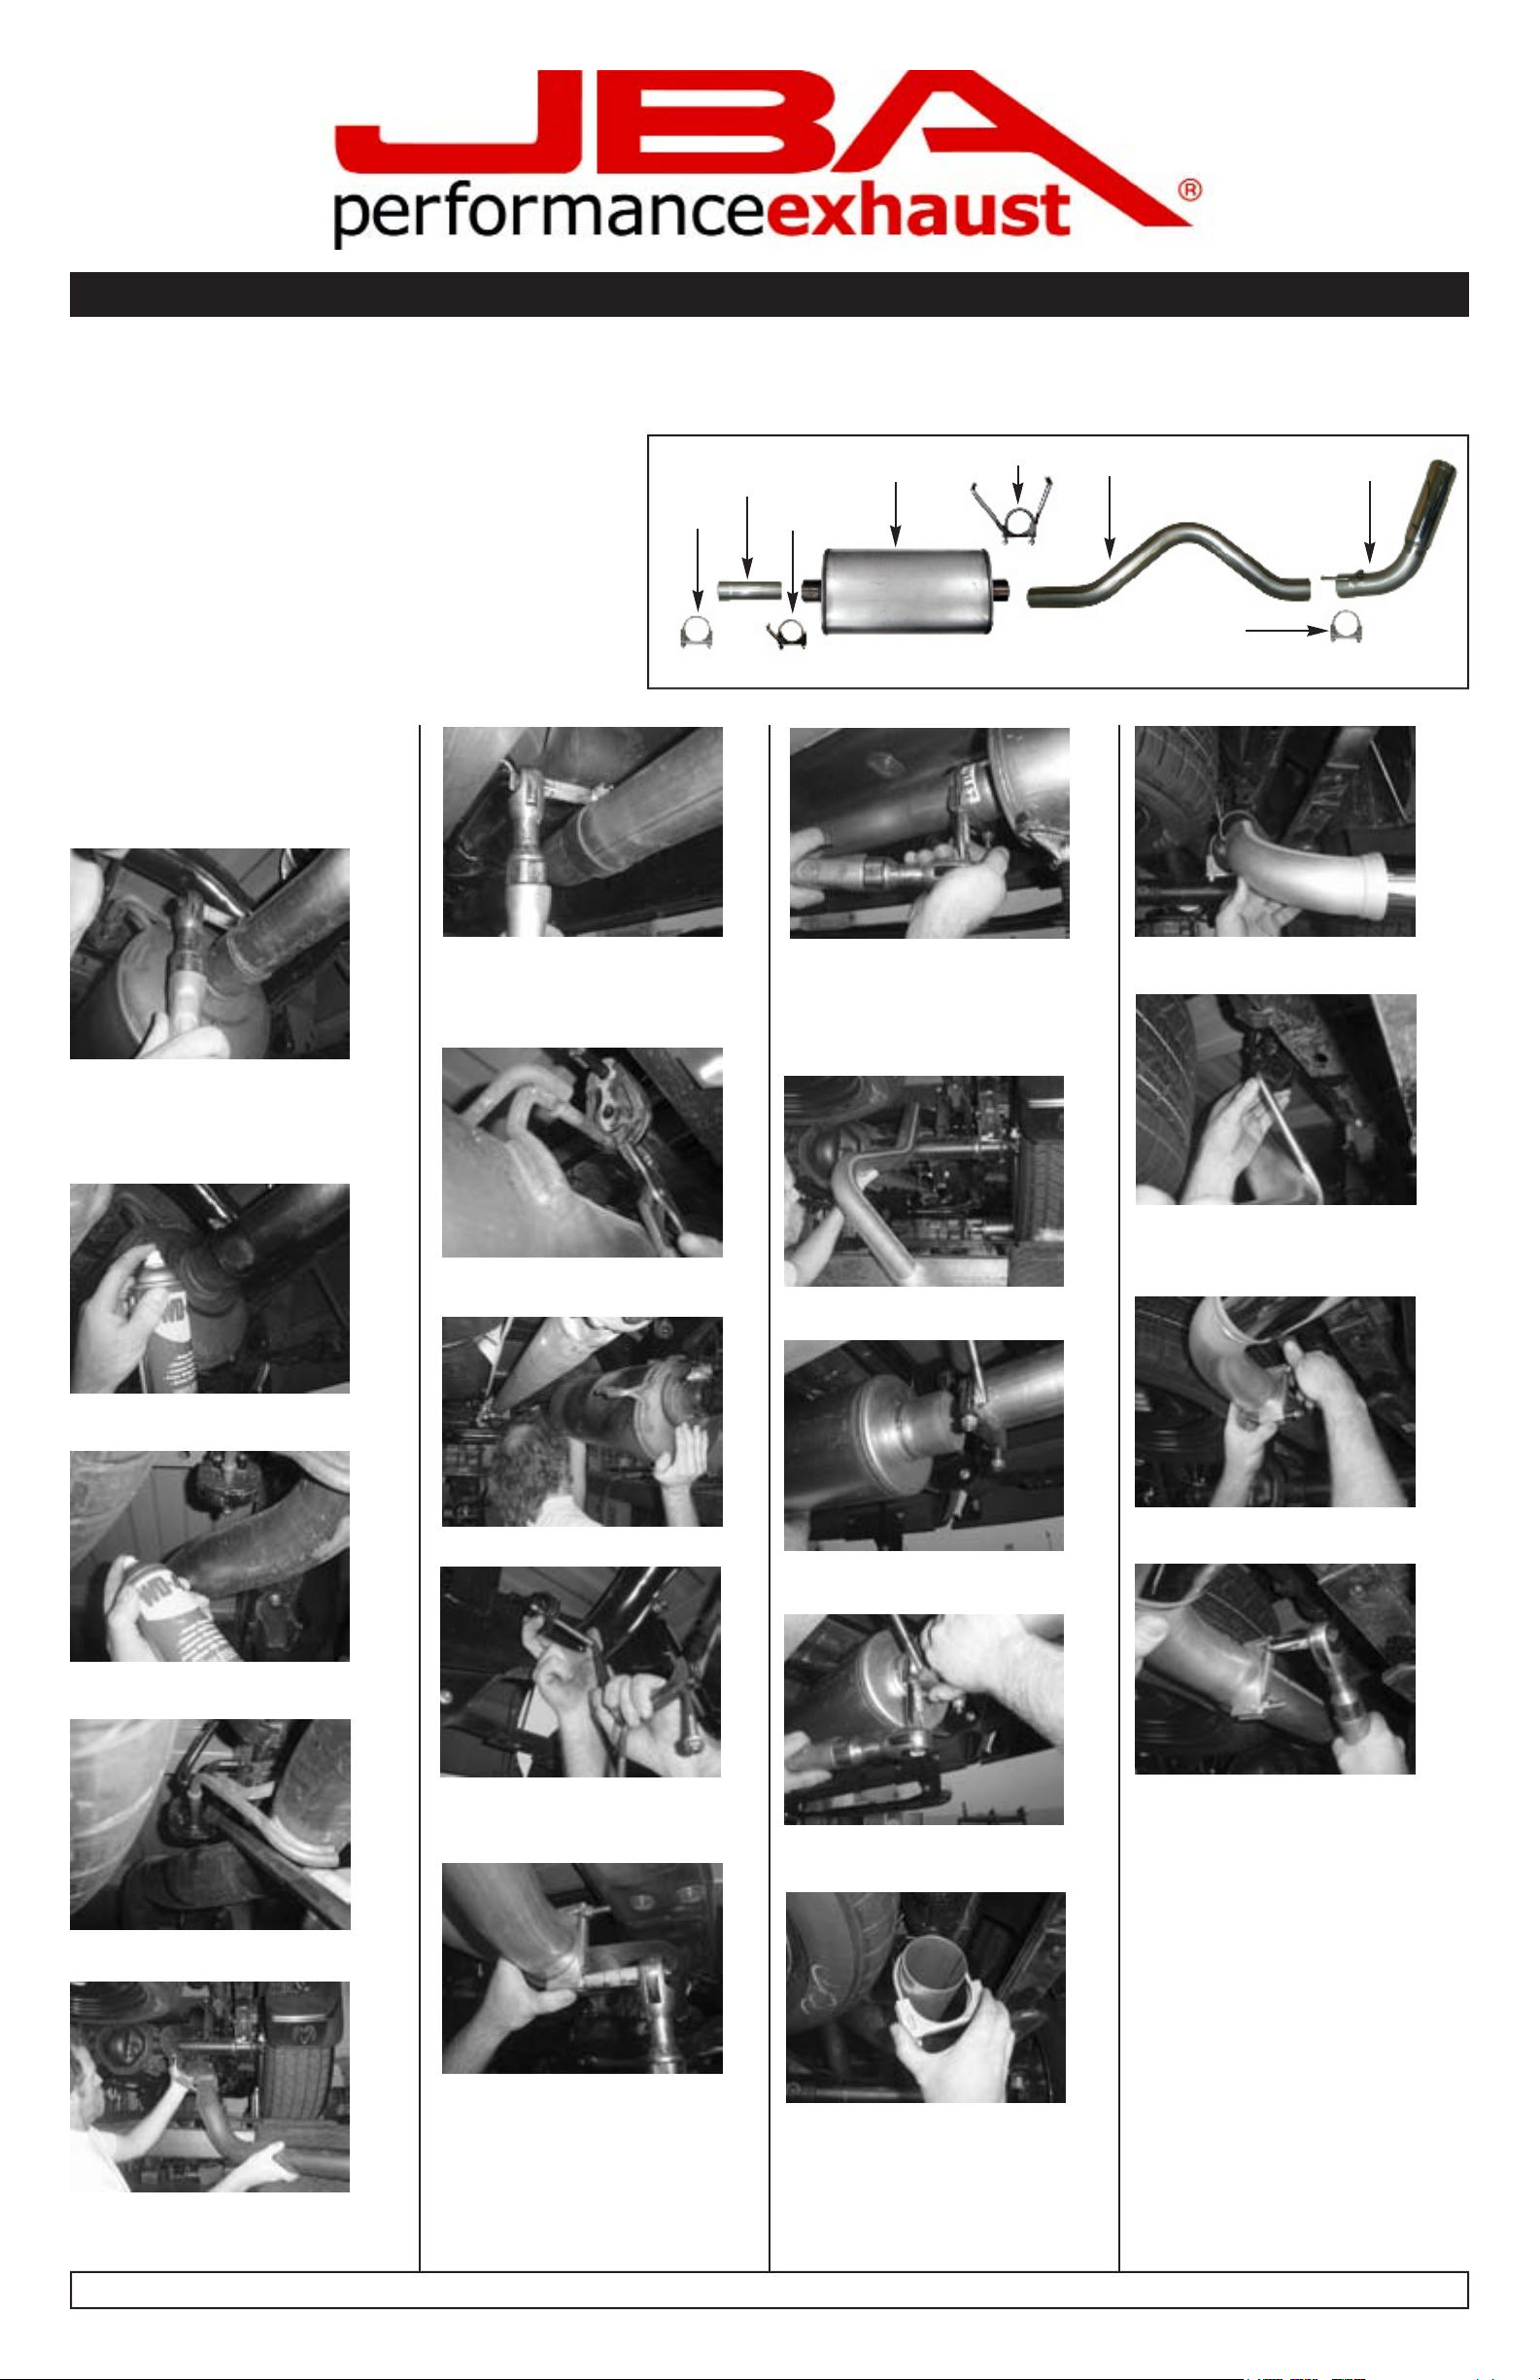
Parts List:
A. Intermediate pipe 1
B. Mufer 1
C. Tail pipe 1
D. Turnout w/ tip and hanger 1
E. Mufer hanger clamp 1
F. Exhaust clamp w/ hanger 1
G. 3” exhaust clamp 2
TO START:
1. Remove and inventory JBA exhaust.
2. Disconnect negative battery cable
and allow vehicle exhaust to cool.
3. With the vehicle raised and properly
supported, using the 15mm socket and
ratchet, loosen the clamp, at the rear
of the mufer, that secures the tail
pipe to the mufer.
A
G
8. Using the 15mm socket and ratchet,
loosen the clamp that secures the
mufer assembly to the resonator/intermediate pipe.
B
E
C
F
13. Insert mufer (B) into intermediate
pipe (A). Place exhaust clamp with
hanger (G) at the front of the mufer.
NOTE: Support the mufer temporarily,
until the mufer hanger clamp is used.
D
G
18. Install turnout w/ tip (D) at the end
of tail pipe (C).
4. Spray lubricant on the exhaust pipe
behind the mufer.
5. Spray lubricant on all factory rubber
isolators.
9. Remove mufer hangers from
rubber isolators.
10. Remove factory mufer assembly.
19. Insert turnout w/ tip and hanger
into rubber isolator at the rear of the
vehicle, near the spare tire.
14. Install tail pipe (C) through the rear
of the vehicle.
20. Position exhaust clamp (H) over
slip connection on turnout w/ tip (D).
15. Insert tail pipe (C) through mufer
hanger clamp (E) and into mufer (B).
21. Align exhaust tip (D) properly and
tighten clamp (G).
22. After installation, it is recommended that all clamps be re-tightened.
23. Tack weld all slip connections in
three spots.
24. Lower the vehicle and reattach the
negative battery cable.
NOTES:
1) It may be necessary to loosen and
realign the spare tire for proper clearance.
2) All exhaust systems will expand
about 1” rearward when exhaust tem-
peratures start to rise.
3) Use Anti-seize on threads of
clamps.
6. Remove the factory tail pipe hanger
from rubber isolator.
7. Remove tail pipe from the rear of
the vehicle.
11. Install mufer hanger clamp (E)
into rubber isolators near the rear of
the factory mufer location.
12. Install intermediate pipe (A) and
secure with exhaust clamp (G).
16. Align tail pipe (C) properly and
tighten mufer hanger clamp (E).
17. Install exhaust clamp (H) loosely
over tail pipe (C). Do not tighten at this
point.
JBA recommends taking the vehicle to a mufer shop and having all slip connections tack welded. 11.15.06
 Loading...