

Page 1
Tradition verpflichtet
User manual
Turntable
Belt Drive
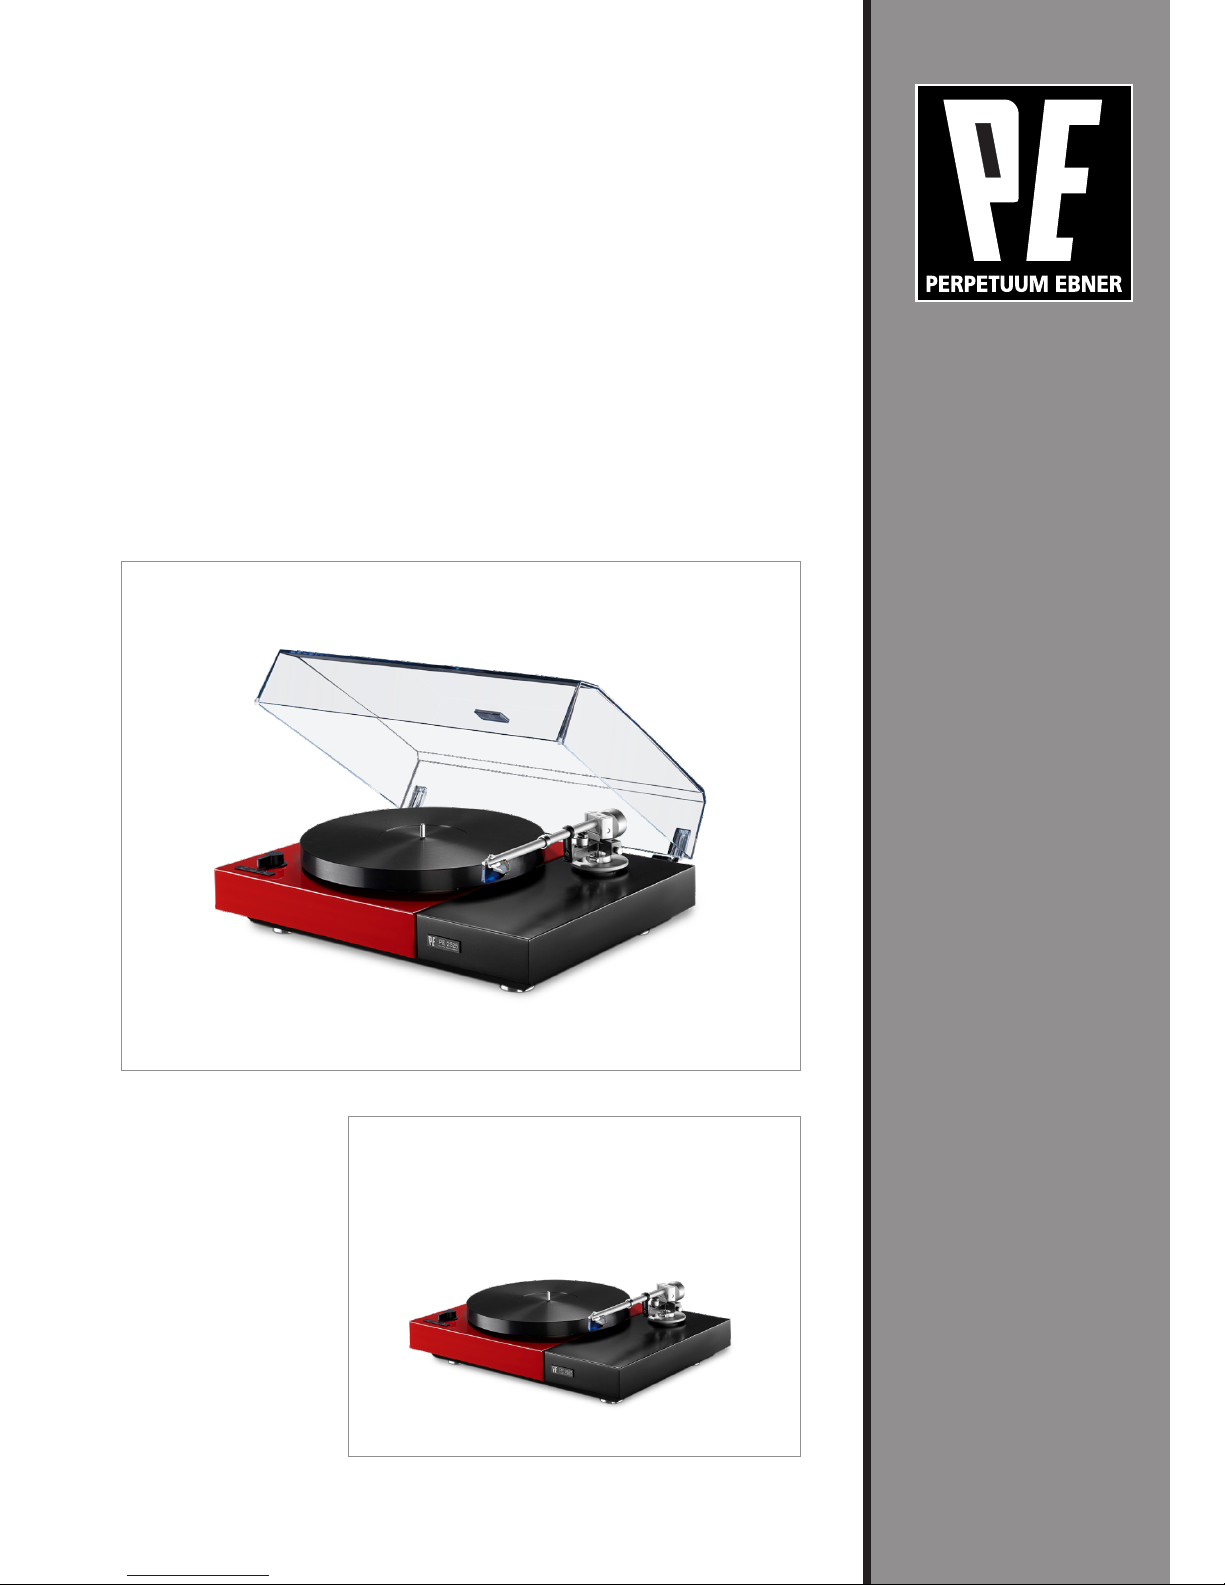
PE 2525
Page 2
2
CONTENTS:
1. SAFETY INFORMATION ............................................
2. UNPACKING ...............................................................
3. SET-UP and ASSEMBLY ............................................
4. CONNECTIONS ..........................................................
5. DRIVE SETTINGS ......................................................
6. TONE ARM and PICKUP CARTRIDGE
a.) Tracking force .......................................................
b.) Anti-skating ...........................................................
7. OPERATION .............................................................
8. TECHNICAL SPECIFICATIONS ................................
9. SERVICE INFORMATION .........................................
3
4
5
7
8
10
12
14
15
16
Page 3

Dear music lover,
Congratulations on the purchase of your new Perpetuum
Ebner (PE) turntable.
This product has been designed and manufactured with the
greatest care.
Please, take note of the enclosed safety information and read
the operating instructions carefully before you set up and
operate the device.
SAFETY INFORMATION:
PLEASE READ CAREFULLY BEFORE OPERATING YOUR
UNIT !
CAUTION:
To reduce risk of electric shock, do not remove the cover.
There are no user-serviceable parts inside.
This symbol on the product or on its packaging indicates that this product
must not be disposed of with your other household waste. Instead, it is
your responsibility to dispose of your waste equipment by handing it over
to a designated collection point for the recycling of waste electrical and
electronic equipment. The separate collection and recycling of your waste
equipment at the time of disposal will help to conserve natural resources
and ensure that it is recycled in a manner that protects human health and
the environment.
For more information about where you can drop off your waste equipment
for recycling, please contact your local city office, your household waste
disposal service or the shop where you purchased the product.
This product was tested and complies with all the requirements
for the CE Mark.
IMPORTANT: Disposal of waste equipment by users in private
households in the European Union.
Tradition verpflichtet
3
Page 4
PE 2525
BEL
T DRIVE - MADE IN GERMANY
4
2. Unpacking
We have developed a high-quality packaging, so that
the product arrives you safe and protected. Carefully
remove the unit and accessories from the packaging
and check the contents for completeness.
Items delivered:
1x chassis with pre-assembled tonearm incl. pick-up
cartridge
1x sub-platter, 1x platter
1x dust cover
1x flat rubber drive belt
1x RCA cable with ground wire
1x Hex key SW3 (transport lock, tone arm height
adjustment)
1x setup template
1x pair of cotton gloves (white)
Please keep the original packaging in order to protect
the device in case you ever need to ship it or transport
it. Make sure to tighten the locking screws when you
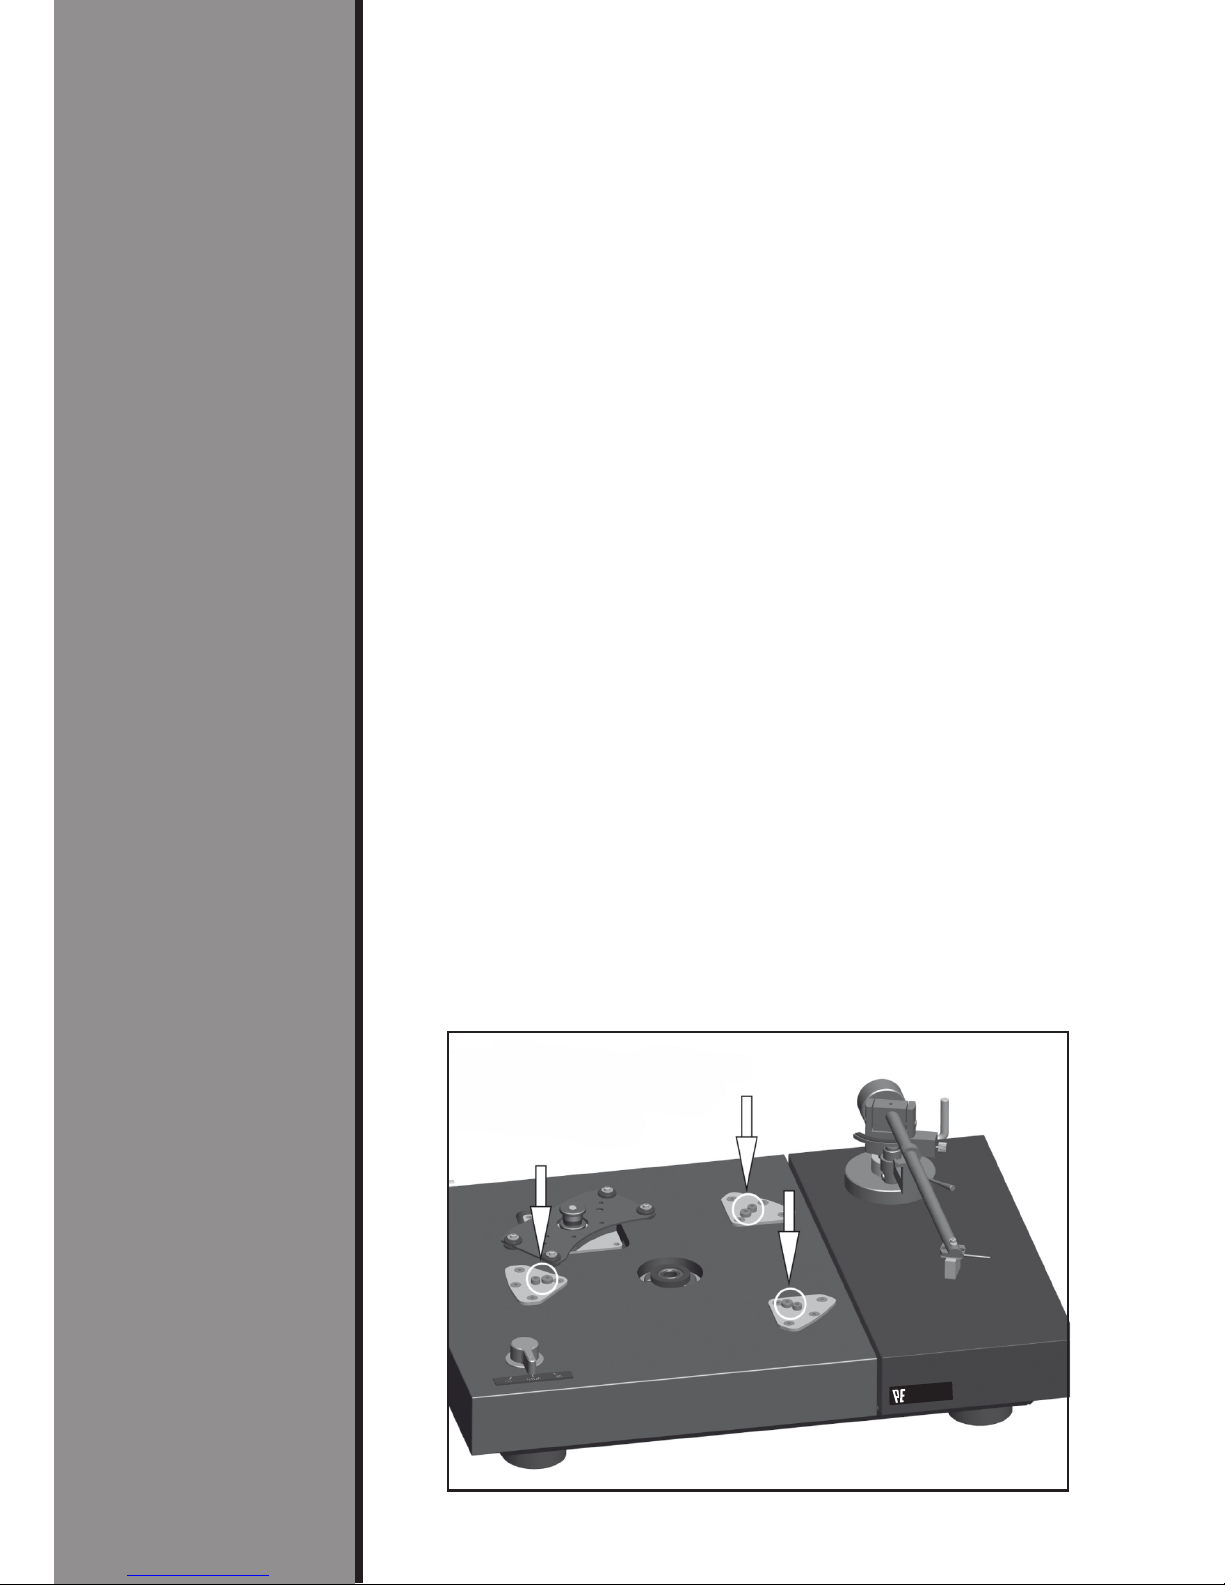
transport the turntable. The 3 x 2 silver-colored locking
screws must be removed completely before first use
(see fig. F 1). For this purpose, please use the
enclosed hex key SW3.
You can keep the screws for possible transports in the
provided plastic bags.
F 1 - Undo and remove
the locking screws
Page 5
PE 2525
BELT DRIVE - MADE IN GERMANY
Tradition verpflichtet
5
3. Set-up and assembly
Your new Perpetuum Ebner turntable is a sub-chassis
turntable and is therefore mostly insensitive to external
shocks.
For optimum use of its musical sound qualities you
should always place the device on a flat and stable
surface.
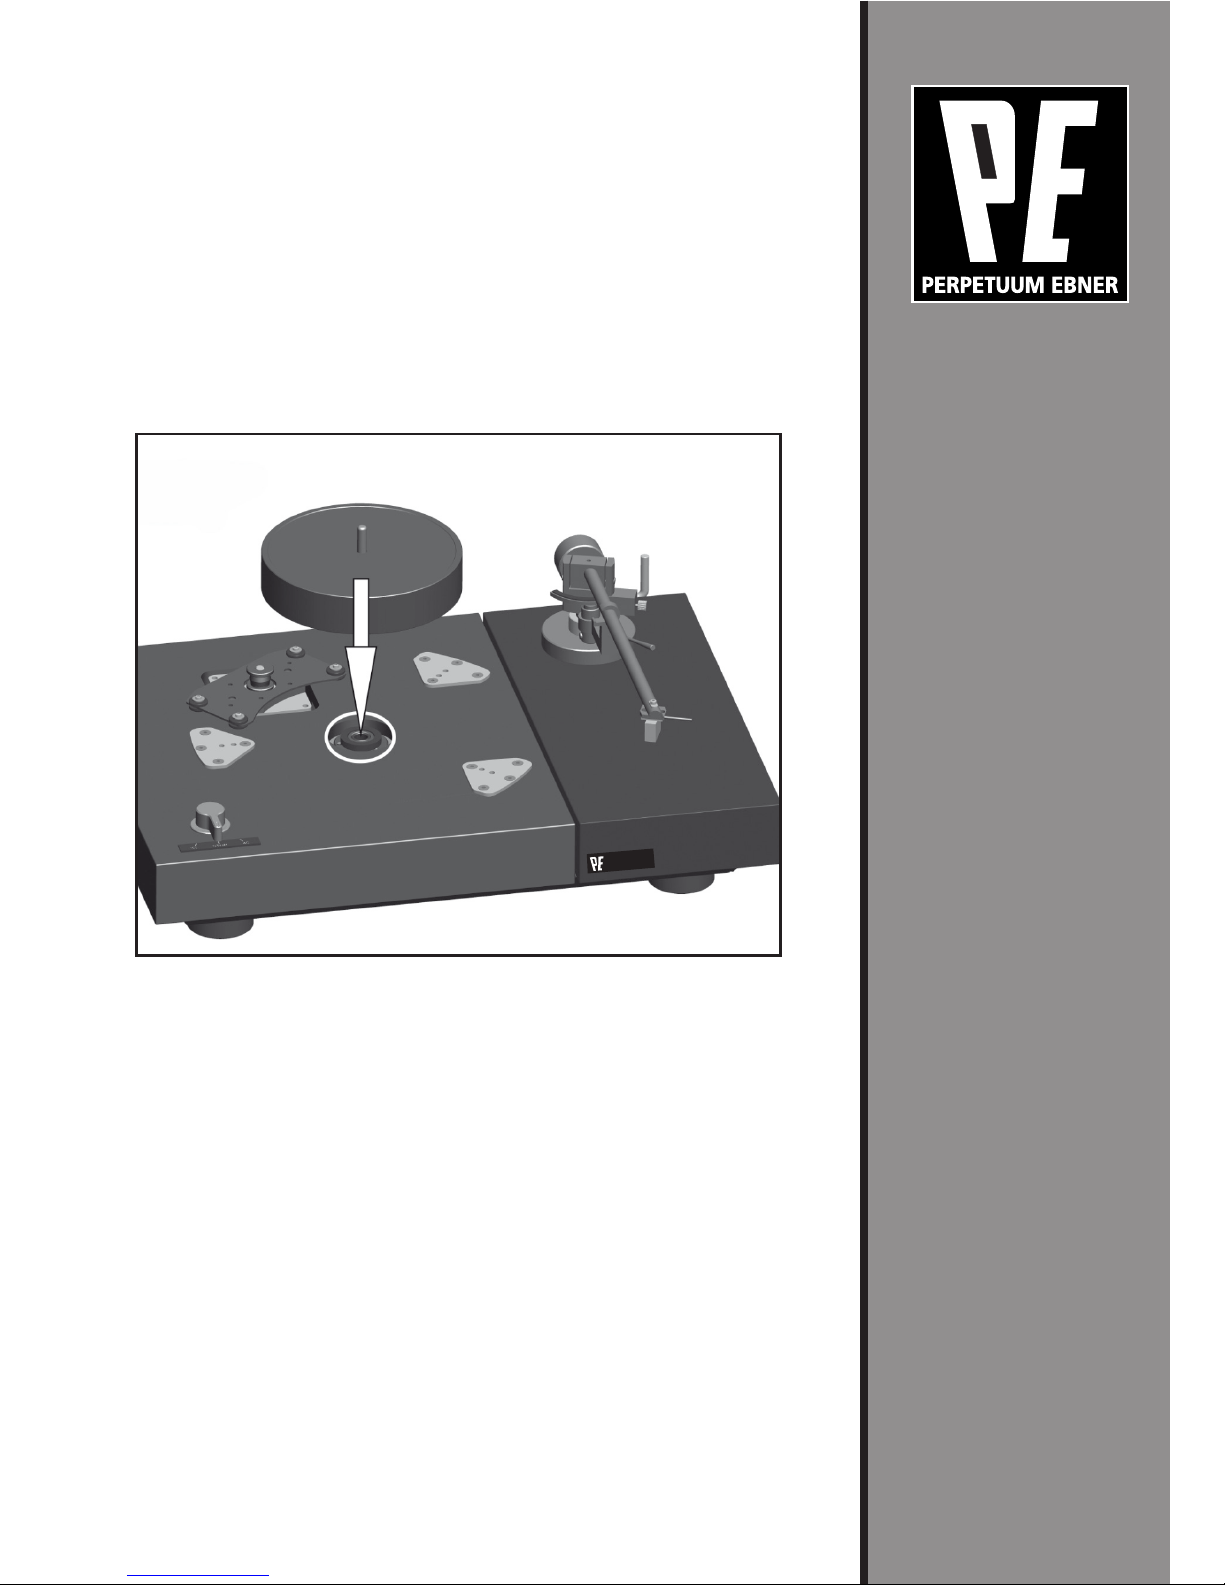
When mounting the device you start with plugging the
sub-platter into the bearing bush (see fig. F 2).
The bearing bushes are self-lubricating and therefore
do not require bearing oil.
F 2 - Assembly
of the sub-platter
Page 6
PE 2525
BELT DRIVE - MADE IN GERMANY
6
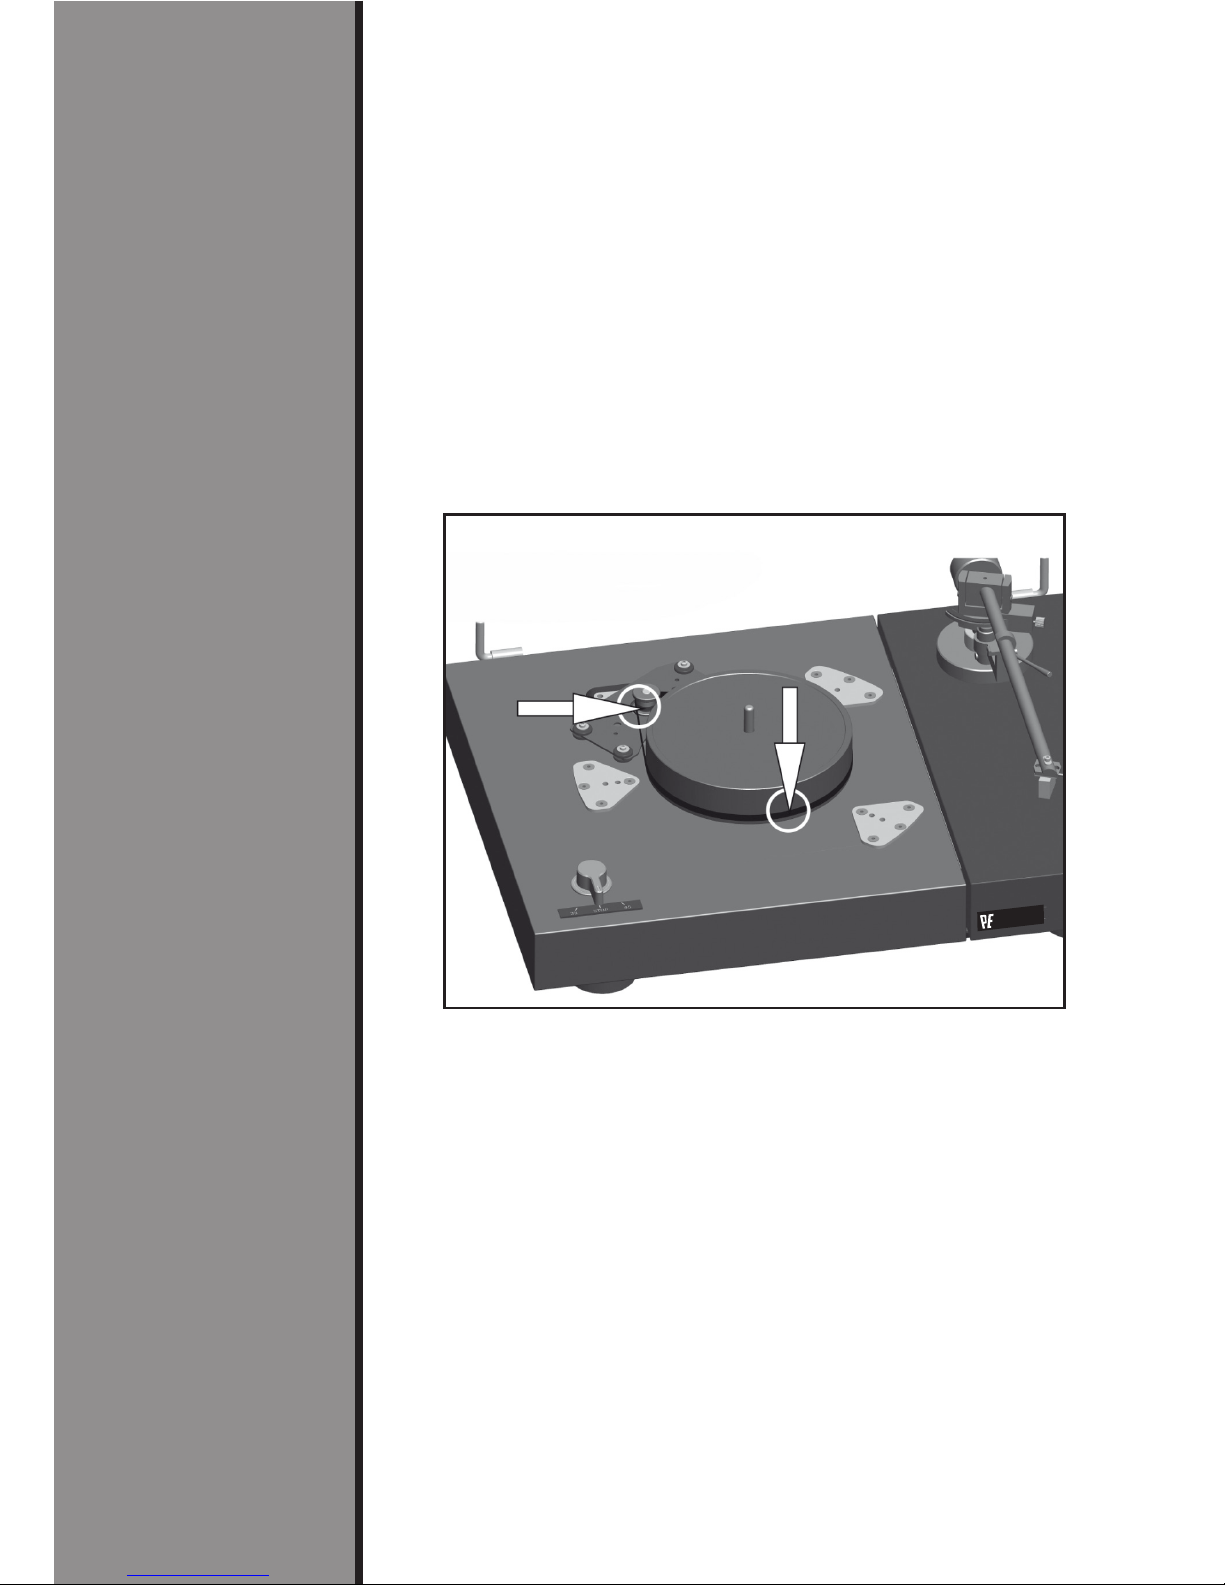
Afterwards, lay the flat belts around the sub-platter
and the motor pulley; please ensure that the belt is not
twisted.
Please use the cotton gloves here in order to avoid
any oil and grease marks.
The belt embraces the sub-platter in the lower area of
the sub-platter scope (see fig. F 3).
Note: If you start the drive of the PE 2525 by turning it
on without having placed the platter, it may happen
that the drive belt falls off due to the low weight!
Next, put the platter on the sub-platter.
We recommend to always use a mat to acoustically
attenuate the platter, to gently playback your records,
and to reduce popping and cracking noises that can
occur because of antistatic charging.
F 3 - Assembly of the drive belt
on the pulley and the sub-platter
Page 7
Tradition verpflichtet
7
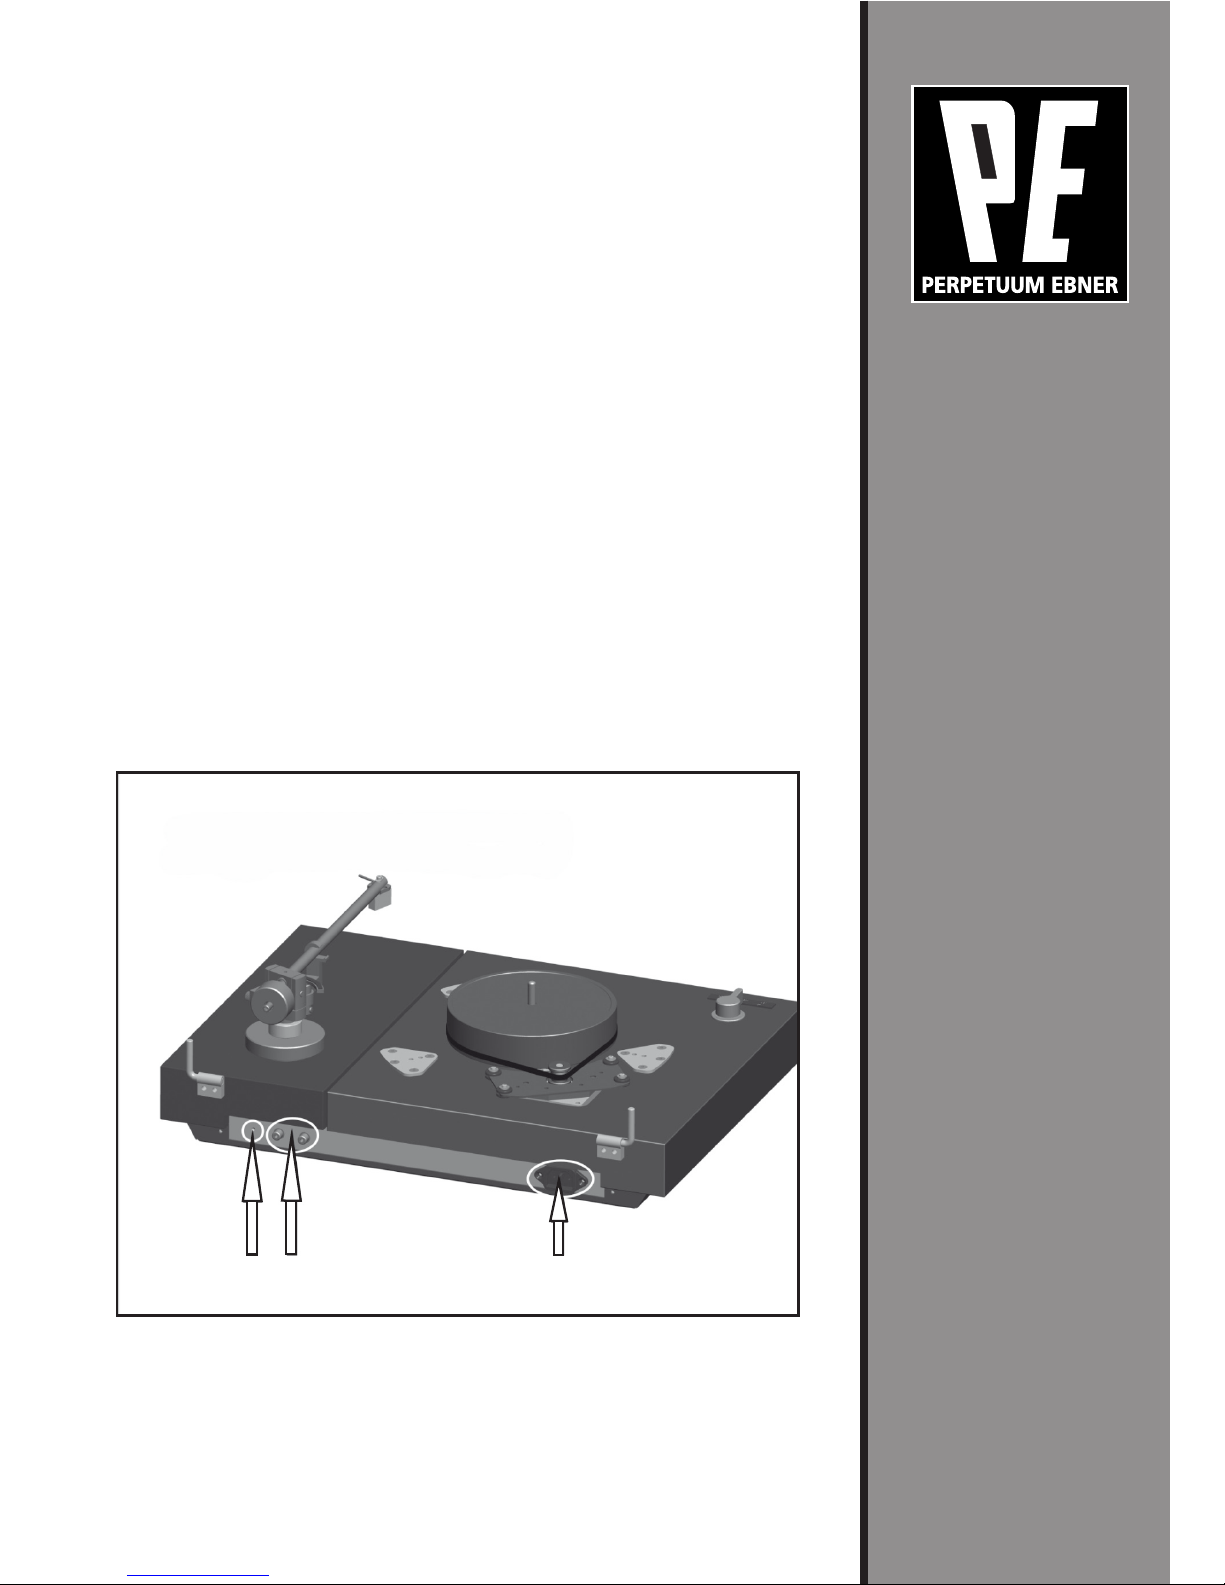
ground connection
RCA L+R
power supply
F 4 - The connections - power supply
RCA connections and ground connection
4. Connections
a.) Power supply
We equip the PE 2525 turntable with power supply
connectors.
b.) RCA connection
Your new PE 2525 turntable is equipped with RCA
sockets as well as a ground wire.
Use the provided connection cable to connect the
turntable to the phono input of your amplifier, or phonopreamplifier. In doing so, make sure the polarity is
correct (R, red, for right, L, black, for left) when
connecting the device. The separate earth wire
establishes the ground connection. Connect the ground
wire of the turntable to the ground wire of your amplifier,
or phono-preamplifier (see fig. F 4).
With these connection possibilities, the sound quality of
your turntable can be further improved at any time with
the high-quality cables available in specialist shops.
Page 8
PE 2525
BELT DRIVE - MADE IN GERMANY
8
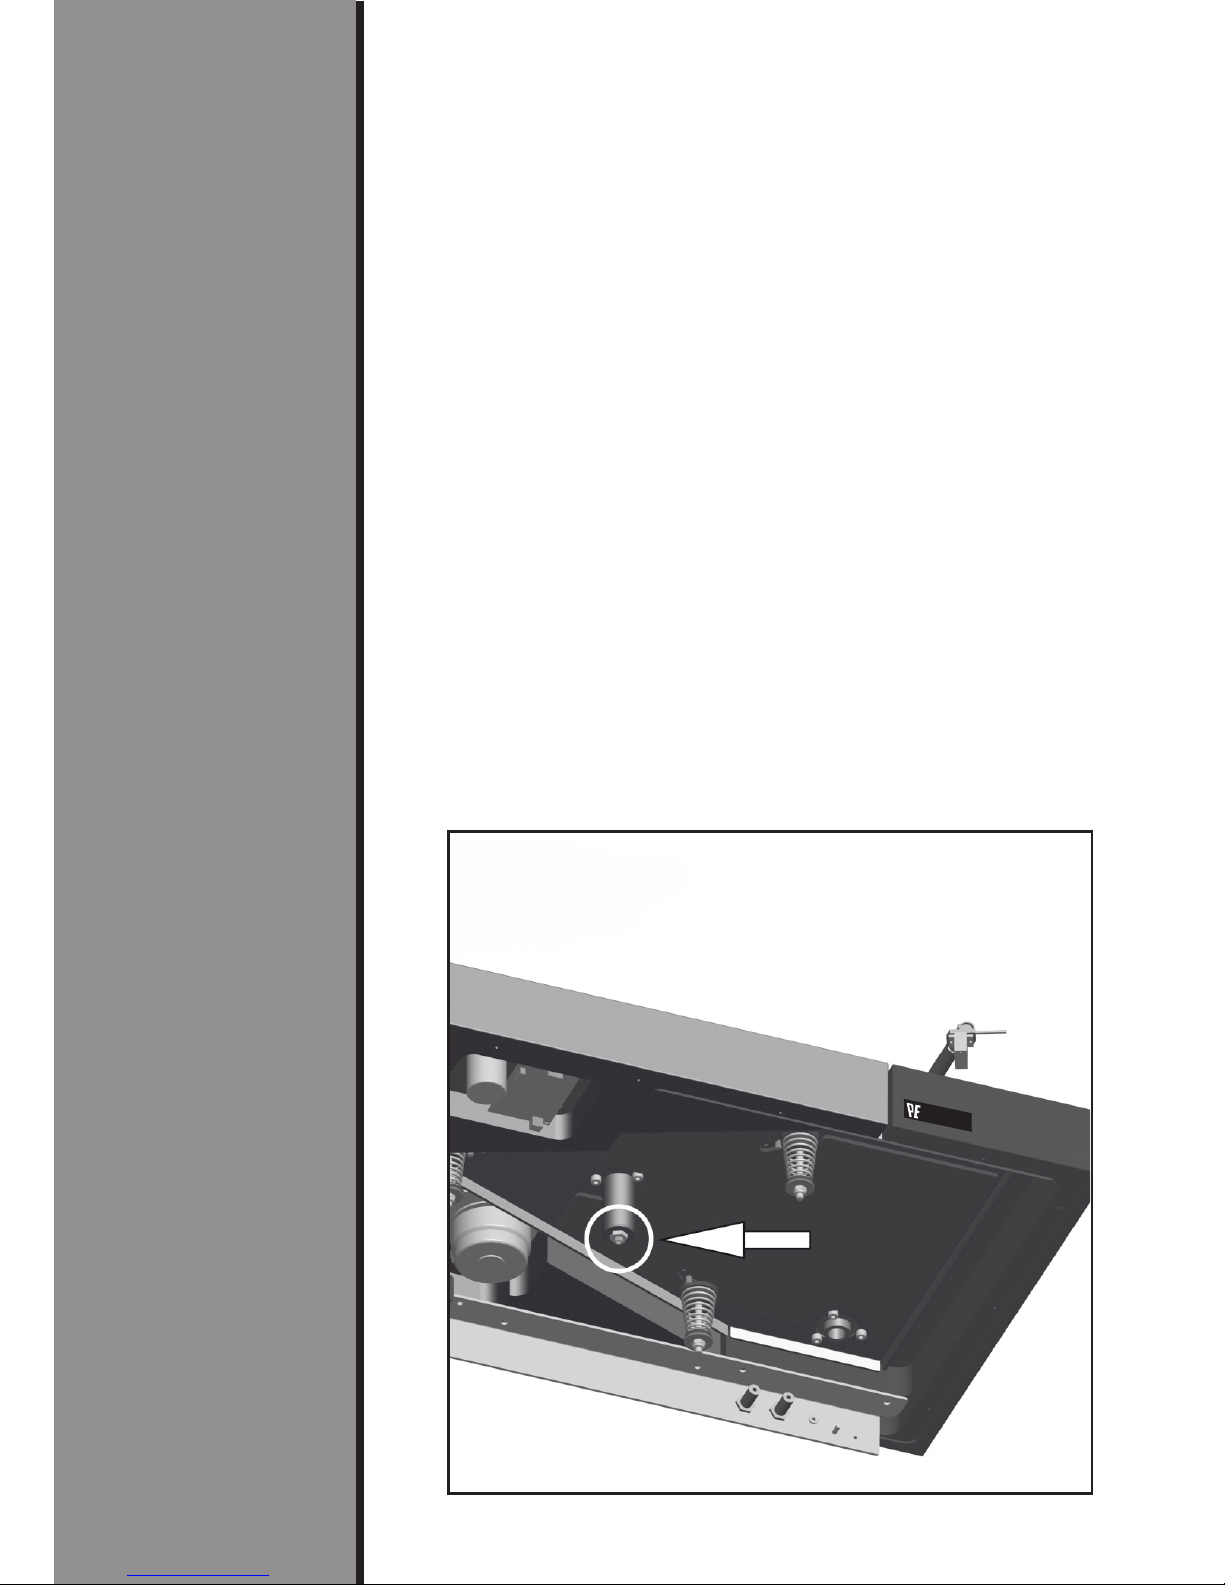
F 5 - Drive setting
Platter bearing
5. Drive settings
The sub-chassis drive and the bearing setting are
already set properly at the factory.
However, for individual adjustments it is possible to
customize the following:
a.) Adjusting the platter bearing:
It is possible to adjust the ratio of the platter bearing
between the bearing on the steel ball or the magnetic
pillow by adjusting the screw M5 on the bottom side of
the device by loosening the counter nut.
You can individually adjust the distance between the
bottom side of the platter and the platter by tightening
or loosening the screw.
This may be necessary after several years because of
the decreasing magnetic effect (see fig. F 5 - platter
bearing).
Page 9
Tradition verpflichtet
9
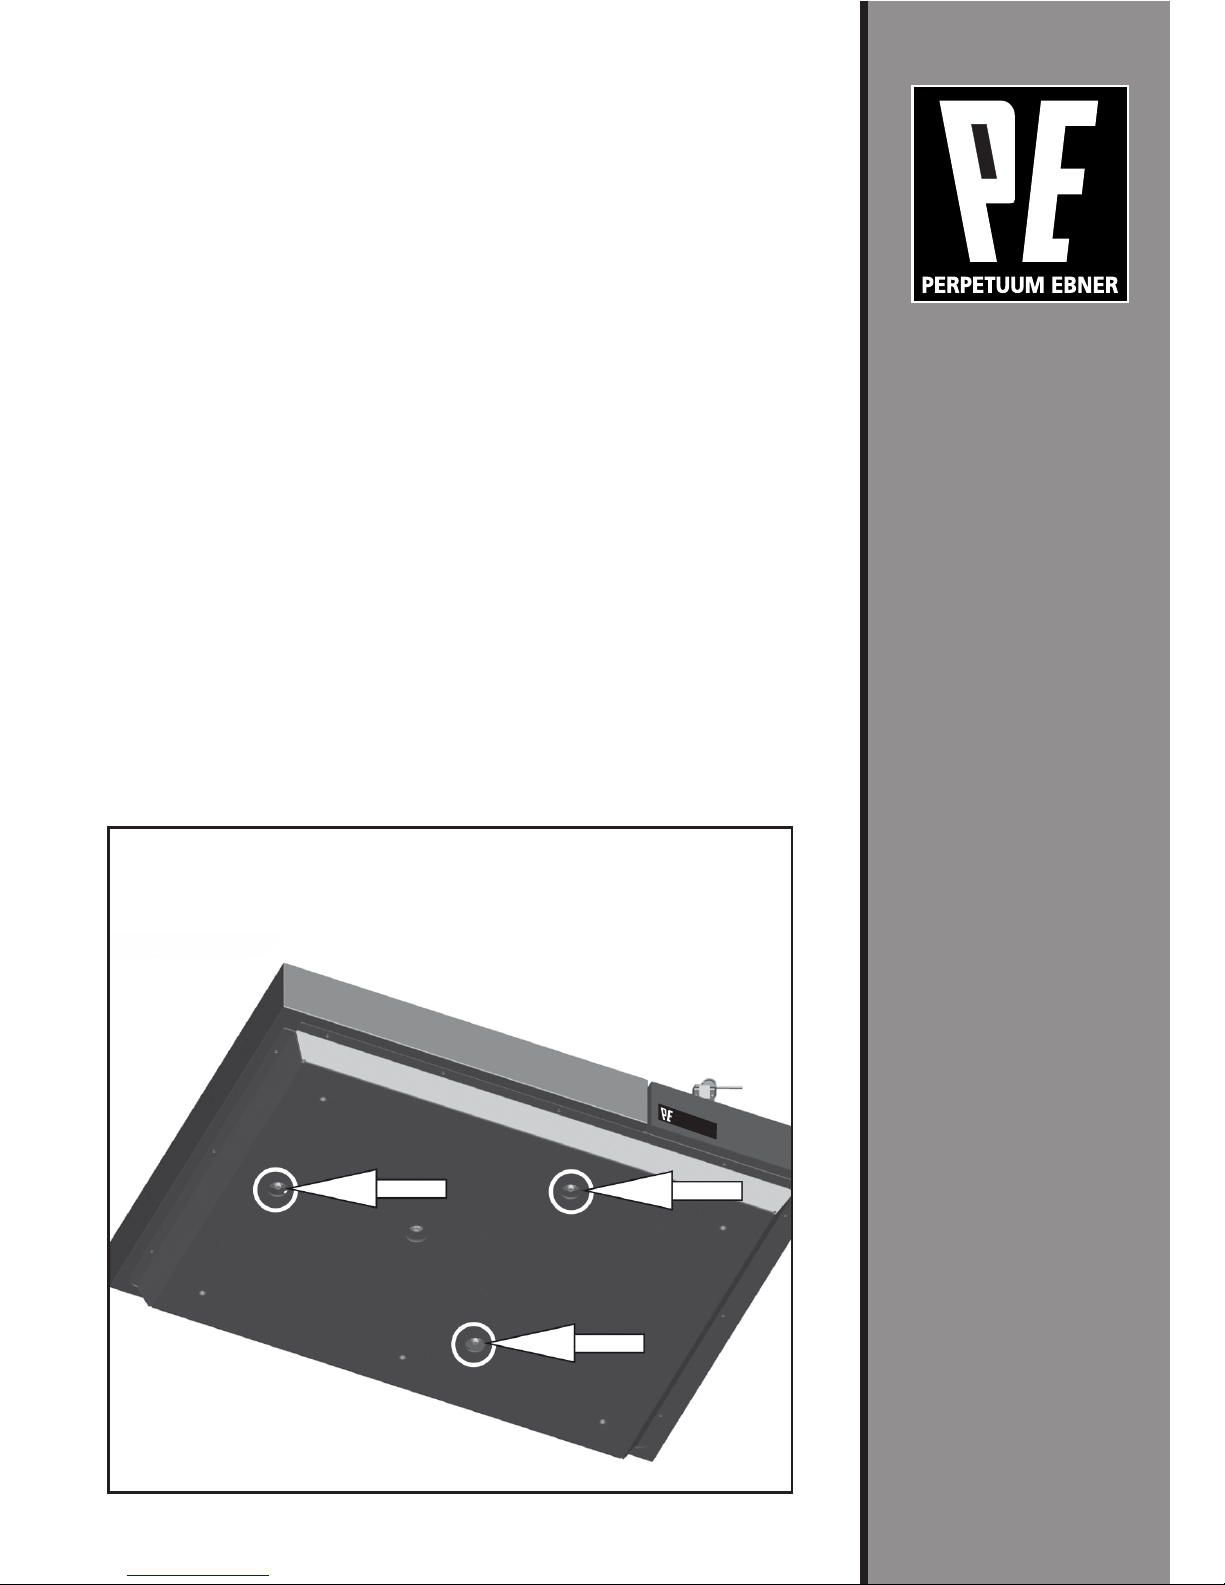
F 6 - Drive setting
Sub-chassis
b.) Adjusting the sub-chassis drive:
The sub-chassis is already preset in the way that there is
a constant distance of approx. 5 mm between the
underside of the platter and the underside of the tone
arm socket.
This distance has the purpose to allow the sub-chassis
to freely oscillate in all directions.
The installation of our suspension bolts permits the subchassis to only oscillate vertically in a limited and
controlled way (see fig. F 6 with bottom tray).
PE 2525
BEL
T DRIVE - MADE IN GERMANY
Page 10
10
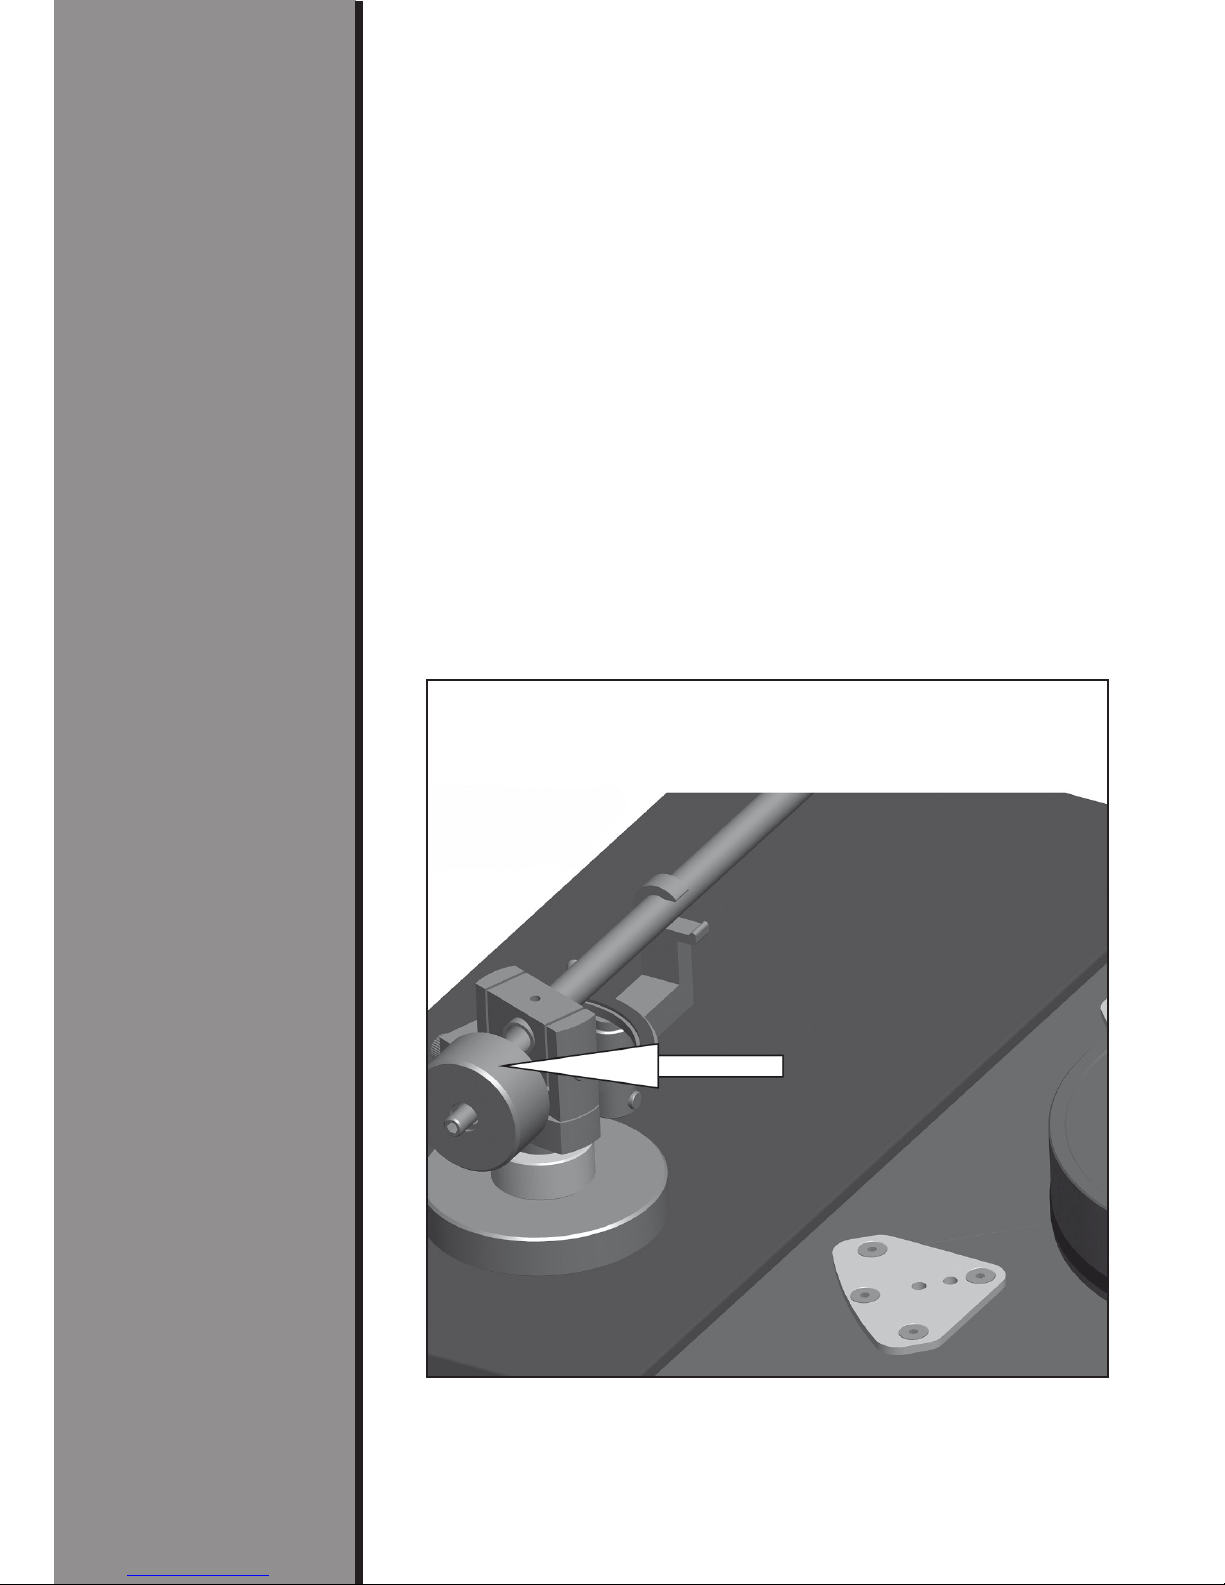
F 7 - Adjusting the
tracking force
6. Tone arm and pick-up cartridge
The PE 2525 is delivered with a preinstalled tone arm
of the producer THORENS, model TP 92, as well as
with an installed ORTOFON pickup, model 2M Blue.
All settings have already been made at the factory.
The weights to balance the tone arm have been
removed for transport.
Further details can be found in the following chapters.
a.) Tracking force
You can adjust the tracking force by rotating the
weights of the tone arm.
The tracking force increases, the more you turn the
weights forward towards the tone arm (see fig. F 7).
Page 11

Tradition verpflichtet
11
You can optimally adjust the tracking force with the help
of a tone arm scale (available in specialist shops).
For this, move the tone arm, with lowered tone arm lift,
over the platter and carefully lower it so that the stylus
rests on the tone arm scale.
In doing so, it is absolutely necessary to remove the
protective cover of the cartridge.
Please be extremely careful in order to not damage the
stylus.
The recommended tracking force for the supplied device
is 18mN (corresponds to a tracking force of 1.8g).
Page 12
12
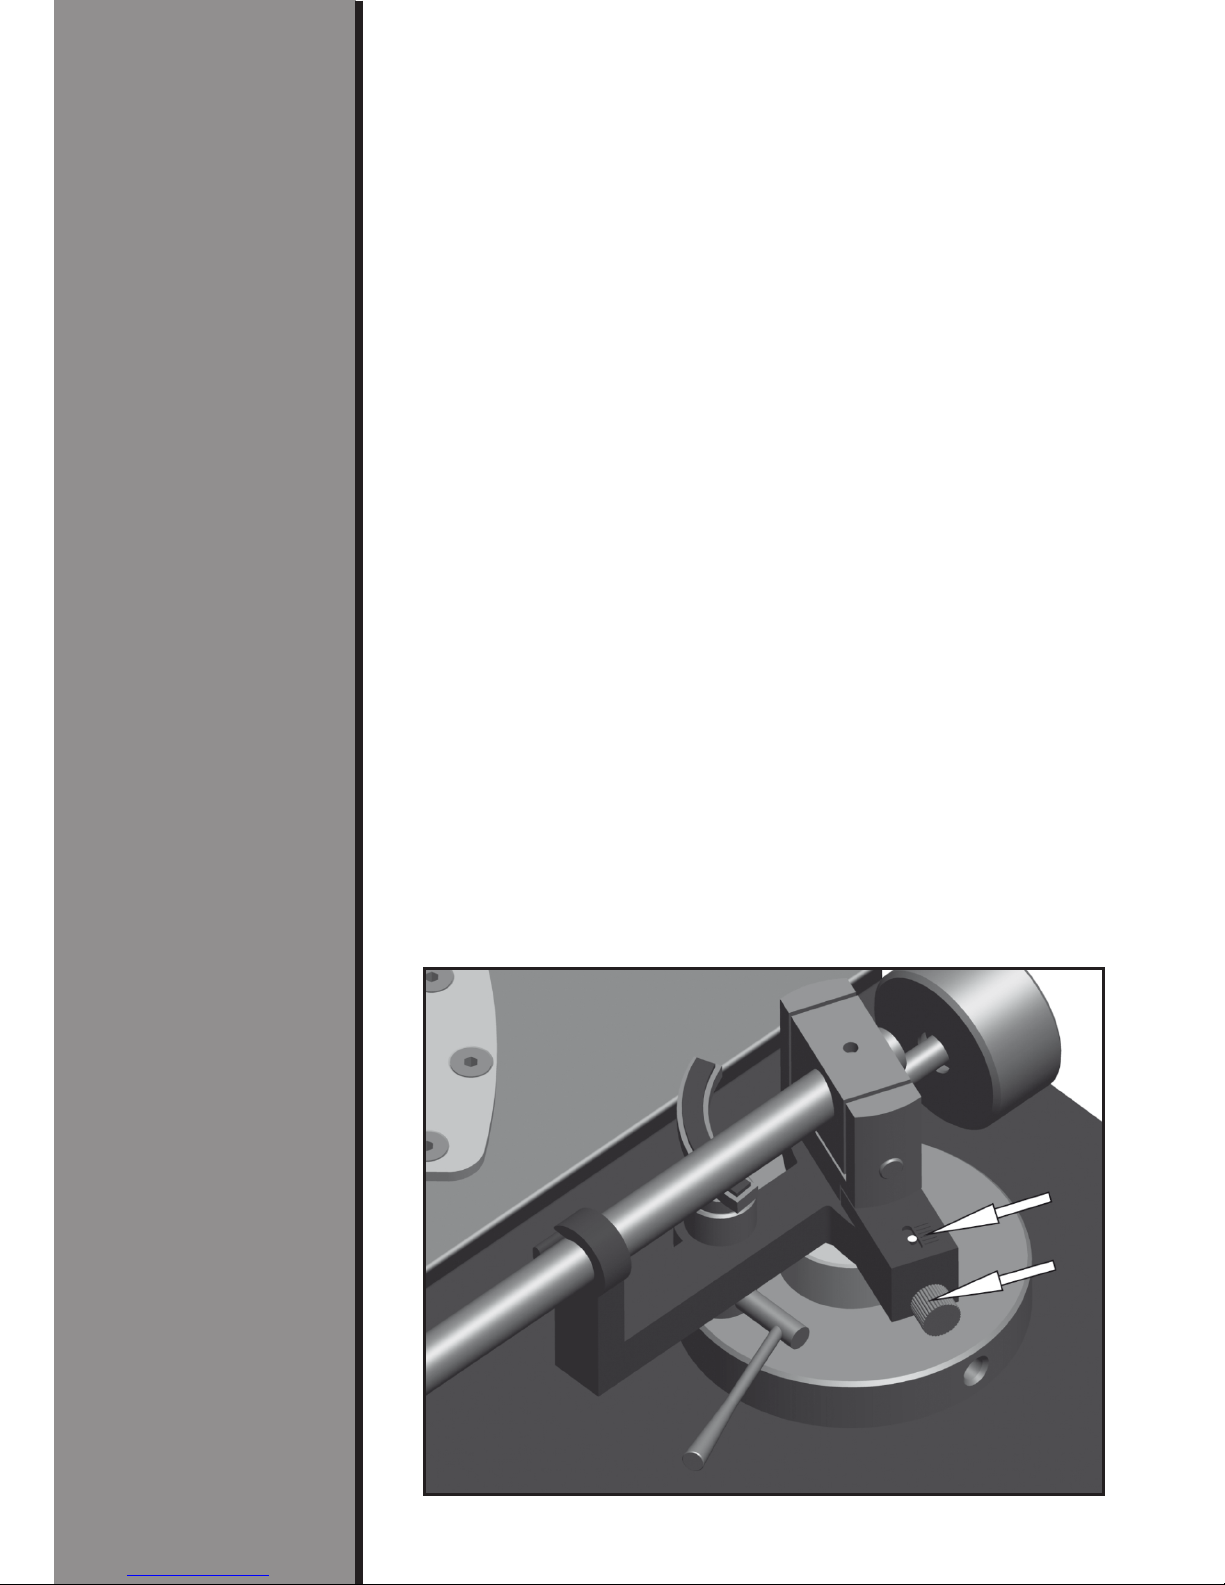
F 8 - Adjusting the
anti-skating force
b.) Anti-skating
Skating arises in connection with radial tone arms.
Due to the offset between the cartridge's axis and the
tone arm's pivot, the force applied (through friction) by
the rotating disc to the cartridge tends to draw the tone
arm toward the center of the record.
To prevent this, the so-called anti-skating force is
applied at the tone arm.
At the PE 2525, this was realized by a built-in magnet.
The anti-skating force is preset at delivery, but it can
be adjusted if necessary, using a set screw below the
tone arm bearing block.
With the preinstalled Ortofon 2M Blue cartridge, the
white point should be located above the set screw
mid-way between the stops (see fig. F 8).
Page 13
Tradition verpflichtet
13
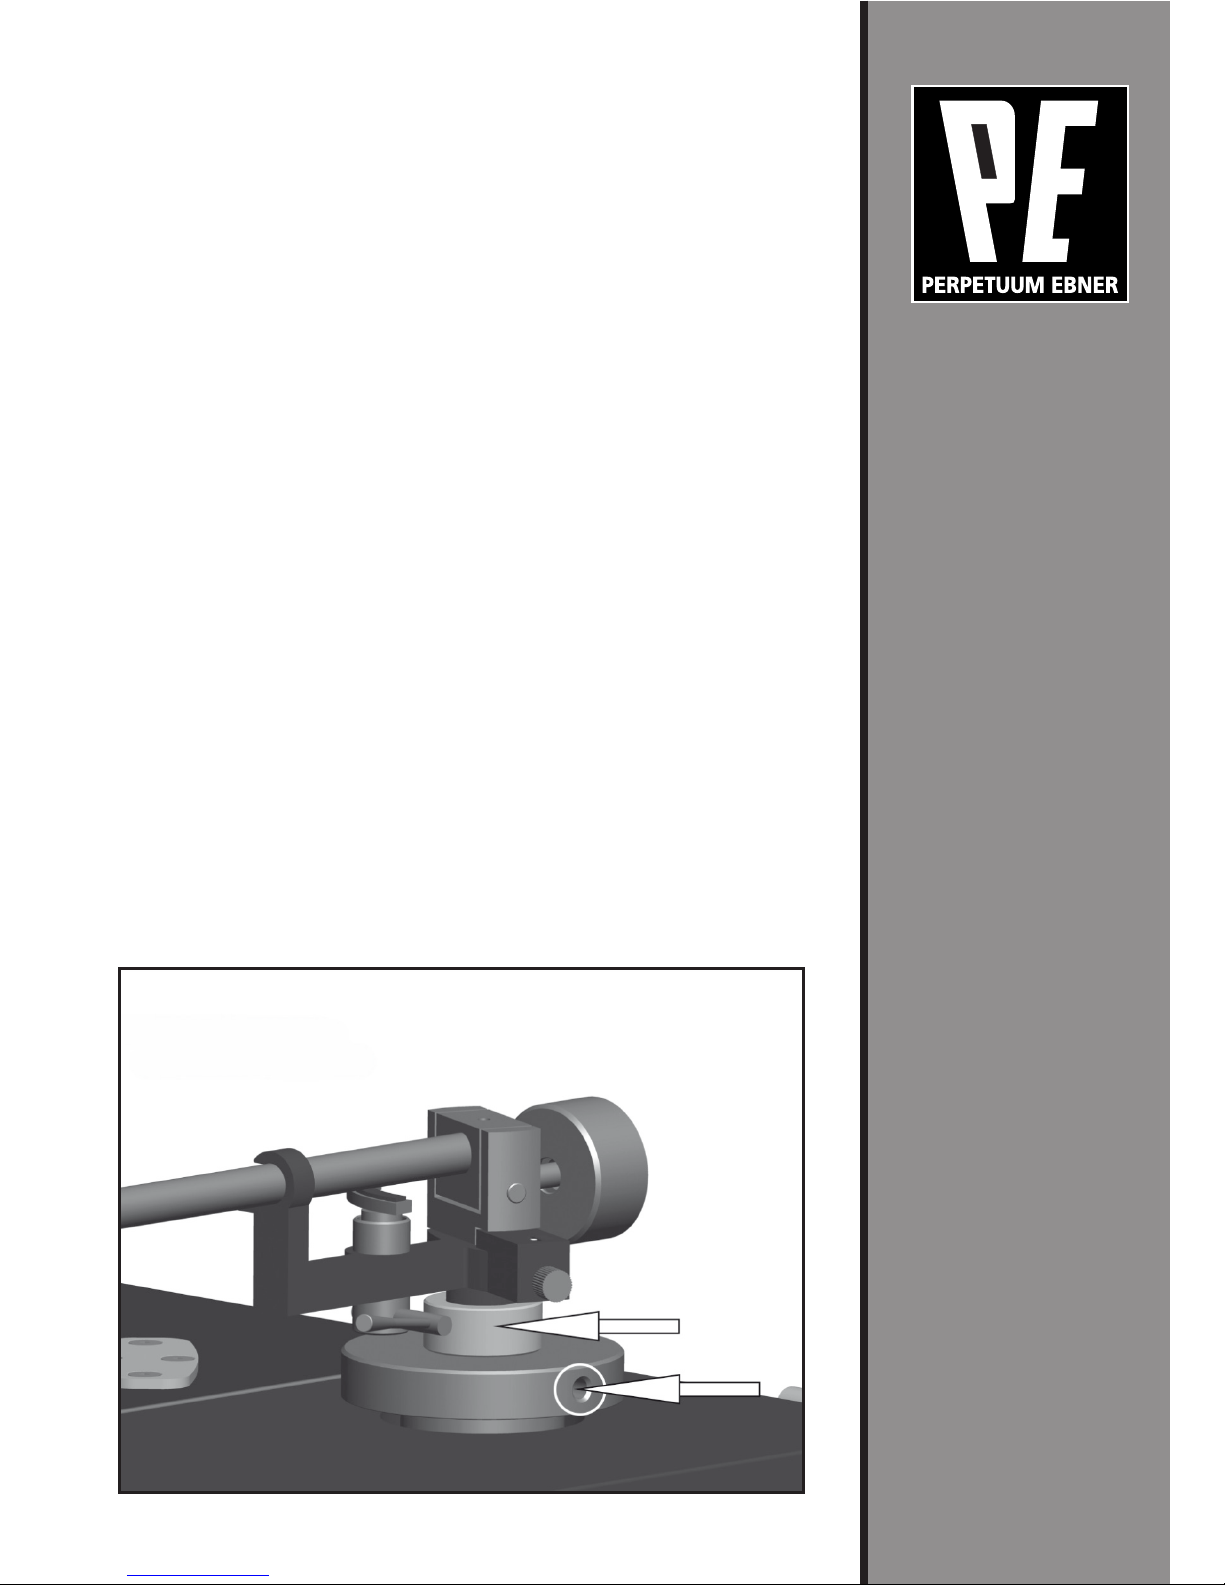
F 9 - Adjusting the
tone arm height
When using other pickup cartridges or other platter
covers the height of the tone arm may be adjusted.
To this, you can loosen the screw at the tone arm socket
using the enclosed hex key SW3, and adjust the height
by rotating the nut on the tone arm tube.
Slightly tighten the bolt after having adjusted the height
(see fig. F 9).
Page 14
14
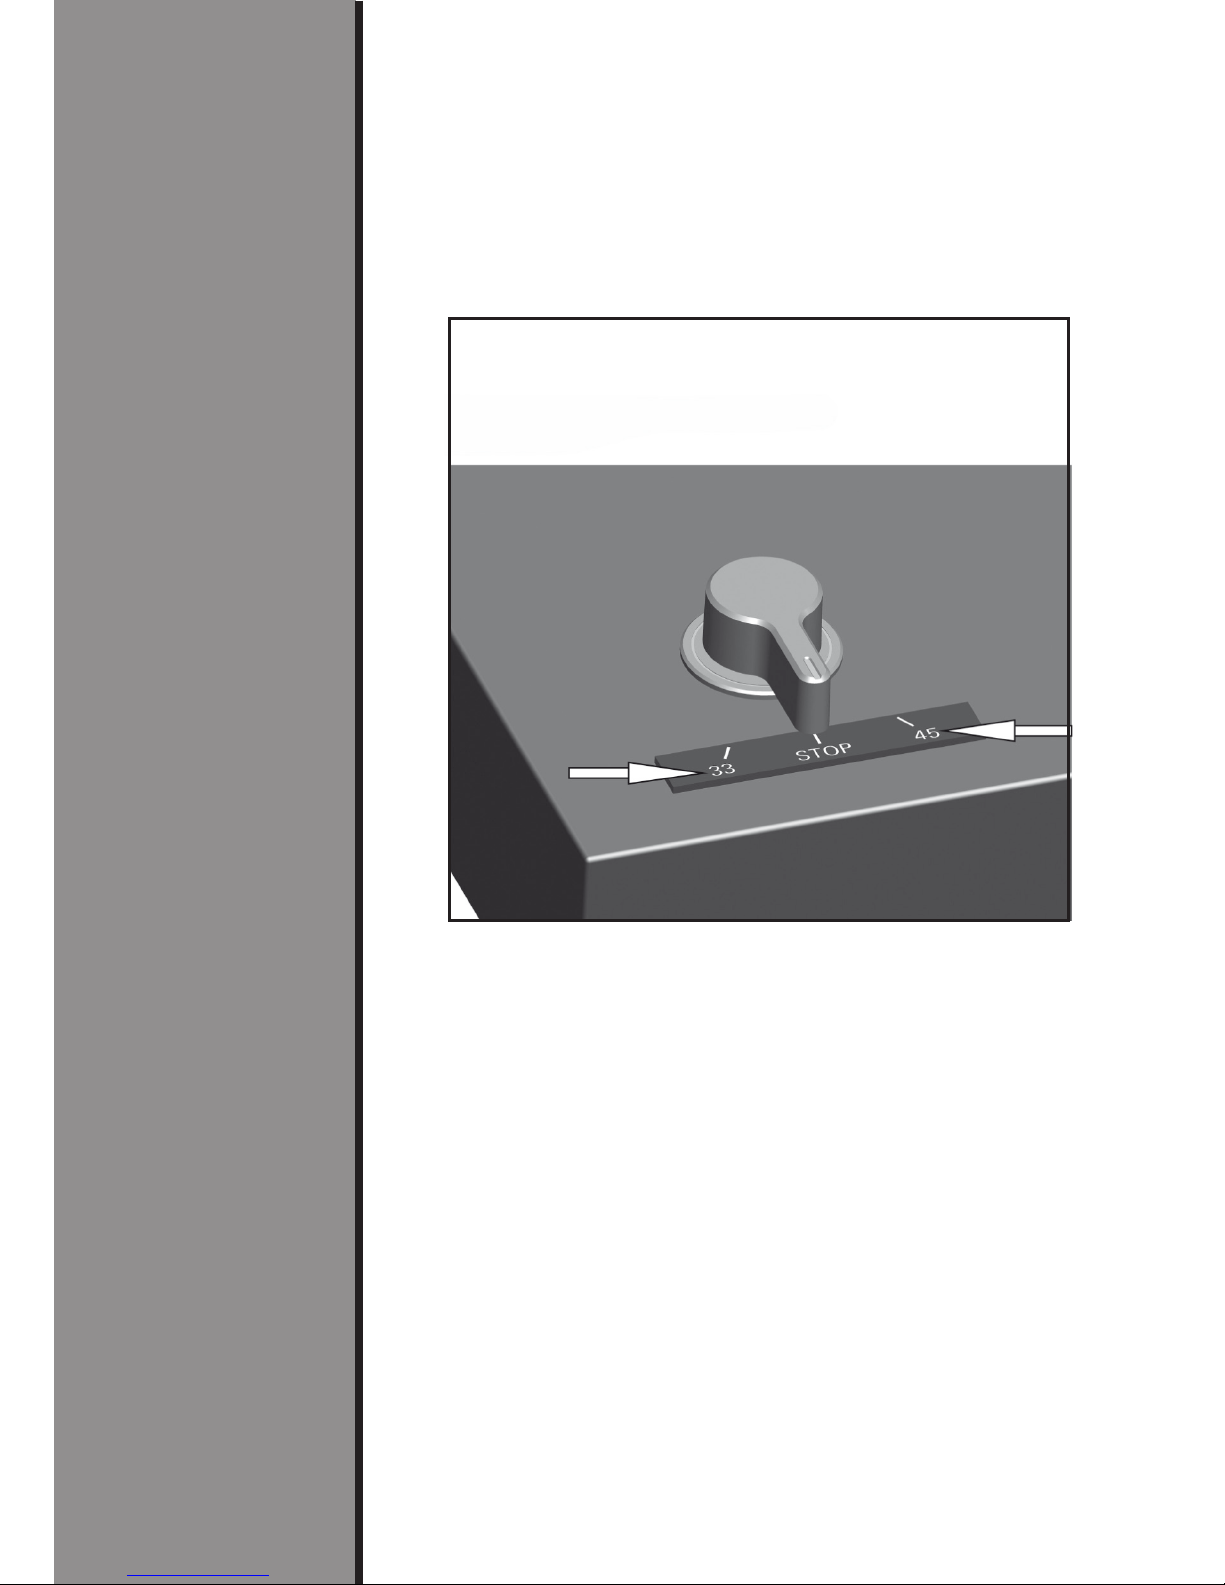
F 10 - Start/Stop - speeds
drive 33 - 45
7. Operation
The lever switch (33 / STOP / 45) on the left front side
of the device starts the turntable with the corresponding speed (see fig. F 10).
Then, the tone arm is released from its rest, the tone
arm lift is raised and the cartridge is positioned above
the lead-in groove of the record or above the desired
piece/track to be played and lowered on the record
using the lift.
This turntable does not feature an automatic end-ofrecord shut-off facility.
As soon as the stylus has reached the lead-out
groove, the tone arm has to be lifted up manually and
put back into the tone arm rest.
You turn of the device with the switch setting “STOP”.
We recommend to leave the dust cover open when
enjoying music because of so-called microphonic
effects, i.e. vibrational stimulation of sound in
resonance bodies over the pick-up cartridge.
Page 15

Tradition verpflichtet
15
8. Technical specifications
PE 2525
(Belt Drive made in Germany)
Ÿ Manual sub-chassis turntable with internal belt drive
via sub-platter
Ÿ Massive, two-part 50mm MDF (medium-density
fiberboard) chassis with platter board and arm
board in piano black lacquer
Ÿ 3-phases external rotor motor with electronic
control via pulse width modulation (PWM), speed
selection (33 / 45) electronically switchable
Speed control via HALL sensors and PID control
Ÿ 3 kg aluminum platter with damping mat
Ÿ High-precision platter bearing, 10mm steel axle,
supporting magnet
Ÿ External power supply
Ÿ Tone arm from German OEM – production with
cardan bearing
aluminum arm tube and anti-skating (magnet)
THORENS 9.1“ TP92
Ÿ Effective length: 232.8mm (9.1“)
Ÿ Overhang: 17.8 mm (variable)
Ÿ Offset angle: 23.6° (fixed)
Ÿ Dynamic mass: approx. 11 g
Ÿ Moving Magnet (MM) cartridge,
ORTOFON 2M Blue
Ÿ Physical dimensions (width / depth / height):
approx. 470 mm x 340 mm x 175 mm (incl. dust
cover)
Ÿ Weight: approx. 12 kg
Page 16

Bahnhofstraße 10
D-78112 St. Georgen im Schwarzwald
www.weaudiosystems.com
9. Service information
If you have any questions regarding your new
turntable, or in the event of problems your PE dealer
shall be pleased to assist you.
You will find the addresses on our website:
www.weaudiosystems.com
Subject to technical modifications.
 Loading...