

Page 1
Problem: Beer flow is slower with Universal Empty Keg Sensor
than with standard Perlick coupler.
Probable Cause: Beer Flow Control Handle is in CLEAN position.
Solution: Slowly turn Beer Flow Control Handle to ON position.
Problem: Beer does not flow after keg is tapped.
Probable Cause: Universal Empty Keg Sensor has locked up.
Solution: Turn Beer Flow Control Handle to OFF position.
Wait two or three seconds than slowly turn Beer Flow
Control Handle to ON position.
Probable Cause: Beer Flow Control Handle is OFF.
Solution: Slowly turn Beer Flow Control Handle to ON position.
Probable Cause: Universal Empty Keg Sensor is dirty.
Solution: Clean Universal Empty Keg Sensor.
Probable Cause: Out of gas.
Solution: Reestablish gas flow.
Problem: Excessive foam.
Probable Cause: Beer temperature too high. Excessive beer flow rate. Beer
is over-carbonated
Solution: These problems are not caused by the Universal Empty
Keg Sensor. Follow established procedures to correct
the problem.
* U.S. Patent #5,630,411
Form Z2148EMU
08.20.04
8300 West Good Hope Road • Milwaukee, WI 53223 • Phone 414-353-7060
Fax 414-353-7069 • Toll Free 800-558-5592 • E-Mail: Perlick@Perlick.com • www.Perlick.com
INST ALLATION AND OPERATING INSTRUCTIONS
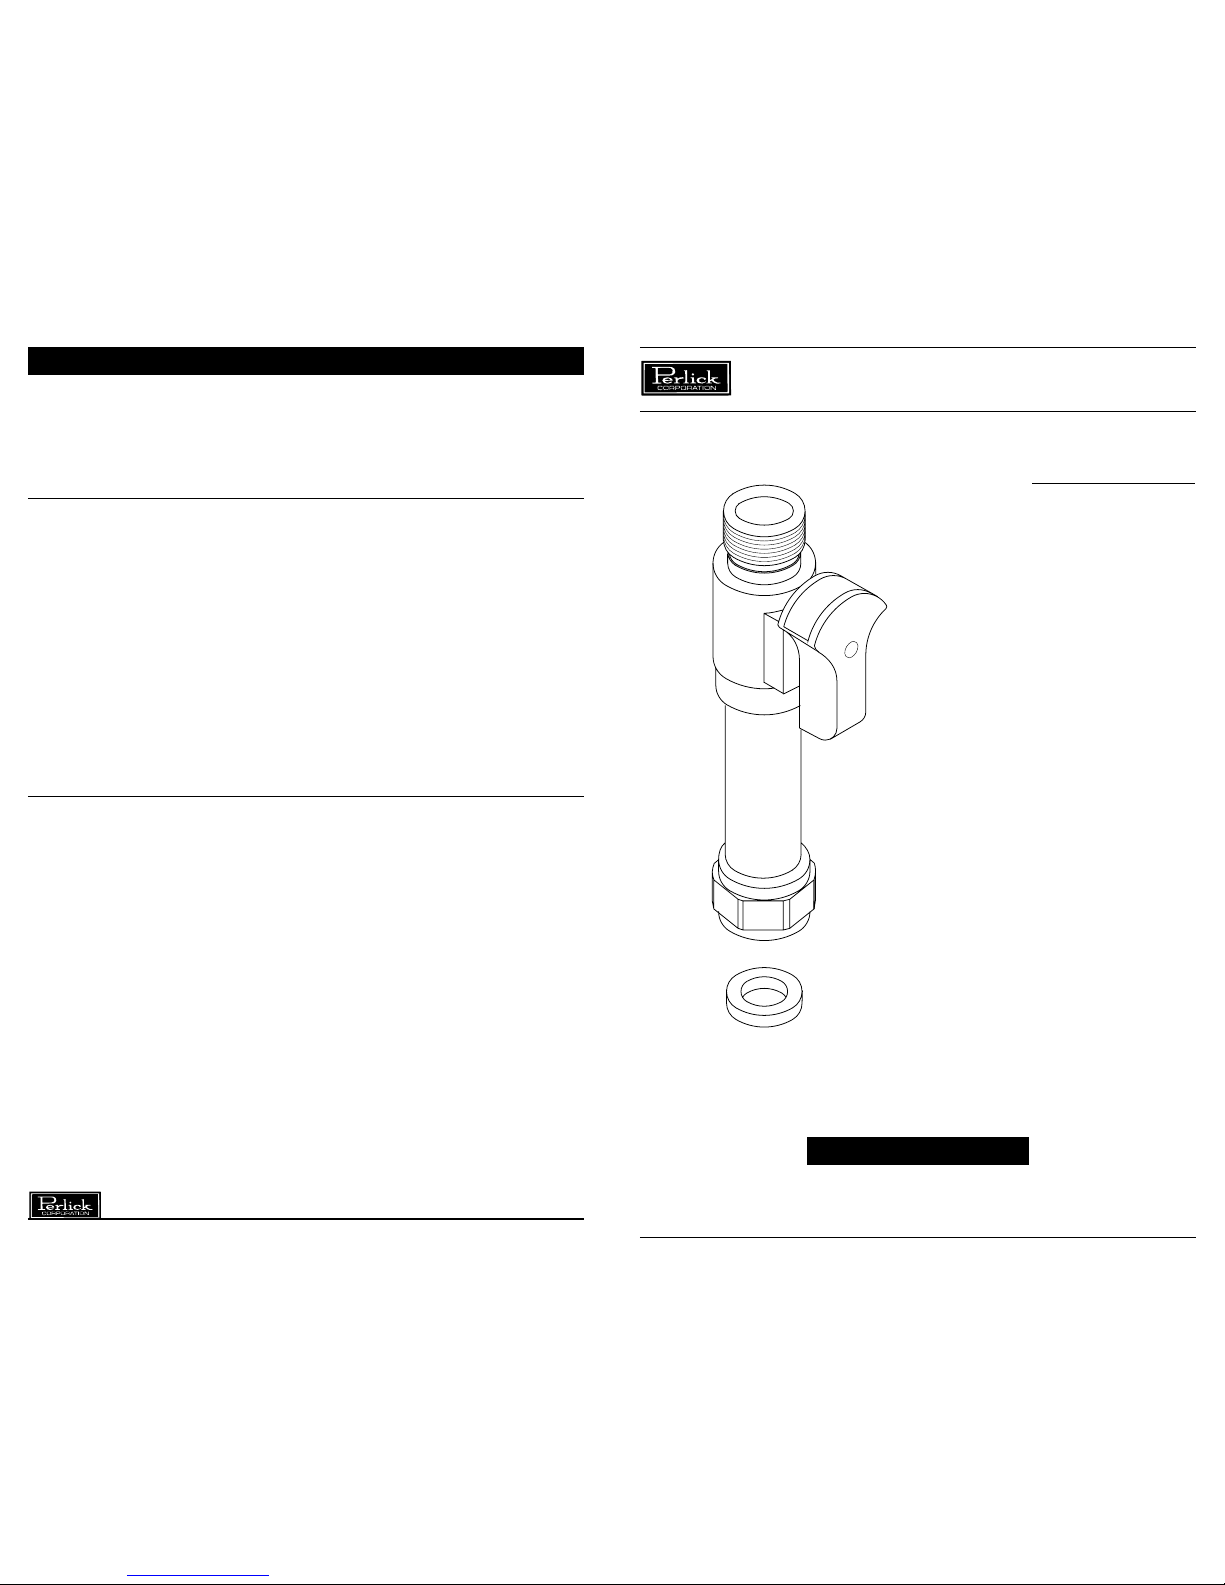
UNIVERSAL EMPTY KEG SENSOR
The Perlick Universal Empty
Keg Sensor shuts off the flow
of beer when the keg empties.
With the line full of beer, the
foaming and resulting beer
waste from changing kegs is
eliminated.
Part No.
■■ 43739
No. 43739
Universal Empty
Keg Sensor
IMPORTANT!
To ensure your complete satisfaction, please read these instructions
before using Perlick’s Universal Empty Keg Sensor.
Troubleshooting
Page 2
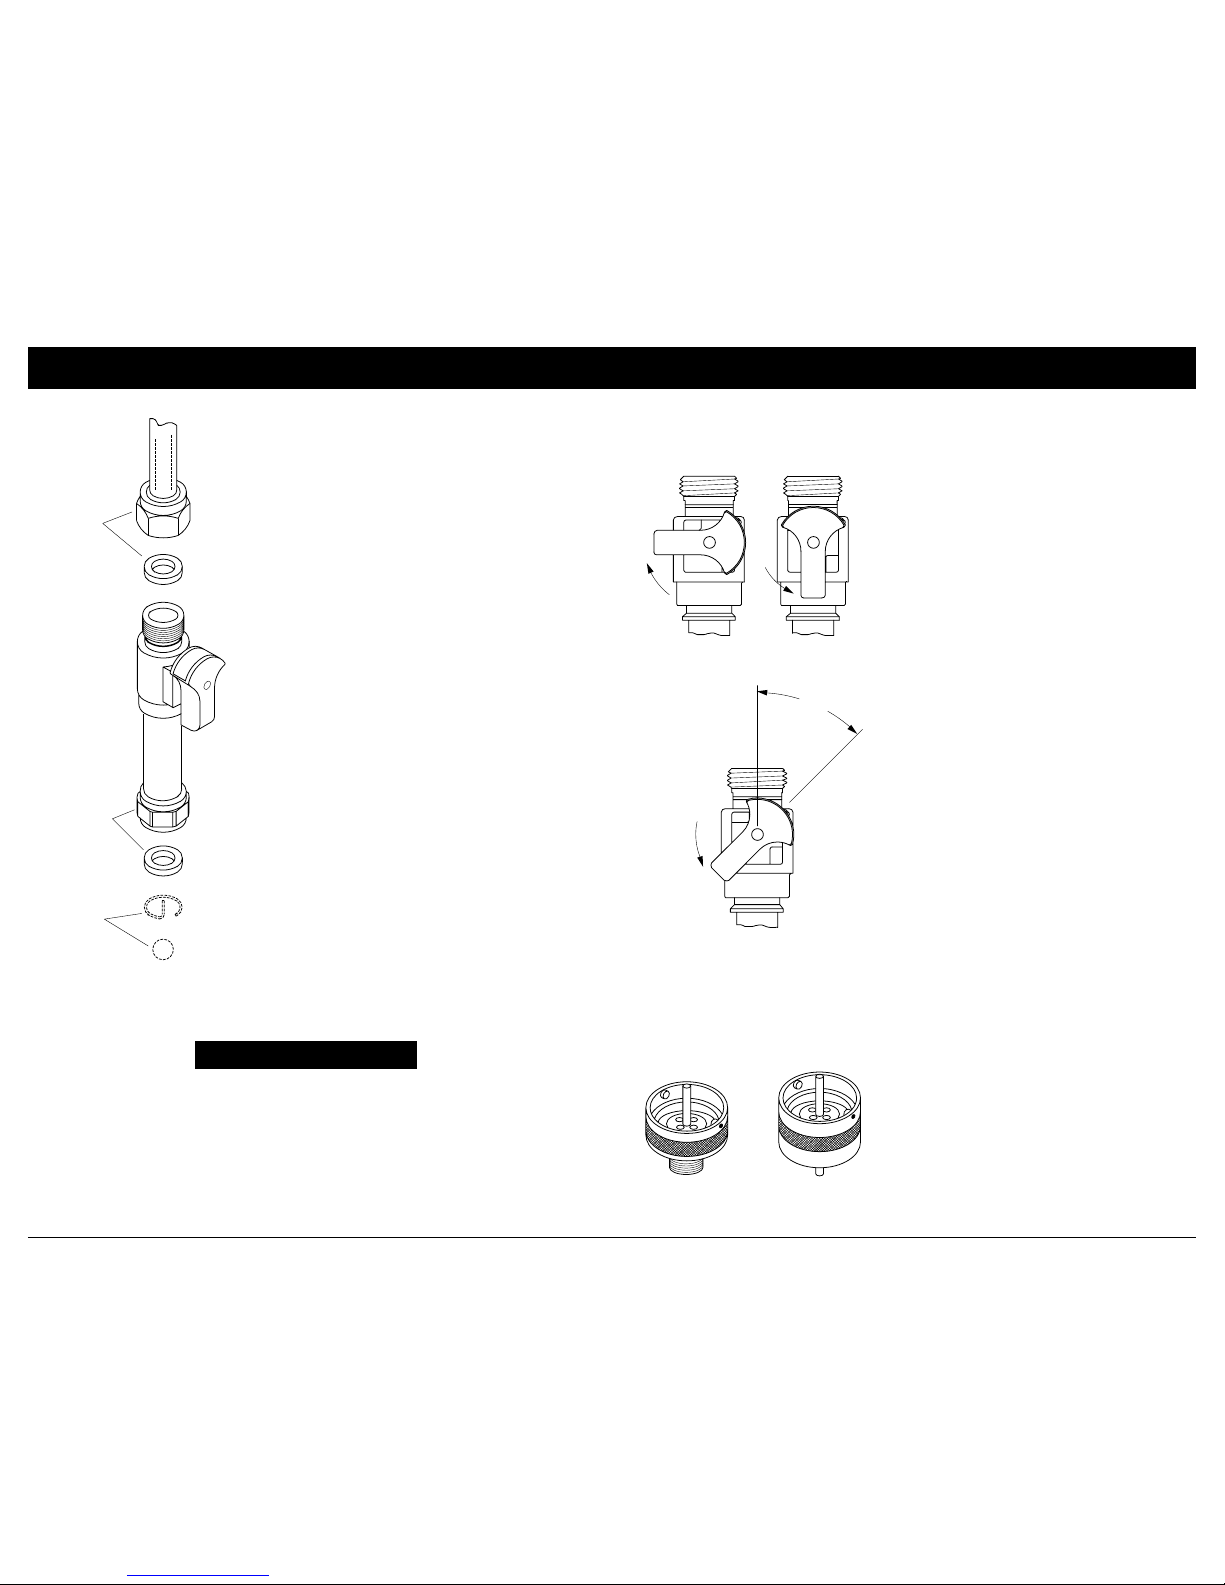
INSTALLATION INSTRUCTIONS TAPPING AND CLEANING PROCEDURES
Fig. 2
ON
Fig. 3
CLEAN
Fig. 1
OFF
45°
1. Disconnect keg coupler from keg.
2. Open faucet to relieve line pressure and
close when flow ceases.
3. Disconnect beer line including seal washer
from keg coupler.
4. Connect beer line including seal washer to
external thread of Universal Empty Keg
Sensor and turn Beer Flow Control Handle
to OFF position.
(See Fig. 1)
. In this
position the Universal Empty Keg Sensor
acts as a shut-off valve.
5. Where fitted, remove retaining clip/spring
and check ball from keg coupler center
probe.
6. Insert seal washer supplied into coupling
nut on Universal Empty Keg Sensor and
couple to the keg coupler.
7. Connect keg coupler to keg and tap keg.
8. Turn Beer Flow Control Handle to CLEAN.
(See Fig. 3)
.
9. Open beer faucet. When solid beer
appears, close the faucet.
10. Turn Beer Flow Control Handle ON.
(See Fig. 2)
. The line is full and ready
for service.
EXISTING
BEER LINE
AND SEAL
WASHER
P/N 43739
UNIVERSAL
EMPTY KEG
SENSOR AND
SEALING
WASHER
REMOVE
CLIP/SPRING
AND CHECK
BALL FROM
COUPLER
Warranty
Perlick Products are fully guaranteed against defects in both material and
workmanship for a period of one year from date of sale. Defective parts will be
replaced on a no-charge basis, F.O.B. our factory, subject to our inspection. We
are not responsible for parts damaged by alteration, unauthorized service,
accident or abuse. All costs incident to replacement to include freight, labor and/or
loss of sales are incidental to this warranty and must be borne by the user.
No. 43657 No. 43681
Single Adapter Dual Adapter
Cleaning Adapters
Beer Flow Control
Handle Operating
Positions
Filling the Lines the First Time
1. Turn Beer Flow Control Handle OFF .
(See Fig. 1).
2. Tap fresh keg.
3. Turn Beer Flow Control Handle to CLEAN.
(See Fig. 3).
4. Open the beer faucet. When solid beer
appears, close the faucet. The line is full.
5. Turn Beer Flow Control Handle ON.
(See
Fig.2)
. The line is full and ready for service.
When Tapping Fresh Kegs
1. Remove coupler from empty keg.
2. Turn Beer Flow Control Handle OFF .
(See Fig. 1).
2. Tap fresh keg in normal manner.
3. Turn Beer Flow Control Handle to CLEAN.
position.
(See Fig. 3).
Wait for five seconds
then turn to ON position.
(See Fig. 2).
To Restart System
If beer does not flow, first turn the Flow Control
Handle to OFF.
(See Fig. 1).
Then turn Handle to
the CLEAN position.
(See Fig. 3).
Wait for five
seconds then turn the Handle to ON position.
(See Fig. 2).
To Clean
1. Untap Keg in usual manner.
2. Turn Beer Flow Control Handle OFF .
(See Fig. 1).
3. Attach cleaning adapter. Use Perlick’s
single cleaning adapter, No. 43657, if
cleaning from faucet to keg. If two or
more lines are cleaned, use Perlick’s
dual cleaning adapter, No. 43681.
4. Turn Beer Flow Control Handle to
CLEAN and clean as usual.
(See Fig. 3).
5. After flushing, turn Beer Flow Control
Handle OFF and retap keg.
(See Fig. 1).
6. To restore service, see above instructions.
 Loading...