

Page 1
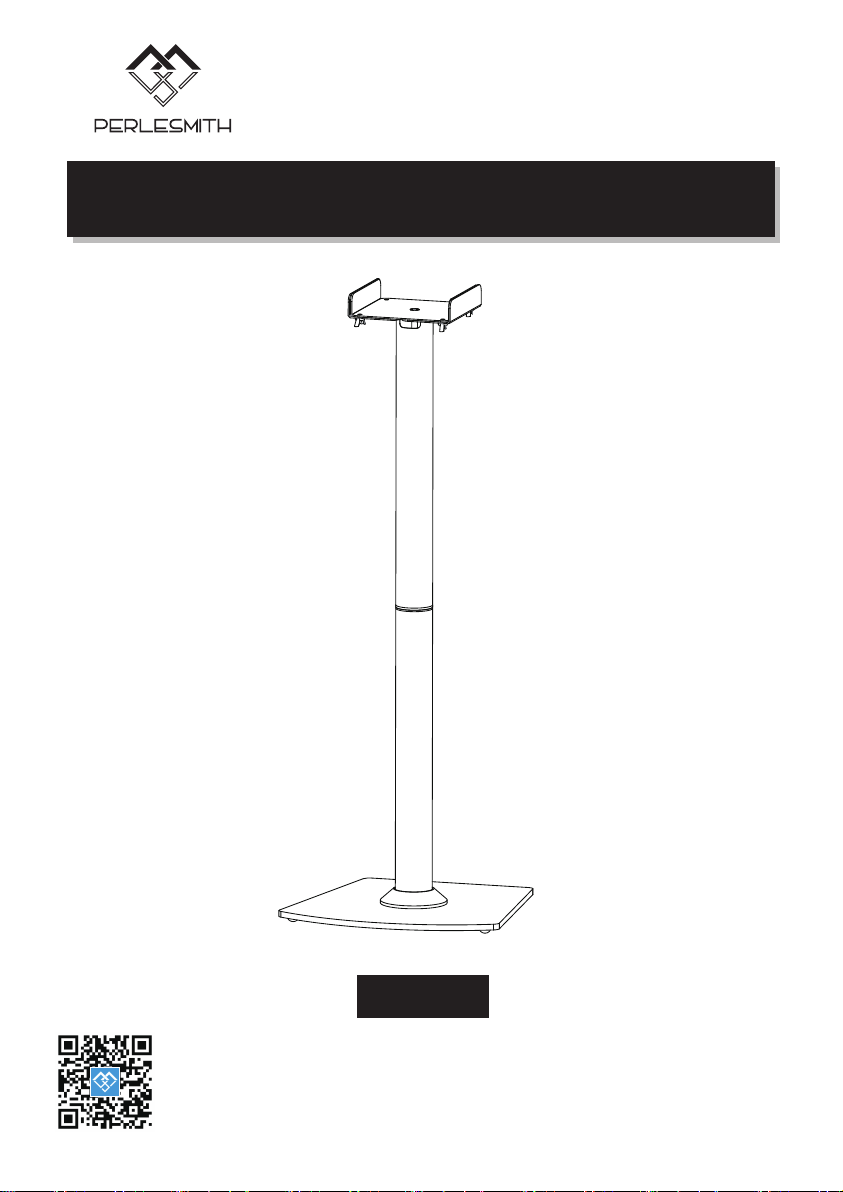
SPEAKER FLOOR STAND
V1.0
PSSS5
Thank you for choosing our product! We strive to provide the best quality and
services for our customers. Would you kindly share your experience on Amazon if
you are satisfied? Should you have any issues, please don't hesitate to contact us.
Telephone:800-5566-806 Mon-Fri 10am - 6pm (PST) (USA) (CAN)
Email:[email protected] (US/CA/DE/UK/FR/IT/ES/JP/AU)
Page 2
Important Safety Instructions
•Check package contents against Supplied Parts and Hardware Lists to assure that all components were received undamaged. Do not use damaged or defective parts.lf you require replacement parts, contact customer service at [email protected].
•Not all parts and hardware included will be used.
•Carefully read all instructions before attempting installation.If you do not understand the instructions or have any concerns or questions, please contact customer service at
[email protected]
•This product may contain moving parts. Use with caution.
•Do not use this product for any purpose or in any configuration not explicitly specified in this
instruction. We hereby disclaims any liability for injury or damage arising from incorrect asse-
mbly or incorrect use of this product.
•Please check www.perlesmith.com for more products and company information.
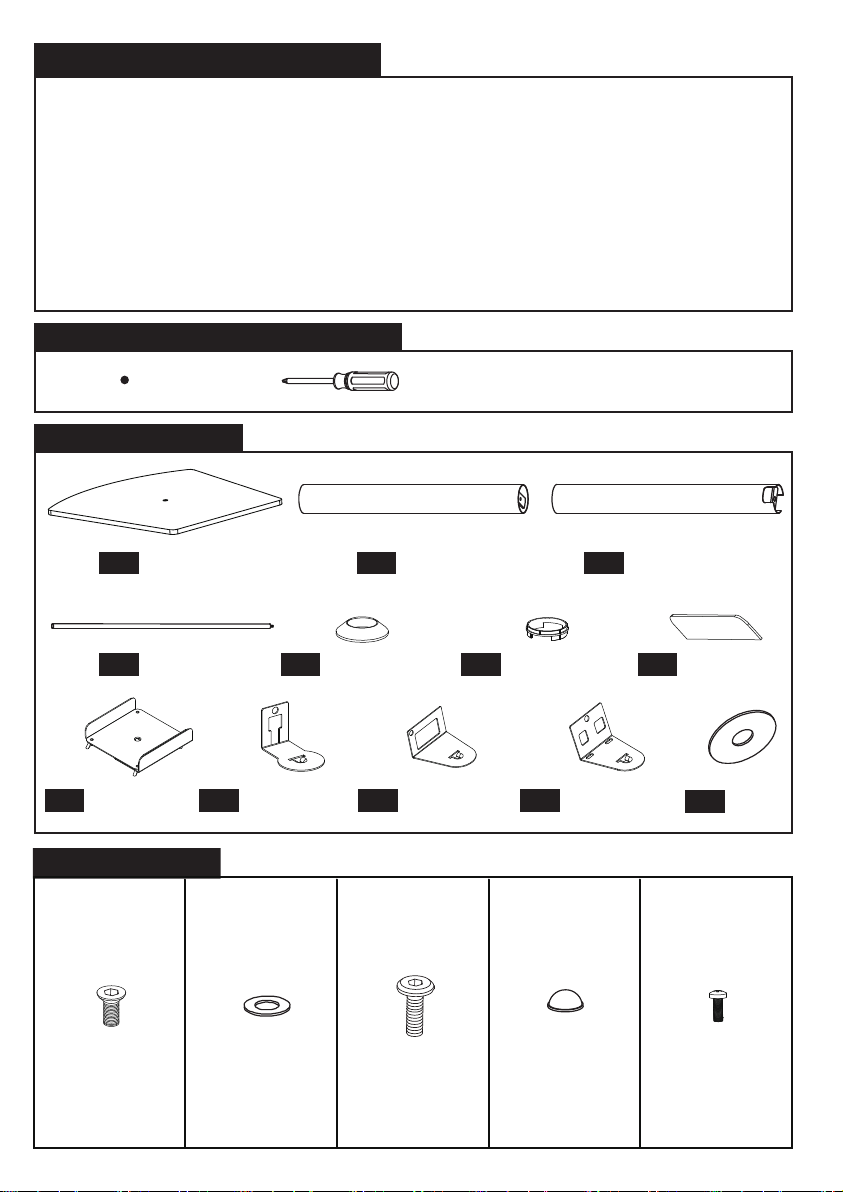
TOOLS NEEDED (NOT INCLUDED)
Phillips Screwdriver
SUPPLIED PARTS
Base X 2
01
Nut Rod X 2
04
Speaker Bracket
08
X2
HARDWARE KIT
Screw M6*16
Lower Post X 2
02
Screw Post X 2
05
Speaker Bracket
09
Plastic washer
X2
X 2X 2 X 2 X 8
Speaker Bracket
10
Inner Hexagon
Screw M6*25
X2
BA C D
06
03
Connector X 2
Speaker Bracket
11
Rubber Pad
Upper Post X 2
07
X2
M4x12mm
Sponge X 4
EVA Pad
12
X2
Screw
X 2
E
1
Page 3
Screw
M5x12mm
Washer
φ6.5*16
Screw
M6x12mm
Screw
1/4-20x1/2”
Washer
φ5*15
Allen Key
M4
x2
x2 x2 x2
x2
F G M H J K
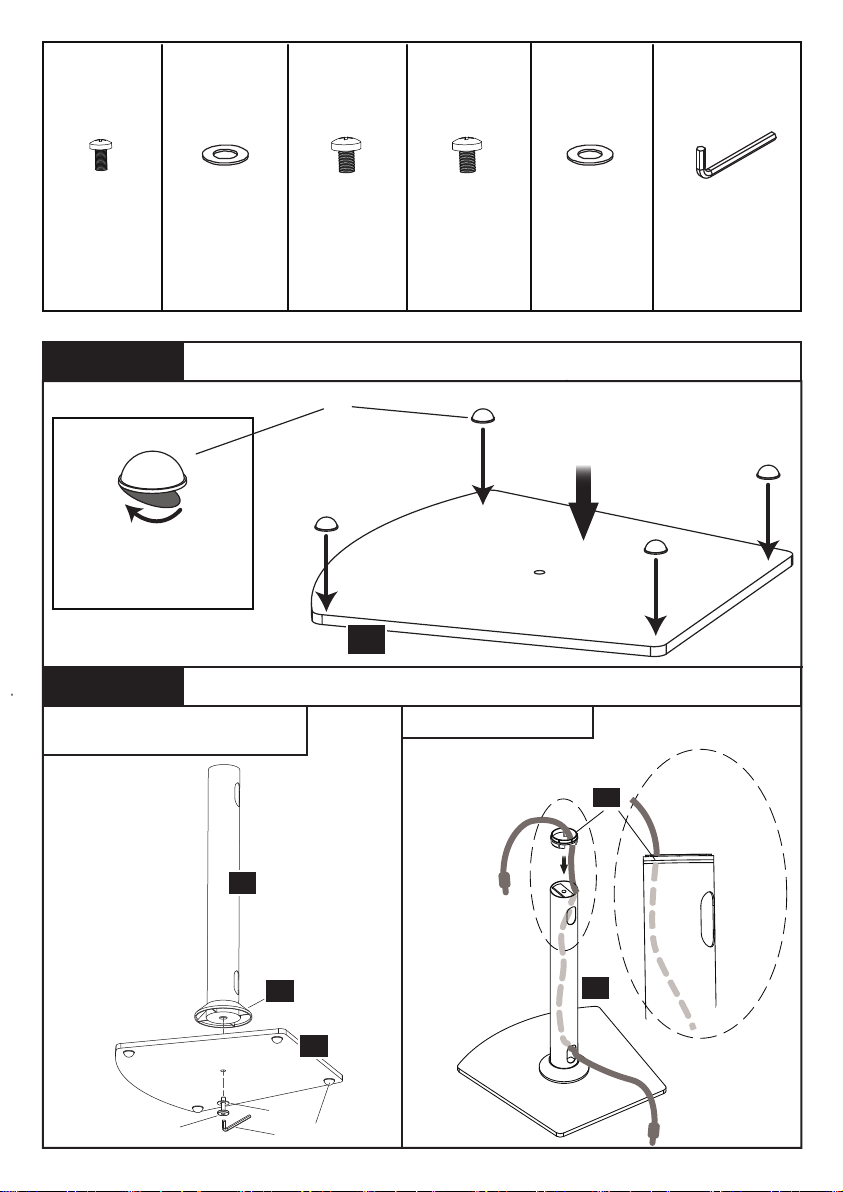
STEP 1
Attach the Rubber Pads to the Bases
D
Side of blacksprayed
Remove the backpapers
from the rubber pads
01
STEP 2
Assemble the base and the
lower post.
Assemble the Lower Posts to the Bases.
Manage the cables
06
x1
02
05
01
B
C
D
K
02
2
Page 4
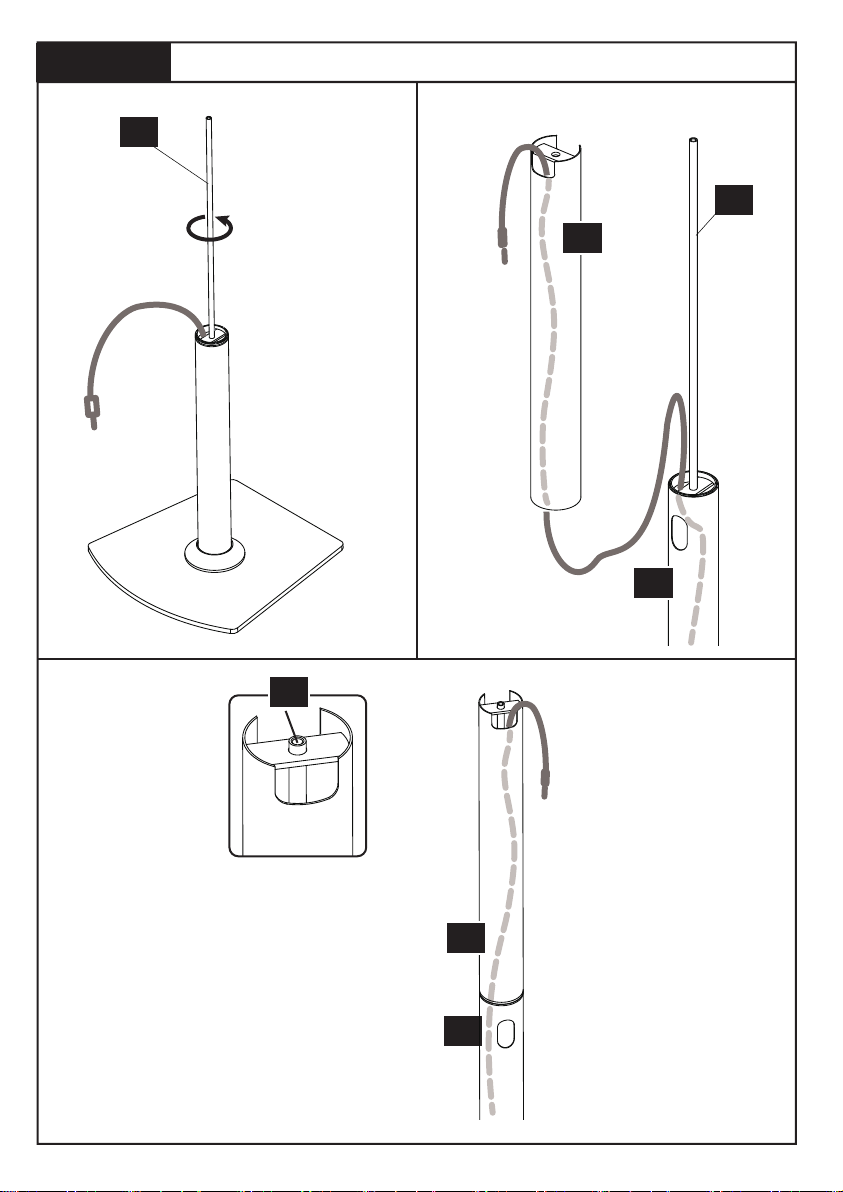
STEP 3
04
Assemble the Upper Posts to the Lower Posts.
Fasten the nut
rods to the
screw rods
Pass cables
through the
posts
04
03
Pass cables
through the
posts
04
02
Attach the upper post
at the lower post
03
02
3
Page 5
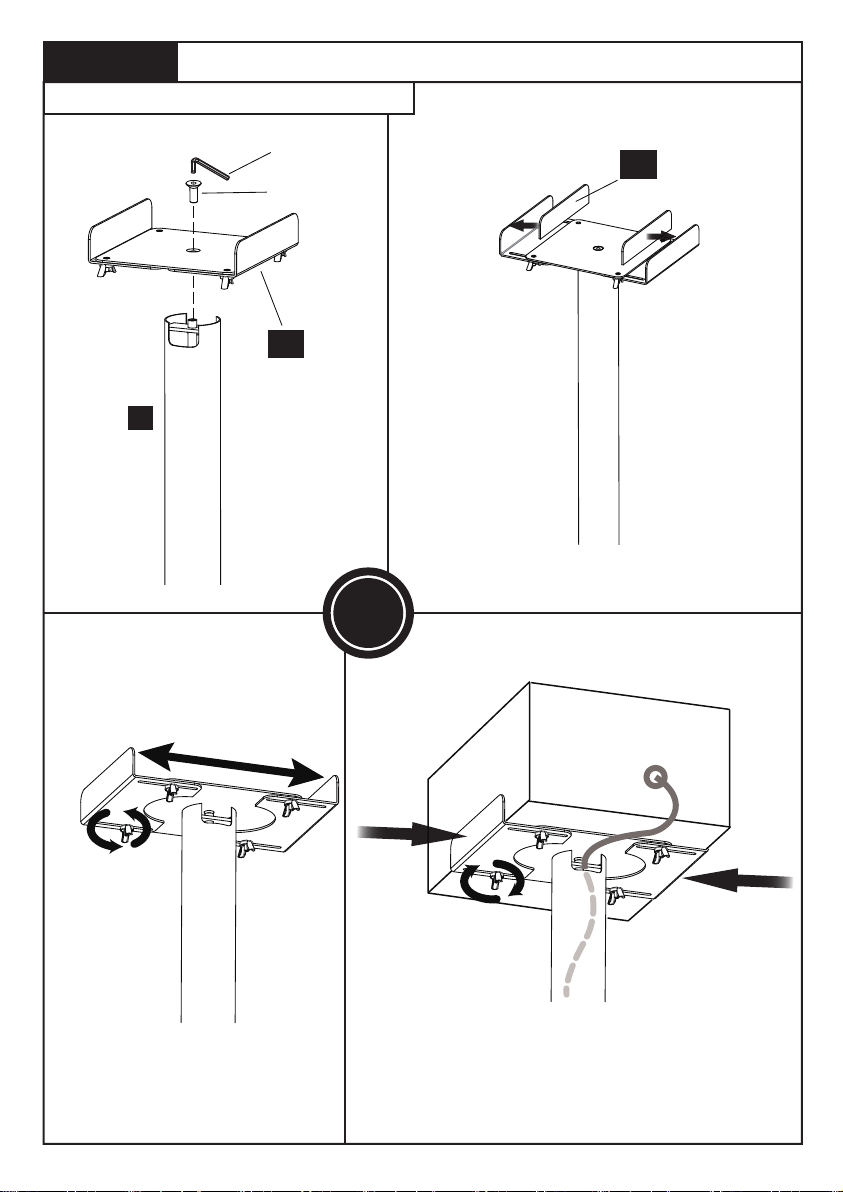
STEP 4
Speaker option A: Bookshelf Speakers
Secure Speaker to the Upper Posts
Secure the
speaker
bracket
08
K
A
08
07
Attach the
sponge (remove
the back paper
at first)
OPT
A
Bookshelf speaker
Loosen the unts and slide the
L plates to fit the speaker.
Put the speaker in placement and
tighten the nuts, manage the cable.
4
Page 6
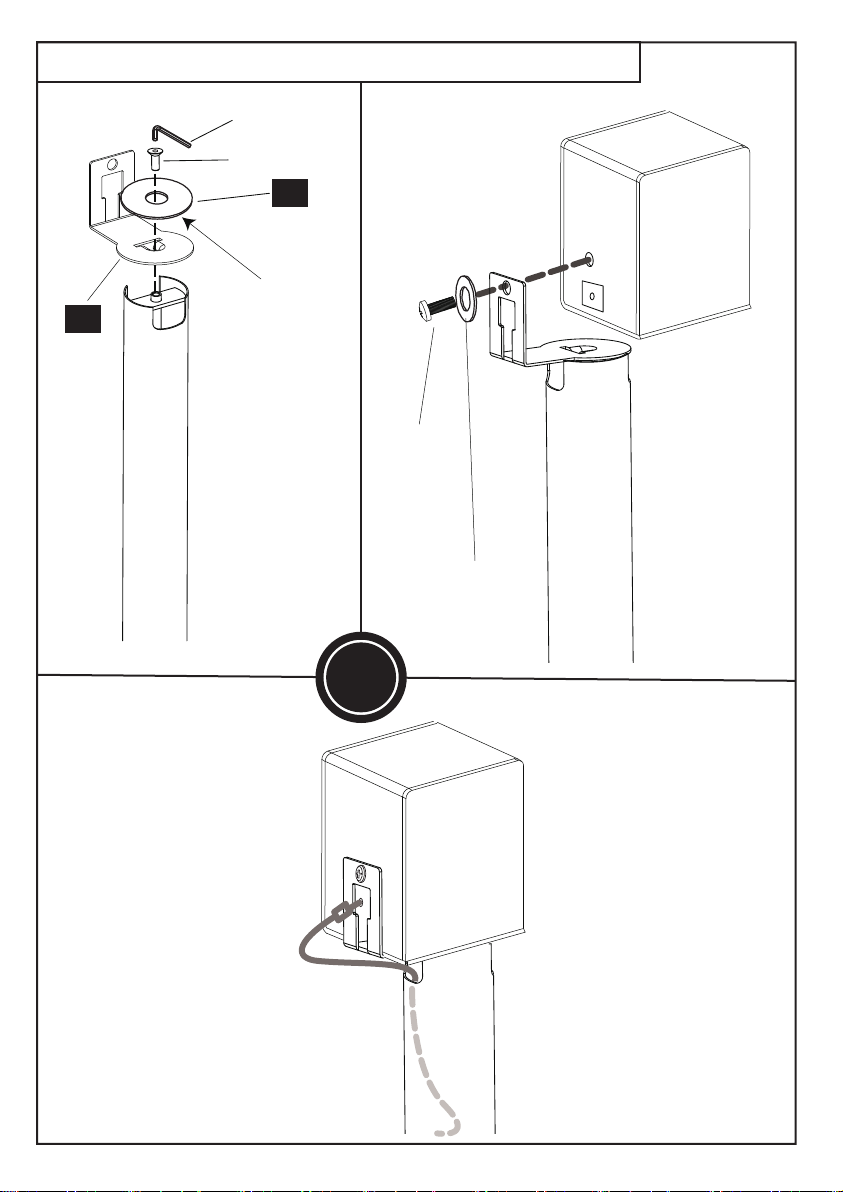
Speaker option B: Sonos One Speakers and PLAY: 1 Speakers
K
A
12
Remove the
09
back paper at
first,then attach
the EVA pad
E or F or
M or H
G or J
(Optional)
OPT
B
Insert the cable into the
cable hole of the speaker
5
Page 7
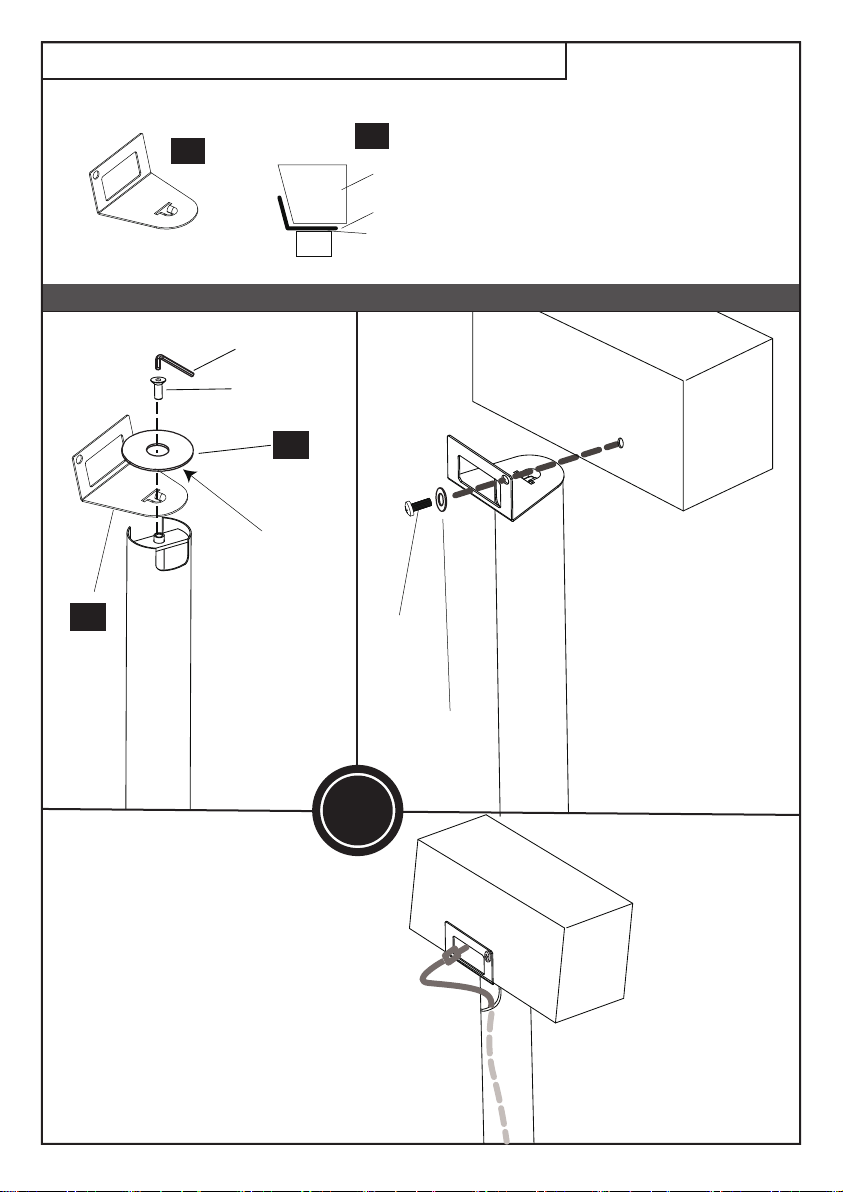
Speaker option C: PLAY:3 (HORIZONTAL) Speakers
Attention! Ensure the degree of the speaker
10
brackets fit the degree of speakers.
Select the proper sepeaker brackets according to your speaker
10
Side view of speaker
Side view of speaker brackets
Upper post
K
A
12
Remove the
back paper at
first,then attach
10
the EVA pad
E or F
or M
or H
G or J
(Optional)
OPT
C
Route the cables
6
Page 8
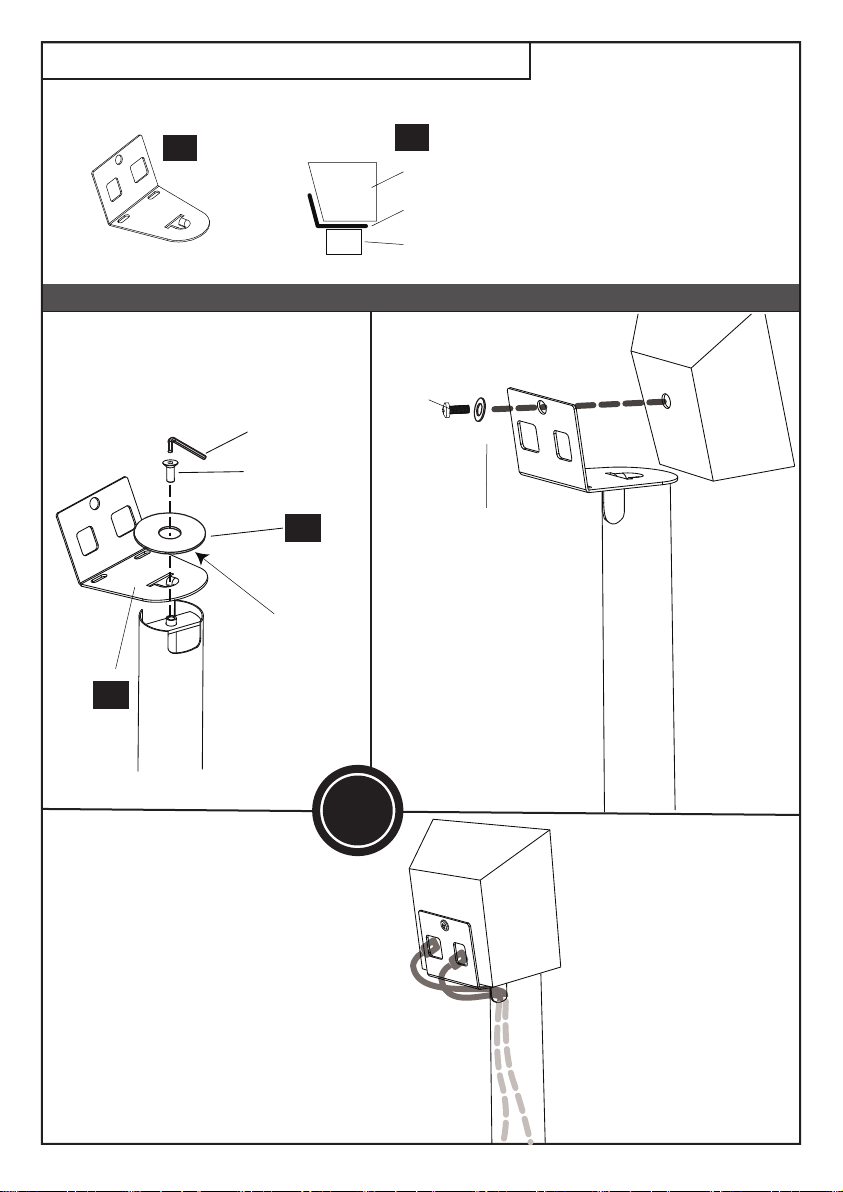
Speaker option D: PLAY:3 (VERTICAL) Speakers
Attention! Ensure the degree of the speaker
11
Select the proper sepeaker brackets according to your speaker
brackets fit the degree of speakers.
K
11
Side view of speaker
Side view of speaker brackets
Upper post
E or F
or M
or H
A
11
12
Remove the
back paper at
first,then attach
the EVA pad
OPT
D
Route the cables
G or J
(Optional)
7
 Loading...