

Page 1
INSTALLATION MANUAL
Full-motion TV Wall Mount
V1.0
V2.0
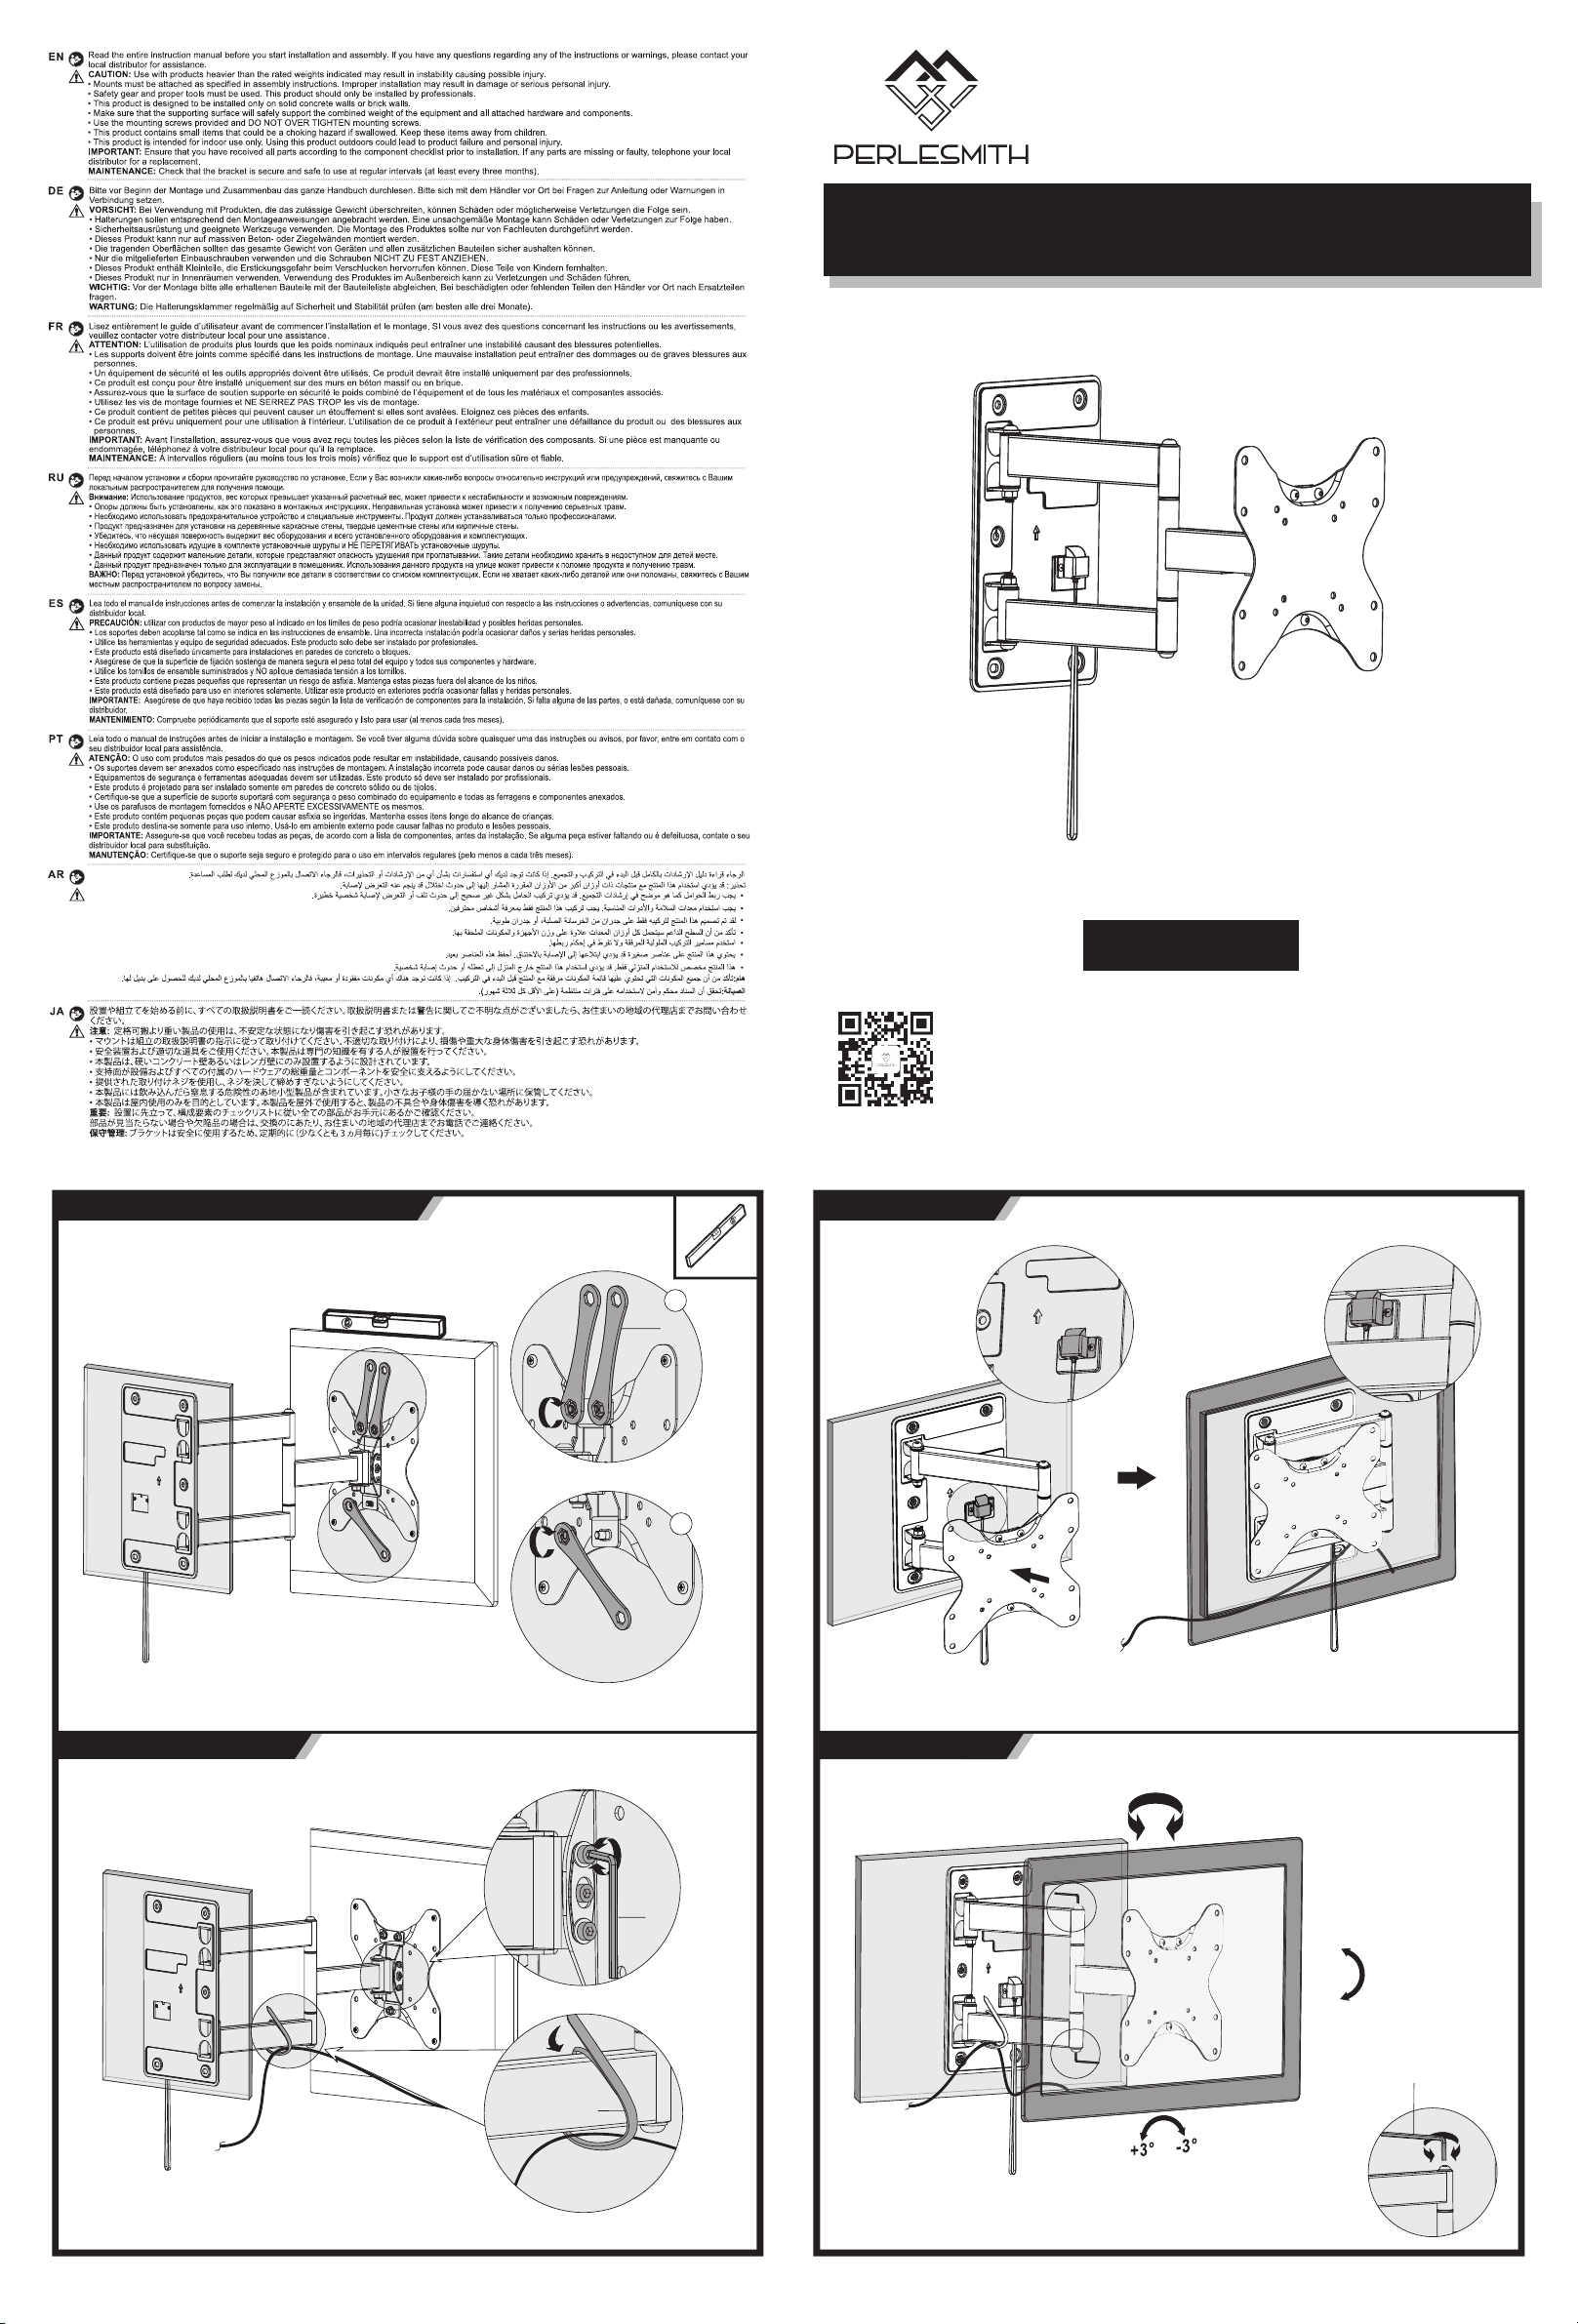
7. TV Fixing and Level Adjustment
1
C
Secure th e TV with s cr ews
PSLR VF
Thank y ou for ch oosin g our pro du ct! W e str iv e to prov ide the b est qua lity an d servi ces for o ur
custo mers. W oul d yo u kin dl y share y our exp erien ce on Amaz on if you a re s ati sf ied ? Sh oul d
you hav e any iss ue s, pl ea se do n' t hes it ate t o co nta ct u s.
Tele ph one:8 00 -55 66 -80 6 Mo n-F ri 1 0am - 6 pm ( PST ) (U SA)
Email:s uppor tus@p erles mith. com (US/ CA/DE /U K/F R/ IT/ ES /JP /A U)
9a. Arm Locking
75x75/1 00 x100
200x100 /2 00x20 0
PSLRVF
43"
MAX
35kgs
(77lb s)
RATE D
8. Cable Management
Route y ou r TV cabl es a long th e ar m
throu gh t he clip.
2
Turn the 3 screws clockwise to secur e.
B
Pull th e st rap to lock t he a rm for se cu rity.
9b. Angle Display
Til t, swiv el a nd l evel th e TV to the
desired p os ition .
Swive l
±90°
+10°
Til t
-15°
E
D
Level a dj ustment
If your m ou nt "drops ",
adjust th e ar m clock wi se
using the 5 mm a llen ke y.(E).
Page 2
Included
Not Included
screwdr iv er driller
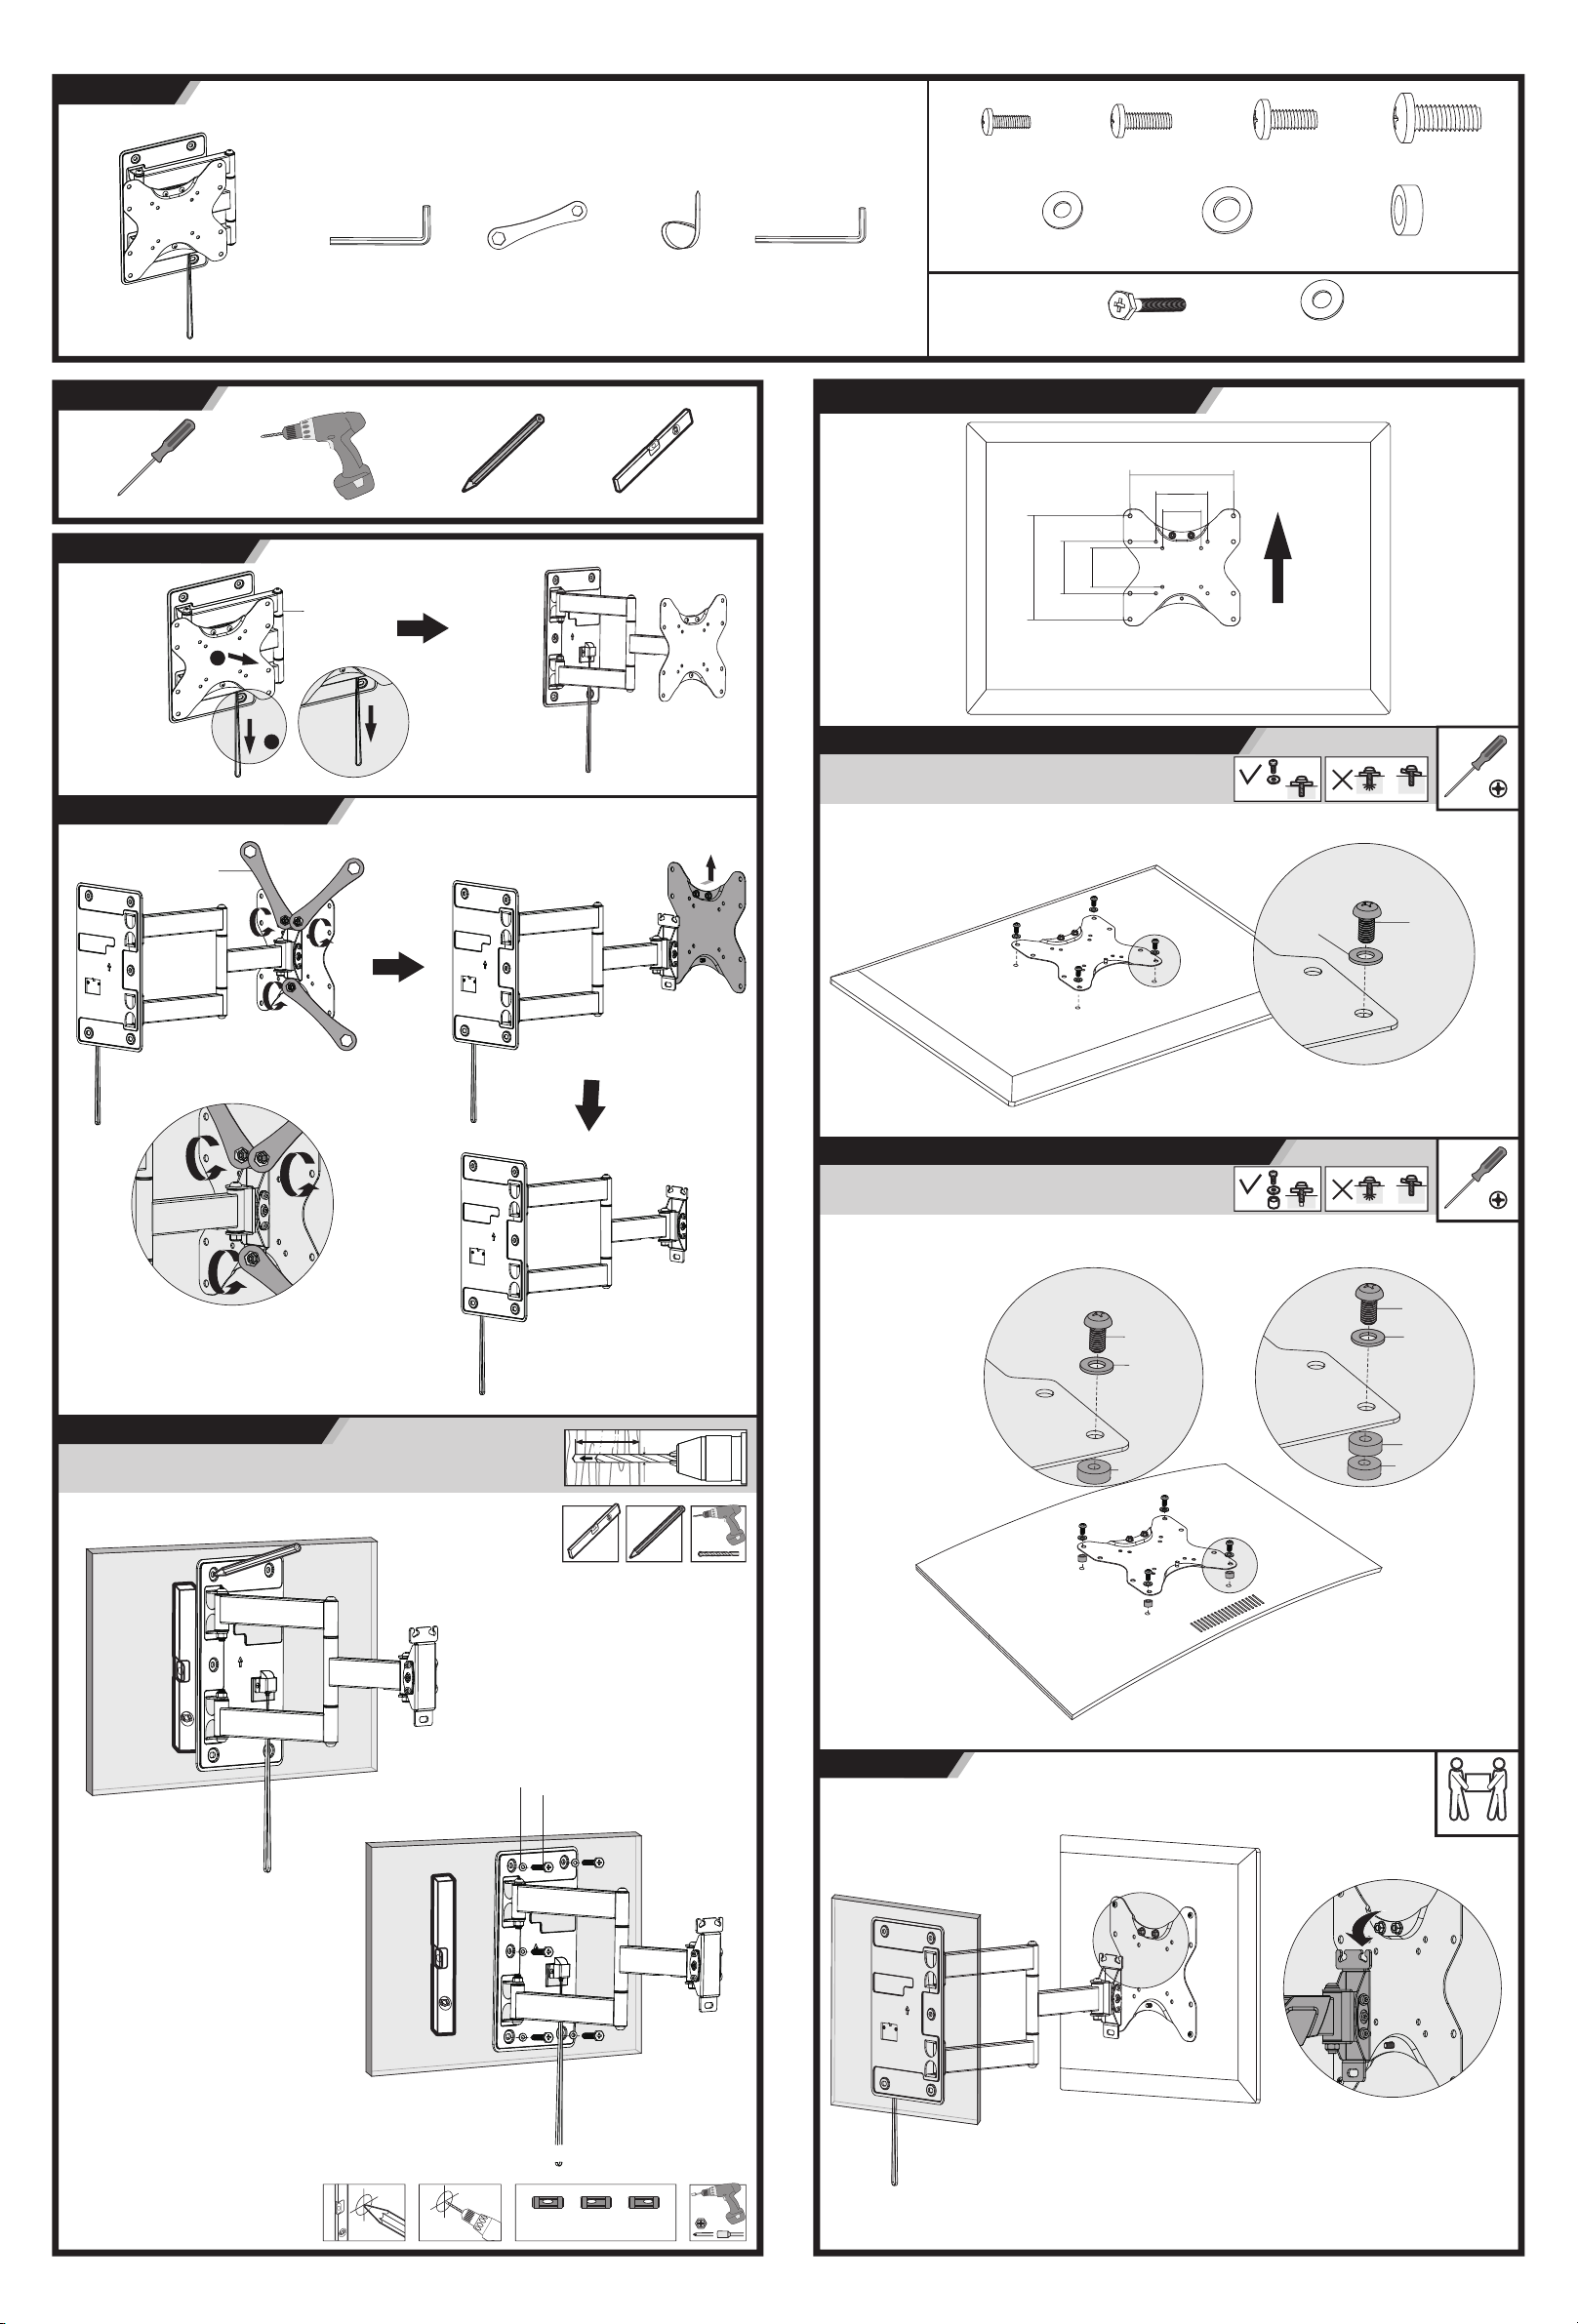
1. Arm Unlocking
2
allen key
4mm (x1 )
B
wrenchTV brac ke t cable cli p
C (x1)A (x1)
D (x1)
allen key
5mm (x1 )
E
M4x14 ( x4 )
M-A
D5 (x4)
M-E
M5x14 ( x4 )
M-B
W-A (x 5)
D8 (x4)
M-F
M6x14 (x4 )
M-C
washer
W-B ( x5 )
M8x20 (x4 )
spacer
M-G(x 8)
M-D
4. VESA Plate Installation Direction
200mm (7. 9")
pen
A
bubble le ve l
75mm( 3")
200mm (7. 9")
100mm (3. 9")
100mm (3. 9")
75mm( 3")
1
2. VESA Plate Removing
C
Pull the strap downward
to unlock the a rm.
5a. Flat Back TV(Universal Monitor Plate)
5b. Round Back TV(Universal Monitor Plate)
M-E
M-F
TV
TV
TV
TV
M-A
M-B
M-C
M-D
TV
TV
Turn the 3 screws clockwise to secur e.
3. Wall Plate Installation
W-B
55mm
(2.2")
Note: Pilot h oles should b e
drilled int o a depth of
55mm(2.2" )
W-A
ø 4.5mm
(ø 3/16")
6. Hang TV
M-D
M-F
M-G
M-D
M-F
M-G
M-G
Mark th e
cente r of it .
1
Dri ll the
pilot h ole s.
2
Ensur e ali gnm en t usi ng
a bubbl e lev el.
√
X X
Drill er
 Loading...