

PerimeterSafe Home Monitoring C220PU, C525BU User Manual

KODAK CHERISH C225
Battery-Operated 2.8”
Wi-Fi Video Baby Monitor
User Manual
The features described in this User Manual are subject
to modiications without prior notice.
WELCOME
ASSEMBLY
Thank you for buying the KODAK CHERISH C225
Battery Operated 2.8” Wi-Fi Video Baby Monitor.
With the Baby Monitor’s Parent Unit or your mobile
device, now you can monitor your baby sleeping in
another room anywhere, anytime!
Please keep your original dated sales receipt. You will
need to produce a copy of your dated sales receipt to
conirm warranty status.
For product-related questions, please send an email
to: support@kodaksmarthome.com.
This User’s Guide covers all the information you’ll need
to get the most from your product.
Prior to using the Baby Monitor, we recommend
that you fully charge the battery in the Parent Unit.
This way, the device will continue to work even if you
disconnect it from the power supply to carry it to
another location. Please read the Safety Instructions
on page 16 carefully before installation.
Page | 2 Introduction
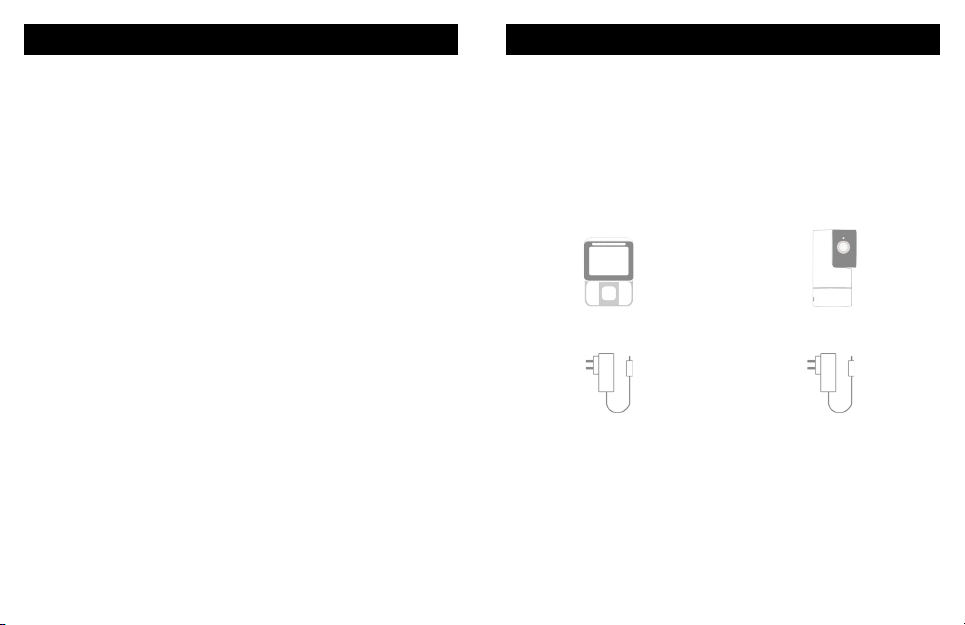
Check List:
1 x Parent Unit
1 x Power adapter for
Parent Unit
1 x Baby Unit(Camera)
1 x Power adapter for
Baby Unit
PARENT UNIT OVERVIEW
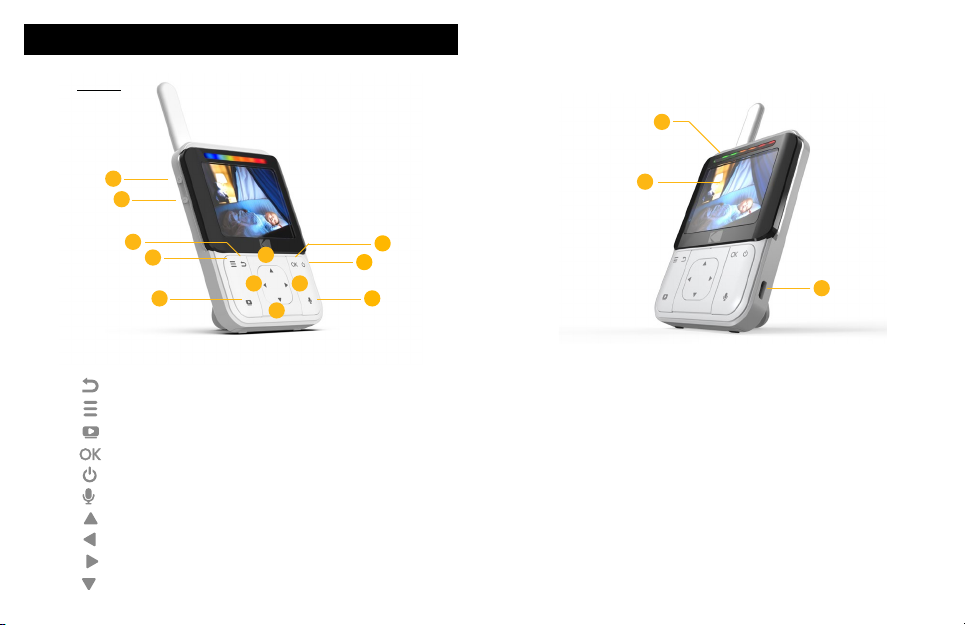
Keys
3
1
2
a
b
c
a.
b.
c.
d.
e.
f.
g.
h.
i.
j.
Page | 4 Parent Unit Overview
: Press to return to the previous menu
: Press to enter/exit the Menu mode
: Press to turn on/o the LCD display
: Press to conirm
: Press and hold to turn on/o the baby unit
: Press and hold to speak to your baby
: Press to scroll/pan up
: Press to scroll/pan left
: Press to scroll/pan right
: Press to scroll/pan down
g
h i
j
d
e
f
4
5
1. Volume Up
2. Volume Down
3. Battery Status Indicator
4. Display (LCD Screen)
5. Charging Socket
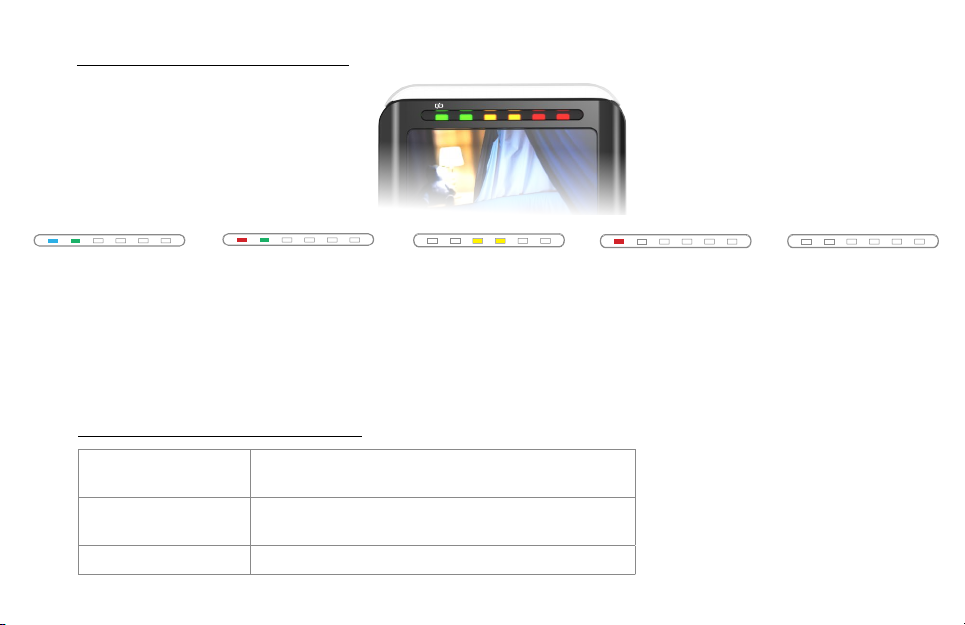
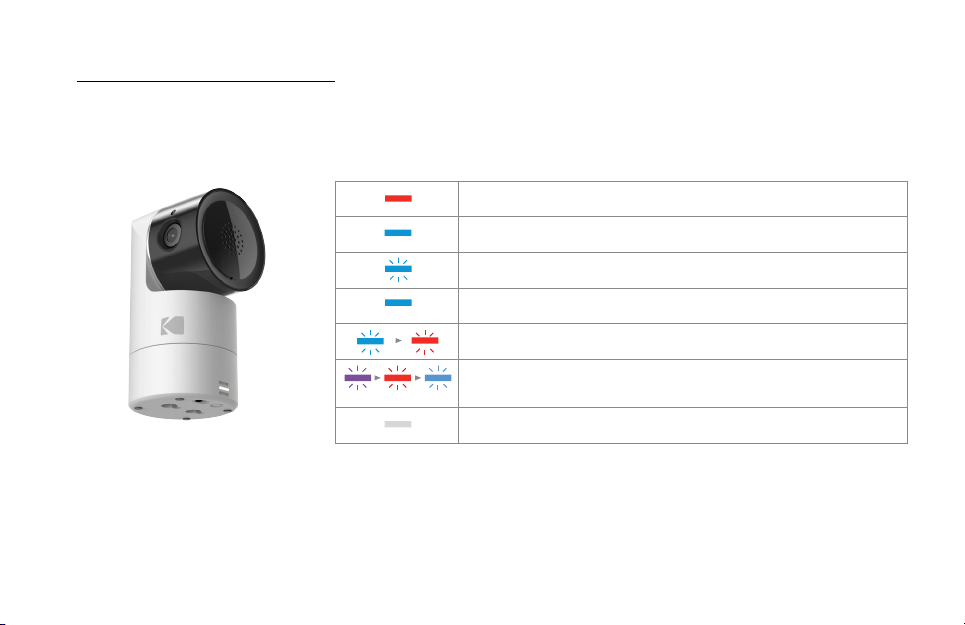
LED Behaviors for Parent Unit
The irst LED lights up in
blue when the adapter
is plugged in and it’s
fully charged; the
second LED lights up in
green when the Parent
Unit is switched on.
The irst LED lights
up in red when it’s
charging and the
adapter is plugged
in; the second LED
lights up in green
when the Parent
Unit is switched on.
When the third and
fourth LED light up
in yellow, the baby
unit is detecting and
transmitting sounds to
the parent unit.
The irst LED lights
up in red when it’s
charging and the
adapter is plugged in;
and the Parent Unit is
switched o.
When it’s fully
charged and the
adapter is plugged in,
the LED light will then
switch o.
Beep Behaviors for Parent Unit
2 Quick Beeps Parent Unit is disconnected from Baby Unit due
1 Beep Low Battery Alert.
5 Continuous Beeps Temperature is out of range.
Page | 6 Behaviors for Parent Unit
to out of range or Baby Unit may be powered o.
It is time to recharge the battery on Parent Unit.
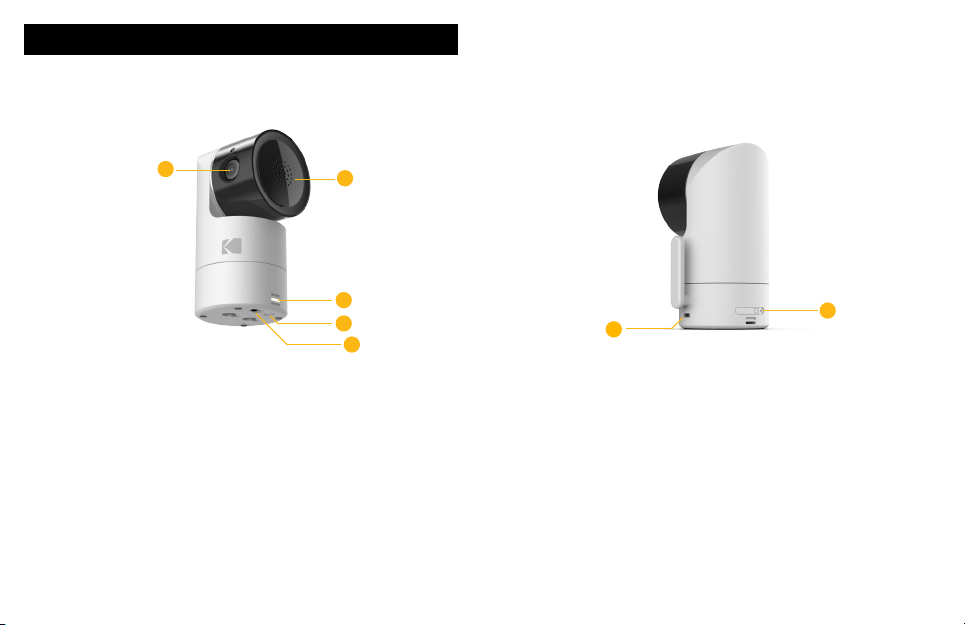
BABY UNIT OVERVIEW
1
1. Camera Lens
2. Speaker
2
3
4
5
6
7
6. Charging Socket
7. SD Card Cover
3. LED Light
4. Pair Button
5. Power Button
Page | 8 Baby Unit Overview
LED Behaviors for Baby Unit
Page | 10 Behaviors for Baby Unit
Camera is OFF, battery is charging: Solid Red
Camera powering up: Solid Blue for irst few seconds
Camera locating router: Blue blinking every one second
Camera connected to router: Solid Blue
Camera in pair mode: Blinking Blue & Red
Firmware upgrading. DO NOT SWITCH OFF THE CAMERA:
Blinking Purple, Red & Blue
Camera is OFF, battery is fully charged: No Light

ESSENTIAL GUIDELINES FOR THE INSTALLATION OF YOUR BABY MONITOR
• Before using your Baby Unit and the Parent Unit
together, you must irst establish a radio link
between them. The range may be aected by
environmental conditions.
• Any large metal object such as refrigerator,
mirror, iling cabinet, metallic door or reinforced
concrete between the Baby Unit and the Parent
Unit may block the radio signal.
• The strength of the signal may also be reduced by
other solid structures such as walls or electrical
appliances (including radios, TVs, computers,
cordless or mobile phones, luorescent lights or
dimmer switches).
Page | 12 Guidelines to Install Your Baby Monitor
• The use of other 2.4 GHz products (e.g. wireless
networks [Wi-Fi routers], Bluetooth systems, or
microwave ovens) may cause interference with this
product. Therefore, always keep the Baby Monitor
at least 5 feet from such products, or turn them o
if they appear to be causing interference.
• If the signal is weak, try moving the Parent Unit and/
or the Baby Unit to another position in the room.
• The Pan-and-Tilt function of the baby unit is operate
via the App or using the Parent unit control. Do not
attempt to rotate or twist the baby unit by hand.

TABLE OF CONTENTS
1. Safety Instructions
2. Getting Started
2.1 Baby Unit Power Supply
2.2 Parent Unit Power Supply
2.3 Registration (Pairing)
3. Using the Baby Monitor
3.1 Setting Up
3.2 Power On or Off the Baby Unit
3.3 Power On or Off the Parent Unit
3.4 Talk Mode
3.5 Video On/Off
4. Parent Unit Options
4.1 Snapshot
4.2 Add a Device
4.3 Melody
4.4 Time Settings
4.5 Temperature
4.6 Brightness
4.7 Camera Loop
4.8 Zoom
4.9 Volume
Page | 14 Table of Contents
16
18
22
26
5. Disposal of the Device (Environment)
6. Cleaning
7. Troubleshooting
8. “KODAK Smart Home” In-App Setup
9. Monitoring Your Baby Via App
10. Grant Access
11. Further Information
• Exclusion
• How to Obtain Warranty Service or
Other Information?
• FCC, IC And CE Regulations
• Warning
• EC Declaration of Conformity
12. Technical Speciications
36
37
38
42
54
58
62
76

1. SAFETY INSTRUCTION
• This product is not a toy. Never let children play
with it.
• This Baby Monitor is not and shall not be deemed
WARNING:
Strangulation Hazard: Children have STRANGLED
in cords. Keep this cord out of the reach of children
(more than 3ft away). Do not remove this tag. Never
use extension cords with AC Adapters. Only use the AC
Adapters provided.
Baby Unit Set Up & Use:
• Determine a location for the Baby Unit that will
provide the best view of your baby in his/her cot.
• Place the Baby Unit on a lat surface, such as a
dresser, bureau, or shelf or mount the Unit to a wall
securely using the keyhole slots underneath the
baby unit.
• NEVER place the Baby Unit or cords within the cot.
This Baby Monitor complies with all relevant standards
concerning electromagnetic ields and is safe to use
when handled as described in the User’s Guide. Always
read the instructions in this User’s Guide carefully before
using the device.
• This product must be assembled by an adult only.
When assembling, keep small parts away from
children.
Page | 16 Safety Instruction
to be a substitute for responsible adult supervision.
• Retain this User’s Guide for future reference.
• Never place the Baby Unit or cords in the cot or
within reach of the baby (the Unit and cords should
be kept more than 3 feet away).
• Never cover the Baby Monitor with a towel or
blanket.
• Familiarize yourself with this monitor and all its
functions prior to actual use.
• Never use the Baby Monitor in damp areas or
anywhere close to water.
• Only use the chargers and power adapters
provided. Never use other chargers or power
adapters or the device and battery pack may be
damaged.
• Only insert a battery pack of the same type.
• Never tamper the plug contacts with sharp or
metal objects.
• Connect the power adapters to easily accessible
power sockets.
CAUTION:
• Explosion risk if the battery is replaced by an
incorrect type.
• Always dispose of used batteries by following the
relevant instructions.

2. GETTING STARTED
2.1 Baby Unit Power Supply
The Baby Unit comes with a built-in Li-ion battery.
Charging the rechargeable battery pack fully before use
is recommended. This will allow the unit to operate on
battery in the event of a power failure.
1. Insert the small end (USB) of the Baby Unit’s power
adapter (Output 5V, 1500mA) into the USB socket
in the back of the Baby Unit.
2. Insert the other end of the power adapter into a
suitable electrical outlet.
3. Slide the ON/OFF switch to the ON position to
switch on the Baby Unit. The power indicator lights
up in blue.
4. Slide the ON/OFF switch to the OFF position to
switch o the Baby Unit. The power indicator
lights up in red, indicating that the battery is being
charged.
*IMPORTANT: Only use the supplied power
adapter.*
Page | 18 Getting Started
2.2 Parent Unit Power Supply
The Parent Unit comes with a built-in Li-ion battery.
Charging the rechargeable battery pack fully before use
is recommended. This will allow the unit to operate on
battery in the event of a power failure.
1. Insert the small end (USB) of the Parent Unit’s
power adapter (Output 5V, 1500mA) into the
USB socket in the back of the Parent Unit.
2. Insert the other end of the power adapter into
a suitable electrical outlet. The battery status
indicator will light up in red to indicate that the
Parent Unit is connected to the electrical outlet.
*IMPORTANT: Only use the supplied power
adapter.*
3. Press and hold the power ON/OFF button for
about ive seconds to switch on the Parent Unit.
4. When the Baby and Parent Units are both
switched ON, the display on the Parent Unit
will show the image captured by the Baby Unit.
If the Baby Unit (camera) is not in range or is
switched o, the Parent Unit beeps repeatedly
and an error message will appear on the screen.
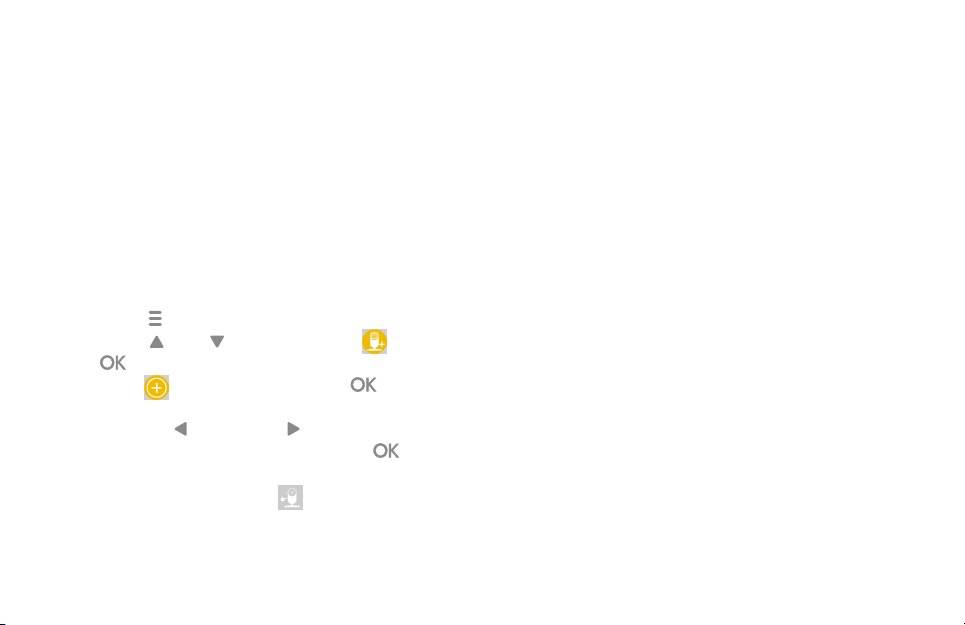
2.3 Registration (Pairing)
1. The Baby Unit is pre-registered to your Parent Unit.
You do not need to register it again unless the Baby
Unit loses its link with the Parent Unit. If you would
like to add an additional camera, please refer to
section 4.2.1.
2. To re-register your Baby Unit, or register a new
Baby Unit, follow the procedure below:
a. Press “ ” on the Parent Unit for the menu bar.
b. Press “ ” or “ ” button to select , then
“ ” to proceed to the next step.
c. Press “ ” to add camera, then “ ” to
proceed.
d. Press the “ ” button or “ ” button to select
the available camera number. Press “ ” to
add a camera unit.
e. You will then see a sign “ ” to indicate you to
press and hold the pair button of the baby unit
until the irst beep then release the pair button.
The Parent Unit will auto detect and pair to the
Baby Unit. Parent Unit will then display live stream
upon successful pairing.
NOTE: If a particular Baby Unit was registered
previously, registering this current Baby Unit again will
overwrite the old registration.
Page | 20
Getting Started

3. USING THE BABY MONITOR
Please read these instructions carefully, and be aware
that this Baby Monitor is only intended as an aid.
It is not a substitute for responsible adult supervision.
3.1 Setting Up 3.2 Power On or Off the Baby Unit
• Make sure that the Baby Unit and Parent Unit are
both switched on.
• Place the Baby Unit in a convenient location (e.g.
on a table, mount on wall...etc) and point the
camera lens towards the area you want to monitor.
NOTE:
• Do not place the Baby Unit within reach of a child
or baby! If there is interference with the picture or
sound, try moving the units to dierent locations,
and ensure that they are not close to any other
electrical equipment.
• If you place the Parent Unit and Baby Unit too close
together, you may hear a high pitched noise. This is
not a fault.
The units are designed to be operated at some
distance apart. So move the units further apart.
• It is recommended to use a Class 10 SD Card.
(Insert the SD card with the labels facing towards
you)
Page | 22 Using the Baby Monitor
• Slide the ON/OFF switch to the ON position to
switch on the Baby Unit. The power indicator lights
up in blue.
• Slide the ON/OFF switch to the OFF position to
switch o the Baby Unit. The power indicator goes
o if the battery is not being charged, or lights up
in red if it is charging.
3.3 Power On or Off the Parent Unit
• To turn on the Parent Unit, press and hold the ON/
OFF switch on the Parent Unit. The power indicator
lights up in green. If the battery is being charged,
the red indicator will light up concurrently.
• To turn o the Parent Unit, press and hold the ON/
OFF switch on the Parent Unit. The green indicator
goes o. If the battery is being charged, the red
indicator will continue to light up.
 Loading...