

Page 1
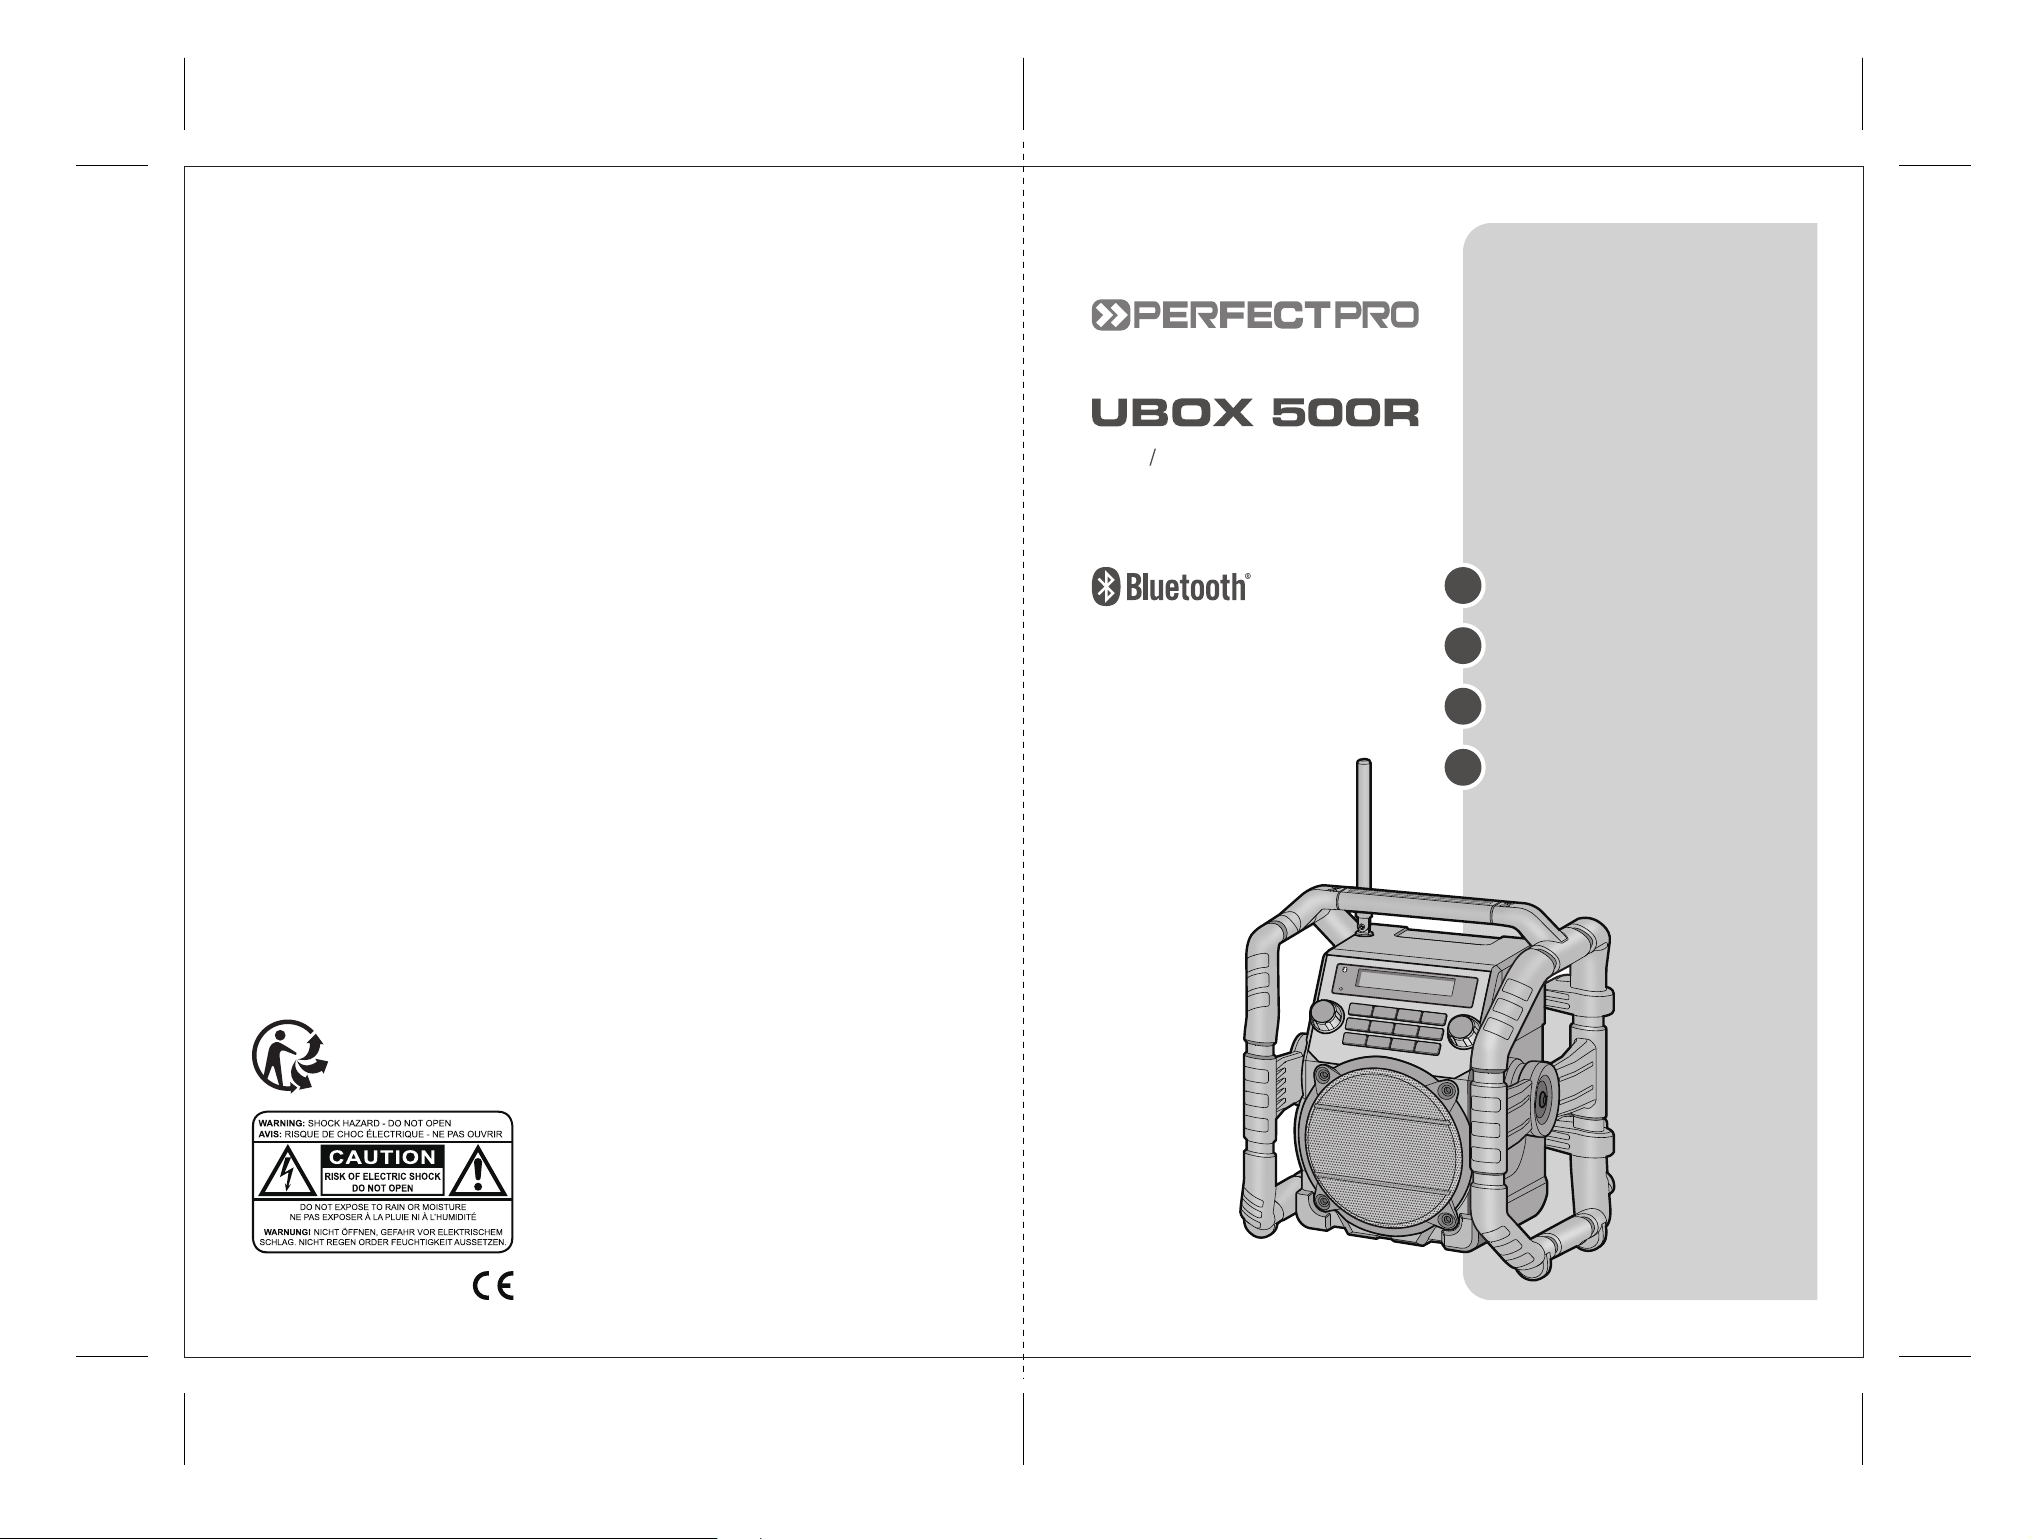
Perfectpro B.V.
Everdenberg 9A
Oosterhout
The Netherlands
DAB+ FM RDS / Bluetooth / USB
Jobsite Radio
GB
Operating instruction ...... 1 - 45
NL
Gebruiksaanwijzing ......... 46 - 93
D
Bedienungsanleitung ...... 94 - 141
Mode d’emploi .................... 142 - 189
F
3A81c86L00000
Page 2
The Bluetooth
®
word mark and logos are registered trademarks owned by Bluetooth SIG, Inc. and any
use of suchmarks by Perfectpro B.V. is under license.
WARNING
WARRANTY BECOMES VOID ONCE THE DEVICE CABINET HAS BEEN OPENED OR ANY
MODIFICATIONS OR ALTERATIONS TO THE ORIGINAL DEVICE HAVE BEEN MADE.
NEVER OPEN THE DEVICE CASING. THE MANUFACTURER WILL NOT ACCEPT ANY
LIABILITY FOR DAMAGE RESULTING FROM IMPROPER HANDLING. THE TYPE PLATE IS
LOCATED ON THE BACK OF THE DEVICE.
1
Page 3

Important Safety Instructions
1.
Read these instructions.
Keep these instructions.
2.
Heed all warnings.
3.
Follow all instructions.
4.
Do not use this apparatus near water.
5.
6.
Clean only with dry cloth.
Do not block any ventilation openings. Install in accordance with the instructions.
7.
Do not install near any heat sources such as radiators, heat registers, stoves or other apparatus
8.
(including ampliers) that produce heat.
9.
Protect the power cord from being walked on or pinched particularly at plug, convenience
receptacles, and the point where they exit from the apparatus.
Only use attachments / accessories specied by the manufacturer.
10.
11.
Use only with the cart, stand, tripod, bracket, or table specied by the manufacturer, or sold with
the apparatus. When a cart is used, use caution when moving the cart / apparatus combination
to avoid injury from tip-over.
Unplug this apparatus during lightning storms or when unused for long periods of time.
12.
Refer all servicing to qualied service personnel. Servicing is required when the apparatus has
13.
been damaged in any way, such as power supply cord or plug is damaged, liquid has been
spilled or objects have fallen into the apparatus, the apparatus has been exposed to rain or
moisture, does not operate normally, or has been dropped.
To reduce the risk of re or electric shock, do not expose this appliance to Rain or Moisture.
14.
For outdoors use, to avoid electric shock, only use batteries power during a raining day or the
weather is wet. This apparatus is provided with protection against splashing water and dust
ingress (IP65).
15.
The Shock Hazard Marking and Associated Graphical Symbol is provided on the back of unit.
2
Page 4
Important Safety Instructions
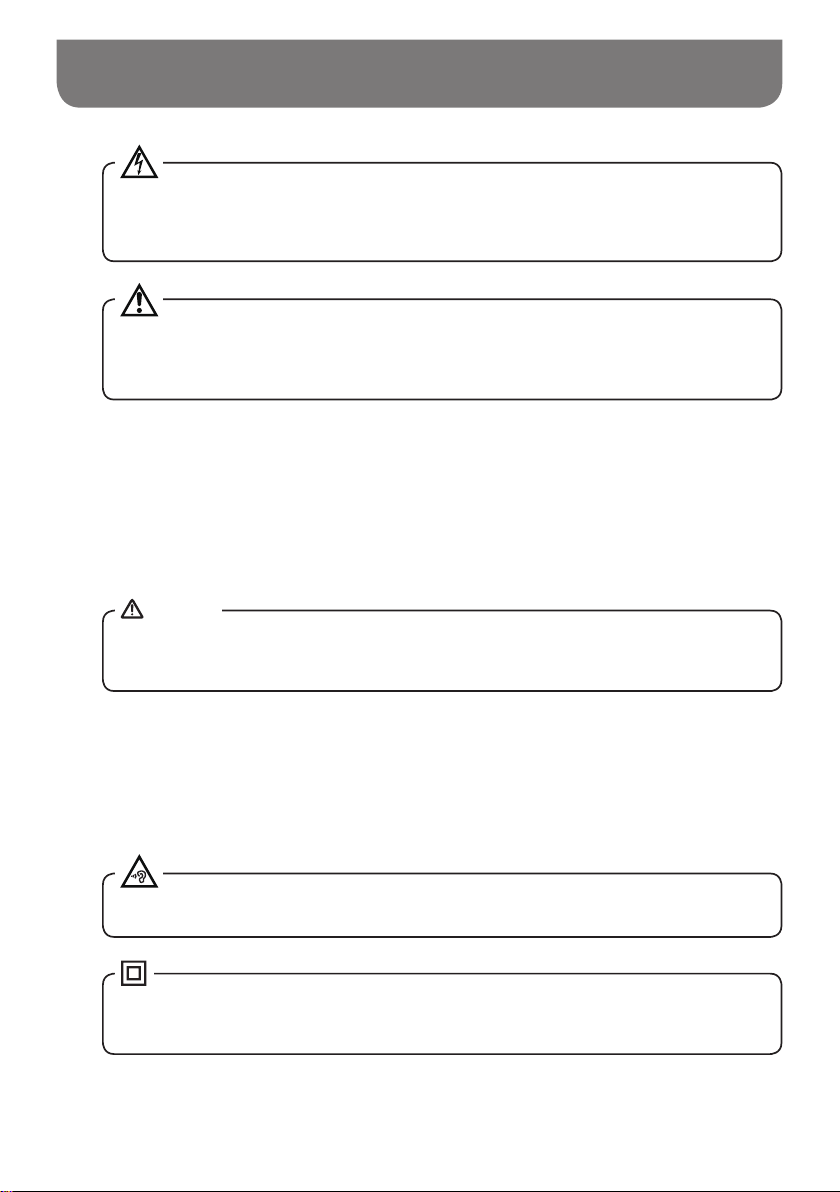
The lightning ash with arrowhead symbol, within an equilateral triangle, is intended to alert
the user to the presence of uninsulated “dangerous voltage” within the product’s enclosure
that may be of sufcient magnitude as to constitute a risk of electric shock to persons.
The exclamation point within an equilateral triangle is intended to alert the user to the
presence of important operating and maintenance (servicing) instructions in the literature
accompanying the appliance.
Apparatus shall not be exposed to dripping or splashing and no objects lled with liquids, shall
16.
be placed on the apparatus.
The power plug should be close to the radio, and easy to be approached that during the
17.
emergency, to disconnect the power from the radio, just unplug the power plug from the AC
power slot.
18.
19.
20.
NOTICE
The changes or modifications not expressly approved by the party responsible for
compliance could void the user’s authority to operate the equipment.
Where the MAINS plug or an appliance coupler is used as the disconnect device, the disconnect
device shall remain readily operable.
A warning that batteries (battery pack or batteries installed) shall not be exposed to excessive
heat such as sunshine, re or the like.
21.
To prevent possible hearing damage, do not listen at high volume levels for long periods.
22.
This equipment is a Class II or double insulated electrical appliance. It has been designed
in such a way that it does not require a safety connection to electrical earth.
The ventilation should not be impeded by covering the ventilation openings with items, such as
23.
newspapers ,table-cloths, curtains, etc.
3
Page 5
Controls
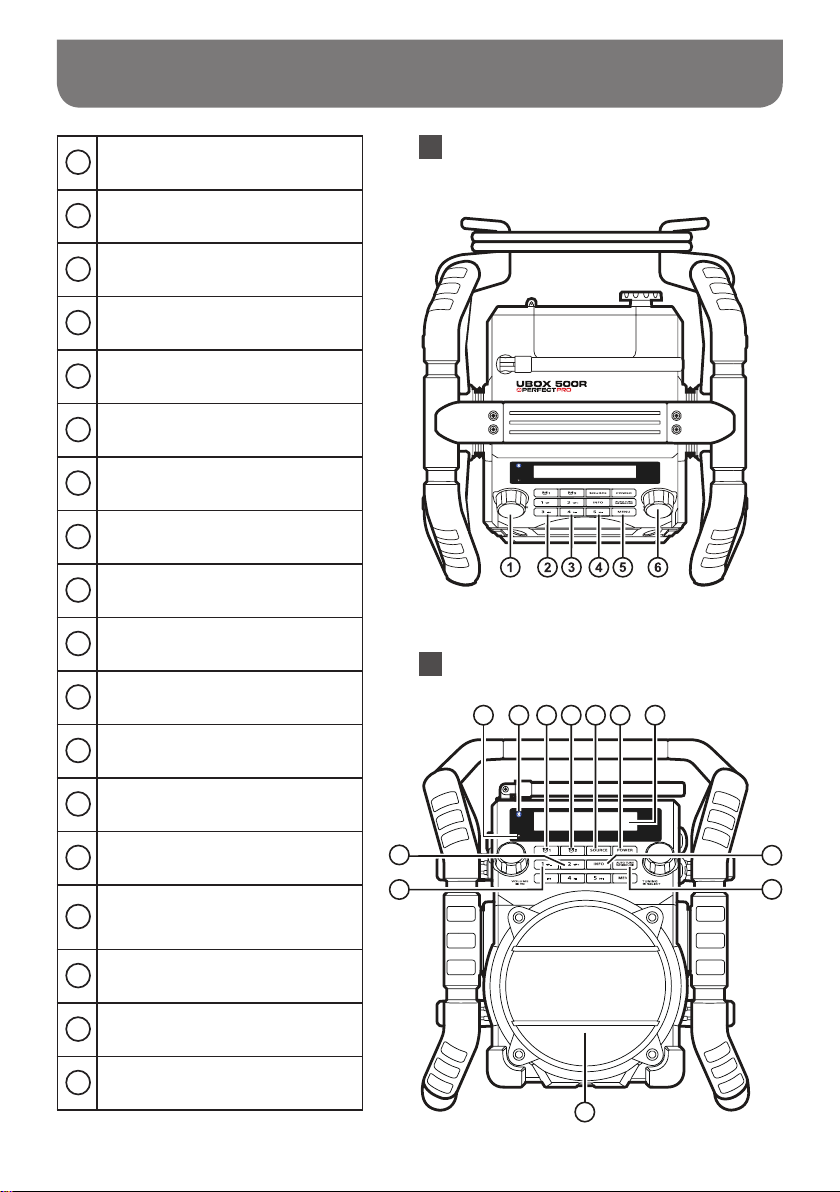
1
Volume control / EQ control button
2
Preset 3 / Rewind button
3
Preset 4 / Play / Pause button
4
Preset 5 / Fast-forward button
5
Menu button
6
Tuning control knob / Select button
7
Battery charging indicator
8
Bluetooth status indicator
9
Alarm 1 button
Alarm 2 button
10
Source button
11
Top view
Front view
7 8 9 10 11 12 13
Power On / Off button
12
LCD display
13
Info button
14
Auto tune / Play mode / Bluetooth
15
pairing button
Speaker
16
Preset 1 / Folder down button
17
Preset 2 / Folder up button
18
4
18
17
16
14
15
Page 6
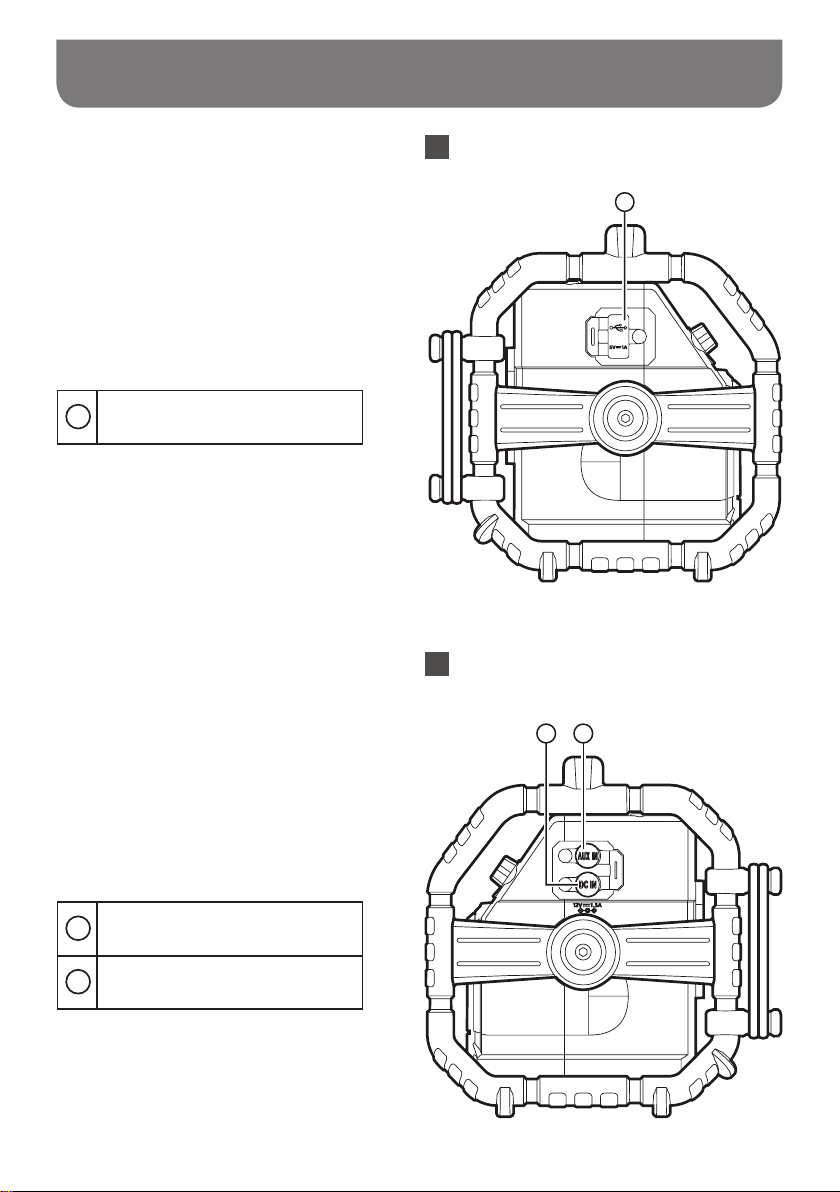
Controls
19 USB socket
Left view
19
Right view
20
DC In socket
21
Aux In socket
20 21
5
Page 7
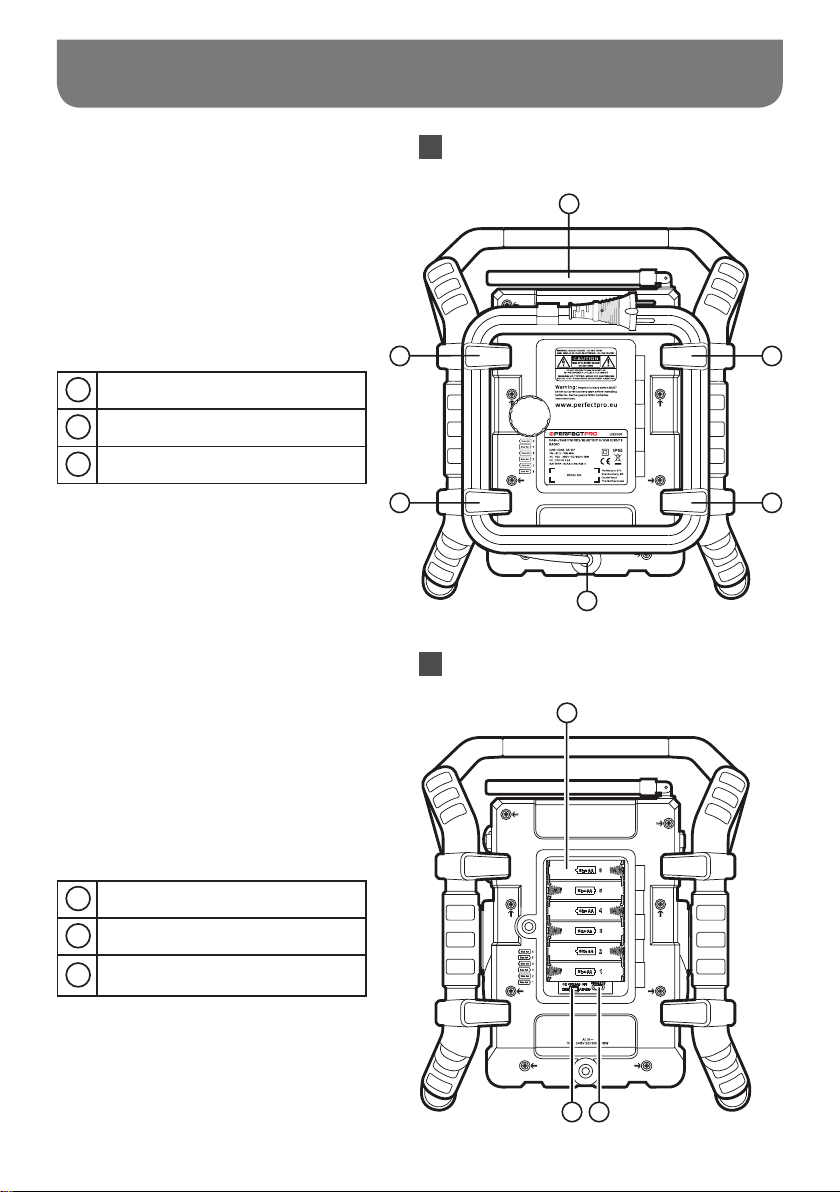
Controls
22 FM / DAB+ antenna
23
Power cord storage
24
AC power cord
Back view
22
23 23
25 Battery compartment
26
NiMH / Alkaline batteries switch
27
Socket for software upgrade
23
23
24
Back view
25
2726
6
Page 8

Powering the radio
Battery operation
Installing the batteries: first turn battery cover fixture
anti-clockwise to loosen and open the battery cover.
NOTE
Before you insert the batteries, if you use nonrechargeable
batteries, make sure the NiMH / Alkaline switch which located
inside the battery compartment is switched to Alkaline
position. If you use rechargeable batteries, make sure to
switch NiMH / Alkaline switch to NiMH position.
Insert 6 x AA size (AM-3) battery into the compartment.
Ensure the batteries are inserted in accordance with the diagram
shown. Close the battery cover and fasten the fixture by turning
clockwise. If the radio is not to be used for any extended period of
time, it is recommended that the batteries are removed from the
radio. Reduced power, distortion and a stuttering sound or “Battery
Low” showing on the display are all signs that the batteries need
replacing or recharging. (see below information on “charging the
batteries”).
When playing on (rechargeable) batteries the output power is less
compared to the output power when playing on AC mains power.
Because of this the sound can be somewhat distorted at the
highest volume settings.
7
Page 9
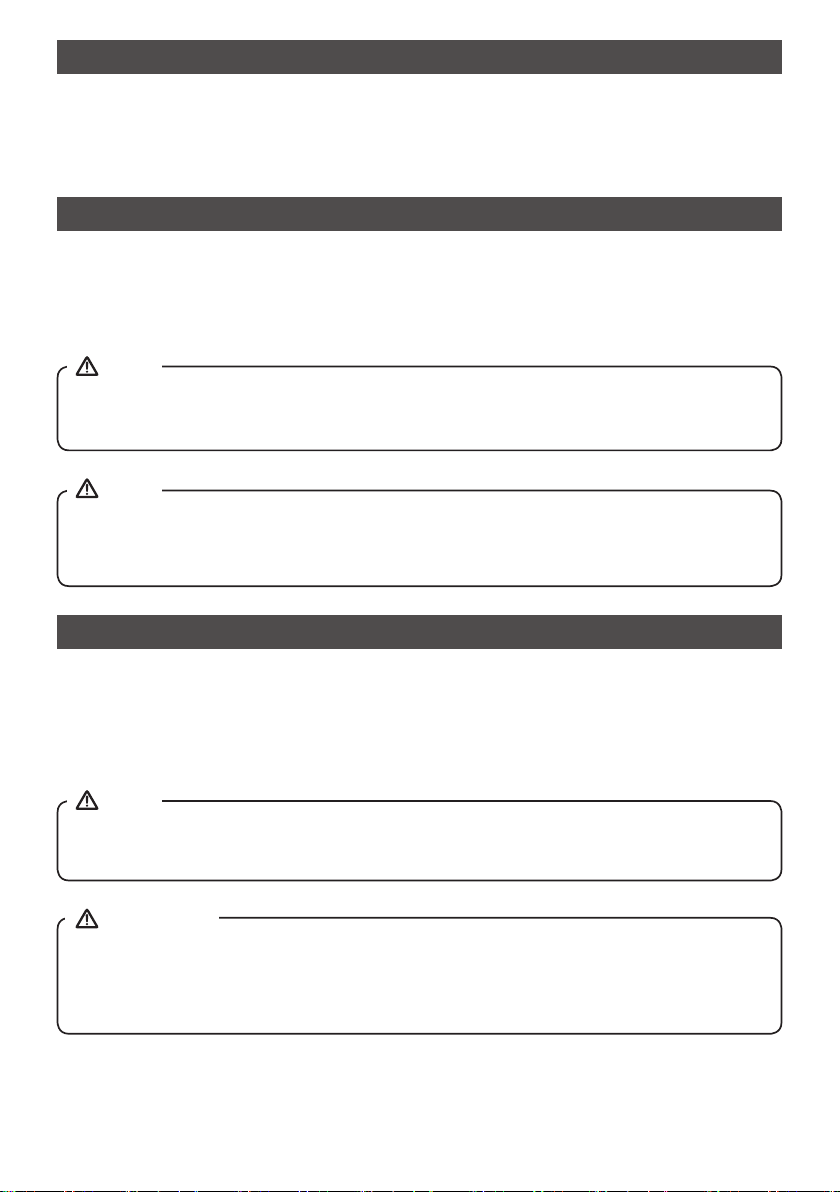
AC operation
Before you plug the AC cord into the AC socket, make sure the voltage is correct. If you have batteries
in the radio and use the AC power cord, the batteries will automatically be disconnected.
Power cord storage is designed to store the cord when the radio is not in use.
Powered via DC IN socket
The radio can be also powered via the DC IN socket which can allow 12 Volt DC, which is designed to
be powered by the vehicle or the boat so you can take the radio with you outdoors or on the boat.
An additional cigarette lighter cable is required (not supplied) for this device.
NOTE
Never use the 12 Volt socket in rainy or moist conditions to prevent moist from entering the radio.
Always keep the rubber cover on the back well closed under these conditions.
NOTE
If no controls are used and no sound output from the radio for 15 minutes, the radio will be put
into standby mode when using the mains power. When the radio is operated on battery power,
the radio will be switched off completely in order to minimize battery usage.
Charging the batteries
Make sure the radio is switched off and connected to the AC mains socket.
When the battery charge indicator LED flashes green, this indicates the batteries are charging.
Batteries will be fully charged in around 5-7 hours. The battery charge indicator LED shows steady
green light when the battery charging process is complete.
NOTE
Duration for charging your batteries fully can vary according to the mAh capacity of the batteries.
Higher mAh batteries require longer charging time.
IMPORTANT
Under some conditions the charging LED indicator may switch off after flashing briefly. This
may happen if the batteries are already freshly charged, or if the radio detects that you may be
attempting to recharge alkaline batteries or mixed different types or capacity of rechargeable
battery. In these cases the charging will be stopped.
INSTALL ONLY PRE-CHARGED (TO THE SAME VOLTAGE LEVEL) NIMH BATTERIES WITH “LOW
SELF-DISCHARGE” CHARACTERISTICS. USE OF ORIGINAL PERFECTPRO BATTERIES IS
HIGHLY RECOMMENDED.
8
Page 10

Important Information On Charging And
Using Rechargeable Batteries
1.
Recharge the batteries in any case at least every 2 months.
Make sure the Battery Select switch next the battery compartment is set to the “CHARGE NiMH
2.
ON” position.
Put the batteries in the compartment whilst paying attention to the correct polarity of the
3.
batteries (+ and -).
First use: Charge new batteries in one continuous, uninterrupted, charge until they are full. This
4.
rst charge may take longer than normal. For longer battery life it is advised to always recharge
in one continuous, uninterrupted charge until batteries are full and to not recharge again whilst
the batteries are still full.
New batteries will only reach their full capacity after some time of use (several charge –
5.
discharge cycles).
Leave the complete group of batteries in place inside the radio and do not use these batteries
6.
or a few of them for other purposes. This will result in a mix of (fully) charged and (partly) empty
batteries. This can seriously damage the batteries and radio when recharged.
7.
It is advised to only charge batteries at room temperatures between 5 degrees C – 35 degrees C.
In lower or higher temperatures full charge cannot be achieved.
Depending on the capacity of the batteries, charging from “empty” to “full” can take several
8.
hours, even up to 7 hours or more.
Do not charge batteries when the radio is hot or exposed to heat or heat sources.
9.
It is advised to clean the metal contacts of the batteries and of the charger inside the radio e.g.
10.
with a contact-spray from time to time.
Do not use a mix of old and new rechargeable batteries.
11.
12.
Do not use a mix of rechargeable and non-rechargeable batteries.
13.
Do not use a mix of full and empty rechargeable batteries.
14.
Do not use batteries that have a different mAh capacity.
9
Page 11
Important Information On Charging And
Using Rechargeable Batteries
Do not use damaged, deformed or leaking batteries.
15.
16.
Battery level indication is an approximate indication only and can vary with battery type used.
17.
Batteries can become hot during charging.
In cold conditions the capacity of batteries will be much lower than when used at normal room
18.
temperature.
19.
Batteries (even when supplied with the radio), as being consumables, do not fall under the
warranty conditions of the radio.
20.
It is advised to use Perfectpro rechargeable batteries as the radio and its charger were
developed for use with these batteries.
21.
Batteries should not be disposed of by incineration and with household waste.
22.
Disposable batteries should be taken to a suitable recycling centre if possible.
23.
10
CAUTION
Danger of explosion if battery is incorrectly replaced. Replace only with the same or equivalent type.
Page 12
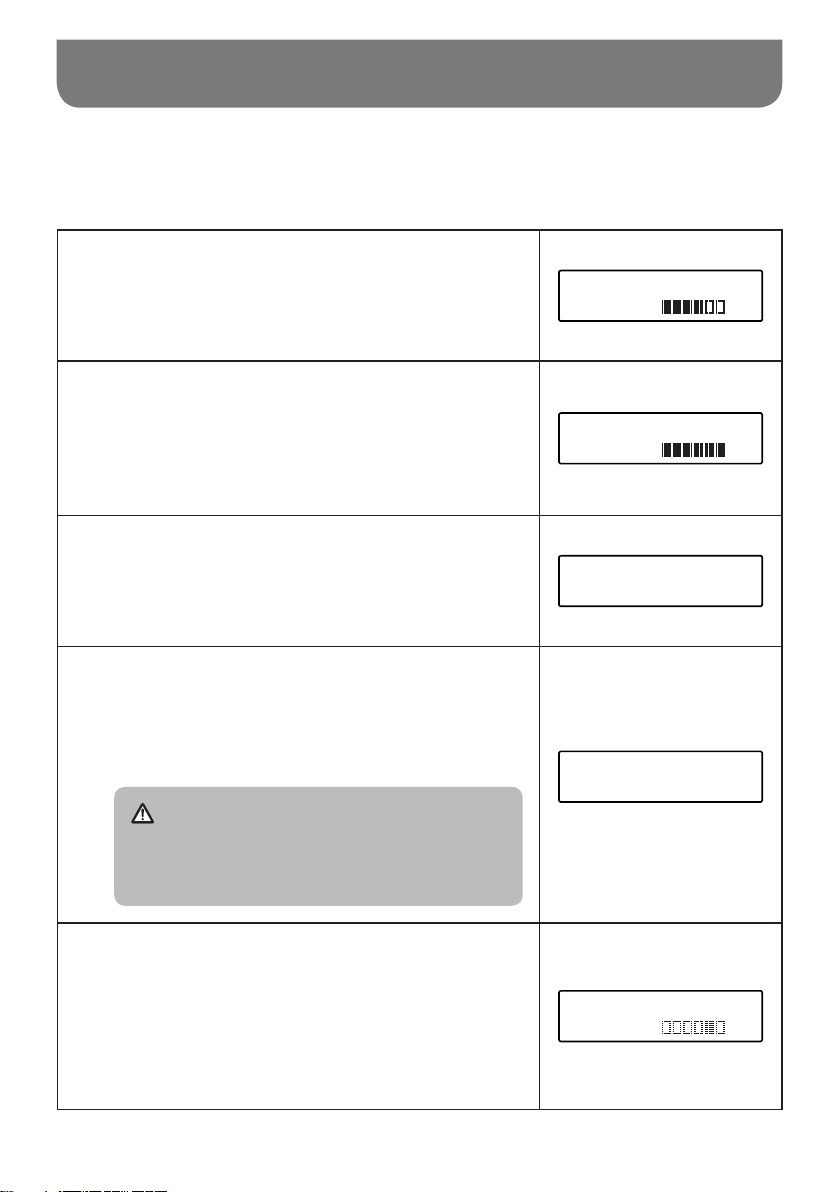
Battery charging indicator
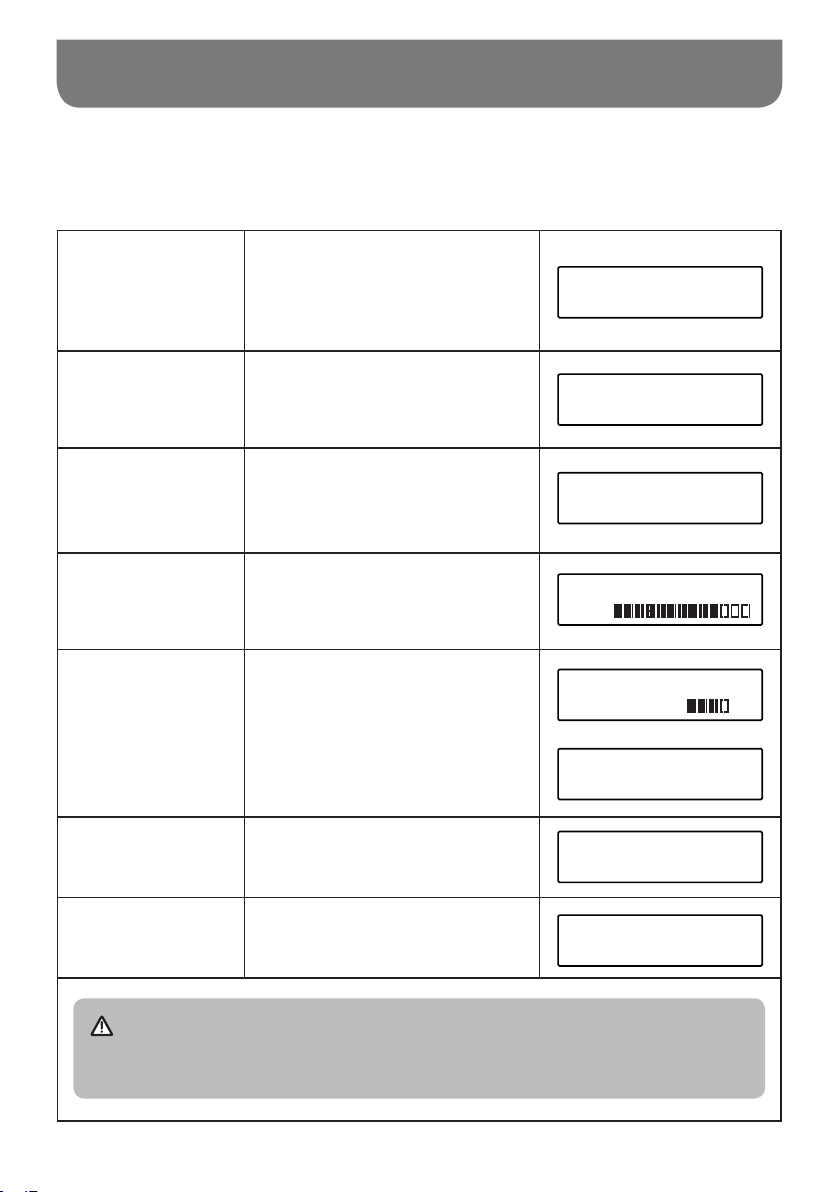
Please note that the battery charging status detection can only be activated when the radio is in
charging mode (i.e. the radio is switched off, the battery switch slides to the NiHM position and it is
connected to the AC mains socket).
When charging is in progress, display is shown at right
and the charging indicator LED ashes green.
1
When the charging process is completed, display is
shown at right and the charging indicator LED lights in
2
steady green.
If batteries are already fully charged, display is shown
at right and it will switch to standby mode after 5 seconds.
3
When there is no battery / missing batteries in the
compartment or some of batteries are inserted with
4
the incorrect polarity, display is shown at right and it will
enter standby screen after 5 seconds.
NOTE
If a battery is removed while charging, display is
shown at right and the charging indicator LED lights
red.
Battery 123456
Charging
Battery 123456
Capacity
Battery Full
No cell
During the charging process, if a battery is detected as
faulty / damaged, a solid square will be displayed under
5
the corresponding battery number (see picture right) and
the charging indicator LED ashes red.
Battery 123456
Error
11
Page 13
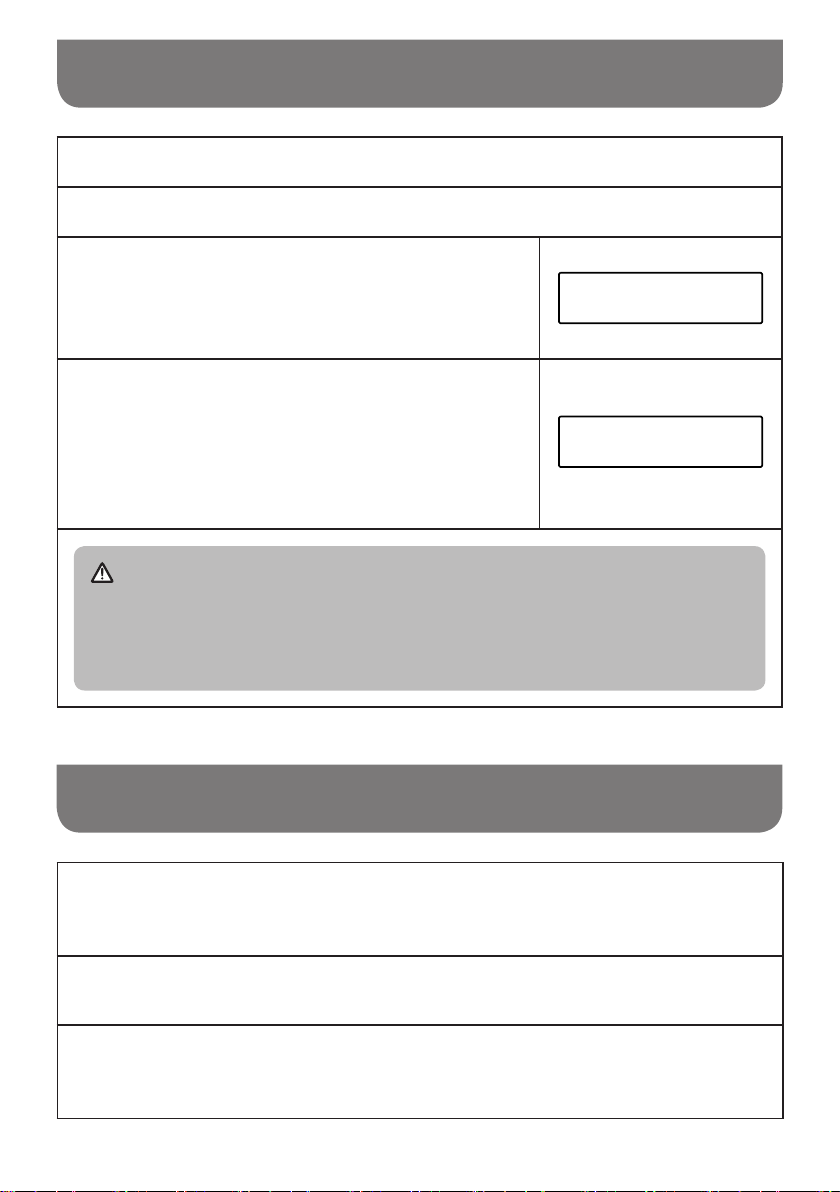
Using the radio for the rst time
Place your radio on a at surface.
1
Straighten up the antenna.
2
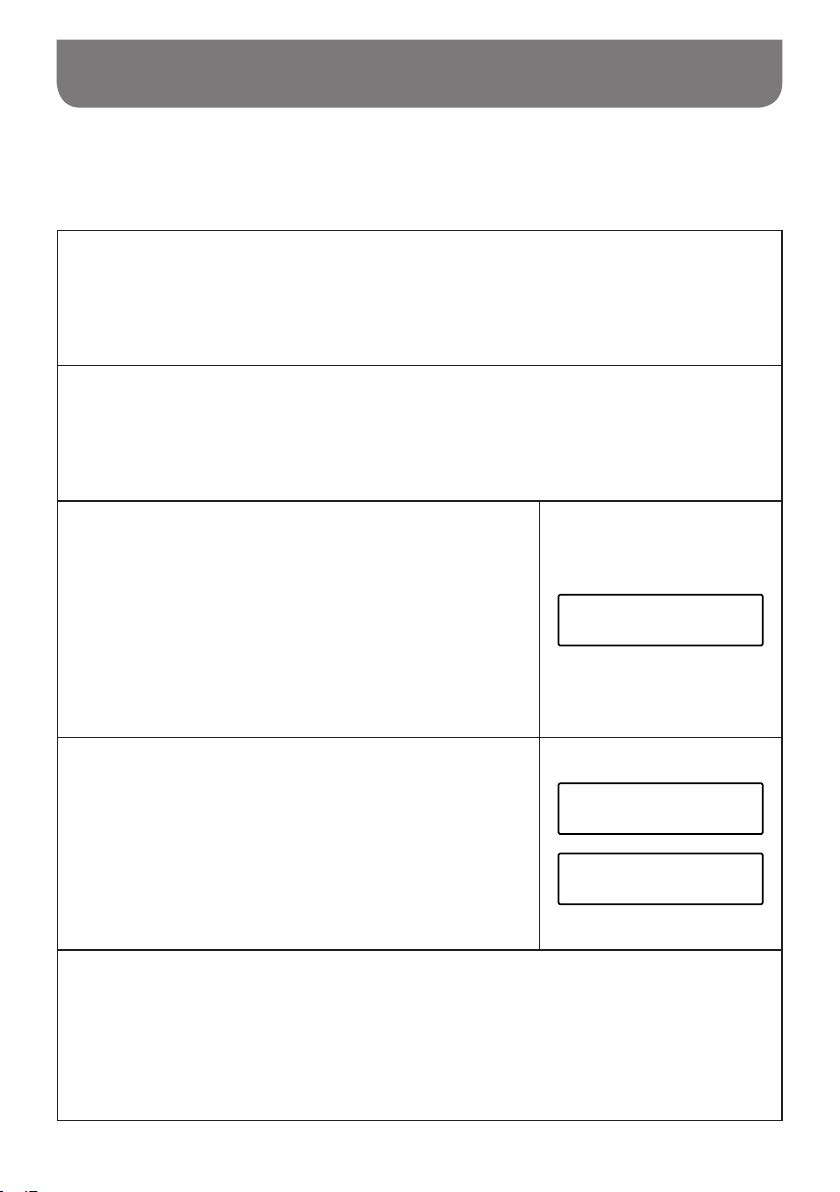
Plug the AC power cord into an AC socket. The display
will show “Welcome to Digital Radio” for a few seconds.
3
After short time, the current time will appear on the
display.
If no time is displayed, the screen will show “00:00”.
Press the Power On / Off button to turn on your radio and
4
it will nd a DAB clock radio stations. It may be necessary
to relocate your radio to a position giving better reception
and carry out a scan to nd stations as described in later
sections.
IMPORTANT
The mains plug is used as the means of connecting the radio to the mains supply. The mains
socket used for the radio must remain accessible during normal use. In order to disconnect
the radio from the mains completely, the mains plug should be removed from the mains
outlet completely.
Welcome to
Digital Radio
00:00
Time not set
Operating your radio – DAB
Straighten the antenna properly which is for both DAB and FM reception. Press the Power
On / Off button to switch on your radio.
1
Press the Source button to select DAB band.
2
If this is the rst time the radio is used, a quick scan of Band III DAB channels will be carried
out. If the radio has been used before, the last used station will be selected.
3
12
Page 14

Operating your radio – DAB
During Autotune, as new stations are detected, the station
counter on the right hand side of the display will increase
4
and stations will be added to the list.
The display shows a bar graph indicating progress of
autotune.
When the Autotune is completed, the rst station (in numeric-alpha order 0…9…A…Z) will
be selected.
5
If the station list is still empty after the Autotune, your radio will display “No DAB Station”.
6
If no signals are found, it may be necessary to relocate your radio to a position giving better
reception.
7
NOTE
The radio station name and frequency displays shown in this user guide may differ from
those that you see on your radio. Broadcasters may change radio station names that are
transmitted, and the frequencies used for DAB and FM radio stations may not be the same
in all parts of the country.
Scanning... 019
Selecting a station – DAB
Press the Power On / Off button to switch on your radio.
1
Press and release the Source button until the DAB mode
is selected. The display will show the name of the radio
2
station currently selected.
Rotate the Tuning control knob to scroll through the list of
available stations.
3
DAB
Station list
<BBC Radio 2 >
13
Page 15
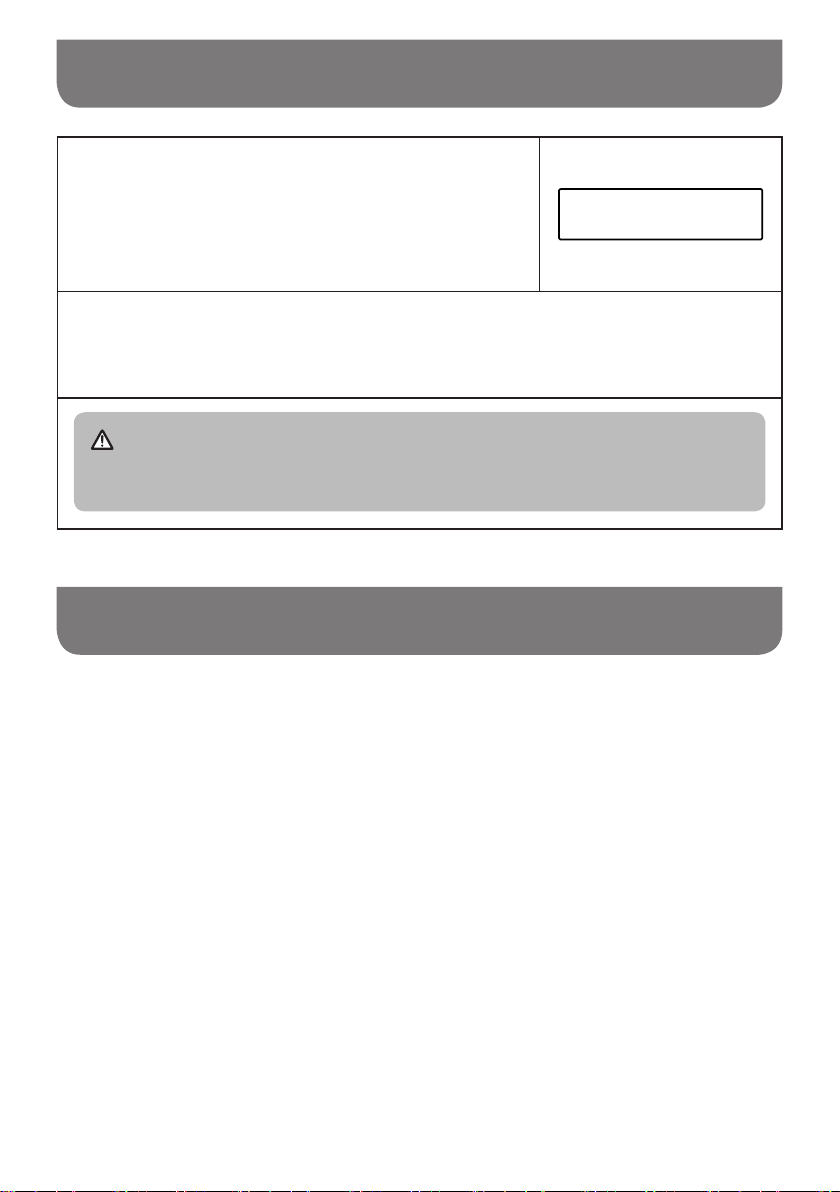
Selecting a station – DAB
Press and release the Tuning control knob to select the
station. The display may show “Connecting…” while your
4
radio nds the new station.
Adjust the Volume control to the required setting.
5
NOTE
If after selecting a station, the station is not found it may be necessary to relocate your radio
to a position giving better reception.
BBC Radio 2
Connecting...
Secondary service – DAB
Certain radio stations have one or more secondary services associated with them. If a station
1.
has a secondary service associated with it, the display will show “>>” next to the station name on
the station list.
The secondary service will then appear immediately after the primary service as you rotate the
Tuning control knob.
Press and release the Tuning control knob to select the station. Most secondary services do not
2.
broadcast continually and if the selected service is not available, the radio will re-tune to the
associated primary service.
14
Page 16
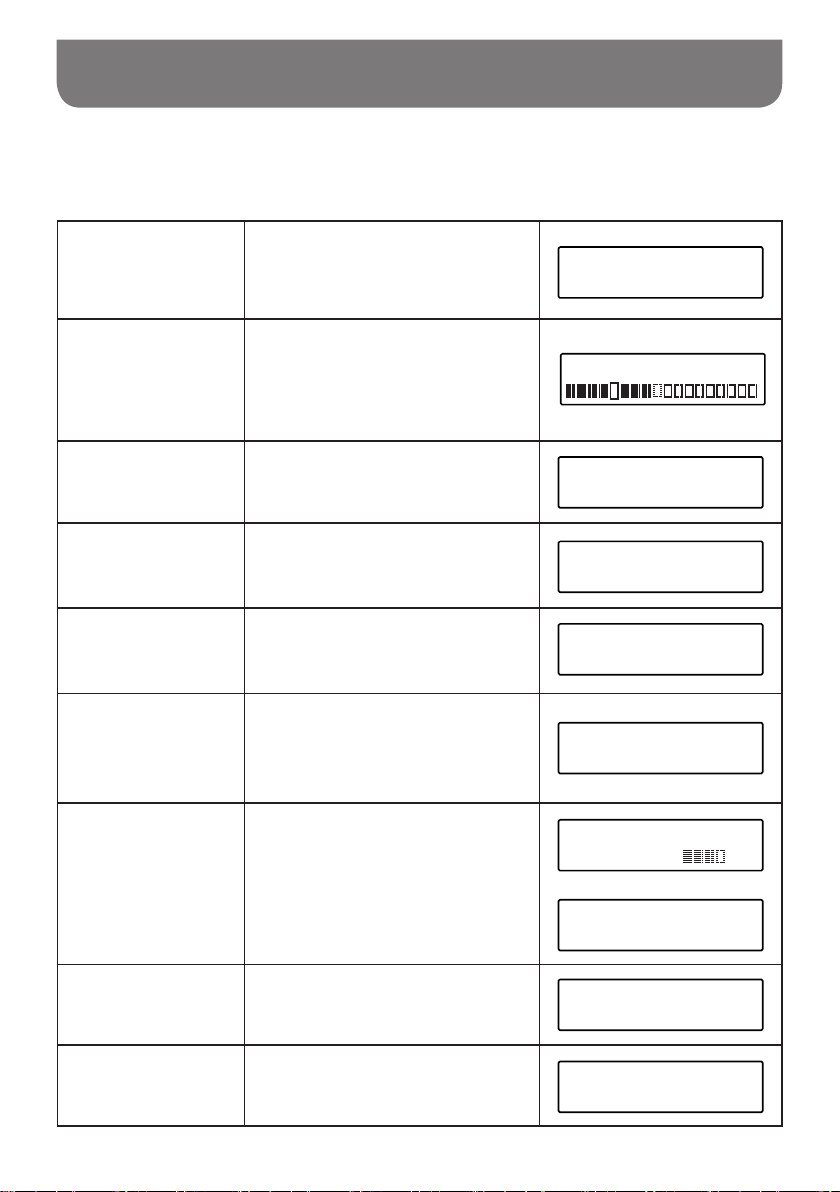
Display mode – DAB
Your radio has a range of display options when in DAB mode:
Press and release the Info button to cycle through the various modes.
1.
a.
Scrolling text (DLS)
b.
Signal strength
Program type
c.
Multiplex name
d.
Channel &
e.
frequency
f.
Bit rate / audio
type
displays scrolling text messages such
as artist / track name, phone in number,
etc.
displays the signal strength of radio
reception. The clear unlled rectangle
indicates minimum signal level required
for satisfactory reception.
displays type of station being listened
to e.g. Pop, Classic, News etc.
displays name of multiplex to which
current station belongs.
displays current channel and frequency.
displays the digital bit rate and the
audio type for the currently tuned DAB
station.
sunshine live
electronic music
sunshine live
sunshine live
Pop Music
sunshine live
DR Deutschland
sunshine live
12B 225.648MHz
sunshine live
72kbps / DAB+
displays current battery level of using
g.
Battery level /
Mains current
Time displays the current time.
h.
i.
Date displays the current date.
batteries operation. (If using AC power cord operation, “Mains current” is
shown on the screen.)
sunshine live
Bat.level
sunshine live
Mains current
sunshine live
9:07 AM
sunshine live
8-9-2016
15
Page 17
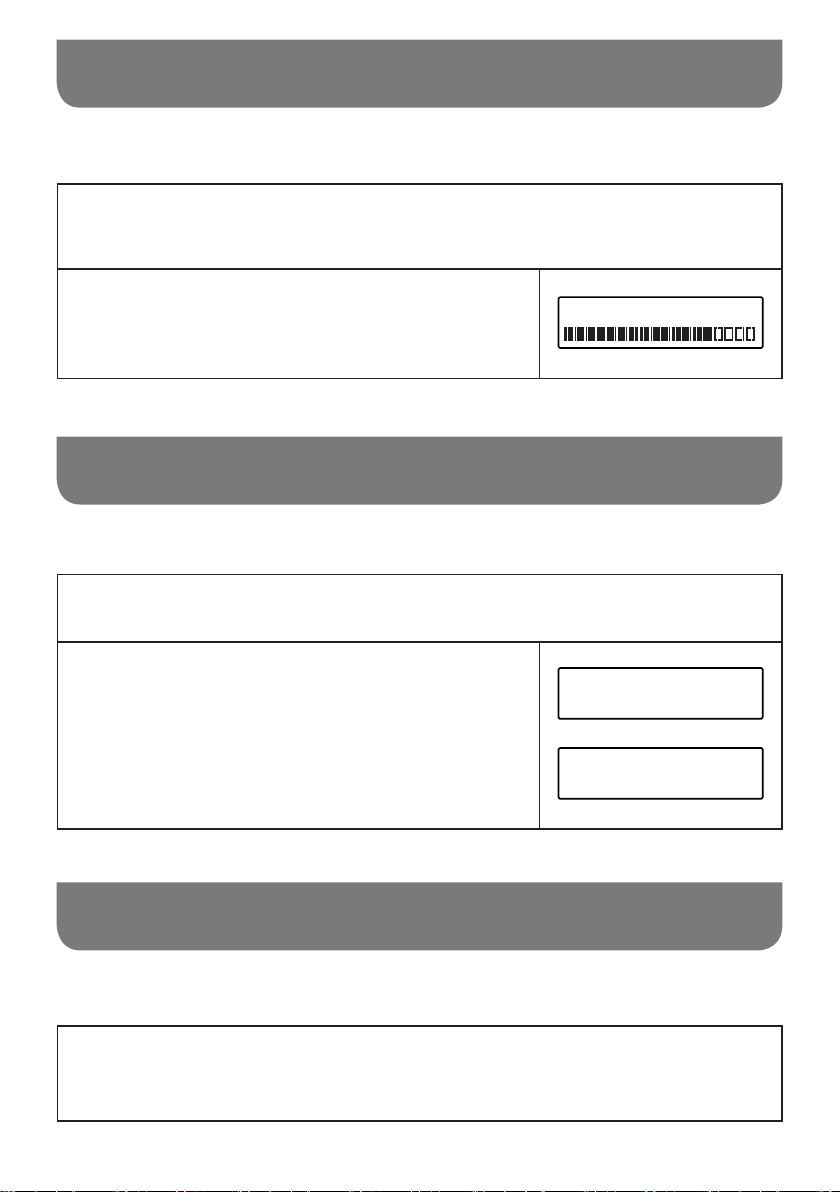
Finding new stations – DAB
As time passes new stations may become available. To nd new stations proceed as follows:
To carry out a full scan of the entire DAB Band III frequencies press and release the Auto
tune button.
1
As new stations are found, the station counter on the right
hand side of the display will increase and stations will be
2
added to the list.
Scanning... 019
Manual Tuning – DAB
Manual tuning allows you to tune directly to the various DAB band III channels.
Press the Menu button to access DAB menu.
1
Rotate the Tuning control knob to nd “Manual tune”.
Press and release the Tuning control knob to enter DAB
2
channels in the list. Rotate the Tuning control knob to
select required DAB channel. When required DAB channel
is found, press and release the Tuning control knob to
select the required DAB channel.
<Manual tune >
Manual tune
<5A 174.928MHz >
DAB
Dynamic Range Control (DRC) setting – DAB
DRC can make quieter sound easier to hear when your radio is used in a noisy environment.
In DAB band, press the Menu button to access DAB menu.
1
16
Page 18
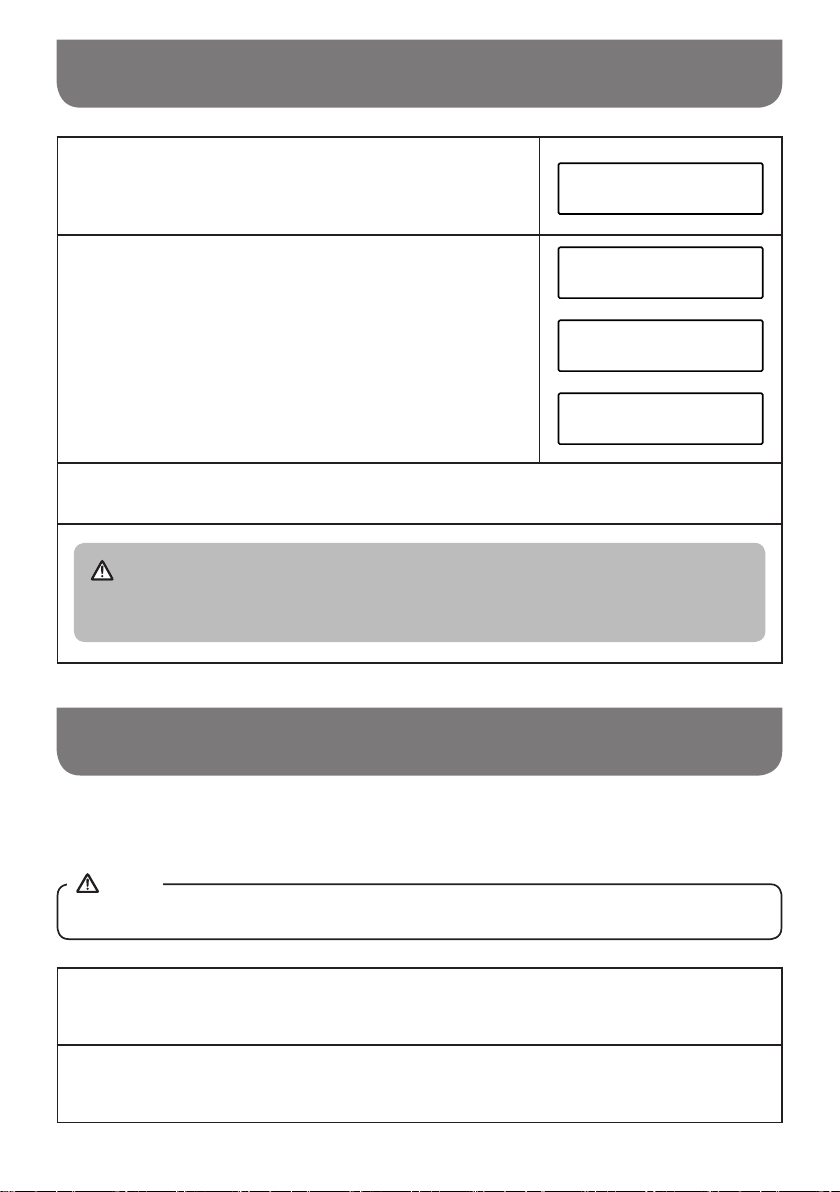
Dynamic Range Control (DRC) setting – DAB
Rotate the Tuning control knob to find “DRC”. Press
and release the Tuning control knob to enter adjustment
2
mode.
Rotate the Tuning control knob to select required DRC
setting (default is off).
3
DRC off DRC is switched off, Broadcast DRC will be
ignored.
DRC high DRC is set as sent by broadcaster.
DRC low DRC level is set to 1/2 that sent by broadcaster.
Press and release the Tuning control knob to conrm the setting.
4
NOTE
Not all DAB broadcasts are able to use the DRC function. If the broadcast does not support
DRC, then the DRC setting in the radio will have no effect.
<DRC >
<DRC off >
<DRC high >
<DRC low >
DAB
DRC *
DRC
DRC
Station order setup
Your radio has 2 station order settings from which you can choose. The station order settings are
alphanumeric and ensemble.
NOTE
The default station order on your radio is alphanumeric.
Press the Power On / Off button to switch on your radio.
1
Press the Source button to select DAB band.
2
17
Page 19
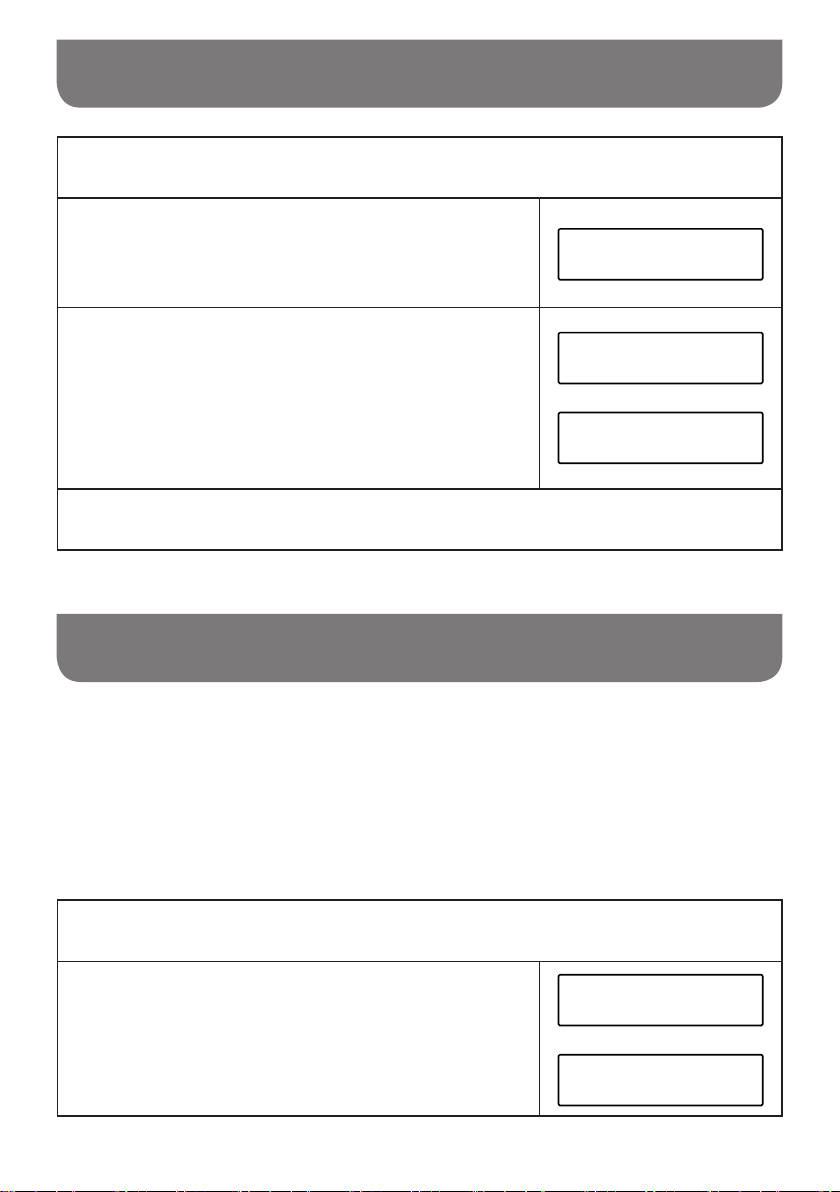
Station order setup
Press the Menu button to access DAB menu.
3
Rotate the Tuning control knob until the display shows
“Station order”. Press the Tuning control knob to enter the
4
station order adjustment mode.
Rotate the Tuning control knob to choose “Alphanumeric”
or “Ensemble”.
5
“Alphanumeric” -sorts the station list alpha-numerically
0...9 A...Z.
“Ensemble” – sorts the station list by DAB multiplex.
The current setting is indicated by an asterisk.
Press the Tuning control knob to select the required station order.
6
<Station order >
Station order *
<Alphanumeric >
Station order
<Ensemble >
DAB
Prune stations
If you move to a different part of the country, some of the stations which were listed may no longer be
available.
Also from time to time, some DAB services may stop broadcasting, or may change location or
frequency.
Stations which cannot be found, or which have not been received for a very long time are shown in the
station list with a question mark. The prune stations function will delete the marked DAB stations from
your station list.
Press the Menu button to access DAB menu.
1
Rotate the Tuning control knob to find “Prune”. Press
and release the Tuning control knob to enter adjustment
2
mode. Then rotate the Tuning control knob to select “Yes”
or “No”. To activate the Prune function select “Yes”, and
press and release the Tuning control knob to conrm the
setting.
18
<Prune >
DAB
Prune?
<Yes> No
Page 20
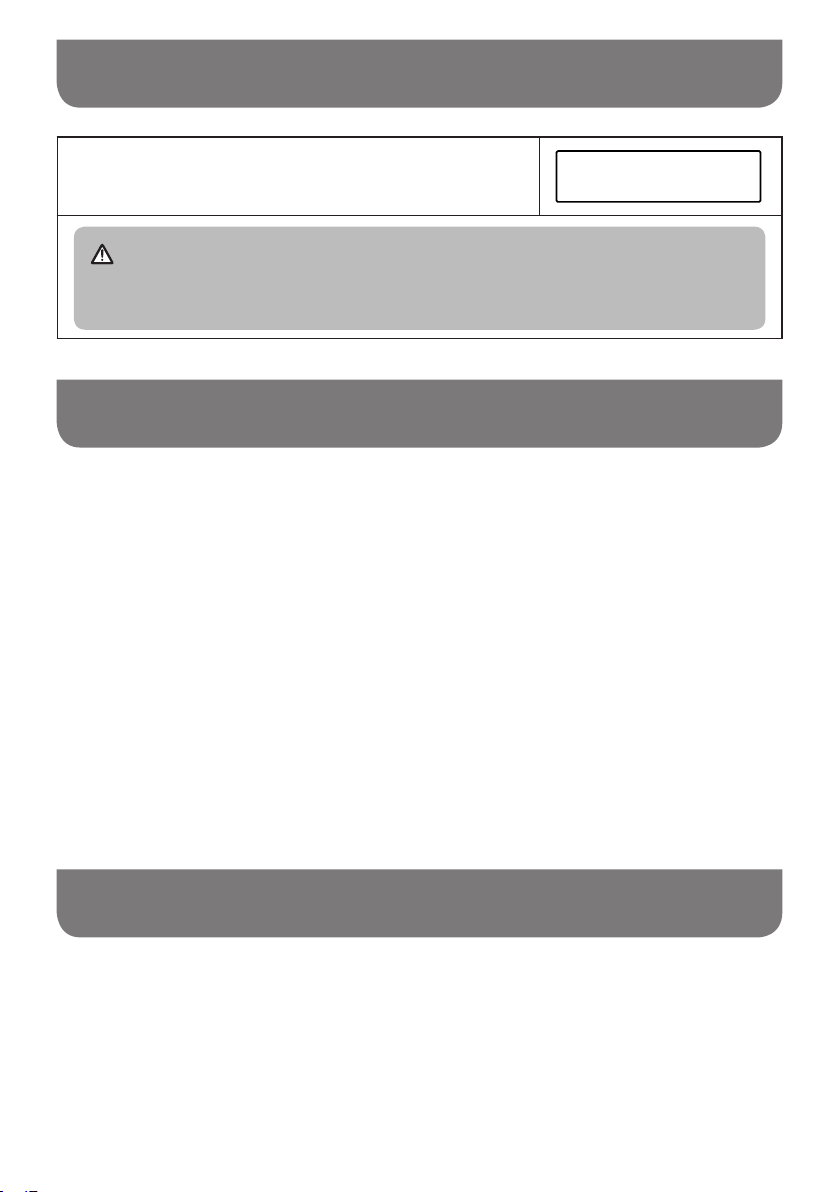
Prune stations
If you do not wish to prune stations, select “No” and then
press and release the Tuning control knob to conrm the
3
setting.
NOTE
If you have moved your radio to a different part of the country you should also carry out a
search for new stations (please see the section 'Finding new stations').
Prune?
Yes <No>
Operating your radio – FM
1. Straighten the antenna. Press the Power On / Off button to switch on your radio.
2. Press the Source button to select FM waveband.
3. To scan up in frequency, first rotate the Tuning control knob in a clockwise direction and then
press the Auto tune button. Your radio will scan in an upwards direction (low frequency to high
frequency) and stop automatically when it finds a station of sufficient strength. To scan down in
frequency, first rotate the Tuning control knob in a anti-clockwise direction and then press the
Auto tune button. Your radio will scan in a downwards direction and stop automatically when it
finds a station of sufficient strength. After a few seconds the display will update. The display will
show the frequency of the signal found. If the signal is strong enough and there is RDS data
present then the radio will display the station name.
4. When the waveband end is reached, your radio will recommence tuning from the opposite
waveband end.
5. Adjust the Volume control to the required setting.
6. To switch off your radio, press the Power On / Off button.
Manual tuning – FM
Press the Power On / Off button to switch on your radio.
1.
Press the Source button to select FM waveband.
2.
Rotate the Tuning control knob to tune to a station. The frequency will change in steps of 50 kHz.
3.
When the waveband end is reached, the radio will recommence tuning from the opposite waveband end.
Adjust the Volume control to the required setting. To switch off your radio, press the Power On /
4.
Off button.
19
Page 21
Display Modes – FM
On FM the bottom line of the display can be set to any of the following modes:
Press and release the Info button repeatedly to cycle through the various modes.
1.
displays scrolling text messages such
a.
Radio text
b.
Program type
c.
Frequency
d.
Signal strength
e.
Battery level /
Mains current
f.
Time displays the current time.
as artist / track name, phone in number
etc.
displays type of station being listened
to e.g. Pop, Classic, News, etc.
displays the frequency of the station
being listened to.
displays the signal strength for the
station being listened to.
displays current battery level of using
batteries operation. (If using AC power
cord operation, "Mains current" is
shown on the screen.)
V.H.B.N
[No RadioText]
V.H.B.N
News
V.H.B.N
106.50MHz
V.H.B.N
SGLV
V.H.B.N
Bat.level
V.H.B.N
Mains current
V.H.B.N
2:18 PM
g.
Date displays the current date.
NOTE
If no RDS information is available, the radio will be unable to display the station name,
scrolling text and program type information.
20
V.H.B.N
8-9-2016
Page 22
Scan sensitivity setting – FM
Your radio includes “Strong stations only” and “All stations” options for the auto-scan function.
By setting the radio to the "Strong stations only" scan option, weaker signals from more distant
transmitters can be ignored by the radio, making stronger signals easier to nd.
Press the Power On / Off button to switch on your radio.
1
If needed, press and release the Source button until the FM band is selected.
2
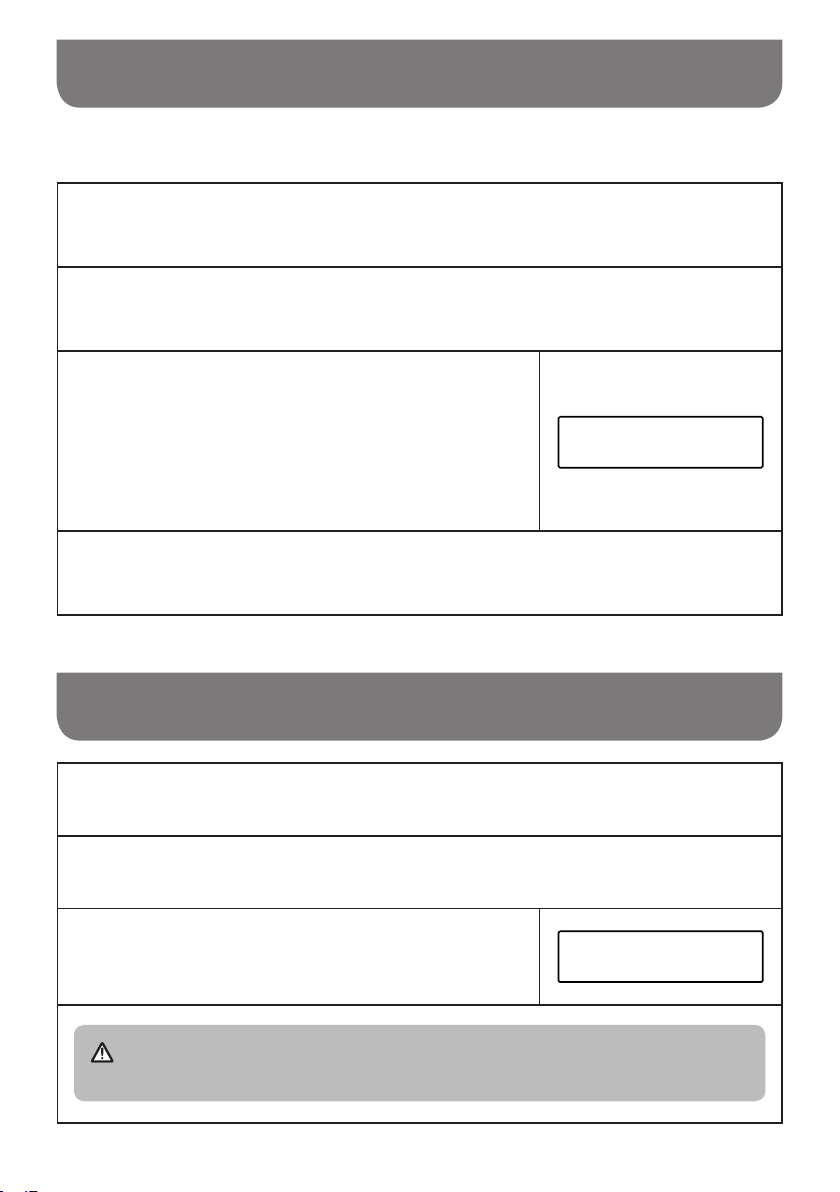
Press the Menu button to access FM menu. Rotate the
Tuning control knob until “FM scan setting” shows on the
3
display. Press and release the Tuning control knob to
enter the scan sensitivity adjustment mode. The current
setting will be marked with an asterisk.
<FM scan setting >
FM
Rotate the Tuning control knob to switch between "Strong
stations only" and "All stations" options on the lower line
4
of the display. The “All stations” option will allow the radio
to nd weaker signals when scanning.
Press and release the Tuning control knob to conrm your selection. The setting is stored in
the radio and remains in force until changed or until a System Reset.
5
FM scan setting *
<All stations >
FM scan setting
<Strong stations only >
21
Page 23
Preset stations in DAB and FM modes
There are 5 memory presets for each DAB / FM wavebands.
Press the Power On / Off button to switch on your radio.
1
Tune to the required station as previously described.
2
Press and hold the required Preset button until the display
shows e.g. Preset 1 saved. The station will be stored
3
under the chosen preset button. The corresponding preset
number e.g.“P1” will show on the display. Repeat this
procedure for the remaining presets.
Station stored in the memories may be over written by following the above procedure.
4
Preset 1
saved
Recall a preset in DAB and FM modes
Press the Power On / Off button to turn on the radio.
1
Press the Source button to select the required waveband.
2
Momentarily press the required Preset button, the preset
number and station will appear in the display.
3
NOTE
The display will show “Preset empty” if no station has been stored to that preset.
22
87.50MHz P1
[No RadioText]
Page 24
Listening to music via Bluetooth streaming
You need to pair your Bluetooth device with your UBOX 500R before you can auto-link to play/stream
Bluetooth music through your UBOX 500R. Pairing creates a ‘bond’ so the two devices can recognize
each other.
Pairing and playing your Bluetooth device for the rst time
1.
Press the Power On / Off button to switch on your radio and press the Source button to select
Bluetooth function. “Bluetooth Pairing” will show on the display.
The Bluetooth status indicator ( ) on the radio will flash a fast blue to show the radio is
discoverable.
Activate Bluetooth on your device according to the device’s user manual to link to the radio. Locate
2.
the Bluetooth device list and select the device named ‘UBOX 500R’ (With some Smartphone’s that
are equipped with earlier versions than BT2.1 Bluetooth device, you may need to input the pass
code “0000”).
3.
Once connected, there will be a confirmation tone sound and the name of your connected
Bluetooth device will show on the display. The Bluetooth status indicator (
blue. You can simply select and play any music from your source device.
4.
The volume control can be adjusted from your source device, or directly from the radio.
Use the controls on your Bluetooth-enabled device or on the radio to play / pause and navigate
tracks.
NOTE
● If 2 Bluetooth devices are pairing for the rst time, both will search for your radio, it will show
its availability on both devices. However, if one device links with this unit rst, then the other
Bluetooth device will not nd it on the list.
) will turn a solid
● If you take your source device out of range, the connection will be temporarily disconnected
to your radio. Your radio will automatically reconnect if the source device is brought back in
range. Be aware that during the period of disconnection, no other Bluetooth device can pair or
link with your radio.
● If ‘UBOX 500R’ shows in your Bluetooth device list but your device cannot connect with it,
please delete the item from your list and pair the device with the radio again following the steps
described previously.
● The effective operation range between the system and the paired device is approximately 10
meters (30 feet). Any obstacle between the system and the device can reduce the operational
range.
● Bluetooth connectivity performance may vary depending on the connected Bluetooth devices.
Please refer to the Bluetooth capabilities of your device before connecting to your radio. All
features may not be supported on some paired Bluetooth devices.
● With some mobile phones, making / receiving calls, text messages, e-mails or any other
activities unrelated to audio streaming may mute the Bluetooth audio streaming or even
temporarily disconnect from your device. Such behavior is a function of the connected device
and does not indicate a fault with your UBOX 500R.
23
Page 25
Listening to music via Bluetooth streaming
Display modes – Bluetooth
Your UBOX 500R has a range of display options when in Bluetooth mode. Note that the availability of
information depends on the specic media format.
Press and release the Info button to cycle through the different options.
1.
a.
Track status
b.
Track name
c.
Artist
d.
Album
e.
Battery level /
Mains current
Displays the current status of the track.
Displays the track information for the
track currently playing.
Displays the artist information for the
track currently playing.
Displays the album information for the
track currently playing.
Displays current battery level of using
batteries operation. (If using AC power cord operation, “Mains current” is
shown on the screen.)
H30-U10
H30-U10
Title:Waiting For You
H30-U10
Artist:lsobel Anderson
H30-U10
Album:In My Garden
H30-U10
Bat.level
H30-U10
Mains current
24
f.
g.
Time
Date
Displays the current time.
Displays the current date.
H30-U10
16:55
H30-U10
4-10-2016
Page 26
Listening to music via Bluetooth streaming
Playing audio les in Bluetooth mode
When you have successfully connected your radio with the chosen Bluetooth source device you can
start to play your music using the controls on your connected Bluetooth device.
Once playing has started adjust the volume to the required setting using the Volume control on
1.
your radio or on your enabled Bluetooth source device.
Use the controls on your Bluetooth source device to play / pause and navigate tracks. Alternatively,
2.
control the playback using Play / Pause (
buttons (
Press and hold the Fast-forward / Rewind button to move through the current track. Release the
3.
button when the desired point is reached.
NOTE
Not all player applications or devices may respond to all of these controls.
) on your radio.
Reconnecting a previously paired Bluetooth source device
The UBOX 500R can memorize up to 8 sets of paired Bluetooth source devices, when the memory
exceed this amount, the earliest paring device will be over written from the device.
If your Bluetooth source device already paired with the UBOX 500R previously, the unit will memorize
your Bluetooth source device and it attempts to reconnect with a Bluetooth source device in memory
which is last connected. If the last connected Bluetooth source device is not available, the UBOX 500R
will try to connect to the second last Bluetooth source device.
Alternatively, you can select to connect to your previously-paired device.
Press the Source button as needed to select Bluetooth mode.
1.
Press Bluetooth pairing button to enter the “Paired Device List” menu.
2.
Rotate the Tuning control knob to select a previously-paired device you would like to connect and
3.
press the Tuning control knob to conrm the selection.
), Next track ( ) , Previous track
Disconnecting your Bluetooth device
Press and hold the Bluetooth pairing button for 2-3 seconds to disconnect with your Bluetooth
1.
device or turn off Bluetooth on your Bluetooth source device to disable the connection. There will
be a conrmation tone sound and the “Bluetooth Pairing” will show on the display. The Bluetooth
status indicator (
pairing.
You can also press the Source button to select any mode other than Bluetooth mode to disable the
2.
connection.
) on the radio will ash a fast blue to show the radio is discoverable again for
25
Page 27
Using USB memory devices
IMPORTANT
Your radio is only designed to work with USB ash memory devices. It is not intended to be
1.
connected to hard disk drives or any other type of USB device.
2.
It is possible to use SD or SDHC cards for media playback when held in a suitable USB
adaptor. However, due to the wide variation of such adaptors, it is not possible to guarantee
that all adaptor / card combinations will work with the radio.
The radio has been tested with a range of USB memory devices of up to 32GB capacity. It
3.
supports USB 2.0 full speed and USB 3.0.
NOTE
when using USB 3.0, please allow the radio to detect the device for a longer period of
time.
4.
USB memory must use the FAT or FAT 32 ling system in order to operate with the radio, it
does not support NTFS.
Audio formats supported for playback are MP3, WMA and AAC. Playback does not support
5.
les encoded using WMA lossless, WMA Voice, WMA 10 professional, nor les of any format
which have DRM protection.
CAUTIONS
1.
In order to minimize the risk of damage to your radio, your USB Memory, please place the
radio such that the device cannot easily be knocked while it is inserted in the socket.
2.
Remove the USB before carrying the radio or if not using the USB feature for a prolonged
period.
Turn off the radio before removing your USB memory device.
3.
4.
The USB connection is intended only for ash memory devices. The use of hard disk storage
media is not supported.
5.
Playback via USB les stored on MP3 players is not guarantee.
Large le size or high memory USB device takes longer time to read.
6.
26
Page 28
Using USB memory devices
Playing les from USB memory devices
Insert the USB memory device into the USB slot which is located on the left hand side of the radio
1.
behind the rubber cover.
Press the Power On / Off button to turn on the radio and Press the Source button to select
2.
USB mode. “Loading” will appear on the LCD display. Then the radio will start playing from the
USB memory device.
NOTE
The text coding only supports ASCII.
To pause playing, press the Play / Pause button (
3.
Pause button ( ) again.
NOTE
● If you turn off the radio, the next time the radio is turned on, it will resume to the last played
track.
● If you switch to other mode when playing from the USB memory device, playback will be
paused. When you switch to the USB mode again, playback will resume from the point where it
was paused.
● It is recommended to store only music les (MP3 / WMA / AAC) in your USB memory device. If
there is one folder contains le(s) other than music les, your radio will skip this le / folder and
the le / folder number shown on the display will not be serial.
). To resume playing, press the Play /
27
Page 29
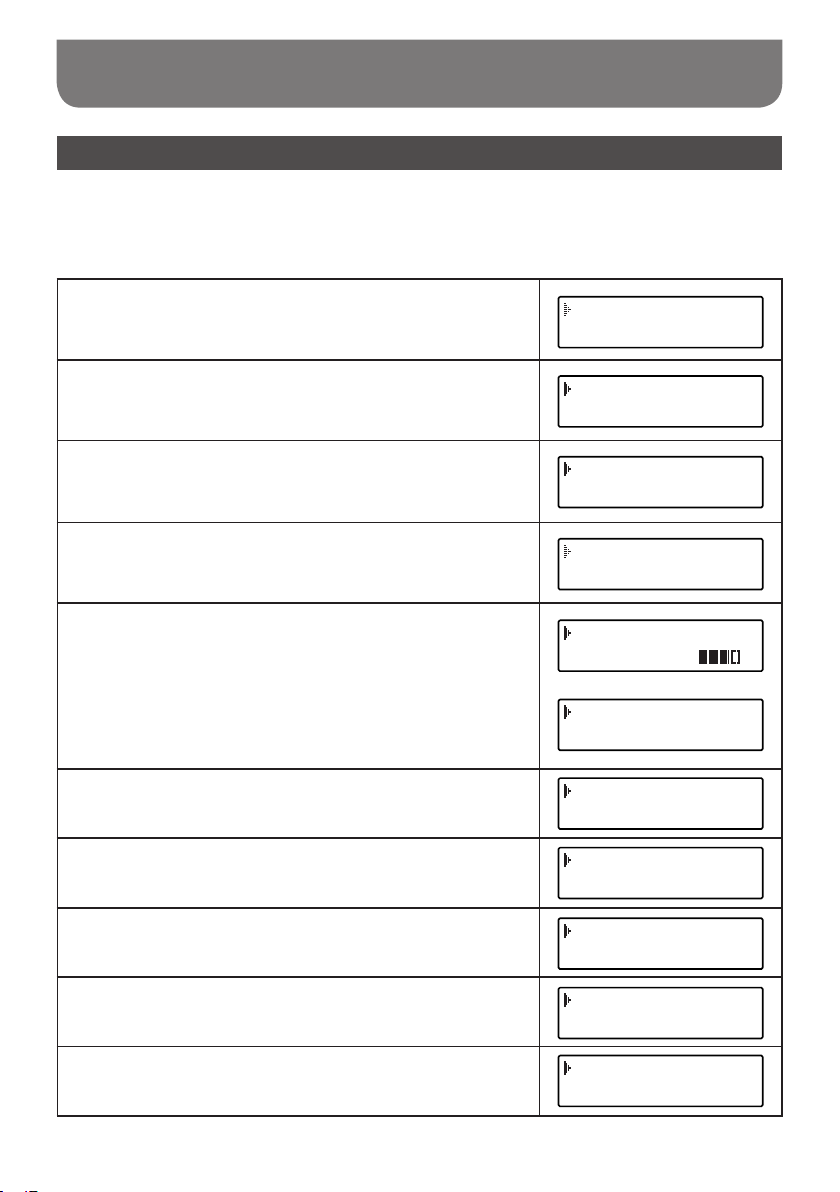
Using USB memory devices
Display modes
Your radio has a range of display mode while in USB playback mode.
Press the Info button to cycle through the different options.
a.
File name
b.
Folder name
c.
Genre
d.
Folder and le numbers
e.
Battery level / Mains current
f.
Time
g.
Date
00:30
File:01 Vincent
00:47
Folder:USB MUSIC
01:01
Genre:MP3
01:07
F003 T001
01:08
Bat.level
01:13
Mains current
01:18
17:17
01:23
17-5-2018
h.
Song title
i.
Artist name
j.
Album name
28
01:49
Title:Vincent
02:10
Artist:Don McLea
02:26
Album:
Page 30
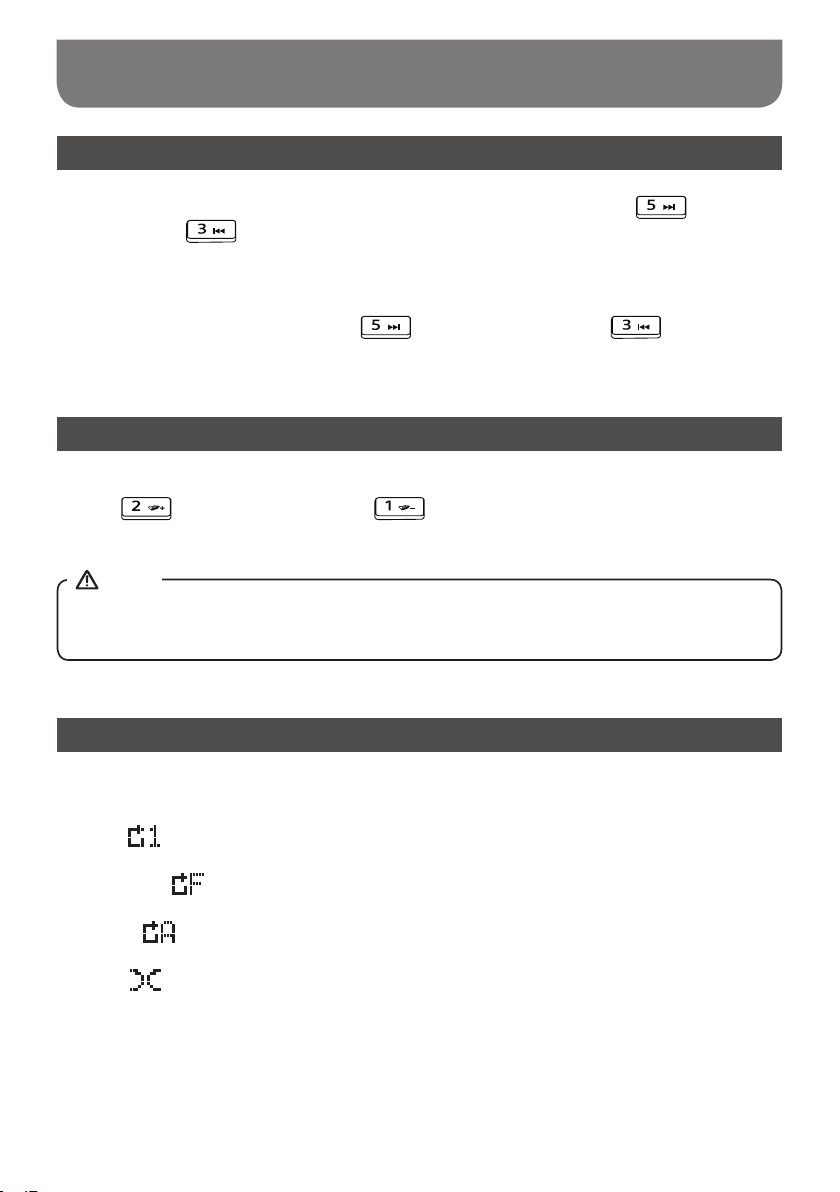
Using USB memory devices
Selecting a le
1.
While the USB memory device is playing, press either the Next track button ( ) or Previous
track button ( ) to change to the desired le. The le number is updated on the display. If
there’s more than one folder, all les in the current folder should have been played and the next
folder will be played.
Press and hold the Next track button ( ) or Previous track button ( to fast-forward /
2.
Rewind the current track. Release the button when the desired point in the track is reached.
To skip to another folder
With the USB memory device is in pause or play mode, press and release the Next folder
button (
played.
NOTE
If your USB contains a folder without les, the device will skip the folder and play the les in the
next folder.
) or Previous folder button ( ). The rst le of the next or previous folder will be
Play Mode
When playing the les in the USB memory device, press and release Play mode button to select:
Repeat 1
Repeat Folder : repeatedly play the les within the folder you are listening to.
Repeat All : repeatedly play the folders in the USB.
Random
: repeatedly play the le you are listening to.
: it will play les in the USB by in random.
29
Page 31
Charging with USB socket
Your radio has a USB socket which is intended for charging an iPhone, smart phone or similar
devices. Charge time may vary and in some cases may take longer to charge than when using the
manufacturers charging unit supplied with the smart phone. The radio can charge the iPhone, smart
phone or similar devices when using AC power cord and the radio is in power on or standby mode.
IMPORTANT
● The USB jack can only provide power for the USB memory stick only with 1A 5V maximum and
most of iPhone models. However, it does not support external Hard disk drive and all mobile
phones and electronic device.
● The charger may not supply power to some USB devices.
●
intended for charging lower voltage device.
● Do not insert a nail, wire, etc. into USB power supply port. Otherwise a circuit short may cause
● Do not connect this USB socket with your PC USB port, as it is highly possible that it may
cause breakdown of the units.
● Never use the USB socket in rainy or moist conditions to prevent moist from entering the radio.
Loudness On / Off
When the radio is switched on, press and hold the EQ control button to get compensation on lower and
higher frequency. The effect will be more audible when the radio is in lower volume level. The display
will show “Loudness on” when Loudness function is applied. To turn off the loudness function, press
and hold the EQ control button again. The display will show “Loudness off”.
Equaliser function
Press the Power On / Off button to switch on your radio.
1.
2.
Press the EQ control button to enter the EQ setting menu.
Rotate the Tuning control knob to select your required mode. Then press the Tuning control knob
3.
30
Page 32
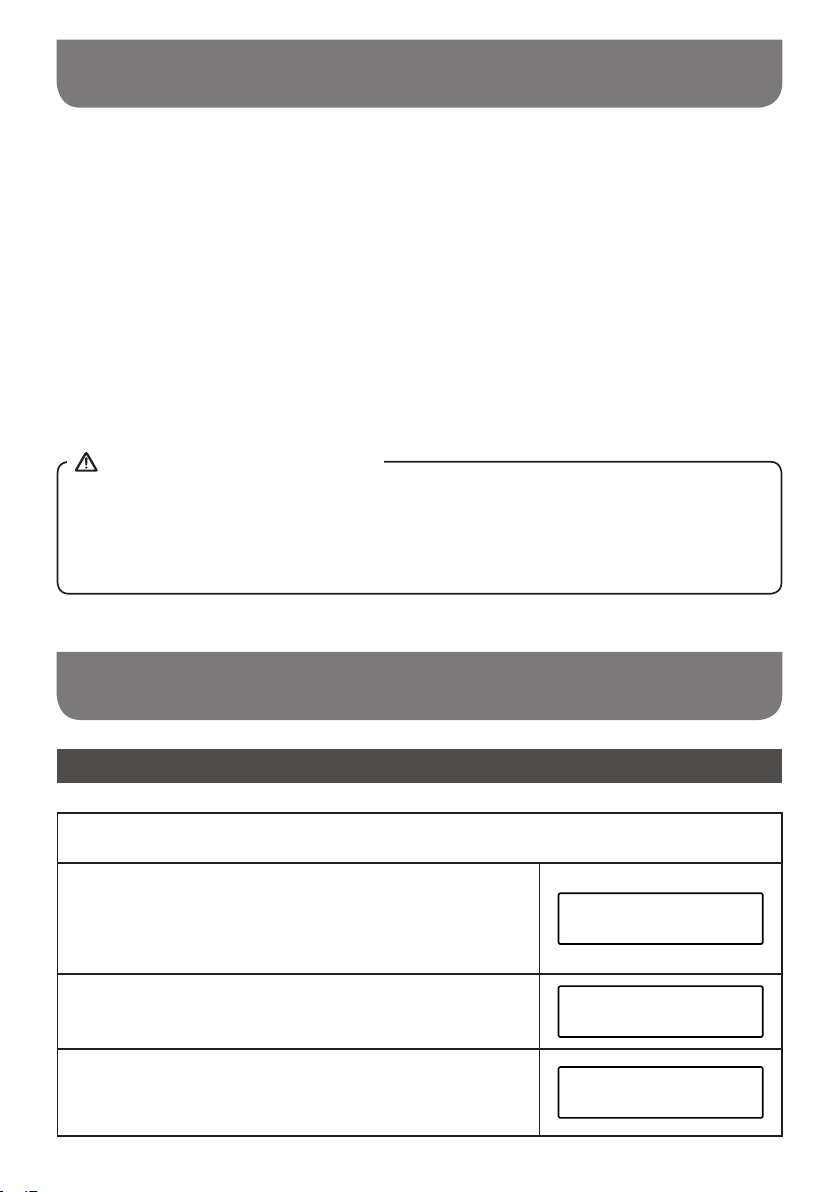
Set up My EQ prole
1.
Press the Power On / Off button to switch on your radio.
2.
Press the EQ control button to enter the EQ setting menu.
3.
Rotate the Tuning control knob to select "My EQ". Then press the Tuning control knob to enter
the setting.
4.
Rotate the Tuning control knob to select “Treble” or “Bass”. Press the Tuning control knob to enter
the setting.
5.
Rotate the Tuning control knob to select your required Treble level or Bass level. Press the Tuning
control knob to conrm the setting.
SAFETY AND COURTESY NOTE
To prevent possible hearing damage, do not listen at high volume levels for long periods or put
your ears too close to the speaker.
Please use the volume level responsibly with respectable consideration of the situation and other
people or animals in the vicinity.
Clock time setting
Setting the time format
Press the Power On / Off button to turn on the radio.
1
Press the Menu button to access the menu for the current
mode. Rotate the Tuning control knob to select “System”
2
and press the Tuning control knob to enter the system
settings menu.
Rotate the Tuning control knob to select “Time” and press
the Tuning control knob to enter the setting.
3
Rotate the Tuning control knob to select “12 / 24 hour
format” and press the Tuning control knob to enter the
4
setting.
FM
<System >
System
<Time >
Time
<12/24 hour format >
31
Page 33
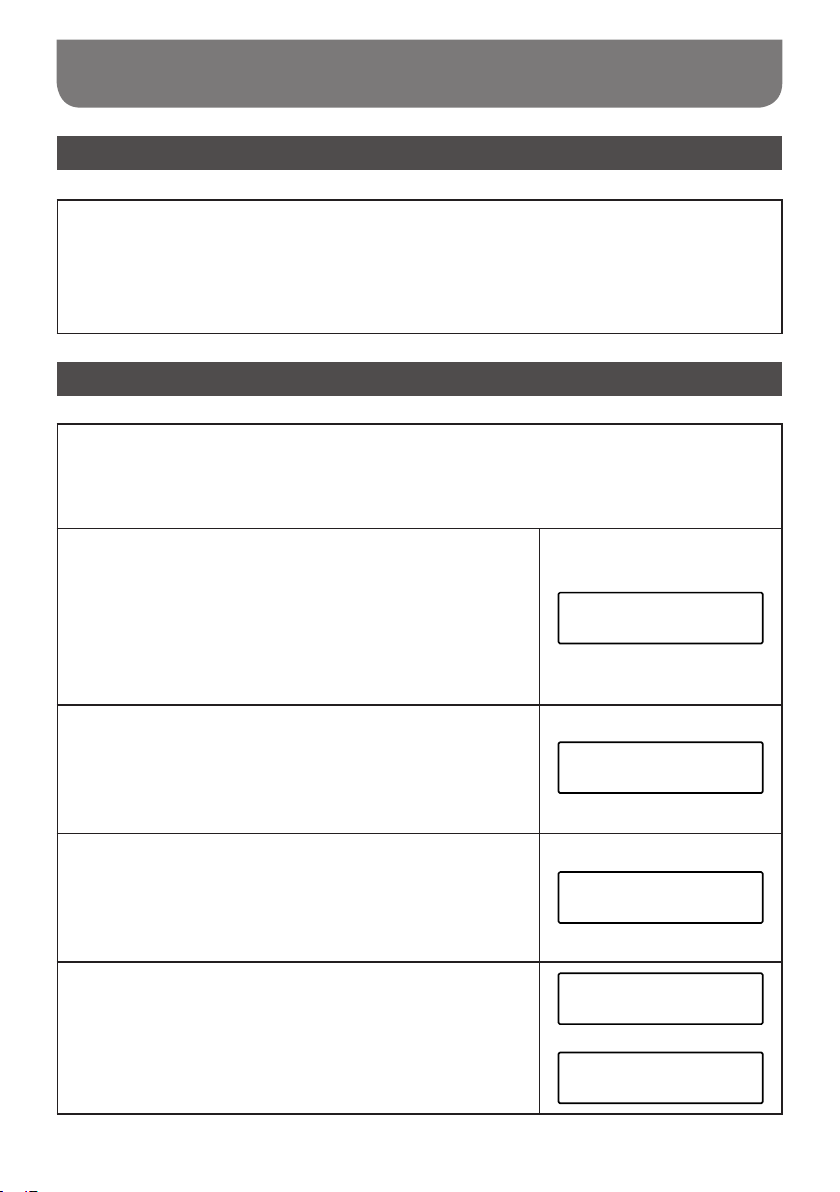
Clock time setting
Setting the time format
Rotate the Tuning control knob to select 12 or 24 hour format and press the Tuning control
knob to conrm the setting. The selected format is used in standby mode and on the playing
5
mode screen. If the 12 hour clock format is chosen, the radio will then use the 12 hour clock
with an AM or PM indicator.
Setting the date format
Press the Power On / Off button to turn on the radio.
1
Press the Menu button to access the menu for the current
mode. Rotate the Tuning control knob to select “System”
2
and press the Tuning control knob to enter the system
settings menu.
<System >
FM
Rotate the Tuning control knob to select “Time” and press
the Tuning control knob to enter the setting.
3
Rotate the Tuning control knob to select “Set date format”
and press the Tuning control knob to enter the setting.
4
Rotate the Tuning control knob to select “DD-MM-YYYY”
or “MM-DD-YYYY” date format and press the Tuning
5
control knob to conrm the setting.
32
System
<Time >
Time
<Set date format >
Set date format*
<DD-MM-YYYY >
Set date format
<MM-DD-YYYY >
Page 34
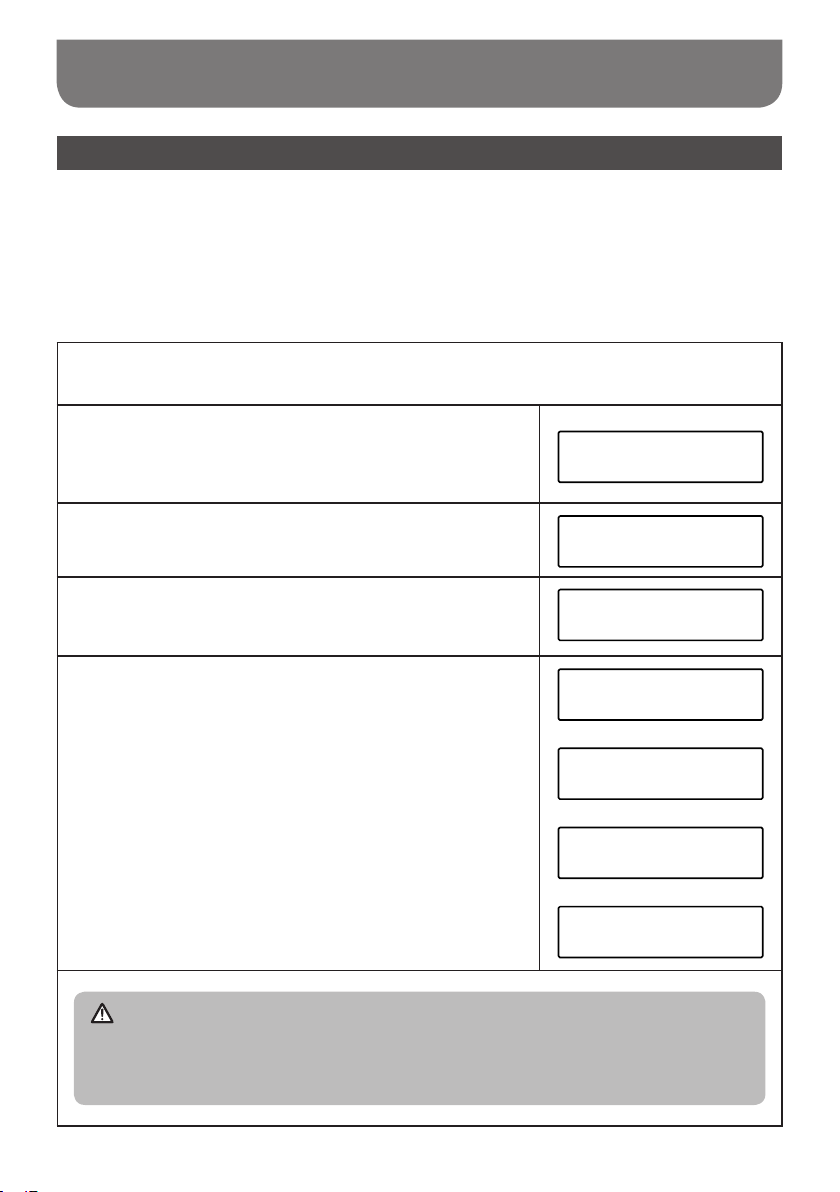
Clock time setting
Automatically updating the clock
Your radio will normally update the clock automatically using the DAB or FM signal. If no signal is
available, then you need to set the time manually. After a power failure the radio will then set its clock
the next time that you turn on the radio in DAB or FM mode. Alternatively you may specify that the
time is not automatically updated. In this case the clock must always be set manually after a power
interruption.
With your radio switched on, press the Menu button to access the menu for the current
mode.
1
Rotate the Tuning control knob to select “System” and
press the Tuning control knob to enter the system settings
2
menu.
Rotate the Tuning control knob to select “Time”. Press the
Tuning control knob to enter the time setting menu.
3
Rotate the Tuning control knob to select “Time auto
update” and press the Tuning control knob to enter the
4
setting.
Rotate the Tuning control knob to choose an update
5
option from “Update from all” “Update from DAB” “Update
from FM” or “No update” as required. Press the Tuning
control knob to conrm your choice.
FM
<System >
System
<Time >
Time
<Time auto update >
Time auto update *
<Update from all >
Time auto update
<Update from DAB >
Time auto update
<Update from FM >
Time auto update
<No update >
NOTE
If you select “Update from all”, “Update from DAB”, “Update from FM” the current time
received will be displayed. If no signal is found you should either position the radio or its
aerial so that a signal can be received, or revert to manual clock mode.
33
Page 35
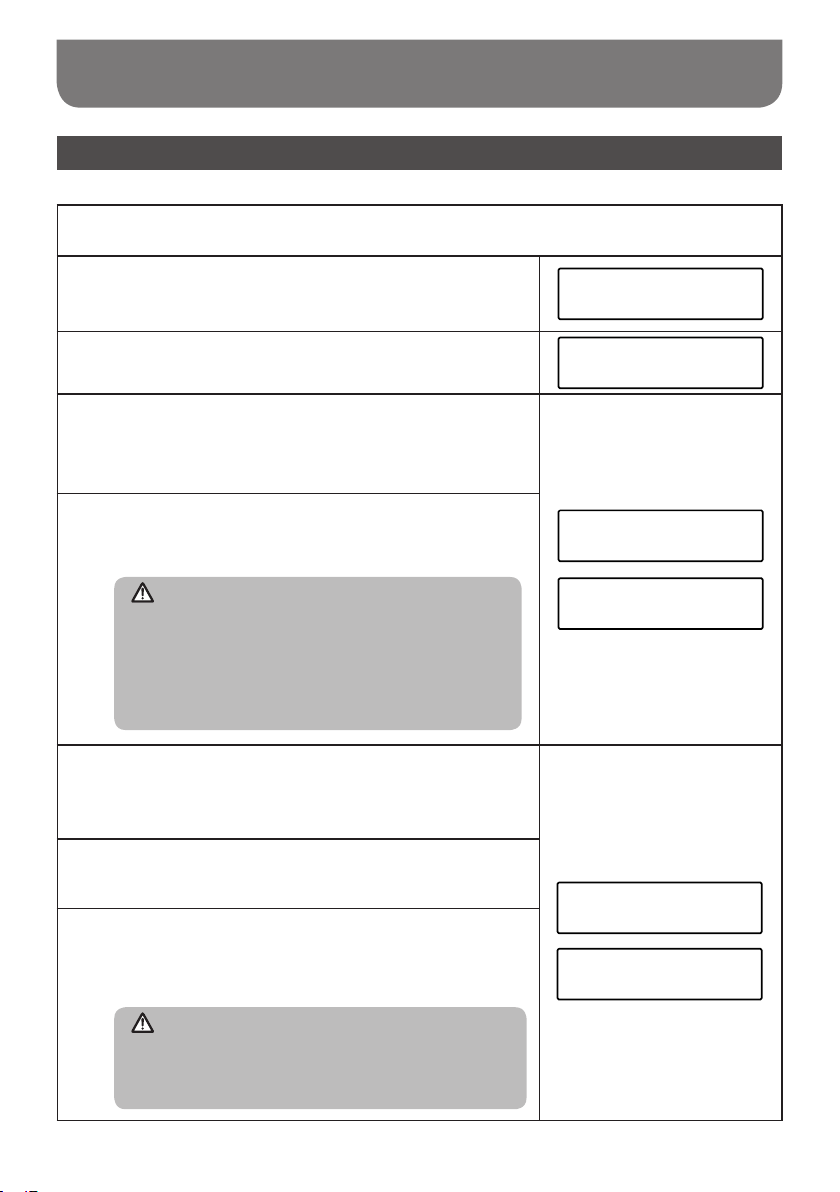
Clock time setting
Setting the clock manually
With your radio switched on, press the Menu button to access the menu for the current
mode.
1
Rotate the Tuning control knob to select “System” and
press the Tuning control knob to enter the system settings
2
menu.
Rotate the Tuning control knob to select “Time”. Press the
Tuning control knob to enter the time setting menu.
3
Rotate the Tuning control knob to select “Set Time / Date”
and press the Tuning control knob to enter the setting.
4
The hour digits will ash on the display. Rotate the Tuning
control knob to set the desired hour.
Press the Tuning control knob. The minute digits will ash
on the display. Rotate the Tuning control knob to set the
5
desired minute.
NOTE
If the radio has been set to use a 12 hour format,
there will be an option here for setting AM or PM for
the clock time. Rotate the Tuning control knob to
select AM or PM.
Press the Tuning control knob to conrm the setting.
<System >
System
<Time >
Time
<Set Time/Date >
Set Time
2:36 PM
FM
If the radio has been set to use a DD-MM-YYYY date
format (for example). The day will ash on the display.
6
Rotate the Tuning control knob to change the day as
needed.
Press the Tuning control knob. The month will ash on the
display. Rotate the Tuning control knob to set the current
7
month.
Press the Tuning control knob. The year will ash on the
display. Rotate the Tuning control knob to set the current
8
year. Then press the Tuning control knob to conrm the
setting. The display will show “Time Saved”.
NOTE
If the radio has been set to use a MM-DD-YYYY date
format, follow the steps above to set the month / day
/ year setting.
34
Set date
21-9-2016
Time
Saved
Page 36
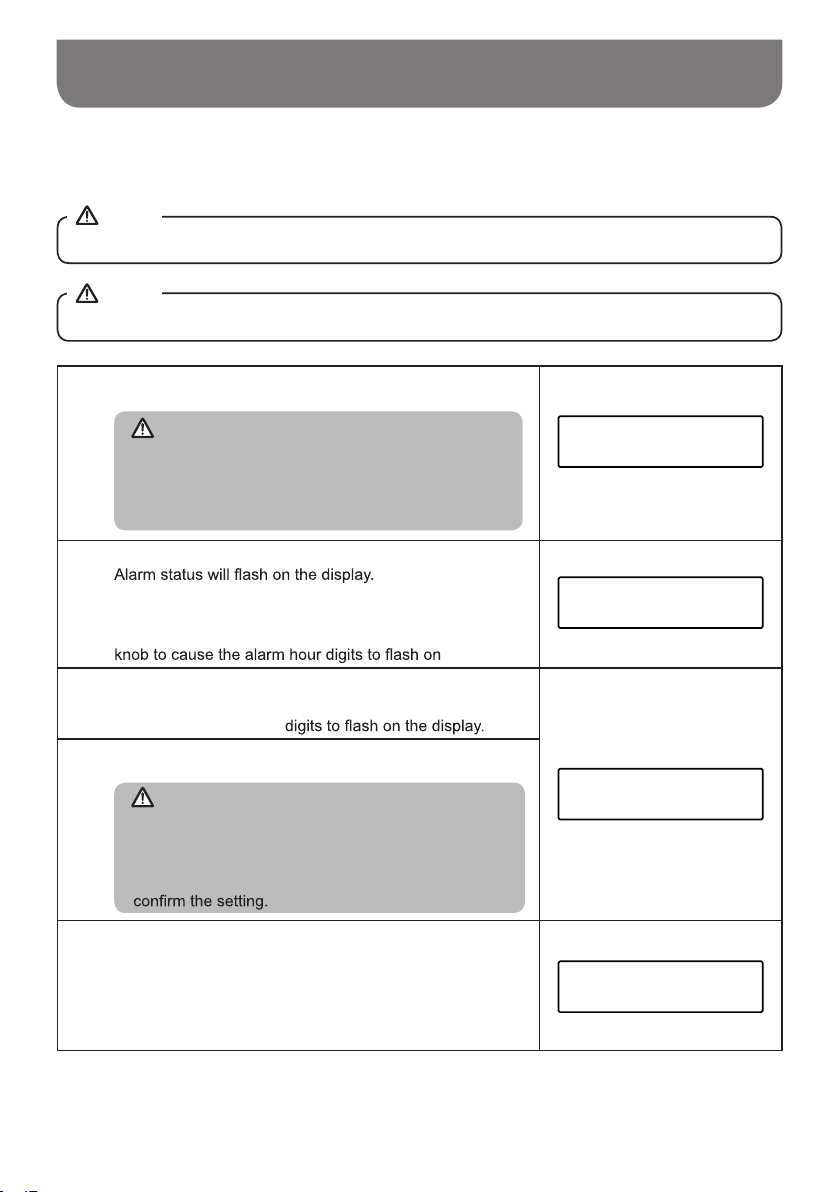
Setting the alarm clock
Your radio has two separate alarms which can be set to wake you to either the radio or a buzzer alarm.
In the event of a power interruption your radio has built in memory that will retain your alarm settings.
Ensure that the time is set correctly before setting the alarms.
NOTE
When using batteries only and the radio is switched off, the alarms can’t be set and activated.
NOTE
If no buttons are pressed for 10 seconds, the radio will exit the alarm setup.
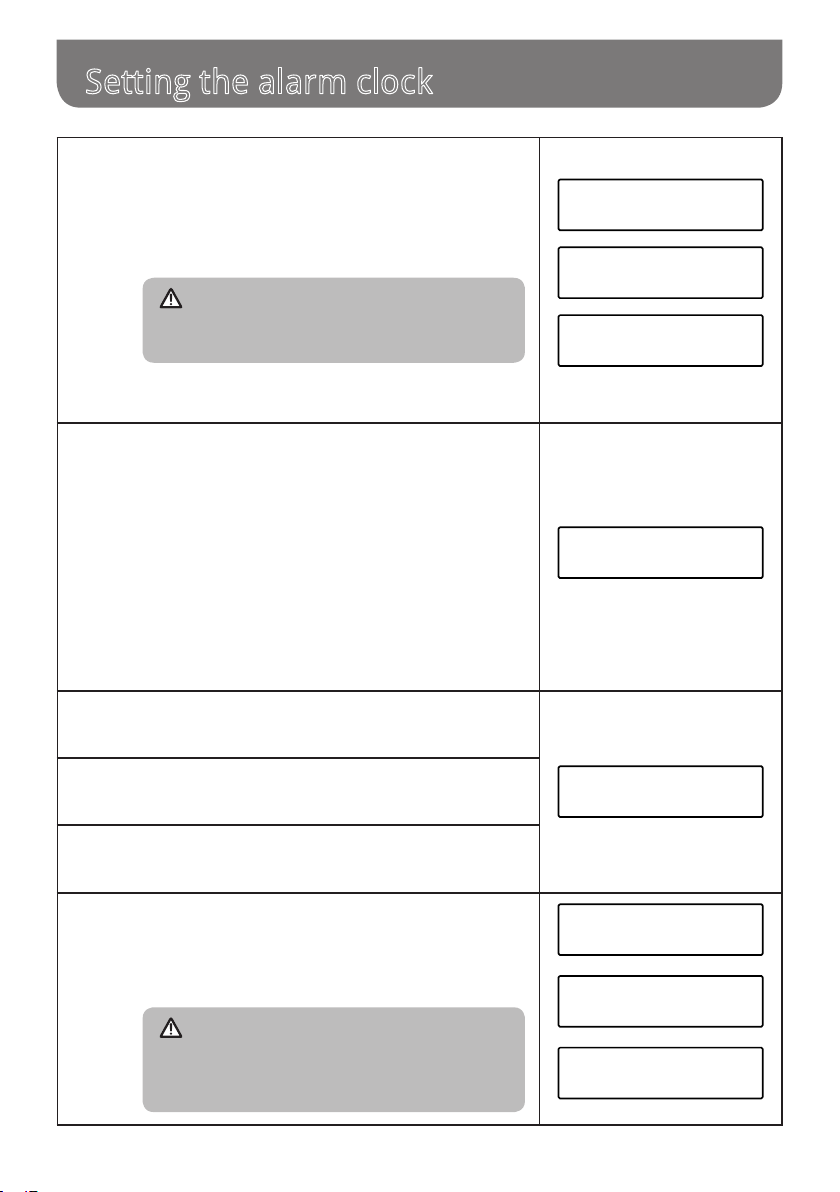
Press and release the Alarm 1 button, for example. “Alarm
1: Setting” will show on the display.
1
NOTE
If the time is not set before setting the alarms, “Time
not set” will show on the display. Then Use the
Tuning control knob to set the time and date. When
the setting is complete, proceed to step 2.
Press the Tuning control knob to enter the alarm setting.
2
Rotate the Tuning control knob to select “On” or “Off”. If
“Off” is selected any current setting for that alarm will be
cancelled. With “On” selected, press the Tuning control
Rotate the Tuning control knob to choose the desired hour
for the alarm and then press the Tuning control knob to
3
cause the alarm minute
Rotate the Tuning control knob to choose the desired minute
for the alarm and then press the Tuning control knob.
4
NOTE
If the radio has been set to the 12 hour clock format,
there will also be an option here for setting AM or PM
for t he alarm time. Rotate the Tuning control knob
to select AM or PM. Press the Tuning control knob to
the display.
Alarm 1:Setting
Off
Alarm 1:Setting
On
Alarm 1:Time
10:00
Rotate the Tuning control knob to choose the desired
source for the alarm (DAB, FM, Buzzer).
5
Press the Tuning control knob when the desired source
alarm is highlighted on the display. If setting alarm to
Buzzer proceed to step 6.
Alarm 1:Mode
Buzzer
35
Page 37
6HWWLQJWKHDODUPFORFN
For which ever radio mode is selected, the radio
alarm may be set to any of the stations which have
been stored as presets or to the station last listened
to. If setting the alarm to a radio option, rotate the
Tuning control knob to choose either last listened or
from presets 1-5.
NOTE
You can only set the alarm to use a preset which
has already been stored.
Press the Tuning control knob to conrm the selection.
The alarm day option will ash on the display.
Your alarm can be set to sound once, daily, weekdays
6
7
8
9
10
and weekends.
Once - Will sound at one time only.
Daily - Will sound every day.
Weekdays - Will sound only on weekdays.
Weekends - Will sound only on weekends.
Rotate the Tuning control knob to choose the day option
and then press the Tuning control knob to confirm the
setting.
● If setting alarms to daily, weekdays or weekends
proceed to point 10. If selecting the alarm to once
you will need to set the day, month and year options
as described below.
Rotate the Tuning control knob to select the correct day
and then press the Tuning control knob to conrm the
setting.
Rotate the Tuning control knob to select the correct
month and then press the Tuning control knob to
conrm the setting.
Rotate the Tuning control knob to select the correct
year and then press the Tuning control knob to
conrm the setting.
Rotate the Tuning control knob to choose the desired
volume and press the Tuning control knob to conrm
the setting. Your radio will show “Alarm 1 Saved” and
will exit the alarm setting procedure. Active alarms are
indicated in the display by the alarm “A” symbol.
NOTE
You can also press and hold the Alarm 1 button
or Alarm 2 button to activate or disable the
alarms.
Alarm 1:Mode
FM
Alarm 1:Mode
Last listened
Alarm 1:Mode
1: 87.50MHz
Alarm 1:Day
Once
Alarm 1:Date
17- 5-2018
Alarm 1:Volume
6
Alarm 1
Saved
10:06 A
17-5-2018
36
Page 38
When the alarm sounds
The alarm will sound at the selected times for up to 60 minutes unless cancelled. The maximum
volume used for the alarm will be specied during the alarm setting procedure. When your radio is
set to wake by the radio alarm, your radio will switch to the selected radio station. If the radio cannot
connect to the specied the radio station, the buzzer will be used instead.
To cancel a sounding alarm, press the Power On / Off button to cancel a sounding alarm.
NOTE
If the radio is switched on because of a radio alarm you can control basic functions such as the
volume control.
When the alarm activates it will start softly and gradually increase in level. The radio will
automatically switch back to standby mode when the 60 minutes have elapsed.
Snooze timer
When the radio alarm sounds, pressing any button other than the Volume control will silence
the alarm for the selected number of minutes. When the buzzer alarm sounds, press any
1
button. This will silence the alarm for the selected number of minutes. The Snooze time can
be adjusted between 5 and 20 minutes in 5 minute increments. Default setting is 5 minutes.
The snooze duration can only be set while the radio is playing. To adjust the silence time for
the snooze timer, press the Menu button to access the menu for the current mode.
2
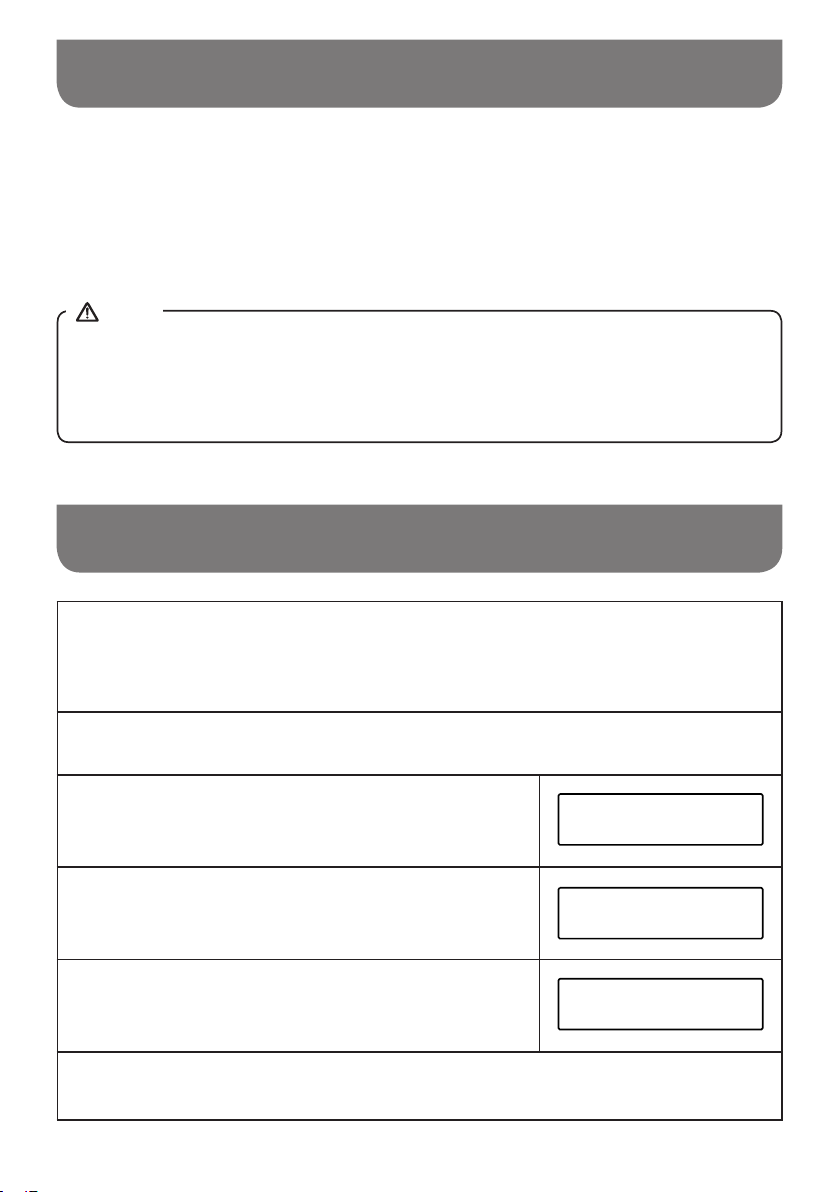
Rotate the Tuning control knob to select “System” and
press the Tuning control knob to enter the system settings
3
menu.
Rotate the Tuning control knob until 'Snooze Duration' is
shown on the display. Press the Tuning control knob to
4
enter the setting.
Rotate the Tuning control knob to choose the desired
snooze time to 5, 10, 15 or 20 minutes. Press the Tuning
5
control knob to conrm the setting.
In order to cancel the Snooze timer while the alarm is suspended, press the Power On / Off
button.
6
<System >
<Snooze Duration >
Snooze Duration
<
5 Minutes
FM
System
*
>
37
Page 39
Sleep function
Your radio can be set to turn off after a preset time has elapsed. The sleep setting can be adjusted
between 15 and 120 minutes. Ensure your radio is switched on.
To set the desired sleep time, press the Menu button to enter the menu of the current mode.
1
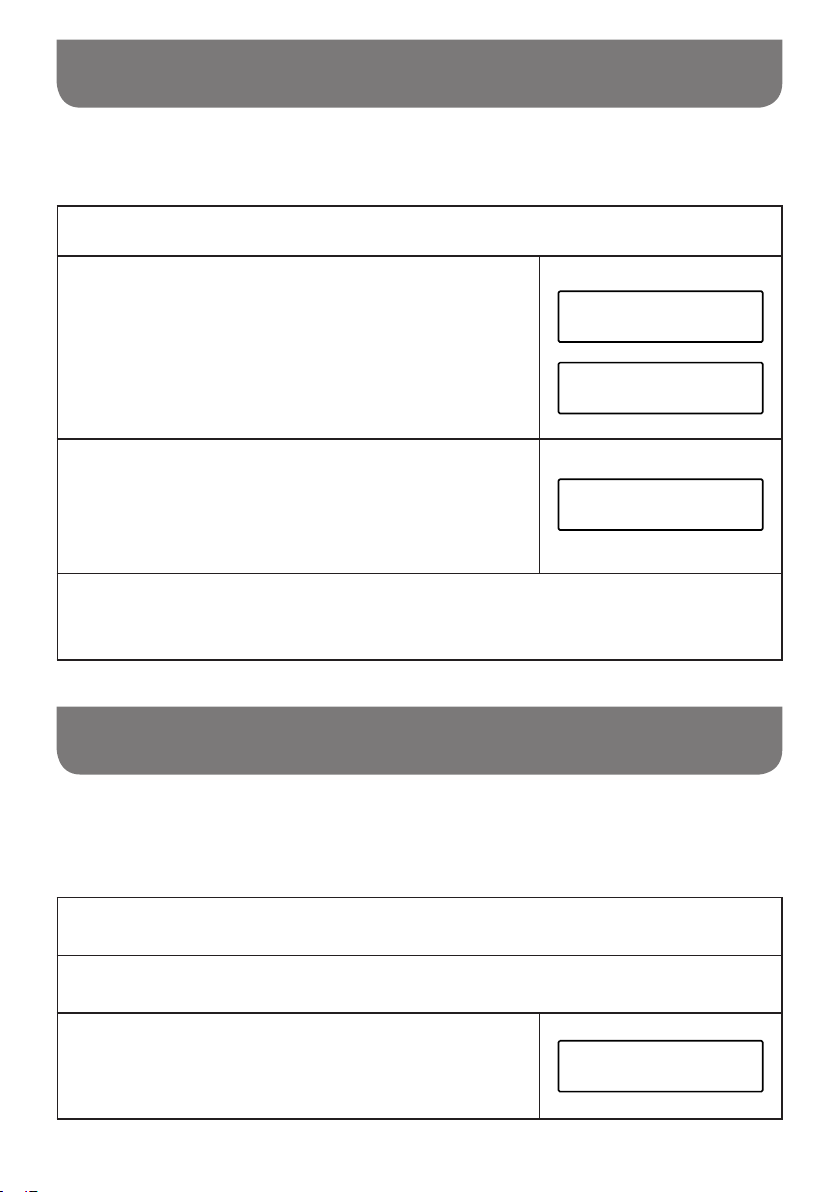
Rotate the Tuning control knob until “Sleep” is shown on
the display. Press the Tuning control knob to enter the
2
setting. The sleep settings available are 15, 30, 45, 60, 90
or 120 minutes. Press the Tuning control knob to conrm
the setting. The display will exit the sleep options. The
sleep symbol ‘S’ will show on the display. Your radio will
switch off after the preset sleep time has elapsed.
To cancel the sleep timer and switch off your radio before
the chosen sleep time has elapsed, press the Power On /
3
Off button. To cancel the sleep timer without switching off
your radio, go back to the sleep timer settings (step 1 to 2)
and select the “Sleep off” option in step 2.
To view the remaining time of an active sleep timer on the display, press the Menu button to
enter the menu of the current mode. Rotate the Tuning control knob until “Sleep” is shown
4
on the display and then press the Tuning control knob.
<Sleep >
Set sleep time
Set sleep time
FM
15 minutes
Sleep off
Brightness control
The brightness of the display can be adjusted for when the radio is in standby and for when it is in
use. If you use the unit in the bedroom, you may prefer a lower standby brightness level than a higher
brightness setting.
Press the Power On / Off button to switch on your radio.
1
Press the Menu button to access the menu for the current mode.
2
Rotate the Tuning control knob to select “System” and
press the Tuning control knob to enter the system settings
3
menu.
38
<System >
FM
Page 40
Brightness control
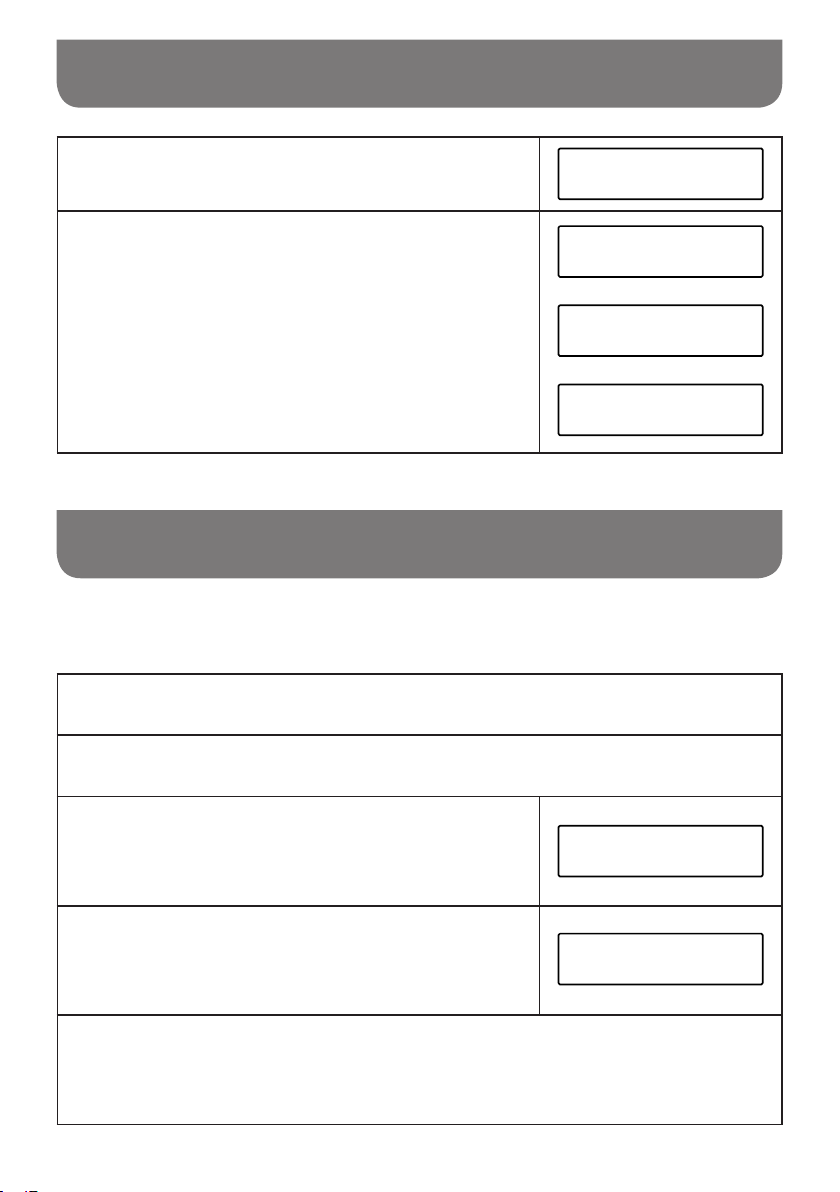
Rotate the Tuning control knob to select “Backlight” and
press the Tuning control knob to enter the setting menu.
4
In Backlight menu, there are 3 settings:
Timeout: to adjust the length of time before the backlight
5
turns off.
Radio on: to adjust the brightness when the radio is in
use.
Radio standby: to adjust the brightness when the radio is
in standby.
Rotate the Tuning control knob to select your option and
press the Tuning control knob to conrm your setting.
System
<Backlight >
Backlight
<Timeout >
Backlight
<Radio on >
Backlight
<Radio standby >
Language selection
By default your radio will display all menus and messages in English. You can choose your preferred
language.
Press the Power On / Off button to switch on your radio.
1
Press the Menu button to access the menu for the current mode.
2
Rotate the Tuning control knob to select “System” and
press the Tuning control knob to enter the system settings
3
menu.
Rotate the Tuning control knob to select “Language”
and press the Tuning control knob to enter the language
4
adjustment menu.
Rotate the Tuning control knob until your desired language appears on the display. Press the
Tuning control knob to conrm your choice. The display will change to the chosen language.
5
The chosen language will be marked with an asterisk.
<System >
<Language >
FM
System
39
Page 41
Factory reset
If your radio fails to operate or some digits on the display are missing or incomplete, carry out the
following procedure.
Press the Power On / Off button to switch on your radio.
1
Press the Menu button to access the menu for the current mode.
2
Rotate the Tuning control knob to select “System” and
press the Tuning control knob to enter the system settings
3
menu.
Rotate the Tuning control knob to select “Factory Reset”
and press the Tuning control knob to enter the setting.
4
Rotate the Tuning control knob to select “Yes” or “No”. If
you do not wish to carry out a system reset, select “No”
5
and then press the Tuning control knob to confirm the
setting.
With “Yes” selected, press the Tuning control knob. A full
reset will be performed. All presets and station lists will be
6
erased. All settings will be set to their default values. After
a system reset, the radio will be restarted.
The display will show “Welcome to Digital Radio” and
a scan of the DAB band III will be performed. In case
of malfunction due to electrostatic discharge, reset the
product (reconnection of power source may be required)
to resume normal operation.
FM
<System >
System
<Factory Reset >
Factory Reset?
Yes <No>
Factory Reset?
<Yes> No
40
Page 42
Socket for software upgrade
From time to time, new software features for your radio may be developed. Your radio has therefore
beendesigned to allow its internal software to be updated using your USB upgrade port. You should
not attempt to update your radio unless it is recommended to you by Perfectpro Customer Services.
Updating the software may remove all radio station presets and settings from your radio.
Software updates for your radio may be available in the future. As software updates become available
software and information on how to update your radio can be found at:
www.perfectpro.eu
For more information, please contact our Head Ofce by sending an email to [email protected]
Using the micro USB cable (not supplied) to connect the USB socket in the battery
compartment and your PC.
1
With your radio switched on, press the Menu button to access the menu for the current
mode.
2
Rotate the Tuning control knob to select “System” and
press the Tuning control knob to enter the system settings
3
menu.
Rotate the Tuning control knob to select “Software
Upgrade” and press the Tuning control knob to enter the
4
setting.
Rotate the Tuning control knob to select “Yes” or “No”. If
you do not wish to carry out a software upgrade, select
5
“No” and press the Tuning control knob to confirm the
setting.
With “Yes” selected, press the Tuning control knob. The
display will show “Waiting for PC wizard”.
6
Go to the website above to download the latest software. Follow the on-screen instructions
on your PC provided with the upgrade software to complete the software upgrade.
7
NOTE
Please use AC power cord as main power when upgrading software. Do not switch off
the power to the radio until the update operation is complete and the radio has restarted,
otherwise the unit may become permanently damaged.
<System >
<Software Upgrade>
FM
System
Upgrade?
Yes <No>
Upgrade?
<Yes> No
Software version
41
Page 43

Software version
The software display cannot be altered and is just for your reference.
With your radio switched on, press the Menu button to access the menu for the current
mode.
1
Rotate the Tuning control knob to select “System” and
press the Tuning control knob to enter the system settings
2
menu.
Rotate the Tuning control knob until “SW version” appears
on the display and press the Tuning control knob. The
3
software version shows on the display.
Press and release the Menu button to exit the software version display.
4
Auxiliary input socket
The 3.5mm Aux In socket is to connect audio source like MP3 player or CD walkman and listen the
audio program via radio speaker.
Connect a stereo or mono audio source (like CD walkman or MP3 player) to the Aux In socket,
1.
which is located on the right hand side, behind the rubber cover.
Press the Power On / Off button to switch on your radio.
2.
<System >
<SW version >
FM
System
3.
Press the Source button until “AUX IN” mode is shown on the display.
Play the le in the CD walkman or MP3 player.
4.
Adjust the volume control to the required level.
5.
NOTE
Make sure the rubber cover of the Aux In socket is closed well after use to prevent moist and dirt
from entering the radio. Never use the Aux In socket in rainy or moist conditions to prevent moist
from entering the radio. Keep the rubber cover always closed under these conditions.
42
Page 44
Warranty
This radio has a 2 year limited warranty.
WARNING
Warranty becomes void once the radio cabinet has been opened or any modifications or
alterations to the radio have been made
The terms of the warranty of this radio do not cover the following:
● Damage caused by misuse, abuse, neglect, alterations, accidents or unauthorized repair.
● Normal wear and tear.
● Batteries
Never open the device casing. The manufacturer will not accept any liability for damage resulting
from improper handling. The type plate is located on the back of the device.
43
Page 45
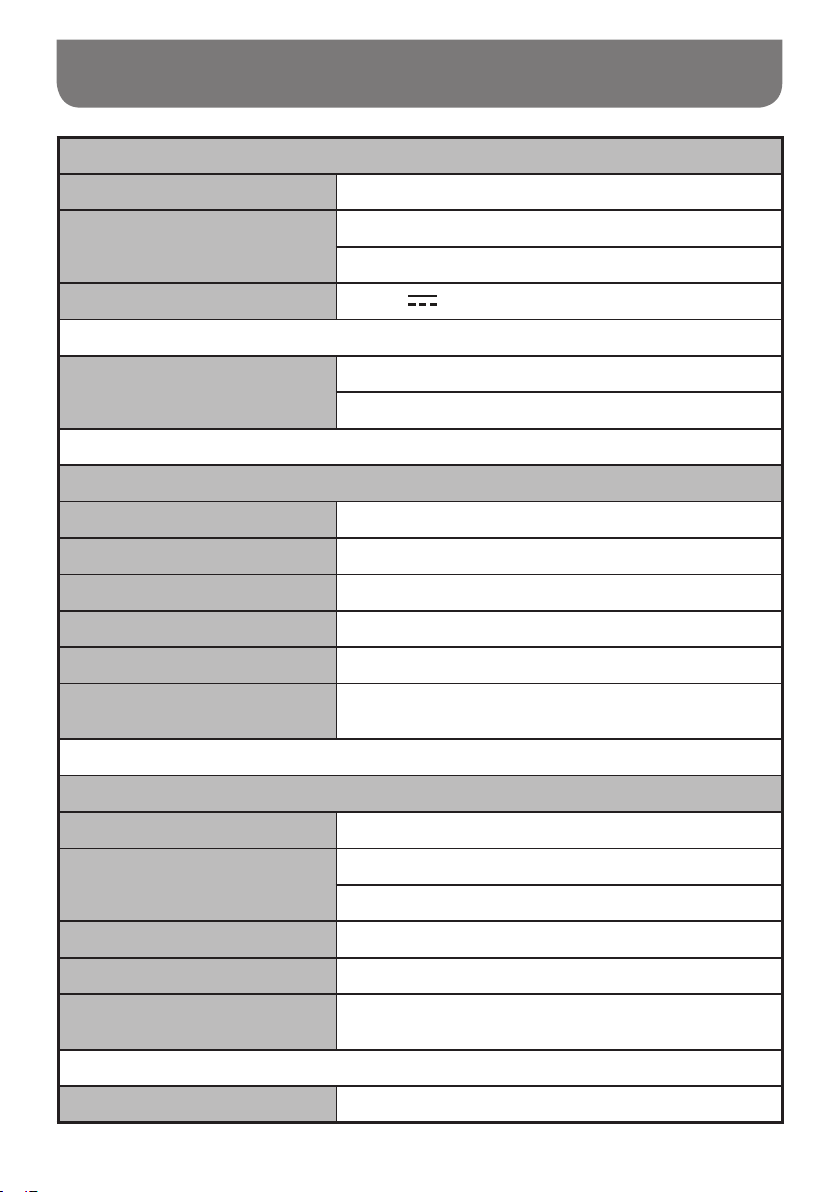
Specications
Power Requirements
AC: 100-240 V ~ 50/60 Hz 18W
Batteries:
Mains via AC adaptor (not supplied): DC 12V
Frequency Coverage:
Bluetooth
Bluetooth specication Bluetooth
Prole Support A2DP 1.2, AVRCP 1.5
Bluetooth Audio CODEC SBC, AAC
Transmitting Power Power Class 2
Line of sight range 10meters / 30feet
The frequency and maximum
transmitted power:
Electronic features
6 x AM-3 (AA size, LR6)
Alkaline or Ni-MH battery
1.5A Center pin positive (+)
FM 87.50-108 MHz
DAB 174.928-239.200 MHz
®
Ver 4.1
2402MHz ~ 2480MHz: 3.85dBm (Bluetooth EDR)
Speaker: 3inches 8ohm 10W full range, waterproof
Output power:
Aux In level: 300±70 mVrms (rated level), 1Vrms (max.)
Aux In socket: 3.5mm diameter
Maximum supplying power of
USB socket:
Operating temperature range: 0°C to +35°C
44
3Watt 10% T.H.D. @ 100Hz @ DC battery 9V
7Watt 10% T.H.D. @ 100Hz @ AC 230V or 120V
5V, 1A
Page 46

The company reserves the right to amend the specications without notice.
If at any time in the future you should need to dispose of this product please note that: Waste
electrical products should not be disposed of with household waste. Please recycle
where facilities exist. Check with your Local Authority or retailer for recycling advice. (Waste
Electrical and Electronic Equipment Directive)
The barcode label on the product is dened as below:
※
Serial number
Production month
Production year
Product code
45
Page 47

®
De Bluetooth
markering en logo’s zijn geregistreerde handelsmerken die eigendom zijn van Bluetooth
SIG, Inc. en elk gebruik van deze markering en logo’s is onder licentie.
WAARSCHUWING
WAARSCHUWING! DE GARANTIE VERVALT INDIEN DE BEHUIZING VAN HET APPARAAT
GEOPEND IS OF INDIEN HET APPARAAT DOOR DE EINDGEBRUIKER OP ENIGERLEI WIJZE
GEMODIFICEERD OF VERANDERD IS! OPEN NOOIT DE BEHUIZING. DE PRODUCENT
AANVAART GEEN AANSPRAKELIJKHEID VOOR SCHADE EN/OF LETSEL VEROORZAAKT
DOOR ONJUIST GEBRUIK. HET TYPEPLAATJE VINDT U OP DE ACHTERZIJDE VAN HET
APPARAAT.
46
Page 48

Belangrijke Veiligheidsinstructies
Lees deze instructies.
1.
2.
Bewaar deze instructies.
3.
Neem alle waarschuwingen in acht.
4.
Volg alle instructies.
5.
Gebruik het apparaat niet in de buurt van water.
6.
Alleen schoonmaken met een droge doek.
Blokkeer de ventilatieopeningen niet. Installeer in overeenstemming met de instructies van
7.
de fabrikant.
8.
Niet installeren in de buurt van warmtebronnen, zoals radiatoren, kachels of andere apparaten
(inclusief versterkers) die warmte produceren.
Bescherm het netsnoer tegen stappen of pletten bij de stekker, het stopcontact en het punt
9.
waar ze het apparaat verlaten.
10.
Gebruik alleen hulpmiddelen / accessoires die gespecificeerd zijn door de fabrikant.
Gebruik alleen de karren, standaards, driehoek standaards, beugels of tafels die gespecificeerd
11.
zijn door de fabrikant of met het apparaat mee verkocht zijn. Als u een kar gebruikt, wees
dan voorzichtig bij het verplaatsen ervan om te voorkomen dat het apparaat om zou
kantelen en letsel zou veroorzaken.
12.
Haal de stekker uit het stopcontact tijdens onweersbuien en als het apparaat langere tijd
niet gebruikt wordt.
13.
Laat al het onderhoud doen door gekwalificeerd personeel. Onderhoud is nodig als het apparaat
beschadigd is, als het stroomsnoer of de stekker beschadigd is, als vloeistof in het apparaat
gemorst is, als voorwerpen erin gevallen zijn, als het apparaat blootgesteld geweest is
aan regen of vochtigheid, als het niet normaal werkt of als het gevallen is.
Stel dit apparaat niet bloot aan regen en vochtigheid om het gevaar van brand en
14.
elektrische schokken te voorkomen. Gebruik bij het gebruik in de open lucht op
regenachtige dagen of bij vochtig weer uitsluitend batterijen om een elektrische schok te
vermijden. Dit apparaat is voorzien van bescherming tegen spatwater en stof (IP65).
47
Page 49
Belangrijke Veiligheidsinstructies
Een aanduiding voor schokgevaar en een bijpassend grafisch symbool zijn voorzien aan de
15.
achterkant van dit apparaat.
De bliksemschicht met pijlpuntsymbool, binnen een gelijkzijdige driehoek
de gebruiker te waarschuwen voor de aanwezigheid van niet-geïsoleerde "gevaarlijke
spanning" in de behuizing van het product, die voldoende groot kan zijn om een risico van
elektrische schok voor personen te vormen.
Het uitroepteken in een gelijkzijdige driehoek is bedoeld om de gebruiker attent te
maken op de aanwezigheid van belangrijke bedienings- en onderhoudsinstructies in de
handleiding die bij het apparaat wordt geleverd.
16.
Stel dit apparaat niet bloot aan druppelend of spetterend water en plaats geen voorwerpen die
gevuld zijn met vloeistoffen op het apparaat.
17.
De netstekker moet dicht bij het toestel en steeds toegankelijk zijn, zodat in geval van nood
(bijv. om het toestel van het stroomnet te scheiden) alleen de stekker uit het stopcontact moet
worden getrokken.
18.
OPMERKING
Veranderingen of aanpassingen die niet uitdrukkelijk zijn goedgekeurd door de partij
die verantwoordelijk is voor de naleving van de richtlijnen, zal de bevoegdheid van de
gebruiker om het apparaat te gebruiken onverminderd opschorten.
, is bedoeld om
Als de stekker of een koppelapparaat wordt gebruikt als ontkoppelapparaat, zorg er dan voor
19.
dat deze eenvoudig bereikbaar blijft.
Een waarschuwing dat de batterijen (batterijen-set of geplaatste batterijen) niet worden mogen
20.
worden blootgesteld aan extreme hitte, zoals zonlicht, vuur en dergelijke.
21.
Om mogelijke gehoorschade te voorkomen niet op een hoog volume gedurende een lange
periode luisteren.
48
Page 50
Belangrijke Veiligheidsinstructies
22.
Dit apparaat is een Klasse II of dubbel geïsoleerd elektrisch apparaat. Het is zo ontworpen
dat het geen veiligheidsverbinding met elektrische aarde vereist.
De ventilatie mag niet worden belemmerd door de ventilatieopeningen af te dekken met items
23.
zoals kranten, tafelkleden, gordijnen, enz.
49
Page 51
Bedieningselementen
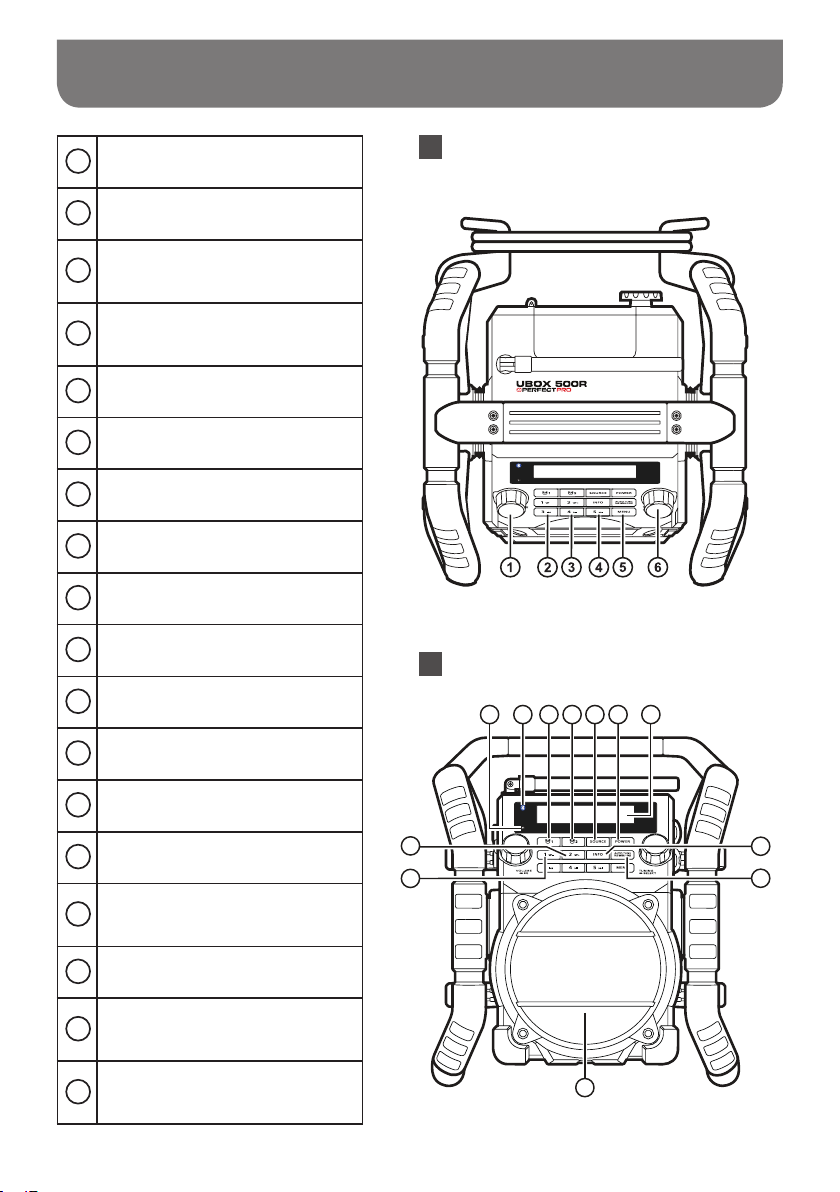
1
Volumeknop / EQ knop
2
Voorkeuzezender 3 / Rewind knop
Voorkeuzezender 4 / Play / Pause
3
knop
Voorkeuzezender 5 / Fast Forward
4
knop
5
Menu knop
6
Tuning knop / Select knop
7
Lader LED indicator
8
Bluetooth status LED indicator
9
Alarm 1 knop
Alarm 2 knop
10
Audiobron knop (Source)
11
Bovenaanzicht
Vooraanzicht
7 8 9 10 11 12 13
Aan / uit knop (Power)
12
LCD display
13
Info knop
14
Auto-tune knop / Afspeel modus /
15
Bluetooth pairing knop
Speaker
16
Voorkeuzezender 1 / Map omhoog
17
knop
Voorkeuzezender 2 / Map oplaag
18
knop
50
18
17
16
14
15
Page 52
Bedieningselementen
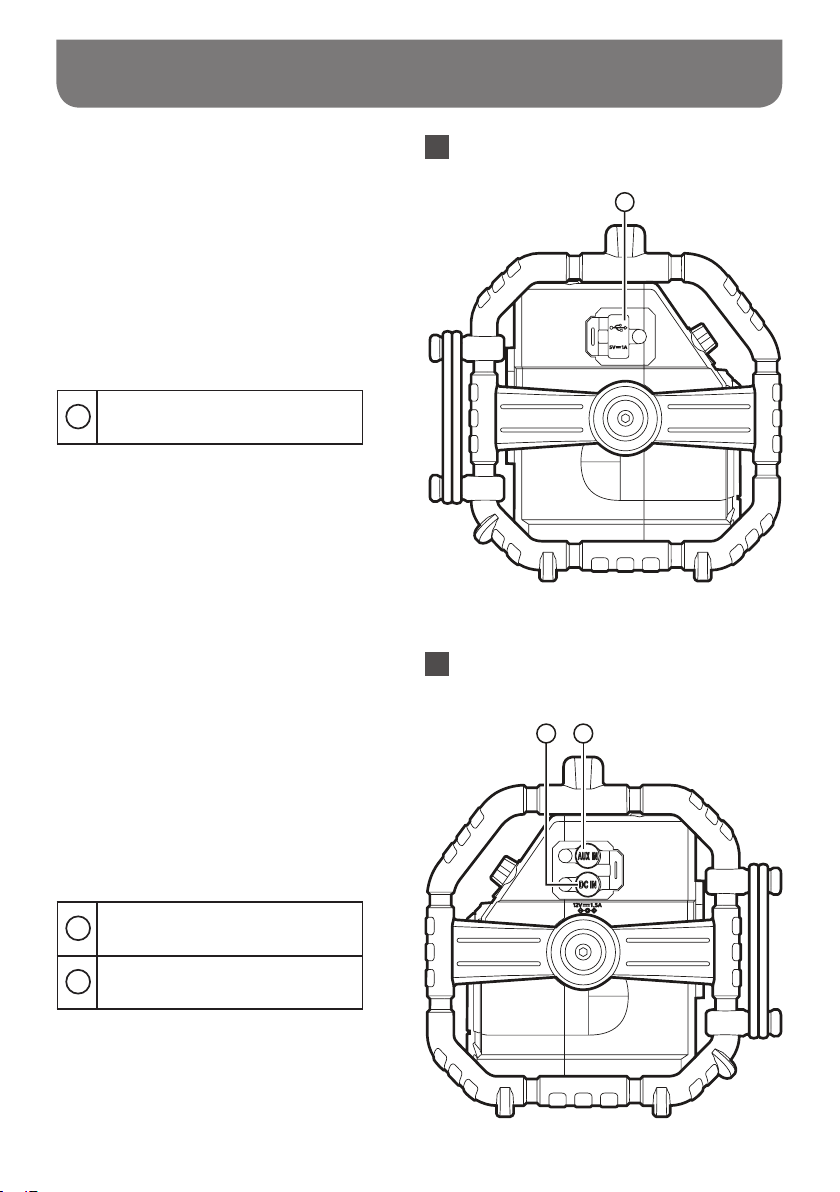
19 USB aansluiting
Linkeraanzicht
19
Rechteraanzicht
20
DC-ingang
21
Aux ingang
20 21
51
Page 53
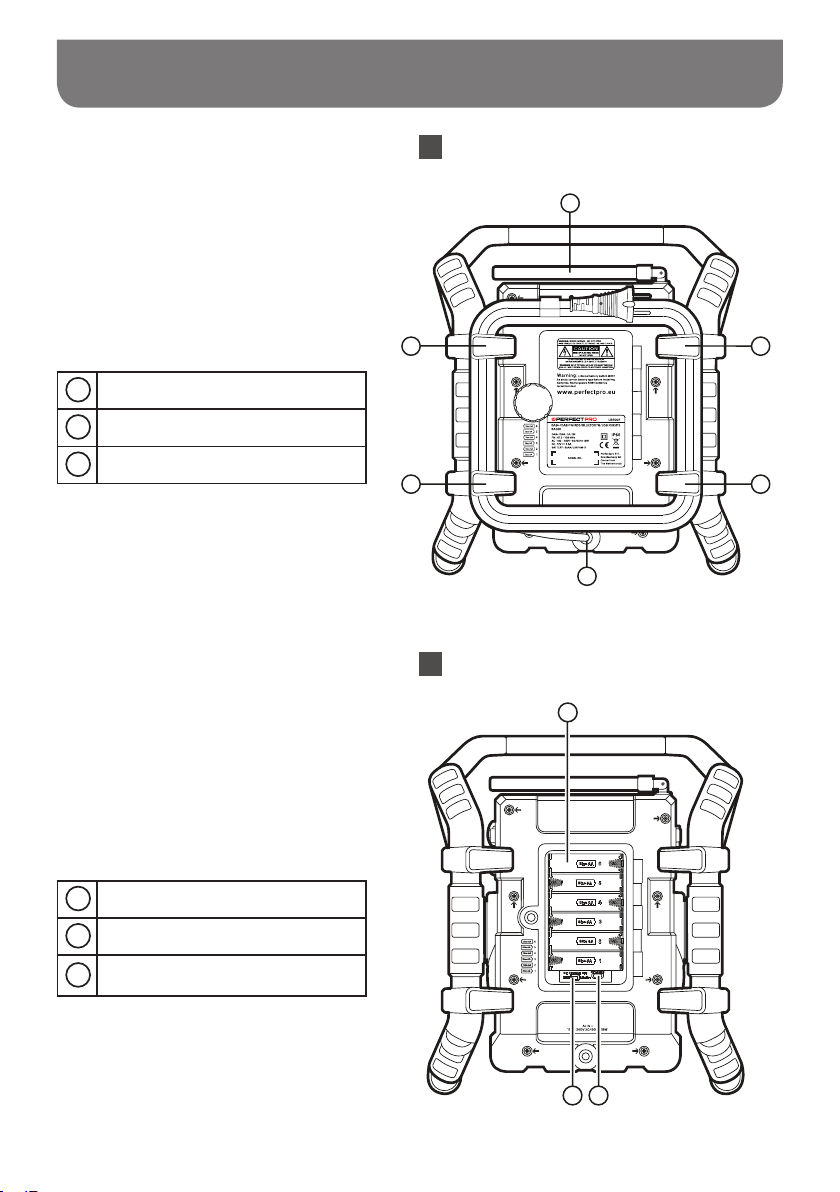
Bedieningselementen
22 FM / DAB+ antenne
23
Kabelopbergmogelijkheid
24
Stroomkabel
Achteraanzicht
22
23 23
23
24
Achteraanzicht
23
25 Batterijen compartiment
26
NiMH / Alkaline schakelaar
27
Aansluiting voor software upgrade
Stromversorgung d
52
25
2726
Page 54
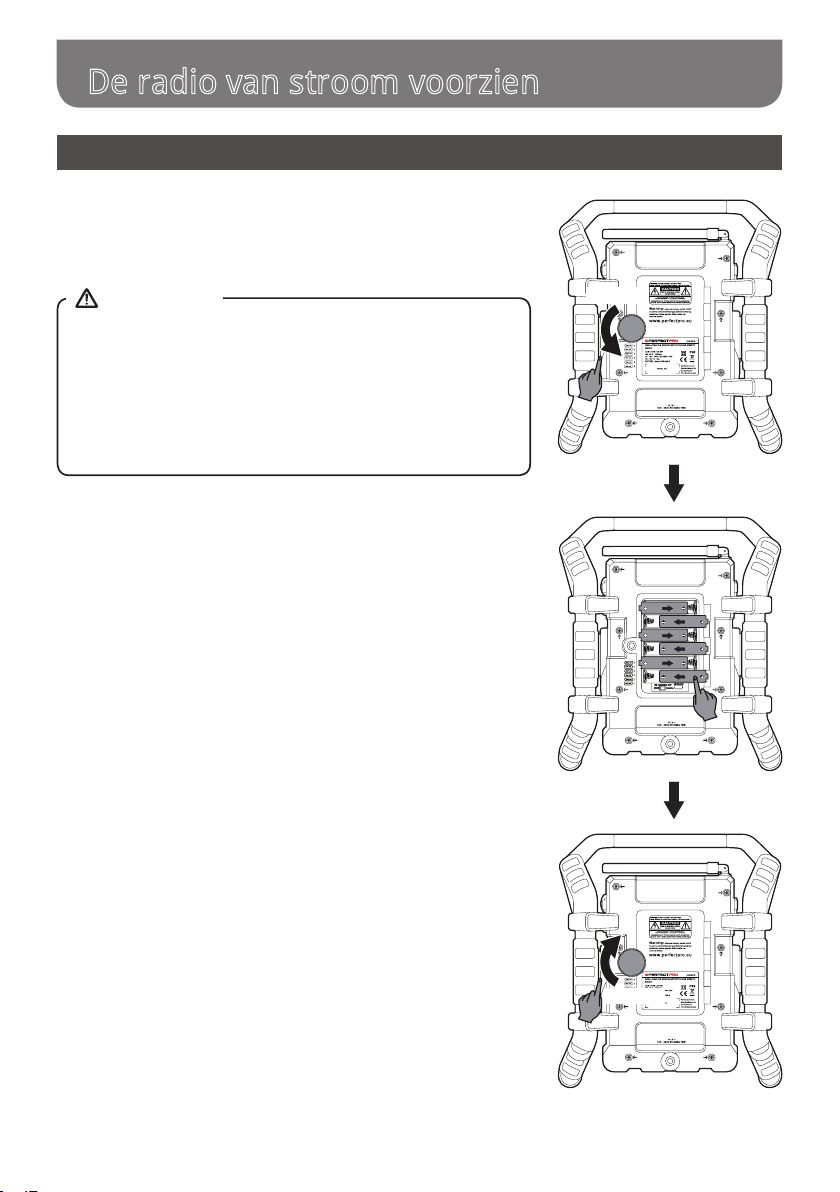
'HUDGLRYDQVWURRPYRRU]LHQ
Gebruik op batterijen
Plaats de batterijen: draai eerst de vergrendeling van het deksel
van het batterijen compartiment tegen de klok in los en open het
deksel.
OPMERKING
Voor u de batterijen plaatst, indien u niet herlaadbare
batterijen gebruikt, verzeker u ervan dat de NiMH/Alkaline
schakelaar in het batterijen compartiment op de stand
Alkaline staat. Indien u herlaadbare batterijen gebruikt,
gelieve dan de NiMH/Alkaline schakelaar in te stellen op de
stand NiMH.
Plaats 6 batterijen van het type AA (AM-3) in het batterijen
compartiment. Verzeker u ervan dat de batterijen geplaatst zijn
in overeenstemming met de afgebeelde plaatsingswijze. Sluit het
deksel van het batterijen compartiment en draai de vergrendeling
van het deksel met de klok mee vast. Indien de radio voor langere
tijd niet gebruikt wordt, wordt aanbevolen de batterijen uit de radio
te verwijderen.
Verminderde capaciteit, vervorming, storing, een stotterend geluid
en/of de weergave van de tekst “Battery Low” op het display zijn
aanduidingen dat de batterijen vervangen of opgaladen moeten
worden. (zie informatie “opladen van de batterijen”)
Bij het spelen op (oplaadbare) batterijen is het uitgangsvermogen
minder ten opzichte van het uitgangsvermogen bij het spelen op
netstroom. Hierdoor kan het geluid mogelijk enigszins vervormen
bij een hogere volume-instellingen.
OPENEN
SLUITEN
53
Page 55
Gebruik op netstroom
Voordat u de stroomkabel met het stopcontact verbindt, dient u te controleren of de netstroom
spanning correct is. Wanneer u batterijen gebruikt dan zullen de batterijen automatisch worden
uitgeschakeld wanneer u netstroom gebruikt. De kabelopbergmogelijkheid, die zich achter op de radio
bevindt, dient ervoor om de stroomkabel op te bergen wanneer de radio niet gebruikt.
Gebruik via de DC–ingang
De radio kan ook van stroom worden voorzien via de DC-ingang met 12 volt gelijkstroom.
Voertuigen en boten kunnen in veel gevallen 12 volt gelijkstroom leveren, zodat de radio ook
buitenshuis of op een boot kan worden gebruikt.
Als u gebruik wilt maken van de DC-ingang, dan is een extra sigarettenaansteker-kabel nodig,
deze wordt niet meegeleverd met het apparaat.
OPMERKING
Gebruik de 12 Volt-aansluiting nooit onder regenachtige of vochtige omstandigheden om te
voorkomen dat er vocht in de radio kan komen. Houd de rubberen afdekking aan de achterkant
goed gesloten onder deze omstandigheden.
OPMERKING
Als er gedurende 15 minuten geen bedieningselementen worden gebruikt en er gedurende 15
minuten geen geluid wordt weergegeven door de radio, wordt de radio in de stand-bymodus
gezet wanneer de netspanning wordt gebruikt. Wanneer de radio op batterijstroom werkt, wordt
de radio volledig uitgeschakeld om het batterijgebruik te minimaliseren.
Opladen van de batterijen
De radio kan enkel de batterijen opladen wanneer het toestel uitgeschakeld is en is verbonden met het
stroomnet. Tijdens het opladen zal de Laad indicator LED groen branden. Het volledig opladen van
batterijen kan maximaal 5-7 uur duren. De Laad indicator LED brandt continu groen wanneer het laden
is voltooid.
OPMERKING
De duur van het opladen van uw batterijen kan variëren, afhankelijk van de capaciteit (mAh) van
de batterijen. Bij batterijen met een hogere capaciteit (mAh) duurt het opladen langer.
BELANGRIJK
Het kan onder bepaalde omstandigheden voorkomen dat de Laad indicator LED kort knippert en
daarna uit gaat. Dit kan gebeuren wanneer de batterijen al voldoende zijn opgeladen, als de radio
detecteert dat u alkaline batterijen gebruikt of wanneer er verschillende soorten (type of capaciteit)
oplaadbare batterijen zijn geplaatst. In elk van deze gevallen zal het opladen worden gestopt.
GEBRUIK ALLEEN VOORGELADEN (TOT HETZELFDE VOLTAGE NIVEAU) NIMH BATTERIJEN
MET “LAGE ZELFONTLADING” EIGENSCHAPPEN. GEBRUIK VAN ORIGINELE PERFECTPRO
BATTERIJEN WORDT TEN ZEERSTE AANBEVOLEN.
54
Page 56

Belangrijke informatie voor het opladen en
gebruiken
Laad de batterijen ten minste iedere 2 maanden op.
1.
2.
Zorg ervoor dat de schakelaar in het batterijen compartiment zeker in de “CHARGE NiMH ON”
(laden) positie staat.
3.
Plaats de batterijen in het compartiment volgens de correcte polariteit (+ en -).
4.
Eerste gebruik: Laad de nieuwe batterijen in één, niet onderbroken, laadbeurt tot ze vol
zijn. Deze eerste laadbeurt zal langer duren dan een normale laadbeurt. Voor een langere
levensduur van de batterijen is het daarna het beste om de batterijen altijd in één, niet
onderbroken laadbeurt te laden tot ze volledig vol zijn en niet steeds te laden wanneer ze nog
voldoende vol zijn.
5.
De nieuwe batterijen zullen hun volle capaciteit pas bereiken na een aantal gebruikscycli
(ontladen-laden).
6.
Laat de hele groep batterijen, bij regelmatig gebruik, in de radio zitten en gebruik deze niet voor
andere doeleinden. Ook nooit een paar batterijen eruit halen en voor iets anders gebruiken. Zo
ontstaat een mix van (volledig) geladen en (gedeeltelijk) ontladen batterijen.
7.
Laad de batterijen bij een omgevingstemperatuur tussen de 5 graden C en 35 graden C. Bij
een hogere of lagere temperatuur kunnen de batterijen niet volledig geladen worden. Je nach
Akkukapazität kann das Laden von „leer“ nach „voll“ mehrere Stunden, sogar bis zu 7 oder
mehr, andauern.
van oplaadbare batterijen
8.
Door de hoge capaciteit van de meegeleverde batterijen kan het laden van “leeg” tot “vol”
ongeveer 7 uur duren, of zelfs langer.
Laad geen batterijen op als de radio warm is of is blootgesteld aan hitte of warmtebronnen.
9.
10.
Geadviseerd wordt de metalen contactpunten van de batterijen en van de lader in de radio van
tijd tot tijd te reinigen met een contactspray speciaal voor elektronica.
Nooit oude en nieuwe oplaadbare batterijen door elkaar gebruiken.
11.
12.
Nooit oplaadbare en niet-oplaadbare batterijen door elkaar gebruiken.
Nooit lege en volgeladen oplaadbare batterijen door elkaar gebruiken.
13.
55
Page 57
Belangrijke informatie voor het opladen en
gebruiken
Nooit batterijen door elkaar gebruiken met een verschillende capaciteit (mAh).
14.
15.
Nooit beschadigde, misvormde of lekkende batterijen gebruiken.
16.
De batterij status indicatie is een indicatie bij benadering en deze kan verschillen afhankelijk van
het gebruikte type batterijen.
17.
De batterijen kunnen warm worden tijdens het opladen.
18.
In koude omstandigheden zal de capaciteit van batterijen lager zijn dan bij normale
kamertemperatuur.
19.
Batterijen vallen, als zijnde verbruiksgoederen, niet onder de garantiebepalingen zoals deze
gelden voor de radio.
20.
Het wordt aangeraden om Perfectpro oplaadbare batterijen te gebruiken, omdat de radio en de
interne oplader ontwikkeld zijn voor deze batterijen.
21.
Batterijen mogen niet bij het normale huisvuil worden aangeboden of worden verbrand als afval.
22.
Breng uw niet-herlaadbare batterijen bij voorkeur naar een verzamelstation voor verwerking van
batterijen.
van oplaadbare batterijen
23.
56
VOORZICHTIG
Er bestaat ontplofngsgevaar als de batterij verkeerd wordt geplaatst. Alleen vervangen
door hetzelfde of een vergelijkbaar type.
Page 58
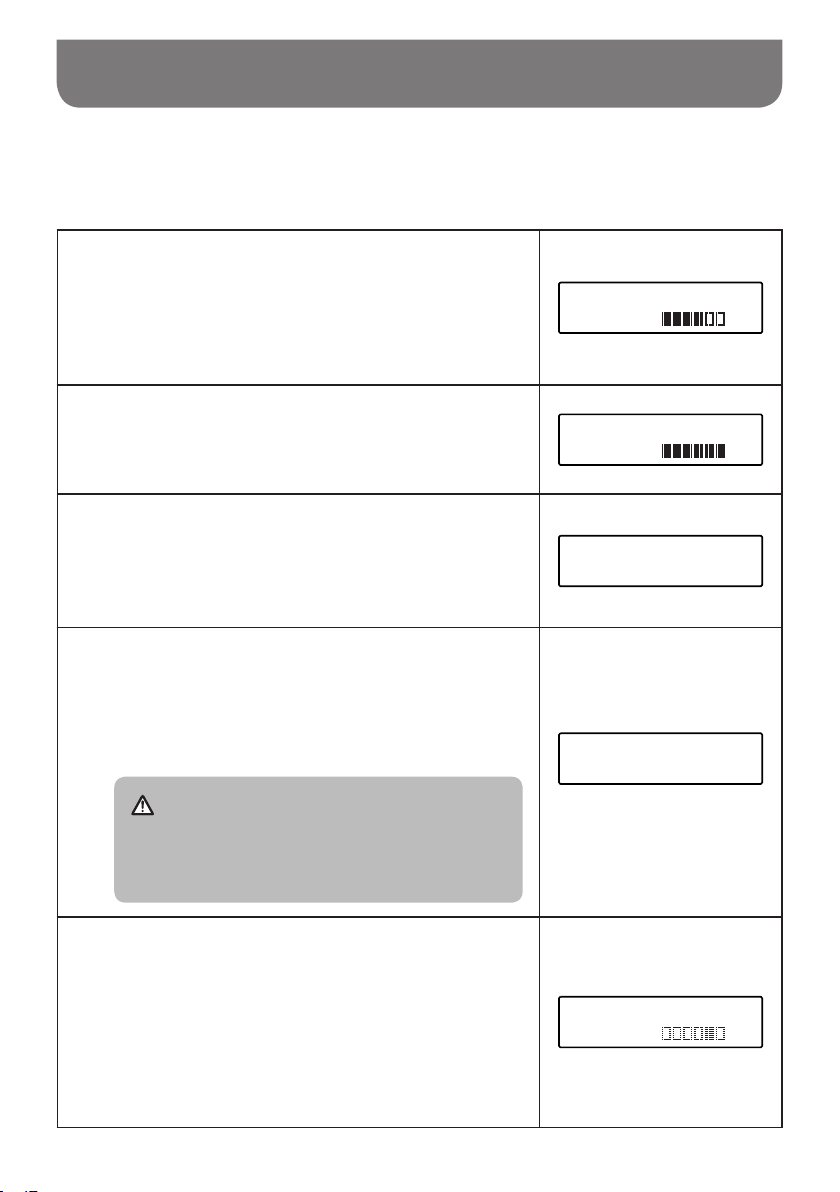
Oplaadindicator
Houd er rekening mee dat de oplaadindicator alleen kan worden geactiveerd als de radio wordt
gebruikt om batterijen op te laden (d.w.z. de radio is uitgeschakeld, de batterijschakelaar staat in de
stand NiMH en de radio is verbonden met het stroomnet).
Tijdens het opladen, ziet het display eruit zoals in de
afbeelding aan de rechterkant en de Laad indicator LED
1
knippert groen.
Als het opladen voltooid is, ziet het display eruit zoals
in de afbeelding aan de rechterkant en de Laad indicator
2
LED brandt continu groen.
Als de batterijen al volledig zijn opgeladen, ziet het
display eruit zoals in de afbeelding aan de rechterkant
3
en de radio zal na 5 seconden naar de standby-modus
schakelen.
Indien er geen / niet alle batterijen zijn geplaatst of
batterijen in de verkeerde richting zijn geplaatst, ziet
4
het display eruit zoals in de afbeelding aan de rechterkant
en de radio zal na 5 seconden naar de standby-modus
schakelen.
OPMERKING
Als er een batterij wordt verwijderd tijdens het opladen,
ziet het display eruit zoals in de afbeelding aan de
rechterkant en de Laad indicator LED brandt rood.
Battery 123456
Charging
Battery 123456
Capacity
Battery Full
No cell
Als er tijdens het oplaadproces gedetecteerd wordt
dat een batterij beschadigd is, dan zal er een blokje
5
verschijnen onder het desbetreffende batterijnummer
(zoals in de afbeelding aan de rechterkant) en de Laad
indicator LED knippert rood.
Battery 123456
Error
57
Page 59
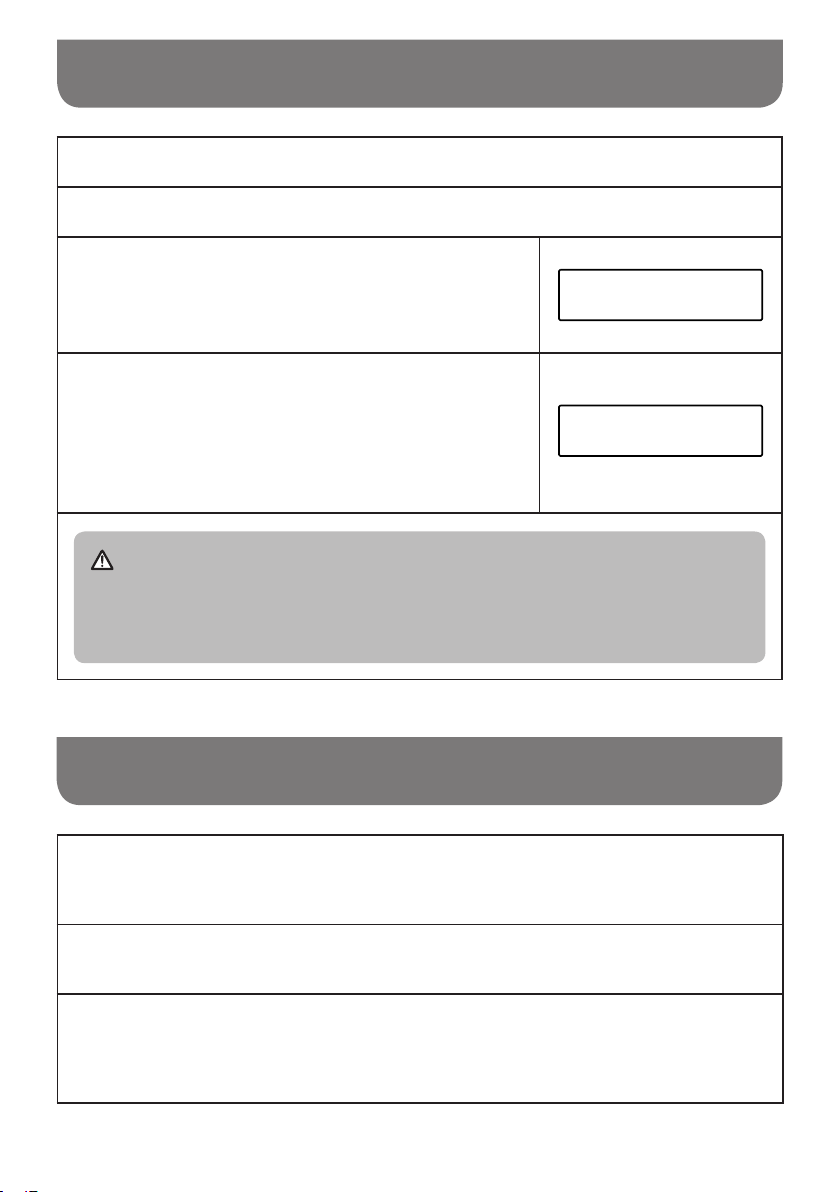
Eerste gebruik van de radio
Plaats uw radio op een vlak oppervlak.
1
Zet de antenne rechtop.
2
Steek de stekker in het stopcontact. De radio zal nu
opstarten en enkele seconden in de display “WELCOME
3
TO DIGITAL RADIO” aangeven. Hierna zal na de tijd in
het display worden weergeven.
Als er geen tijd wordt weergegeven wordt dit weergegeven
als “00:00”. Druk dan op de Aan/uit knop om de radio in
4
te schakelen en voer een scan uit. Het kan noodzakelijk
zijn de radio te verplaatsen voor een betere ontvangst en
daarna een scan uit te voeren om zenders te vinden zoals
verderop wordt beschreven.
BELANGRIJK
De stekker wordt gebruikt om de radio aan te sluiten op het lichtnet. Het stopcontact dat
wordt gebruikt voor de radio moet bereikbaar blijven tijdens gebruik. Om de radio volledig los
te koppelen van het lichtnet, moet de stekker uit het stopcontact worden gehaald.
Welcome to
Digital Radio
00:00
Time not set
De radio gebruiken – DAB
Zet de antenne recht op, deze is voor ontvangst van DAB en FM. Druk op de Aan / uit knop
om de radio in te schakelen.
1
Druk op de Audiobron knop om de DAB-band te selecteren.
2
Wanneer dit de eerste keer is dat de radio wordt gebruikt zal er een snelle scan van de
DAB-Band III worden uitgevoerd. Wanneer u de radio eerder heeft gebruikt wordt de laatst
3
geluisterede zender geselecteerd.
58
Page 60
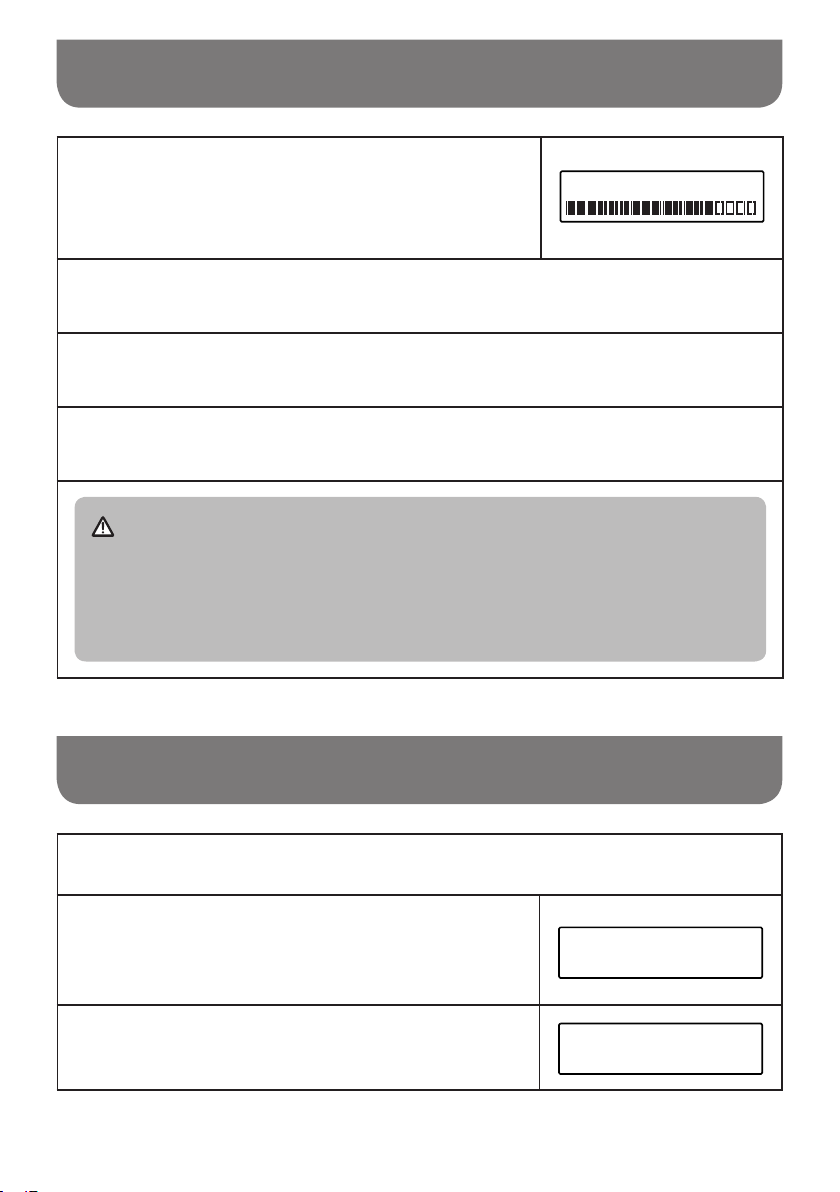
De radio gebruiken – DAB
Tijdens het scannen loopt de teller in het display op als er
nieuwe zenders worden gevonden en de zenders worden
4
toegevoegd aan de lijst die is opgeslagen in de radio. Het
afgebeelde balkje geeft voortgang van de scan aan.
Als het scannen is voltooid, start de radio met het afspelen van de eerste zender in de lijst (in
alfanumerieke volgorder 0…9…A…Z).
5
Als de zenderlijst na de scan nog altijd leeg is, verschijnt op het display de tekst “No DAB
Station”.
6
Als er geen zenders worden gevonden kan het noodzakelijk zijn de radio te verplaatsen voor
7
een betere ontvangst.
OPMERKING
De zendernamen en frequenties weergegeven in deze handleiding kunnen afwijken van de
zendernamen en frequenties die u ziet op het display van uw radio. Zenders kunnen hun
zendernaam tussentijds veranderen. Daarnaast zijn de DAB- en FM-frequenties niet in alle
gebieden hetzelfde.
Scanning... 019
Een zender selecteren – DAB
Druk op de Aan / uit knop om de radio in te schakelen.
1
Druk op de Audiobron knop om de DAB-band te
selecteren. Het display geeft de naam van de huidige
2
zender weer.
Draai aan de Tuning knop om door de lijst van
beschikbare zenders te bladeren.
3
DAB
Station list
<BBC Radio 2 >
59
Page 61
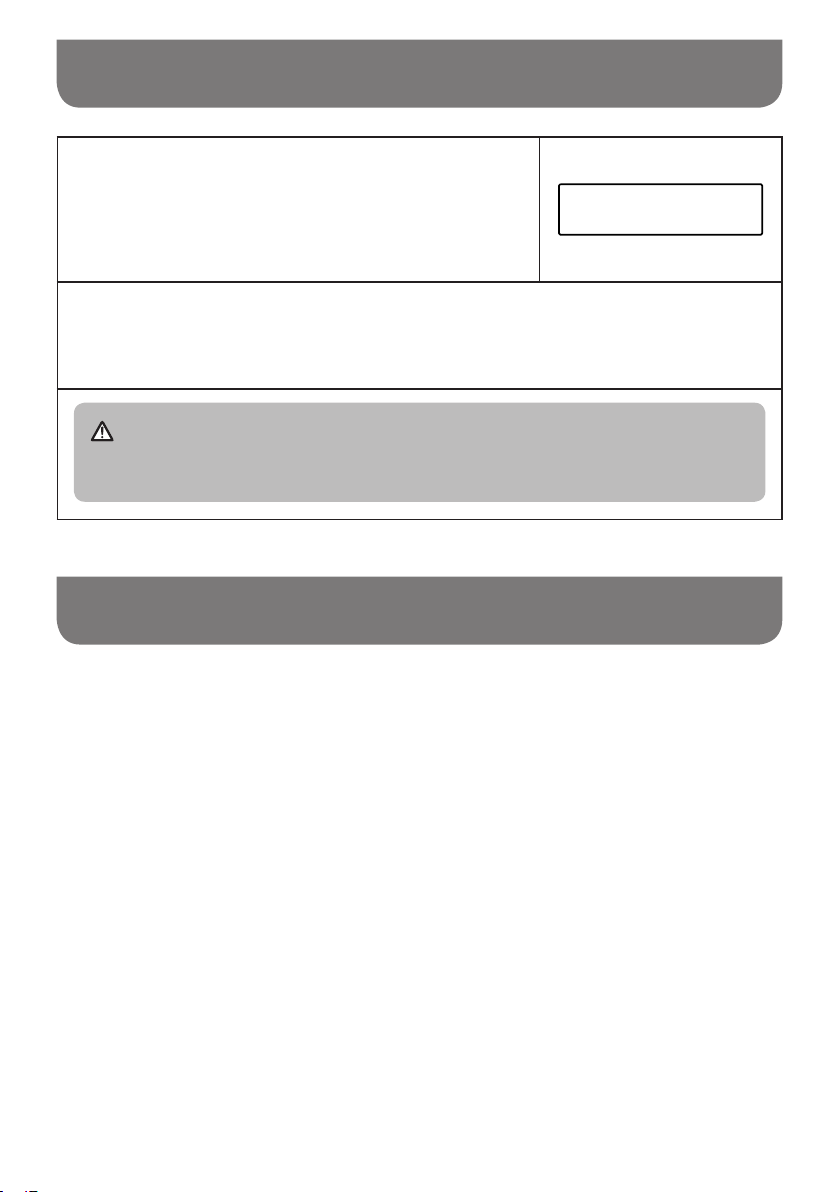
Een zender selecteren – DAB
Druk op de Tuning knop om de weergegeven zender te
selecteren. Het display geeft dan “Connecting…” weer
4
wanneer uw radio de gekozen zender zoekt.
Pas desgewenst het volume aan met de Volumeknop.
5
OPMERKING
Wanneer na het selecteren van een zender de zender niet kan worden gevonden kan het
noodzakelijk zijn de radio te verplaatsen voor een betere ontvangst.
BBC Radio 2
Connecting...
Secundaire diensten – DAB
Sommige DAB-zenders hebben één of meer secundaire diensten. Als een radiozender een
1.
secundaire dienst heeft, dan zal het display in de zenderlijst “>>” naast de zendernaam tonen. De
secundaire dienst zal dan direct na de primaire dienst worden getoond zodra u op de Tuning knop
drukt.
2.
Druk op de Tuner knop om de zender te selecteren. De meeste secundaire diensten worden niet
continu uitgezonden en als de geselecteerde dienst niet beschikbaar is, zal de radio opnieuw
afstemmen op de bijbehorende primaire dienst.
60
Page 62
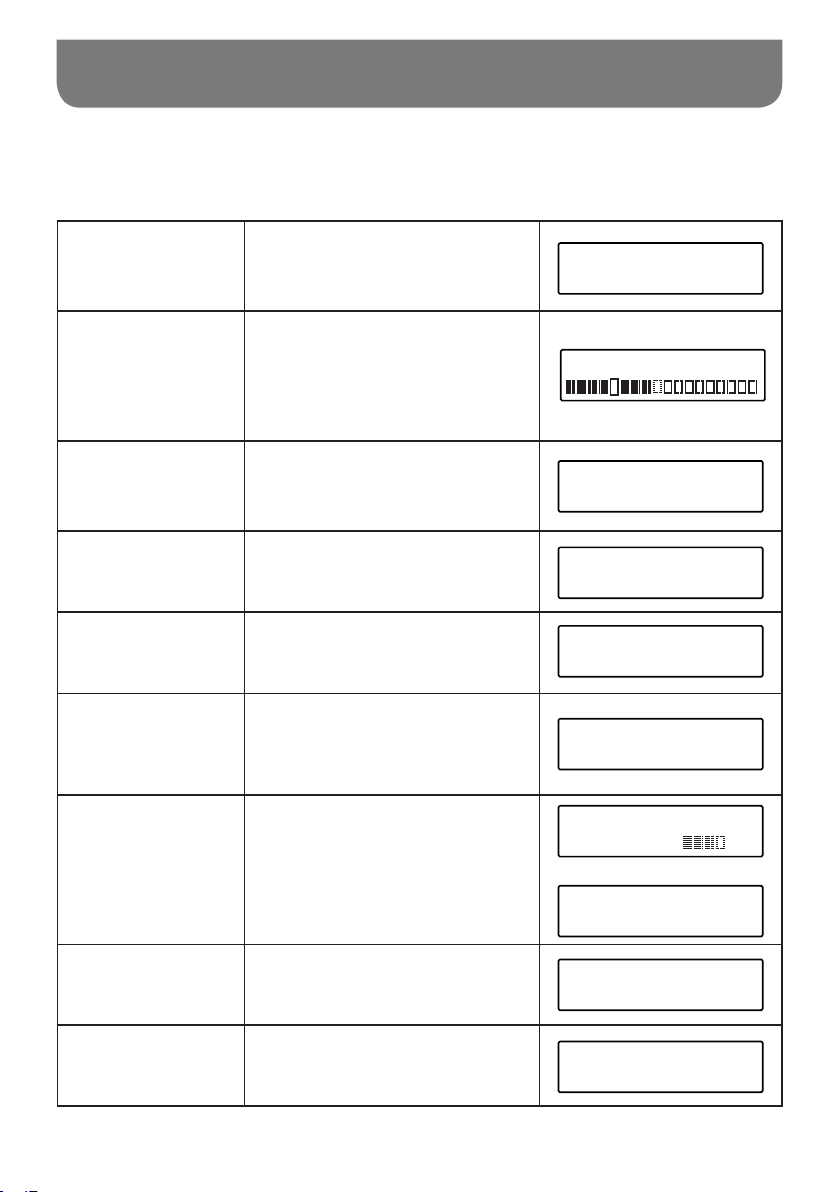
Weergave opties – DAB
Uw radio heeft verschillende weergave opties in de DAB-modus:
Druk op de Info knop om door de verschillende opties te bladeren:
1.
a.
Tekst (DLS)
b.
Signaalsterkte
Programmatype
c.
Multiplexnaam
d.
Kanaal & frequentie
e.
f.
Bitrate / audiotype
g.
Batterij niveau
Toont tekstberichten zoals de artiest
of tracknaam,telefoonnummer,
verkeersinformatie, etc.
Toont de signaalsterkte van de huidige
zender. Het ongevuld vierkante
indicatie vakje geeft de minimale
signaalsterkte aan voor een goede
ontvangst.
Toont het soort zender waar naar
geluisterd wordt, zoals Pop, Klassiek,
Nieuws, etc.
Toont de naam van de DAB-multiplex
waartoe de huidige zender behoort.
Toont de frequentie en het kanaalnummer
voor de zender waarop is afgestemd.
Toont de digitale bitrate en de
informatie over de audiocodering voor
de zender waarop is afgestemd.
Toont tijdens het gebruik op batterijen
het huidige batterij niveau. (bij gebruik
op netstroom wordt het batterij niveau
niet weergegeven).
sunshine live
electronic music
sunshine live
sunshine live
Pop Music
sunshine live
DR Deutschland
sunshine live
12B 225.648MHz
sunshine live
72kbps / DAB+
sunshine live
Bat.level
sunshine live
Mains current
Tijd Toont de huidige tijd.
h.
i.
Datum Toont de huidige datum.
sunshine live
9:07 AM
sunshine live
8-9-2016
61
Page 63

Nieuwe zenders zoeken – DAB
Er kunnen van tijd tot tijd nieuwe DAB-zenders beschikbaar komen. U kunt dan uw radio laten scannen
naar nieuwe zenders. Ook wanneer u bent verhuisd of verplaatst naar een ander deel van het land is
het mogelijk dat u de radio moet laten scannen naar nieuwe zenders.
Om een volledig scan uit te voeren op de hele DAB-Band III-frequenties druk u op
de Auto Tune knop.
1
Tijdens het scannen loopt de teller in het display op als
er nieuwe zenders worden gevonden en de
2
zenders worden toegevoegd aan de lijst die is
opgeslagen in de radio.
Scanning... 019
Handmatig afstemmen – DAB
U kunt met handmatig afstemmen uw radio afstemmen op een speci
Druk op de knop.
1
Draai de Tuning knop tot “Manual tune” wordt weerge-
geven. Druk op de Tuning knop om de modus voor hand-
2
matig afstemmen te selecteren.
Draai aan de Tuning knop om het gewenste DAB-kanaal te selecteren.
3
Druk op de Tuning knop om uw keuze te bevestigen.
4
62
DAB
<Manual tune >
Manual tune
<5A 174.928MHz >
Page 64
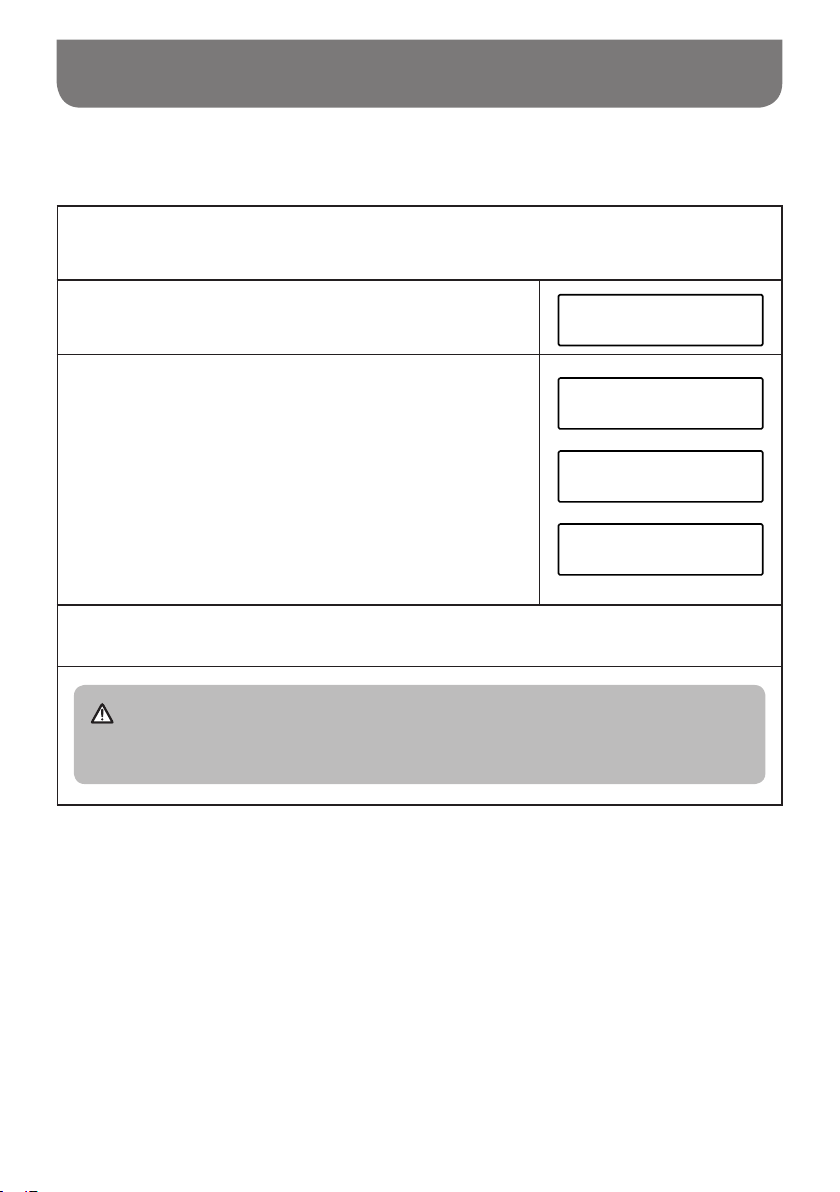
Dynamic Range Control (DRC) – DAB
De DRC-functie kan zachte geluiden makkelijker hoorbaar maken wanneer uw radio wordt gebruikt in
een lawaaiige omgeving.
In DAB-modus, druk op de Menu knop.
1
Draai de Tuning knop tot “DRC” wordt weergegeven. Druk
op de Tuning knop om naar de instellingen te gaan.
2
Draai de Tuning knop om de gewenste DRC-instelling te
selecteren.(standaard staat deze op ”off”).
3
DRC off DRC staat uit, geen compressie toegepast
(standaard)
DRC high DRC z oals uit gez onden, maximale
compressie
DRC low DRC 50% toegepast zoals uitgezonden, lage
compressie
Druk op de Tuning knop om uw keuze te bevestigen.
4
OPMERKING
Niet alle DAB-uitzendingen kunnen gebruik maken van de DRC- functie. Als de uitzending
geen ondersteuning biedt voor DRC, dan heeft het instellen van DRC op de radio geen effect.
<DRC >
<DRC off >
<DRC high >
<DRC low >
DAB
DRC *
DRC
DRC
63
Page 65
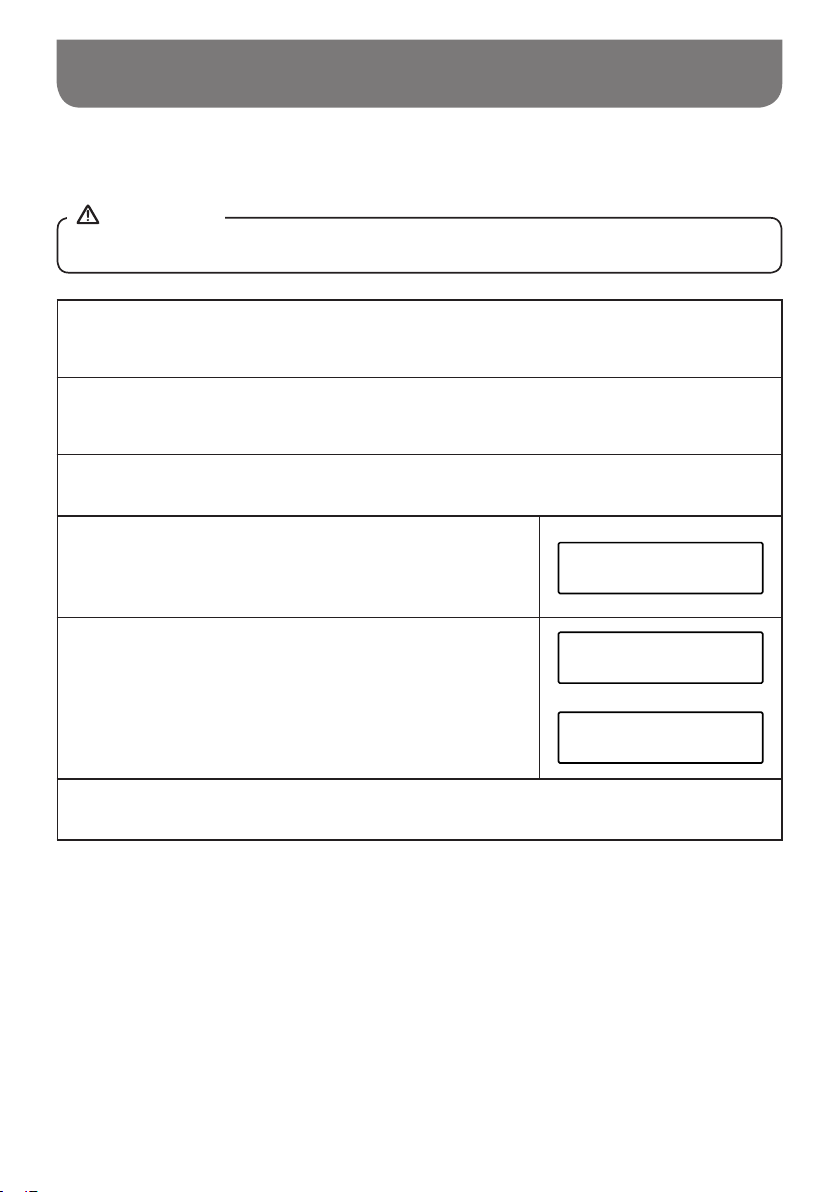
Instellen zendervolgorde
Uw radio heeft 2 instellingen voor de zendervolgorde. De instellingen voor de zendervolgorde zijn:
alfanumeriek en ensemble.
OPMERKING
De zendervolgorde staat op uw radio standaard ingesteld op ensemble.
Druk op de Aan / uit knop om de radio in te schakelen.
1
Druk op de Audiobron knop om de DAB-band te selecteren.
2
Druk op de Menu knop om naar het DAB menu te gaan.
3
Draai de Tuning knop tot 'Station order' wordt getoond op
het display. Druk op de Tuning knop om de instelling van
4
de zendervolgorde te openen.
Draai aan de Tuning knop om te kiezen uit 'Alphanumeric'
en 'Ensemble' . 'Alphanumeric' – de zenderlijst wordt
5
alfanumeriek gesorteerd 0...9 A...Z. 'Ensemble' – de
zenderlijst wordt geselecteerd op basis van het DABmultiplex. De huidige instelling wordt aangegeven met
een asterisk.
Druk op de Tuning knop om de gewenste zendervolgorde te selecteren.
6
DAB
<Station order >
Station order *
<Alphanumeric >
Station order
<Ensemble >
64
Page 66
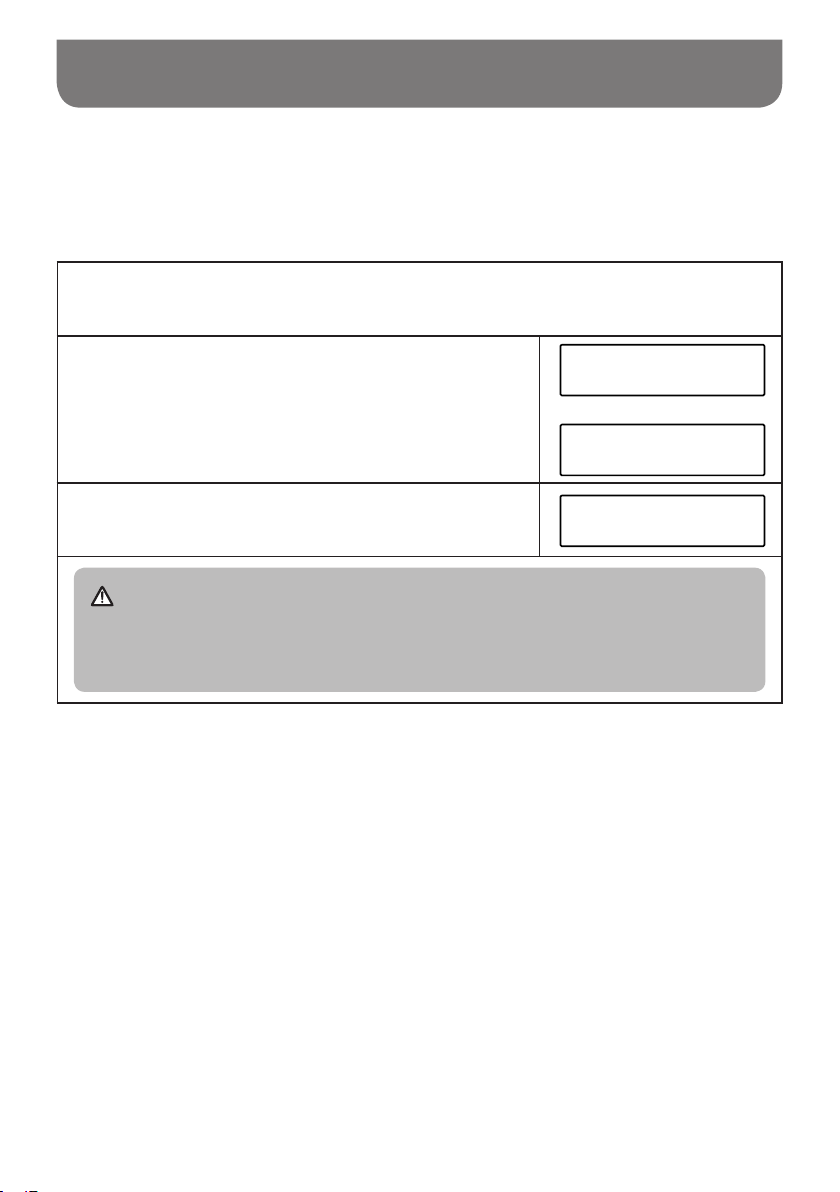
Zenders inkorten (Prune) – DAB
Wanneer u zich verplaatst of bent verhuisd naar een ander gebied of land kunnen bepaalde zenders
niet meer beschikbaar zijn. Ook kunnen bepaalde zenders stoppen met uitzenden of van frequentie
veranderen. Zenders die niet meer gevonden worden, staan in de zenderlijst weergegeven met een
vraagtegen (?). De “Prune” (“Inkorten”) functie verwijdert dan de niet beschikbare zenders uit uw
zenderlijst.
Druk op de Menu knop.
1
Draai de Tuning knop tot “Prune” wordt weergegeven.
Druk op de Tuning knop om verder te gaan. Draai dan
2
aan de Tuning knop om “Yes” (ja) of “No” (nee) te kiezen.
Om de Prune-functie (inkorten) te starten kiest u “Yes” en
druk op de Tuning knop om te bevestigen.
Wilt u de Prune-functie niet starten kies dan “No” en druk
op de Tuning knop om te bevestigen.
3
OPMERKING
Wanneer u zicht heeft verplaatst of bent verhuisd naar een ander gebied of land, dan moet
u mogelijk ook een scan naar nieuwe zenders uitvoeren (zie de paragraaf “Nieuwe zenders
zoeken” hierboven).
<Prune >
DAB
Prune?
<Yes> No
Prune?
Yes <No>
65
Page 67

De radio gebruiken – FM
Zet de antenne rechtop en druk op de Aan / uit knop om de radio in te schakelen.
1.
Druk op de Audiobron knop om de FM-band te selecteren.
2.
Draai de Tuning knop met de klok mee. De weergegeven frequentie neemt toe. Druk daarna op de
3.
Tuning knop om automatisch af te stemmen op een zender. Uw radio zoekt nu vanaf de huidige
frequentie op de FM-band naar zenders met een hogere frequentie en stopt automatisch met
scannen als er een zender met voldoende signaalsterkte wordt gevonden. Draai de Tuning knop
tegen de klok in en druk daarna op de Tuning knop om naar zenders met een lagere frequentie
te scannen. Uw radio zoekt nu vanaf de huidige frequentie op de FM-band naar zenders met
een lagere frequentie en stopt automatisch met scannen als er een zender met voldoende
signaalsterkte wordt gevonden.
Het display zal na enkele seconden worden bijgewerkt. Het display toont de frequentie van het
gevonden signaal. Als het signaal sterk genoeg is en er RDS-gegevens aanwezig zijn, dan kan de
radio de zendernaam tonen.
Wanneer het einde van het frequentiebereik is bereikt, begint de radio opnieuw te zoeken vanaf
4.
het tegenovergestelde einde van het frequentiebereik.
5.
Pas desgewenst het volume aan met de Volumeknop.
Om uw radio uit te schakelen drukt u op de Aan/uit knop.
6.
Handmatig afstemmen – FM
1.
Druk op de Aan / uit knop om de radio in te schakelen.
Druk op de Audiobron knop om de FM-band te selecteren.
2.
Draai aan de Tuning knop om de gewenste frequentie te selecteren. De frequentie gaat in stap-
3.
pen van 50 kHz. Wanneer het einde van het frequentiebereik is bereikt, begint de radio opnieuw
te zoeken vanaf het tegenovergestelde einde van het frequentiebereik.
Pas desgewenst het volume aan met de Volumeknop. Om de radio uit te schakelen drukt u op de
4.
Aan / uit knop.
66
Page 68
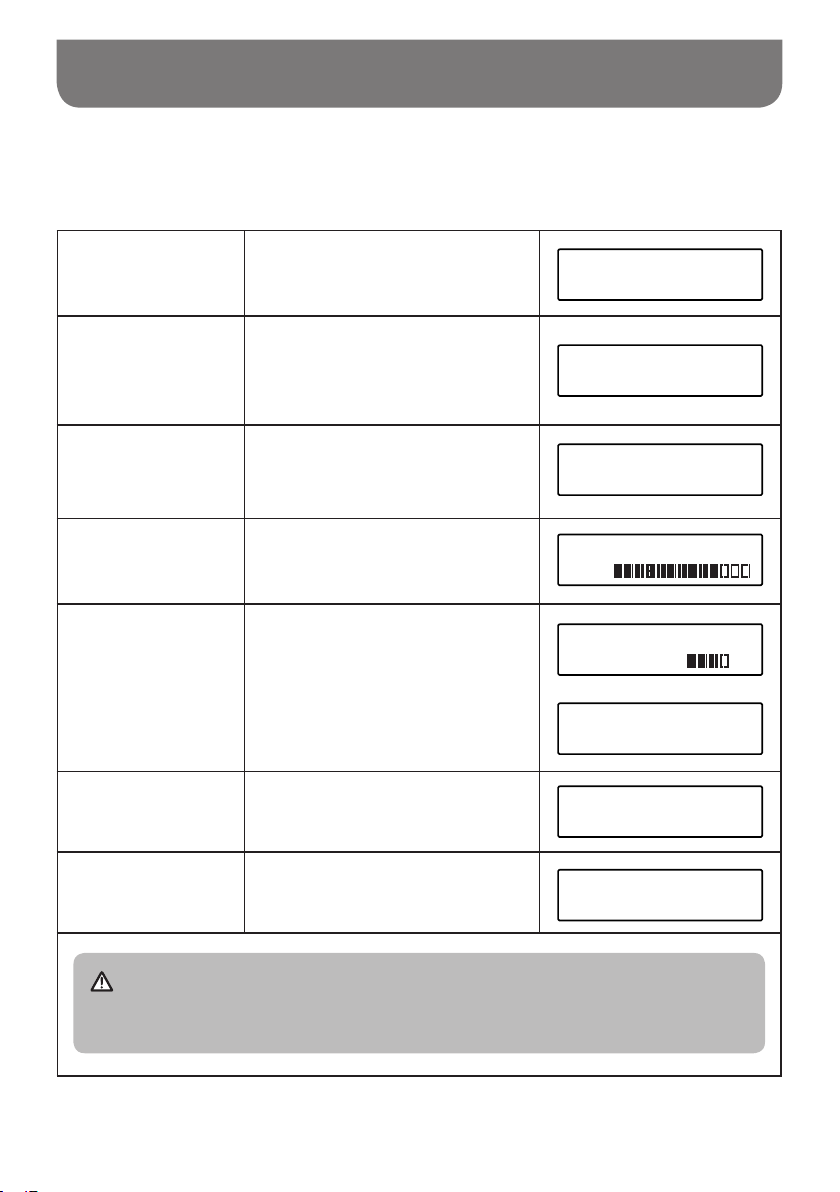
Weergave opties – FM
Uw radio heeft verschillende weergave opties in de FM-modus.
Druk op de Info knop om door de verschillende opties te bladeren
1.
a.
Radio Tekst
b.
Programmatype
c.
Frequentie
d.
Signaalsterkte
e.
Batterij niveau
f.
Tijd Toont de huidige tijd.
Toont tekstberichten zoals de artiest,
tracknaam, telefoonnummer, etc.
Toont het soort zender waarnaar
geluisterd wordt, zoals Pop, Klassiek,
Nieuws, etc.
Toont de frequentie van de huidige
zender.
Toont de signaalsterkte van de huidige
zender.
Toont tijdens het gebruik op batterijen
het huidige batterij niveau. (bij gebruik
op netstroom wordt het batterij niveau
niet weergegeven).
V.H.B.N
[No RadioText]
V.H.B.N
News
V.H.B.N
106.50MHz
V.H.B.N
SGLV
V.H.B.N
Bat.level
V.H.B.N
Mains current
V.H.B.N
2:18 PM
g.
Datum Toont de huidige datum.
OPMERKING
Als er geen RDS-informatie beschikbaar is, dan kan de radio geen zendernaam, tekst en
informatie over het programmatype tonen.
V.H.B.N
8-9-2016
67
Page 69
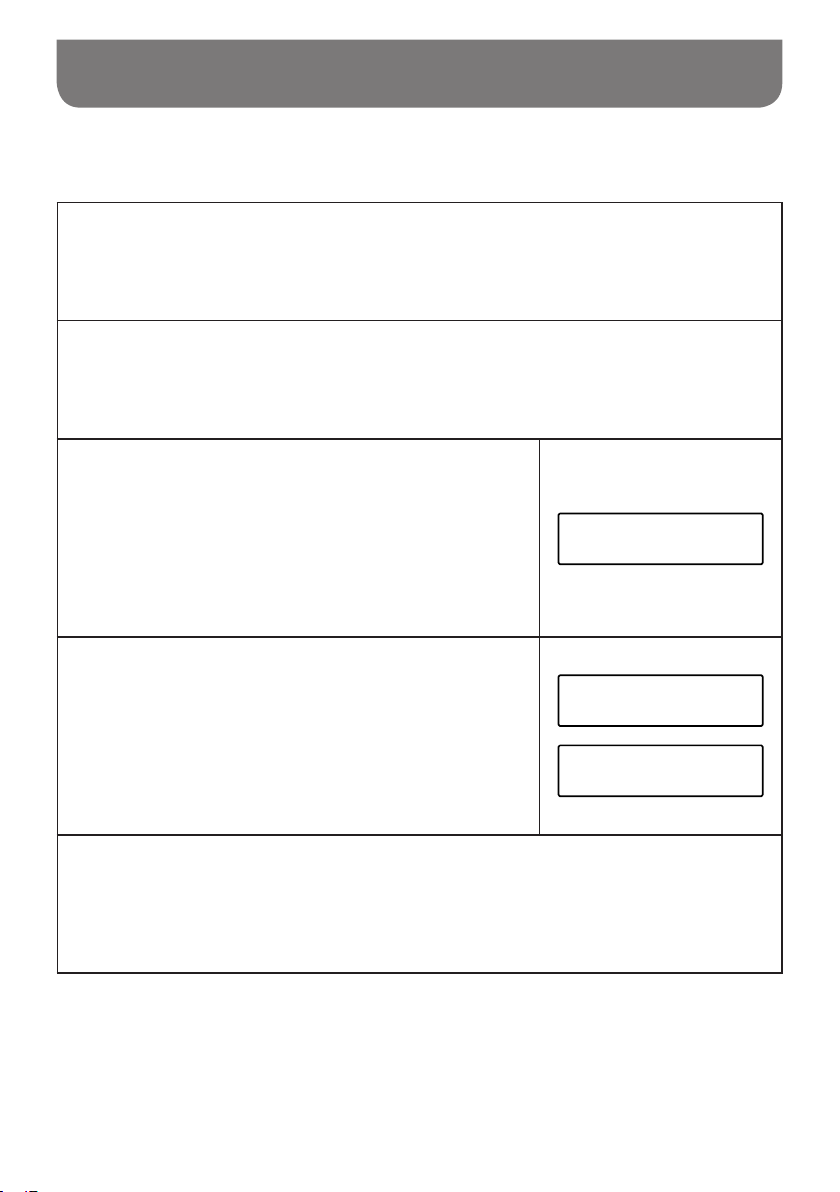
Scangevoeligheid – FM
Uw radio heeft een optie om bij de automatische scanfunctie minder sterke zenders te negeren. Door
de optie in te stellen op alleen sterke zenders, worden sterke zenders eenvoudiger gevonden.
Druk op de Aan / uit knop om de radio in te schakelen.
1
Druk op de Audiobron knop om de FM-band te selecteren.
2
Druk op de Menu knop om naar het menu te gaan.
Draai de Tuning knop tot “FM Scan setting”
3
wordt weergegeven in het display. Druk op de Tuning
knop om uw keuze te bevestigen. De huidige
instelling wordt aangegeven met een asterisk (*).
<FM scan setting >
FM
Draai de Tuning knop om te kiezen uit “Strong stations
only” (alleen sterke zenders) of “All stations” (alle
4
zenders). Door de optie “All stations” te kiezen worden
tijdens het scannen ook zenders met een zwakker signaal
gevonden.
Druk op de Tuning knop om uw keuze te bevestigen. De instelling wordt opgeslagen en blijft
van kracht tenzij veranderd of tot er een systeem reset wordt uitgevoerd.
5
68
FM scan setting *
<All stations >
FM scan setting
<Strong stations only >
Page 70
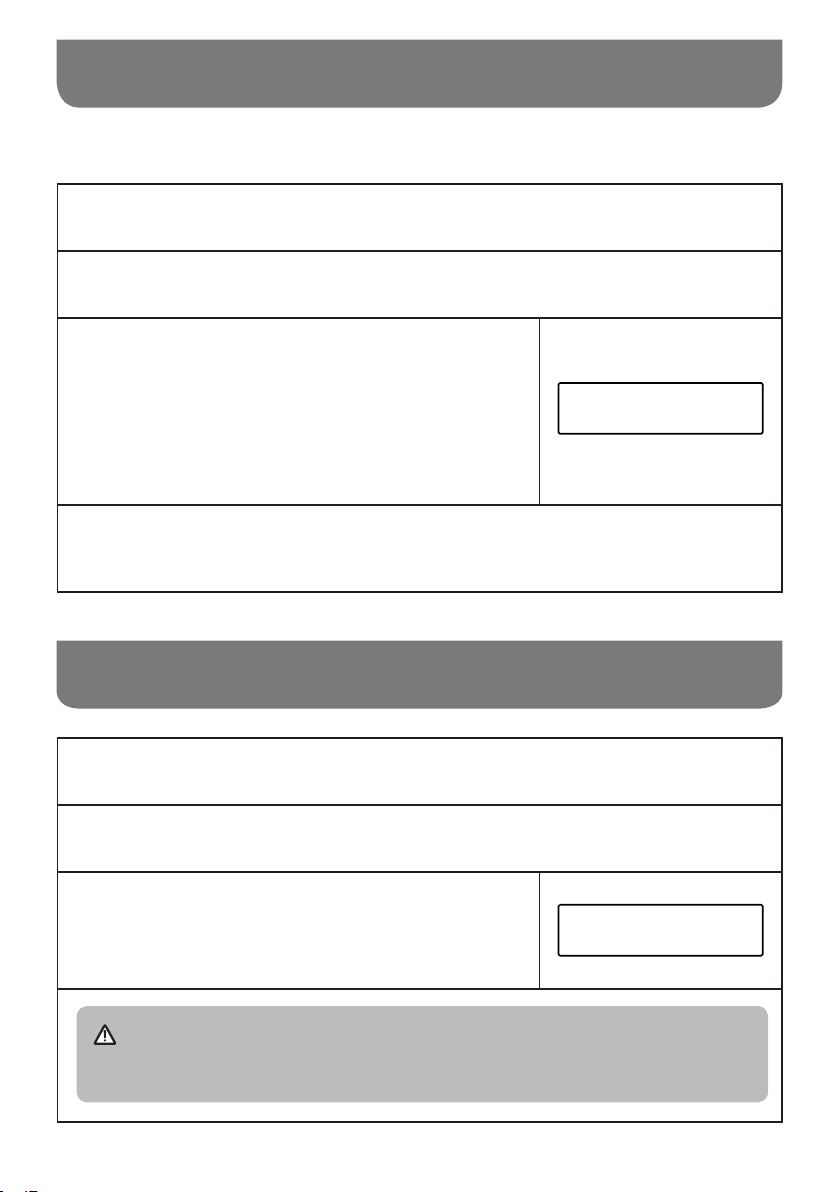
Voorkeuzezenders opslaan – DAB en FM
Uw radio beschikt over 5 voorkeuzezender voor FM en 5 voor DAB.
Druk op de Aan / uit knop om de radio in te schakelen.
1
Stem af op de gewenste zender.
2
Houd de knop van een voorkeuzezender ingedrukt tot
het display bijvoorbeeld de melding “Preset 1 sDYHG”
3
weergeeft. De zender is dan opgeslagen onder het
gekozen voorkeuzezender nummer. Het bijbehorende
voorkeuzezender nummer, b.v. “P1” wordt weergegeven
in het display. Herhaal deze procedure voor de resterende
voorkeuzezenders.
Zenders die zijn opgeslagen in het geheugen kunnen worden overschreven door de
bovenstaande procedure te volgen.
4
Preset 1
saved
Voorkeuzezender oproepen – DAB en FM
Druk op de Aan / uit knop om de radio in te schakelen.
1
Druk op de Audiobron knop om de FM of DAB-band te selecteren.
2
Druk op de knop van een voorkeuzezender om af te
stemmen op de zender die is opgeslagen onder de
3
desbetreffende voorkeuzezender.
OPMERKING
Wanneer er geen zender is opgeslagen onder de gekozen voorkeuzezender knop, toont het
display de tekst “Preset empty”.
87.50MHz P1
[No RadioText]
69
Page 71
Luisteren naar Bluetooth – muziek
U moet uw Bluetooth-apparaat koppelen met uw radio voordat u de verbinding tot stand kunt brengen
en kunt starten met het afspelen / streamen van Bluetooth muziek via uw radio. Koppelen creëert een
permanente ‘band’ waardoor twee apparaten elkaar kunnen herkennen.
Uw Bluetooth – apparaat voor het eerst koppelen
Druk op de Aan / uit knop om de radio in te schakelen en druk op de Audiobron knop om de
1.
Bluetooth modus te selecteren. Op het display wordt “Bluetooth pairing” weergegeven en op de
radio knippert het Bluetooth status LED ( ) snel om aan te geven dat de radio “discoverable”
(vindbaar) is.
Activeer Bluetooth op het bron-apparaat volgends de handleiding van dit apparaat. Ga op het
2.
bron-apparaat naar de Bluetooth-apparatenlijst en selecteer het apparaat met de naam ‘UBOX
500R. (Bij sommige apparaten, die zijn uitgerust met een eerdere versie dan Bluetooth 2.1 kan om
een pincode gevraagd worden, vul dan ‘0000’ in).
3.
Zodra de apparaten verbonden zijn, klinkt er een bevestigende toon en de naam van het
verbonden bron-apparaat wordt op het display weergegeven. Het Bluetooth status LED ( )
brand continu blauw. U kunt nu simpelweg muziek selecteren en afspelen op uw bron-apparaat.
Het volume kan worden ingesteld op uw bron-apparaat en / of rechtstreeks op de radio.
Gebruik de bediening op uw bron-apparaat of gebruik de bediening op de radio om te starten /
4.
stoppen en om de vorige of volgende track te selecteren.
OPMERKING
● Als er 2 Bluetooth-apparaten, bij het koppelen voor de eerste keer, naar uw radio zoeken,
dan wordt de radio op beide apparaten als beschikbaar getoond. Als er echter één apparaat
verbinding maakt met de radio, zal het andere Bluetooth-apparaat de radio niet vinden in de
lijst.
● Als het Bluetooth-apparaat buiten het Bluetooth-bereik van de radio wordt verplaatst, dan zal
de Bluetooth-verbinding met de radio tijdelijk worden verbroken. Uw radio zal automatisch
opnieuw verbinding maken met het Bluetooth-apparaat als het weer binnen bereik komt. Houd
er rekening mee dat er in de periode dat de verbinding is verbroken geen andere Bluetoothapparaten mogen koppelen of verbinden maken met de radio.
● Als ‘UBOX 500R” wordt getoond in de lijst met Bluetooth-apparaten, maar u geen verbinding
kunt maken met de radio, verwijder het item dan uit de lijst en koppel het apparaat nogmaals
met de radio door de eerder beschreven stappen te volgen.
● Het effectieve bereik tussen het systeem en het gekoppelde apparaat is ongeveer 10 meter (30
voet). Eventuele obstakels tussen het systeem en het apparaat kunnen het bereik reduceren.
● De prestaties van Bluetooth-connectiviteit kunnen variëren, afhankelijk van de verbonden
Bluetooth-apparaten. Bekijk de Bluetooth-mogelijkheden die uw apparaat biedt voordat u
verbinding maakt met de radio. Het is mogelijk dat niet alle functies worden ondersteund op
sommige gekoppelde Bluetooth-apparaten.
● Sommige mobiele telefoons kunnen de verbinding met de radio verbreken wanneer er
oproepen worden gemaakt of ontvangen. Sommige apparaten kunnen het geluid van de
Bluetooth-audiostream tijdelijk uitschakelen wanneer er sms’jes of e-mails worden ontvangen
of voor andere redenen die niets met het streamen van audio te maken hebben. Dergelijk
gedrag is een functie van het Bluetooth-apparaat en duidt niet op een fout met uw radio.
70
Page 72
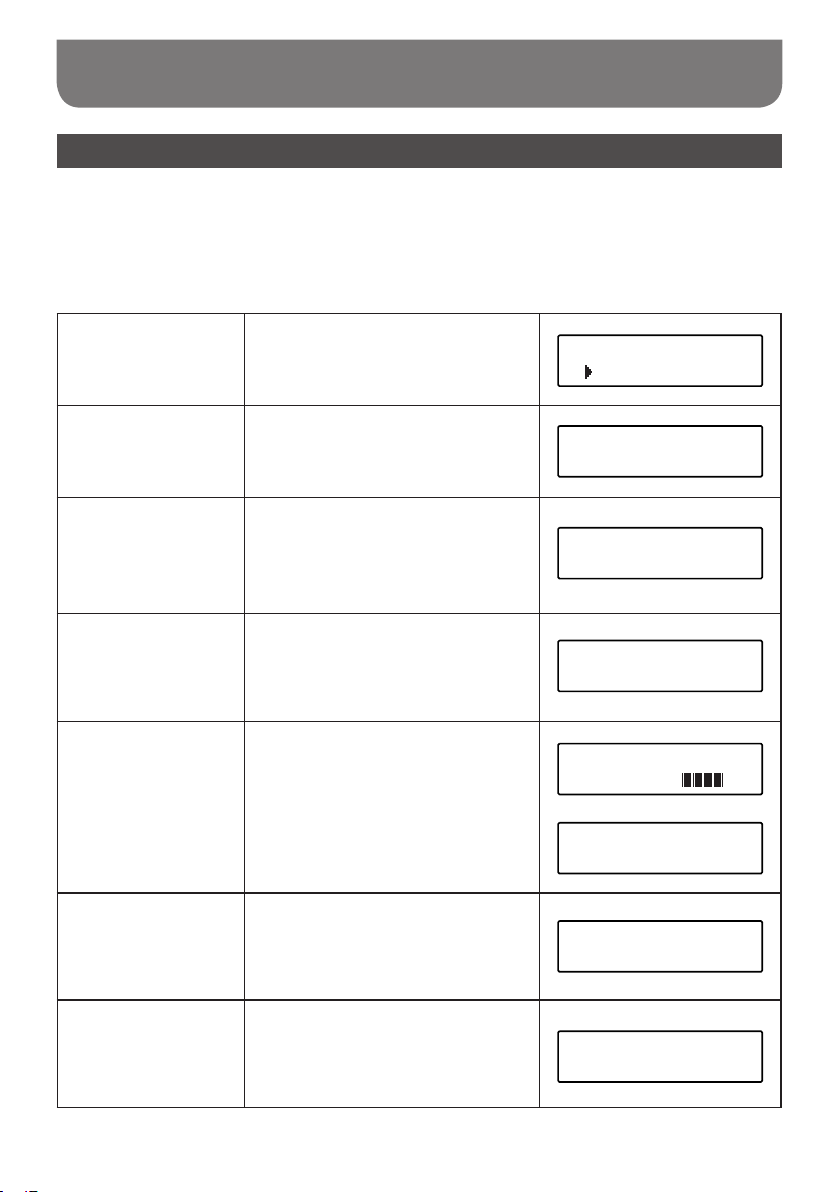
Luisteren naar Bluetooth – muziek
Weergave opties – Bluetooth
Uw UBOX 500R heeft verschillende weergave opties in de Bluetooth modus. De beschikbaarheid is
afhankelijk van de informatie in het bron-bestand.
Druk op de Info knop om door de verschillende opties te bladeren:
1.
a.
Track status
b.
Track naam
c.
Artiest
d.
Album
e.
Batterij niveau
Toont de status van de huidige track.
Toont de titel van de huidige track.
Toont de artiestnaam van de huidige
track.
Toont de albumnaam waar de huidige
track onderdeel van uitmaakt.
Toont tijdens het gebruik op batterijen
het huidige batterij niveau. (bij gebruik
op netstroom wordt het batterij niveau
niet weergegeven).
H30-U10
H30-U10
Title:Waiting For You
H30-U10
Artist:lsobel Anderson
H30-U10
Album:In My Garden
H30-U10
Bat.level
H30-U10
Mains current
f.
g.
Tijd
Datum
Toont de huidige tijd.
Toont de huidige datum.
H30-U10
16:55
H30-U10
4-10-2016
71
Page 73
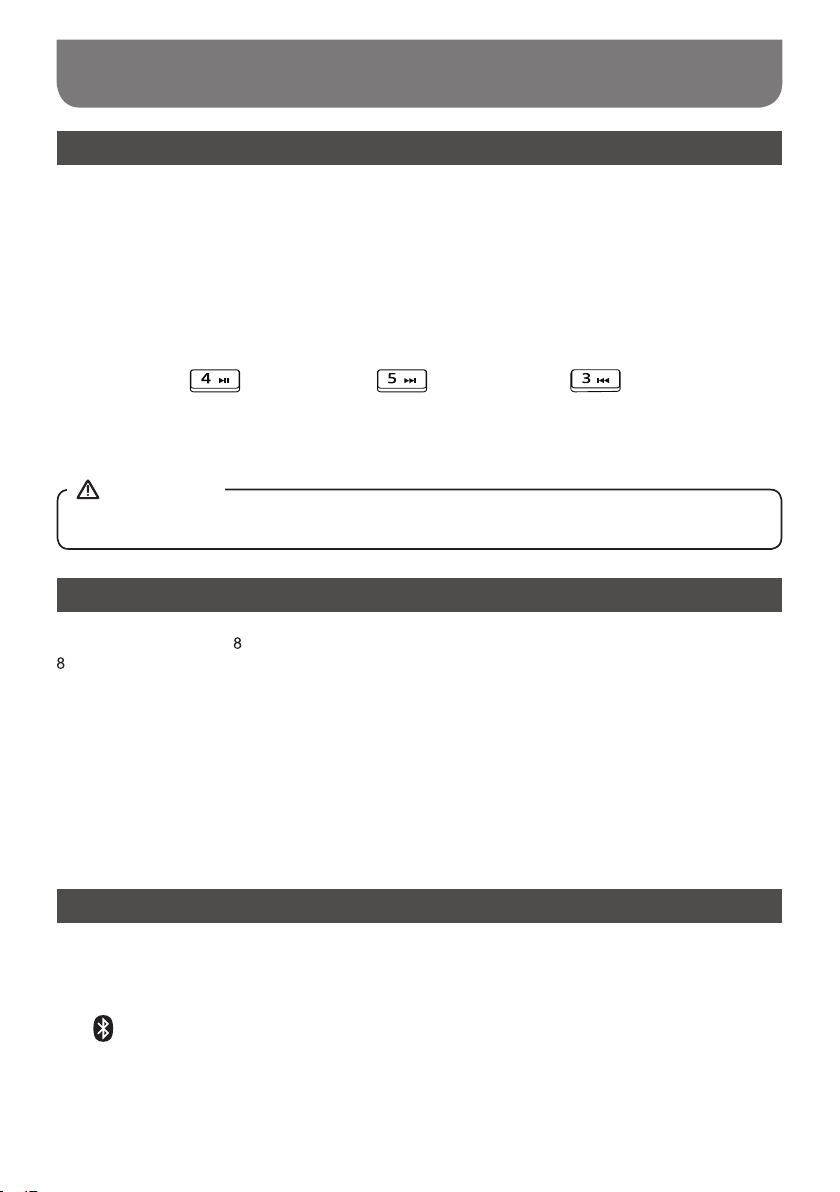
Luisteren naar Bluetooth – muziek
Audiobestanden afspelen in de Bluetooth-modus
Als u uw radio succesvol heeft verbonden met het gekozen Bluetooth-apparaat, dan kunt u het
afspelen van muziek starten met behulp van de bedieningselementen van het verbonden Bluetoothapparaat.
Zodra het afspelen is gestart, kunt u het volume naar wens instellen met behulp van de
1.
Volumeknop op uw radio of de volumeregeling op uw Bluetooth bron-apparaat.
Gebruik de bedieningselementen op uw bron-apparaat om het afpelen te starten / pauzeren en
2.
naar de gewenste track te gaan. Als alternatief kunt u het afspelen ook bedienen met de knoppen
Play / Pause ( ), Volgende track ( ) , en Vorige track ( ) op uw radio.
Druk op de Fast forward of Rewind knop en houd deze ingedrukt om vooruit of achteruit te spoelen
3.
in de huidige track. Laat de knop los wanneer het gewenste punt is bereikt.
OPMERKING
Het is mogelijk dat niet alle bron-apparaten of applicaties reageren op alle bedieningselementen.
Afspelen vanaf apparaten waarmee eerder is gekoppeld
De UBOX 500R kan tot apparaten onthouden waarmee eerder is gekoppeld. Als er met meer dan
apparaten is gekoppeld, dan zal het apparaat waarmee het langst niet is gekoppeld worden gewist
uit het geheugen.
De radio onthoudt de Bluetooth-apparaten waarmee eerder verbinding is gemaakt en zal automatisch
proberen om te koppelen met het apparaat waarmee het laatst verbinding is gemaakt. Als dit
apparaat niet beschikbaar is, probeert de radio verbinding te maken met het apparaat waarmee
de een na laatste keer verbinding is gemaakt.
U kunt ook een Bluetooth-apparaat selecteren door in de Bluetooth modus op kort op de Bluetooth
knop te drukken, een apparaat te kiezen en op de Tuning knop te drukken.
De verbinding met uw Bluetooth – apparaat verbreken
Druk op de Bluetooth pairing knop en houd deze 2-3 seconden ingedrukt om de verbinding te
1.
verbreken of schakel Bluetooth op uw bron-apparaat uit. Er klinkt een bevestigende toon en op het
display wordt “Bluetooth pairing” weergegeven en op de radio knippert het Bluetooth status LED
( ) snel om aan te geven dat de radio weer “discoverable” (vindbaar) is.
U kunt ook op de Audiobron knop drukken om naar een andere modus te gaan en op deze manier
2.
de Bluetooth modus te verbreken.
72
Page 74
Gebruik maken van USB – sticks
BELANGRIJK
Uw radio kan uitsluitend overweg met USB-sticks. Het is niet mogelijk om harddisks of
1.
andere USB-apparaten aan te sluiten.
Het is mogelijk om SD of SDHC-kaarten te gebruiken, echter door de grote diversiteit in
2.
producten en adapters is de werking hiervan niet gegarandeerd.
Uw radio is getest met een breed scala aan USB-sticks met een capaciteit tot 32Gb. Het
3.
ondersteunt USB 2.0 fullspeed en USB 3.0.
OPMERKING
Als u USB 3.0 gebruikt, kan het detecteren langer duren.
USB-sticks moeten gebruik maken van het FAT- of FAT 32-bestandssysteem.
4.
5.
De audioformaten die worden ondersteund voor het afspelen zijn MP3, WMA en AAC.
Afspelen biedt geen ondersteuning aan bestanden die zijn gecodeerd met behulp van WMA
lossless, WMA Voice, WMA 10 professional, noch aan bestanden van elk formaat dat is
voorzien van DRM-beveiliging.
OPMERKING
Om schade aan uw radio en USB-stick te voorkomen, plaats de radio dusdanig dat de USB-
1.
stick niet kan worden geraakt wanneer deze is aangesloten.
2.
Verwijder de USB-stick voor u de radio gaat vervoeren of de USB-modus langere tijd niet
gebruikt.
3.
Plaats de radio eerst in Standby modus voor u de USB-stick verwijderd.
De USB-aansluiting is alleen bedoeld voor USB-sticks. Het gebruik van harddisk of andere
4.
media is niet ondersteund.
Het afspelen van MP3-bestanden op een MP3-speler verbonden via de USB-aansluiting
5.
wordt niet gegarandeerd.
6.
Grote bestanden of USB-apparaten met een hoog geheugen hebben meer tijd nodig om te
lezen.
73
Page 75
Gebruik maken van USB – sticks
Bestanden afspelen vanaf USB – sticks
Plaats de USB-stick voorzichtig in de USB-poort.
1.
2.
Druk op Aan / uit knop (Power) om de radio in te schakelen. Druk om de USB-modus te selecteren
op Audiobron knop (Source). “Loading” wordt weergegeven op het lcd-display. De radio zal nu
starten met het afspelen van de bestanden op de USB-stick.
OPMERKING
Er worden alleen ASCII-tekens ondersteunt voor weergave.
3.
Om te pauzeren, druk op de the Play / Pauze knop ( ). Om verder af te spelen druk weer op
de Play / Pauze knop ( ).
OPMERKING
● Als u de radio uitschakelt, wordt de laatst afgespeelde track hervat als de radio de volgende
keer wordt aangezet.
● Als u overschakelt naar een andere modus tijdens het afspelen vanaf het USB-
geheugenapparaat, wordt het afspelen gepauzeerd. Als u opnieuw naar de USB-modus
schakelt, wordt het afspelen hervat vanaf het punt waarop het werd gepauzeerd.
● Het wordt aanbevolen om alleen muziekbestanden (MP3 / WMA / AAC) op te slaan op uw
USB-geheugenapparaat. Als er één map andere bestanden bevat dan muziekbestanden, slaat
uw radio dit bestand / deze map over en het bestand / map nummer dat op het scherm wordt
weergegeven over.
74
Page 76
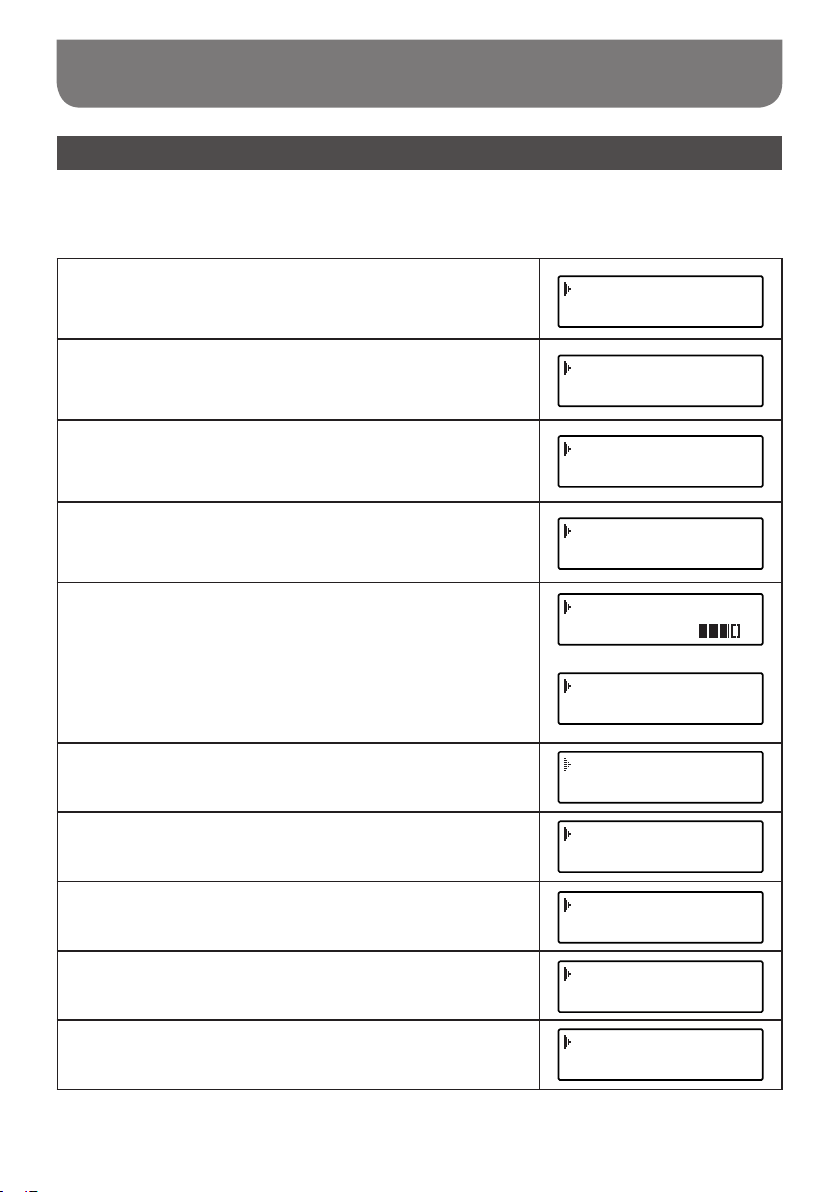
Gebruik maken van USB – sticks
Display modes
Uw radio heeft in de USB-modus een reeks display-opties. De beschikbaarheid van de informatie is
afhankelijk van de specieke media-bestanden.
a.
Bestandsnaam
b.
Map
c.
Genre
d.
Map en tracknummer
e.
Battery niveau / netstroom
f.
Tijd
g.
Datum
00:30
File:01 Vincent
00:47
Folder:USB MUSIC
01:01
Genre:MP3
01:07
F003 T001
01:08
Bat.level
01:13
Mains current
01:18
17:17
01:23
17-5-2018
h.
i.
j.
Titel
Artiest
Album
01:49
Title:Vincent
02:10
Artist:Don McLea
02:26
Album:
75
Page 77
Gebruik maken van USB – sticks
Een bestand selecteren
Druk terwijl het USB-geheugenapparaat speelt op de Fast Forward knop( ) of Rewind knop
1.
( ) om naar het gewenste bestand te gaan. Het bestandsnummer wordt bijgewerkt op het
display. Als er meer dan één map is, moeten alle bestanden in de huidige map zijn afgespeeld en
de volgende map worden afgespeeld.
Druk op de Fast Forward knop en houd deze ingedrukt( ) of doe dit met de Rewind knop
2.
( ) om binnen de huidige track vooruit of achter te spoelen. Laat de knop los wanneer u de
gewenste positie heeft bereikt..
Een map kiezen
Druk terwijl het USB-geheugenapparaat speelt op de Map omhoog knop ( ) of Map
omlaag knop ( ) . De eerste track van de gekozen map start met spelen.
OPMERKING
Als uw USB-stick een map bevat zonder bestanden, zal de radio de map overslaan en de
bestanden in de volgende map afspelen.
Afspeel modus
Druk tijdens het afspelen van de bestanden op de USB-stick op de Afspeel modus knop om een van
de volgende modi te selecteren:
Herhaal 1
Herhaal map : speel de bestanden herhaaldelijk af in de huidige map.
Herhaal alles : herhaaldelijk alle mappen afspelen.
Shufe
76
: speel het huidige bestand herhaaldelijk af.
: willekeurig bestanden afspelen.
Page 78
Opladen met de USB – poort
Uw radio beschikt over een USB-poort die is bedoeld voor het opladen van een iPhone,
smartphone of soortgelijke apparaten. De oplaadtijd kan variëren en het kan langer duren dan
wanneer de oplader van de fabrikant die met het toestel werd meegeleverd wordt gebruikt. De radio
kan de iPhone, smartphone of soortgelijke apparaten opladen wanneer het netsnoer wordt gebruikt en
de radio is ingeschakeld of in de stand-bymodus staat.
BELANGRIJK
● De USB-aansluiting kan alleen stroom leveren voor USB-aansluitingen met maximaal 1A 5V
en de meeste iPhone-modellen. Het ondersteunt echter geen externe harde schijf en alle
mobiele telefoons en elektronische apparaten.
● Het is mogelijk dat de oplader bepaalde USB-apparaten niet van stroom voorziet.
● Sluit voedingsbron niet aan op de USB-poort. Anders bestaat het risico op brand. De USB-
poort is alleen bedoeld voor het opladen van een lager voltage-apparaat.
● Steek geen spijker, draad, enz. in de USB-voedingspoort. Anders kan een kortsluiting leiden
tot rook en vuur.
● Sluit de ze USB -aanslui ting niet aan o p d e U SB -poor t v a n uw pc, aange zien dit
hoogstwaarschijnlijk een defect aan de apparaten kan veroorzaken.
● Gebruik de USB-aansluiting nooit in regenac htige of vocht ige omstandigheden om te
voorkomen dat vocht de radio binnendringt.
Loudness aan / uit
Druk, wanneer de radio aan staat, op Loudness Aan/uit knop voor compensatie op de lagere en
hogere geluidsfrequenties. Het effect zal het best hoorbaar zijn als de radio is ingesteld op een lager
volumeniveau. Op het display wordt “Loudness On” weergegeven als de functie is ingeschakeld.
Equalizer functie
1. Druk op de Aan / uit knop om de radio in te schakelen.
2. Druk op de EQ knop om naar het EQ instellingen menu te gaan.
3.
Draai aan de Tuning knop voor de gewenste instelling. Druk daarna op de Tuning knop om de
keuze te bevestigen.
77
Page 79
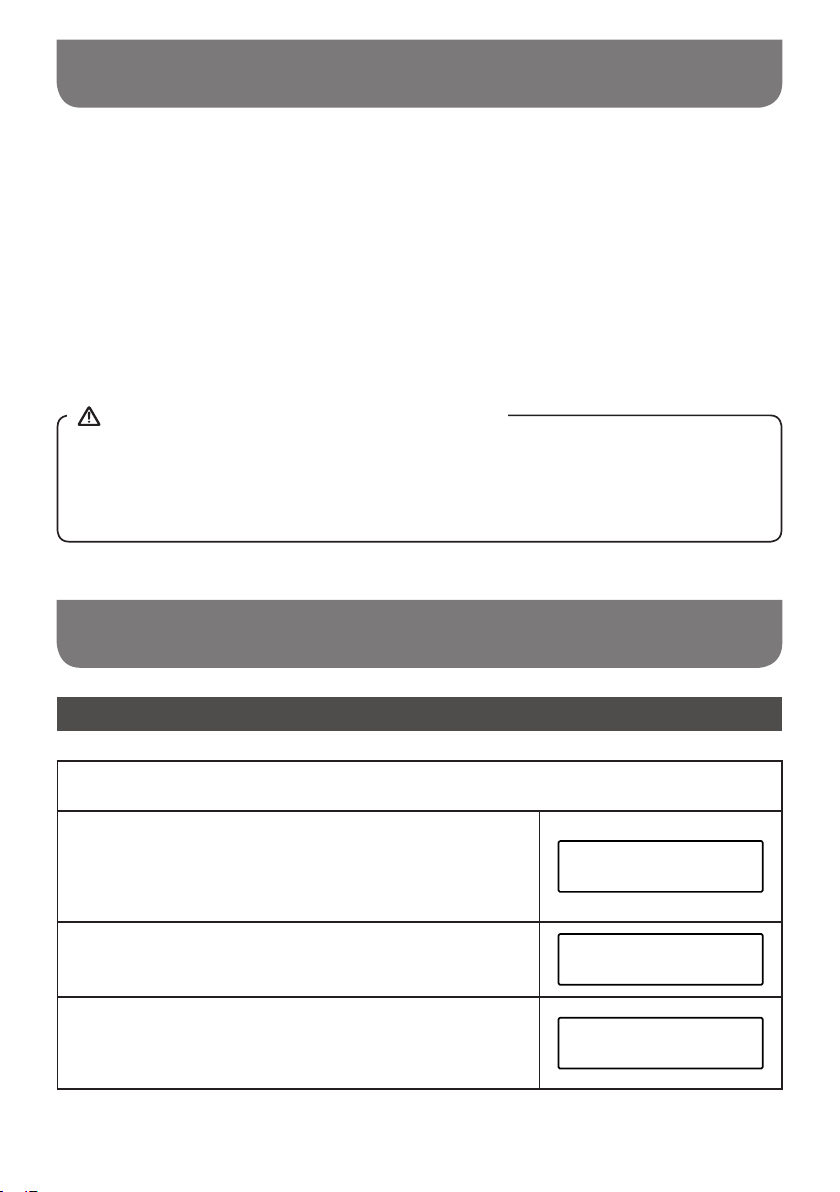
My EQ prole instellen
1.
Druk op de Aan / uit knop om de radio in te schakelen.
2.
Druk op de EQ knop om naar het EQ instellingen menu te gaan.
3.
Draai aan de Tuning knop om "My EQ" te kiezen. Druk daarna op de Tuning knop om te selecteren.
4.
Draai aan de Tuning knop om “Treble” of “Bass” te kiezen. Druk daarna op de Tuning knop om
te selecteren.
5.
Draai aan de Tuning knop het gewenste Treble of Bass niveo te kiezen. Druk daarna op de
Tuning knop om te selecteren.
VEILIGHEIDS – EN OMGEVINGS OPMERKING
Om mogelijke gehoorschade te voorkomen niet op een hoog volume gedurende lange periode
luisteren of uw oren te dicht bij de speaker houden.
Gebruik een volumeniveau dat verantwoord is, maar zeker ook op respectabele wijze rekening
houdt met de situatie en andere mensen en dieren in de omgeving.
De klok instellen
Het tijdformaat instellen
Druk op de Aan / uit knop om de radio in te schakelen.
1
Druk op de Menu knop om naar het menu te gaan.
Draai aan de Tuning knop tot “System” wordt
2
weergegeven. Druk op de Tuning knop om uw keuze te
bevestigen.
Draai aan de Tuning knop tot “Time” wordt weergegeven
en druk op de Tuning knop om te bevestigen.
3
Draai aan de Tuning knop tot “KRXUIRUPDW”
wordt weergegeven en druk op de Tuning knop
4
om te bevestigen.
78
FM
<System >
System
<Time >
Time
<12/24 hour format >
Page 80
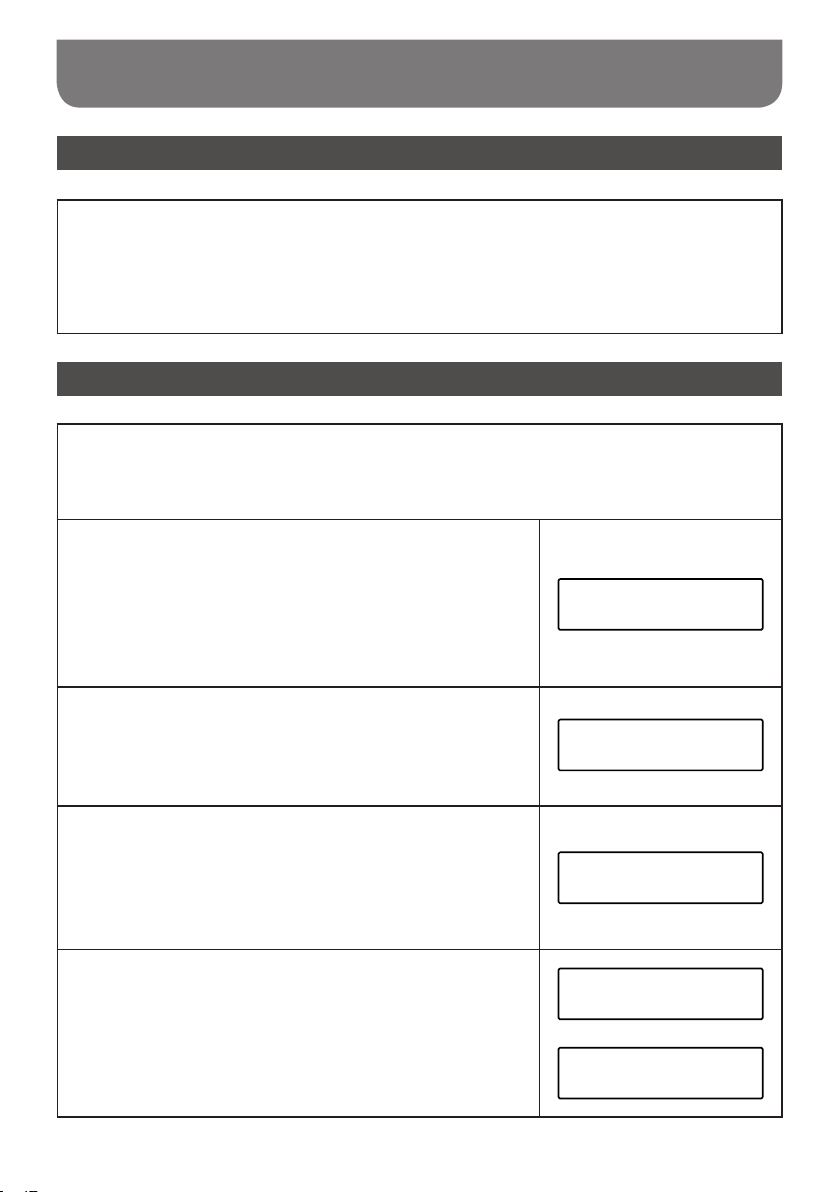
De klok instellen
Het tijdformaat instellen
Draai aan de Tuning knop om 12 - of 24 - uursformaat te kiezen en druk op de Tuning knop
om te bevestigen. Het geselecteerde formaat wordt gebruikt in standby modus en tijdens het
5
spelen. Wanneer voor een 12-uursformaat is gekozen, wordt de tijd weergegeven met AM of
PM weergave.
Datum weergave instellen
Druk op de Aan / uit knop om de radio in te schakelen.
1
Druk op de Menu knop om naar het menu te gaan. Draai
aan de Tuning knop tot “System” wordt weergegeven.
2
Druk op de Tuning knop om uw keuze te bevestigen.
<System >
FM
Draai aan de Tuning knop tot “Time” wordt weergegeven
en druk op de Tuning knop om te bevestigen.
3
Draai aan de Tuning knop tot “Set date format” wordt
weergegeven en druk op de Tuning knop om te
4
bevestigen.
Draai aan de Tuning knop om te kiezen uit datum
weergave “DD-MM-YYYY” (dag-maand-jaar) of “MM-DD-
5
YYYY” (maand-dag-jaar) en druk op de Tuning knop om
te bevestigen.
System
<Time >
Time
<Set date format >
Set date format*
<DD-MM-YYYY >
Set date format
<MM-DD-YYYY >
79
Page 81

De klok instellen
Automatisch de klok instellen
Uw radio zal normaal gesproken de klok automatisch instellen d.m.v. het DAB-of FM-signaal. Wanneer
er geen signaal beschikbaar is, kunt u de klok handmatig instellen.
Na een stroomonderbreking stelt de radio de klok automatisch opnieuw in wanneer de radio in DAB of
FM-modus wordt gestart. U kunt er ook voor kiezen om niet automatisch te updaten. U dient dan na
een stroomonderbreking altijd de klok handmatig in te stellen.
Druk, wanneer de radio aan staat op de Menu knop om naar het menu te gaan.
1
Draai aan de Tuning knop t o t “ System” wordt
weergegeven. Druk op de Tuning knop om uw keuze te
2
bevestigen.
Draai aan de Tuning knop tot “Time” wordt weergegeven.
Druk op de Tuning knop om uw keuze te bevestigen.
3
Draai aan de Tuning knop tot “ T ime aut o update ”
wordt weergegeven. Druk op de Tuning knop om uw
4
keuze te bevestigen.
Draai aan de Tuning knop om te kiezen uit “No update”,
“Update from all” “Update from DAB” of “Update from
5
FM”. Druk op de Tuning knop om uw keuze te bevestigen.
FM
<System >
System
<Time >
Time
<Time auto update >
Time auto update *
<Update from all >
Time auto update
<Update from DAB >
Time auto update
<Update from FM >
Time auto update
<No update >
OPMERKING
Wanneer u “Update from all”, “Update from DAB”, “Update from FM” heeft gekozen, wordt
de huidige tijd weergegeven. Wanneer u onvoldoende ontvangst heeft voor weergave van
de huidige tijd, verplaats dan de radio of kies voor handmatig instellen van de klok.
80
Page 82
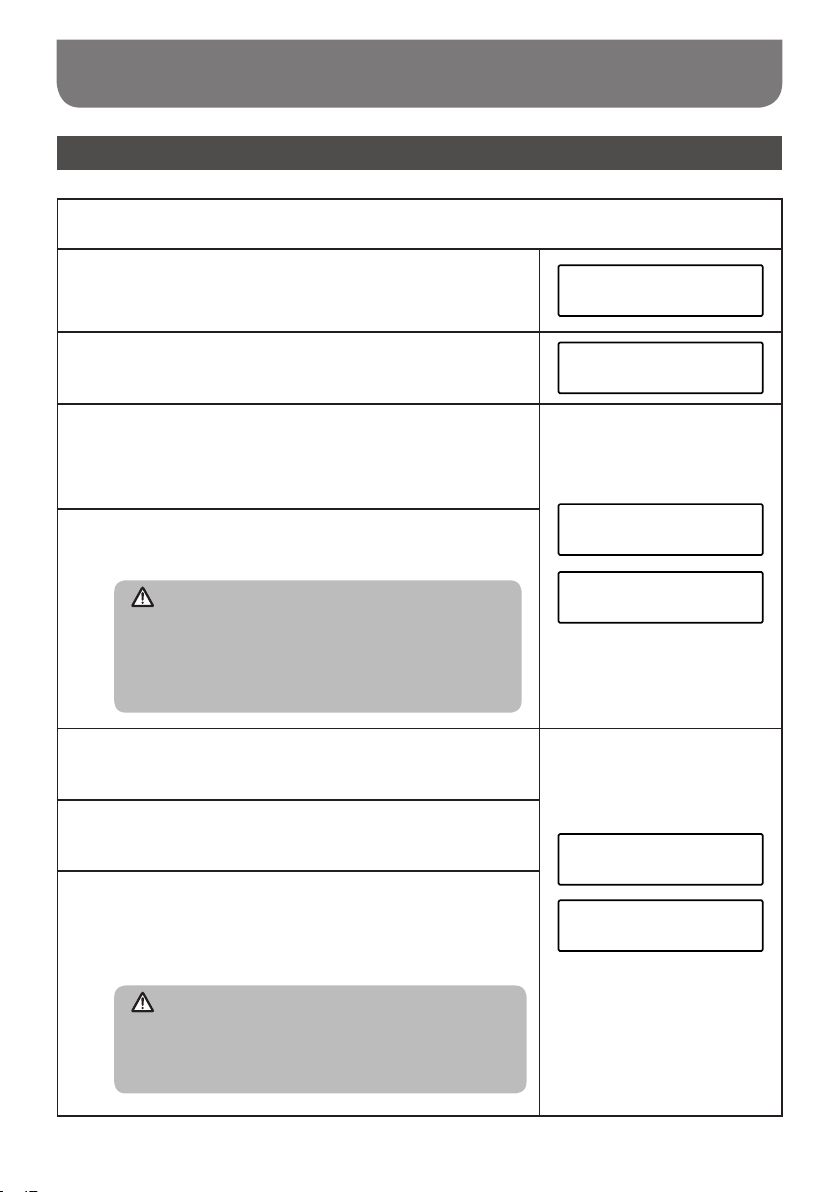
De klok instellen
Handmatig de klok instellen
Druk, wanneer de radio aan staat op de Menu knop om naar het menu te gaan.
1
Draai aan de Tuning knop tot “System” wordt
weergegeven. Druk op de Tuning knop om uw keuze te
2
bevestigen.
FM
<System >
Draai aan de Tuning knop tot “Time” wordt weergegeven.
3
Druk op de Tuning knop om uw keuze te bevestigen.
Draai aan de Tuning knop tot “Set Time/Date” wordt
weergegeven. Druk op de Tuning knop om uw keuze te
4
bevestigen. De ‘uren’ knipperen, draai de Tuning knop om
het juiste uur te kiezen.
Druk op de Tuning knop om te bevestigen. De ‘minuten’
knipperen. Draai de Tuning knop om de juiste minuten te
5
kiezen.
OPMERKING
Wanneer de radio op 12-uursformaat is ingesteld, is
er een optie voor het instellen van AM of PM. Draai
de Tuning knop om AM of PM te selecteren. Druk op
de Tuning knop om te bevestigen.
Wanneer de radio is ingesteld op datum weergave “DDMM-YYYY” gaat nu de ‘dag’ knipperen, draai aan de
6
Tuning knop om de juiste dag in te stellen.
Druk op de Tuning knop om te bevestigen. De ‘maand’
knippert, draai aan de Tuning knop om de juiste maand in
7
te stellen.
Druk op de Tuning knop om te bevestigen. Het ‘jaar’ knippert,
draai aan de Tuning knop om het juiste jaar te kiezen. Druk op
8
de Tuning knop om te bevestigen. Het display zal “Time Saved”
weergeven en het menu afsluiten.
System
<Time >
Time
<Set Time/Date >
Set Time
2:36 PM
Set date
21-9-2016
Time
Saved
OPMERKING
Wanneer de radio is ingesteld op datum weergave
“MM-DD-YYYY” worden stap 7 en 8 involgorde
omgewisseld.
81
Page 83
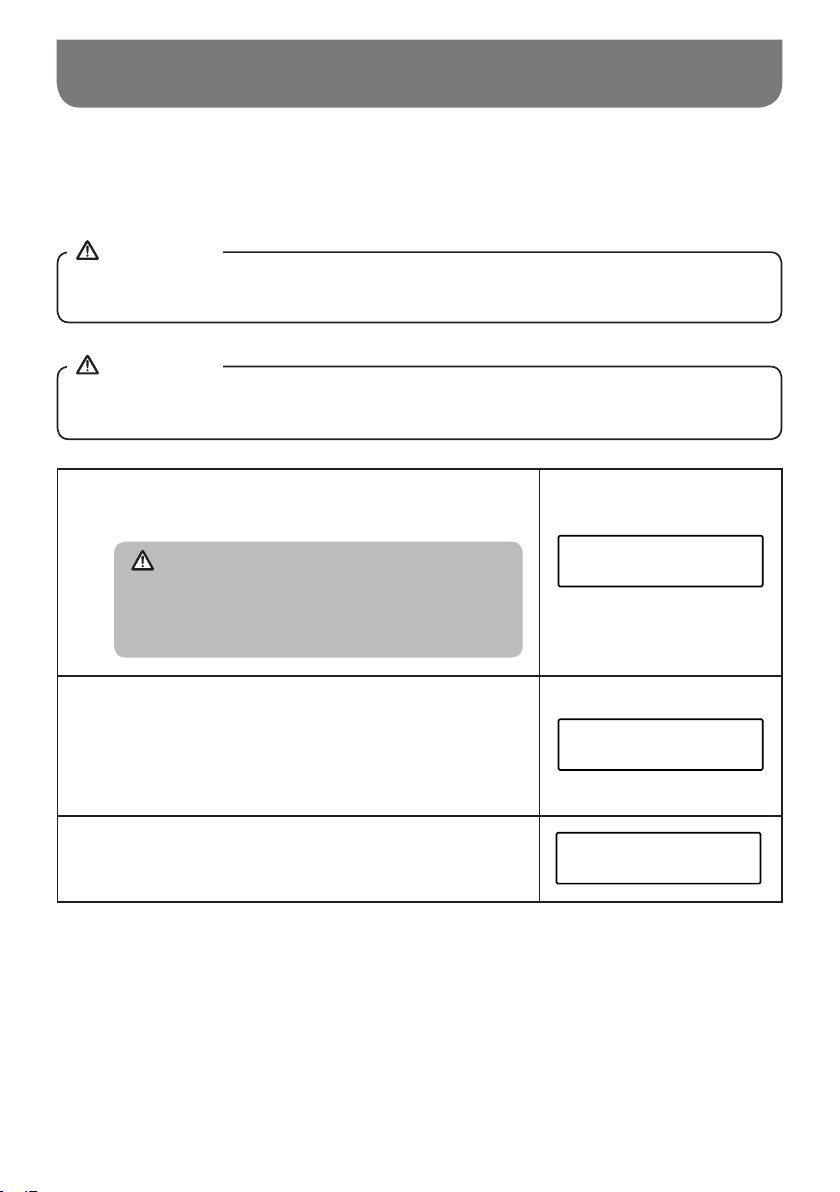
Het alarm instellen
Uw radio beschikt over 2 aparte alarmen die kunnen worden ingesteld om u te wekken met radio of
zoemeralarm. In het geval van stroomonderbreking zal het ingebouwde geheugen van uw radio de
alarminstellingen onthouden tot de stroom weer is ingeschakeld. Zorgt dat de tijd is ingesteld voordat
het alarm instelt.
OPMERKING
Wanneer u de radio enkel op batterijen gebruikt en is uitgeschakeld kan het alarm niet worden
ingesteld en geactiveerd.
OPMERKING
Als er gedurende 10 seconden geen knoppen worden ingedrukt, dan zal de radio de modus voor
het instellen van het alarm verlaten.
Druk op de Alarm 1 knop, bijvoorbeeld. “Alarm 1: Setting”
wordt weergegeven op het display.
1
OPMERKING
wanneer de tijd niet is ingesteld wordt “Time not
set” weergegeven. Gebruik dan de Tuning knop om
de tijd in te stellen. Wanneer dit is gebeurd, gaat u
verder met stap 2.
Alarm 1:Setting
Off
Druk op de Tuning knop om de instellingen te openen. De
alarm status knippert op het display.
2
Draai aan de Tuning knop om “On” of “Off” te kiezen.
Wanneer “Off” gaan alle instellingen voor dat alarm
verloren. Met “On” gekozen, druk op de Tuning knop, de
uren knipperen in het display.
Draai aan de Tuning knop om het gewenste uur te
selecteren en druk op de Tuning knop om te selecteren.
3
De minuten knipperen nu in het display.
82
Alarm 1:Setting
On
Alarm 1:Time
10:00
Page 84
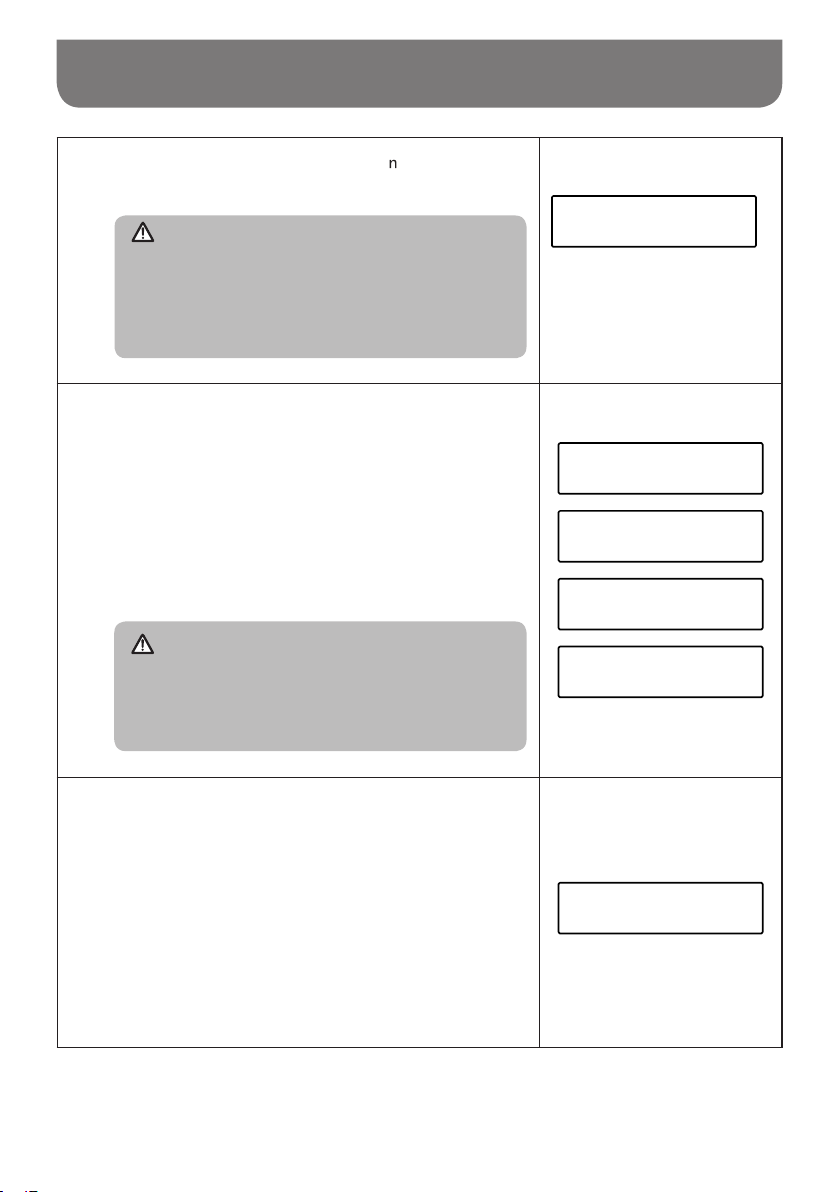
Het alarm instellen
Draai aan de Tuning knop om de minute in te stellen en
druk op de Tuning knop om te bevestigen.
4
OPMERKING
Als de radio is ingesteld op het 12-uursformaat, dan
zal er ook een optie verschijnen voor het instellen
van AM of PM. Draai aan de Tuning knop om AM
of PM te selecteren. Druk op de Tuning knop om te
bevestigen.
Draai aan de Tuning knop om de gewenst bron voor het
alarm te kiezen (DAB, FM, Zoemer).
5
Druk op de Tuning knop wanneer de gewenste bron is
geselecteerd. Wanneer als bron Zoemer is gekozen, ga
dan verder bij stap 6.
Als er een radiomodus wordt geselecteerd, dan kan
het radioalarm worden ingesteld op een zender die is
opgeslagen als voorkeurszender of op de zender die het
laatst is beluisterd. Draai voor een voorkeuze zender de
Tuning knop om voorkeuze 1-5 te kiezen.
OPMERKING
U kunt alleen een zender kiez en die reeds i s
opgeslagen.
Druk op de Tuning knop om te beves tigen. De
alarmfrequentie knippert op het display.
Alarm 1:Time
10:00
Alarm 1:Mode
Buzzer
Alarm 1:Mode
FM
Alarm 1:Mode
Last listened
Alarm 1:Mode
1: 87.50MHz
Uw alarm kan worden ingesteld om eenmalig, dagelijks,
op weekdagen of in de weekenden te klinken.
6
Once – het alarm klinkt eenmalig.
Daily – het alarm klinkt elke dag.
Weekdays – het alarm klinkt op weekdagen.
Weekends – het alarm klink in de weekenden.
Draai aan de Tuning knop en druk daarna op de Tuning
knop om te bevestigen.
●
Bij de instelling dagelijks, weekdagen of weekenden,
ga verder bij stap 10. Wanneer u het alarm instelt
op eenmalig, dan moet u de dag, maand en het jaar
instellen, zoals beschreven in de volgende stappen.
Alarm 1:Day
Once
83
Page 85
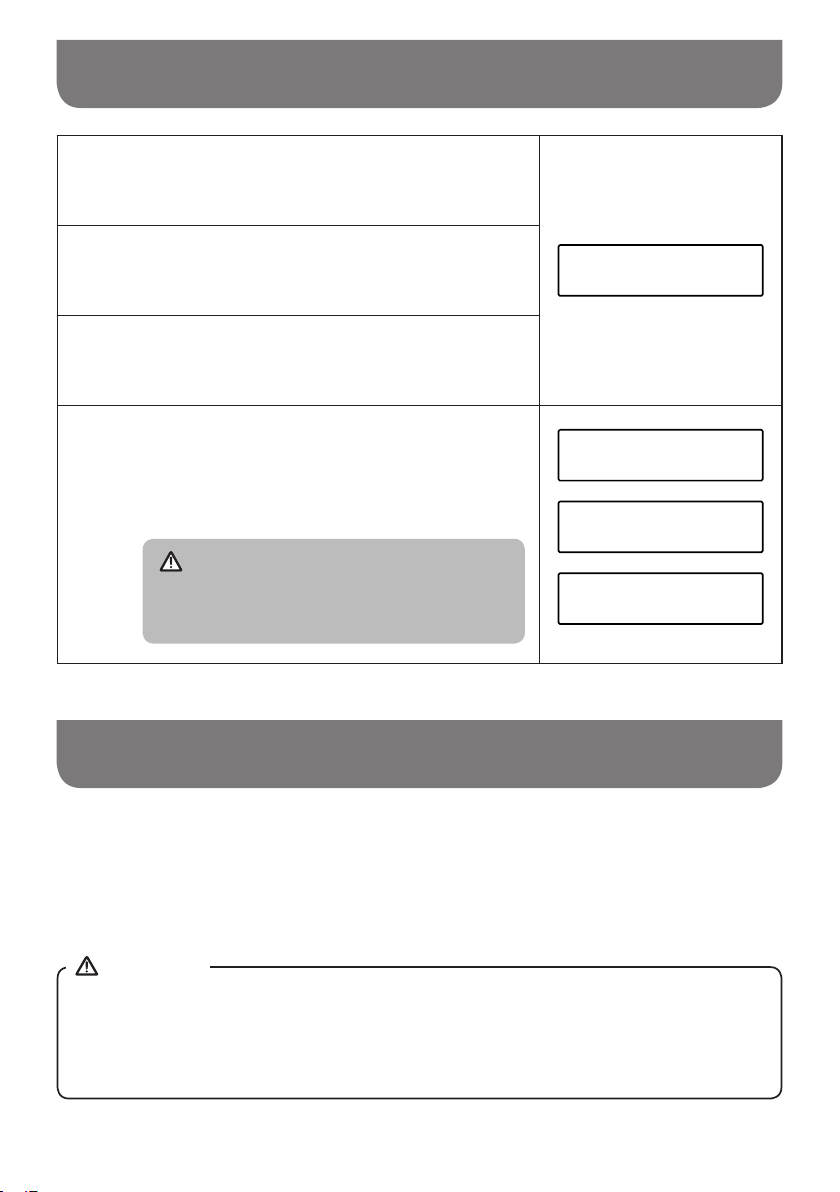
Het alarm instellen
Draai aan de Tuning knop om de gewenste dag te
7
selecteren en druk daarna op de Tuning knop om te
bevestigen.
8
9
10
Draai aan de Tuning knop om de gewenste maand te
selecteren en druk daarna op de Tuning knop om te
bevestigen.
Draai aan de Tuning knop om het gewenste jaar in
te stellen en druk daarna op de Tuning knop om te
bevestigen.
Draai aan de Tuning knop om het gewenste volume
in te stellen druk daarna ter bevestiging op de Tuning
knop.Uw radio toont de tekst ‘Alarm 1 saved’ en
verlaat de procedure. Actiev e alarmen woreden
aangegeven op het display met het alarmsymbool.
OPMERKING
U kunt ook de Alarm 1 of Alarm 2 knop ingedrukt
houden om het alarm in- of uit te schakelen.
Alarm 1:Date
17- 5-2018
Alarm 1:Volume
6
Alarm 1
Saved
10:06 A
17-5-2018
Wanneer het alarm klinkt
Op de gekozen tijd klinkt het alarm gedurende 60 minuten of tot deze wordt onderbroken. Het
maximale volume is het volume dat is ingesteld in het alarm. Wanneer de alarm bron op radio staat
ingesteld, zal de radio opstarten en naar de juiste bron gaan. Wanneer de ingestelde bron of zender
niet beschikbaar is zal de zoemer klinken.
Om het alarm uit te schakelen, druk op de Aan / uit knop.
OPMERKING
Wanneer de radio door de alarmfunctie is ingeschakeld zijn de basis functies van de radio te
gebruiken, zoals het instellen van het volume.
Wanneer het alarm gaat, zal het volume langzaam oplopen. De radio gaat na 60 minuten
automatisch weer standby.
84
Page 86
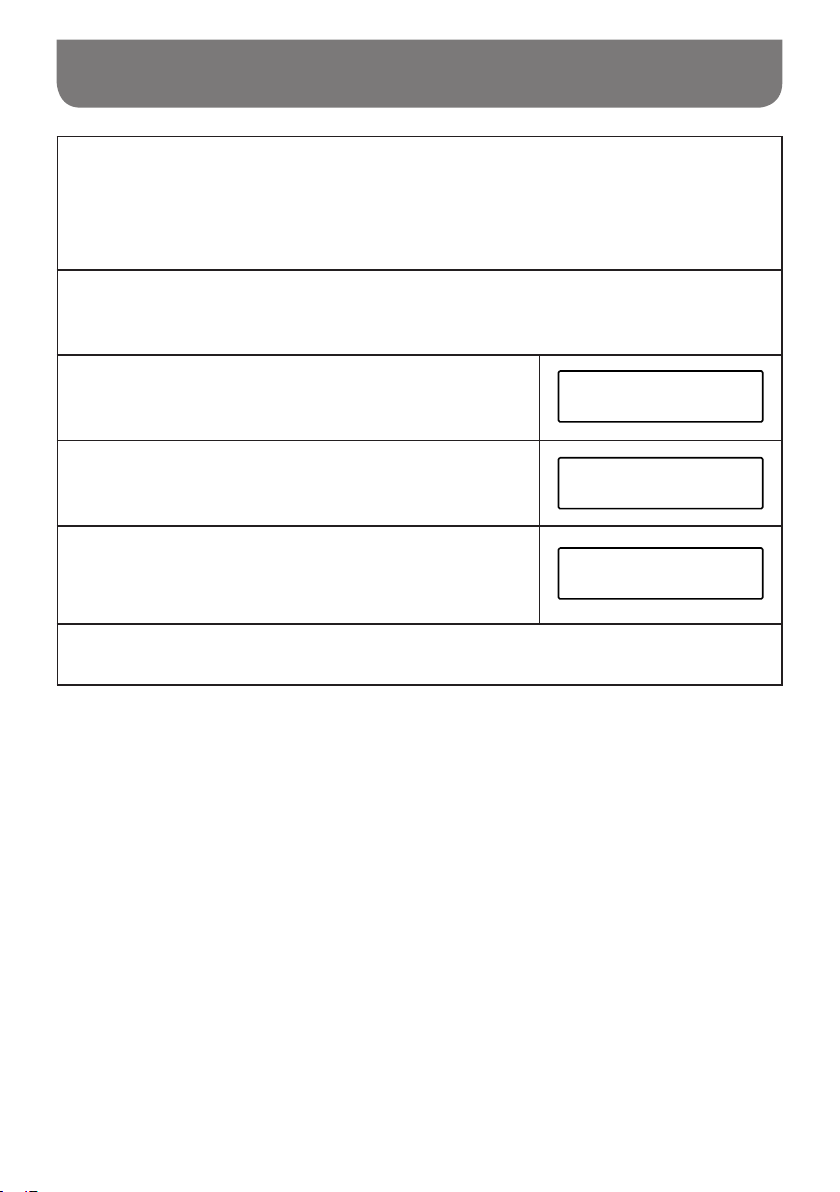
Snooze
Wanneer het radio alarm klinkt, druk op elke willekeurige knop met uitzondering van de
volumeknop om het alarm te dempen. Bij het zoemer alarm, druk op elke willekeurige knop.
1
Het alarm dempt voor het ingesteld aantal minuten. Snooze tijd kan worden ingesteld tussen
5 en 20 minutes in stappen van 5 minuten. Standaard instelling is 5 minuten.
De snooze tijd kan worden ingesteld tijdens het alarm. Om de snooze tijd in te stellen, druk
op de Menu knop.
2
Draai aan de Tuning knop tot “System” wordt weergegeven
en druk op de Tuning knop om te bevestigen.
3
Draai aan de Tuning knop tot 'Snooze Duration' wordt
weergegeven. Druk op de Tuning knop.
4
Draai aan de Tuning knop om de gewenste snooze tijd: 5,
10, 15 of 20 minuten te kiezen. Druk op de Tuning knop
5
om te bevestigen.
Om de snooze functie uit te schakelen tijdens een alarm, druk op de Aan / uit knop.
6
<System >
<Snooze Duration >
Snooze Duration
<
5 Minutes
FM
System
*
>
85
Page 87
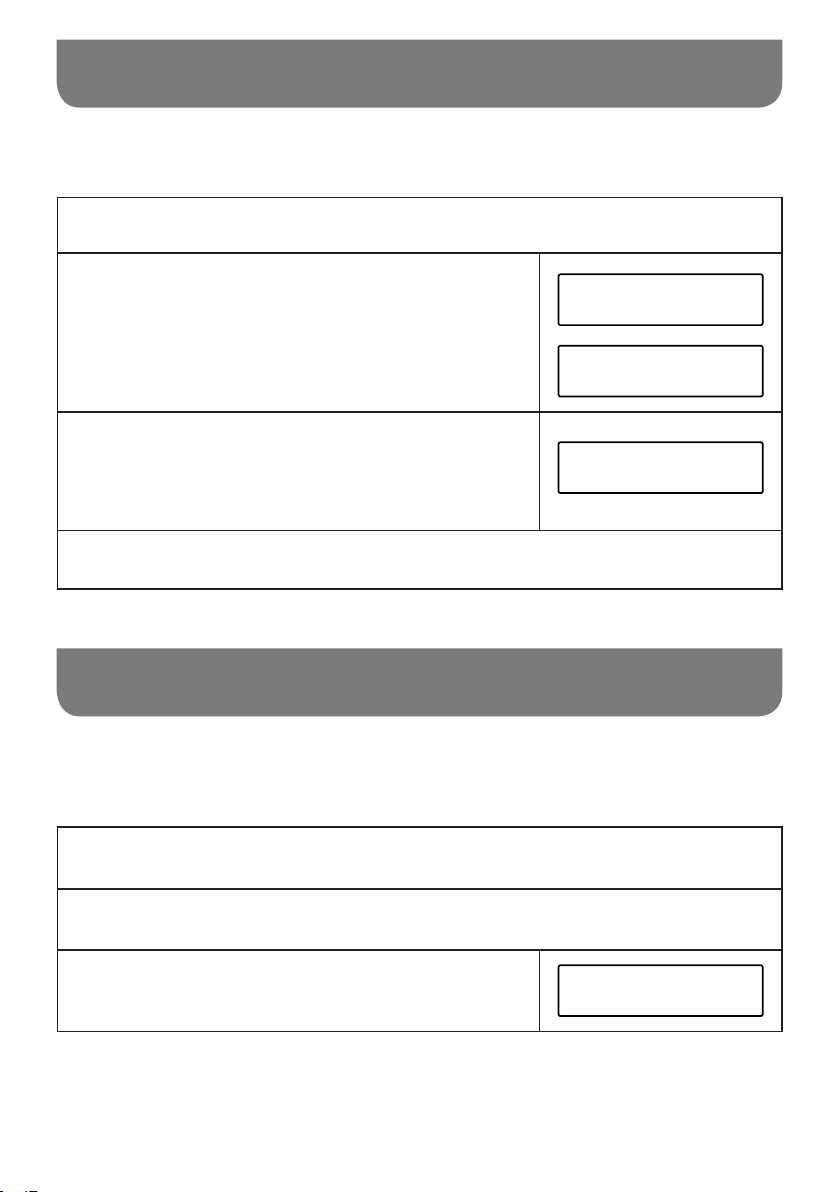
Slaapfunctie
Uw radio kan worden ingesteld om uit te schakelen wanneer een vooraf ingestelde tijd is verstreken.
De slaaptimer kan worden ingesteld van 15 tot 120 minuten.
Op het menu door op de Menu knop te drukken.
1
Draai aan de Tuning knop tot “Sleep” wordt weergegeven.
Druk op de Tuning knop. Draai aan de Tuning knop om de
2
gewenste slaaptijd in te stellen. De opties zijn: 15, 30, 45,
60, 90 of 120 minuten. Druk op de Tuning knop om
uw keuze te bevestigen. Het icoon ‘S’ wordt weergegeven in het display. Uw radio zal uitschakelen nadat
de slaaptijd is verstreken.
Wanneer u de slaapfunctie wilt annuleren voordat de
slaaptijd is vertreken, druk dan op de Aan/uit knop. Om
3
de slaapfunctie uit te schakelen zonder de radio uit te
schakelen, ga naar het menu van de slaapfunctie (stap 1
en 2) en kies “Sleep off” in stap 2.
Om de huidige resterende tijd weer te geven, ga naar het Menu en draai aan de Tuning
knop tot “Sleep” wordt weergegeven. Druk daarna op de Tuning knop.
4
<Sleep >
Set sleep time
Set sleep time
FM
15 minutes
Sleep off
Helderheid instellen
De helderheid van het display kan worden ingesteld voor als de radio in gebruik is of voor als de radio
standby staat. Als u het apparaat in de slaapkamer gebruikt, dan is het mogelijk dat u in de modus
Standby een lager helderheidsniveau dan de standaardinstelling wenst.
Druk op de Aan / uit knop om de radio in te schakelen.
1
Druk op de Menu knop.
2
Draai de Tuning knop tot “System” wordt weergegeven en
druk op de Tuning knop om te bevestigen.
3
86
FM
<System >
Page 88
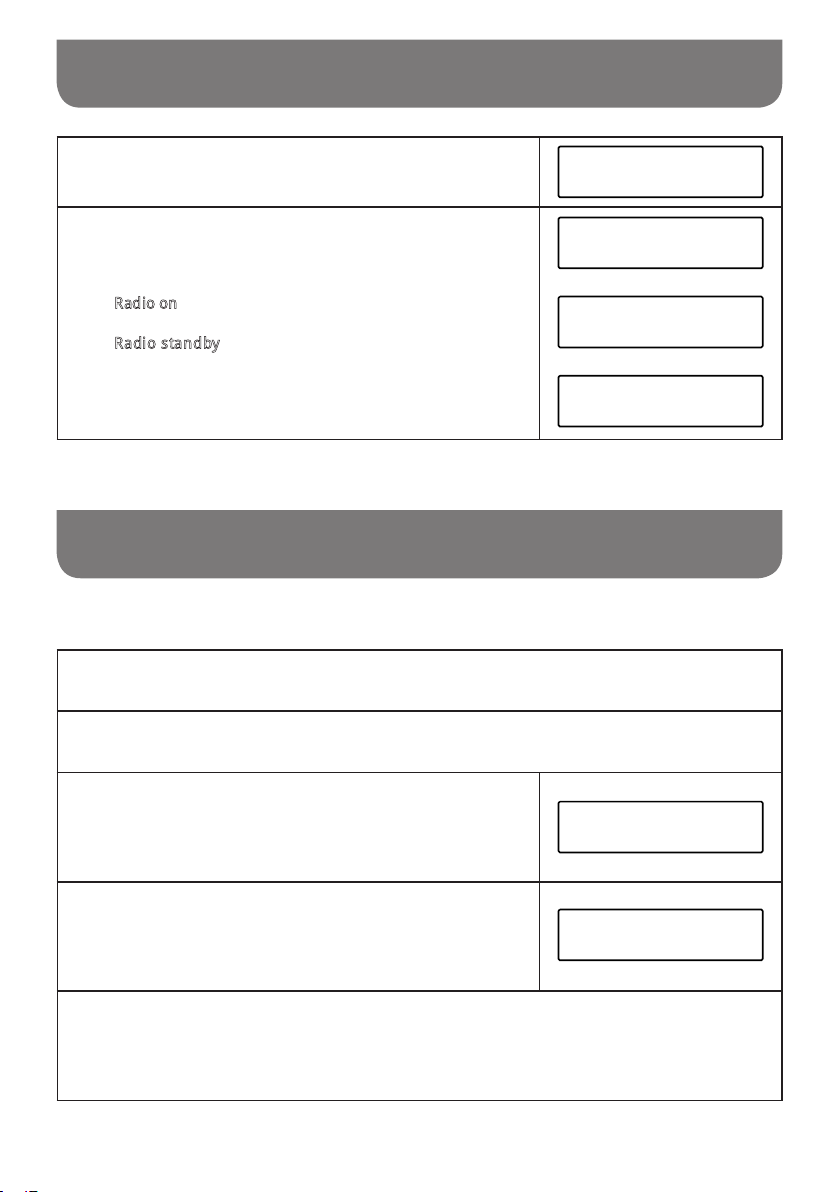
Helderheid instellen
Draai de Tuning knop tot “Backlight” wordt weergegeven
en druk op de Tuning knop om te bevestigen.
4
In het Backlight menu zijn 3 instellingen:
Timeout: voor het instellen van de tijd waarna het display
5
dimt.
5DGLRRQ
van de radio.
5DGLRVWDQGE\
standby.
Draai aan de Tuning knop om uw keuze te maken en druk
op de Tuning knop om uw keuze te bevestigen.
: voor het instellen van de helderheid bij gebruik
: voor het instellen van de helderheid in
System
<Backlight >
Backlight
<Timeout >
Backlight
<Radio on >
Backlight
<Radio standby >
Taal instellen
Standaard worden alle meldingen op het display weergegeven in Engels. U kunt dit aanpassen.
Druk op de Aan / uit knop om de radio in te schakelen.
1
Druk op de Menu knop.
2
Draai aan de Tuning knop tot “System” wordt
weergegeven. Druk op de Tuning knop om uw keuze te
3
bevestigen.
Draai aan de Tuning knop tot “Language” wordt
weergegeven. Druk op de Tuning knop om uw keuze te
4
bevestigen.
Draai aan de Tuning knop tot de gewenste taal wordt weergegeven. Druk op de Tuning knop
om uw keuze te bevestigen. Het display zal nu de gewenste taal weergeven. De gekozen
5
taal wordt gemarkeerd met een asterisk (*).
<System >
<Language >
FM
System
87
Page 89
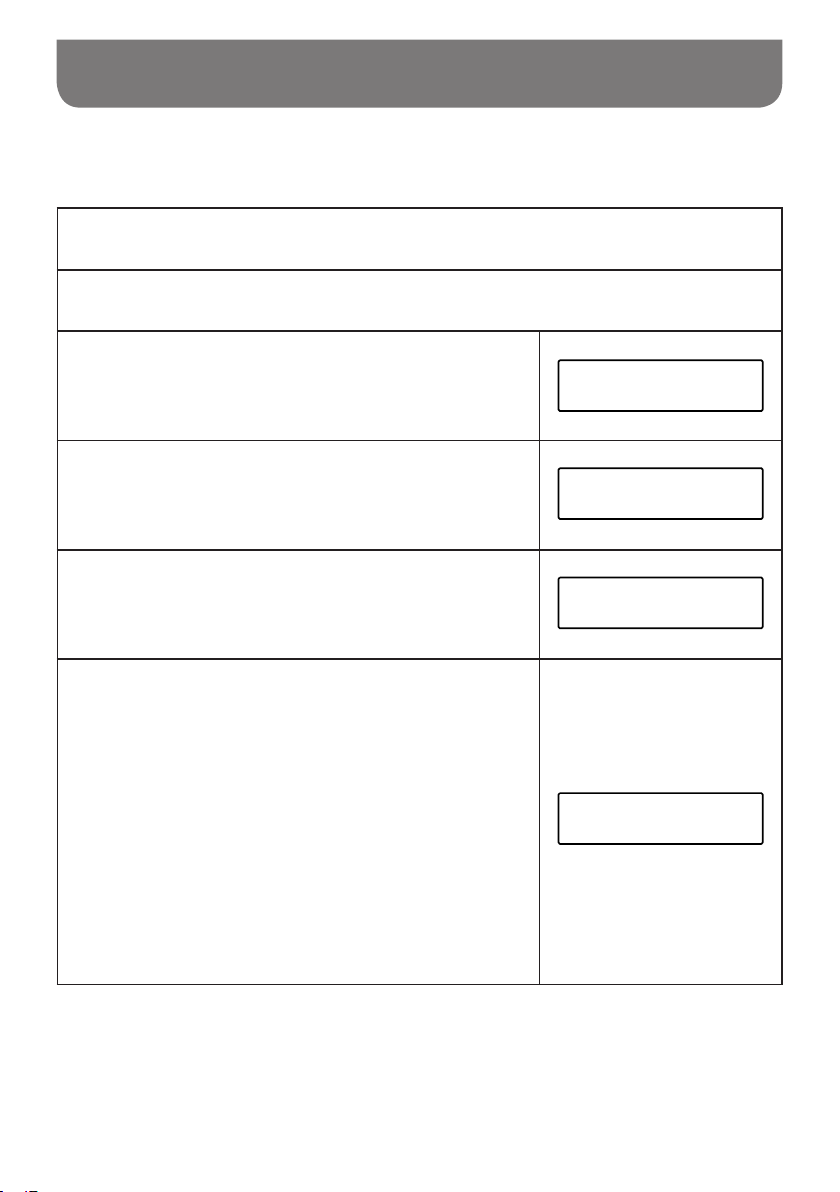
Systeem reset
Als de radio niet correct functioneert of b.v. de weergave in de display ontbreekt, geheel of gedeeltelijk,
voer dan de volgende procedure.
Druk op de Aan / uit knop om de radio in te schakelen.
1
Druk op de Menu knop.
2
Draai aan de Tuning knop tot “System”
wordt weergegeven. Druk op de Tuning knop om uw
3
keuze te bevestigen.
Draai aan de Tuning knop tot “Factory reset” wordt
weergegeven. Druk op de Tuning knop om uw keuze te
4
bevestigen.
Draai aan de Tuning knop om “Yes” (ja) te kiezen om door
te gaan of “No” (nee) om af te breken. Druk op de Tuning
5
knop om uw keuze te bevestigen.
Wanneer uw voor “Yes” en op de Tuning knop drukt
om te bevestigen, wordt er een volledige reset
6
uitgevoerd. De voorkeuzezenders worden gewist en alle
instellingen worden teruggezet naar de zogenaamde
‘Fabrieksinstellingen’.
Na een systeem reset gaat de radio vanzelf aan. Het
display zal “Welcome to Digital Radio” weergeven en
automatisch de DAB Band III scannen.
In geval van storing ten gevolge van elektrostatische
ontlading, reset de radio als hierboven beschreven. Als
dat niet werkt verwijder de stekker uit het stopcontact en
de batterijen en sluit deze daarna weer aan.
FM
<System >
System
<Factory Reset >
Factory Reset?
Yes <No>
Factory Reset?
<Yes> No
88
Page 90
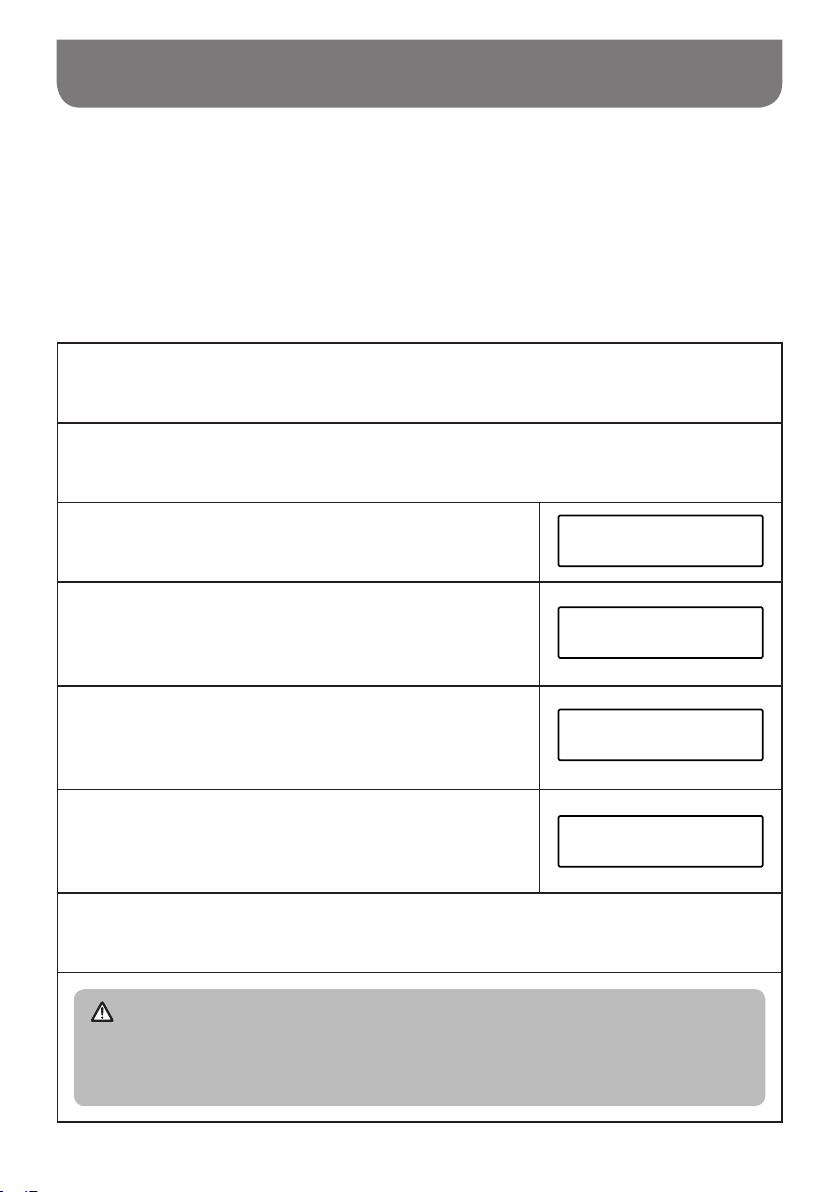
Aansluiting voor software update
Het is mogelijk dat er in de toekomst software- updates voor uw radio beschikbaar zijn. Uw radio is
hiervoor uitgerust met een USB-aansluiting.
Probeer uw radio nooit zelf te updaten tenzij uitdrukkelijk op aanwijzing van de Perfectpro
Klantenservice. Bij een update gaan alle instellingen en opgeslagen zenders verloren.
Als er software-updates beschikbaar zijn, dan kunt u deze updates en informatie over het updaten van
de software vinden op: www.perfectpro.eu
Voor meer informatie neemt u contact op met ons hoofdkantoor door een e-mail te sturen naar:
Gebruik een micro USB-kabel (niet meegeleverd) om de radio aan te sluiten op uw PC. De
aansluiting van de radio zit in het batterijen compartiment.
1
Druk, wanneer de radio aan staat op de Menu knop om naar het menu te gaan.
2
Draai de Tuning knop tot “System” wordt weergegeven en
druk op de Tuning knop om te bevestigen.
3
Draai de Tuning knop tot “Software Upgrade” wordt
weergegeven en druk op de Tuning knop om te
4
bevestigen.
Draai de Tuning knop om te kiezen uit “Yes” (ja) of “No”
(nee). Wanneer u geen update wilt uitvoeren kiest u “No”
5
en druk dan op de Tuning knop om te bevestigen.
Wilt u toch updaten, drukt up met “Yes” geselecteerd op
de Tuning knop om uw te bevestigen. Op het beeldscherm
6
wordt ‘Waiting for pc-wizard’ weergegeven.
Ga naar onze website, www.perfectpro.eu en download de juiste software (indien
7
beschikbaar) en volg de aanwijzingen op uw pc.
OPMERKING
Gebruik netstroom tijdens het uitvoeren van een update. Schakel de radio niet uit tot de
update volledig is afgerond, dit kan uw radio ernstig beschadigen en mogelijk onbruikbaar
maken.
<System >
<Software Upgrade>
FM
System
Upgrade?
Yes <No>
Upgrade?
<Yes> No
89
Page 91
Softwareversie
De weergave van de softwareversie kan niet worden veranderd en dient alleen ter referentie.
Dr
uk, wanneer de radio aan staat op de Menu knop om naar het menu te gaan.
1
Draai de Tuning knop tot “System” wordt weergegeven en
druk op de Tuning knop om uw keuze te bevestigen.
2
Draai de Tuning knop tot “SW version” wordt weergegeven
en druk op de Tuning knop om uw keuze te bevestigen.
3
De softwareversie wordt nu weergegeven op het display.
Druk op de Menu knop om af te sluiten.
4
<System >
<SW version >
FM
System
Aux ingang
Achter de rubberen afdekking bevindt zich een 3,5mm stereo Aux in ingang voor het aansluiten van
een extern audio-apparaat zoals bijv. een MP3-speler of een Cd-speler (niet meegeleverd bij de radio).
Verbind een audiobron met de Aux ingang
1.
Druk op de Aan/uit knop om de radio in te schakelen
2.
3.
Druk op de Audiobron knop om de Aux modus te selecteren.
Speel de externe speler af.
4.
Pas desgewenst het volume van de speler en / of de radio in op het gewenste niveau.
5.
OPMERKING
Zorg ervoor dat de rubberen afdekking na het gebruik weer goed wordt gesloten, zodat er geen
vocht of vuil in de radio kan binnendringen.
Gebruik de Aux ingang nooit in de regen of in een vochtige omgeving om te voorkomen
dat er vocht binnendringt in de radio! Houd de rubberen afdekking altijd gesloten in deze
omstandigheden.
90
Page 92
Garantie
Dit product heeft 2 jaar garantie.
WAARSCHUWING
De garantie vervalt indien de behuizing van het apparaat geopend is of indien het apparaat door
de eindgebruiker op enigerlei wijze gemodiceerd of veranderd is!
De voorwaarde van de garantie van deze radio dekken niet de volgende zaken:
● Schade, beschadiging en breuk veroorzaakt door verkeerd gebruik, misbruik, verwaarlozing,
wijzigingen, ongevallen of ongeautoriseerde reparaties.
● Normale gebruiksslijtage.
● Batterijen.
Open nooit de behuizing. De producent aanvaart geen aansprakelijkheid voor schade en / of letsel veroorzaakt door onjuist gebruik. Het typeplaatje vindt u op de onderzijde van het apparaat.
91
Page 93
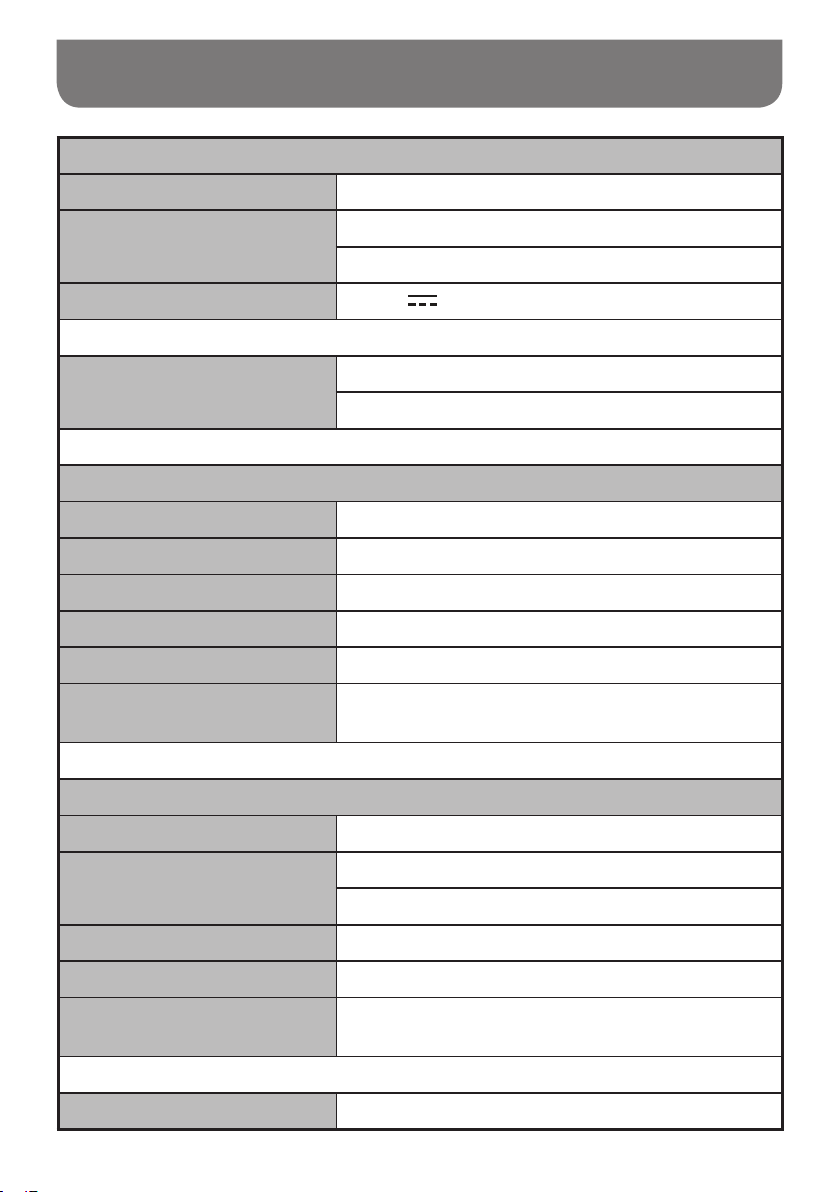
Specicaties
Voeding
Netstroom: 100-240 V ~ 50/60 Hz 18W
Batterijen:
Adapter 12V (niet meegeleverd): DC 12V
Frequentiebereik:
Bluetooth
Bluetooth-specicatie Bluetooth
Ondersteunde proelen A2DP 1.2 , AVRCP 1.5
Bluetooth Audio CODEC SBC, AAC
Zendvermogen Power Class 2
Bereik 10meter / 30voet
Frequentie en maximaal
zendvermogen:
Elektronische eigenschappen:
6 x AM-3 (maat AA, LR6)
Alkaline of Ni-MH
1.5A middelste pin positief (+)
FM 87.50–108 MHz
DAB 174.928–239.200 MHz
®
Ver 4.1
2402MHz ~ 2480MHz: 3.85dBm (Bluetooth EDR)
Speaker: 3inches 8ohm 10W volledig bereik, waterdicht
Vermogen:
Aux In niveau: 300±70 mVrms (nominale niveau), 1Vrms (max.)
Aux In aansluiting:
Maximale stroom geleverd
door USB poort:
Bedrijfstemperatuur:
92
3Watt 10% T.H.D. @ 100Hz @ DC batterij 9V
7Watt 10% T.H.D. @ 100Hz @ AC 230V of 120V
3.5mm diameter
5V, 1A
0°C to +35°C
Page 94
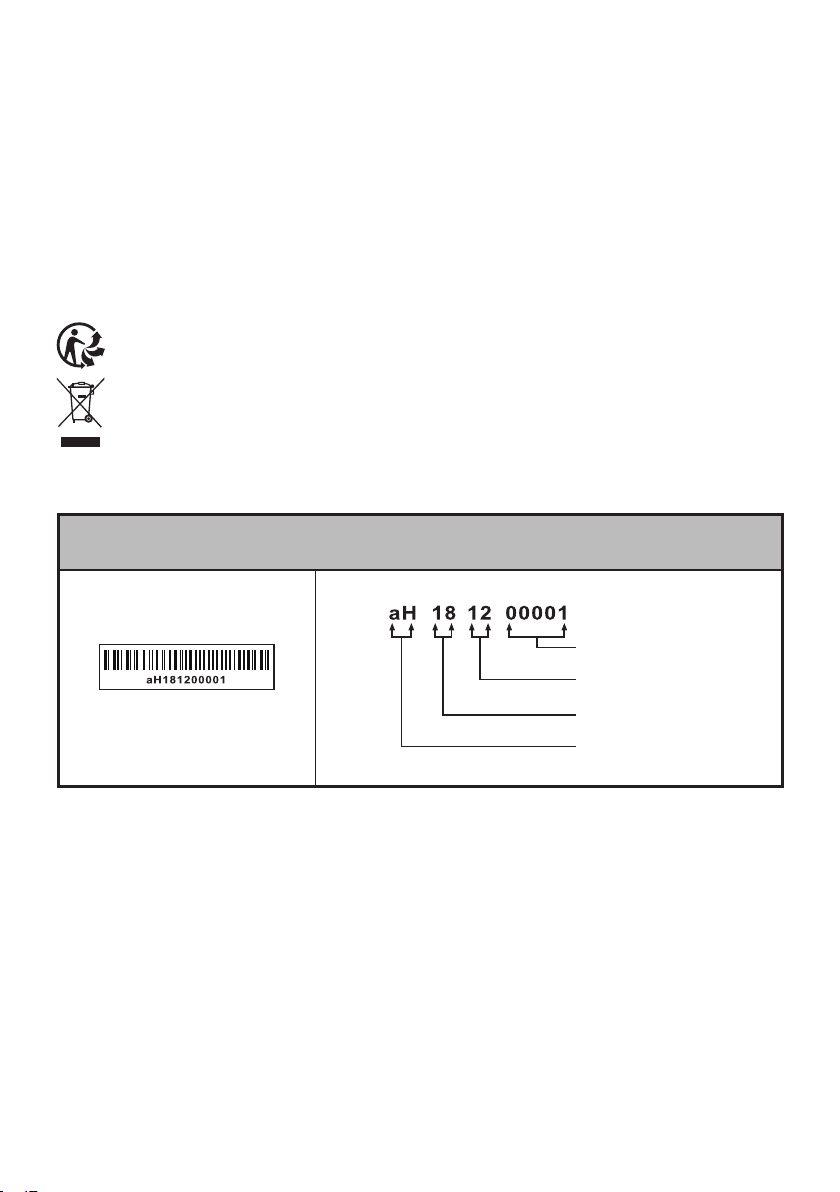
Het bedrijf behoudt zich het recht voor om de specicaties te wijzigen zonder voorafgaande kennisgeving.
Als u dit product op enig moment in de toekomst wilt weggooien, houd er dan rekening mee
dat afgedankte elektrische producten niet met het huisafval mogen worden weggegooid.
Recycle indien mogelijk. Neem contact op met uw gemeente of winkel voor advies over recy-
cling. (Richtlijn voor afgedankte elektrische en elektronische apparatuur)
De barcode van de radio is als volgt opgebouwd:
※
Productcode
Productiejaar
Productiemaand
Serienummer
93
Page 95
Die Bluetooth® Wortmarke und Logos sind eingetragene Warenzeichen der Bluetooth SIG, Inc. und
DIE GARANTIE ERLISCHT, WENN DAS GEHÄUSE DES GERÄTS GEÖFFNET WIRD ODER
JEDWEDE MODIFIKATIONEN ODER ÄNDERUNGEN AM URSPRÜNGLICHEN GERÄT
VORGENOMMEN WERDEN.
ÖFFNEN SIE NIEMALS DAS GEHÄUSE DES GERÄTS. DER HERSTELLER ÜBERNIMMT
KEINE HAFTUNG FÜR SCHÄDEN, DIE AUF EINEN UNSACHGEMÄSSEN UMGANG
ZURCKZUFHREN SIND. DAS TYPENSCHILD BEFINDET SICH AN DER RCKSEITE DES
GERÄTS.
94
jede Verwendung dieser Marken durch die Perfectpro B.V. erfolgt unter Lizenz.
WARNUNG
Page 96

Wichtige Sicherheitshinweise
Lesen Sie diese Anleitung.
1.
2.
Bewahren Sie diese Anleitung auf.
3.
Beachten Sie alle Warnungen.
4.
Beachten Sie alle Anweisungen.
5.
Verwenden Sie dieses Gerät nicht in der Nähe von Wasser.
6.
Reinigen Sie das Gerät ausschließlich mit einem trockenen Tuch.
Achten Sie darauf, die Belüftungsschlitze nicht zu blockieren. Folgen Sie bei der Montage den
7.
Anweisungen.
8.
Platzieren Sie das Gerät nicht in der Nähe von Wärmequellen wie Heizkörpern,
Wärmespeichern, Öfen oder anderen Geräten (einschließlich Verstärkern), die Wärme
erzeugen.
Verhindern Sie, dass das Netzkabel eingeklemmt oder darauf getreten wird, insbesondere am
9.
Stecker, an den Steckdosen und an der Stelle, an der das Kabel aus dem Gerät austritt.
10.
Benutzen Sie nur vom Hersteller empfohlene Erweiterungen/Zubehörteile.
11.
Das Gerät darf nur dann mit Wagen, Gestellen, Dreifüßen, Halterungen oder Tischen verwendet
werden, wenn diese vom Hersteller angegeben oder zusammen mit dem Gerät verkauft werden.
Wenn ein Wagen benutzt wird, muss darauf geachtet werden, dass das Gerät nicht zusammen
mit dem Wagen umkippt und Verletzungen verursacht.
Trennen Sie das Gerät während eines Gewitters oder bei Nichtverwendung über einen längeren
12.
Zeitraum vom Netz.
Überlassen Sie alle Wartungsarbeiten qualifiziertem Fachpersonal. Eine Wartung ist
13.
erforderlich, wenn das Gerät in irgendeiner Weise beschädigt wurde, falls zum Beispiel das
Stromversorgungskabel oder der Stecker beschädigt ist, Flüssigkeit verschüttet wurde oder
Gegenstände in das Gerät gefallen sind, das Gerät Regen oder Feuchtigkeit ausgesetzt wurde,
nicht ordnungsgemäß funktioniert oder fallengelassen wurde.
95
Page 97

Wichtige Sicherheitshinweise
Um die Gefahr von Bränden oder elektrischen Schlägen zu verringern, darf dieses Gerät nicht
14.
Regen oder Feuchtigkeit ausgesetzt werden. Um bei Gebrauch im Freien das Risiko eines
elektrischen Schlages zu vermeiden, nutzen Sie an regnerischen Tagen oder bei nassem Wetter
nur den Akku. Dieses Gerät ist gegen Spritzwasser und eindringenden Staub (IP65) geschützt.
15.
Ein Stromschlaggefahrsymbol und ein grafisches Warnsymbol sind zur Warnung auf der
Geräterückseite angebracht.
Das Blitzsymbol mit Pfeilspitze in einem gleichseitigen Dreieck soll den Benutzer auf nicht
isolierte "gefährliche Spannungen" innerhalb des Gehäuses des Produkts aufmerksam
machen, die eine ausreichende Stärke haben können, um die Gefahr eines Stromschlags
für Personen zu gewährleisten.
Das Ausrufezeichen in einem gleichseitigen Dreieck weist den Benutzer auf wichtige
Betriebs- und Wartungsanweisungen in der Begleitdokumentation des Geräts hin.
16.
Das Produkt darf nicht ins Wasser fallen und keinem Spritzwasser ausgesetzt werden und es
dürfen keine mit Wasser gefüllten Gegenstände auf das Gerät gestellt werden.
Der Netzstecker sollte sich immer möglichst nahe am Gerät befinden und leicht zugänglich
17.
sein, damit in Notfällen, um den Strom vom Gerät zu trennen, lediglich der Netzstecker aus der
Steckdose gezogen werden muss.
18.
19.
20.
96
HINWEIS
Änderungen oder Modikationen, die nicht vom Compliance-Verantwortlichen ausdrücklich
genehmigt sind, können die Zulassung zum Betrieb der Ausrüstung unwirksam machen.
Wenn der Netzstecker oder eine Steckdose zum Ein- und Ausschalten des Geräts benutzt
wird, achten Sie bitte immer darauf, dass die Steckdose jederzeit für den Benutzer erreichbar
bleibt.
Eine Warnung, dass Akkus (Akkupack oder eingesetzte Akkus) keiner extremen Hitze wie z. B.
Sonnenschein, Feuer o. ä. ausgesetzt werden dürfen.
Page 98
Wichtige Sicherheitshinweise
21.
Um mögliche Hörschäden zu vermeiden, sollten Sie nicht für längere Zeit hohe Lautstärken
hören oder Ihre Ohren zu nah an den Lautsprecher halten.
22.
Dieses Gerät ist ein elektrisches Gerät der Klasse II oder doppelt isoliert. Es wurde so
konzipiert, dass keine Sicherheitsverbindung zur elektrischen Erde erforderlich ist.
23.
Die Belüftung sollte nicht durch Abdecken der Lüftungsöffnungen mit Gegenständen wie
Zeitungen, Tischdecken, Vorhängen usw. behindert werden.
97
Page 99
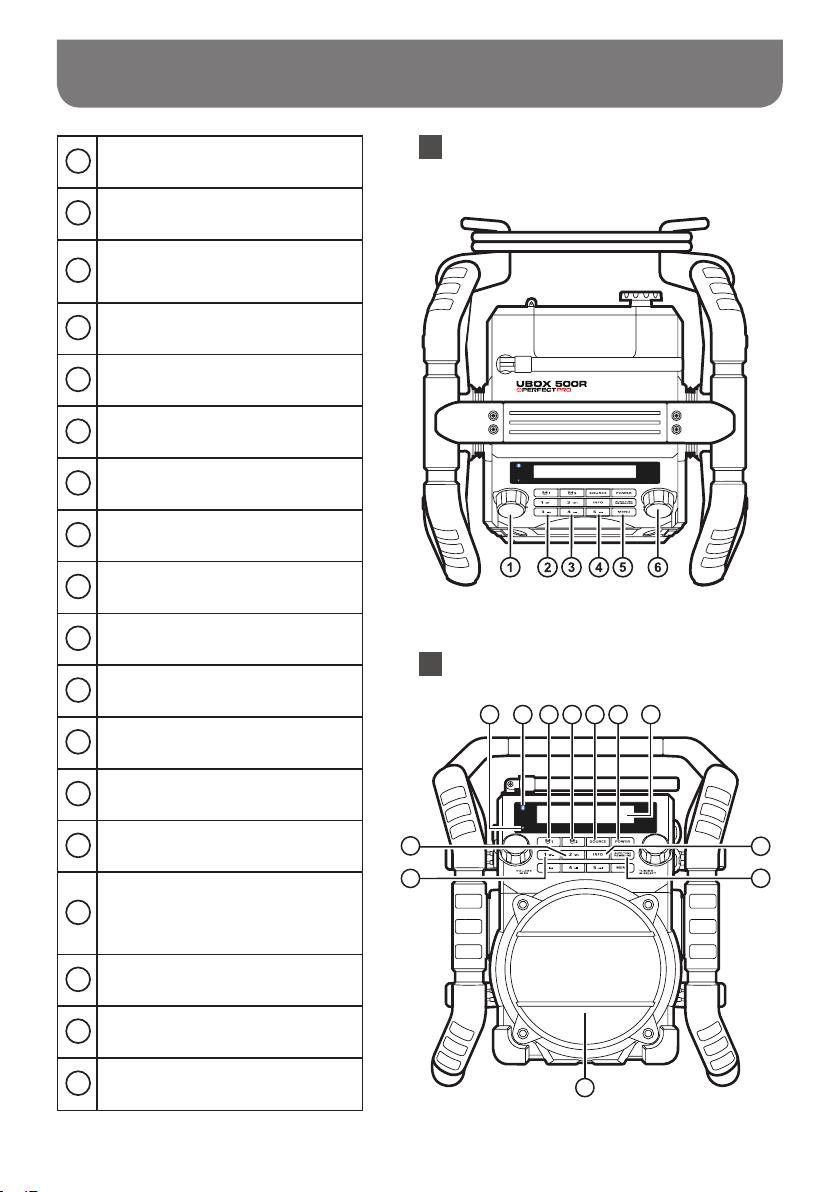
Bedienelemente
1
Lautstärkeregler / EQ Steuerung
2
Senderspeicher 3 / Taste Rücklauf
Senderspeicher 4 /
3
Taste Wiedergabe / Pause
4
Senderspeicher 5 / Taste Vorlauf
5
Taste Menü
6
Drehregler / Wahlknopf
7
LED-Ladestandanzeige
8
Bluetooth-Status LED
9
Taste Alarm 1
Taste Alarm 2
10
Quellentaste (Source)
11
Ein- / Aus-Taste (Power)
12
Oberseite
Vorderseite
7 8 9 10 11 12 13
LCD-Display
13
Taste Info
14
Automatische Sendersuche /
Wiedergabemodus /
15
Bluetooth-Kopplungstaste
Lautsprecher
16
Senderspeicher 1 / Verzeignis zurück
17
18 Senderspeicher 2 / Verzeignis vor
98
18
17
16
14
15
Page 100
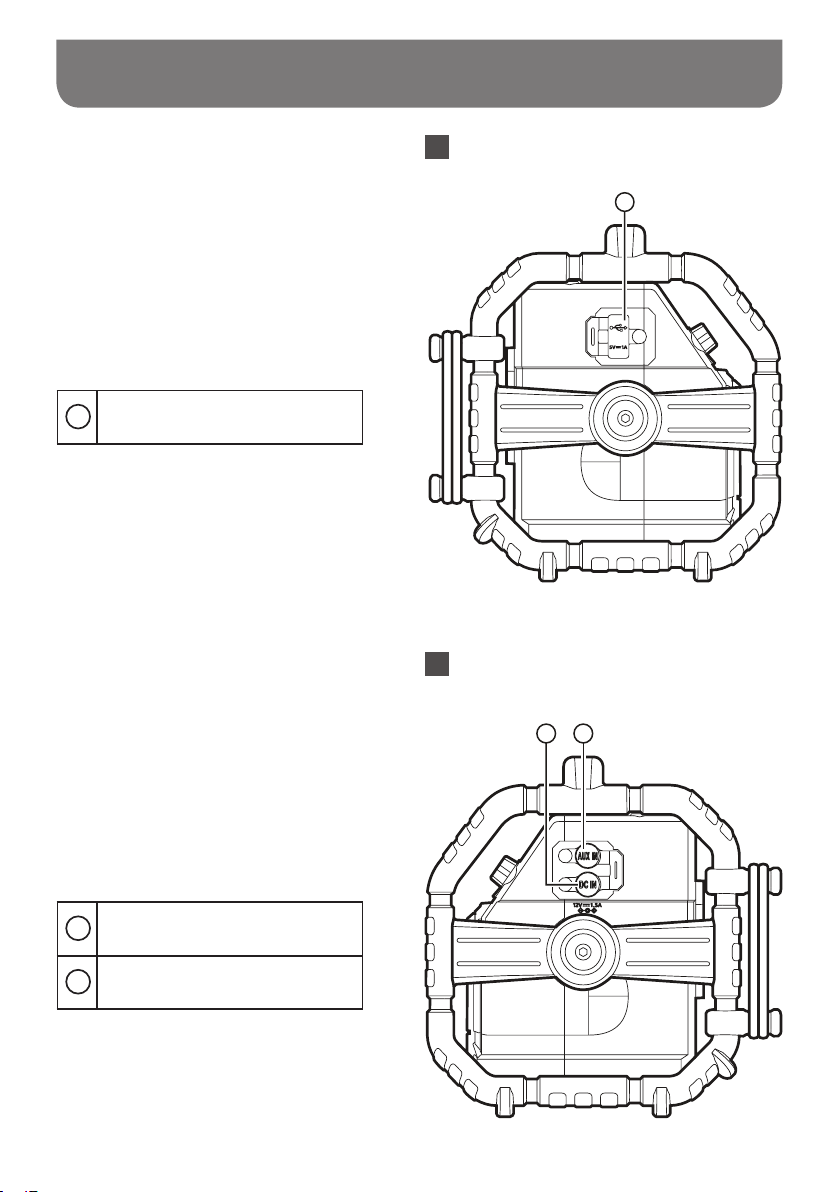
Bedienelemente
19 USB-port
Linke Seite
19
Rechte Seite
20
DC-Netzeingang
21
AUX-Eingangsbuchse
20 21
99
 Loading...