

Page 1
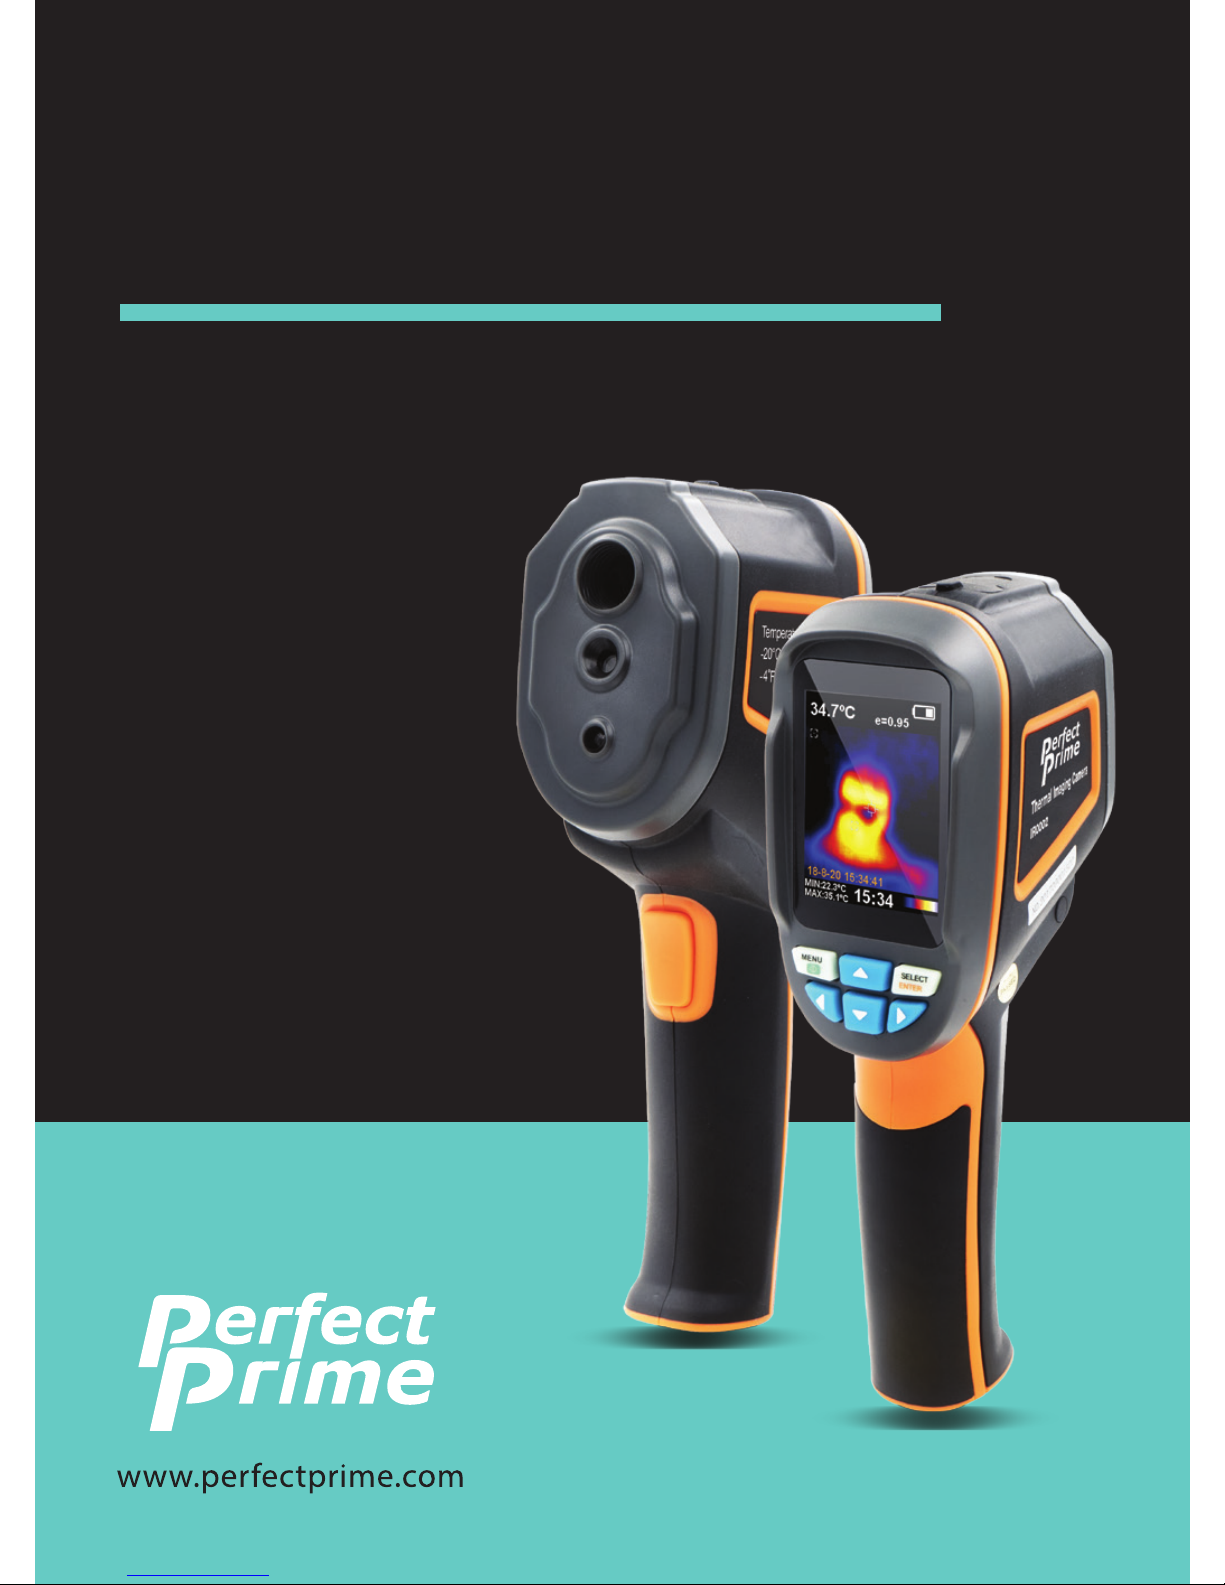
Thermal Imaging Camera
IR0002
Instruction Manual
Page 2

1. Overview
2. Considerations and Safety Maintenance
3. Performance Index
4. Product features
5. Menu Description
6. Basic Operation
7. Time setting
8. Measurement
9. Color Palette
10. Temperature of reective background
11. Marking of spot temperature
12. Image mixing
13. Image capturing and checking
14. Emissivity
15. The Table of Emissivity Value
2 - 3
4
5-6
7
8
9 - 10
11
12
13
14
15
16
17
18
19
Contents
P. 1
Page 3

1. Overview
P. 2
IR0002 is an uncooled thermal imaging camera that integrates
surface temperature measurement and real-time thermal image.
With this product, the potential problems can be identied on the
color display screen which is helpful for users to locate the problem,
take readings and solve the issue.
The product has a visual camera integrated to increase the dierentiation degree. The thermal images and full vision images can be
stored in the detachable memory card. IR0002 can store up to 25,000
images on the micro SD card. The image can be stored in PC to
generate a report and print.
The following are the major features of IR0002:
• High accuracy: The adjustable radiation coecient increases
the measurement accuracy of reective
surfaces.
• Time-saving: The traditional infrared thermometer needs to
measure every component one by one, this is
not necessary for IR0002.
• Easy to use: Turn on the device and start measuring
temperatures straight away.
• User-friendly: The thermal point and cold point temperature
automatically marks the area with highest or
lowest temperature in real time.
• Adjustable: Five types of color palettes and emissivity values
provided.
Page 4

1. Overview
P. 3
The product can be utilized in many elds, for instance:
1. Detect spills and leaks of chemicals which have dierent
thermal signatures to the surroundings.
2. Fire ghting: Vision can be obscured by smoke and debris in the
event of a re, thermal imaging can see through this and locate
victims or re spots.
3. Locate the source of abnormal leaking of heat of a house or a
machine, nd out the problem area and x it.
4. Enable drug-enforcement units to locate cannabis plants by
detecting abnormal amount of heat spot in buildings.
5. Moisture detection: Areas with lower temperatures to its
uniform surroundings can be a source of moisture staining or
damage.
6. Measure body temperatures: Point the thermal imaging camera
at a person to nd their surface body temperature.
7. Night vision: Measuring the electromagnetic energies given o
when objects emit heat, the IR0002 translates those energies
into visible light for users to see them in the dark.
8. Building inspection: Check that heat is retained uniformly in a
building.
IR0002 is the ideal selection for electrician, maintenance personnel,
technicians and even the emergency personnel.
Page 5
Please read the instructions carefully so as to
ensure accurate measurement results and safety:
DANGER
Do not use the device in
explosive, ammable or
corrosive environments.
When the product works, there
is a tiny clicking sound every
several seconds. This is a
normal phenomenon as the
lens captures images to
produce electronic noises.
Since the product is a
precision electronic and
sensitive optical device. Do
not drop it or allow impacts
to occur to prevent damage.
Do not dismantle the
product, doing so can
damage it and revoke the
warranty.
Please use a damp cloth or
gentle soap to clean the
enclosure of the device. Do not
use abradant, isopropanol or
solvent to clean. Special
optical lens cleaner should be
used to clean the screen.
P. 4
2. Considerations and
Safety Maintenance
Page 6

3. Performance Index
P. 5
Display screen 2.4 full-angle high
resolution
Infrared image resolution 60*60 (3600 pixels)
Visible image resolution 0.3 mega pixels
Thermal sensitivity 0.15°C
Temperature measurement range -20~300°C (-4°F~572°F)
Measurement precision ±2% or ±2°C (±2% or ±4)
Wavelength coverage 8-14um
Field angle/shortest focus length 20*20/0.5m
Emissivity Adjustable from 0.01 to 1.0
Focus mode Fixed
Image capture frequency 6 Hz
Color palette Spectra, iron, cool, black
and white
View option 25% step infrared to vision
to infrared and vision image
Page 7

3. Performance Index
P. 6
Image storage Mini SD Card
Image format bmp
Battery type 1.5V x 4 power supply (For
best performance use
Alkaline Battery)
Battery service life 6 hours
Auto power-off time 12 minutes
Authentication CE (EN61326-1:2006)
Warranty period 2 years
Size 212×95×62mm
Product Weight 320g
Work temperature -5°C to ±40°C
Storage temperature -20°C - +50°C
Humidity 10% RH to 80% RH
◄ UV ► ◄
Infrared
► ◄
Microwaves
►
0.1
Higher Energy
1
Wavelength (µm)
10
Lower Energy
NIR SWIR MWIR LWIR
0.75µm 1µm 2.7µm
3µm 8µm 14µm5µm
LWIR: thermal
infrared radiation
Wavelength coverage
of thermal infrared
radiation of IR0002
Page 8

10. Temperature of reective
background
P. 7
Set the temperature compensation for reective background in
the option of background. The background temperature can be
set between 0°C and +36°C.
The surface temperature and measurement accuracy of
measured object may be inuenced by over-hot or over-cold
object (When the radiation coecient of the surface of the
measured object is low, this phenomenon is obvious).
Under many situations, the temperature of reective background
should be adjusted to get the optimum measured result.
Page 9
5. Menu Description
P. 8
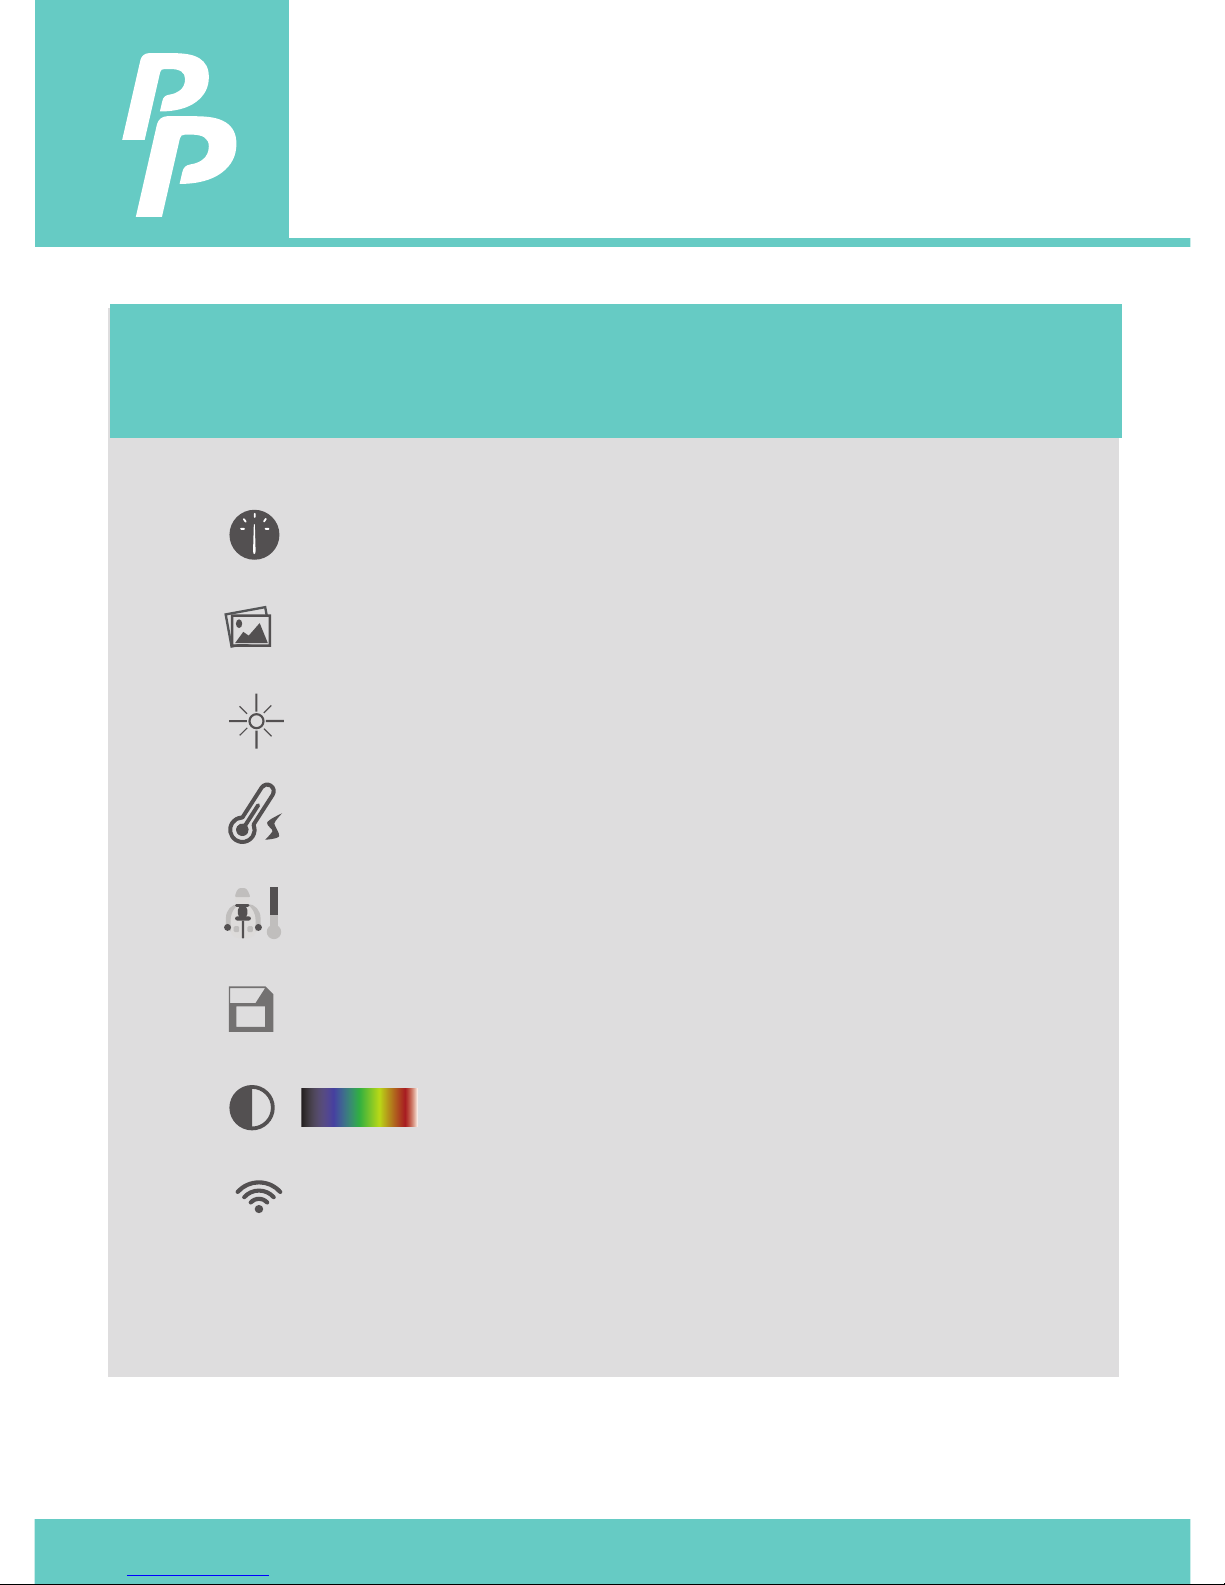
Icon
Time setting
Save image
Background light setting
Temperature unit setting
Background temperature setting
Capacity of memory card
Color palette setting
Emissivity setting
Description
12:12 ►
5000 ►
50% ►
°C ►
25°C ►
11088mb ►
►
0.95 ►
Page 10

6. Basic Operation
P. 9
6.1. Elimination of noise
1. Start up the instrument.
2. Put the head of sensor close to the worktop.
3. Press “ ▲” key for 5 seconds to eliminate the noise.
6.2. LED light
Press “image capturing” key for 5 seconds to turn on LED light.
6.3. Battery Installation
1. Slide the battery cover open for inserting new batteries into
IR0002.
2. Ensure polarity of batteries inserted are correct.
3. Close the battery cover.
6.4. Product Operation
1. Press “Start-up” key for 5 seconds to power up the
instrument.
2. Press “menu” for 1 second to enter mode setting of basic
functions.
3. The LCD shows 5 function setting options on the screen,
press “ ▲“ /“ ▼” to scroll.
Page 11

6. Basic Operation
P.10
4. Select the function for adjustment by the yellow option box
5. Press “select” and select “menu” option and edit the value.
6. Press “ ▲“ /“ ▼” to edit the value.
7. After adjustment, conrm the new value and press “menu” key
to exit the edit mode.
Page 12
P.11
7. Time setting
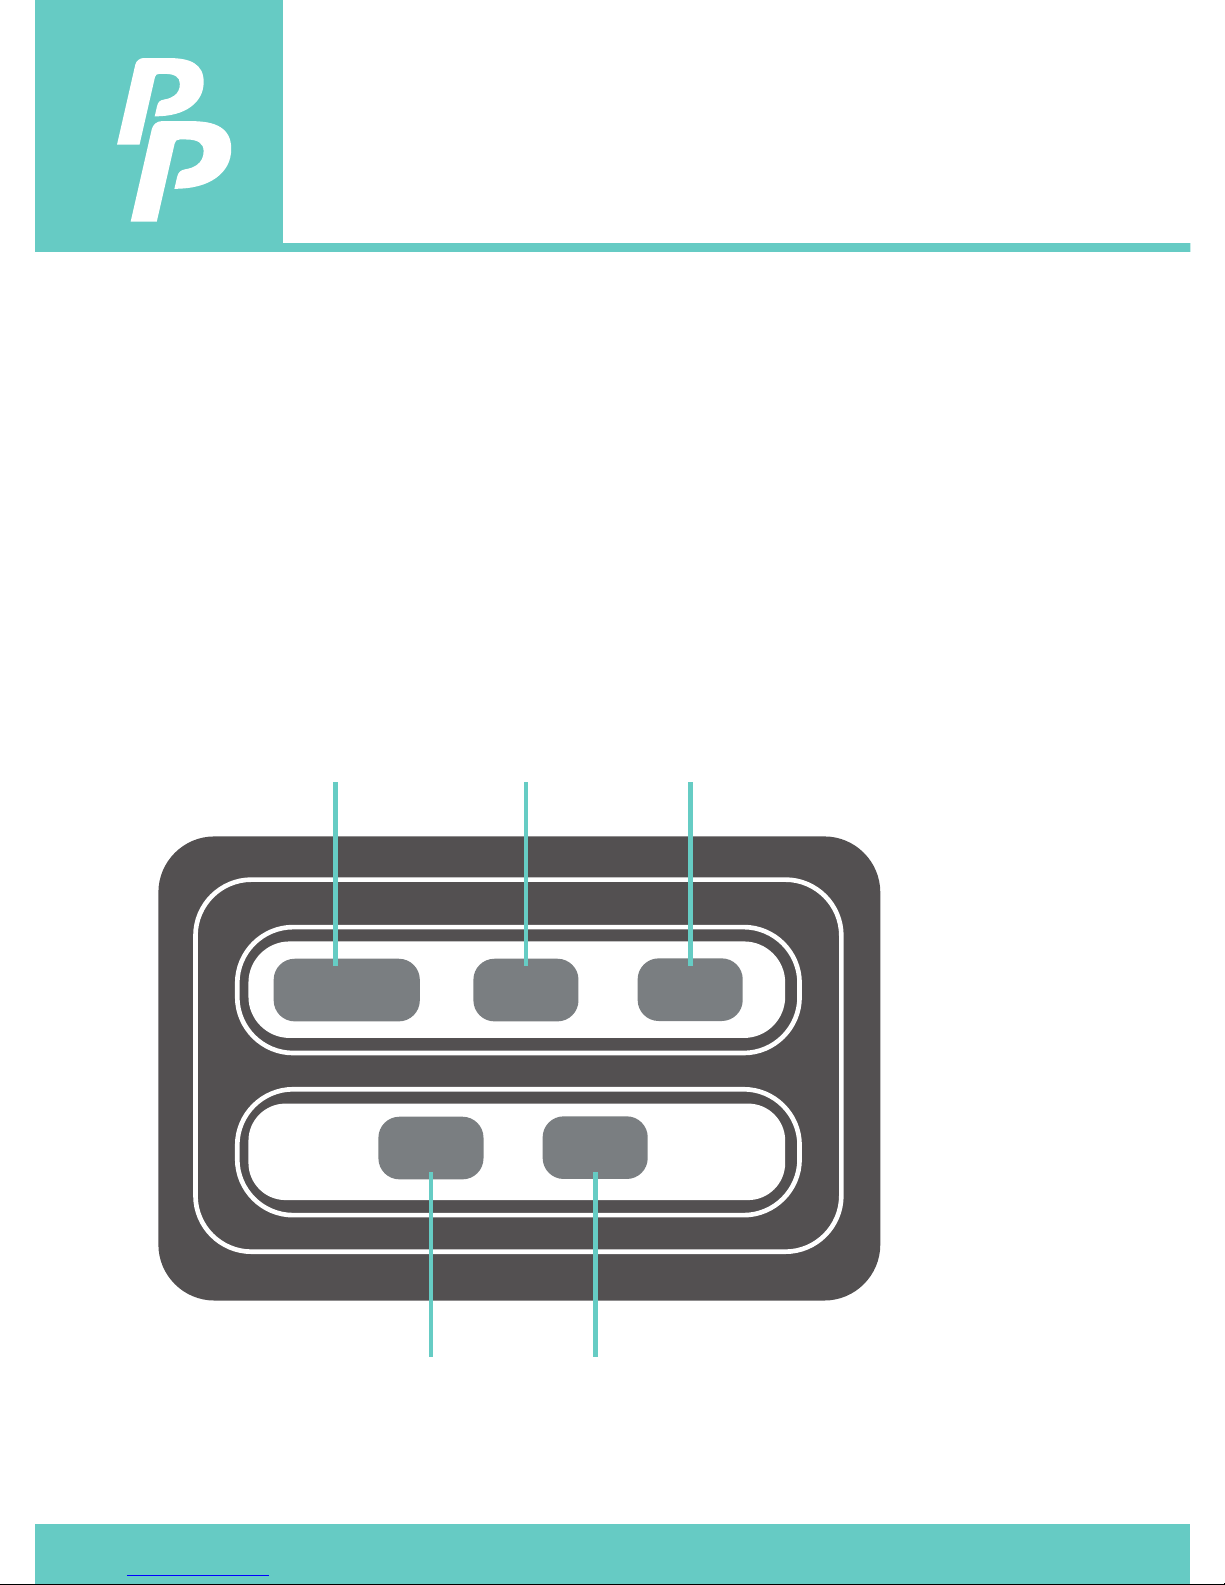
1. Under Time Setting menu, press “ ◄“ /“ ►” to select digit for
adjustment.
2. Press “ ▲“ /“ ▼” to increase or decrease the time value.
3. After setting, press “menu” to exit.
14 4
26
11
12
Year
Month Day
Hour Second
Page 13
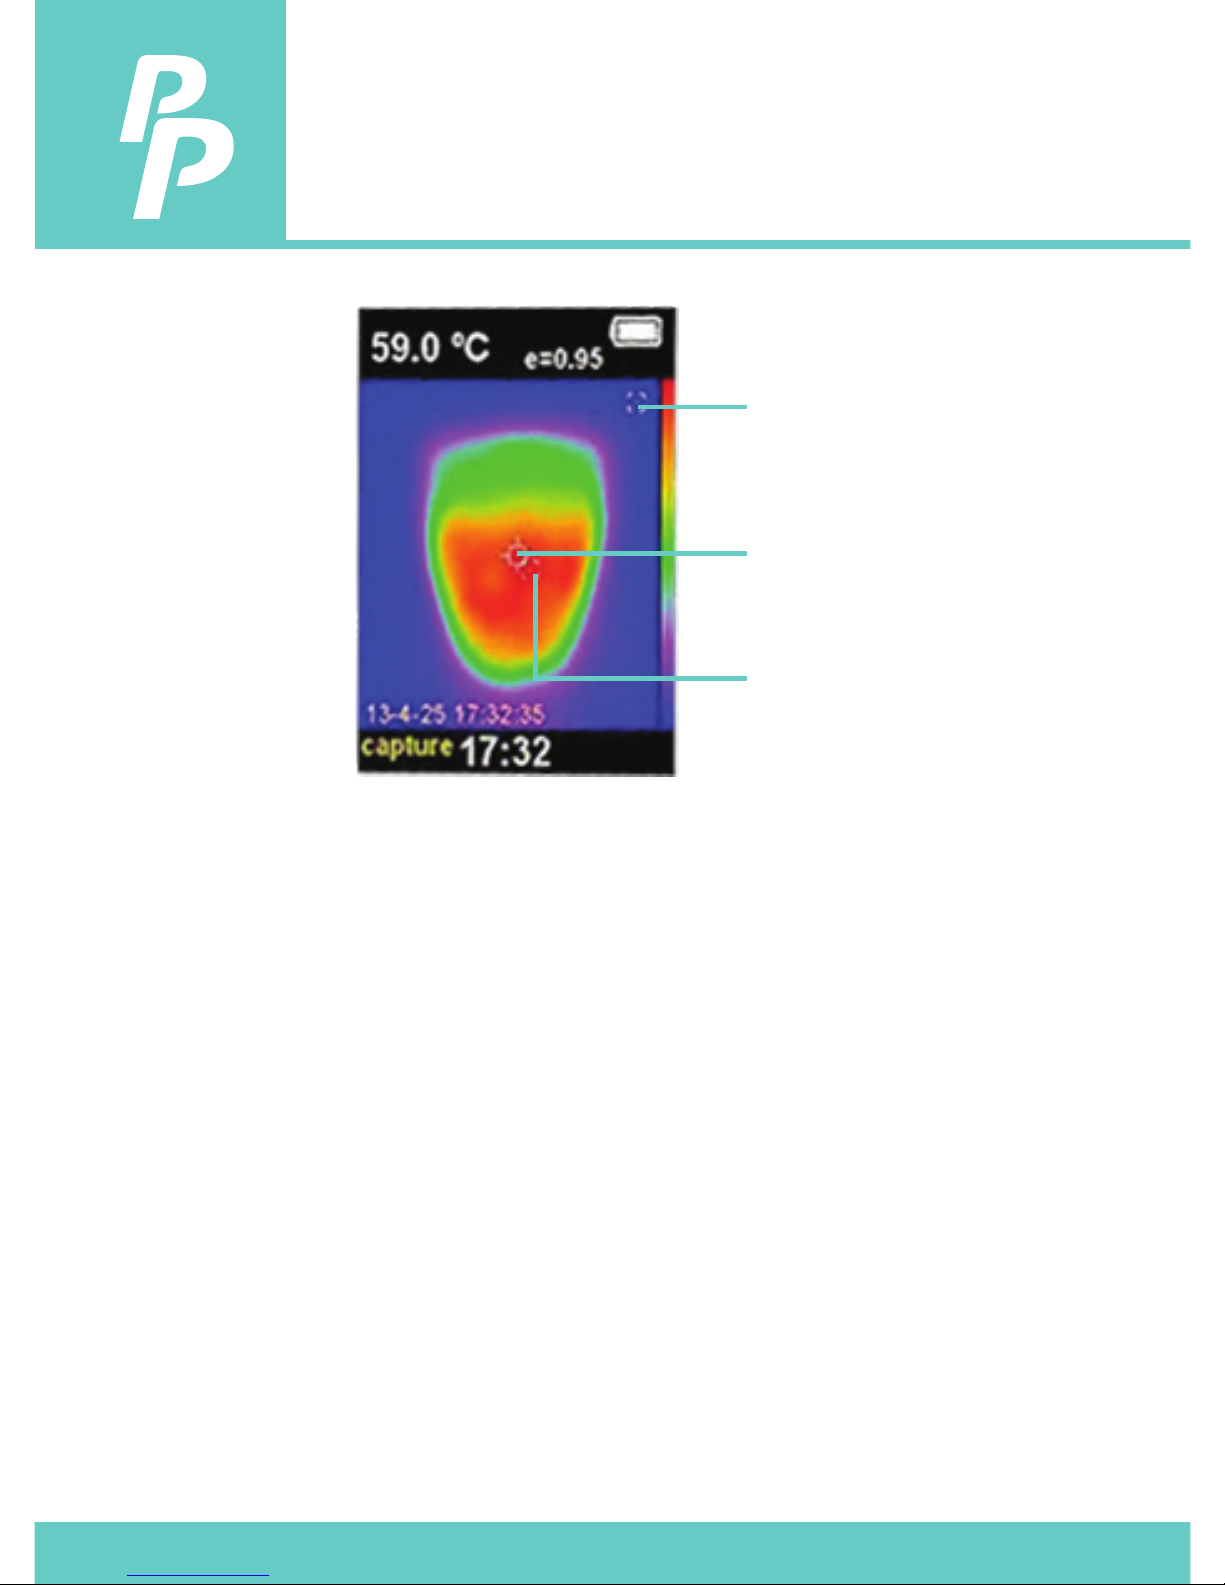
8. Measurement
P.12
- The measured temperature at the pixel center is displayed at the
upper left corner.
- The radiation coecient is displayed at the upper right corner
1. Move the product until hot spot or cold spot coincides with the
center of pixel.
2. Direct the product to the object to get the optimum measured
results. (object temperature is higher or lower than the
surroundings temperature.)
Center spot
Center spot
Hot spot
Page 14

9. Color Palette
P.13
“Color palette” menu can change the representation color of the
infrared image displayed on the screen or captured. A number of
color palettes are available as below:
1. Gray-scale color:
• provides balanced linear color, help to reveal full details
2. High-contrast color:
• emphasize the displayed color, and the color contrast of
high-temperature and low-temperature can therefore be
improved.
3. Iron and spectra color:
• provide a mixed high-contrast gray-scale color palette.
High contrast
Iron
Spectra
Page 15

10. Temperature of reective
background
P.14
Set the temperature compensation for reective background in
the option of background. The background temperature can be
set between 0°C and +36°C.
The surface temperature and measurement accuracy of
measured object may be inuenced by over-hot or over-cold
object (When the radiation coecient of the surface of the
measured object is low, this phenomenon is obvious).
Under many situations, the temperature of reective background
should be adjusted to get the optimum measured result.
Page 16

11. Marking of spot
temperature
P.15
Turn on or o the marking of spot temperature:
1. If turning on, the marking of spot temperature indicates that the
hot or cold spot on screen needs additional appraisal.
2. If turning o, it indicates that user can focus on the measured
pixel per time.
Page 17
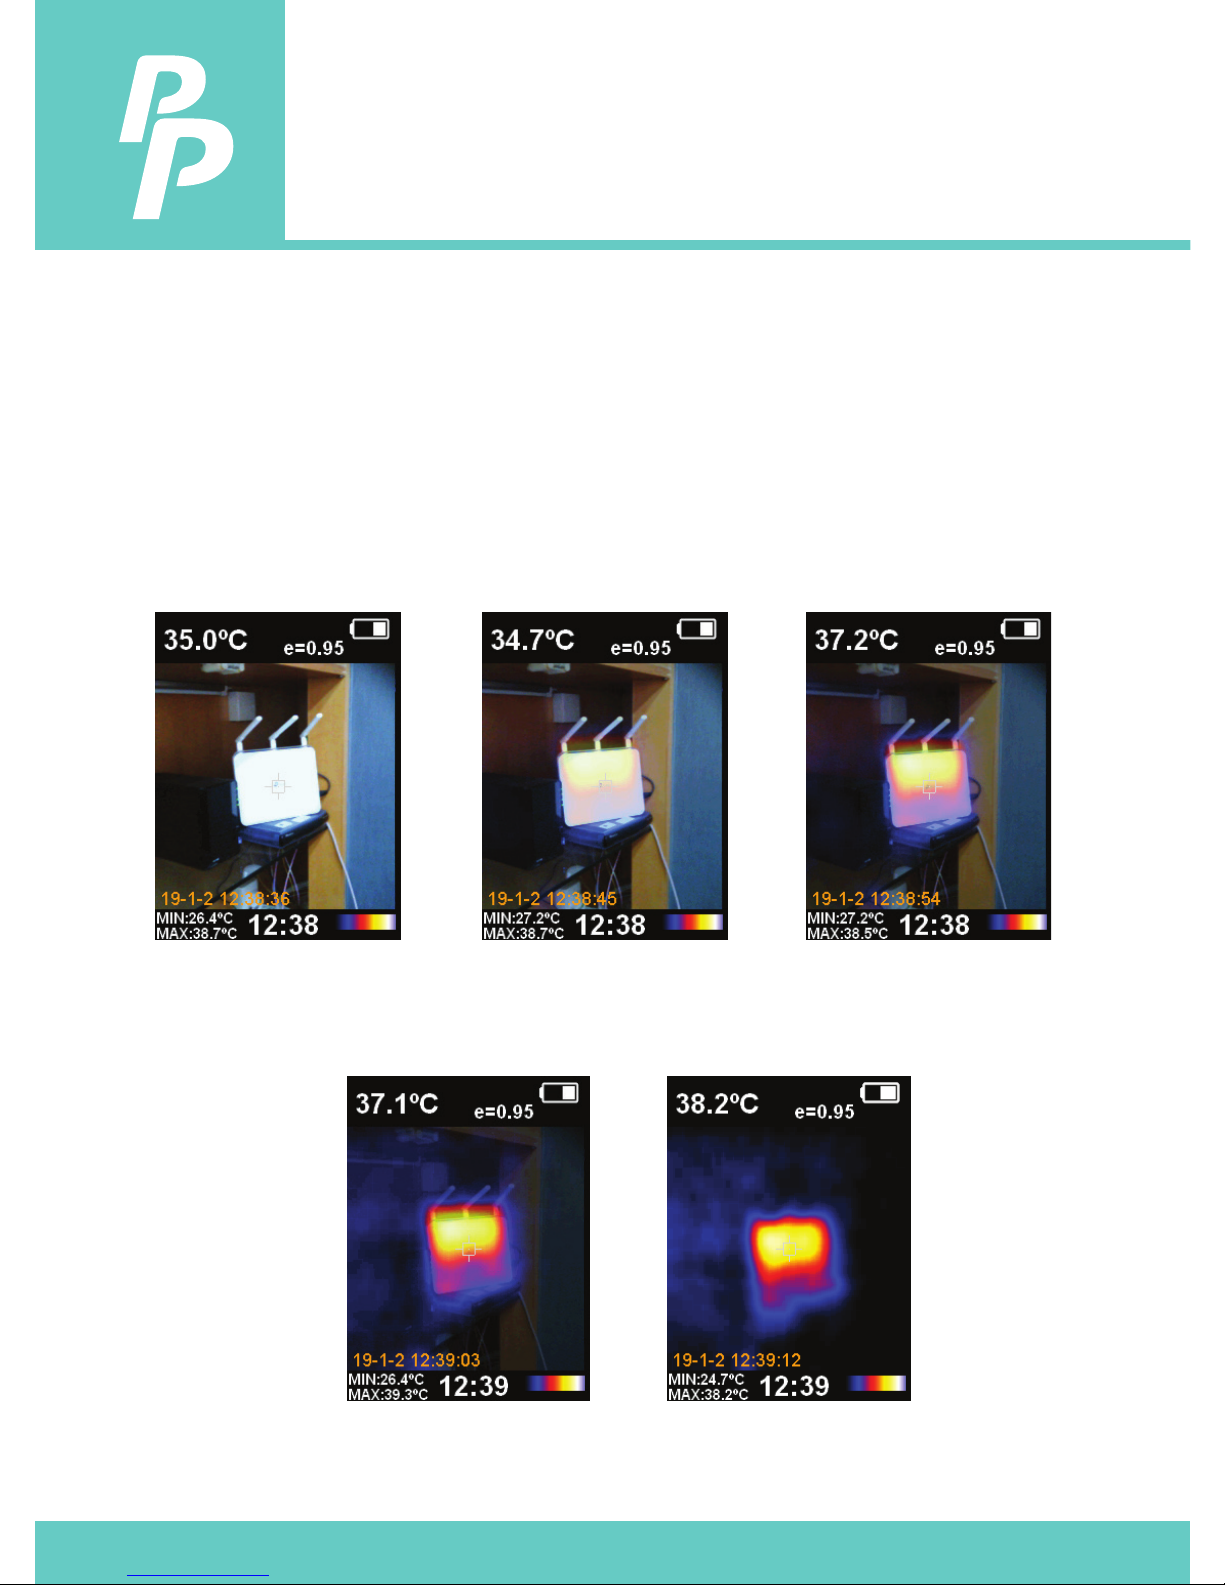
P.16
12. Image mixing
IR0002 can capture visible image of infrared image with the
temperature distribution of target area clearly displayed on
screen, resulting in a easier understanding of infrared image.
To use this function, press “ ◄“ /“ ►” to adjust the mixed image
from 0% to 100%
0% 25% 50%
75%
100%
Page 18

13. Image capturing and
checking
P.17
13.1. Image capturing
1. Press image capturing button and the symbol of “store
photos yes no” will display on screen.
2. Press “MENU” to store image; press “SELECT” to delete the
captured image.
- If “NO SD” displayed at the lower left corner of screen, it
indicates SD card is not installed.
- If “FULL” is displayed at the lower left corner of screen, it
indicates that SD card is full.
13.2. Image checking
1. Press “menu” to enter into the mode of menu.
2. Select the image storage module using the arrow keys.
3. Press the “SELECT” button to choose the picture you want
to view.
4. Press the arrow keys to view other pictures.
5. Press the “SELECT” button to view pictures.
6. Press the above key on the screen will display "Delete
photo yes no":
-Press “MENU” to delete the picture
-Press "SELECT" to cancel.
7. Press the “MENU” button to exit Review.
Page 19

P.18
14. Emissivity
The emissivity of the surface of a material is its eectiveness in
emitting energy as thermal radiation. The emissivity of the product
can be adjusted from 0.10 to 1.00 with the default value of 0.95. Many
common objects and materials (such as timber, water, skin and textile
fabric) will reect heat energy, so it is easy to obtain high accuracy as
a result.
Choosing the correct setting of the emissivity value of dierent
objects and materials is very important for achieving accurate
temperature measurement. The surface emissivity will greatly aect
the measured temperature and therefore adjusting the emissivity
value to match it is essential.
Page 20

P.19
15. The Table of Emissivity
Value
The product is provided with four types of object measurement
modes:
1. Coarse object (easy to give
out energy)(0.95);
2. Semi-matte object (0.80);
Substance Thermal Substance Thermal
radiation radiation
Bitumen 0.90-0.98 Black cloth 0.98
Concrete 0.94 Human skin 0.98
Cement 0.96 Foam 0.75-0.80
Sand 0.90 Charcoal dust 0.96
Earth 0.92-0.96 Paint 0.80-0.95
Water 0.92-0.96 Matte paint 0.97
Ice 0.96-0.98 Black rubber 0.94
Snow 0.83 Plastic 0.85-0.95
Glass 0.90-0.95 Timber 0.90
Ceramics 0.90-0.94 Paper 0.70-0.94
Marble 0.94 Chromium 0.81
hemitrioxide
Gypsum 0.80-0.90 Copper oxide 0.78
Mortar 0.89-0.91 Ferric oxide 0.78-0.8
Brick 0.93-0.96 Textile 0.90
3. Semi-shiny object (0.60);
4. Shiny object (0.30);
Page 21

CUSTOMER SERVICE INQUIRIES
Your emails are important to us so we strive to reply all
inquiries and emails within 24 hours. In exceptional cases,
we may require more time to respond.
Thank you for your understanding.
For more information about our products and services,
please send us an email:
For B2B or project-based application, please send an email:
FOR MORE INFORMATION ABOUT PERFECT PRIME PLEASE
VISIT OUR ABOUT US PAGE AND FEEL FREE TO BROWSE.
製品マニュアルページのQRコードをスキャンする
(特定の製品で利用可能な多言語)
Scan QR Code for the Product Manual page
(Multi-Language available for certain products)
Page 22

HORMES LIMITED
G/F UNIT 3, 61 GLENTHORNE ROAD,
LONDON W6 0LJ UNITED KINGDOM
+44 203 7695377
Retailer
Email
Address
Telephone
 Loading...