

Page 1
1
www.perfectprime.com for product register and warranty
Customer Service: [email protected]
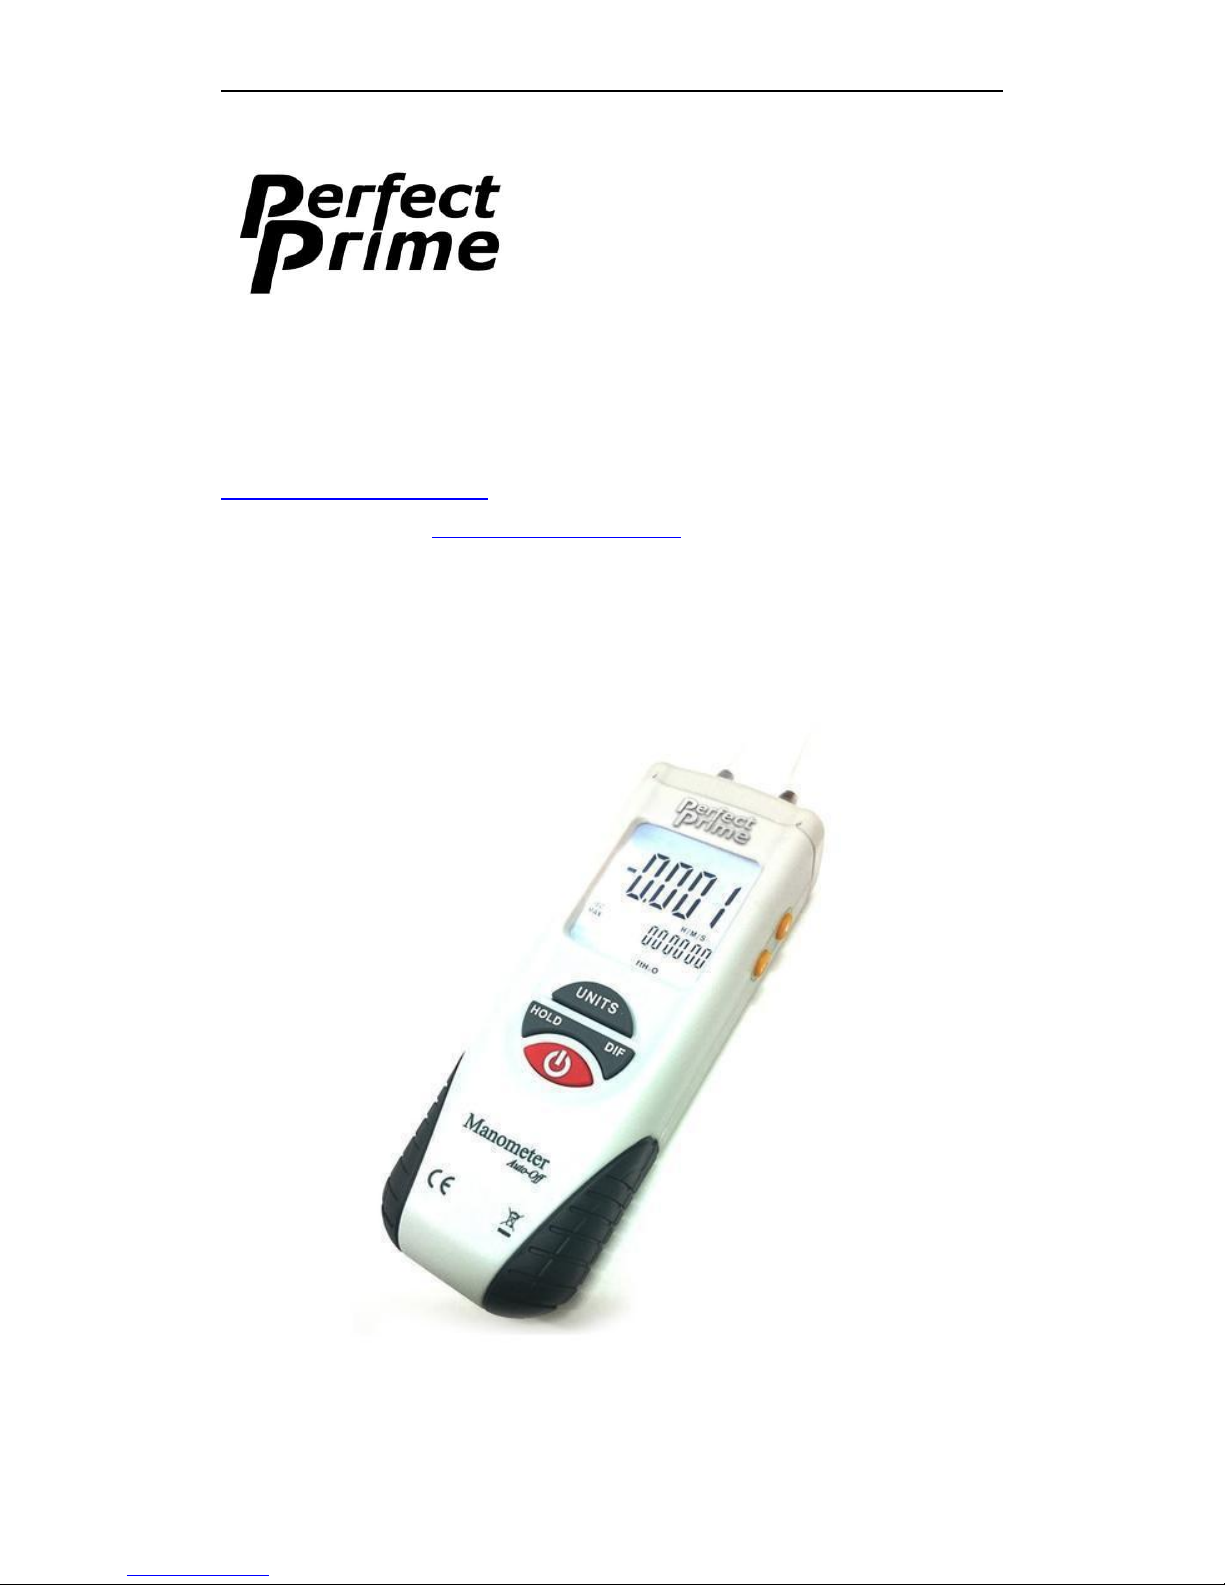
Digital Manometer AR1895
Page 2

2
Contents
1. Overview---------------------------------------------------------------------------------------------3
2. Performance Index--------------------------------------------------------------------------------3
3. Buttons Description-------------------------------------------------------------------------------4
4. Display Description--------------------------------------------------------------------------------4
5. Degree of Accuracy And Range of Units------------------------------------------------------5
6. Operation--------------------------------------------------------------------------------------------6
8. Error Codes------------------------------------------------------------------------------------------7
9. Battery Replacement------------------------------------------------------------------------------7
10. Safety Precaution And Consideration--------------------------------------------------------7
Page 3

3
1. Overview
The AR1890 digital manometer can measure different pressure levels with high
accuracy (details below) as well as the maximum pressure across the measurement.
In addition, there are 11 units that can be selected:
1. inH2O 2. psi 3. bar 4. mbar
5. kPa 6. inHg 7. mmHg 8. ozin2
9. ftH2O 10. cmH2O 11. kgcm
With a simple hose connection device equipped,it can be used for:
1. Testing ventilation
2. Air conditioning system
3. Spot checking
4. Air conditions in a room
5. Any gas pressure system troubleshooting.
Easy operation and clear reading are the major features of AR1895. Therefore, it is
doubtlessly an indispensable testing tool for HVAC technician, maintenance
engineers and science researchers.
2. Performance Index
Display
Dual LCD
Accuracy
±0.3%FSO(25°C)
Reliability
±0.2%FSO(Max+/-0.5%FSO)
Linearity/Hysteresis
±0.29%FSO
Maximum Pressure
150 psi
Response Time
0.5 seconds typical
Low Battery Indicator
Yes
Over Range Indicator
Err.1
Under Range Indicator
Err.2
Operating Temperature
32°F to 122°F (0 to 50°C)
Storage Temperature
14°F to 140°F (-1 to 60°C)
Power Supply
1 X 9V Battery (included) or External
9VDC
Standard Accessories
Pouch &. Tubing
Page 4
4
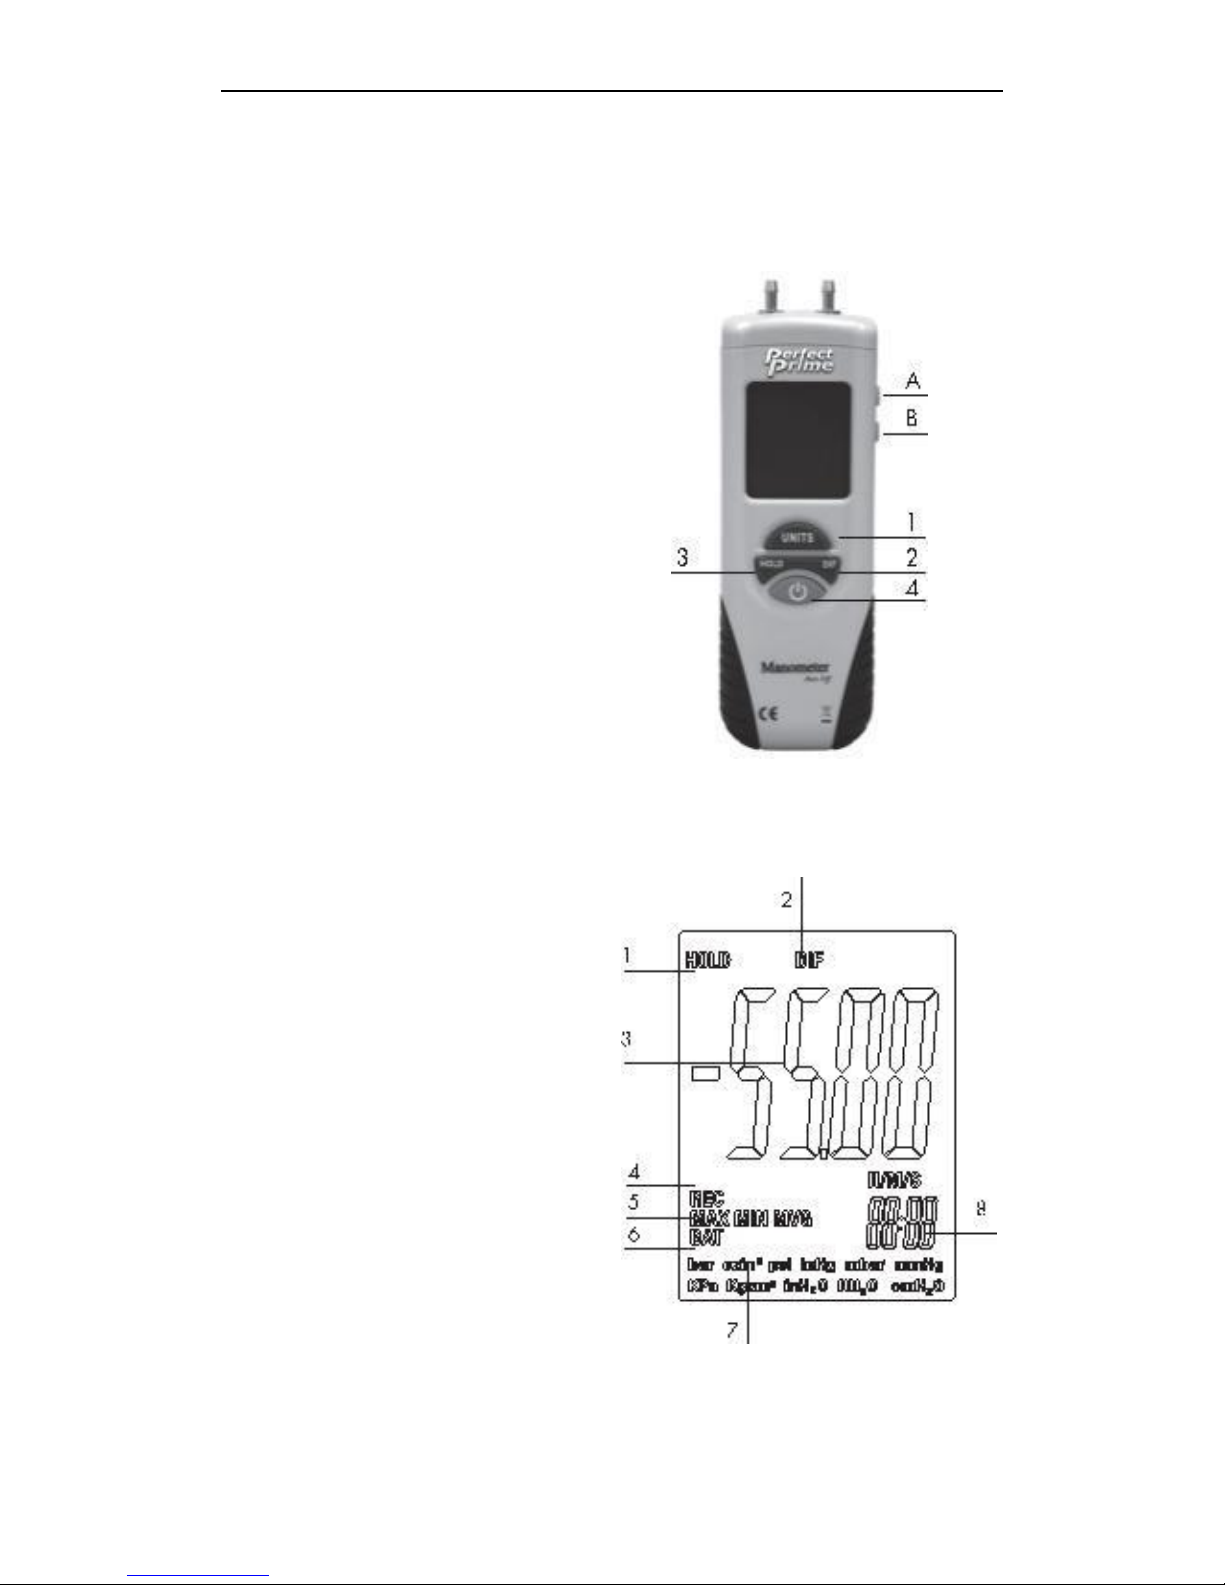
3. Buttons Description
The meter has six buttons:
1. UNITS
2. DIF
3. HOLD
4. ON/OFF
A. REC
B. BACKLIGHT
4. Display Description
1. Hold Function
2. Differential mode
3. Primary Data Screen
4. Record Mode
5. MAX/MIN/AVG
6. Low Battery Indicator
7. Pressure Unit Indicator
8. Relative Time Clock
Page 5
5
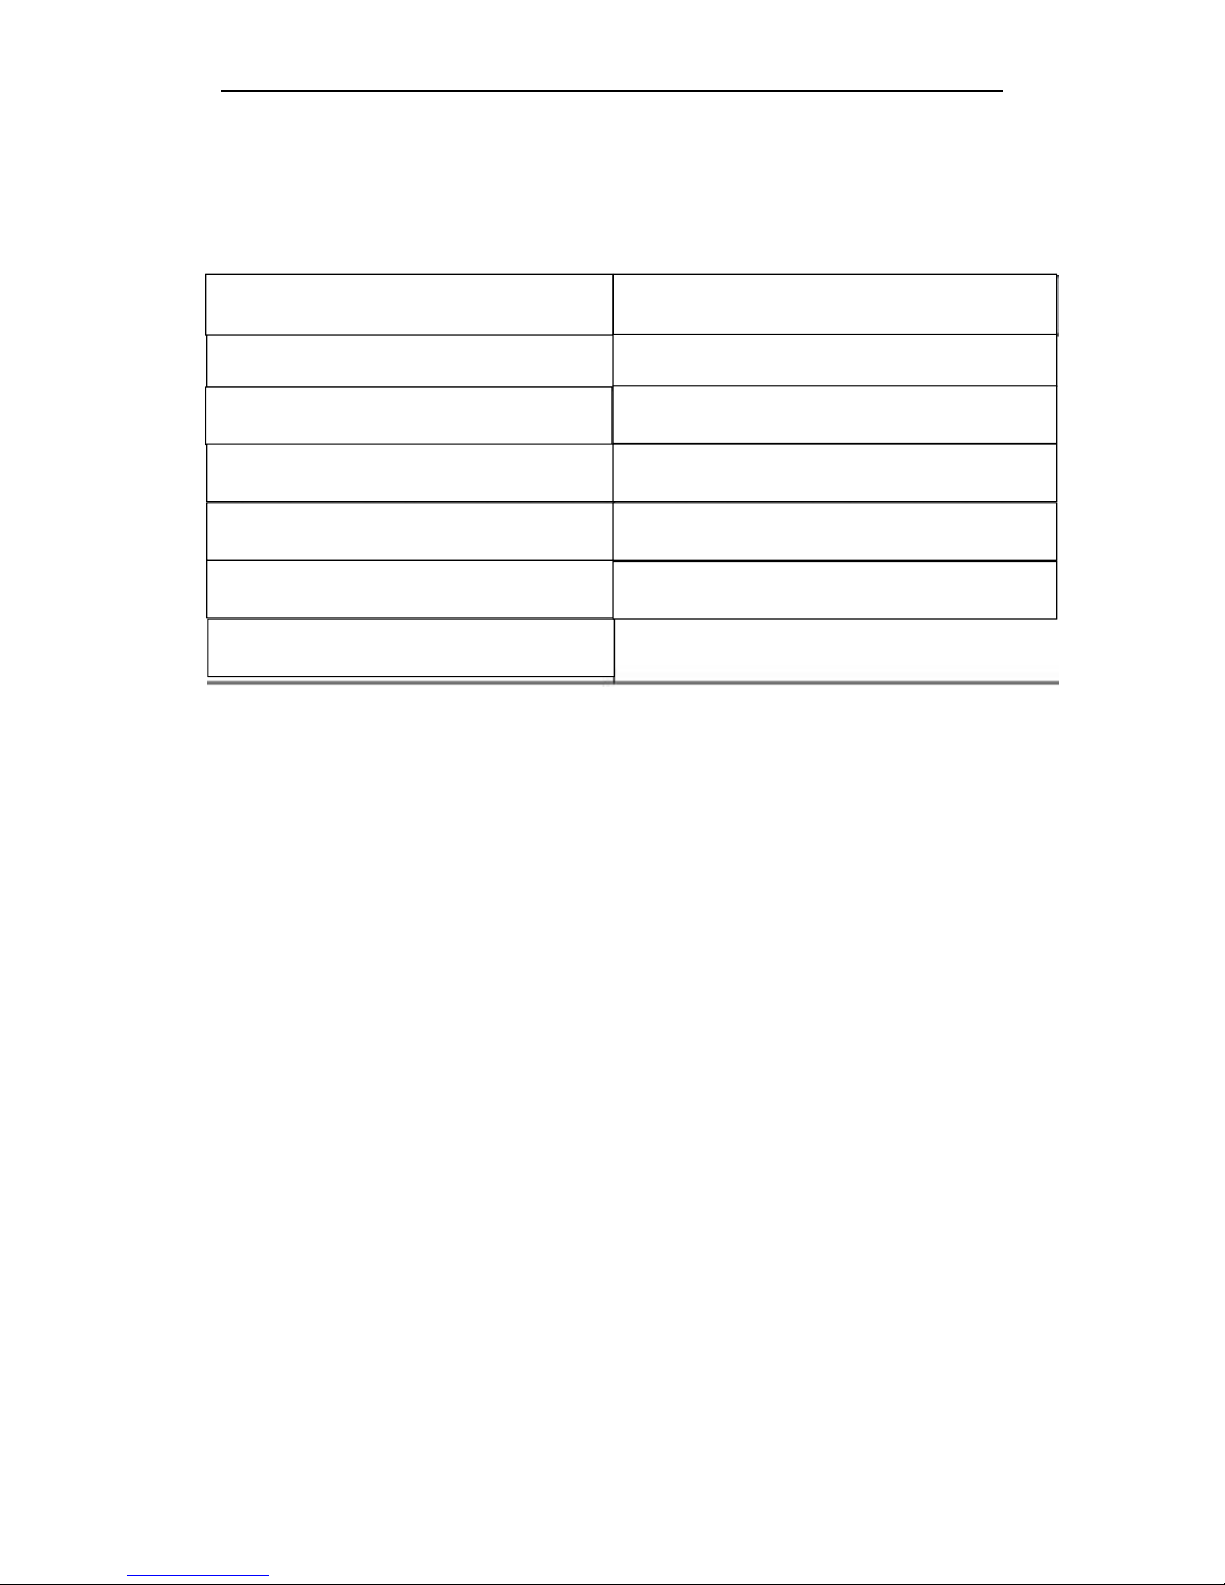
5. Degree of Accuracy And Range of Units
Function Range Accuracy
Function Range Accuracy
inH2O ±2772 1
Psi ±100.0 0.1
Mbar ±6895 1
kPa ±689.5 0.1
inHg ±203.6 0.1
mmHg ±5171 1
Ozin2 ±1600 1
ftH2O ±230.7 0.1
cmH2O ±7031 1
Kgcm2 ±7.031 0.001
Bar ±60895 0.001
Page 6

6
6. Operation
1. ON/OFF button:
-Press the ON / OFF button to turn on/off manometer.
-When turned on, the screen will be displayed for about two seconds and the
normal measurement mode will appear afterwards.
2. Clearance:
-If there is no input deferential pressure, the manometer will not be clear the
data automatically.
-When manually clearance is needed, press the HOLD button for about five
Seconds,
-->the screen will show ---- then it will be cleared.
3. UNITS button:
-Press the UNITS button, units at the bottom of the screen will change.
-These units include:
1. inH2O 2. psi 3. bar 4. mbar
5. kPa 6. inHg 7. mmHg 8. ozin2
9. ftH2O 10. cmH2O 11. kgcm
4. DIF button:
-Press the DIF button, the pressure value will subtract the pressure value before
pressing.
5. HOLD button:
-Press the HOLD button, the current measured result will be kept.
-Press once more will lift the hold function.
6. REC button:
-Press this button intermittently, the maximum, minimum, average result from
process of recording the measuring will be displayed.
-Press and hold the button for about 5 seconds and it will stop recording.
-Other function buttons are locked and can not be used during recording.
7. Backlit button:
-Press this button, the backlight will turn on.
-Press the button again to turn off the backlight.
8. Automatic power-off function:
-The manometer will automatically power off if no buttons has been pressed for
25 minutes.
-If you want to turn off function of automatic power-off:
1. Press HOLD button.
2. Press the ON / OFF button to start.
Page 7

7
3. LCD will show "ON"--->the function of automatic power-off turned off.
7. Error Codes
An error message will appear on screen if the meter fails an internal diagnostic test.
1. Err. 1: Pressure value is over the read range.
2. Err. 2: Pressure value is below the read range.
8. Battery Replacement
When the battery power is low, “BAT” will display on the screen to remind you for
replacing the 9V battery.
9. Safety Precaution And Consideration
• If product operates abnormally, stop using.
• Please test the manometer before usage to ensure proper operation.
• Always ensure that the connecting hoses are free from kinks, blockage or splits.
• While using the manometer, if you suspect gas is leaking or smell gas:
1. Turn off gas supply and ventilate the affected areas.
2. Identify and iron out the source of leaking before using the product again.
• Do not disassemble or modify the manometer in any way. Otherwise, accident and
injury may occur.
 Loading...