

Pepperl+Fuchs PEDESTAL1-150-1P-NP-G-T-S3-304, PEDESTAL1-150-1P-KP-G-T-304, PEDESTAL1-150-1P-KP-G-T-S3-304, PEDESTAL1-150-1P-NP-G-T-304 Instruction Leaflet
Page 1
Bestellbezeichnung /
model number
Standfuß für / Pedestal for
VisuNet EX2 GMP
Beschreibung / Description
1
PEDESTAL1-150-1P-KP-G-T-304
Standfuß inkl. EX2-Anschluss-Adapter,
350° drehbar, Bildschirmneigung 10°
mit Tastaturvorbereitung
Pedestal incl. EX2 mounting bracket
turnable 350°, monitor 10° tilt
PEDESTAL1-150-1P-KP-G-T-S3-304
Wie (1), zusätzlich mit Buchse für
kabelgebundenen Barcode-Handheld
As (1) additional with receptacle for wired
handheld barcode reader
2
PEDESTAL1-150-1P-NP-G-T-304
Standfuß inkl. EX2-Anschluss-Adapter,
350° drehbar, Bildschirmneigung 10°
Pedestal incl. EX2 mounting bracket
turnable 350°, monitor 10° tilt
PEDESTAL1-150-1P-NP-G-T-S3-304
Wie (2), zusätzlich mit Buchse für
kabelgebundenen Barcode-Handheld
As (2) additional with receptacle for wired
handheld barcode reader
Doc. No. 229451 45-3182
Beipackzettel
Instruction leaflet
Montage VisuNet EX2 GMP an einen Standfuß
Mounting VisuNet EX2 GMP to pedestal
1/8 453182b / 07/13
Page 2
Standfuß für / Pedestal for
VisuNet EX2 GMP
Standfuß mit 3 montierten Kabelverschraubungen und Kabeleinzugshilfen
Pedestal with 3 mounted cable glands and a wire pull which is helping to pull the cable through the
pedestal
7 Stopfen für nicht verwendete Kabelverschraubungen
caps for unused cable glands
4 Schrauben mit Innensechskant + NORD-LOCK Scheiben
zur Befestigung des VisuNet EX2 GMP am Standfuß
Screws with hexagon socket + NORD-LOCK washers
to mount the VisuNet EX2 GMP on the pedestal
M5 x 20
1 Dichtung / gasket
zur Abdichtung des Standfußes am Boden / to seal the pedestal to floor
* Schraubenzieher mit Innensechskant / Allen key
2,5 mm, 3 mm, 4 mm
* Gabelschlüssel für Kabelverschraubungen / fork wrench for cable glands
* 4 Schrauben 8 mm zur Befestigung am Boden
(Schrauben passend zur Beschaffenheit des Untergrunds wählen)
4 screws 8 mm for floor mount
(Choose the appropriate screws depending of type of floor)
* 2 Personen / 2 people
Schlüsselweite
Wrench size
Klemmbereich des Kabels
Cable diameter
Anzugsmoment
Torque
M 16
20
4,5 – 10 mm
10 Nm
M 20
24
7 – 13 mm
12 Nm
M 25
29
9 – 17 mm
12 Nm
Lieferumfang / Scope of supply
Zur Montage werden die folgenden Hilfsmittel benötigt
Tools required for assembly
Je nach verwendeter Kabelverschraubung sind folgende Gabelschlüssel notwendig:
Choose the appropriate wrench size to tighten the cable glands.
2/8 453182b / 07/13
Page 3
Dichtung / gasket
Boden / ground
Dichtung / gasket
Standfuß / pedestal
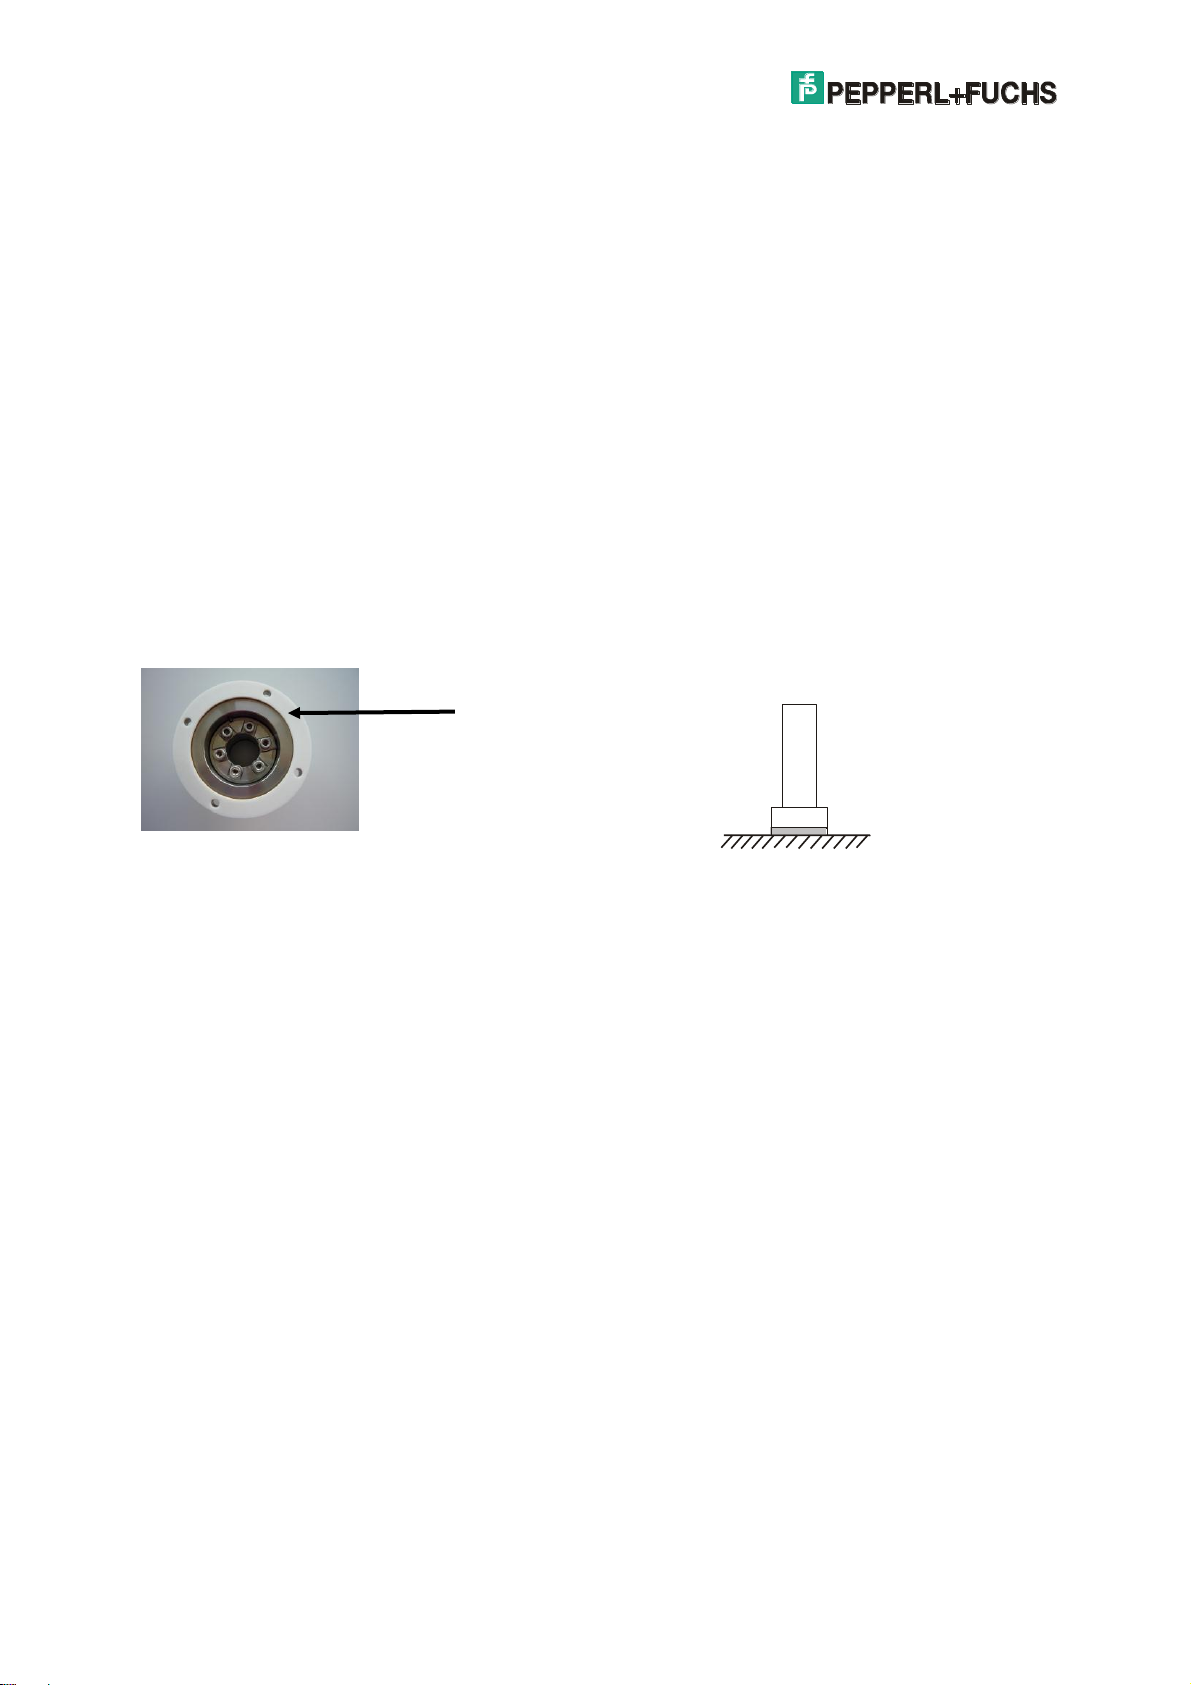
1 Standfuß auf dem Boden befestigen
Mounting pedestal on the ground
Beschaffen Sie 4 Stück Schrauben 8 mm für die Bodenbefestigung.
Find four 8 mm screws for floor mount.
Wählen Sie, passend zur Beschaffenheit des Untergrunds, 4 Stück Schrauben 8 mm zur Befestigung
des Standfußes.
Four 8 mm screws are used to mount the pedestal to the floor.
Die beigelegte Dichtung verwenden / Use the enclosed gasket.
Bitte verwenden Sie die beigelegte Dichtung bevor Sie den Standfuß am Untergrund befestigen.
Place the enclosed gasket before attaching the pedestal at the floor.
Standfuß drehbar / Pedestal turnable
(Bild 1: Standfuß von unten gesehen)
(Fig.1: Pedestal from the bottom view)
3/8 453182b / 07/13
Page 4

Vormontiertes Anschlagblech /
premounted stop plate
Anschlagschraube /
locking screw
1.1 Bodenbefestigung, drehbar / Floor mounting, turnable
Drehwinkel / Angle of turn
Das erste Anschlagblech ist vormontiert für einen max. Drehwinkel von 350°.
Mit dem beigelegten zweiten Anschlagblech kann ein individuell gewünschter Drehwinkel festgelegt
werden.
(Der Drehwinkel kann über die 6 Schrauben in 60° Schritte unterteilt werden.)
The first stop plate is premounted and provides a max. rotation of 350°. With the second enclosed
stop plate choose the amount of rotation in 60° increments.
(This is accomplished by placing a stop plate under the appropriate screw in relation to the stop
screw.)
(Bild 2: Standfuß von unten gesehen)
Fig.2: Pedestal from the bottom view)
Montageplatte / mounting plate
4/8 453182b / 07/13
Page 5

Bestellbezeichnung / model number
Standfuß für / Pedestal for
VisuNet EX2 GMP
Beschreibung / Description
PEDESTAL1-150-1P-KP-G-T-304
(350°C drehbar, turnable)
PEDESTAL1-150-1P-KP-G-T-S3-304
Standfuß, mit Tastaturvorbereitung
Bildschirmneigung 10°, mit Tastaturvorbereitung
Pedestal , with pipe for keyboard,
inclination of monitor 10°
Tastaturanschlusskabel /
Cable on keyboard
VisuNet GMP
11
2 Montagehinweis für Version mit Tastaturvorbereitung
Mounting note for version with pipe for keyboard
Tastaturanschlusskabel mit der Einzugshilfe durch den Standfuß ziehen
Run the cable on the keyboard through the pedestal (using a wire pull)
Diese Montage sollte mit 2 Personen durchgeführt werden.
This requires 2 people.
Befestigen Sie das Tastaturanschlusskabel an der Einzugshilfe (1) und ziehen Sie das Kabel durch
den Standfuß in Richtung VisuNet EX2 GMP.
Eine Person hält die Tastatur fest, die andere Person zieht das Kabel durch.
Attach the cabel on the keyboard on the wire pull (1) and pull the cable up through the pedestal
towards VisuNet EX2 GMP.
One person is holding the keyboard the other person pulls the cable through.
Befestigung der Tastatur am Standfuß / Mounting the keyboard on the pedestal
Nun befestigen Sie die Tastatur mit den beiden Madenschrauben am Standfuß.
Now attach the keyboard with the two grub screws on the pedestal.
5/8 453182b / 07/13
Schlüsselweite
Wrench size
Page 6

Klemmbereich des Kabels
Cable diameter
Anzugsmoment
Torque
M 16
20
4,5 – 10 mm
10 Nm
M 20
24
7 – 13 mm
12 Nm
M 25
29
9 – 17 mm
12 Nm
3 Kabel einziehen /Run the cable
Wählen Sie für Ihre Kabel die passenden Kabelverschraubungen aus.
(Z. B. 1 Kabelverschraubung für das Versorgungskabel, 1 Kabelverschraubung für das
Netzwerkkabel, 1 Kabelverschraubung bleibt leer (Stopfen).)
Choose the corresponding correct cable gland to your cable.
(E.g. 1 cable gland for the supply cable, 1 cable gland for the network cable, 1 cable gland is unused
(cap)).
Befestigen Sie Ihr Kabel mit der Einzugshilfe (2) und ziehen Sie das Kabel durch den Standfuß
Richtung VisuNet EX2 GMP.
Attach the cable with the wire pull (2) and pull the cable through the pedestal towards the
VisuNet EX2 GMP.
6/8 453182b / 07/13
Page 7

VisuNet EX2 GMP
Diese Montage sollte mit 2 Personen durchgeführt werden.
This requires 2 people.
Schließen Sie alle Kabel am VisuNet EX2 GMP korrekt an. (siehe Handbuch VisuNet EX2 GMP
Kapitel Standfuß-Montage, Kabel an VisuNet EX2 GMP anschließen)
Eine Person hält das VisuNet EX2 GMP fest, die andere Person schließt die Kabel an.
Connect correctly all cables at the VisuNet EX2 GMP. (See VisuNet EX2 GMP manual chapter
Mounting the pedestal, connecting cable to VisuNet EX2 GMP)
One person holds the VisuNet EX2 GMP while the other person connects the cables.
VisuNet EX2 GMP
Anzugsmoment / Torque 5 -6 Nm
4 Schrauben mit Innensechskant + NORD-LOCK Scheiben
Screws with hexagon socket + NORD-LOCK washers
M5 x 20
Innensechskantschlüssel / Allen Key
4 mm
4 Kabel anschließen / Connect all cables
5 VisuNet EX2 GMP am Standfuß befestigen
Mounting the VisuNet EX2 GMP on pedestal
Diese Montage sollte mit 2 Personen durchgeführt werden. Eine Person hält das VisuNet EX2 GMP
fest, die andere Person schraubt.
This requires 2 people. One person holds the VisuNet EX2 GMP the other person attaches the cover.
Befestigen Sie das VisuNet EX2 GMP am Standfuß wie folgt:
Attach the VisuNet EX2 GMP on the pedestal as follows:
7/8 453182b / 07/13
Schlüsselweite
Page 8

Wrench size
Klemmbereich des Kabels
Cable diameter
Anzugsmoment
Torque
M 16
20
4,5 – 10 mm
10 Nm
M 20
24
7 – 13 mm
12 Nm
M 25
29
9 – 17 mm
12 Nm
Info / Note
Der IP Schutz ist nur gewährleistet, wenn
entweder ein Kabel durchgezogen ist, oder die
Schutzkappe (1) eingesteckt ist.
The IP protection is only ensured if either a cable
is run or a cap (1) is put on.
6 Kabelverschraubungen schließen
Close the cable glands
Verschrauben Sie die Kabelverschraubung mit dem Gabelschlüssel.
Screw the cable glands with a fork wrench
Bitte schließen Sie die nicht benötigten Kabelverschraubungen mit einer Schutzkappe. Bitte beachten
Sie dabei die Reihenfolge der Arbeitsschritte 1.) bis 3.).
Cap the unused cable glands with a cap. Ensure the order of the mounting steps 1.) to 3.).
(1) Schutzkappe
1.) Ziehen Sie die Kabelverschraubung leicht an.
Lightly tighten the cable gland.
2.) Setzen Sie die Schutzkappe ein.
Put the caps in.
3.) Ziehen Sie die Kabelverschraubung an.
Firmly tighten the cable gland.
7 Erdung über Standfuß
Grounding at pedestal
Pepperl+Fuchs empfiehlt zur Erdung den Einsatz eines Kabels mit einem Aderdurchmesser von min.
4 mm2. Nähere Informationen hierzu, entnehmen Sie bitte dem VisuNet EX2 GMP Handbuch Kapitel
Erdung über Standfuß .
Pepperl+Fuchs recommends to use a cable with a core-cross section of 4 mm2 (min.) for grounding.
You’ll find more information in the VisuNet EX2 GMP technical manual. See, the chapter Grounding at
pedestal.
8/8 453182b / 07/13
 Loading...