

Page 1

FACTORY AUTOMATION
MANUAL
JAVASCRIPT PROGRAMMING GUIDE
Page 2

With regard to the supply of products, the current issue of the following document is
applicable: The General Terms of Delivery for Products and Services of the Electrical
Industry, published by the Central Association of the Electrical Industry (Zentralverband
Elektrotechnik und Elektroindustrie (ZVEI) e.V.) in its most recent version as well as the
supplementary clause: "Expanded reservation of proprietorship"
2
Page 3

JavaScript Programming Guide
1 Introduction ............................................................................ 10
1.1 Document Organization ...................................................................... 10
1.2 Document and Coding Conventions .................................................. 10
1.3 Related Documents ............................................................................. 10
1.4 Related Utility ....................................................................................... 11
2 Programming Environment ................................................... 12
2.1 Editor ..................................................................................................... 12
2.2 CodeViewer Application ...................................................................... 12
2.3 Security ................................................................................................. 12
2.4 Debugging ............................................................................................ 13
3 Programming Concepts ........................................................ 14
3.1 Simplicity .............................................................................................. 14
3.2 The OHV300 gui Object ....................................................................... 15
3.2.1 Softkey Implementation ..........................................................................................16
3.2.2 Forms ....................................................................................................................16
3.2.3 Menus ....................................................................................................................17
3.2.4 Text .......................................................................................................................19
3.3 Event ..................................................................................................... 19
3.3.1 Decode Events ......................................................................................................20
3.3.2 Key Events .............................................................................................................21
3.3.3 Command Execution ..............................................................................................22
3.4 Reader Configuration .......................................................................... 22
3.5 Symbol Decoding ................................................................................ 23
3.5.1 Transform Data by Symbology ...............................................................................25
3.5.2 Evaluate Data Format ............................................................................................26
3.5.3 Detect Format Errors ..............................................................................................27
3
Page 4

JavaScript Programming Guide
3.5.4 Let the Handheld Process the Decode ...................................................................27
3.5.5 Ignore the Decode .................................................................................................28
3.5.6 Determine the Orientation of the Decode ................................................................28
3.6 Host Communication ........................................................................... 29
3.7 Data in Handheld Local Storage ........................................................ 30
3.8 Demo Programs ................................................................................... 30
4 Class Reference ..................................................................... 31
4.1 decode .................................................................................................. 31
4.1.1 Properties ..............................................................................................................31
4.1.1.1 data ............................................................................................................................... 31
4.1.1.2 symbology ..................................................................................................................... 31
4.1.1.3 symbology_ex ............................................................................................................... 32
4.1.1.4 symbologyModifier ........................................................................................................ 32
4.1.1.5 symbologyModifier_ex .................................................................................................. 32
4.1.1.6 symbologyIdentifier ....................................................................................................... 32
4.1.1.7 x .................................................................................................................................... 32
4.1.1.8 y .................................................................................................................................... 32
4.1.1.9 time ............................................................................................................................... 33
4.1.1.10 quality_percent ............................................................................................................. 33
4.1.1.11 qrPosition ...................................................................................................................... 33
4.1.1.12 qrTotal ........................................................................................................................... 33
4.1.1.13 qrParity .......................................................................................................................... 33
4.1.1.14 linkage ........................................................................................................................... 33
4.1.1.15 bounds .......................................................................................................................... 33
4.1.1.16 numExtraFields ............................................................................................................. 34
4.1.1.17 decoderType ................................................................................................................. 34
4.1.1.18 aimSymbology .............................................................................................................. 34
4.1.1.19 aimModifier ................................................................................................................... 35
4.1.1.20 decodeOutputFormat .................................................................................................... 35
4
Page 5

JavaScript Programming Guide
4.2 gui .......................................................................................................... 36
4.2.1 Methods .................................................................................................................36
4.2.1.1 alert ............................................................................................................................... 36
4.2.1.2 confirm .......................................................................................................................... 37
4.2.1.3 prompt ........................................................................................................................... 38
4.2.1.4 putBox ........................................................................................................................... 39
4.2.1.5 sendKey ........................................................................................................................ 40
4.2.1.6 sendText ....................................................................................................................... 40
4.2.1.7 show.............................................................................................................................. 40
4.2.1.8 showForm ..................................................................................................................... 41
4.2.1.9 showMenu .................................................................................................................... 41
4.2.1.10 showSubMenu .............................................................................................................. 42
4.2.1.11 splash and clearSplash ................................................................................................. 42
4.2.1.12 sync............................................................................................................................... 43
4.2.2 Properties ..............................................................................................................43
4.2.2.1 inputMode ..................................................................................................................... 43
4.2.2.2 key ................................................................................................................................ 44
4.2.2.3 leftSoftkey ..................................................................................................................... 44
4.2.2.4 rightSoftkey ................................................................................................................... 44
4.2.2.5 statusText ..................................................................................................................... 45
4.2.3 Objects ..................................................................................................................45
4.2.3.1 gui.Button ...................................................................................................................... 45
4.2.3.2 gui.Edit .......................................................................................................................... 46
4.2.3.3 gui.Form ........................................................................................................................ 48
4.2.3.4 gui.Image ...................................................................................................................... 49
4.2.3.5 gui.Label ....................................................................................................................... 50
4.2.3.6 gui.Menu ....................................................................................................................... 50
4.2.3.7 gui.MenuItem ................................................................................................................ 51
4.2.3.8 gui.MultiLineEdit ........................................................................................................... 51
4.2.3.9 gui.Separator ................................................................................................................ 52
5
Page 6

JavaScript Programming Guide
4.2.3.10 gui.Softkey .................................................................................................................... 53
4.2.3.11 gui.Text ......................................................................................................................... 54
4.2.3.12 gui.ToggleButton ........................................................................................................... 55
4.2.4 Predefined Softkey Objects ....................................................................................57
4.2.4.1 backSoftkey .................................................................................................................. 57
4.2.4.2 cancelSoftkey ............................................................................................................... 57
4.2.4.3 okSoftkey ...................................................................................................................... 57
4.2.4.4 selectSoftkey ................................................................................................................ 57
4.2.5 Form and Menu Common Methods ........................................................................57
4.2.5.1 append(control)............................................................................................................. 57
4.2.5.2 prepend(control) ........................................................................................................... 58
4.2.5.3 setActiveChild(control) .................................................................................................. 58
4.2.6 Form and Menu Common Properties ......................................................................58
4.2.6.1 caption .......................................................................................................................... 58
4.2.6.2 onKey ............................................................................................................................ 59
4.3 reader .................................................................................................... 59
4.3.1 Methods .................................................................................................................59
4.3.1.1 beep .............................................................................................................................. 59
4.3.1.2 defaultSettings .............................................................................................................. 60
4.3.1.3 getKeyboardStatus ....................................................................................................... 60
4.3.1.4 processCommand......................................................................................................... 61
4.3.1.5 readSetting.................................................................................................................... 61
4.3.1.6 runScript ........................................................................................................................ 61
4.3.1.7 saveSettings ................................................................................................................. 62
4.3.1.8 setDisplayLed ............................................................................................................... 62
4.3.1.9 setInterval ..................................................................................................................... 63
4.3.1.10 clearInterval .................................................................................................................. 63
4.3.1.11 setTimeout .................................................................................................................... 63
4.3.1.12 clearTimeout ................................................................................................................. 64
4.3.1.13 shiftJisToUnicode ......................................................................................................... 64
6
Page 7

JavaScript Programming Guide
4.3.1.14 writeSetting ................................................................................................................... 64
4.3.1.15 unicodeToShiftJis ......................................................................................................... 65
4.3.2 Properties ..............................................................................................................65
4.3.2.1 onCommand ................................................................................................................. 65
4.3.2.2 onCommandFinish ........................................................................................................ 66
4.3.2.3 onDecode ..................................................................................................................... 67
4.3.2.4 onDecodeAttempt ......................................................................................................... 68
4.3.2.5 onIdle ............................................................................................................................ 69
4.3.2.6 onStandby ..................................................................................................................... 69
4.3.2.7 batteryLevel .................................................................................................................. 70
4.3.2.8 red ................................................................................................................................. 70
4.3.2.9 green ............................................................................................................................. 70
4.3.2.10 amber ............................................................................................................................ 70
4.3.2.11 none .............................................................................................................................. 70
4.3.2.12 cabled ........................................................................................................................... 71
4.3.2.13 charging ........................................................................................................................ 71
4.3.2.14 hardwareVersion ........................................................................................................... 71
4.3.2.15 oemId ............................................................................................................................ 71
4.3.2.16 readerId ......................................................................................................................... 71
4.3.2.17 softwareVersion ............................................................................................................ 71
4.3.2.18 bdAddr .......................................................................................................................... 72
4.4 storage .................................................................................................. 72
4.4.1 Methods .................................................................................................................72
4.4.1.1 append .......................................................................................................................... 72
4.4.1.2 erase ............................................................................................................................. 72
4.4.1.3 findFirst ......................................................................................................................... 73
4.4.1.4 findNext ......................................................................................................................... 73
4.4.1.5 read ............................................................................................................................... 74
4.4.1.6 rename .......................................................................................................................... 74
4.4.1.7 size ................................................................................................................................ 74
7
Page 8

JavaScript Programming Guide
4.4.1.8 upload ........................................................................................................................... 74
4.4.1.9 write .............................................................................................................................. 75
4.4.1.10 getHeader ..................................................................................................................... 76
4.4.1.11 saveOffsetWindow ........................................................................................................ 76
4.4.2 Properties ..............................................................................................................76
4.4.2.1 fullness_percent ............................................................................................................ 76
4.4.2.2 isFull .............................................................................................................................. 77
4.4.2.3 logFullness_percent ...................................................................................................... 77
4.5 comm..................................................................................................... 77
4.5.1 Methods .................................................................................................................77
4.5.1.1 connect ......................................................................................................................... 77
4.5.1.2 disconnect ..................................................................................................................... 77
4.5.1.3 sendPacket ................................................................................................................... 77
4.5.1.4 sendText ....................................................................................................................... 78
4.5.2 Properties ..............................................................................................................78
4.5.2.1 isConnected .................................................................................................................. 79
4.6 Functions .............................................................................................. 79
4.6.1 Dialog ....................................................................................................................79
4.6.1.1 alert ............................................................................................................................... 79
4.6.1.2 confirm .......................................................................................................................... 80
4.6.1.3 prompt ........................................................................................................................... 81
4.6.2 Other Functions .....................................................................................................82
4.6.2.1 gc .................................................................................................................................. 82
4.6.2.2 include .......................................................................................................................... 82
4.6.2.3 print ............................................................................................................................... 82
4.6.2.4 setStandbyMessage ..................................................................................................... 83
4.6.2.5 wdt ................................................................................................................................ 83
5 Glossary and Acronyms ........................................................ 84
6 Input Modes ............................................................................ 85
8
Page 9

JavaScript Programming Guide
7 Format Specifiers ................................................................... 86
8 Supported JavaScript Core ................................................... 87
9 Symbology ID & Modifier Information .................................. 89
9
Page 10

Introduction
1 Introduction
This manual describes the application programming interface for OHV300 handhelds. It is
assumed the user will have programming knowledge and familiarity with the JavaScript
language.
Handhelds read code and can be programmed to transmit code data over a selected
communications link or to store data in reader memory (batch mode).
The programming environment provides interfaces to:
Read and manipulate data in reader memory.
Display information on the OHV300 screen.
Retrieve data from reader hardware or OHV300 key pad.
Access data sent by host.
Transmit data to a host computer via communications link.
Select type of communications link.
Set, change, and retrieve reader configuration settings.
1.1 Document Organization
This document is organized as follows:
Section 1, Introduction: gives a product description and describes how to use this
document.
Section 2, Programming Environment: identifies tools used to create and load
application software into reader.
Section 3, Programming Concepts: discusses how to accomplish various operations
on the reader using the application programming interface.
Section 4, Class Reference: presents classes, objects, methods, properties, and
constructors that support application programs.
Section 5 – 9: Appendix
1.2 Document and Coding Conventions
The JavaScript library uses the following naming conventions:
identifiers: mixed-case with a capital letter where words join (soCalledCamelCase);
acronyms and other initialisms are capitalized like words, e.g., nasaSpaceShuttle,
httpServer
variables and properties: initial lower case
classes (i.e., constructors): initial capital
functions: initial lower case
1.3 Related Documents
10
unit of measure: suffix to name, separated from name by underscore, using correct
case when it’s significant, e.g., offset_pixels, width_mm, power_MW, powerRatio_dB
OHV manuals
Interface Configuration Document
Page 11
Introduction
Example!
Visit http://www.pepperl-fuchs.com to obtain this application.
1.4 Related Utility
Vision Configurator
11
Page 12

Programming Environment
2 Programming Environment
This document is not a JavaScript manual. The following sources are a few of the many
JavaScript reference books and online documents:
JavaScript: The Complete Reference, Second Edition
by Thomas Powell, et al.
JavaScript Demystified (Demystified)
by James Keogh.
JavaScript in 10 Simple Steps or Less
by Arman Danesh.
http://www.javascript.com/
2.1 Editor
You can use your favorite editing product to create and modify JavaScript code. Turn off
any smart quote options in the editor. Smart quotes are not valid in JavaScript.
2.2 CodeViewer Application
The CodeViewer Application runs as a JavaScript application on the OHV300. The menu
driven application has features for changing configuration settings and for defining the
applications that run on the reader. JavaScript developers can make use of the following
keywords in the CodeViewer Application:
Title – Displays the title of the JavaScript rather than the file name in CodeViewer’s
‘Application’ menu. Add a comment to your script formatted as $Title: <title of script>$ to
implement.
Revision – Displays the revision of the JavaScript from the CodeViewer’s
‘Application/<script>’ submenu. Add a comment to your script formatted as $Revision:
<revision of script>$ to implement.
2.3 Security
Each handheld reader contains a unique reader ID.
Select features of the reader are protected by license.
A license file is required for each reader licensed to use protected features.
Third party software licenses may also be protected using the encryption utility.
12
Page 13

Programming Environment
2.4 Debugging
The handheld reader contains a built-in error log that can be used when debugging scripts.
To debug the script when an error has occurred, send the ‘(‘ command to the reader; the
reader responds by sending the error log to the communications port. The error log may
contain messages from the firmware that should be ignored. JavaScript errors in the log
can be identified by the format: filename:lineNumber. If there are many error codes in the
error log, send the ‘)’ command to clear the log and repeat the steps to create the error,
leaving only one entry in the log.
Example:
X ap/gerror-log. storage_init: flMountVolume fail status 26,
formatting.storage_formatFilesystem: status 0.
temp.js:3: TypeError: gui.aler is not a function. X ap/dEOF.
This error log contains one firmware error and one JavaScript error. The JavaScript error
description begins with temp.js:3: and tells us that on line three of the temp.js file, gui.aler
is not recognized as a function. In this case, gui.alert has been misspelled (it is missing the
t).
13
Page 14

Programming Concepts
Note!
The default application allows scripts to be run by host command or configuration code scan;
the command is “|run:scriptName.js” (using your own scriptName).
3 Programming Concepts
To help the developer create unique applications for the reader, we provide this JavaScript
Programming Guide. The developer can create complex business applications with
prompts and data entry through the OHV300 user interface features (keypad and display
screen).
The features of the programming interface include:
A graphical user interface
Event handlers
Symbol decoding
Host communications
Local data storage
Handheld configuration
In support of these features, the environment defines the following objects:
gui
reader
storage
comm
Using these features, you can create robust, interactive, and sophisticated user
applications.
A script can be made the default application using the configuration utility, or it may be run
from the configuration utility without making it the default.
3.1 Simplicity
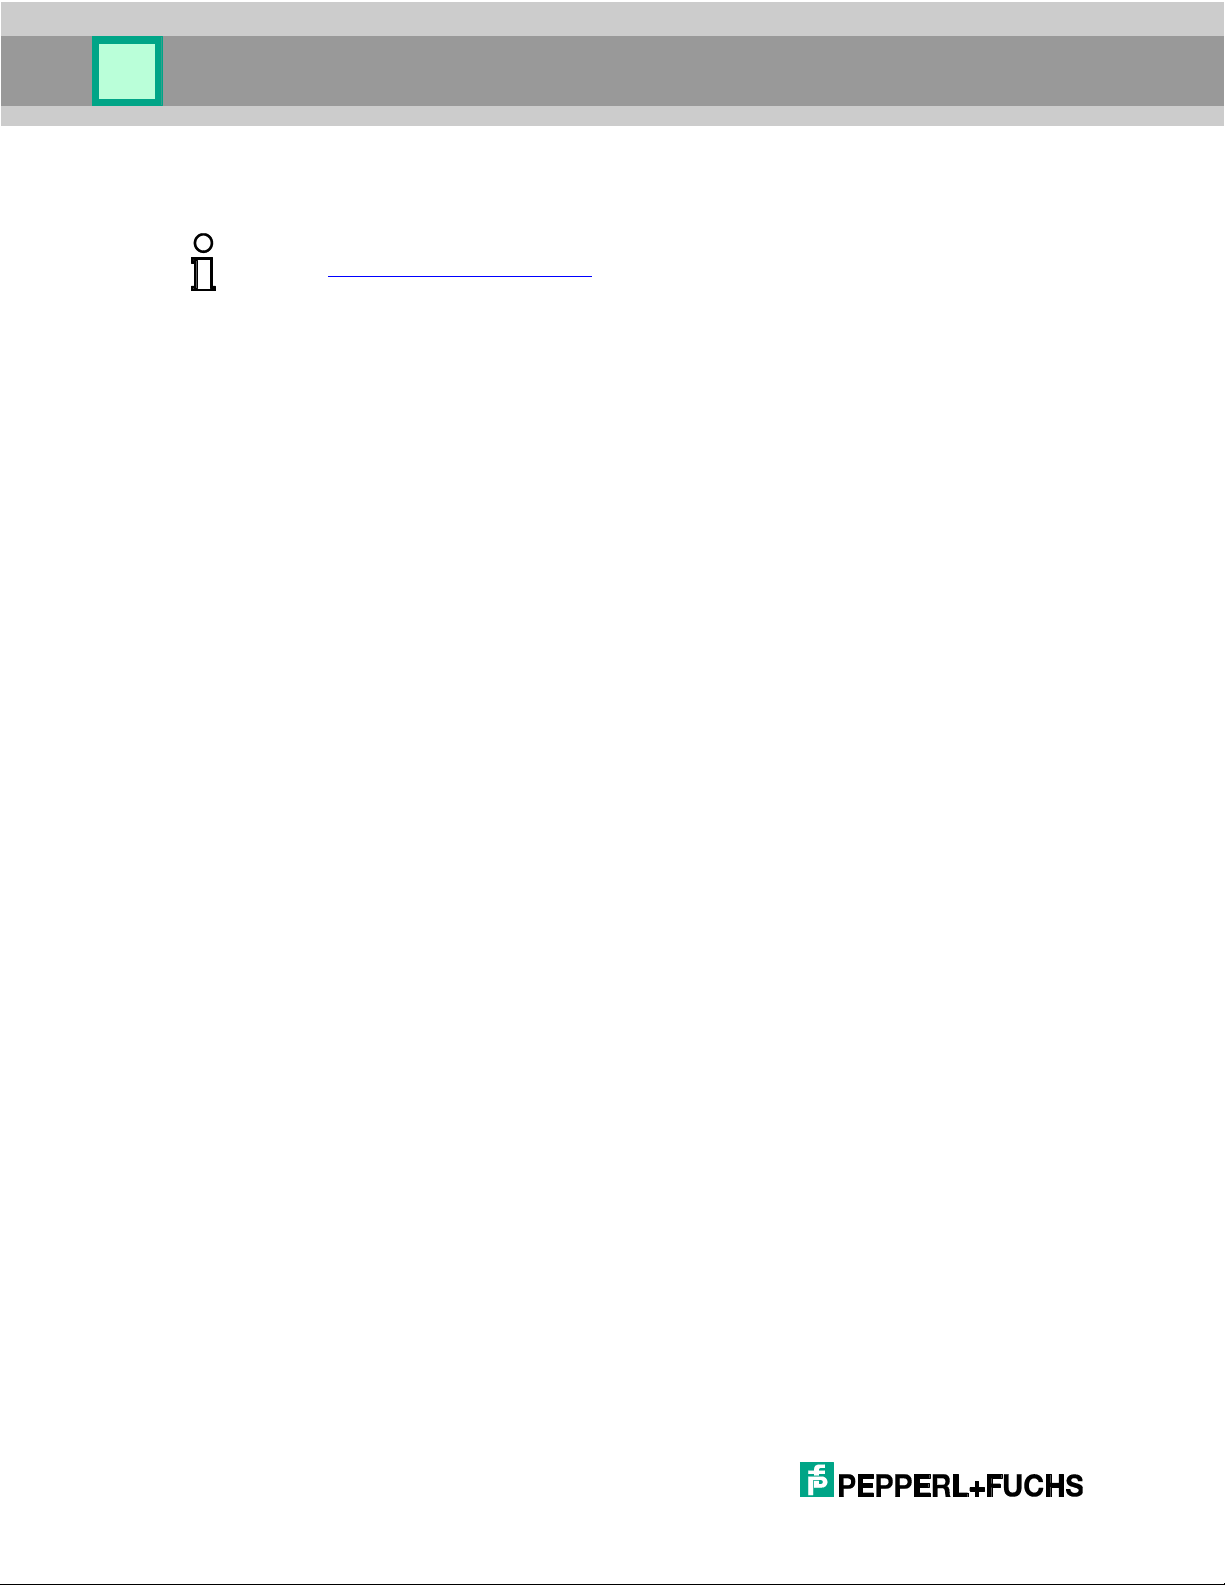
The “Hello World!” application is traditionally the first application presented in a
programming guide. It is an easy to code and understand application that illustrates how
the programming environment works.
In its simplest form, the “Hello World!” application in the OHV300 environment sends text
to the display. With the following single line of code, you can display “Hello World!” in the
screen defined by the standard OHV300 gui object (section 4.1).
gui.show(new gui.Text("Hello World!"));
Execution of this script displays the image shown in Figure 1.
14
Page 15
Programming Concepts
Note!
The text is displayed in a text box control with a scroll bar to the right as defined by the
OHV300 gui object.
Figure 1 – Hello World Application
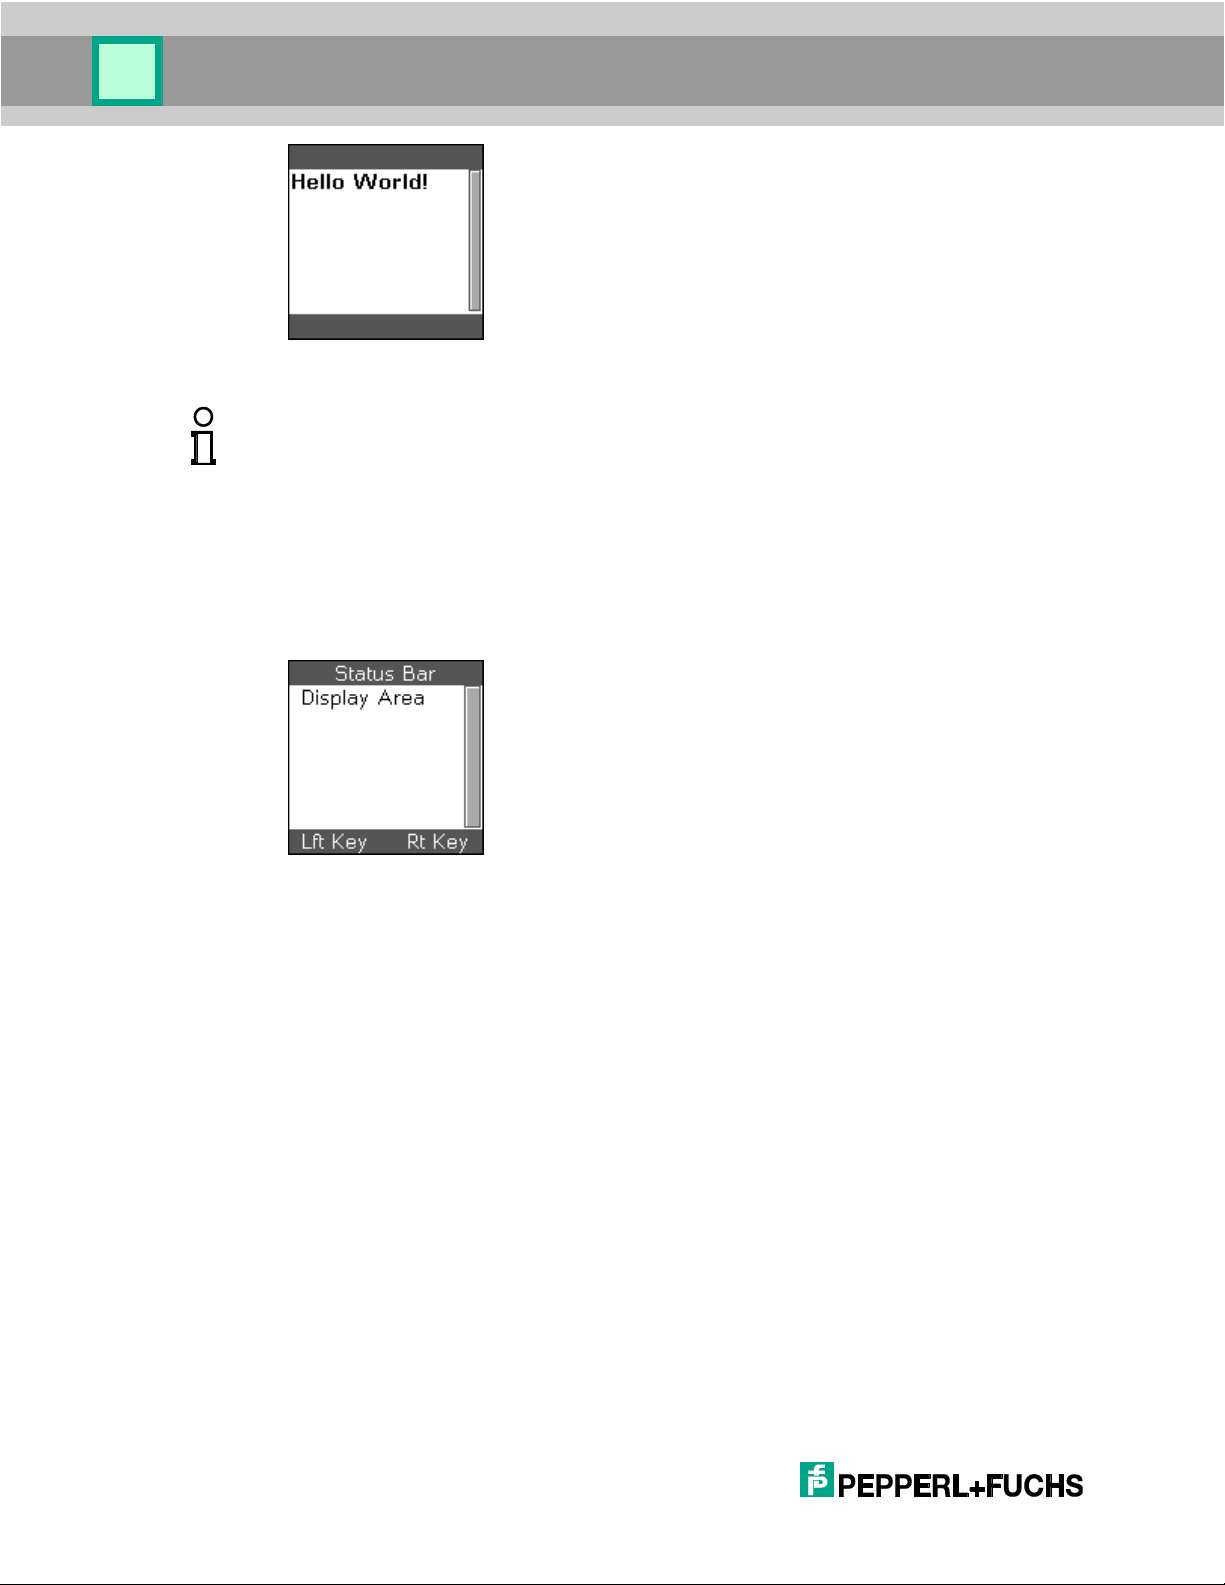
3.2 The OHV300 gui Object
The OHV300 application development environment defines a standard GUI display for
application software (Figure 2). The display supports simple prompts and data entry.
Figure 2 – The Standard GUI Display
The standard display consists of a status bar, a display area, and labels for the left and
right software programmable keys (softkeys) at the top of the OHV300 key pad (see Figure
6).
The scroll bar on the right side of the screen indicates the relative position within the
displayed object as the operator scrolls through forms, menus, or text using the up and
down keys on the keypad. This scrolling feature allows the application to display objects
larger than the display area.
Use the gui interface to develop forms and menus applications, and use the “show”
methods to display them.
15
Page 16

Programming Concepts
3.2.1 Softkey Implementation
Softkeys are general purpose, programmable keys. The softkeys are independent of the
GUI display. The gui.showForm, gui.showMenu, and gui.showSubmenu methods include
softkey definitions appropriate for the implementation.
The following example shows the basic approach to programming the softkeys and
implementing their event handlers.
// define send-key functions used by common softkeys
function sendEnter() { gui.sendKey(gui.key.enter); }
function sendEscape() { gui.sendKey(gui.key.escape); }
// create some common softkeys
var selectSoftkey = new gui.Softkey("Select", sendEnter);
var okSoftkey = new gui.Softkey("OK", sendEnter);
var backSoftkey = new gui.Softkey("Back", sendEscape);
var cancelSoftkey = new gui.Softkey("Cancel", sendEscape);
See section 0 (gui object) for more information.
3.2.2 Forms
Forms are the building blocks of your application. Each form represents a set of actions
you want to present to the user on screen.
Use the gui.Form object (section 4.2.3.3) to define the forms for your application. Section
4.2.3 defines the form object and several constructors that you can use to create controls
on your application form.
The following examples demonstrate how to create a form. The event handler functions
need to be defined for your application.
// JavaScript Form Demo Script Document
// form event handlers
function myFormOnOk(){/* processing code (example: save the
Employee #) */}
function myFormOnCancel(){/* processing code (example: return to
main menu) */}
// create the form object
var myForm = new gui.Form(myFormOnOk, myFormOnCancel);
// create the edit control
var edit = new gui.Edit("");
// create the label control
var label = new gui.Label("Employee #:");
// position the controls on the form
16
Page 17
Programming Concepts
myForm.append(label);
myForm.append(edit);
// Create the caption that will appear on the status bar
myForm.caption = "form demo";
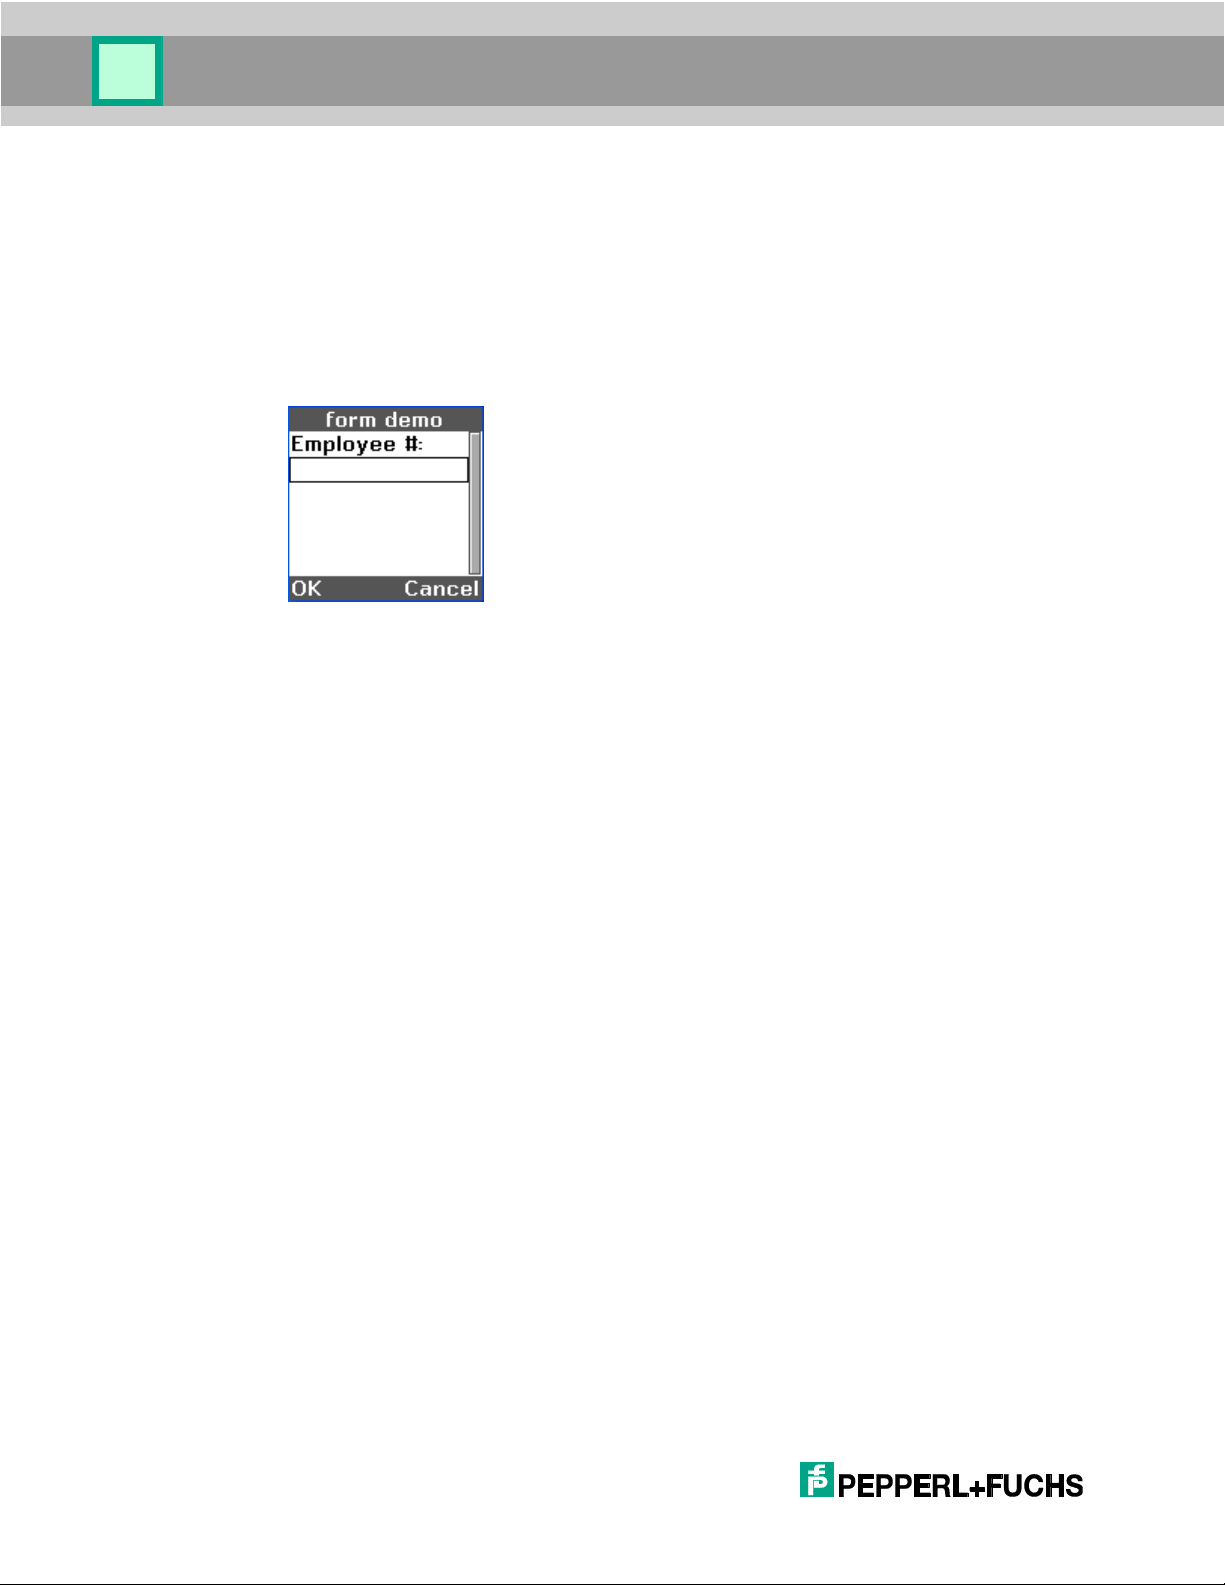
// show the form
gui.showForm(myForm);
When the Form Demo Script runs, the OHV300 displays the following image:
Figure 3 – Form Demo Display
The user enters an employee number into the edit control and presses the left button (OK)
to submit the data.
3.2.3 Menus
Use the gui.Menu object (section 4.2.3.6) to define the menus for your application. Use the
gui.MenuItem constructor to define the controls in the menu. Each control has an
associated onClick property that defines the function of the OHV300.
The following example demonstrates how to build and display menus and submenus.
// JavaScript Menu Demo Script Document
// menu event handlers
function onTimeCard(){alert(postAlertFunc, "TimeCard");}
function onInventory()
{
gui.showSubMenu(subMenu, myMenu);
}
function onCapital(){alert(postAlertFunc, "capital");}
function onStock(){alert(postAlertFunc, "stock");}
// create menu objects
var myMenu = new gui.Menu();
var subMenu = new gui.Menu();
// create menu entries
var timeCardApp =
17
Page 18
Programming Concepts
new gui.MenuItem("Time Card", onTimeCard);
var inventoryApp =
new gui.MenuItem("Inventory", onInventory);
var separator =
new gui.Separator(1, gui.separatorStyle.horizontalLine);
myMenu.caption = "menu demo";
subMenu.caption = "subMenu demo";
// create subMenu entries
var capital =
new gui.MenuItem("Capital", onCapital);
var stock =
new gui.MenuItem("Stock", onStock);
// position the controls on the menus
myMenu.append(separator);
myMenu.append(inventoryApp);
myMenu.append(timeCardApp);
subMenu.append(capital);
subMenu.append(stock);
//Specify a child to be selected when the menu is displayed
(optional)
myMenu.setActiveChild(inventoryApp);
subMenu.setActiveChild(capital);
// set the caption text for the status bar
myMenu.caption = "menu demo";
// show the menu
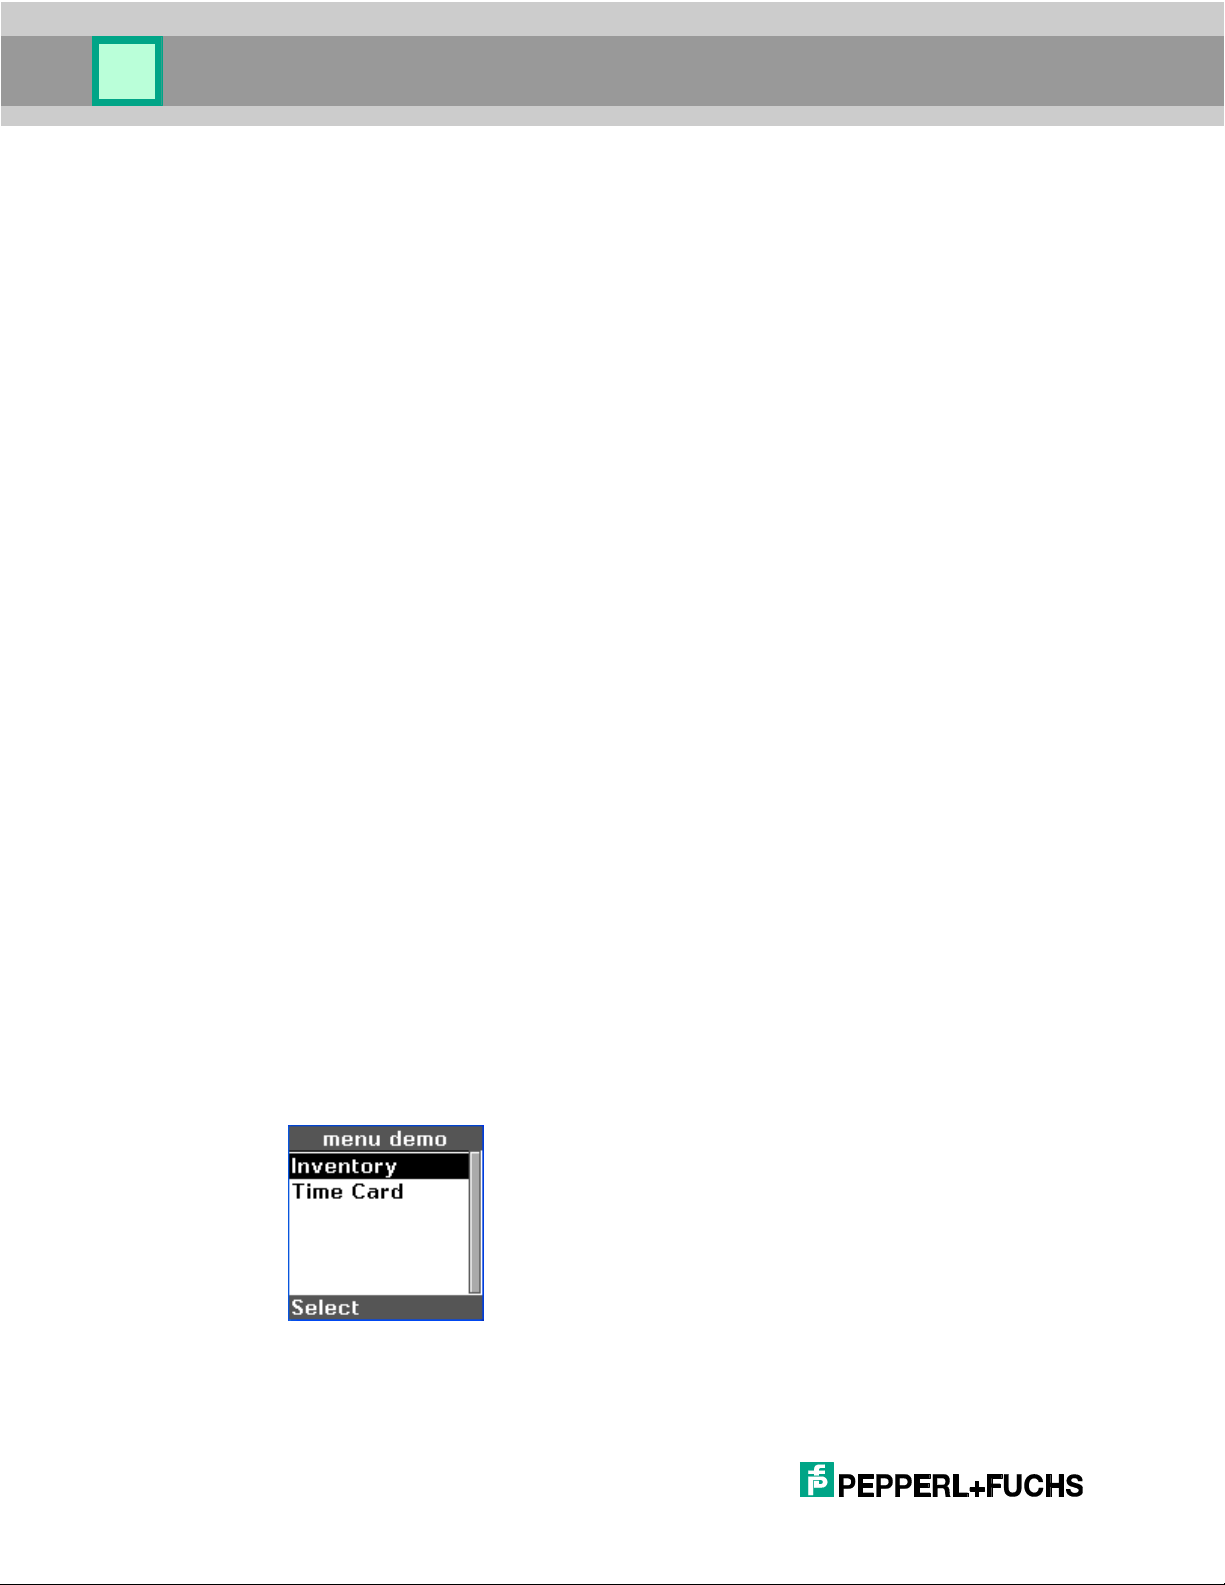
gui.showMenu(myMenu);
When the Menu Demo application is initiated, the OHV300 displays the following image:
Figure 4 – Menu Demo Display
18
Page 19
Programming Concepts
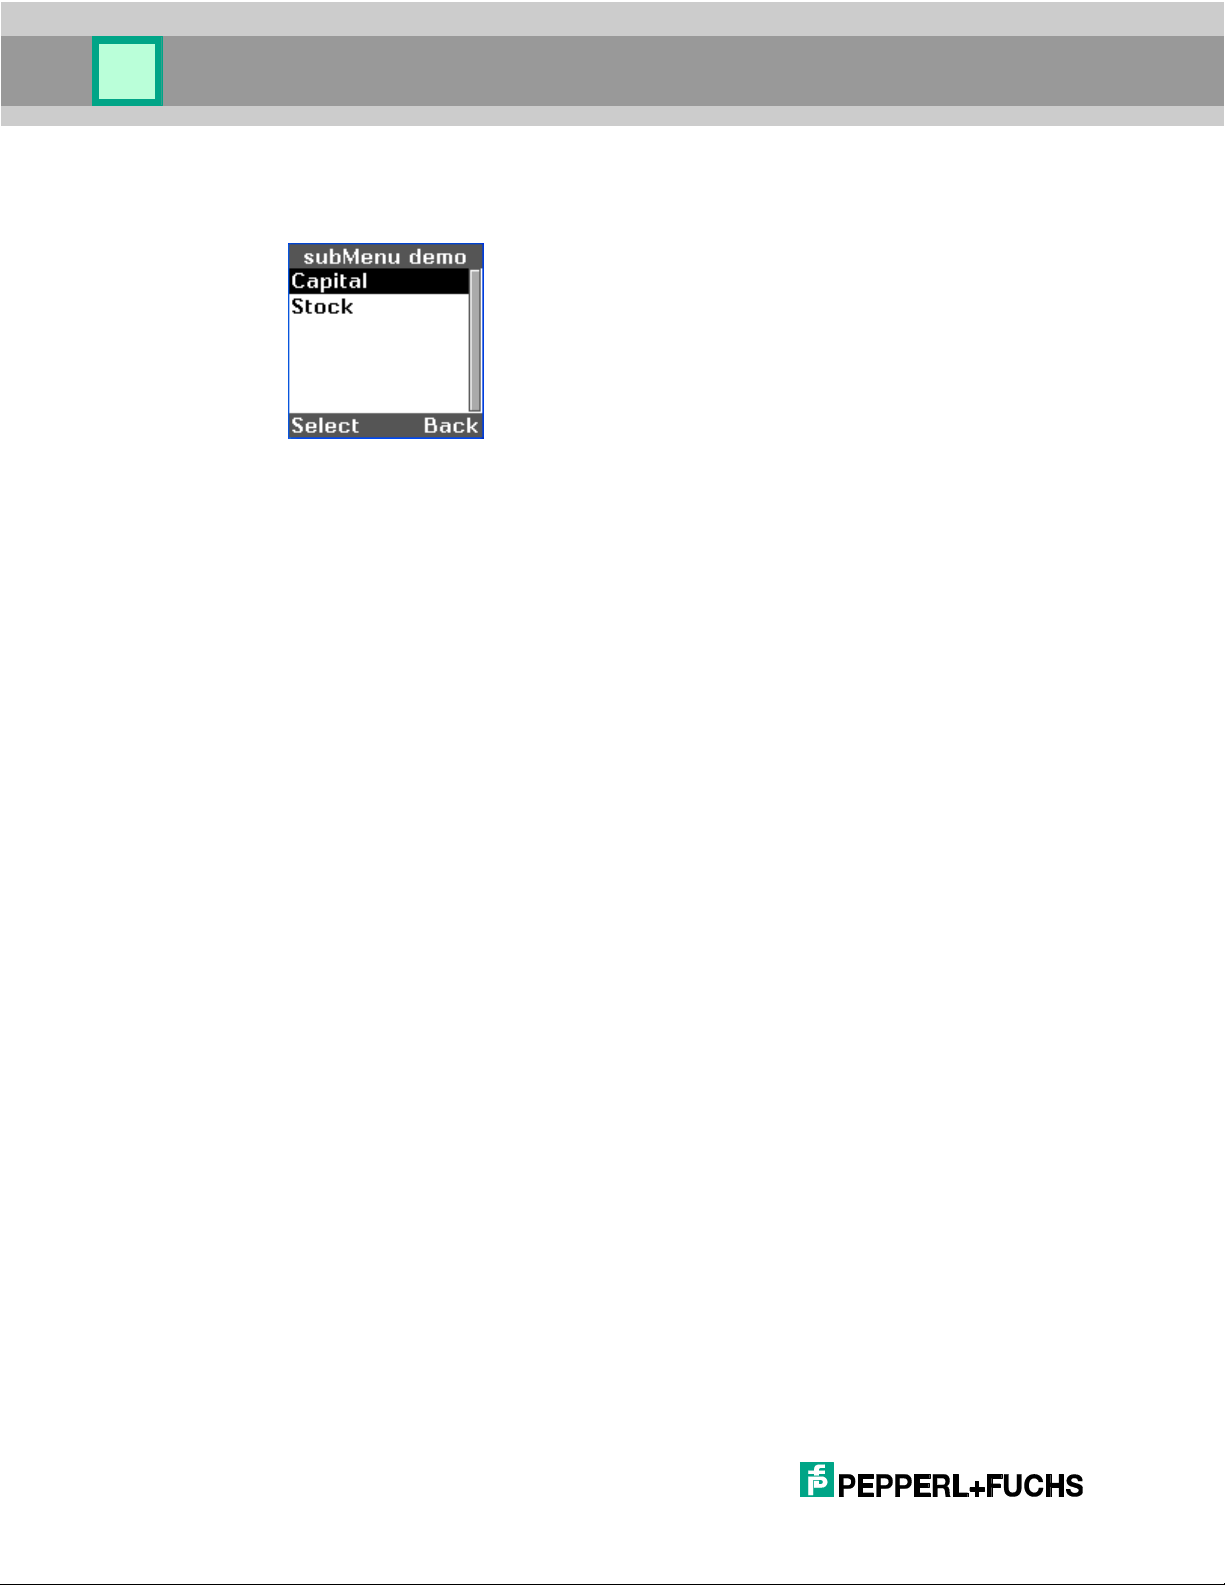
The Select button sends gui.softkey.enter to run the highlighted application. In this
example, the Inventory option is selected. The script then displays the Inventory submenu
shown in Figure 5.
Figure 5 – Sub Menu Demo Display
3.2.4 Text
Use the gui.Text object (section 4.2.3.11) to show text. Text may exceed the display area,
toggling the arrow buttons to view all data. This should not be used to control text within
menus or forms.
3.3 Event
The JavaScript environment is event driven. The reader firmware waits for an event such
as a pressed key. The application gains control of an event by setting an object's event
properties to functions. Events include:
send and receive of communications packets
decode operations
pressed keys
command execution
change of reader mode (idle, standby, and power down)
An application gains control only when:
The reader application defines an event property.
The application creates a function and assigns it to the event property.
The event occurs.
The application can disable an event by setting the event property to null.
19
Page 20

Programming Concepts
3.3.1 Decode Events
The reader object defines an event onDecode. Section 4.3.2.3 discusses decode events.
Example:
var numDecodes = 0;
var numDecodesProcessed = 0;
reader.onDecodeAttempt = function(count)
{
numDecodes = count;
numDecodesProcessed = 0;
}
reader.onDecode = function(decode)
{
if( ++numDecodesProcessed < numDecodes )
{
// process individual decode, save in variables, etc.
}
else
{
// process the whole set, using saved variables, etc.
}
}
20
Page 21
Programming Concepts
Key
Object
Event Handler Property
Enter – button located in the
center of the arrow keys
gui.Form
gui.Menu
gui.Text
gui.Button
gui.MenuItem
onOk
onOk
onOk
onClick
onClick
Clear – bottom right button
gui.Form
gui.Menu
gui.Text
onCancel
onCancel
onCancel
Left Button – top left soft key
gui
onClick
Right Button – top right soft key
gui
onClick
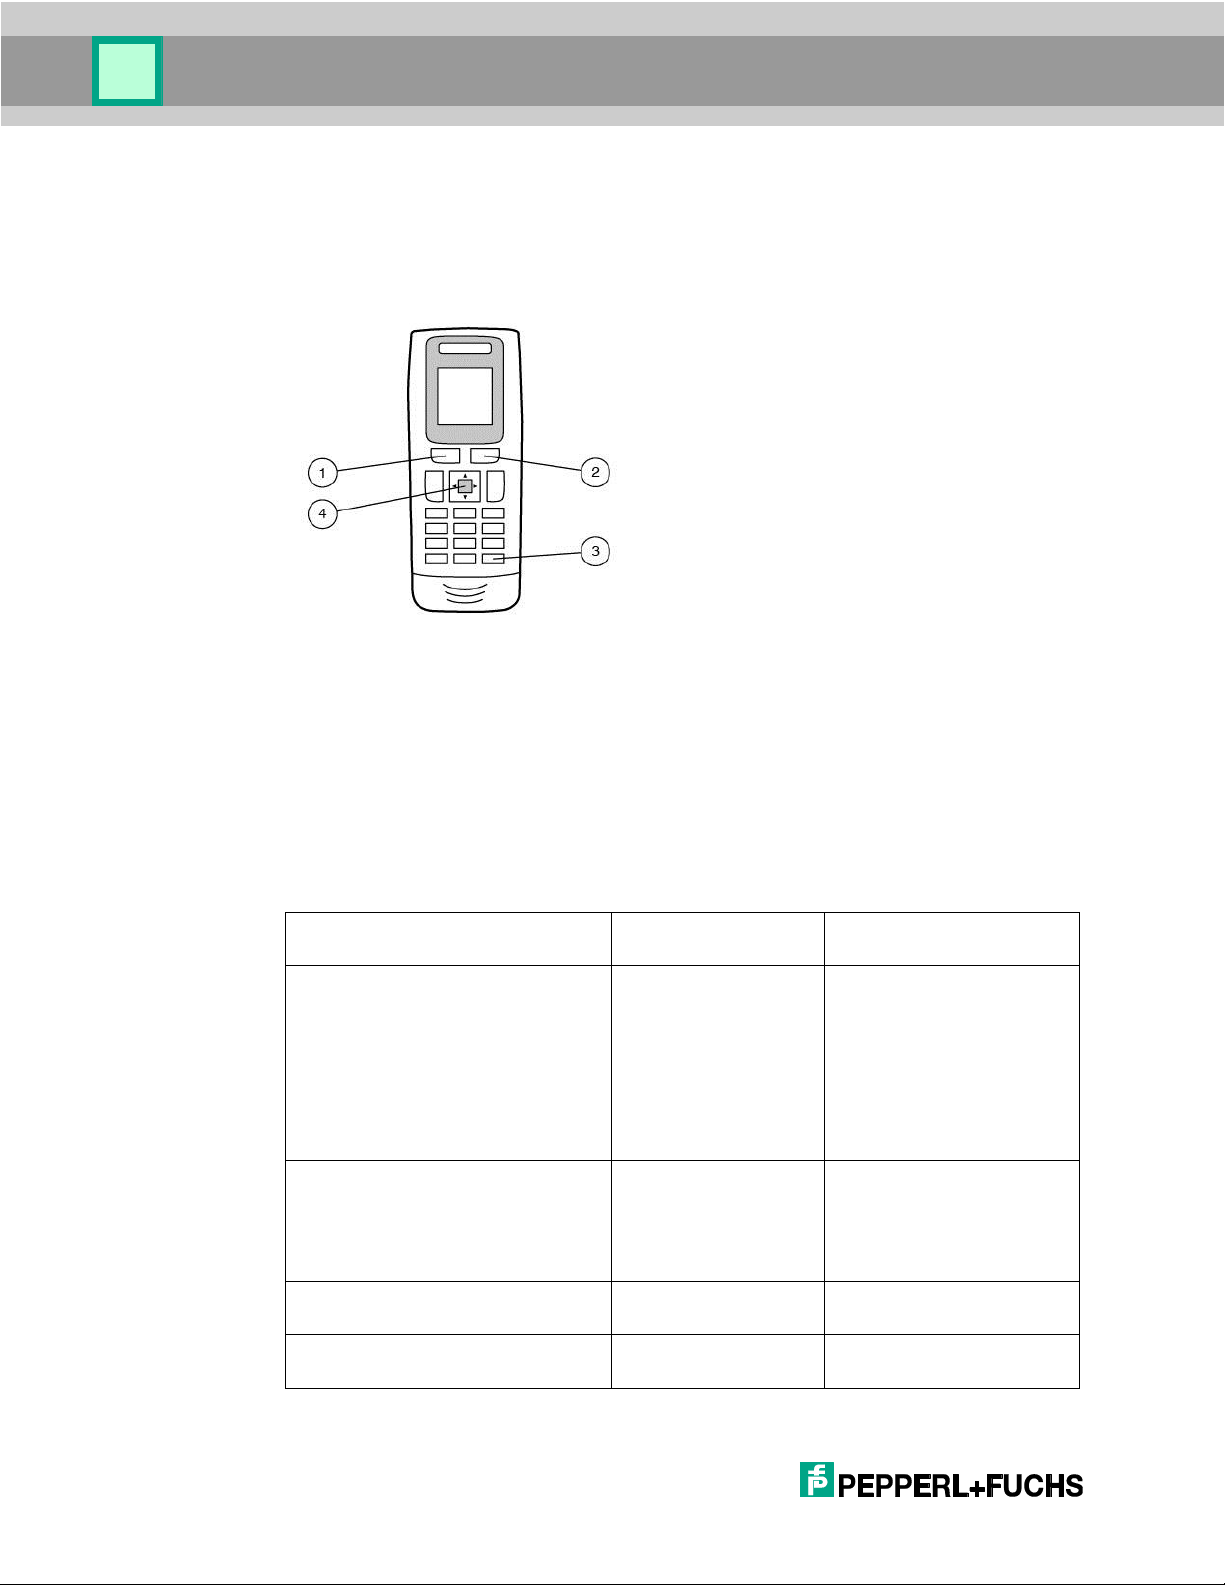
3.3.2 Key Events
The clear, enter, and left and right buttons (softkeys) can be programmed to seamlessly
integrate with user specific events.
The possibilities are shown in Table 1. The GUI objects are documented in section 4.2.3.
Figure 6 – OHV300 Keypad
1. Left Softkey
2. Right Softkey
3. Clear/Escape Button
4. Enter Button
Table 1 – Keys to Event Mapping
21
Page 22
Programming Concepts
Key
Object
Event Handler Property
Any Other Buttons
gui.Form
gui.Menu
gui.Text
onKey
onKey
onKey
3.3.3 Command Execution
The reader application defines a number of commands that can be sent to the firmware
from the host or by reading codes. The reader (section 4.3) defines an event by the
onCommand function. If onCommand is set, the reader finds the specified event before
running the command and transmitting the data.
3.4 Reader Configuration
The configuration settings define the active capabilities of the handheld. The application
development environment defines the reader object (section 4.3), which contains
methods for manipulating handheld settings. The Interface Configuration Document
defines the configuration items and the values that can be set for each item.
The application developer can dynamically change the active settings by using the
reader.writeSetting method. This method changes the operational value of the
setting, but that value is lost when the reader is turned off. The current values of all settings
can be saved by using the reader.saveSettings method, which writes the current
values of the settings to flash memory from where they are restored on power up.
Example:
reader.writeSetting(0x1b, 4);
gui.confirm( yesFunc, noFunc, "Setting changed.\n\nSave now? ",
"Setting Change")
//This function will be called if user presses Yes softkey
yesFunc = function() {
if ( !reader.saveSettings() )
alert(postAlertFunc, "Error Saving Settings");
}
Retrieve the current value of a setting by using the reader.readSetting method.
Restore factory default settings by using the reader.defaultSettings method.
22
Page 23

Programming Concepts
3.5 Symbol Decoding
The primary function of the OHV300 is scanning, decoding, and processing onedimensional and two-dimensional barcodes. The reader can read a wide range of code
types, or symbologies, and provide access to the data after decoding. The reader decodes
in one of two ways:
Pressing the read key on the key pad.
A decode command from the reader.processCommand method.
The reader.onDecode defines an event that allows the application to access data.
To program the OHV300 to scan and transmit data, follow the below commands.
function onDecode(decode)
{
// Processing
}
reader.onDecode = onDecode;
There are four basic options for decoding scanned data:
Process the data in the script, such as fill in form fields, and return null.
Let the data be further processed by the handheld firmware, typically for sending
and/or storing, by returning decode.
Transform the data and let the handheld firmware process the changed data by
setting decode.data as necessary and returning decode.
Invalidate the decode by returning false. The handheld will act as though the decode
never occurred.
The following pseudocode presents an example of decode processing addressing the four
options. The example transforms decode data based on certain symbologies. Then the
example checks the format of the decode data to determine the next processing steps.
Subsections following the pseudocode discuss the processing steps in the following
example.
23
Page 24

Programming Concepts
Example:
function onDecode(decode)
{
data = decode.data;
if (decode.symbology == some-special-symbology)
{
data = transformed decode.data;
}
else if (decode.symbology
== some-other-special-symbology)
{
data = differently transformed decode.data;
}
if (data matches employee-badge format)
{
loginForm.employeeField.text = decode.data;
loginForm.pinField.text = "";
gui.showForm(loginForm);
return null;
}
else if (data matches part-number format)
{
stockForm.partField.text = decode.data;
gui.showForm(stockForm);
return null;
}
else if (data matches shelf-number format)
{
stockForm.shelfField.text = decode.data;
gui.showForm(stockForm);
return null;
}
else if (data matches wrong formats)
{
warning.text = "bad code for this application";
24
Page 25

Programming Concepts
Note!
Sometimes symbology is used to distinguish otherwise like-formatted data; for example, shelf
tags may have the same number of digits as UPC codes for the products on the shelves, but
have different barcode symbologies that can be used to determine whether the decode is a
shelf tag or a product UPC code.
gui.showForm(warning);
return null;
}
else if (data matches format that is to be ignored)
{
return false; // invalidate the decode
}
else // code should be processed by handheld firmware
{
if ( code should be processed
with transformed data)
{
decode.data = data; // replace the data field
// with transformed data
}
return decode;
}
}
3.5.1 Transform Data by Symbology
Barcodes read by the handheld are encoded in unique symbologies. Particularly within
two-dimensional codes, common data items may be present in different locations within
the decode depending on the encoding symbology. In the example, line 5 checks the value
of decode.symbology and transforms the decode data to a common format. To check
symbology, compare decode.symbology against the symbology codes documented in the
Interface Configuration Document.
25
Page 26

Programming Concepts
3.5.2 Evaluate Data Format
After the data is converted into a common data format based on the symbology, the
application determines the data format and processes according to data content.
if (data matches employee-badge format)
{
loginForm.employeeField.text = decode.data;
loginForm.pinField.text = "";
gui.showForm(loginForm);
return null;
}
else if data matches part-number format
{
stockForm.partField.text = decode.data;
gui.showForm(stockForm);
return null;
}
else if (data matches shelf-number format)
{
stockForm.shelfField.text = decode.data;
gui.showForm(stockForm);
return null;
}
The previous statements from the example demonstrate the processing of data within the
decode handler. Based on the data format, the application program extracts data from the
decode and displays appropriate forms.
These examples execute a return null statement to consume the decode for the specified
data formats.
26
Page 27
Programming Concepts
Note!
Do not code alert, confirm, or prompt, either as functions or as gui methods, in an
onDecode or onCommand event handler. The events originate in the handheld firmware,
resulting from decodes, commands, or communication events. While the event handler is
running, the main application is held idle until the event handler returns. If the event handler is
waiting for the user to finish with alert, confirm, or prompt, the main application will be
forced to wait as well, resulting in timeout errors.
3.5.3 Detect Format Errors
If the format matches a known format that should not be used in the current application
context, the application can send a warning message, which is displayed in "warning"
form.
else if data matches wrong formats
{
warning.text = "bad code for this application";
gui.showForm(warning);
return null;
}
In this case, the example returns a null to consume the decode.
3.5.4 Let the Handheld Process the Decode
If you want the handheld to process the decode, set the decode as the return statement
parameter. If you have changed decode data and want the changes available to the
handheld, set the appropriate data field in the decode to the changed value before
returning the decode.
else // code should be processed by handheld firmware
{
if ( code should be processed
with transformed data)
{
decode.data = data; // replace the data field
// with transformed data
}
return decode;
}
27
Page 28

Programming Concepts
Note!
Normally, the handheld will sound a good-decode beep at the end of decode processing. If
you do not want invalidated decodes to cause the usual good-decode beep in the handheld
firmware, you must configure the reader to process the decodes via JavaScript before
beeping. Then the handheld will only beep if there is at least one decode that is not invalidated.
For more information, refer to the Interface Configuration Document.
If your reader.onDecode function returns false, you should configure the handheld to
beep upon decode error.
3.5.5 Ignore the Decode
You can ignore a particular format by exiting the function with a return value of false as
shown in the following code segment from the example.
else if (data matches format that is to be ignored)
{
return false; // invalidate the decode
}
3.5.6 Determine the Orientation of the Decode
You can determine the orientation of a code by using the bounds array. The bounds array
has four elements that can be used to give the coordinates of the four corners of the code
(the origin is the center of the decode field):
(decode.bounds[0].x, decode.bounds[0].y) = coordinates of top right corner
(decode.bounds[1].x, decode.bounds[1].y) = coordinates of top left corner
(decode.bounds[2].x, decode.bounds[2].y) = coordinates of bottom left corner
(decode.bounds[3].x, decode.bounds[3].y) = coordinates of bottom right corner
These designations (e.g. top left) refer to the corners of the symbol, not as it appears in a
particular image, but rather as it appears (most often) in its symbology specification. For
example, for Data Matrix, array element 2, which contains the coordinates of the bottom
left vertex of the symbol boundary, will always be proximate to the intersection of the two
lines which form the “∟” of the symbol, regardless of the actual orientation (or mirroring) of
the symbol in the image submitted to the decoder.
In normal orientation, we would expect the signs of the coordinates to be:
decode.bounds[0].x (-), decode.bounds[0].y (+)
decode.bounds[1].x (-), decode.bounds[1].y (-)
decode.bounds[2].x (+), decode.bounds[2].y (-)
decode.bounds[3].x (+), decode.bounds[3].y (+)
28
Page 29
Programming Concepts
Note!
Normally, the handheld will sound a good-decode beep at the end of decode processing. If
you do not want invalidated decodes to cause the usual good-decode beep in the handheld
firmware; you must configure the reader to process the decodes via JavaScript before
beeping. Then the handheld will only beep if there is at least one decode that is not invalidated.
For more information, refer to the Interface Configuration Document.
A code that is not “right side up” could be rejected by exiting the function with a return
value of false as shown in the following example.
if (decode.bounds[0].x > 0 && decode.bounds[0].y < 0 &&
decode.bounds[1].x > 0 && decode.bounds[1].y > 0 &&
decode.bounds[2].x < 0 && decode.bounds[2].y > 0 &&
decode.bounds[3].x < 0 && decode.bounds[3].y < 0)
{
return false; // invalidate the decode
}
3.6 Host Communication
The handheld application development environment defines a host communication comm
object (section 4.4.2.3) to support communications with a host resident application. For
example, Vision Configurator (section 1.4) is a host resident utility that communicates with
the handheld reader for downloading files to the handheld.
From the host computer’s view, the handheld is a serial device accessible through a serial
or USB port, or through Bluetooth Radio Frequency (RF) communications. Handheld
configuration settings define the active host communications port.
The handheld host communications implementation supports two basic styles of
communication: raw text and packets. It also supports a set of native protocols.
The application program transfers data to the host by writing to the handheld host
communications port using methods defined by the hendheld reader comm object (section
4.4.2.3). Applications gain access to data sent by the host by implementing onCommand
(and optionally onCommandFinish) event handlers defined by the handheld's reader
object properties (section 4.3) and parsing the “|” command.
29
Page 30

Programming Concepts
Example:
reader.onCommand = function(type, data)
{
// intercept | command with app-data: prefix
if( type == '|' && data.match(/^app-data\:/) )
{
return false; // Suppress the command
}
return true;
}
For more information on host communications, refer to the Interface Configuration
Document.
3.7 Data in Handheld Local Storage
The application development environment provides program access to handheld local
storage through the storage object (section 4.3.2.18). Data is maintained in storage as
named objects called files. Vision Configurator can transfer host data into a handheld
reader file. The handheld application can also store data in files.
The name of a handheld file may be 1 - 200 printable ASCII characters.
Use the erase and write methods of the storage object to manage files. Use the
findFirst and findNext methods to locate files. Use the read method to access a file
or the upload method to send it to the host.
3.8 Demo Programs
Many of the concepts discussed in this section can be found in the source code of the
demo programs.
30
Page 31

Class Reference
4 Class Reference
The built-in objects described in this section enable a JavaScript program to receive data
from the handheld and control its behavior.
4.1 decode
The decode object provides data and metadata on the currently decoded barcode. Since
the decode object is passed from the decode engine to the JavaScript engine, any valid
variable name can be used to hold the data. For reasons of clarity, we will use the name
decode. Other common uses seen in existing JavaScript code are d or obj.
The properties of the decode object define the raw output of the handheld decode engine.
4.1.1 Properties
The following section documents the properties defined for the decode object.
4.1.1.1 data
The decode.data property is a read/write value representing the payload of the barcode
that has just been decoded. This data may also include data processing, checksum
information, or data formatting based on settings made by the user for the decode engine.
If the decode engine has no special handling settings applied, this information should
match the string that was used to encode the barcode before the barcode was printed or
displayed.
If the current JavaScript program makes a change to the data, it can be stored back into
the decode.data object in order to pass it downstream.
Example:
//remove all Group Separator characters
decode.data = decode.data.replace(/%1D/g, "");
return decode;
4.1.1.2 symbology
The decode.symbology property is a read only property that contains the symbology of
the barcode decoded by the decode engine.
Valid values for symbology are defined in 9.
Example:
//Code Symbology Identifier (38 is PDF417)
if (decode.symbology == 38)
{
//Perform action on PDF417
}
31
Page 32

Class Reference
4.1.1.3 symbology_ex
The decode.symbology_ex property is a read only property that contains extended
symbology information for the barcode decoded by the decode engine.
Valid values for symbology_ex are defined in 9.
This property is seldom used, but is used in the same way as symbology.
4.1.1.4 symbologyModifier
The decode.symbologyModifier property is a read only property that contains
symbology modifier information for the barcode decoded by the decode engine.
Valid values for symbologyModifier are defined in 9.
Example:
//UPC-E
if (decode.symbology == 49 && decode.symbologyModifier == 66)
{
decode.data = "\x02E" + decode.data;
}
4.1.1.5 symbologyModifier_ex
The decode.symbologyModifier_ex property is a read only property that contains
extended symbology modifier information for the barcode decoded by the decode engine.
Valid values for symbologyModifier_ex are defined in 9.
This property is seldom used, but is used in the same way as symbologyModifier.
4.1.1.6 symbologyIdentifier
The decode.symbologyIdentifier property is a read only property that contains the
full AIM (Automatic Identification and Mobility) information for the barcode decoded by the
decode engine. read-only string; this is the AIM identifier (“]cm”).
4.1.1.7 x
The decode.x property is a read only property that defines the horizontal position, in
pixels, of the barcode that was just decoded in relation to the entire image captured by the
reader and analyzed by the decode engine. The value for decode.x can be positive or
negative based on the fact that 0 is the center of the image.
4.1.1.8 y
32
The decode.y property is a read only property that defines the vertical position, in pixels,
of the barcode that was just decoded in relation to the entire image captured by the reader
and analyzed by the decode engine. The value for decode.y can be positive or negative
based on the fact that 0 is the center of the image.
Page 33

Class Reference
4.1.1.9 time
The decode.time property is a read only property that defines the amount of time, in
milliseconds, it took the decode engine to decode the barcode that was just analyzed.
4.1.1.10 quality_percent
The decode.quality_percent property is a read only property that defines an
internally-defined image quality value determined by the decode engine while analyzing
the captured image. This is not the quality of the printed or displayed barcode but rather
the quality of the captured image for use in decoding.
4.1.1.11 qrPosition
The decode.qrPosition property is a read only property that gives the index of a QR
Code in a set of QR Codes that have been linked via Structured Append. More information
can be found in the QR Code specification (ISO/IEC 18004). This property is only defined if
the decode.symbology is QR Code.
4.1.1.12 qrTotal
The decode.qrTotal property is a read only property that gives the count of QR Code in
a set of QR Codes that have been linked via Structured Append. More information can be
found in the QR Code specification (ISO/IEC 18004). This property is only defined if the
decode.symbology is QR Code.
4.1.1.13 qrParity
The decode.qrParity property is a read only property that gives parity information for
QR Code in a set of QR Codes that have been linked via Structured Append. More
information can be found in the QR Code specification (ISO/IEC 18004). This property is
only defined if the decode.symbology is QR Code.
4.1.1.14 linkage
The decode.linkage property is a read only property that gives information about the
linking code between the segments that make up a composite barcode, if a composite
barcode was just decoded by the decode engine. This property is null if the decoded
barcode was not a composite barcode.
4.1.1.15 bounds
The decode.bounds property is an array of four sets of x and y coordinates that give
information about the position of the last decoded barcode. The four points (x, y) indicate
the position in pixels of the four corners of the barcode from the upper left (0, 0) position in
the captured image as integers. Be aware, in some readers the image is rotated 90°.
//The x and y coordinates of the top right corner of the barcode
in the image:
pos.tR = (decode.bounds[0].x, decode.bounds[0].y)
33
//The x and y coordinates of the top left corner of the barcode in
the image:
Page 34

Class Reference
pos.tL = (decode.bounds[1].x, decode.bounds[1].y)
//The x and y coordinates of the bottom left corner of the barcode
in the image:
pos.bL = (decode.bounds[2].x, decode.bounds[2].y)
//The x and y coordinates of the bottom right corner of the
barcode in the image:
pos.bR = (decode.bounds[3].x, decode.bounds[3].y)
4.1.1.16 numExtraFields
This property is for internal use only.
4.1.1.17 decoderType
The decode.decoderType property is a read only property that gives information about
the decoder that was used to capture data from the last barcode decode process. This
property is only relevant if a 3rd party decoder has been implemented.
A decode.decoderType value of 1 indicates that the decoder decoded the last barcode.
A value of 0 indicates that the decoder is unknown. Other values may be introduced at any
time.
4.1.1.18 aimSymbology
The decode.aimSymbology property is a read only property that gives the first character
of the AIM (Automatic Identification and Mobility) symbology determined by the decode
engine of the barcode that was just decoded. More information on AIM Standards can be
found at the Association for Automatic Identification & Mobility web site:
http://www.aimglobal.org/
The following example illustrates a translation from the AIM standard to a different system
used in-house by a customer:
var newSymbol;
aimSymbol = String.fromCharCode(decode.aimSymbology);
switch( aimSymbol )
{
case "E":
newSymbol = "A";
break;
case "A":
newSymbol = "B";
34
break;
case "F":
newSymbol = "C";
break;
Page 35

Class Reference
Value
Definition
0
Raw output – no formatting applied by the decoder
1
Customer formatted data – This is formatting applied from a customersupplied .parse file.
2
JSON formatted data – This is data formatted in JavaScript Object Notation
(JSON). Currently, only DL/ID data can be formatted in JSON by the
decoder. For more information about JSON, see JSON.org
default:
newSymbol = aimSymbol
}
return newSymbol + decode.data;
4.1.1.19 aimModifier
The decode.aimModifier property is a read only property that gives the AIM
(Automatic Identification and Mobility) Modifier determined by the decode engine of the
barcode that was just decoded. More information on AIM Standards can be found at the
Association for Automatic Identification & Mobility web site: http://www.aimglobal.org/
4.1.1.20 decodeOutputFormat
The decode.decodeOutputFormat property is a read only property that gives the type
of output the JavaScript should expect.
35
Page 36

Class Reference
4.2 gui
The gui object provides application programming access to the OHV300 display screen.
The OHV300 application development environment defines a standard software GUI
format (section 4.2.3) consisting of a status bar, a display area, and labels for the left and
right software programmable keys (softkeys) on the OHV300 key pad.
The properties, methods, and classes of the gui object support the development of
graphical user interfaces in custom software applications.
4.2.1 Methods
The following section documents the methods defined for the OHV300 gui object.
4.2.1.1 alert
The gui.alert function displays text in the display area of the standard GUI display. Do not
call this function within onDecode and onCommand event handlers.
Format:
gui.alert(func, text, title);
Where:
func – function name; function to be called after displaying the alert. This function does
not take any arguments and returns void.
text – string; text to display as the alert.
title – string; text to display in the gui object status bar; defaults to “Alert.”
Processing suspends until the operator presses an enter key – either the enter key or the
left softkey defined as OK. Once the operator presses the enter key, it calls the provided
function to continue processing.
Example:
gui.alert(samplefunction, "Status Alert", "gui.alert example");
Displays the alert shown in Figure 7 and waits until the operator presses the enter key or
the left softkey (OK). Once the operator presses a key, it calls samplefunction() to
continue.
36
Figure 7 – gui.alert Example
Page 37

Class Reference
4.2.1.2 confirm
The gui.confirm function displays text in the display area of the standard GUI display and
returns a value based on the key pressed. Do not call this function within onDecode and
onCommand event handlers.
Format:
gui.confirm(yesFunc, noFunc, text, title,
leftSoftkeyLabel, rightSoftkeyLabel);
Where:
yesFunc – function name; function to be called when the confirm receives left softkey.
This function does not take any arguments and returns void.
noFunc – function name; function to be called when the confirm receives right softkey.
This function does not take any arguments and returns void.
text – string; text to display for confirmation.
title – string; text to display in the gui object status bar; defaults to “Confirm.”
leftSoftkeyLabel – string; text to use as label for the left softkey (default is "Yes").
rightSoftkeyLabel – string; text to use as label for the right softkey (default is "No").
Processing suspends until the operator presses an enter key or cancel key.
Example:
gui.confirm(onYesClick, onNoClick, "Exit?", "guiConfirm");
Displays the confirm dialog shown in Figure 8 and waits until the operator presses the
enter key or the left softkey. If operator presses Yes key, it calls onYesClick function. If
operator presses No key, it calls onNoClick function to continue processing.
Figure 8 – gui.Confirm Example
37
Page 38

Class Reference
4.2.1.3 prompt
The gui.prompt function displays text in the display area of the standard GUI display and
returns a value based on the key pressed. Do not call this function within onDecode and
onCommand event handlers.
Format:
gui.prompt(func, text, initial, title);
Where:
func – function name. Function to be called when prompt receives an enter key. The
function takes one argument named result and returns void.
result – string; This is the argument to the function. It provides contents of the edit
control if the prompt receives an enter key (either the enter key or the left softkey defined
as OK); null if the prompt receives the right softkey defined as Cancel.
text – string; text to display as a label above a gui.Edit control.
initial – string; the initial string to display as the contents of edit control; default is an
empty string.
title – string; text to display in the gui object status bar; defaults to “Prompt”.
Processing suspends until the operator presses an enter key or Cancel key. The operator
can key new data into the edit control before pressing enter or the left softkey.
Example:
gui.prompt(postPromptFunc, "Enter login ID", "None",
"guiPrompt");
Displays the prompt shown in Figure 9 – gui.Prompt Example.
Figure 9 – gui.Prompt Example
The postPromptFunc would be defined as follows
postPromptFunc = function(string) {
38
//Continue after prompt…
}
Page 39

Class Reference
The value of string depends on the operator action.
If the operator presses the right softkey (Cancel), the value of string is null.
If the operator presses the “enter” key or the left softkey (OK) the value of string is:
<new content> if the operator changes the contents of the edit control
"None" if the operator does not change the content.
4.2.1.4 putBox
The gui.putBox method allows graphical boxes to be painted to the display.
Format:
gui.putBox(x, y, xEnd, yEnd, backgroundColor, type);
Where:
x – defines the starting x coordinate.
y – defines the starting y coordinate.
xEnd – defines the width of the box
yEnd – defines the height of the box
backgroundColor – defines a color represented in RGB565 format to fill the box region.
type – defines the type of box.
Following box types are supported:
1. Flat
2. Raised
3. Lowered
4. Half Lowered
5. Ridged
6. Scribed
Example:
red = 0xF800;
green = 0x01E0;
gui.putBox(0, 14, 120, 14, red , 1); //box type flat
gui.putBox(0, 28, 120, 14, green, 2); //box type raised
39
Page 40

Class Reference
4.2.1.5 sendKey
The gui.sendKey method sends a “pressed key” indication to the OHV300 firmware as
though it came from OHV300 keypad.
Format:
result = gui.sendKey(key);
Where:
key – number constant; the key to send. Use number constants defined in section 0.
result – Boolean; true if successful; false if not, which usually means the keypad is
locked but can also mean that the key buffer is full.
Example:
gui.sendKey(enter);
Sends the enter key event to the OHV300 firmware as though the operator had pressed
the enter key.
4.2.1.6 sendText
The gui.sendText method sends a text string to the OHV300 gui object as though it had
been entered from the keypad.
Format:
result = gui.sendText(text);
Where:
text – string; the text to send.
result – Boolean; false if all specified text could not be sent to the GUI (in which case,
none of it will have been sent); otherwise, true.
Example:
reader.onDecode =
function(decode) { gui.sendText(decode.data); }
Sends all decode data to the gui object as though it had been entered from the keypad.
4.2.1.7 show
The gui.show method instructs the OHV300 to write the specified form, menu, or text
object to the OHV300 display as a standard gui object (section 4.2.3).
40
This low level approach is not recommended for use in most applications. Instead, we
recommend that you use the gui.showForm, gui.showMenu, and gui.showSubMenu
methods.
Format:
gui.show(object);
Page 41

Class Reference
Where:
object – object to show on the display. The object must be a gui.Form, gui.Menu, or
gui.Text object (section 4.2.3).
Note: This method does not return a value.
4.2.1.8 showForm
The gui.showForm method instructs the OHV300 to display the specified form on the
OHV300 display as a standard gui object (section 4.2.3).
Format:
gui.showForm(yourForm);
Where:
yourForm – form object to show on the display; the object must be a gui.Form object
(section 4.2.3.3).
Note: This method does not return a value.
To insert a caption into the status bar, set the yourForm.caption property.
By default, the left software programmable key is set to gui.okSoftkey (section 4.2.4.3).
You may also define a custom leftSoftkey for your form object, e.g., yourForm.leftSoftkey =
yourSoftkey, in which case gui.showForm will use your softkey.
By default, the right software programmable key is set to gui.cancelSoftkey (section
4.2.4.2). You may also define a custom rightSoftkey for your form object.
4.2.1.9 showMenu
The gui.showMenu method instructs the OHV300 to display the specified menu on the
OHV300 display as a standard gui object (section 4.2.3). This menu is the top level menu;
sub-menus can be created using the gui.showSubMenu method.
Format:
gui.showMenu(yourMenu);
Where:
yourMenu – menu object to show on the display. The object must be a gui.Menu object
(section 4.2.3.6).
Note: This method does not return a value.
To insert a caption into the status bar, set the yourMenu.caption property.
41
This method sets the left software programmable key to gui.selectSoftkey (section
4.2.4.4).
This method sets the right software programmable key to gui.backSoftkey (section 4.2.4.1)
if the yourMenu.onCancel property is set; otherwise, null.
Page 42

Class Reference
4.2.1.10 showSubMenu
The gui.showSubMenu method instructs the OHV300 to display the specified menu on
the OHV300 display as a standard gui object (section 4.2.3).
Format:
gui.showSubMenu(yourMenu, parentMenu);
Where:
yourMenu – menu object to show on the display. The object must be a gui.Menu object
(section 4.2.3.6).
parentMenu – parent menu to display in response to gui.backSoftkey.
Note: This method does not return a value.
To insert a caption into the status bar, set the yourMenu.caption property.
This method sets the left software programmable key to gui.selectSoftkey (section
4.2.4.4).
This method sets the right software programmable key to gui.backSoftkey (section
4.2.4.1) and sets the menu object’s onCancel property to a function that shows the parent
menu.
4.2.1.11 splash and clearSplash
The gui.splash method displays an image on the OHV300 screen. The gui.splash
function should be used in conjunction with the setTimeout function. The setTimeout
function will suspend execution for a provided timeout value. Once the timeout specified in
the setTimeout function expires, it will call the function specified in the setTimeout to
continue execution.
Format:
gui.splash(imageName, stringText);
setTimeout(func, timeout_ms);
Where:
imageName – string; the name of the image file to display (section 4.2.3.4).
stringText – string; the text string to be displayed below the image in the softkey area of the
display.
func – function; the name of the function to be called after timeout.
timeout_ms – number; the number of milliseconds to wait before timeout of the splash
display.
42
Page 43

Class Reference
Example:
gui.splash(“CorpLogo.img”, ”Version 1”);
setTimeout(postSplashfunc, 2000);
displays a corporate logo image and the text “Version 1” on the display. Then, it sets a
timeout of 2 seconds. Once, the timer expires, postSplashfunc is called to continue
execution.
The first thing you need to do in the postSplashfunc is to call gui.clearSplash
method. This function will clear the image from the OHV300 screen. The
gui.clearSplash method should only be called after calling gui.splash method.
The OHV300 supports only its native format, which uses the extension .img. The image
must be 128x128 pixels (for splash screen only). Images are not cropped; they will either
display in their entirety or will not display at all.
4.2.1.12 sync
The gui.sync method causes the display to be updated immediately.
Format:
gui.sync();
Where:
result – no return, GUI display is updated.
4.2.2 Properties
The following section documents the properties defined for the OHV300 gui object.
4.2.2.1 inputMode
The gui.inputMode object contains constants that define input modes for the OHV300.
The constant definitions are:
gui.inputMode.numeric
gui.inputMode.caps
gui.inputMode.lowerCase
gui.inputMode.symbols
The character sets defined for these modes are described in 6.
43
Page 44

Class Reference
4.2.2.2 key
The gui.key property is a read-only object containing number constants specifying keys
for use with the gui.sendKey method. The constants are named:
up
down
left
right
enter
back (“CLEAR” on the keypad)
escape
home
end
leftSoftkey
rightSoftkey
Constants escape, home, and end have no keypad counterpart.
Constants leftSoftkey and rightSoftkey represent the left and right software
programmable keys on the OHV300.
4.2.2.3 leftSoftkey
The gui.leftSoftkey property identifies an event handler for the onClick property of
a gui.Softkey object and the key label, associated with the left programmable key on
the OHV300. The application program defines a gui.Softkey object. See the example in
section 0
Setting gui.leftSoftkey to null disassociates the softkey object from the property
(removing the event handler and the softkey label).
When menus and forms are shown using the gui.showMenu, gui.showSubMenu, and
gui.showForm methods, the gui.leftSoftkey property is set automatically.
4.2.2.4 rightSoftkey
The gui.rightSoftkey property identifies an event handler for the onClick property
of a gui.Softkey object and the key label, associated with the right programmable key
on the OHV300. The application program defines a gui.Softkey object. See the
example in section 0.
Setting gui.rightSoftkey to null disassociates the softkey object from the property
(removing the event handler and the softkey label).
44
When menus and forms are shown using the gui.showMenu, gui.showSubMenu, and
gui.showForm methods, the gui.rightSoftkey property is set automatically.
Page 45

Class Reference
4.2.2.5 statusText
The gui.statusText property is a string that specifies text for display in the status bar at
the top of a OHV300 GUI screen. When gui.status is null, the OHV300 displays status
icons in the status bar. Note: The input mode icon will always be displayed in addition to
the status text when an edit control is active.
With menus and forms, use the caption property (section 4.2.6.1) to automatically set
gui.statusText when the menu or form is shown.
4.2.3 Objects
The OHV300 application development environment provides the user classes described in
this section for use in building forms for the OHV300 gui object. The instances of these
classes are referred to as controls in this document.
4.2.3.1 gui.Button
The gui.Button constructor creates a button control for a GUI form. The onClick event
handler is called when the enter key on the OHV300 keypad is pressed and the button
control is active. Program the function to return Boolean true if the control’s default
processing of the key should continue. Otherwise, program the function to return false;
the control will act as if not clicked.
Format:
var <button_name> =
new gui.Button(text, onClick);
Where:
<button_name> – program-provided button control.
text – string; a label for the button. This property can be changed after the object is
created.
onClick – function for handling the button click event. The OHV300 calls this function
when the operator presses the OK enter key on the OHV300 keypad when the GUI button
is the active control.
Example:
// button control event handler
function rFOnClick(){reader.writeSetting(0x1b, 4);}
function rs232OnClick(){reader.writeSetting(0x1b, 1);}
// create the form object
var myForm = new gui.Form();
45
// create the button
var rfButton = new gui.Button("RF Comm", RFOnClick);
var rs232Button = new gui.Button("RS232 Comm", RS232OnClick);
Page 46

Class Reference
// position the controls on the form
myForm.append(rfButton);
myForm.append(rs232Button);
// Place text on the status bar
gui.statusText = "button demo";
// show the form
gui.showForm(myForm);
Displays the form shown in Figure 10.
Figure 10 – Button Demo
When the operator presses the left softkey or the enter key when the control labeled “RF
Comm” is active, the script executes a reader.writeSettings method to set the
communications mode setting to RF (Bluetooth). When the “RS232 Comm” control is
active and the operator presses the key, the script executes a reader.writeSettings
method to set the communications mode setting to RS232.
Note: The active control is highlighted.
4.2.3.2 gui.Edit
The gui.Edit constructor creates an edit control for a GUI form. The OHV300 operator can
enter data into the edit control.
Format:
var <edit_name> =
new gui.Edit(text, defaultInputMode, validInputModes, onChar,
readOnly);
Where:
<edit_name> – program-provided edit control.
text – string; the initial value for the edit control. The control contains text when it is first
displayed on the gui object. This property can be changed after the object is created.
46
defaultInputMode – number; the input mode that is selected when the user navigates
to the edit control and enters data. Modes are defined by gui.inputMode (section
4.2.2.1).
Note: The user can change to another input mode using the shift key.
Page 47

Class Reference
validInputModes – number; a bitwise combination of input modes as defined by
gui.inputMode (section 4.2.2.1); defines the input modes that are valid in the edit
control.
onChar – function; the function to run when a character is entered into an edit control.
readOnly – Boolean; false allows the text to be changed by the user, true prevents the
text from being changed.
Example:
function quit() { reader.runScript(".default.js"); }
var form = new gui.Form(null, quit);
form.Caption = "Input Modes";
form.append(new gui.Edit("Num, any",
gui.inputMode.numeric));
form.append(new gui.Edit("CAP, any",
gui.inputMode.caps));
form.append(new gui.Edit("Num, only",
gui.inputMode.numeric,
gui.inputMode.numeric));
form.append(new gui.Edit("CAP, U/l Case",
gui.inputMode.caps,
gui.inputMode.caps
| gui.inputMode.lowerCase));
gui.showForm(form);
Displays the form shown in Figure 11.
Figure 11 -- Input Modes Example
Example: The following example shows how to use onChar property of the Edit control.
The onChar property specifies a function which will run every time a character is entered.
The function returns either TRUE or FALSE. The user input is appended to the edit control
ONLY if the specified function returns FALSE.
47
Page 48

Class Reference
For example, if you want the user input to not exceed 100, you could do it as shown below:
var usr_input = "";
var Quantity = new gui.Edit("", gui.inputMode.numeric,
gui.inputMode.numeric, maxValue);
function maxValue(data)
{
usr_input += data;
if ( parseInt(usr_input) > 99 )
{
reader.beep(3);
Quantity.text = "";
usr_input = "";
return true;
}
return false;
}
The text in each edit control identifies the default input mode of the control and the modes
which are enabled for the shift key.
4.2.3.3 gui.Form
The gui.Form constructor creates a Form object for the OHV300 GUI. The gui.Form
constructor defines three event handlers for key events. Event handlers are null if not
specified.
The following controls can be used in a form:
gui.Button
gui.ToggleButton
gui.Edit
gui.Image
gui.Label
gui.Separator
Form controls must be appended (section 4.2.5.1) or prepended (section 4.2.5.2) to the
form object.
48
Format:
var <form_name> = new gui.Form(onOk, onCancel, onKey);
Page 49

Class Reference
Where:
<form_name> – program-provided form control.
onOk – function for handling the enter key. The OHV300 calls this function when the
operator presses the enter key on the OHV300 keypad and the active control is not a
button.
onCancel – function for handling the CLEAR key. The OHV300 calls this function when
the operator presses the key on the OHV300 keypad and the active control is not an edit
control. This function is also called when the escape key is issued as a softkey.
onKey – function for handling any key, soft or real, not consumed by the active control
(section 4.2.6.2).
To add a label to the form in the status area, set the form's caption property to a string
containing the label.
Example:
See section 3.2.2.
4.2.3.4 gui.Image
The gui.Image constructor creates an image object that can be displayed in the OHV300
GUI form.
Format:
var <image_name> = new gui.image(name);
Where:
<image_name> – program-provided image control.
name – string; the name of an image file in file storage (section 4.2.3.4).
Example:
var myForm = new gui.Form();
var image = new gui.Image("MyImage.img");
myForm.append(image);
gui.showForm(myForm);
The image can be up to 128x128 pixels depending on the form. Images are not cropped;
they either display in their entirety or do not display at all.
49
The image file format is specific to the OHV300.
Page 50

Class Reference
4.2.3.5 gui.Label
The gui.Label constructor creates a label control that can be displayed in the OHV300
GUI menu or form.
Format:
var <label_name> = new gui.Label(text);
Where:
<label_name> – program-provided label control.
text – string; the text to be displayed as a label. This property can be changed after the
object is created.
Example:
See the form example in section 3.2.2.
4.2.3.6 gui.Menu
The gui.Menu constructor creates a menu object for the OHV300 GUI. The gui.Menu
constructor defines three event handlers for key events. Event handlers are null if not
specified.
The following controls can be used in a menu:
gui.MenuItem
gui.Separator
gui.ToggleButton
Menu controls must be appended (section 4.2.5.1) or prepended (section 4.2.5.2) to the
menu object.
Format:
var <menu_name> = new gui.Menu(onOk, onCancel, onKey);
Where:
<menu_name> – program-provided menu.
onOk – function for handling the enter key. The OHV300 calls this function when the
operator presses the enter key on the OHV300 keypad when the active control is not a
button.
onCancel – function for handling the CLEAR key. The OHV300 calls this function when
the operator presses the CLEAR key on the OHV300 keypad and the active control is not
an edit control. This function also is called when the escape virtual key is issued (typically
by a softkey).
50
onKey – function for handling any key, soft or real, not consumed by the active control
(section 4.2.6.2).
Example: See the menus example in section 3.2.3.
Page 51

Class Reference
4.2.3.7 gui.MenuItem
The gui.MenuItem constructor creates a MenuItem control for display in a OHV300 GUI
menu. The onClick processing function is called when the enter key on the OHV300
keypad is pressed and the MenuItem control is active.
Format:
var <menuItemItem_name> =
new gui.MenuItem(text, onClick);
Where:
<menuItem_name> – program-provided MenuItem control.
text – string; a label for the MenuItem.
onClick – function for handling the MenuItem. The OHV300 calls this function when the
operator presses the enter key on the OHV300 keypad when the MenuItem is the active
control. Code the function to return Boolean true if the control's default processing of the
key should continue. Otherwise, code the function to return false; the control will act as if
not clicked.
Example:
See section 3.2.3.
4.2.3.8 gui.MultiLineEdit
The gui.MultiLineEdit constructor creates a multiple line edit control for the GUI
screen. The OHV300 operator can enter data into the multiple line edit control. The
gui.MultiLineEdit constructor consumes the entire GUI screen, so it cannot be
appended/prepended to a menu or form. To access a multiple line edit control from a
menu
Format:
var <multiLineEdit_name> =
new gui.MultiLineEdit(text, defaultInputMode, validInputModes,
onChar);
Where:
<edit_name> – program-provided multiple line edit control.
text – string; the initial value for the multiple line edit control. The control contains text
when it is first displayed on the gui screen. This property can be changed after the object
is created.
51
defaultInputMode – number; the input mode that is selected when the user navigates
to the edit control and enters data. Modes are defined by gui.inputMode (section
4.2.2.1).
Note: The user can change to another input mode using the shift key.
Page 52

Class Reference
validInputModes – number; a bitwise combination of input modes as defined by
gui.inputMode (section 4.2.2.1); defines the input modes that are valid in the edit
control.
onChar – function; the function to run when a character is entered into a multiple line edit
control.
Other Functionality:
insert – function, arg: string; this function inserts a string where the cursor is when the
function is called.
Format:
<multiLineEditControlName>.insert(string);
Where
< multiLineEditControlName> – program- provided multiple line edit control.
string – string; text to insert into multiLineEdit control.
Example:
var main = new gui.Menu
main.append(new gui.Button("Notes", function() {
gui.showDialog(captureNotes); }));
gui.showMenu(main);
storage.write("saveNotes.txt","");
var captureNotes = new gui.MultiLineEdit("", gui.inputMode.caps)
captureNotes.leftSoftkey = new gui.Softkey("Save", function()
{storage.append("saveNotes.txt", captureNotes.text);
captureNotes.text = ""; gui.showMenu(main); });
captureNotes.rightSoftkey = new gui.Softkey("Cancel", function() {
captureNotes.text = ""; gui.showMenu(main); });
4.2.3.9 gui.Separator
The gui.Separator constructor creates a separator control for display in a OHV300 GUI
menu or form. Use the separator to insert white space or lines into a form to increase
separation between controls.
Format:
var <separator_name> =
new gui.Separator(height, style);
52
Page 53

Class Reference
Where:
<separator_name> – program-provided separator control.
height – number; the height in pixels of the separator; minimum 1 pixel.
style – number; the style of the separator. style must be selected from one of the
following numeric constants:
gui.separatorStyle.blank
gui.separatorStyle.horizontalLine
gui.separatorStyle.horizontalGroove
gui.separatorStyle.horizontalRidge
The gui.separatorStyle.horizontalLine style adds a line in the approximate
center of the separator space as shown in Figure 12.
Figure 12 – gui.Separator Lines
Example:
See the menu example in section 3.2.3.
4.2.3.10 gui.Softkey
The gui.Softkey object provides processing control of the programmable or “soft” keys
on the OHV300 just below the display screen.
Format:
var <softkey> = new gui.Softkey(text, onClick);
Where:
<softkey> – program-provided softkey object.
text – string; a label for the softkey; displays on the GUI.
onClick – function; the function to be executed when the softkey is pressed.
Set the gui.leftSoftkey or gui.rightSoftkey property to <softkey> as
appropriate. The OHV300 JavaScript library defines a set of useful softkey objects (section
4.2.4).
53
Page 54

Class Reference
Example:
function leftSoftkeyOnClick()
{
/* processing code */
}
function rightSoftkeyOnClick()
{
/* processing code */
}
var left = new gui.Softkey("Ok", leftSoftkeyOnClick);
var right =
new gui.Softkey("Cancel", rightSoftkeyOnClick);
gui.leftSoftkey = left;
gui.rightSoftkey = right;
4.2.3.11 gui.Text
The gui.Text constructor creates a text object that can be displayed in the OHV300 GUI
display area. Text length can exceed the capacity of the display area. The Text control
includes a scroll bar to indicate relative position within the text when the operator presses
the up and down arrow keys.
Format:
var <text_name> =
new gui.Text(text, onOk, onCancel, onKey);
Where:
<text_name> – program-provided text control.
text – string; text data to display on the OHV300 GUI. To display multi-line text, insert the
new-line character (“\n”) in the text string. This property can be changed after the object is
created.
onOk – function for handling the enter key. The OHV300 calls this function when the
operator presses the enter key on the OHV300 keypad.
onCancel – function for handling the CLEAR key. The OHV300 calls this function when
the operator presses the CLEAR key on the OHV300 keypad. This function also is called
when the escape key is issued (typically by a softkey).
54
onKey – function for handling any key, soft or real, not consumed by the active control
(section 4.2.6.2).
Page 55

Class Reference
Note: The gui.Text constructor should be used only to display text, not as a control
within a gui.Form or gui.Menu.
Example:
gui.statusText = "text example";
gui.show(new gui.Text
("Four score and seven years ago, our fathers brought forth upon
this continent, etc ..."));
displays the screen shown in Figure 13.
Figure 13 – gui.Text Example
Note: The scroll bar indicates that there is more text to display than is currently on the
screen.
4.2.3.12 gui.ToggleButton
The gui.ToggleButton constructor defines a button control for a GUI form. When a
toggle button is clicked, an indicator in the button is alternately displayed or suppressed.
Format:
var <togglebutton_name> =
new gui.ToggleButton(text, initiallyChecked, onToggle);
Where:
<togglebutton_name> – program-provided toggle button control.
text – string; a label for the toggle button.
initiallyChecked – Boolean; true, the button displays the checked indicator when
first shown; false, the button does not display the checked indicator when first shown.
onToggle – function for handling the button click event. It passes a single Boolean
parameter; true, the button is checked; false, the button is not checked. The OHV300
calls this function when the operator presses the OK enter key on the OHV300 keypad
when the GUI button is the active control.
55
Other Functionality:
checked – Boolean; current state of toggle button.
toggle – function; toggles the toggle button as if activated by the GUI screen.
Page 56

Class Reference
Example:
// form event handlers
// button control event handler
function toggleOnClick(checked)
{reader.writeSetting(0xa7, checked);}
// create the form object
var myForm = new gui.Form();
// create the button
var toggle =
new gui.ToggleButton("Vibrate", false, toggleOnClick);
// position the controls on the form
myForm.append(toggle);
// Place text on the status bar
myForm.caption = "toggle demo";
// show the form
gui.showForm(myForm);
Initially shows the form in Figure 14.
Figure 14 – Toggle Not Selected
Pressing the left softkey (OK) toggles the indicator, as shown in Figure 15, and turns on the
vibrate feature of the OHV300. Pressing OK again turns off the indicator and the vibrate
feature.
56
Figure 15 – Toggle Selected
Page 57

Class Reference
4.2.4 Predefined Softkey Objects
The softkey objects described in this section are defined by the OHV300 JavaScript
library.
4.2.4.1 backSoftkey
The gui.backSoftkey object defines a softkey object. It labels the softkey “Back” and
sends the escape key when the softkey is clicked.
Example:
gui.rightSoftkey = gui.backSoftkey;
4.2.4.2 cancelSoftkey
The gui.cancelSoftkey object defines a softkey object. It labels the softkey “Cancel” and
sends the escape key when the softkey is clicked.
Format:
gui.rightSoftkey = gui.cancelSoftkey;
4.2.4.3 okSoftkey
The gui.okSoftkey object defines a softkey object. It labels the softkey “OK” and sends
the enter key when the softkey is clicked.
Format:
gui.leftSoftkey = gui.okSoftkey;
4.2.4.4 selectSoftkey
The gui.selectSoftkey object defines a softkey object. It labels the softkey “Select”
and sends the enter key when the softkey is clicked.
Example:
gui.leftSoftkey = gui.selectSoftkey;
4.2.5 Form and Menu Common Methods
4.2.5.1 append(control)
The append function places the specified control as the last control in the specified
menu or form.
Format:
<MenuOrForm_name>.append(control);
57
Where:
control – the control to append.
Note: A control cannot be used more than once in a form or menu.
Example: See section 3.2.2.
Page 58

Class Reference
4.2.5.2 prepend(control)
The prepend function places the specified control as the first control in the specified
menu or form.
Format:
<MenuOrForm_name>.prepend(control);
Where:
control – the control to prepend to the menu.
Note: A control cannot be used more than once in a menu or form.
Example:
See forms example in section 3.2.2.
4.2.5.3 setActiveChild(control)
The setActiveChild selects (but does not activate) the specified control when the menu or
form is displayed. This method is optional.
Format:
<MenuOrForm_name>.setActiveChild(control);
Where:
control – the control to select when the menu is displayed.
Example:
See forms example in section 3.2.2.
Note: You must show the form/menu after setting the active child in order for this function
to work properly.
4.2.6 Form and Menu Common Properties
The properties and methods described in the following section are common to the
gui.Menu and gui.Form objects.
4.2.6.1 caption
The caption property is a string that is used by gui.showForm, gui.showMenu, and
gui.showSubMenu to display a caption in the status bar of the OHV300 gui object.
Format:
<MenuOrForm_name>.caption = "<caption_string>";
58
Example:
See forms example in section 3.2.2.
Page 59

Class Reference
4.2.6.2 onKey
The onKey property is a property of type function that is used by gui.Form, gui.Menu,
and gui.Text to provide control for any key not consumed by the active control. Key
constants are defined in section 0.
Format:
function processKey(key)
{
/* processing code */
}
<MenuOrForm_name>.onKey = processKey;
4.3 reader
The reader object models the handheld hardware and firmware. Use the methods and
properties of the reader object to command the behavior of the handheld such as:
Executing commands on the handheld
Running a JavaScript on the handheld
Reading and changing handheld settings
Obtaining data decoded from bar codes
4.3.1 Methods
This section documents the methods defined for the handheld's reader object.
4.3.1.1 beep
The beep method causes the handheld to beep.
Format:
reader.beep(numBeeps);
Where:
numBeeps – number; number of beeps.
Note: This method does not return a value.
Example:
reader.beep(3);
59
Cause the reader to beep 3 times
Page 60

Class Reference
Bit
Key
Value
0
Numlock
0: Disabled
1: Enabled
1
Caps/Shift Lock
0: Disabled
1: Enabled
2
Scroll Lock
0: Disabled
1: Enabled
3
Compose
0: Disabled
1: Enabled
4
KANA
0: Disabled
1: Enabled
4.3.1.2 defaultSettings
The defaultSettings method resets selected handheld settings to manufacturing defaults; it
is equivalent to sending the 'J' command using the reader.processCommand method
(section 4.3.1.3).
Format:
reader.defaultSettings();
Note: This method has no arguments and no return value. Default settings may vary by
unit depending on the configuration purchased.
4.3.1.3 getKeyboardStatus
The getKeyboardStatus method takes no arguments and returns a read only Integer
bitmapped value containing the keyboard state of the handheld hardware. Possible
keyboard states include:
60
Example:
keyboardStatus = reader.getKeyboardStatus();
A keyboardStatus value of 5 would indicate that the Scroll Lock key and the Numlock
key were both enabled.
Page 61

Class Reference
4.3.1.4 processCommand
The processCommand method instructs the handheld to execute a command.
Format:
result = reader.processCommand(commandType, data);
Where:
commandType – string, 1 character; the command to be processed on the handheld.
data – string; data as required to process the command.
result – depending on the command, either:
a Boolean value
a data string
For commandType, data, and resulting values, refer to the Interface Configuration
Document.
Example:
reader.processCommand('$', "\x03"); // read a code
reader.processCommand(‘P’, “(26)32”); //change beep volume to 50
Sends a “$” command code (post event) with a one-byte value of 3 (event type = read near
and far fields) to the handheld firmware.
4.3.1.5 readSetting
The readSetting method returns the current value of the specified configuration setting.
Format:
value = reader.readSetting(settingNumber);
Where:
settingNumber – number; integer value representing the setting to be read.
For settingNumber values, refer to the Interface Configuration Document.
Example:
value = reader.readSetting(0x1b);
Returns the current value of the handheld setting hex 1b (communications mode).
4.3.1.6 runScript
The runScript method instructs the handheld to schedule the load, compile, and
execution of the specified JavaScript. The handheld schedules execution of the script
immediately after the currently executing event handler or main script completes. The
runScript method does not include a mechanism to return to the calling script.
61
Page 62

Class Reference
Format:
result = reader.runScript(scriptName);
Where:
scriptName – string; the name of the JavaScript to be run. The script must first be loaded
into handheld flash by name. See Vision Configurator (section 1.4).
result – Boolean; true if the script was loaded successfully; false otherwise. A return of
false usually means that the script could not be found.
Example:
In the forms example (section 3.2.2), the onTimeCard function could be defined as follows:
function onTimeCard()
{reader.runScript("TimeCardApp.js");}
The operator, at the end of a work shift, could press the “TimeCard” button to access a
time card application.
4.3.1.7 saveSettings
The saveSettings method writes the current values of the handheld configuration
settings into flash memory. Operational setting values are loaded from flash memory when
the handheld reader initializes. Any changed configuration settings will be lost at reader
shutdown unless saved in flash memory.
Format:
result = reader.saveSettings();
Where:
result – Boolean; false if the flash write fails; true otherwise.
Note: There are no arguments to this method.
4.3.1.8 setDisplayLed
The setDisplayLed method activates the LED of the OHV300 above the display.
Format:
reader.setDisplayLed(color);
Where,
color – must be reader.green, reader.red, reader.amber or reader.none.
62
Note: Setting 0x014d should be set to false for setDisplayLed to work properly.
Page 63

Class Reference
4.3.1.9 setInterval
The setInterval method calls a function or evaluates an expression at specified
intervals in seconds.
The setInterval method will continue calling the function until clearInterval is
called, or the window is closed.
The ID value returned by setInterval is used as the parameter for the
clearInterval method.
Format:
intervalId = reader.setInterval(function, interval_sec);
Where:
intervalId – program provided interval ID.
function – program provided function to run at the specified interval.
interval_sec – amount of time (in seconds) to delay before running the function again.
4.3.1.10 clearInterval
The clearInterval method removes the instance of setInterval that has the handle
intervalId.
Format:
reader.clearInterval(intervalId);
Where:
intervalId – program provided interval ID.
4.3.1.11 setTimeout
The setTimeout method calls a function or evaluates an expression after a specified
number of seconds. The function cannot be an object method.
The setTimeout method will call the function passed to it after the set amount of time
unless clearInterval is called, or the window is closed.
The ID value returned by setInterval is used as the parameter for the
clearInterval method.
Format:
timeoutId = reader.setTimeout(function, timeout_sec);
Where:
63
timeoutId – program provided timeout ID.
function – program provided function to run after the specified timeout.
timeout_sec – amount of time (in seconds) to delay before running the function.
Page 64

Class Reference
4.3.1.12 clearTimeout
The clearTimeout method removes the instance of setTimeout that has the handle
timeoutId.
Format:
reader.clearTimeout(timeoutId);
Where:
timeoutId – program provided timeout ID.
4.3.1.13 shiftJisToUnicode
The shiftJisToUnicode method converts a string from Shift-JIS encoding to Unicode
encoding.
Format:
unicodeString = reader.shiftJisToUnicode(text);
Where:
text – String; text encoded as JIS.
unicodeString – String; text encoded as Unicode.
Example:
myUnicodeString = reader.shiftJisToUnicode(myString);
Sets myUnicodeString to the Unicode encoded equivalent of myString.
4.3.1.14 writeSetting
The writeSetting method changes the operational value of a single handheld
configuration setting.
Format:
writeSetting(settingNumber, value);
Where:
settingNumber – decimal integer; the setting to be changed.
value – decimal integer; the value to be written to the configuration setting.
For the possible values of settingNumber and value, refer to the Interface Configuration
Document.
Note: This method does not return a value.
64
Note: Use 0x to denote hex values
Example:
reader.writeSetting(0x1b, 4);
Page 65

Class Reference
Sets the reader communications mode to Bluetooth RF. See also the gui.Button
example in section 4.2.3.1.
Example:
reader.writeSetting(2, 0x7FFFFFFF);
Sets the reader Battery Trigger Confirmation Time to 0x7FFFFFFF milliseconds or ~596
hours (effectively infinite time).
4.3.1.15 unicodeToShiftJis
The unicodeToShiftJis method converts a string from Unicode encoding to Shift-JIS
encoding.
Format:
shiftJisString = reader.unicodeToShiftJis(text);
Where:
shiftJisString – String; text encoded as JIS.
text – String; text encoded as Unicode.
Example:
myShiftJisString = reader.unicodeToShiftJis(myString);
Sets myShiftJisString to the Shift-JIS encoded equivalent of myString.
4.3.2 Properties
This section documents the properties defined for the handheld's reader object.
4.3.2.1 onCommand
The onCommand property of the handheld calls the specified function when the reader:
Receives a configuration command from a communication port.
Decodes a configuration command from a code read by the handheld.
The application uses this property as an event handler to:
Receive notification of command processing.
Prevent execution of a command.
The function will not be called in response to a reader.processCommand call or
commands within a stored-code (“performance strings”). Performance strings are
documented in the Interface Configuration Document.
Return Boolean true to instruct the reader to process the command. Return Boolean
false to suppress the command. When a command is suppressed, the firmware will not
send any response to the host, but the JavaScript application may provide its own
response to the host.
65
Page 66

Class Reference
Format:
function filterCommand(commandType, commandData)
{
var shouldSuppressCommand = false;
/* Processing statements */
return !shouldSuppressCommand;
}
reader.onCommand = filterCommand;
Where:
commandType – string; 1 character; specifies the command being processed.
commandData – string; data to be process by the command.
Example:
function notifyErase(commandType)
{
if ( commandType == ')' )
print("Erasing Error Log...");
}
reader.onCommand = notifyErase;
Sends a debugging message to the host to show that the erase command was detected.
4.3.2.2 onCommandFinish
The onCommandFinish property of the reader object provides processing control upon
completion of a command.
Format:
function finishedCommand(commandSuccess,
responseType,
responseData)
{
/* Processing statements */
}
reader.onCommandFinish = finishedCommand;
66
Where:
commandSuccess – Boolean; contains the return status of the command: true = success,
false = failure.
responseType – string; 1 character; specifies the response type.
Page 67

Class Reference
responseData – string; the response data.
Example:
function finishedCommand(commandSuccess,
responseType,
responseData)
{
if( !commandSuccess )
alert(postAlertFunc, "Command failed ("
+ responseType + ":" + responseData + ")");
}
reader.onCommandFinish = finishedCommand;
sends an alert when a command fails.
4.3.2.3 onDecode
The onDecode property of the reader object provides processing control to the
application program at the completion of a decode action. The handheld firmware passes
the decode object to the function through the calling argument.
Code the function in your script and return a code as follows:
null – the decode has been consumed by the JavaScript application; there should be no
further processing of it by the handheld firmware.
false – invalidate the decode; if the handheld firmware is so-configured, it will act as if
there had not been a decode; the good-decode-beep will be suppressed.
decode – object (modified or unmodified) – the handheld firmware will continue to process
the modified or unmodified decode data.
Format:
function onDecode(decode)
{
var valid = true;
/* set to false below if decode is to be invalidated */
var passthrough = true;
/* set to false below if decode is consumed here */
/* processing statements, which may modify decode.data,
valid, and/or passthrough */
67
if( !valid )
return false;
if( !passthrough )
Page 68

Class Reference
return null;
return decode;
}
reader.onDecode = onDecode;
See the discussion of the decode object in section 4.1
Example:
See the discussion of symbol decoding in section 0.
4.3.2.4 onDecodeAttempt
The onDecodeAttempt property of the reader object provides processing control to the
application program at the completion of a decode action, before any of the decoded
symbols are passed to reader.onDecode.
Format:
function onDecodeAttempt(count)
{
/* processing statements */
}
reader.onDecodeAttempt = onDecodeAttempt;
Where:
count – number; a count of the number of symbols that were read by a single decode
request.
Note: This method does not return a value.
Example:
var ok = false;
reader.onDecodeAttempt = function(count)
{
ok = count >= 2;
}
reader.onDecode = function(decode)
{
if( !ok )
68
return false;
return decode;
}
Page 69

Class Reference
Ensures there at least two decodes per attempt; otherwise, invalidates the single decode.
Each decode found in the field of view will be decoded only once per attempt, so this
example ensures there are two distinct symbols in the field of view. The reader must have
been configured (section 3.8) to support multiple reads per attempt.
4.3.2.5 onIdle
The onIdle property of the reader object provides processing control to the application
program whenever the reader is idle; i.e., no events (such as button presses) are active or
queued. This event is posted when the JavaScript has nothing else queued and is not
related to the handheld active time (setting hex 32).
Format:
function onIdle()
{
/* processing statements */
}
reader.onIdle = onIdle;
Note: This method does not return a value.
Example:
function onIdle()
{
reader.processCommand(‘.’, “\x22\x05\x32\x64”);
}
reader.onIdle = onIdle;
Flashes both LEDs on the OHV300 green 5 times, with LEDs on for ½ second and off for 1
second.
4.3.2.6 onStandby
The onStandby property of the reader object provides processing control to the
application program whenever the reader is about to enter the standby mode.
Format:
function onStandby()
{
/* processing statements */
69
}
reader.onStandby = onStandby;
Page 70

Class Reference
Where:
return – Boolean; true if the reader should be allowed to enter the standby mode;
false to prevent it.
Example:
function onStandby()
{
if (comm.isConnected) return false;
else return true;
}
reader.onStandby = onStandby;
Prevents the reader from entering standby if it is connected and allows it to enter standby
otherwise.
4.3.2.7 batteryLevel
The batteryLevel property of the reader object contains a read only integer specifying
the battery charge level. Possible battery charge levels are:
reader.green – not low.
reader.amber – somewhat low.
reader.red – very low.
Example:
batteryLevel = reader.batteryLevel;
4.3.2.8 red
The red property of the reader object contains a read only constant for use with
reader.batteryLevel and reader.setDisplayLed.
4.3.2.9 green
The green property of the reader object contains a read only constant for use with
reader.batteryLevel and reader.setDisplayLed.
4.3.2.10 amber
The amber property of the reader object contains a read only constant for use with
reader.batteryLevel and reader.setDisplayLed.
4.3.2.11 none
70
The none property of the reader object contains a read only constant for use with
reader.batteryLevel and reader.setDisplayLed.
Page 71

Class Reference
4.3.2.12 cabled
The cabled property of the reader object contains a read only Boolean value containing
the cabling state of the handheld hardware. The value will be true if cabled and false if
not cabled.
Example:
cabled = reader.cabled;
4.3.2.13 charging
The charging property of the reader object contains a read only Boolean value
containing the charging state of the handheld hardware. The value will be true of
charging and false if not charging.
Example:
charging = reader.charging;
4.3.2.14 hardwareVersion
The hardwareVersion property of the reader object contains a read only string
containing the version number of the handheld hardware.
Example:
hwVersion = reader.hardwareVersion;
4.3.2.15 oemId
The oemId property of the reader object contains a read-only string containing the
handheld unique OEM identifier from the locked flash memory.
Example:
oemId = reader.oemId;
4.3.2.16 readerId
The readerId property of the reader object contains a read-only string containing the
handheld unique ID from the locked flash memory.
Example:
rid = reader.readerId;
4.3.2.17 softwareVersion
The softwareVersion property of the reader object contains a read only string
containing the version number of the firmware currently running in the handheld reader.
71
Example:
swVersion = reader.softwareVersion;
Page 72

Class Reference
Note!
Names of files can be 1 - 200 printable ASCII characters. For compatibility with host file
systems, we recopmmend that you do not use characters that are reserved by host operating
systems: /, \, :, ?, *, [, ], ', ", etc. Files should be kept to a maximum length of 32K bytes. Files
are stored in UTF8 format, which encodes Unicode characters in one or more bytes each.
4.3.2.18 bdAddr
The bdAddr property of the reader object contains a read only string containing the
Bluetooth address of the radio installed in the handheld.
Example:
bdAddrString = reader.bdAddr;
4.4 storage
The storage object provides application software access to handheld file storage. Files
are written to storage by the storage.write method and by downloading from the host
(see section 3.7).
4.4.1 Methods
The following section documents the methods defined for the handheld storage object.
In this section, the examples use elements of a time card application that assumes time
card records are maintained as files organized by employee number. The naming
convention for the time card records is TimeCard<employee_number>.
4.4.1.1 append
The storage.append method adds data to the end of a file.
Format:
result = storage.append(name, data);
Where:
name – string; the name of the object to append.
data – string; the data to add to the end of the file.
result – Boolean; true if the append succeeded; false if the append failed.
Example:
storage.append("TimeCard” + employeeNumber, tcRecord);
Adds the time card record to the end of the time card record that already exists for the
employee specified by employeeNumber.
4.4.1.2 erase
The storage.erase method erases a file.
72
Page 73

Class Reference
Format:
result = storage.erase(name);
Where:
name – string; the name of the object to erase.
result – Boolean; true if the file existed (the object is deleted); false if the file did not
exist.
Example:
storage.erase("TimeCard” + employeeNumber);
Erases the time card record for the employee specified by employeeNumber.
4.4.1.3 findFirst
The storage.findFirst method locates the first file where the name matches a regular
expression specified in the call parameter.
Format:
name = storage.findFirst(expression);
Where:
expression – regular expression (not a string); a regular expression used by the
handheld to match against names of stored objects.
name – string; the name of the first matching file; name is null if no file matches the
expression.
Example:
name = storage.findFirst(/^TimeCard.*/);
Sets name to the name of the first time card record file.
4.4.1.4 findNext
The storage.findNext method locates the next file where the name matches the
regular expression specified in the expression parameter of a previous
storage.findFirst call. The matching names are not ordered, but they will not be
repeated; a findFirst - findNext sequence will return all matching files, provided
that there are no other intervening storage method calls. (You can put the files into an array
and use JavaScript’s sort method when you need them ordered.)
Format:
73
name = storage.findNext();
Where:
name – string; the name of a file; name is null if no remaining file matches the previous
regular expression.
Page 74

Class Reference
Example:
name = storage.findNext();
Sets name to the name of the next time card record file.
4.4.1.5 read
The storage.read method reads a file.
Format and Example:
data = storage.read(name);
Where:
name – string; the name of a file.
data – string; the contents of the file; null if there was no file with that name.
Sets data to the contents of the time card record specified by name.
4.4.1.6 rename
The storage.rename method renames a file.
Format and Example:
ok = storage.rename(oldName, newName);
Where:
oldName – string; the name of a file to rename.
newName – string; the name of the file after rename.
ok – bool; success or failure of the renaming.
Sets ok to true or false. The file oldName is renamed to newName if return is true.
4.4.1.7 size
The storage.size method returns the size of a file in bytes.
Format and Example:
nameSize = storage.size(name);
Where:
name – string; the name of a file.
nameSize – integer; the size of the file in bytes.
4.4.1.8 upload
74
Sets nameSize to the size of the time card record specified by name.
The storage.upload method uploads a file to the host over the current active host
comm port.
Page 75

Class Reference
Format:
result = storage.upload(name, withHeaderAndFooter);
Where:
name – string; the name of a file.
withHeaderAndFooter – Optional boolean; If set to false the file is uploaded without
the header (ap/g(file size) )and footer (ap/d(checksum)). If the parameter is not included
the header and footer will be included with the upload.
result – Boolean; false if there was a failure on the communications port; otherwise,
true. If the current communications mode is a 2-way mode, true indicates that the data
has been sent to and acknowledged by the host.
Note: The upload protocol is documented with the "^" command in the Interface
Configuration Document.
Example:
name = storage.findFirst(/TimeCard.*/);
while (name)
{
if ( !storage.upload(name) )
alert(name + " upload failed!");
name = storage.findNext();
};
Uploads all time card records to the host. If a time card record fails to upload, the operator
is alerted.
4.4.1.9 write
The storage.write method writes a file to storage. If the file does not exist, the
handheld creates it. If there was an existing file of the same name, it is replaced.
Format:
result = storage.write(name, data);
Where:
name – string; name of a file.
data – string; data to be written.
result – Boolean; true if the file was successfully written; otherwise, false.
75
Note: When replacing an existing file, if there is insufficient storage space to hold the new
file, it will not be written; however, the old file will be erased.
Page 76

Class Reference
Example:
result = storage.write("TimeCard" + employeeNumber, tcRecord);
Writes a time card record to a file.
4.4.1.10 getHeader
The storage.getHeader method returns the first multiline comment block from a JavaScript
file. This includes encrypted files if the proper developer key is installed.
Format and Example:
data = storage.getHeader(name);
Where:
name – string; the name of a file.
data – string; the first multiline comment block of the file.
Sets data to the first multiline comment in the file.
4.4.1.11 saveOffsetWindow
The storage.saveOffsetWindow function will use the last decode to determine the
origin and bounding box within the last image and save the rotated box defined by the
offset point, width and height to filename. The function will return a bool indicating
success or failure. Failure will usually mean the file could not be saved.
Format:
result = storage.saveOffsetWindow(xOffset, yOffset, width,_
height, filename)
Where:
xOffset -
yOffset -
width -
height -
filename – The body of the file name. The appropriate extension will be added by the
system based on the JPEG compression settings in the registry.
4.4.2 Properties
The following section documents the properties defined for the handheld storage object.
4.4.2.1 fullness_percent
76
The storage.fullness_percent property is a read-only integer containing the
percent of storage in use.
Page 77

Class Reference
4.4.2.2 isFull
The storage.isFull property is a read-only Boolean value; true if storage is full and
cannot be added to; otherwise, false.
4.4.2.3 logFullness_percent
The storage.fullness_percent property is a read-only integer containing the
percent of storage in use.
4.5 comm
The comm object models the host commutation feature of the handheld reader. Use the
methods and properties of the comm object to send either packet or text data to the host.
4.5.1 Methods
The following section documents the methods defined for the handheld comm object.
4.5.1.1 connect
The connect method instructs the handheld communication driver to attempt to establish
a connection.
Format:
result = comm.connect(try_until_timeout);
Where:
try_until_timeout – Boolean; if true, the reader will attempt to try connecting for the
number of seconds defined in connectionTime_sec (register 0xd9). If false,reader will
try to connect once
result – Boolean; false if there was a failure to connect; otherwise, true.
4.5.1.2 disconnect
The disconnect method instructs the handheld communication driver to disconnect from
the host.
Format and Example:
comm.disconnect();
Causes the reader to disconnect from the host.
4.5.1.3 sendPacket
The sendPacket method instructs the hanheld reader to send a data packet to the host
via the communications port currently specified by the active handheld communication
settings. The handheld creates a packet formatted according to the active handheld
packet protocol configuration setting.
77
For a discussion of data packets, see the Interface Configuration Document.
Page 78

Class Reference
Format:
result = comm.sendPacket(type, data);
Where:
type – string, length 1; the type of packet to send. The packet types are documented in
the Interface Configuration Document.
data – string; data to be inserted into the packet.
result – Boolean; false if there was a failure on the communications port; otherwise,
true. If the current communications mode is a 2-way mode, true indicates that the data
has been sent to and acknowledged by the host.
Example:
reader.onDecode =
function(decode) {comm.sendPacket('z', decode.data)};
Sends a packet containing results of a decode to the current comm port.
4.5.1.4 sendText
The sendText method instructs the handheld reader to send arbitrary text (which may
include NULL characters) to be sent via the active communication port; the text will be sent
“raw” regardless of the reader comm mode settings. This method buffers the data until the
USB packet size limit is reached or a ‘z’ packet is sent. For an immediate response, send
the data as a ‘z’ packet using comm.sendPacket.
Format:
result = comm.sendText(data);
Where:
data – string; data to be sent via the active communication port.
result – Boolean; false if there was a failure on the communications port; otherwise,
true. If the current communications mode is a 2-way mode, true indicates that the data
has been sent to and acknowledged by the host.
Example:
reader.onDecode =
function(decode) {comm.sendText("decode.data"); }
Sends the raw text “decode.data” via the active communications port.
4.5.2 Properties
78
The following section documents the properties defined for the handheld comm object.
Page 79

Class Reference
4.5.2.1 isConnected
The isConnected property of the comm object contains a read-only boolean specifying
the host connection status. Possible connection values are:
true – reader is connected to the host.
false – reader is not connected to the host.
Example:
connected = comm.isConnected;
4.6 Functions
The following section documents functions that enhance the application development
environment.
4.6.1 Dialog
The handheld JavaScript Engine provides the following functions like those defined by
JavaScript in Web browsers:
alert
confirm
prompt
These functions interact with the OHV300 standard GUI display. The OHV300 displays the
name of the function in the GUI status bar and the text associated with the function, and
then waits until a key is pressed. The following subsections describe the operation of each
function in the OHV300 environment.
Similar but more flexible functions are provided in the gui object (see section 4.1). For
example, if you want to change the caption on these displays use the gui object functions.
4.6.1.1 alert
The alert function displays text in the display area of the standard GUI display. Do not call
this function within onDecode and onCommand event handlers.
Format:
alert(func, text);
Where:
func – function name; function to be called after displaying the alert. This function does
not take any arguments and returns void.
79
text – string; text to display as the alert.
Processing suspends until the operator presses an enter key – either the enter key or the
left softkey defined as OK.
Page 80

Class Reference
Example:
alert(samplefunction, "Status Alert");
Displays the alert shown in Figure 717 and waits until the operator presses the enter key or
the left softkey (OK). Once the operator presses a key, it calls samplefunction() to
continue.
Figure 16 – Alert Example
4.6.1.2 confirm
The confirm function displays text in the display area of the standard GUI display and
returns a value based on the key pressed. Do not call this function within onDecode and
onCommand event handlers.
Format:
result = confirm(yesFunc, noFunc, text);
Where:
yesFunc – function name; function to be called when the confirm receives left softkey.
This function does not take any arguments and returns void.
noFunc – function name; function to be called when the confirm receives right softkey.
This function does not take any arguments and returns void.
text – string; text to display for confirmation.
result – Boolean; true if the confirm receives an enter key (either the enter key or the
left softkey defined as OK); false if the confirm receives the right softkey defined as
Cancel.
Processing suspends until the operator presses a suitable key.
Example:
result = confirm(onYesClick, onNoClick, "Exit?");
Displays the confirm dialog shown in Figure 818 and waits until the operator presses the
enter key or the left softkey. If operator presses Ok key, it calls onYesClick function. If
operator presses Cancel key, it calls onNoClick function to continue processing.
80
Page 81

Class Reference
Figure 17 – Confirm Example
If you want softkey labels other than OK and Cancel (for example, Yes and No), use the
gui.confirm method (section 4.2.1.2).
4.6.1.3 prompt
The prompt function displays text in the display area of the standard GUI display and
returns a value based on the key pressed. Do not call this function within onDecode and
onCommand event handlers.
Format:
result = prompt(func, text, default);
Where:
func – function name. Function to be called when prompt receives an enter key. The
function takes one argument named result and returns void.
text – string; text to display as a label above a gui.Edit control.
default – string; a default string to display as the contents of edit control.
result – string; contents of the edit control if the prompt receives an enter key (either the
enter key or the left softkey defined as OK); null if the prompt receives the right softkey
defined as Cancel.
Processing suspends until the operator presses an enter key or Cancel key. The operator
can key new data into the edit control before pressing enter or the left softkey.
Example:
string = prompt(postPromptFunc, "Enter login ID", "None");
Displays the prompt shown in Figure 18.
81
Figure 18 – Prompt Example
Page 82

Class Reference
The value of string depends on the operator action.
If the operator at any time presses the right softkey (Cancel), the value of string is null.
If the operator changes the contents of the edit control to <new content> and presses
the left softkey (OK), the value of string is <new content>.
If the operator presses the left softkey (OK) without changing the contents of the edit
control, the value of string is “None” (the value entered as the second call parameter).
4.6.2 Other Functions
4.6.2.1 gc
The gc function cleans up memory that has been allocated but is no longer needed by the
runtime environment. This function is processor intensive, so its use can degrade
performance.
Format:
gc();
4.6.2.2 include
The include function executes the included script inline.
Format:
result = include(scriptName);
Where:
scriptName – string; the name of the script to be included.
result – Boolean; true if the script could be loaded and executed; otherwise, false.
Example:
include("myScript.js");
adds the definitions in myScript.js to the application. The definitions become part of the
“including” script.
4.6.2.3 print
The print function sends text to stdout (the active communication port), not to the OHV300
display. Limit the use of the print function to debugging. Use the comm object methods for
normal data output to communication ports.
Format:
print(text);
82
Where:
text – string; debugging data to be sent to the active communications port.
Page 83

Class Reference
4.6.2.4 setStandbyMessage
The setStandbyMessage allows you to create a custom standby message to display when
the reader enters standby mode.
Format:
setStandbyMessage(text);
Where:
text – string; message to display when the reader enters standby mode.
4.6.2.5 wdt
Long processes may require the firmware watchdog to be petted during the operation. If
the watchdog times out during a processor intensive operation, the reader will reboot and
an error will be logged in the error log (see section 0). To prevent the reader from rebooting
during a processor intensive section, the firmware watchdog timer needs to be petted.
Format:
wdt(seconds)
Where:
seconds – number; number of seconds for which the watchdog should be petted. Valid
values are 1 to 300.
83
Page 84

Glossary and Acronyms
Term
Definition
Control
User Class object instantiated in a OHV300 GUI form.
OHV300
Handheld reader with Bluetooth for all standard 1-D and 2-D codes with LC
display and keyboard
RF
Radio Frequency
Code Data
Data resulting from the decode process after data capture or bar code read
Smart Quote
Previously formatted quotation marks, usually found in a word processing
program
Softkey
User programmable key found on the OHV300
Consume
Used with no return value by the user defined application or firmware
5 Glossary and Acronyms
84
Page 85

Input Modes
inputMode
characters
numeric
0123456789
caps
A-Z, 0-9 and all ASCII non-alphanumeric symbols:
'!', '"', '#', '$', '%', '&', '\'', '(',
')', '*', '+', ',', '-', '.', '/', ':', ';',
'<', '=', '>', '?', '@', '[', '\\', ']', '^',
'_', '`', '{', '|', '}', '~'
lower
a-z, 0-9 and all ASCII non-alphanumeric symbols
symbols
All ASCII and ISO-8859-1 non-alphanumeric symbols
6 Input Modes
The input mode determines the character set that is active for the OHV300 keypad. The
modes are described in Table 2.
Table 2 – Keypad Input Modes
85
Page 86

Format Specifiers
7 Format Specifiers
The control string of the format function accepts the following codes from the standard C
library:
%d signed decimal integers
%i signed decimal integers
%e lowercase scientific notation
%E uppercase scientific notation
%f floating point decimal
%g uses %e or %f , whichever is shorter
%G uses %E or %f, whichever is shorter
%o unsigned octal
%s character string
%u unsigned decimal integers
%x lowercase unsigned hexadecimal
%X uppercase unsigned hexadecimal
%% insert a percent sign
Flag, width, and precision modifiers are the same as in the standard C library definition.
86
Page 87

Supported JavaScript Core
8 Supported JavaScript Core
Objects, Methods, and Properties
Array
Boolean
Date
Function
Math
Number
Object
Packages
RegExp
String
sun
Top-Level Properties and Functions
decodeURI
decodeURIComponent
do...while
export
for
for...in
function
if...else
import
label
return
switch
throw
try...catch
var
while
with
encodeURI
encodeURIComponent
eval
Infinity
isFinite
isNaN
NaN
Number
parseFloat
parseInt
String
undefined
Statements
break
const
continue
Operators
Assignment Operators
Comparison Operators
Arithmetic Operators
% (Modulus)
++ (Increment)
-- (Decrement)
- (Unary Negation)
Bitwise Operators
Bitwise Logical Operators
Bitwise Shift Operators
Logical Operators
String Operators
Special Operators
?: (Conditional operator)
, (Comma operator)
87
Page 88

Supported JavaScript Core
delete
function
in
instanceof
new
this
typeof
void
88
Page 89

Symbology ID & Modifier Information
Symbology Name
ID
ID_EX
Mod
Mod_EX
UPC_A
49 0 65
UPC_E0
49 0 66 UPC_E1
49 0 67 EAN_JAN_8
49 0 68
EAN_JAN_13
49 0 69
UPC_D1
4†
N/A
N/A UPC_D2
5†
N/A
N/A UPC_D3
6†
N/A
N/A UPC_D4
7†
N/A
N/A
UPC_D5
8†
N/A
N/A
UPC_A_plus2
49 0 97 UPC_A_plus5
49 0 48
UPC_E0_plus2
49 0 98
UPC_E0_plus5
49 0 49
UPC_E1_plus2
49 0 99 UPC_E1_plus5
49 0 50
EAN_JAN_8_plus2
49 0 100
9 Symbology ID & Modifier Information
There are several elements of the decode object that describe properties of the symbology
read by the handheld reader. These elements are:
decode.symbology – Main Symbology Identifier (ID)
decode.symbology_ex – Extended Symbology Identifier (ID_EX)
decode.symbologyModifier – Symbology Modifier (Mod)
decode.symbologyModifier_ex – Extended Symbology Modifier (Mod_EX) (where
this value is blank in the table below, no Extended Symbology Modifier is defined)
decode.decoder – Which decoder was used in the decode process. For example:
“cd”
89
Page 90

Symbology ID & Modifier Information
EAN_JAN_8_plus5
49 0 51
EAN_JAN_13_plus2
49 0 101
EAN_JAN_13_plus5
49 0 52*
EAN Bookland
49 0 52* EAN_UCC 14
17 0 48* Interleaved_2_of_5 (Full symbol decoded)
17 0 48*
0
Interleaved_2_of_5 (Partial left-half symbol issued)
17 0 48*
+1 (add one to existing
value)
Interleaved_2_of_5 (Partial right-half symbol issued)
17 0 48*
+2 (add two to existing
value)
ITF-14
17 0 48*
Code39 (Full symbol decoded)
18 0 48
0
Code39 (Partial left-half symbol issued)
18 0 48
+1 (add one to existing
value)
Code39 (Partial right-half symbol issued)
18 0 48
+2 (add two to existing
value)
Code128 (Full symbol decoded)
19 0 48
0
Code128 (Partial left-half symbol issued)
19 0 48
+1 (add one to existing
value)
Code128 (Partial right-half symbol issued)
19 0 48
+2 (add two to existing
value)
Codabar
20 0 48 Code93
21 0 48
UCC_EAN_128
19 0 49
UPC_A_w_Code_128_Supplemental
23†
N/A
N/A
UPC_E_w_Code_128_Supplemental
24†
N/A
N/A
EAN_JAN_8_w_Code_128_Supplemental
25†
N/A
N/A
90
Page 91

Symbology ID & Modifier Information
EAN_JAN_13_w_Code_128_Supplemental
26†
N/A
N/A
num_IBM_symbologies
28†
N/A
N/A
Australia Post
29 0 50
Aztec
30 0 51 Data Matrix
31 0 49 Straight_2_of_5_2_Bar_Start_Stop
32†
N/A
N/A
Straight_2_of_5_3_Bar_Start_Stop
33 0 48
Japan Post
34 0 49
KIX
35 0 53 MSI_Plessey
36 0 48 Maxi
37 0 49
PDF417
38 0 48
0
Micro PDF417
38 0 48
1
PLANET
39 0 51
POSTNET
40 0 48
QR
41 0 49
0
Micro QR
41 0 49 1 Royal_Mail_4_State_Customer
42 0 52 RSS_Expanded
43 0 48 RSS_Expanded_Stacked
44 0 48
RSS_Limited
45 0 48
RSS_14
46 0 48 RSS_14_Stacked / RSS_14_Stacked_Omni
47 0 48 GoCode
48 0 N/A
91
Page 92

Symbology ID & Modifier Information
Codablock F
50 0 52
Code11
51 0 51
Pharmacode
52 0 49
Telepen
56 2 48 Hong Kong 2 of 5
0
64
57 Matrix 2 of 5 (checksum not checked)
0 1 50
Matrix 2 of 5 (Checksum checked and included in
output string)
0 1 51
Matrix 2 of 5 (Checksum checked and stripped from
output string)
0 1 52
NEC 2 of 5 (checksum not checked)
0 4 53
NEC 2 of 5 (Checksum checked and included in output
string)
0 4 54 NEC 2 of 5 (Checksum checked and stripped from
output string)
0 4 55
Trioptic Code 39
0 8 56
Royal Mail InfoMail A
0
4096
57 Royal Mail InfoMail B
0
4096
58 Korea Post
0
16384
N/A UPU (57-bar)
?
N/A
54
UPU (75-bar)
?
N/A
55
USPS 4CB
?
N/A
56
? Unknown *Symbology ID + Modifier Conflict † Not tested yet
92
Page 93

Symbology ID & Modifier Information
93
Page 94

TDOCT-4981_ENG
11/2015
 Loading...