

Page 1

Digitalizing hazardous areas.
Enabling connectivity.
Enhancing mobility.
Feature Phone for use
in Hazardous Areas
Ex-Handy 10
User Guide
English
Page 2
Copyright © 2019 Pepperl+Fuchs GmbH.
PEPPERL+FUCHS and the ecom A PEPPERL+FUCHS
BRAND logo are trademarks of Pepperl+Fuchs GmbH.
Other company and product names may be trademarks
or registered trademarks of the respective owners with
whom they are associated.
Third Party Trademarks
Google™, Android™, Google Play and other marks are
trademarks of Google LLC.”
The Android robot is reproduced or modified from work
created and shared by Google and used according
to terms described in the Creative Commons 3.0
Attribution License.
RISK OF EXPLOSION IF BATTERY IS REPLACED
BY AN INCORRECT TYPE . DISPOSE OF USED
BATTERIES ACCORDING TO THE INSTRUCTIONS.
Guideline for Headphone and Earphone
This device have been tested to comply with the Sound
Pressure Level requirement laid down in the applicable
EN 50332-1and/or EN 50332-2 standards. Permanent
hearing loss may occur if earphones or headphones
are used at high volume for prolonged periods of time.
To prevent possible hearing damage, do not
listen at high volume levels for long periods.
Disposal of Old Electrical and Electronic
Equipment
The symbol of the crossed-out wheeled
bin indicates that within the countries in
the European Union, this product, and any
enhancements marked with this symbol, can
not be disposed as unsor ted waste but must be
taken to separate collection at their end-of-life.
Disposal of Battery
Please check local regulations for disposal of
batteries. The battery should never be placed
in municipal waste. Use a battery disposal
facility if available.
Legal Information
Charging Mode
For charging the temperature for the adapter and the
Ex-Handy 10 shall not higher than 45 ˚C.
2
Page 3

Legal Information 2
Phone Models and Support Information 5
Phone Models Covered 5
Network Services 5
ECOM Support Information 5
Menu Options 6
Options Commonly Used across Menu Items 6
Limited Feature Description - Disclaimer 6
Safety Guidelines 7
SAR Information 9
Avoid High Temperatures 9
Personal Medical Devices 10
Child Safety 10
Battery Usage Guidelines 11
Batter y Usage 11
Charging the Battery 11
Verifying and Optimizing Battery Usage 12
Tips to extend the battery life 12
Getting Star ted 13
What Is In the Box ? 13
Your SIM Card 13
Inser ting the Nano-SIM Card 13
Your ECOM Ex-Handy 10 15
Switching On 16
Setting Up Your Phone 16
Need for a Google Account 16
Managing Home Screen 17
Phone Operations Without SIM Card 20
Changing the Wall paper 20
Taking a Screenshot 20
Keypad Functions 21
Contents
Managing Phone Settings 22
Language and Input Settings 22
Power Saving Settings 23
Connecting a PC Using USB Connection 24
Viewing Device Details 24
Managing Memory Utilized by Applications 25
Optimizing Memory Usage 25
Using Flashlight 25
Managing Wireless and Network Settings 26
Connecting to Wi-Fi Network 26
Connecting to Bluetooth Devices 26
Optimizing Data Usage 28
Activating Aeroplane Mode 28
Setting Up Tethering & portable hotspot 29
Setting Up Wi-Fi Hotspot 29
Activating Bluetooth Tethering 29
Setting Up VPN Connection 29
Connecting to a VPN Network 30
Managing Mobile Network 30
Managing Phone Security Settings 31
About Android Security 31
Managing Security Settings 31
Locking your Screen 31
Encrypting Phone Data 31
Locking Your SIM Card 32
Managing Credential Certificates 32
Managing Personal, Account and
System Set tings 33
Location Access 33
Backup and Restore Data 33
Managing Accounts 33
Adding an Account 33
Deleting an Account 34
Syncing Your Account 34
3
Page 4

Managing Contacts 35
Add a New Contact 35
View the Contact Details 35
Sending a Message from Contacts 35
Dialing a Number from Contacts 35
Editing the Contact Details 35
Copy to Phone 36
Managing Contact Settings 36
Managing Phonebook Settings 36
Searching Contacts 37
Deleting a Contact 37
Managing Calls 38
Making a Call 38
Dialing a Number via Contacts 38
Answering an Incoming Call 38
Adding a Contact From Phone Screen 38
Viewing All Contacts from Phone Screen 38
Viewing Call History 38
Deleting Call History 39
Managing Call Settings 39
Changing Ringtones 39
Activating Vibrate Mode 39
Setting Up Your Voicemail 39
Editing Quick Responses 39
Managing Fixed Dial Numbers 39
Managing Calls 40
Blocking Incoming Calls 40
Call Forwarding 40
Call Waiting 41
Sending Messages 42
Sending SMS/MMS Message 42
Managing Message Settings 42
Deleting Messages 43
Using the Keyboard 44
Contents
Keyboard Dictionaries 44
Installing and Using
Android™ Applications 45
Google Play™ 45
Downloading Media Files and Documents 45
Accessing Gmail™ 45
Google Calendar™ 45
Alarm 46
Clock 46
Calculator 46
Voice Search 46
Frequently Asked Questions 48
Why is my phone not powering on
after inserting the SIM card? 48
How to Enable VoLTE on my phone? 48
What is Pocket mode? 48
How can I activate text entry using physical keypad? 48
How can I activate Wi-Fi Calling (VoWiFi)? 48
How can I configure and use Speed dial? 48
How can I perform a system update? 48
Frequently Asked Questions 49
How can I use the flash light set tings? 49
End User License Agreement 50
License 50
Phone Care 50
Warranty 50
FCC Statement 51
FCC Caution 51
EU - Declaration of Conformity 52
Index 5 3
4
Page 5
Congratulations on the purchase of a ECOM Ex-Handy
10 feature phone. This phone is a GSM/GPRS/EDGE/
UMTS/LTE/VoWiFi enabled handset and has an
intuitive, feature-rich user interface, which allows you
to make the best use of the oered functions.
Phone Models Covered
This user guide covers the dierent variants of
Ex- Han dy 10.
The model name of the device can be found on the
packaging.
Network Services
These are additional services that you can avail
through your network service provider. To make the
best of these services, you must subscribe to them
through your service provider and obtain instructions
for their use from your service provider.
ECOM Support Information
For additional product and support information,
visit https://www.ecom-ex.com.
Use the Guide Eectively
Familiarize yourself with the terminology and symbols
used in the guide to help you use your phone
eectively.
Phone Models and Support Information
HOME
SCREEN
TOUCH &
HOLD
DRAG
SWIPE OR
SLIDE
PINCH IN/
OUT
5
This is the screen displayed when the
phone is in idle condition.
Touch and hold an item on the screen by
touching it and not lifting your finger until
an action occurs.
Touch and hold an item for a moment and
then, without lif ting your finger, move your
finger on the screen until you reach the
target position.
Quickly move your finger across the
surface of the screen, without pausing
when you fir st touch. For example, you can
slide a home screen left or right to view the
other home screens.
Pinch in/out on a webpage, map or other
screen to zoom. For example, double-tap
a webpage in Browser to zoom in, and
double-tap again to zoom out.
Signifies a Note.
Page 6

Options Commonly Used across Menu Items
The following are common actions used across various
menu items:
BACK
OK
HOME
Displays the previous screen. Use
the Left Selection Key to perform this
function.
Confirms an action. Use the Center
key on applicable screens, to per form
this function.
Moves the current working application
to the recent applications list/
background and displays home
screen
Double tap the Home key to access
the recent applications.
OPTIONS
Displays the options for the current
screen.
Limited Feature Description - Disclaimer
Your Ex-Handy 10 feature phone comes with feature rich
Android operating system and GMS applications which
gets frequent updates. This document intend to address
the basic features of the phone and the integrated
applications. To get the best out of your EX-Handy
10, we recommend you to refer the help and support
documentation associated with each application and
explore the latest features oered by them.
Menue Options
6
Page 7
Please read and understand the following safety
guidelines before you use the phone. These
guidelines provide details to enable you to operate
your phone safely and conform to any legal
requirements regarding the use of cellular phones.
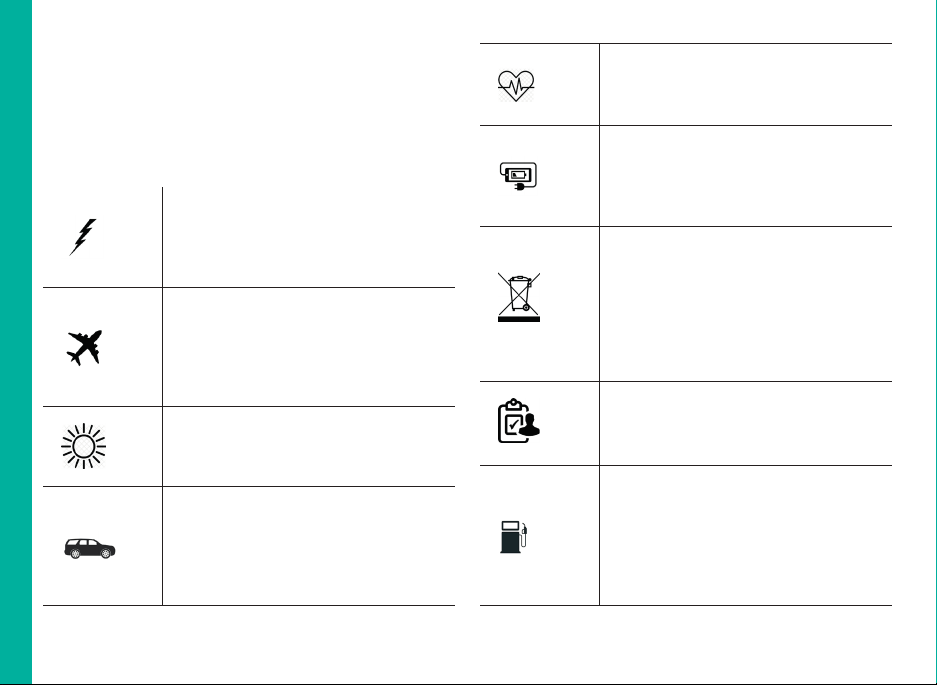
Electrical interference may obstruct
the use of your phone. Obser ve
restrictions in hospitals and near
medical equipment.
Switch o your cellular phone when in
an aircraft. Wireless phone s can cause
interference or danger to an aircraft. In
an aircraft, the phone can be used in
flight mode.
Do not expose the bat tery to high
temperatures (in excess of 55°C).
Adhere to road safety laws. Do not
hold/use a phone while you are driving;
find a safe place to stop first. Use
hands-free microphone while you are
driving.
Avoid using the phone in close
proximity to personal medical devices,
such as pacemakers and hearing aids.
Use only ECOM Ex-Handy 10 approved
charging equipment to charge your
phone and avoid damage to your
phone.
The symbol of the crossed-out
wheeled bin indicates that this
product, and any enhancements
marked with this symbol, can not be
disposed as unsorted waste but must
be taken to separate collection at their
end-of-life.
Ensure that only qualified personnel
install or repair your phone.
Applicable to non-EX versions only:
Do not to use the phone at a refueling
point. Observe restrictions when
using radio equipment at fuel depots,
chemical plants or where blasting
operations are in progress.
Safety Guidelines
7
Page 8

The ECOM Ex-Handy 10 is wate r-proof
and can be submerged to 2 metres for
30 minutes.
Make sure to properly close the rubber
cover of the charging connector and
audio connector and the screws of
the SIM card cover shall be tightened
to avoid deposits of water drops on
these connectors, when the phone is
immersed in water.
Water droplets may condense under
the display cover if the phone is
immersed in water with significant
drop in temperature. This does not
indicate water leakage. The droplets
disappear at room temperature.
The ECOM Ex-Handy 10 is dustresistant, rugged and shockresistant. However, it is not dustproof or unbreakable if subjected to
overwhelming impact. For best results
and long product life, one should
protect the ECOM Ex-Handy 10 from
salt water, dust and strong impacts.
Safety Guidelines
8
Page 9

SAR Information
The ECOM Ex-Handy 10 has been certified in
compliance with the Government’s requirements
for exposure to Radio Waves.
When communicating over the wireless network, the
feature phone emits via the radio frequency waves low
levels of radio energy. The Specific Absorption Rate,
or SAR, is the amount of RF energy absorbed by the
body while using the phone and is expressed in watts/
kilogram (W/kg).
Governments around the world have adopted
comprehensive international safety guidelines,
developed by scientific organizations, for example,
ICNIRP (International Commission on Non-Ionizing
Radiation Protection) and IEEE (The Institute of
Electrical and Electronics Engineers Inc.). These
guidelines establish permitted levels of radio wave
exposure for the general population.
Tests for SAR are conducted using standardized
methods with the phone transmitting at its highest
certified power level in all used frequency bands.
SAR Data Information for residents in countries
that have adopted the SAR limit recommended
by the International Commission on Non-Ionizing
Radiation Protection (ICNIRP). For example,
European Union, Japan, Brazil and New Zealand.
Safety Guidelines
A minimum separation distance of 1.5 cm must be
maintained between the user’s body and the device,
including the antenna during body-worn operation to
comply with the RF exposure requirements in Europe.
The limit recommended by ICNIRP is 2 W/kg averaged
over ten (10) gram of tissue.
The following SAR values are applicable to
Ex-Handy-10 RoW variant of ECOM Ex-Handy 10
feature phones. This variant is available in countries in
Asia, Australia and European union.
The highest SAR value for the ECOM Ex-Handy 10
RoW phone when tested by ECOM for use:
By the head is 0.489 W/Kg (10 g).
Worn on the body is 1.033 W/Kg (10 g-5 mm).
Avoid High Temperatures
Leaving the phone in hot or cold places, such as in a
closed car in summer or winter conditions, reduces
the capacity and lifetime of the built-in battery. For
the best results, try to keep the phone between -20°C
and +55°C (-4°F and 131°F). A phone with a hot or
cold battery may not work temporarily, even when
the battery is fully charged. Battery performance is
particularly limited in temperatures well below freezing.
9
Page 10

Personal Medical Devices
Feature phones may aect the operation of cardiac
pacemakers and other implanted equipment. Please
avoid placing the feature phone over the pacemaker,
for example in your breast pocket. When using
the feature phone, place it at the ear opposite the
pacemaker. If a minimum distance of 15 cm (6 inches)
is kept between the feature phone and the pacemaker,
the risk of interference is limited. If you suspect that
interference is taking place, immediately turn o your
feature phone. Contact your cardiologist for more
information. For other medical devices, consult your
physician and the manufacturer of the device. Comply
with instructions to switch o the device or deactivate
the RF transmitter when required, especially when
posted in hospitals and aeroplanes. Equipment used in
these places may be sensitive to radio waves emitted
from the device and adversely aect their operation.
Also, observe restrictions at gas stations or other areas
with flammable atmosphere or when close to electroexplosive devices.
Child Safety
Do not allow children to play with your feature phone
or its accessories. Keep it out of their reach. They
could hur t themselves or others, or could accidentally
damage the feature phone or accessories. Your feature
phone and its accessories may contain small parts,
which could be detached and create a choking hazard.
Emergency Calls
Safety Guidelines11Battery Usage Guidelines
Feature phones operate using radio signals, which
cannot guarantee connection under all conditions.
Therefore you should never rely solely upon any feature
phone for essential communications (e.g. medical
emergencies). Emergency calls may not be possible
in all areas, on all cellular networks, or when certain
network services and/or feature phone features are in
use. Check with your local service provider.
To make emergency calls, the user can dial the
emergency numbers.
If the device is in keypad locked state, you can long
press the EMERGENCY text on the screen.
The user can also long press the power key to bring up
the power down menu and tap the emergency call
(
) option.
10
Page 11
Battery Usage
ECOM Ex-Handy 10 phone comes with a built-in
battery. For any battery related queries contact ECOM
customer support.
WARNING
Use only ECOM certified charger and charging
cable with magnetic connector , to charge your
ECOM Ex-Handy 10.
Charging the Batter y
The battery delivered with your feature phone is not
fully charged. We recommend to charge the phone
for five hours before using it for the first time. The full
capacity of the battery is reached after 3 to 4 complete
charge/discharge cycles.
There is a risk of explosion while charging if the
battery has been replaced by an incorrect t ype.
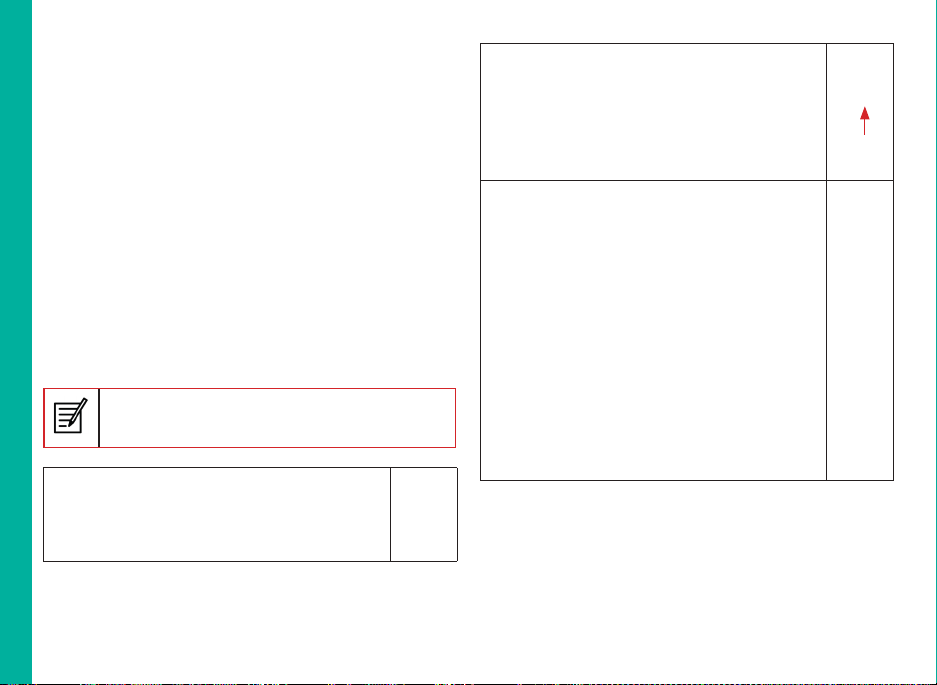
2. Connect to Phone
The charging port is located in lower side of
the phone, below the back cover. Insert the
magnetic connector to the charging port, such
that the black arrow is positioned on the top of
the connector.
3. Charging Animation/Icon
If the battery is being charged when the phone
is switched o, a battery charging animation
with charged percentage is displayed.
If the battery is being charged while the phone
is switched on, the batter y charge icon on the
home screen shows animation indicating that
the battery is being charged. After the phone
is fully charged the charging animation stops
and you can disconnect the charger from the
phone.
The LED indicator on the top right corner of
the phone, shows RED when the charging is
in progress and changes to GREEN once the
charging completes.
1. Insert Charger
Inser t the charger plug into a power outlet.
WARNING
DO NOT charge your ECOM Ex-Handy 10 inside
hazardous areas and/or with any other cable and
charger other than the provided ECOM certified
charging cable and charger.
Charging your ECOM Ex-Handy 10 with a dierent
Page 12
cable/Charger and/or in a hazardous environment
will compromise the intrinsically safe nature of the
device.
Verifying and Optimizing Battery Usage
To check the battery usage status and also close some
applications to save battery power, select Settings >
Battery.
The current battery charge status (charging or
discharging) and the charge level details are displayed
on the top of the screen.
The discharge graph (visible upon tapping the battery
image) shows the battery level over time since you last
charged the device.
The list at the bottom of the screen shows the
breakdown of battery usage for individual applications
and services. Touch any listed items for more details.
The details screen for some applications includes
options that allow you to adjust settings aecting
power usage, or stop the app completely.
If you stop some system apps or services such as
Google ser vice, your device may not work correctly.
Tips to extend the battery life
Follow these tips to extend your phone’s battery life.
Battery Usage Guidelines
If you are using Wi-Fi, Bluetooth, or GPS, use the
Quick Settings or Phone Settings to turn them o.
Move Maps or Navigation apps to background
when you are not using them. They use GPS (and
thus more power) only when they’re running.
Set screen brightness to Auto and set a shor ter
Sleep timeout (1 minute). The display settings are
located in Settings > Display.
If you are travelling and do not have access to
mobile or Wi-Fi network, switch to Aeroplane
mode. Drag down the notification bar and locate the
Airplane mode icon ( ). Tap the Aeroplane icon
to enable/activate Aeroplane mode ( ).
12
Page 13
What Is In the Box ?
The list of items in the ECOM Ex-Handy 10 phone box
are:
ECOM Ex-Handy 10 phone with rechargeable
built-in battery
Wall charger
USB cable
Screw driver
Documentation
Your SIM Card
The SIM card associates your network services (for
example, phone number, data services, and so on) with
your phone.
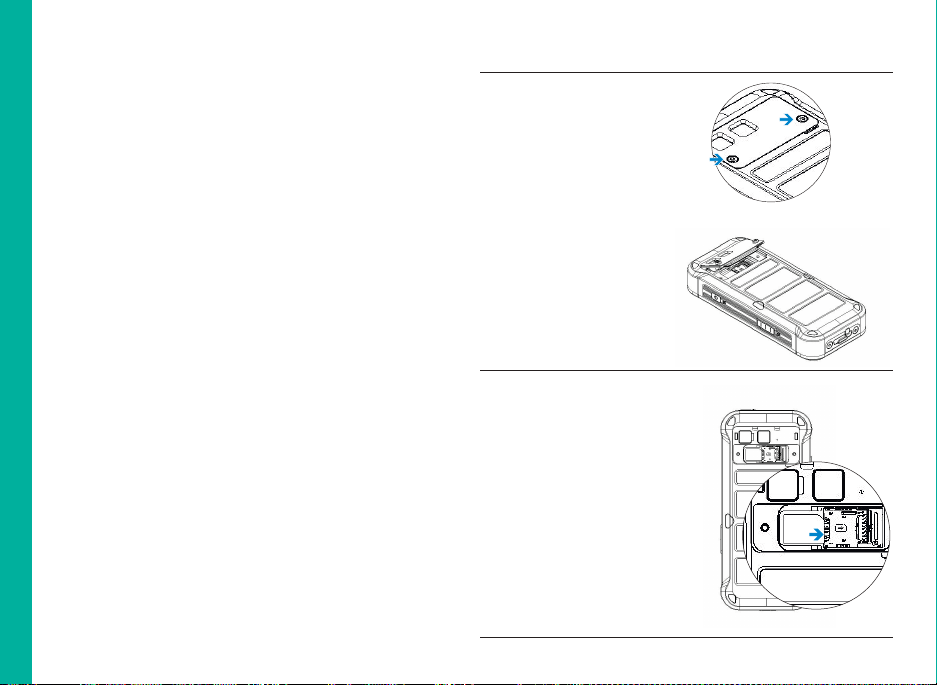
Inserting the Nano-SIM Card
Step 1
To insert the nano-SIM
card unscrew the t wo
cover screws in a counter
clockwise direction and
remove the SIM card
cover.
Please use the
screwdriver Torx T8
provided with the device.
Step 2
Insert the nano-SIM
card with the goldcolored contacts facing
downwards by pushing it
upward in the designated
slot.
Getting Started
13
Page 14
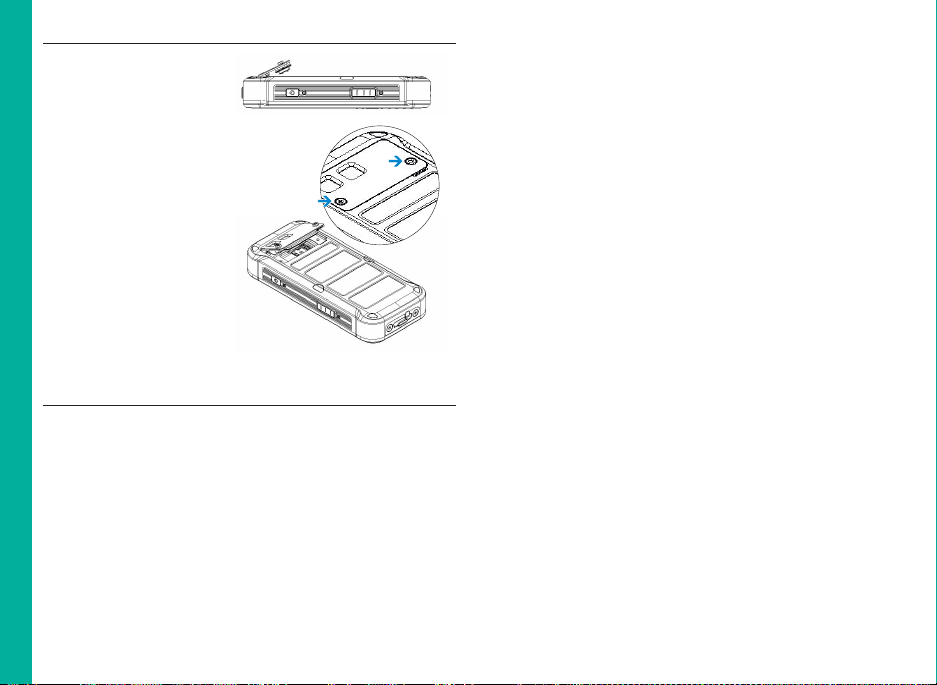
Step 3
Reattach the SIM card
cover and screw down
the two cover screws in a
clockwise direction.
Please use the
screwdriver Torx T8
provided with the device
and ensure not to
overtighten the screws.
14
Page 15

ECOM Ex-Handy 10 Phone
Receiver/ Earpiece
Touch Display
Volume
Programmable key
Alarm key
Headset port
Power On/O
Volume
Navigation Keys
Make Call/Accept Call
Press and hold to access voicemail
Press and hold to lock the keypad
Your ECOM Ex-Handy 10
Back Key
Microphone
Camera
Home
Options
OK
Call End/Reject
Press and hold to turn on/o DnD mode
Loudspeaker
USB/Charger
Port
15
Page 16

Switching On
Press and hold the Power ON/OFF key located in
the top corner in the right hand side for 2 seconds to
Power ON the phone.
When the phone is switched on, it tries to register with
the network. After successful registration, the name of
the service provider is displayed.
Setting Up Your Phone
To setup your phone follow the instructions on the
setup wizard.
Need for a Google Account
Signing into Google account helps user to access
personalized oerings via Google Mobile Services
(e.g. e-mail, calendar, drive, contacts). It also provides
multiple security and management services for your
device and Google services. For more details and
latest information, visit https://support.google.com/
accounts.
Your ECOM Ex-Handy 10
16
Page 17
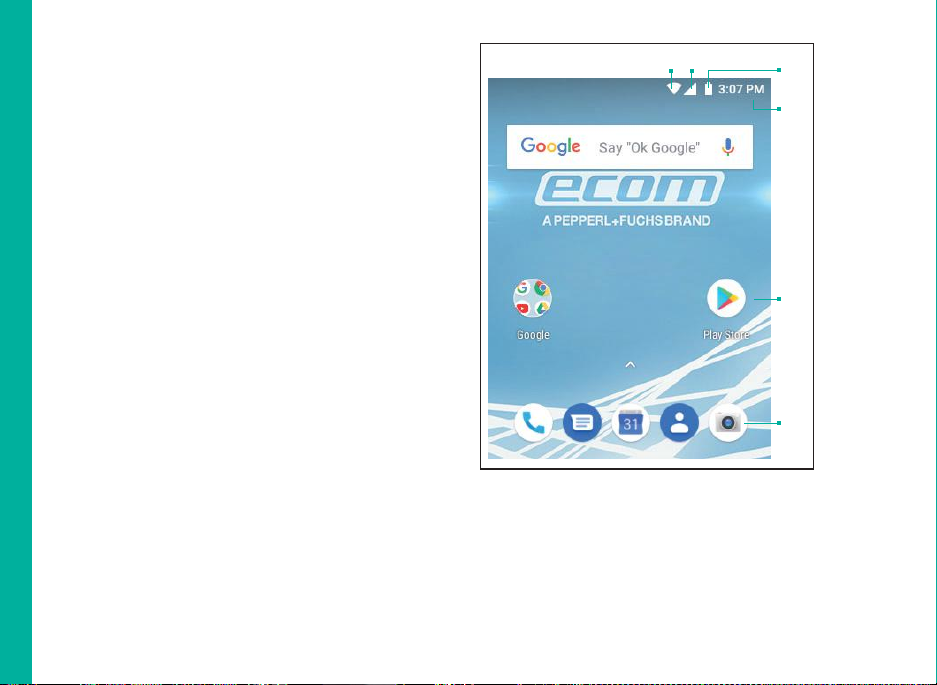
Managing Home Screen
After you complete the phone setup, the home screen
is displayed. The home screen is the begining point
to access all the device’s features. The home screen
can have multiple panels. To move between the home
panels, press the navigation keys.
The home screen includes,
Wi-Fi Signal strength indicator
Service indicator
Battery charge indicator
Time indicator
Display icons and Home screen
Application menu or grid
Your ECOM Ex-Handy 10
1
2
3
4
5
6
The navigation keys are located below the display
screen.
The Application menu or grid is located above the
navigation buttons in the home screen. The app icons
you keep in the tray remain visible on every Home
screen panel.
17
Page 18

The Status bar on the top of the display screen
provides details about various notifications such
as missed call, new messages, alarms, events and
software updates.
To view the notifications, swipe your finger down
from the top of the screen.
The System icons on the right displays the current
device status such as wireless and network connection
strength, batter y level and time.
The Google Search bar is just below the status bar
and lets you search the items in your phone or the
Internet.Touch Google Search bar to type your search
terms, or to speak and give a voice input.
You can save folders, application and add widgets on
your home screen panel.
Adding an Application Icon to Home Screen
1. Go to home screen and drag it up (
) to view the
Applications screen.
2. Swipe up or down to locate the application for
which you require a shortcut on the home screen.
3. Touch and hold the application icon and drag it to
the home screen.
4. To open an app, folder, or widget, touch its icon.
5. To view other Home screens, swipe the current
Your ECOM Ex-Handy 10
home screen to left or right.
Creating a Folder on the Home Screen
1. Folders helps you to keep the icons in an organized
fashion. To create folders,
2. Touch and hold an icon on the home screen or
Applications.
3. Drag and postion it on another icon that you want to
be included in the same folder.
4. Tap the folder. Both the icons are grouped together
in an unnamed folder.
5. Tap the name area and give a suitable name.
Moving an Icon/Folder from the Home Screen
Tap and hold the application icon and drag it to the
new location.
To move it to another panel, drag it to the side of the
screen.
Removing an Icon/Folder from the Home Screen
Tap and hold the application icon. A Remove icon
( )is displayed on the top of the home
screen.
Drag the icon and position it on the Remove icon till
it turns red.
Drop the icon and it is deleted from the home
screen.
18
Page 19

Deleting an application icon from the home screen
does not delete the application. You must go to the
Applications panel and select the application to
uninstall it.
Icons Description
4G LTE Network connected
Home Screen Indicators
The icons displayed at the top of the screen provides
information about the status of the device. Details
such as date and time, battery charge status, and data
service and Wi-Fi connectivity are displayed when the
phone is in standby mode. Other indicators such as
Bluetooth connectivity status, airplane mode, alarm and
call forward are displayed, if the feature is activated.
Icons Description
Battery level indicator
Battery charging in progress
No signal
Signal strength
No SIM card
Your ECOM Ex-Handy 10
Roaming
EDGE network connected
Wi-Fi connected
Bluetooth activated
Call in progress
Missed call
New SMS or MMS
New E mail
Alarm activated
19
Page 20

Icons Description
Silent mode activated
Vibration mode activated
Flight mode activated
Synced with the associated account
such as Google
Screenshot captured
Phone Operations Without SIM Card
You can perform the following operations without
inserting a SIM card in your phone.
Make emergency calls.
View and modify all settings except Data usage and
mobile network related settings.
Activate and share files through Bluetooth.
Activate and access the Internet, and all your
synced accounts using Wi-Fi connectivity.
Access your phonebook, files, and applications.
View and modify your profile settings.
Your ECOM Ex-Handy 10
Changing the Wall paper
You can set an image or a photo stored in your phone
as your home sceen wall paper. To change the wall
paper,
1. Tap and hold on the Home screen. Choose Wall
papers option.
2. Select from one of the following Wall paper
collections
Photos: includes photos captured using the
phone camera, screen capture, downloaded and
the photos synced from google account.
Wallpapers: includes images that are prebundled with the phone.
Taking a Screenshot
You can take the screenshot of the current screen
and it is stored in your phone’s gallery. To take a
screenshot:
1. Ensure that the image to be captured is displayed in
the current screen.
2. Press Power and Volume down button
simultaneously. The screnshot is captured and
stored in the galler y. A screenshot captured icon
(
) is also displayed in the home screen top bar.
20
Page 21

Keypad Functions
The following table displays the various keys and the
corresponding functions they perform:
Keypad key Operations
Back - Opens the previous screens
in the working sequence till the home
screen is displayed. Once the home
screen is displayed, it remains there
even when you press the back key.
Home - moves the current working
application to the recent applications
list/background and displays home
screen.
Options - displays the options for the
currently active screen.
Press to answer an incoming call.
After entering a phone number,
press to make a call.
CALL/ ACCEPT /
SEND
Press while in Standby mode to
access last received or dialed call
list.
Present above the Call accept key.
Press this key to go back to the
BACK
previous screen. You can press till
you reach the Home screen.
Your ECOM Ex-Handy 10
NAVIGATION KEYS
ALPHANUMERIC KEYS
21
Press to navigate in up, down, left
and right directions.
Press the required keys ( 1- 0) to
enter the desired phone number
and press
Enter text while in the text editor.
Press and hold in standby mode to
to make a call.
access your Voice mail.
Press and hold to display ‘+’ used
for dialing an international number,
while in standby mode.
On editor screen, press 0 to get
blank space in T9 or normal mode.
Press and hold to lock/unlock the
keypad.
Press and hold in standby mode
to switch between Meeting on/o
modes.
When entering tex t, pres s to switch
between lower case, uppe r case or
numeric.
Press and hold to enable/disable
T9 mode.
Press and hold to change the
language, when entering text.
Page 22

Language and Input Settings
You can set the phone’s language to any language or
english preferred language.
1. From the Home or All Apps screen, tap Settings
(
).
2. Scroll down and tap Languages & input, located
under System settings.
3. Go to Languages and select any language from the
list as your preferred language.
4. If the required language is not available, tap Add a
Language, select the language from the language
list. The language pack is downloaded and added.
5. Tap the preferred languages.
6. To delete a language from the list, tap Options (
and tap Remove.
All the menu items and user feedback messages are
displayed in the set language.
Keyboard Settings
To view and modify the keyboard settings, edit the
following options under keyboards & inputs.
Virtual keyboard - The list of enabled virtual
keyboards are displayed. Tap Manage keyboard
and select one or more touch/virtual keyboard from
the following list
Managing Phone Settings
Android keyboard (AOSP) - is enabled by default
and can’t be disabled.
Phone keypad
Google voice typing
Jaanese IME
Physical keyboard - connect a physical keyboard
using the USB connector.
You can also enable the option to use the virtual
keyboard, when physical keyboard is connected.
Spell Checker Settings
Enable Spell checker, to verify and change the
spellings when you type your text message or mail.
)
Personal Dictionary Settings
The default keyboard input language is English(US)-
Phone keypad.
Text -to-speech output Settings
The Speech engine is set to Text-to-speech.To
change the Google Text-to-speech engine settings
and install new language packs. Tap Settings ( )
provided in the Text-to-speech output menu next to
the engine (Google Text-to-Speech).
Tap Speech rate, to set speed at which text is to be
spoken.
Tap Play to verify the set speech rate.
22
Page 23

Tap Language, to view the language set for speech
output.
Select Google > Search Assistant & Voice >
Search Language to change the voice search
language. You can search anything on Google,
send message or can use for navigation using voice
command in your own set language.
Display Settings
From the Home or All Apps screen, tap Settings
( ).
Scroll down and tap Display.
Set one of the following options to configure your
phone’s display:
Brightness level: Set the brightness of the
phone display. It is recommended to set to
Adaptive brightness so that the display
brightness is adjusted automatically based on
the brightness of the surroundings. This also
optimizes the batter y power consumed.
Wallpaper: Set the wallpaper for your home
screen. You can select from one of the following
wallpaper collections:
Photos: includes photos captured using the
phone camera, screen capture, downloaded
and the photos synced from Google account.
Wallpapers: includes images that are prebundled with the phone.
Managing Phone Settings
Sleep: Set the sleep time so that the backlight
turns o after specified time of phone inactivity.
This setting will also help you to optimize battery
po wer.
Font size: Set the font size of the text displayed in
the screen.
Ambient display: Activates the screen from sleep
mode, when there is a new notification.
Power Saving Settings
Viewing Batter y Life
To view the battery life when all the apps are running,
1. From the Home or All Apps screen, tap Settings
(
).
2. Scroll down and tap Battery.
3. The battery life and list of running applications is
displayed.
4. You can also view and modify the following power
management options:
Battery saver - Turn ON/OFF battery saver
automatically
Battery percentage - Display battery percentage
in the status bar
Adaptive brightness - Adjust and optimize the
brightness level depending on the available light
Sleep - Turn ON sleep mode after specific time of
inactivity
Ambient display - Activate screen when new
notifications are received
23
Page 24

Quick Settings
Quick settings helps to access the most frequently
used settings from the status bar.
Drag down the status bar to access the Quick Settings.
Tap the down arrow (
) to view the complete list of
settings present in the quick settings.
To add or remove a setting to/from the quick settings,
tap Edit (
).
Force Stopping an Application
1. From the Home or All Apps screen, tap
Settings (
).
2. Scroll down and tap Apps & notifications. The
recently used application list is displayed
3. Tap See all apps to view all the applications.
4. Tap the application to be force stopped.
5. Tap Force stop to stop an application.
Connected as a media device, then the following two
options are displayed:
Charge the device: Select this to charge your
phone using USB charging.
Transfer files: Lets you transfer files between your
phone and PC.
Transfer photos (PTP): Lets you transfer photos
using camera software and transfer any files that
don’t support MTP.
Use device as MIDI: Lets you use your phone as a
MIDI device to play music.
When the phone is connected to the computer
using ECOM certified USB cable, you can charge
the phone without selecting any USB option..
When the phone is connected to the computer via
ECOM certified USB cable in Transfer Files mode
phone memory is displayed in the computer.
If you stop some apps or ser vices, your device may
not work correctly.
Connecting a PC Using USB Connection
When the phone is connected to the computer via an
ECOM certified USB cable, Connected as a media
device message is displayed in the notification bar.
Drag down the notification bar and tap the option
Managing Phone Settings
Viewing Device Details
To view the device details such as system update
status, model number, Android version, Kernel and
baseband versions,
1. From the Home or All Apps screen, tap
Settings (
).
2. Scroll down and tap About Phone, located under
System settings.
24
Page 25

Managing Memory Utilized by Applications
The Apps screen allows you to optimize memor y usage
for all the applications. To view these settings,
1. From the Home or All Apps screen tap Settings ( ).
2. Scroll down and tap Apps and notifications. The
following tabs are displayed:
Downloaded: Displays all applications
downloaded from Google Play™ or other
sources.
Running: Displays all applications, processes,
and services that are currently running or that
have cached processes, and the details about
the RAM utilized by each application.
The graph at the bottom of the Running
tab shows the total RAM in use and the
available RAM to use. Touch SHOW CACHED
PROCESSES or SHOW RUNNING SERVICES to
switch back and forth.
All: Displays all applications that are pre-bundled
with Android and downloaded on Google Play™
or other sources.
Optimizing Memory Usage
You can optimize your phone’s memory by performing
the following tasks:
Uninstall apps that are not required.
Delete unwanted files that are downloaded or
created.
Managing Phone Settings
Transfer files that would be required later to your
computer.
Delete oine content on Google Play and stream it
via a Wi-Fi or mobile network.
Using Flashlight
You can add the flashlight widget to the home or lock
screen.
1. From the Home or All Apps screen tap
Settings (
).
2. Tap Custom Features and enable Flash.
3. Drag down the notification bar and tap the
Flashlight icon ( ) to turn On torch.
4. Drag down the notification bar and tap the
Flashlight icon ( ) again to turn it OFF.
5. You can also turn ON/OFF the flashlight, by long
pressing Key 5.
25
Page 26

Connecting to Wi-Fi Network
Wi-Fi is a wireless network technology that can provide
Internet access at distance upto 100 Feet, depending
on the Wi-Fi router and surroundings, when you
connect your mobile device to the wireless router.
You can access Internet when you connect your ECOM
Ex-Handy 10 to a Wi-Fi network. To connect your
phone to a Wi-Fi network,
1. From the Home or All Apps screen, tap
Settings (
).
2. Enable Wi-Fi, located under Network & Internet
settings.
3. Tap Wi-Fi. A list of Wi-Fi routers present within your
phone’s accessible range are displayed.
4. Tap your preferred network. Enter the password (if it
is a secured network) and tap Connect.
It is always recommended to make your Wi-Fi
router secure and also to connect your phone to a
secure network.
Adding a New Network
To add a new Wi-Fi network
1. In the Wi-Fi settings screen,Tap Add Network
button (
).
2. Enter the following details:
Network name: The wireless network SSID.
Managing Wireless and Network Settings
Security: Set the security type to None, WEP,
WPA/WPA2 PSK, 802.1x EAP.
3. Enable Advanced Settings to set the Proxy details
and IP settings.
Editing a Network
1. Tap and hold your preferred network.
2. Select Modify Network. The network setting details
such as Password, Show Password and Advanced
options are displayed are displayed.
3. Tap Save to save the settings or Cancel to exit to
the previous screen.
Forgetting a Network
1. Tap and hold your preferred network.
2. Select Forget Network. The selected network is
removed from the list.
Enabling WPS For your Router
To setup a secure Wi-Fi network, tap WPS Push
button (
) in the Wi-Fi network Settings and tap the
WPS button in your router, when prompted.
Connecting to Bluetooth Devices
Bluetooth is short-range wireless communication
technology used to communicate between the devices
over a distance of about 8 meters.
26
Page 27

You can perform the following tasks using Bluetooth
paired devices.
Transfer media files and contacts between mobile
devices connected using Bluetooth.
Access Internet through a Bluetooth device.
Use Bluetooth headphones for playing media file
Pairing a Bluetooth Device
To activate Bluetooth and pair your ECOM Ex-Handy 10
phone with other Bluetooth devices:
1. From the Home or All Apps screen, tap
Settings (
).
2. Enable Bluetooth, located under Connected
devices settings. A list of accessible Bluetooth
devices are displayed. Ensure that Bluetooth is
activated in the other device too.
3. Tap Pair new device to search and add other
Bluetooth enabled devices. A list of accessible
Bluetooth devices are displayed. Ensure that
Bluetooth is activated in the other device too.
4. Tap Settings next to the specific paired device
to connect the Bluetooth device to access your
phone’s contacts, call history and also provide
Internet access.
5. Enable Media Audio to connect the Bluetooth
device for listening to media files.
This option is displayed only when a Bluetooth
headset/Carkit is connected.
Confirm the pass key in the other device and tap Pair
in your phone.
The device is displayed in the Paired device list.
Managing Wireless and Network Settings
27
Page 28

Editing Bluetooth Device Settings
1. Tap Settings icon (
preferred paired Bluetooth device.
2. Enter a new name to change the display name of the
device and tap OK.
3. Enable Media Audio to connect the Bluetooth
device for listening to media files.
4. Enable Internet access to use the paired Bluetooth
device to access the Internet.
5. Tap Forget to remove the device from your paired
list.
Optimizing Data Usage
Data usage refers to the amount of data used by your
phone during internet access. The data usage charges
are dependent on the plan provided by your service
provider.
To monitor your data usage, adjust your data usage
settings.
1. From the Home or All Apps screen, tap
Settings (
2. Tap Data Usage, located under Network &
Internet settings.
3. Tap Usage and set data usage warning limit.
4. Enable Data saver to allow unrestricted Internet
access to only 2 applications that are currently
running.
).
) located next to the
Managing Wireless and Network Settings
5. Enable Mobile Data to access Internet using your
mobile network.
6. Tap Mobile data usage to set the mobile data usage
limits.
7. Tap Settings icon ( )
8. Enable Set data warning to preset your data usage
limit and to set an aler t before reaching the preset
limit.
9. Enter the Data warning limit.
10. Enable Set data limit.
Mobile data access is disconnected automatically
as soon as you reach this limit. You cannot access
the Internet and related phone features do not work.
You receive a notification once you reach the set
data usage limit.
11. Enter the data limit.
Activating Aeroplane Mode
When your phone is set in airplane mode, network
Connectivity or mobile data connectivity gets disabled.
But you can access your media files and other features
that do not require mobile data connectivity.
You can activate aeroplane mode from Quick settings.
You can also activate using the following steps, if it
is not not available in the quick settings.’To activate
airplane mode,
1. From the Home or All Apps screen, tap
Settings (
28
).
Page 29

2. Enable Airplane mode located under Network &
Internet settings.
Setting Up Tethering & portable hotspot
Using tethering and portable hotspot, you can share
your device’s Internet connection with a computer or
with other devices.
To activate USB tethering,
1. Tap Hotspot and tethering located under Network
& Internet settings.
2. Enable USB tethering.
The USB Tethering option can be enabled only
on connect ing the USB cable to the PC.
Setting Up Wi-Fi Hotspot
When you setup your phone as a Wi-Fi hotsopt you can
connect other devices to this phone through Wi-Fi and
access Internet.
1. Tap Hotspot and tethering located under Network
& Internet settings.
2. Tap Set up Wi-Fi Hotspot.
3. Enter Network name, Security and Password and
tap Save.
Managing Wireless and Network Settings
Activating Bluetooth Tethering
When you activate Bluetooth tethering, you can share
your phone’s Internet connection with other Bluetooth
paired devices.
1. Tap Hotspot and tethering located under Network
& Internet settings.
2. Enable Bluetooth tethering.
Setting Up VPN Connection
Using a Vir tual private network (VPN) connection, you
can access websites and other resources within a
secured local network, even when you are outside that
network. To setup a VPN connection,
1. From the Home or All Applications screen, tap
Settings (
).
2. Tap VPN located under Network & Internet
settings.
3. Tap Add network icon (
). Edit VPN profile
screen is displayed.
4. Enter the following details:
VPN profile: VPN connection name.
Typ e : Select the connection type.
Server address: Address of the secure server
for connection.
PPP encryption (MPPE): Enable to perform a
secure point-to-point encryption between your
device and the VPN server.
29
Page 30

Select Show advanced options to enter DNS
server details.
Connecting to a VPN Network
1. Tap the required VPN name from the list of VPN
networks configured.
2. Enter the required credentials.
3. Tap Connect.
When the phone is connected to the VPN network ,
the icon is displyed in notifcation bar.
Editing VPN Network Details
1. Touch and hold the required VPN profile to be
edited, from the list of VPN networks configured.
2. Tap Edit profile.
3. Modify the required information.
4. Tap Save to save the changes.
Deleting a VPN Network
To delete a VPN profile from the VPN screen,
1. Touch and hold the required VPN profile to be
deleted, from the list of VPN networks configured.
2. Tap Delete profile.
Managing Mobile Network
You can view and modify your mobile ser vice provider
settings. To view and modify your mobile network
settings,
1. From the Home or All Apps screen, tap
Settings (
).
2. Tap Mobile network located under Wireless &
Networks settings.
3. Enable Mobile data to access the Internet using
your mobile network.
4. Enable Roaming to have network connectivity when
you are in a roaming network.
5. Set Data usage limit.
6. Select the preferred Network type. You can set
it to either 2G only, 3Gonly, 4G only, 2G/3G only,
3G/4Gonly, 2G/3G/4G only.
7. Tap Network to to choose network operator.
8. Tap Access Point Names to view, add and edit the
network access points.Tap Add network icon (
)
to add a new access point.
Managing Wireless and Network Settings31Managing Phone Security Settings
30
Page 31

About Android Security
Android provides a multi-layered approach to the
security.
Prevent: Apps on Google Play are scanned
continuously to block harmful apps and policy
violators. You can also choose to have apps
installed from other sources verified.
Control: App sandboxes prevent apps from
accessing other parts of your device’s operating
system, or each other, unless you give permission
during installation. Screen lock and encryption
prevent unauthorized access to the entire device.
Defend: Once identified, dangerous apps can be
removed remotely.
2. Tap Security & location.
3. Enable and modfiy required security settings.
4. Tap Screen lock and select one of the following
options to configure phone:
None: Disables the phone lock.
Swipe: When the phone is locked slide to your
right or left or long press * key to unlock the
phone.
Pattern: When enables, enter a pattern
connecting atleast 4 dots. When the phone is
locked, unlock it with the pattern.
PIN: When enabled, enter you own PIN value.
When the phone is locked, unlock it using the
PIN.
For more information about protecting your phone,
refer to the topics below.
Managing Security Settings
You can activate and protect your phone from
unauthorized by configuring the security settings.
1. From the Home or All Apps screen, tap Settings ( ).
2. Tap Security and location located under Settings
menu. Enable and modfiy required security settings.
Locking your Screen
1. From the Home or All Apps screen tap
Settings (
).
When the phone is locked, you can answer an
incoming call, without unlocking the phone. Touch the
white phone icon and slide over one of these icons:
Encrypting Phone Data
You can encrypt your accounts,settings downloaded
applications and their data,media and other files.
Tap Security & Location > Encryption &
Credentials > Encrypt phone to encrypt your
phone. Once you encr ypt your phone ,you need to
type a numeric PIN or Password to decrypt it each
time you power it on.
Page 32

Encryption takes an hour or more .You
must star t with a charged battery and keep
your phone plugged in untill encr yption is
complete.If you interrupt the encryption
process,you will lose some or all of your data.
Locking Your SIM Card
You can set SIM lock for your SIM.
1. From the Home or All Apps screen, tap
Settings (
).
2. Tap Security and location. Enable and modfiy
required security settings.
3. Tap SIM card lock.
4. Enable Lock SIM card.
5. Enter SIM PIN and tap OK.
6. Tap Change SIM PIN. Enter the old SIM pin and tap
OK.
7. Enter the new PIN and re-enter the same value
when asked. Tap OK.
Managing Credential Certificates
You can view, install, verify and manage the certificates
installed in your phone.
Tap Trusted Credentials under Encryption &
Credentials, to view and verify the system and user
certificates.
Managing Phone Security Settings33Managing Personal, Account and System Settings
Tap Install from SD card to install certificates from
SD card if any.
32
Page 33

Location Access
If you enable Google Location Service™, you can let
your device access GPS, Wi-Fi networks, and mobile
networks to estimate your location.
1. From the Home or All Apps screen, tap
Settings (
).
2. Tap Location located under Security & location
settings. Enable and modify required security
settings.
3. Enable Location.
4. Set the Location mode to one of the following
options:
High accuracy: uses GPS, Wi-Fi, mobile
networks, to get the highest-accuracy location
for your device. .
Battery saving: allows your device to estimate
your location using low battery-intensive location
sources, such as Wi-Fi and mobile networks.
Device only: allows your device to estimate
your location using GPS only. It use the satellite
information to provide location information. This
mode may use more battery power and take
longer to determine your location.
When the location switch from the notification
screen is OFF, your device location is not shared
with any applications.
Backup and Restore Data
You can backup your phone data to one or more of
your Google Accounts using Android backup ser vices.
If you need to replace your device or erase its data,
you can restore your data for any accounts that were
previously backed up.
To backup your data,
From the Home or All Apps screen, tap
Settings ( ).
Tap Backup located under Google settings.
Tap Back up now.
If you do not have a backup account on your device,
you can touch Backup account to add an account.
Managing Accounts
You can link an existing Google Account to your phone
to organize and access your personal information from
any computer or mobile device.
Adding an Account
1. From the Home or All Apps screen, tap
Settings (
).
2. Tap Add Account.
3. Select the type of account. You can create a
Corporate account or an IMAP account.
Page 34

4. Complete the on-screen instructions. The account
is displayed under one of the following list:
Google Accounts shown under Settings > Users
& accounts > Google.
Other accounts shown under Settings > Users
& accounts.
Deleting an Account
You can remove any account and all the information
associated with it from your device, including e-mail,
contacts, settings, and other data backed up in that
account.
1. To remove a Google Account, Settings on home
page > Users & accounts - Google > Select the
account to be deleted.
2. Tap Remove account.
3. To remove any other type of account, tap Settings
- Users & accounts > account-name and tap the
suitable Remove option.
Syncing Your Account
To view and modify the sync settings for Google
Accounts,
1. From the Home or All Apps screen, tap
Settings (
).
2. Tap Accounts located under Users & accounts
settings.
3. Tap Google Account.
Managing Personal, Account and System Settings
Configure Auto-Sync for all Apps
To enable auto-sync for all apps that are linked with
your account,
1. To control auto-sync for all apps that use it, open
Settings (
) > Network & Internet > Data
usage > Menu and check or uncheck Auto-sync
data.
If this option is not checked, you can only sync the
data manually. You can also sync manually to collect
messages, e-mail, and other recent information.
If auto-sync is disabled, it extends your phone’s battery
life. But it prevents your from receiving notifications
when updates occur.
Configure Google Account Sync Settings
To modify a single Google Account’s sync settings:
1. Go to Settings (
) - User & accounts > Google.
2. Tap the account whose sync settings has to be
changed.
3. If your account is set to auto-sync, you can check or
uncheck items as needed. If auto-sync is o which
is located under Settings > Users & accounts
> Automatically sync data, touch an item to
manually sync its data.
Sync a Google Account Manually
1. Go to Settings (
) - Accounts > Google.
2. Tap the account whose data has to be synced.
34
Page 35

You can use the phonebook to maintain your contacts.
It enable you to perform call,SMS, mms etc.
To access the contacts,
From Home or All Apps screen, tap Contacts ( ).
The contacts saved in the phonebook are displayed.
Touch and drag the scroll bar on the screen to
scroll through the contacts.
Add a New Contact
1. To add a new contact, From Home or All Apps
screen, tap Contacts > Add new contact ( ).
Enter the contact details ,tap Options ( ) and
Save, to save the contact.
2. You can also enter a number using the dial pad and
tap Create a new contact to add a new contact, or
Add to a contact to update existing contact details.
View the Contact Details
1. From Home or All Apps screen, tap People (
2. Scroll to the required contact and tap the contact,
to view the contact details.
Sending a Message from Contacts
You can send SMS and MMS messages to the
contacts.
Managing Contacts
Sending SMS/MMS
1. From Home or All Apps screen, tap Contacts (
2. Scroll to the required contact and tap the Message
icon ( ), to open the message screen.
3. (Optional). Tap Attachment (
), to attach a
multimedia file.
4. Type the message and tap Send ( ).
If you at tach a media file or a contact to your
SMS message it is converted to an MMS message
automatically.
Dialing a Number from Contacts
1. From Home or All Apps screen, tap Contacts (
2. Scroll to the required contact and tap the contact to
view the contact details.
3. Tap the required phone number to dial the contact
or press the OK key to dial the default number.
Editing the Contact Details
1. From Home or All Apps screen, tap Contacts (
).
2. Scroll to the required contact and tap the contact,
tap the contact to view the contact details.
3. Press Edit ( )
4. Edit the required details and tap Done.
35
).
).
).
Page 36

Copy to Phone
1. From Home or All Apps screen, tap Contacts (
2. Tap Options (
) and Settings > Import, to impor t
the contact to phone.
3. The selected contact is copied to the phone
storage.
This option present only when Google account is not
configured.
Managing Contact Settings
You can edit and modify ringtone and call receiving
settings for individual contacts.
1. From Home or All Apps screen, tap Contacts ( ).
2. Scroll to the required contact and tap the contact,
tap the contact to view the contact details.
3. Tap Options (
) and select one of the following
options:
Send message: Send a message to the selected
contact.
Delete: Delete the selected contact.
Share: Share the contact details via Email,
Messages or Google drive.
Copy to Phone: Copy the selected contact to
phone.
Create shortcut: Select Place on Home screen
to copy the contact widget to the Home screen
for easy access.
Managing Contacts
Set ringtone: Set a specific ringtone for the
).
contact.
Route to voice mail: Can route the contact to
voice mail
Managing Phonebook Settings
You can set the default Google account to save the
contacts, select the list of contacts to be displayed or
sort list to view the contacts and also the first or last
name of the contact to be displayed first.
From Home or All Apps screen, tap Contacts (
Tap Options (
) and Settings select one of the
following options:
My info: View and modify your Google account and
phone number.
Accounts: View and modify user account settings.
Default account for new contacts: Set the default
contact storage to Google account or SIM card.
Contacts to display: View all the contacts stored
in the SIM card and Google account or customize to
view only Google contacts.
Sort by: Sort the contacts by first name or Surname.
Name format: View the contact name beginning
with first name or last name.
Phonetic name: View the phonetic name always or
the name is hidden if empty
Import: Import contacts list from .VCF file or SIM card.
36
).
Page 37

Export: Export contact to .VCF file or SIM card. You
can also share all the contacts using Messages,
E-mail, Google Drive or Bluetooth.
Blocked Numbers: View blocked phone numbers.
Searching Contacts
1. From Home or All Apps screen, tap Contacts (
2. Tap Search ( ) and enter the first few letters/
numbers of the contact name/phone number to be
searched. All the contacts containing the search
text are displayed.
Deleting a Contact
1. From Home or All Apps screen, tap Contacts ( ).
2. Scroll to the required contact and tap the contact,
tap the contact to view the contact details.
3. Tap Options (
) and select Delete.
).
Managing Contacts38Managing Calls
37
Page 38

Making a Call
From Home or All Apps screen, tap Phone (
).
The Phone screen with Recents ( ), Favourites ( ),
Call histor y , Contacts ( ) is displayed.
To dial a number use one of the following options:
Recents: Tap the Recents icon ( ) to view the call
history. Tap the contact/number and tap the phone
icon ( ).
Favorites: Tap the specific contact/number from
the frequently called numbers to make a call.
Contacts: Tap a specific contact and tap the phone
number to dial a call.
Dialing a Number via Contacts
1. From Home or All Apps screen, tap Contacts (
2. Scroll to the contact and tap the contact. The
contact details are displayed.
3. Tap the required phone number or Call icon to call
the contact.
Answering an Incoming Call
To answer/reject an incoming call, press the answer
key (green key).
To answer/reject an incoming call in phone locked
state, touch the white phone icon and slide over one
of these icons:
These options are available when the phone is in
locked state. You can also press the answer key
(green key) for accepting the call.
Icons Description
Answer the call.
Disconnect the call.
Disconnect the call and respond with a
quick response from a list of response text
messages.
Adding a Contact From Phone Screen
1. From Home or All Apps screen, tap Phone (
2. Enter the phone number using the numeric keypad
).
in the phone.
3. Ta p Create new contact to add a new contact or
Add to a contact to add to an existing contact in the
phonebook. Enter the contact details and tap Done.
Viewing All Contacts from Phone Screen
1. From Home or All Apps screen, tap Phone (
2. Tap Contacts ( ).
Viewing Call History
1. From Home or All Apps screen, tap Phone (
2. Tap the Recents icon ( ).
).
).
).
Page 39

Deleting Call History
1. From Home or All Apps screen, tap Phone (
2. Tap the Call history icon ( ).
3. Tap Options (
).
4. Tap Options > clear call history to delete the call
history.
Managing Call Settings
You can change the incoming call ring tone, enable
vibrate during call and also activate voicemail using
call settings.
To view and modify call settings,
From Home or All Apps screen, tap Phone ( ).
Tap Options ( ).
Tap Settings.
Changing Ringtones
In the Call settings screen, tap Sounds and
vibration.
Tap Phone ringtone
Select the ringtone from the ringtones list and tap Ok.
Activating Vibrate Mode
In the Call settings screen, enable Also vibrate
for calls to receive both ring and vibrate alert for an
incoming call.
Managing Calls
Setting Up Your Voicemail
).
1. From Home or All Apps screen, tap Phone (
2. Tap Options (
).
).
3. Tap Settings.
4. Tap Voicemail.
5. View or enter the following details:
Service: Your service provider name.
Setup: Enter your voicemail number.
Sound: Set aler t tone for voicemail message
Vibrate: Enable this option to receive a vibrating
alert.
Editing Quick Responses
When you are not able to answer an incoming call, you
can send quick response to the caller.
To view and edit quick responses, in the Call settings
screen, tap Quick responses, tap the specific response
message to edit. Edit the message and tap OK.
Managing Fixed Dial Numbers
FDN (fixed dialing numbers) is a SIM card-enabled
feature. It restricts outgoing calls to phone numbers
which are not listed in the FDN list. This feature can
be activated only if PIN2 is entered. Contact your
network operator if you do not have a PIN2. Set up your
phone to place outgoing calls only to the fixed dialing
numbers (FDN) that you save on the phone’s SIM card.
39
Page 40

1. From Home or All Apps screen, tap Phone ( ).
2. Tap Options (
).
3. Tap Settings.
4. Tap Fixed Dialing Numbers under Call settings.
5. Tap Enable FDN, and then enter the PIN2 supplied
with the SIM card.
6. Tap Change PIN2 to change the PIN2 number
supplied with the SIM card.
7. Tap FDN list and add phone numbers.
Blocking Incoming Calls
The Call blocking options helps you to block incoming
calls and SMS messages from blocked numbers.
1. To block incoming calls from certain numbers, tap
Call blocking > Add a number.
2. Enter the phone number to be blocked and tap
Block.
Call Barring
You can set the Call barring feature for all incoming
and outgoing calls, international calls, local and home
only calls.
To access call barring settings in the call settings
screen, tap Call barring. Select one of the following
call barring options:
Options Function
Outgoing calls
Incoming calls
Change barring
password
Cancel all call
barring
All voice calls or International voice
calls or International voice calls except
home country.
All voice calls or voice calls when
roaming.
You can change the barring password
by entering a new password.
Revoke all the call barring settings.
Call Forwarding
You can forward your incoming calls to a number in
the contacts or a new number, provided your network
operator suppor ts this service.
To access call forward settings in the call settings
screen, tap Call forwarding. Select one of the
following call forward options:
Options Function
Always forward
Forward when
busy
Forward all incoming calls to a
pre-designated number.
Forward calls when your phone is busy.
Managing Calls
40
Page 41

Forward when
unanswered
Forward when
unreachable
Forward calls when you do not answer
incoming calls.
Forward calls when your phone is
switched o or is in out of coverage
area.
Call Waiting
When call waiting is enabled and the phone is in
conversation, the incoming number is displayed when
you receive a call.
To activate call waiting in the call settings screen, tap
Additional settings. Enable Call waiting.
Caller ID Display
When you make a call, you can select whether or not to
display your id to the receiver.
To activate call waiting in the call settings screen, tap
Additional settings. Enable Caller ID.
Managing Calls42Sending Messages
41
Page 42

SMS and MMS are convenient and inexpensive means
of communication. You can send a text message to
other people via SMS service. MMS allows you to send
messages by including multimedia content such as
pictures, audio files, video files.
You can use the Messages ( ) in your phone to send
an SMS and MMS message to other feature phones or
any other equipment that can receive SMS and MMS.
The MMS feature is available only if you subscribe
it from your network operator.
To access the messages function, from the home
screen or All Apps screen, tap Messages ( ).
Sending SMS/MMS Message
1. To create a SMS message, from the home screen or
All applications screen, tap Messages (
).
2. Tap Start chat ( ).
3. Enter the contact name or the phone number in the
To field.
4. If you enter an alphabet, all the contact names
starting with that alphabet is displayed as a list.
Scroll down to select the contact.
5. Enter the message and tap Send ( ).
6. When you add a multimedia attachment, the
message is automatically converted to a multimedia
message. MMS charges are applied based on the
operator.
7. You can add a multimedia attachment. To add
an attachment, tap Attach (
). Select the
attachment type from the following options:
8. Browse the operation type from the below list and
select the multimedia file to be attached.
Attachment Type Description
Gallery/Camera
Smileys Attach a smiley image.
GIF Attach an animated GIF image.
Favorites Attach a sticker.
Location Share your current location.
Record audio
Select an image from the
galler y or shoot a new image
using the camera
Record a new audio file using
the voice recorder and attach.
Managing Message Settings
You can customize the way you want to view and filter
the messages. You can also set the default messaging
application.
To view and modify the message settings,
1. To edit message settings, from the home screen or
All Apps screen, tap Messages (
2. Tap Options (
).
).
Page 43

3. Tap Settings. View and edit the following settings:
Settings Description
Default SMS
app
Notifications
Hear outgoing
message
sounds
Your Current
country
Smar t Reply
Automatic
previews
Advanced
Set tings
- Group
messaging
Auto-download
MMS
Set the default messaging
application.
Set message notification for
dierent profile settings, message
display options for phone lock
screen and enable notfication dot
Enable audible alert for outgoing
messages
Set your current countr y. If you
select Automatically detected to set
the country based on your location
View message text suggestions
based on the recent messages you
had sent.
You can show all message previews
or only Web link previews or
download data when connected
to Wi-Fi
You can send SMS/MMS to all
recipients and receive individual
response.
Enable to download all MMS
messages in home network
Auto-download
MMS when
roaming
Use simple
characters
Get SMS
delivery
reports
Wireless
emergency
alerts
SIM card
messages
Phone number
Enable to download all MMS
messaged in roaming network
Convert special characters to
simple characters in SMS
Activate read report for multimedia
messages.
Activate wireless emergency
broadcast messages.
View messages stored in the SIM
card.
Set the sender’s phone number to
be displayed in the messages
Deleting Messages
To delete all the message threads,
1. From the home screen or All Apps screen, tap
Messages (
).
2. Select a conversation and tap on options ( ) or
long press on a conversation.
3. Tap Delete all threads. All the message thread are
deleted after confirmation.
Managing Messages
43
Page 44

You can view and modify the keyboard, language and
dictionary setting using the Phone Settings.
Keyboard Dictionaries
1. To manage keyboard dictionaries,
2. From the Home or All Apps screen, tap
Settings (
3. Tap Languages & Input located under System
settings.
).
3. Tap Virtual keyboard.
4. Tap Google Keyboard.
5. Tap Add-on dictionaries. under Dictionary.
The dictionaries for other languages that you can
download to your device are displayed.
AdapTxt Keyboard
The default keyboard input language is English(US)-
Phone keypad.
Personal Dictionary
You can add your own words to your personal
dictionary so that your device remembers them.
1. To add a word or phrase, including an optional
shortcut,
2. Tap Language & Input located under System
settings.
3. Tap Personal dictionary and then Add ( ) icon.
4. Add a required word and respective shortcut which
is optional and press Back key.
5. The word will be saved.
Add-on Dictionary
1. From the Home or All Apps screen, tap Settings
(
).
2. Tap Language & Input located under System
settings.
Using the Keyboard
You can enable phone keypad from System settings >
Languages and input > Virtual Keyboard > Manage
Keyboards.
44
Page 45

Google Play™
Google Play™ provides access to dierent Android
applications that you can download on the go and use
in your ECOM Ex-Handy 10 phone.
Downloading Media Files and Documents
You can download media files and documents when
your phone is connected to internet through Wi-Fi or
mobile data connection.
To manage application downloads, tap All apps
screen. Use the Files app (
delete the downloaded files.
From the Files app,
1. Tap an item to open it.
2. Long tap the items you want to share. Then touch
the Share icon and choose a sharing method from
the list.
3. Long tap the items you want to delete. Then touch
the Trash icon.
4. At the top of the screen, touch the 3 horizontal lines
to sort your downloads by name, by date modified,
or by size.
The downloaded applications can be viewed in two
dierent ways:
) to view, reopen, or
Installing and Using Android™ Applications
Grid view
1. Tap the Files icon (
screen.
2. Tap Grid view ( )to view the downloads. The
downloads are displayed with the details such as
the size, downloaded date etc.
List view
3. Tap List view ( ) to view the files. The files are
listed with the downloaded date details.
Accessing Gmail™
Gmail application comes pre-installed on your
EX-Handy 10. It is a versatile email solution from
Google. You can access Gmail services through your
Google account. While most of the basic functions are
intuitive, the help and support section gives details
about all the features and its usage.
Google Calendar™
The Google Calendar helps you to set appointments,
schedule reminders and alerts and repeat them if
required. You can also view your saved tasks on a
daily, weekly, monthly and agenda basis.
When you first set up your phone and configure it to
use a Google Account (such as Gmail), you can link
your Google Calendar also. All the appoinments and
tasks stored in the Google Calendar will also be synced
to your phone.
45
)located on the All apps
Page 46

To access Google Calendar,
1. Tap Calendar icon ( ) on All Apps screen.
2. To change the calendar view, choose Day, Week,
Month, Agenda from the top of the screen in a dropdown list.
3. Select Refresh to update the calendar.
Alarm
You can set an alarm for a particular time.
1. Tap the Clock icon (
) located in the All Apps
screen.
2. Tap the Alarm activation icon ( ) on the top of
the screen.
To set a simple alarm, tap Add Alarm ( ) icon.
Enter the time and tap Done.
To set a reccuring alarm, enable the checkbox
Repeat.
Its selects every day of the week.
Unselect the day in a week by tapping that
particular day for which you don’t want a
reoccurring alarm.
Select the days for repeating the alarm.
To set the alarm tone, select the type of alarm from
the Ringtone list. Tap the selected ringtone and
select OK.
The alarm will work even when the phone is set in
silent mode.
Installing and Using Android™ Applications
Clock
You can view the time of major cities in dierent time
zones using Clock (
). You also have the option to
use Daylight Saving Time (DST).
The local time in the home city is displayed in the
upper half of the screen.
Tap World clock icon ( ) located at the botton
of the screen, to search for a city and view the local
time. there
Calculator
To access calculator, tap Calculator (
) located in
All Apps screen.
To enter the numbers, tap the numeric keys.
To use mathematical operators, touch the
respective operation keys on the keypad.
Tap = for the final results.
The default calculator in this phone is designed to
perform simple mathematical calculations.
Press Options (
History: Clear the previously inputted numbers
Send feedback: Sends feedback about the
) to
calculator application to Google.
Voice Search
You can speak to your phone to search, get directions,
send messages and perform other tasks.
46
Page 47

To initiate the voice search, tap the microphone ( )
icon in the Google search bar.
After you touch the Microphone icon (
) or say OK
Google, Google listens as you speak and initiates the
search or action you describe. If voice search does not
understand you, it lists some suggestions. Select the
one you want from the list.
Spoken answers are supported for English
language only.
Installing and Using Android™ Applications48Frequently Asked Questions
47
Page 48

Why is my phone not powering on after inserting
the SIM card?
Your EX-Handy 10 will not power on if the SIM cover is
not properly fastened. Check if the SIM card cover is
tightly fixed to the phone.
How to Enable VoLTE on my phone?
VoLTE services will work only if your service provider
activates it. Please contact your service providerfor
VoLTE servicesactivation. After activationof VoLTE
services, enable Enhanced 4G LTE mode (Settings
> Mobile Network > Advanced > Enhanced 4G LTE
Mode). The 4G service selected by default, is enabled.
What is Pocket mode?
Pocket mode allows the you to avoid accidental screen
touches or any operation when the phone is in your
pocket. If activated, all screen touches are disabled, so
the phone won’t try to unlock itself or dial a number or
call any number from your Contacts.
How can I activate text entry using physical keypad?
Use quick settings to activate and deactivate physical
keypad. For more information refer to “Quick Settings”
on page 24 and “Language and Input Settings” on
page 22 .
How can I activate Wi-Fi Calling ( VoWiFi)?
With Wi-Fi Calling, you can dial or receive a phone call
if you have a Wi-Fi connection in an area with little or
no cellular coverage. Please ensure that this service is
provided by your service provider.
To activate Wi-Fi calling (VoWiFi), tap Calls Settings >
Wi-Fi Calling >Wi-Fi preferred.
How can I configure and use Speed dial?
Speed dialling helps you to associate each numeric
key with one of the frequently used contacts or phone
number. If the user long presses the numeric key, the
associated contact/number will be dialled. However,
numeric key ‘1’ is associated with voice mail and speed
dial cannot be associated.
To activate speed dial, tap Call Settings > Speed dial
settings.
How can I perform a system update?
You can upgrade your device OS by checking updates
in System update under Settings.
Page 49

If there is any System update to be performed, your
phone will communicate the server via Wi-Fi/Mobile
data and upgrade the device OS. Wi-Fi is the preferred
mode for download of update as mobile data incurs
additional charges including roaming.
How can I use the flash light settings?
This setting helps you to restrict the accidental usage
of flash light. To turn ON/OFF Flash, tap Settings
>System > Custom Feature. Once turned OFF, the
flash bulb will not be available for Camera flash and
Torch.
Frequently Asked Questions50End User License Agreement
49
Page 50

License
This wireless device, (the “Device”) contains
software owned by PEPPERL+FUCHS GmbH.
(“PEPPERL+FUCHS”) and its third party suppliers and
licensors (collectively, the “Sof tware”). As user of this
Device, PEPPERL+FUCHS grants you a non-exclusive,
non-transferable, non-assignable license to use the
software solely in conjunction with the Device on which
it is installed and/or delivered with. Nothing herein shall
be construed as a sale of the Sof tware to a user of this
Device.
You shall not reproduce, modify, distribute, reverse
engineer, decompile, otherwise alter or use any other
means to discover the source code of the Software
or any component of the Software. For avoidance of
doubt, you are at all times entitled to transfer all rights
and obligations to the Software to a third party, solely
together with the Device with which you received the
Software, provided always that such third party agrees
in writing to be bound by these rules.
You are granted this license for a term of the useful
life of this Device. You can terminate this license by
transferring all your rights to the Device on which you
have received the Software to a third party in writing. If
you fail to comply with any of the terms and conditions
set out in this license, it will terminate with immediate
eect PEPPERL+FUCHS and its third party suppliers
and licensors are the sole and exclusive owner of and
retain all rights, title and interest in and to the Software.
PEPPERL+FUCHS, and, to the extent that the Software
contains material or code of a third party, such third
party, shall be entitled third party beneficiaries of
these terms. The laws of Delaware, United States shall
govern the validity, construction and performance of
this license.
Phone Care
Each ECOM Phone has a designated IP class for dust
and water protection, according to the IEC Ingress
Protection (IP) Standard 60529. This means that
the phone is dust protected and can be submerged
into 6.5 feet /2 m deep water for up to 30 minutes.
Immersion in deeper water can damage it and must be
avoided.
ECOM phones are built for heavy duty use. Its design
protects against disassembly or mechanical damage
when subjected to forces equal to free fall from the
height of 6.5 feet/2 meters. Subjecting the phone to
stronger impact and forces can damage it and must be
avoided.
WARRANTY
Please observe the Quickstart guide provided in
the Sales kit of this device for details about the
warranty.
Page 51

WARNING
Changes or modifications made to this equipment
not expressly approved by PEPPERL+FUCHS GmbH
for compliance could void the user’s authority to
operate the equipment.
FCC Statement
This Ex-Handy 10 variant targeted for the North
American region complies with part 15 of the FCC
rules (FCC ID: XAM500080GR01). Operation is
subject to the following two conditions:
This device may not cause harmful interference.
This device must accept any interference
received, including interference that may cause
undesired operation.
This device has been tested and found to comply
with the limits for a Class B digital device, pursuant
to Part 15 of the FCC Rules. These limits are
designed to provide reasonable protection against
harmful interference in a residential installation. This
equipment generates, uses, and can radiate radio
frequency energy, and, if not installed and used
in accordance with the instructions, may cause
harmful interference to radio communications.
However, there is no guarantee that interference
will not occur in a particular installation If this
equipment does cause harmful inter ference to radio
or television reception, which can be determined
by turning the equipment o and on, the user is
encouraged to try to correct the interference by one
FCC Statement
or more of the following measures:
Reorient or relocate the receiving antenna.
Increase the separation between the equipment
and receiver.
Connect the equipment into an outlet on a
circuit dierent from that to which the receiver is
connected.
Consult the dealer or an experienced radio/ TV
technician for help.
The countr y code selection is for non-US model
only and is not available to all US model. Per FCC
regulation, all Wi-Fi product marketed in US must
fixed to US operation channels only.
FCC Caution
Any Changes or modifications not expressly approved
by the party responsible for compliance could void the
user‘s authority to operate the equipment.
The antenna(s) used for this transmitter must not be
co-located or operating in conjunction with any other
antenna or transmitter.
For body worn operation, this phone has been tested
and meets FCC RF exposure guidelines when used
with an accessor y that contains no metal and that
positions the handset a minimum of 1cm from the
body. Use of other accessories may not ensure
compliance with FCC RF exposure guidelines.
51
Page 52

EU - Declaration of Conformity
Hereby, Pepperl+Fuchs GmbH declares that the
radio equipment type Ex-Handy 10 is in compliance
with Directive 2014/53/EU. The full text of the EU
declaration of conformity is available at the following
URL : www.ecom-ex.com.
EU - Declaration of Conformity
52
Page 53

A
Adding a contact from phone screen
Add new contact 35
Aeroplane mode 28
Alarm 46
Android security 31
Answering a call 38
B
Backup data 33
Battery
Charging indicator 11
Battery usage 11
Charging 11
Improving battery life 12
Optimize power 12
Bluetooth devices 26
Editing Bluetooth device settings 28
Pairing a Bluetooth device 27
Bluetooth tethering 29
C
Calculator 46
Call barring 40
Calling from Contacts 35
Call settings 39
Call waiting 41
Clock 46
Connecting to a Wi-Fi network 26
Index
38
Adding a new network 26
Editing a Wi-Fi network 26
Forgetting a Wi-Fi network 26
WPS for router 26
Contacts
Add 35
Send message 35
Credential certificates 32
D
Data backup and restore 33
Data syncing 34
Configuring an account 34
Manual 34
Deleting a contact 37
Deleting call history 39
Deleting messages 43
Device details 24
Dialing a call 38
From People 38
Display caller ID 41
Display icons 18
Display settings 23
E
ECOM Ex-Handy 10
Box contents 13
Keypad layout 15
Switching On 16
Editing contact details 35
53
Page 54

F
Favorites tray 17
Fixed dial numbers (FDN) 39
Force stopping an application 24
Frequenctly called list 39
G
Gmail 45
Google account 16, 33
Adding an account 33
Deleting an account 34
Syncing data 34
Google Search bar 18
H
Home screen 17
Indicators 19
Home screen icons/folders
Adding to home screen 18
Creating Folder in home screen 18
Moving an icon/folder 18
Removing from home screen 18
K
Keypad
Accept/Send 21
Back 21
Navigation keys 21
Keypad for ECOM EX-Handy 10 15
Index
Keypad functions 21
Keypad layout
Ex-Handy phone 15
L
Language settings
Personal dictionary 22
Spell checker 22
Location access 33
M
Managing memory utilized
by applications 25
Media device 24
Media files and document
download 45
MMS 42
Sending MMS message 42
Mobile network 30
Music player 46
O
Optimizing data usage 28
Optimizing memory usage 25
Optimizing power 23
P
People 35
Phone data encryption 31
54
Page 55

Play store 45
Power Optimization 12
Power saving settings 23
Force stopping an application 24
Viewing battery life 23
Q
Quick responses 39
R
Restore data 33
Ringtones 39
S
Safety Guidelines for mobile usage 7
SAR information 9
Screen lock 31
Search bar 18
Searching Contacts 37
Security settings 31
Sending SMS 42
Sending SMS/MMS
From Contacts 35
Setting up your phone 16
Sharing contact details 36
SIM card 13
Inserting SIM card 13
SIM card lock 32
SMS 42
SMS settings 42
Index
System icons 18
T
Tethering and portable hotspot 29
Time and date settings 22
V
Viewing call history 38
Viewing contact details 35
Viewing contacts from
phone screen 38
Viewing device details 24
Voice Actions 47
Voice Search 46
VPN connection 29
Connecting to a VPN network 30
Deleting VPN network 30
Editing VPN network details 30
W
Warranty 50
Wi-Fi hotspot 29
WPS for router 26
55
Page 56

Copyright© 2019 Pepperl+Fuchs GmbH.
The contents of this document, either in part or in their entirety, may not be reproduced, forwarded, distributed or
saved in any way without Pepperl+Fuchs GmbH prior written consent.
The contents of this document are presented as they currently exist. Pepperl+Fuchs GmbH does not provide any
express or tacit guarantee for the correctness or completeness of the contents of this document, including, but
not restricted to, the tacit guarantee of market suitability or fitness for a specific purpose unless applicable laws
or court decisions make liability mandator y. Pepperl+Fuchs GmbH reserves the right to make changes to this
document or to withdraw it any time without prior notice.
 Loading...