

Pentair MiniMax 75, MiniMax 100 Operation & Installation Manual

Attention Installer
Please give this manual to the owner and/or
operator once installation is complete.
Attention User
Please retain this manual for future reference, it
contains important information that will help you in
operating and maintaining this heater.
Call (800) 831-7133 for additional free copies of these instructions.
© 2007 Pentair Water Pool and Spa, Inc.
This document is subject to change without notice.
1620 Hawkins Ave., Sanford, NC 27330 • (800) 831-7133 • (919) 566-8000
10951 West Los Angeles Ave., Moorpark, CA 93021 • (800) 831-7133 • (805) 553-5000
All rights reserved.
Warning:
1
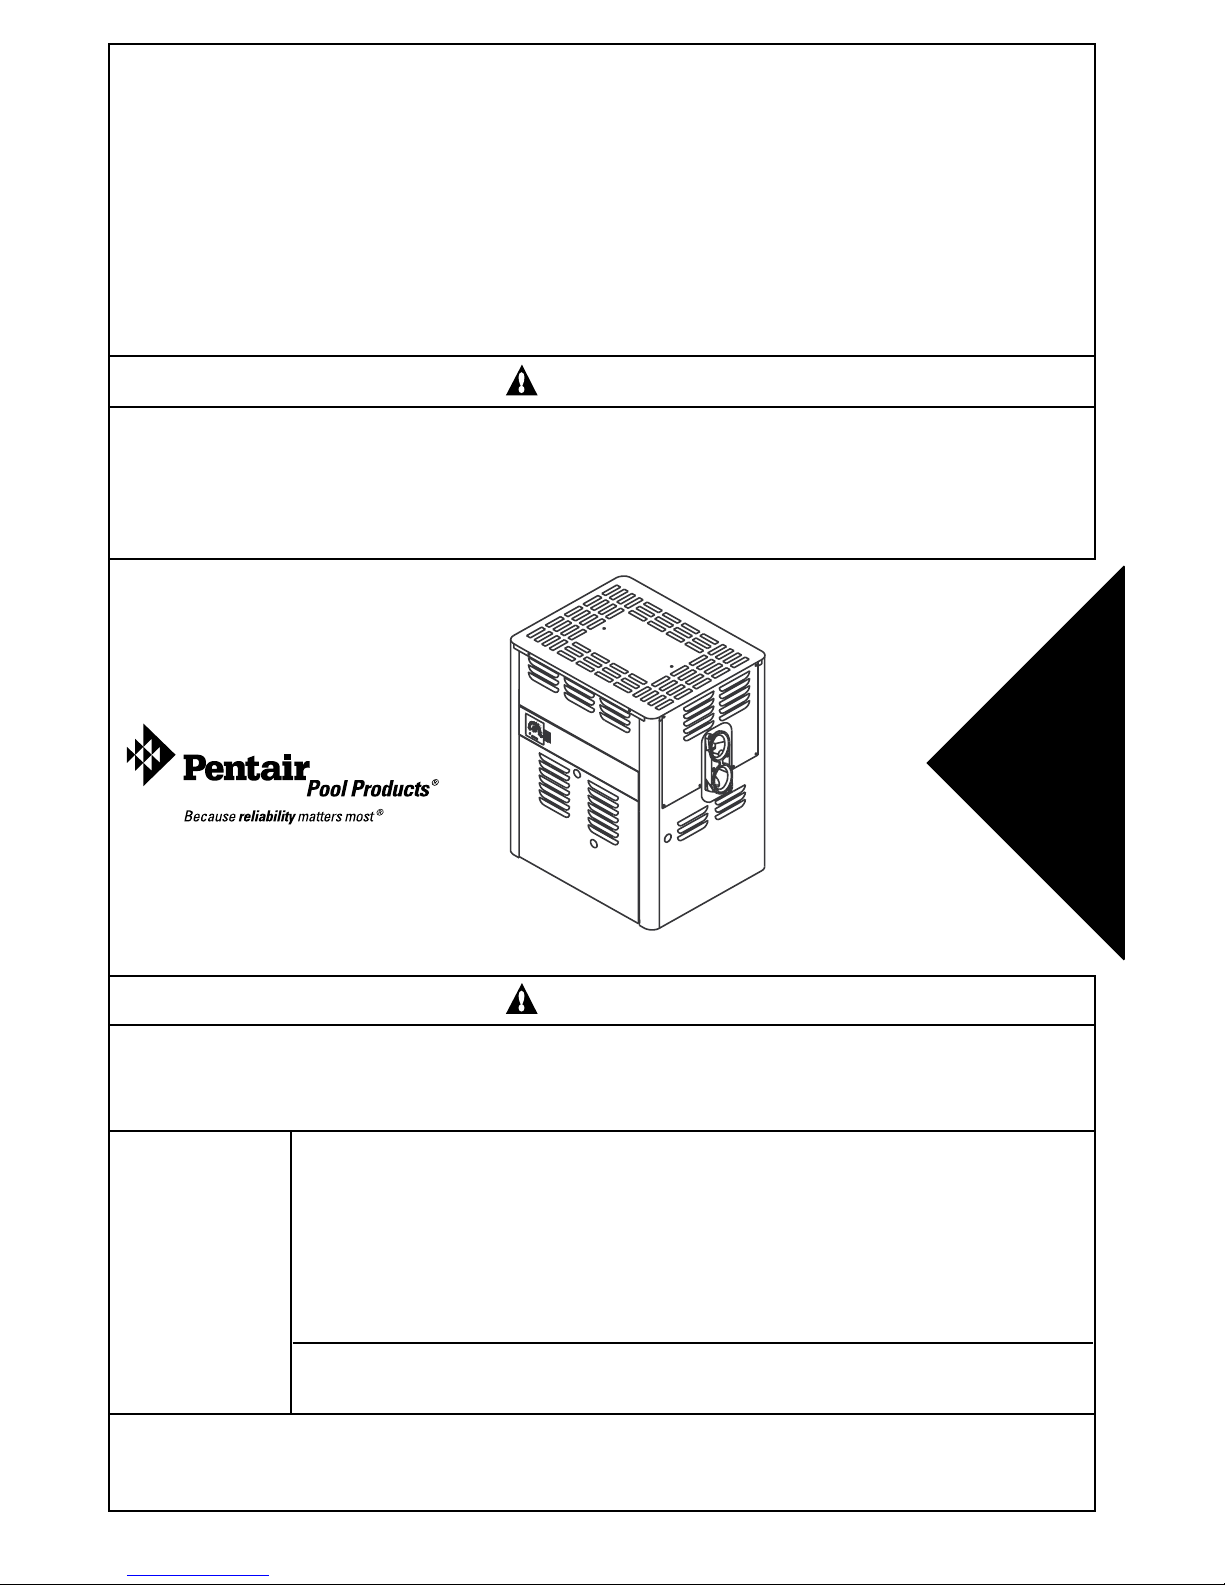
MiniMax® 75 & 100
ABOVEGROUND POOL & SPA HEATERS
OPERATION & INSTALLATION MANUAL
IMPORTANT SAFETY INSTRUCTIONS
READ AND FOLLOW ALL INSTRUCTIONS
SAVE THESE INSTRUCTIONS
WARNING
FOR YOUR SAFETY - READ BEFORE OPERATING
If you do not follow these instructions exactly, a fire or explosion may result,
causing property damage, personal injury or loss of life. Call (800) 831-7133
for additional free copies of these instructions.
Consumer
Retain For
Future
Reference
U.S. Patent Numbers
5,201,307
WARNING
Warning: Improper installation, adjustment, alteration, service or maintenance can cause
property damage, personal injury or death. Installation and service must be performed by a
qualified installer, service agency or the gas supplier.
WHAT TO DO IF YOU SMELL GAS
• Do not try to light any appliance.
For Your
Safety
• Do not touch any electrical switch; do not use any phone in your building.
• Immediately call your gas supplier from a neighbor's phone.
Follow the gas supplier's instructions.
• If you cannot reach your gas supplier, call the fire department.
To
Do not store or use gasoline or other flammable vapors and liquids in
the vicinity of this or other appliances.
1620 Hawkins Ave., Sanford, NC 27330 • (919) 566-8000
10951 West Los Angeles Ave., Moorpark, CA 93021 • (805) 553-5000
Rev. H 10-16-07 P/N 471105
Pentair Water Pool and Spa, Inc.

2
Customer Service
If you have questions about ordering Pentair replacement parts, and pool products,
please use the following contact information:
Customer Service (8 A.M. to 5 P.M. — Eastern and Pacific Times)
Phone: (800) 831-7133
Fax: (800) 284-4151
Technical Support
Sanford, North Carolina (8 A.M. to 5 P.M. — Eastern Time)
Phone: (919) 566-8000
Fax: (919) 566-8920
Moorpark, California (8 A.M. to 5 P.M. — Pacific Time)
Phone: (805) 553-5000 (Ext. 5591)
Fax: (805) 553-5515
Web site
visit www.pentairpool.com or www.staritepool.com to find information about Pentair products
© 2007 Pentair Water Pool and Spa, Inc. All rights reserved.
This document is subject to change without notice.
1620 Hawkins Ave., Sanford, NC 27330 • (919) 566-8000
10951 West Los Angeles Ave., Moorpark, CA 93021 • (805) 553-5000
Trademarks and Disclaimers: MiniMax and the Pentair Pool Products logo are registered trademarks of Pentair Water Pool and Spa, Inc. Other
trademarks and trade names may be used in this document to refer to either the entities claiming the marks and names or their products. Pentair
Water Pool and Spa, Inc. disclaims any proprietary interest in trademarks and trade names other than its own.
P/N 471105 Rev. H 10-16-07

TABLE OF CONTENTS
Introduction . . . . . . . . . . . . . . . . . . . . . . . . . . . . . . . . . . . . . . . . . . . . . . . . . . . . . . . . . . . . 4
Codes . . . . . . . . . . . . . . . . . . . . . . . . . . . . . . . . . . . . . . . . . . . . . . . . . . . . . . . . . . . . . . . . . . . . . . . . . . . . . . . . . . . . . . 4
Warranty Information . . . . . . . . . . . . . . . . . . . . . . . . . . . . . . . . . . . . . . . . . . . . . . . . . . . . . 5
Operation . . . . . . . . . . . . . . . . . . . . . . . . . . . . . . . . . . . . . . . . . . . . . . . . . . . . . . . . . . . . . . . 5
Safety Rules . . . . . . . . . . . . . . . . . . . . . . . . . . . . . . . . . . . . . . . . . . . . . . . . . . . . . . . . . . . . . . . . . . . . . . . . . . . . . . . . . . 5
Direct Spark Ignition Lighting/Operation - Natural & Propane . . . . . . . . . . . . . . . . . . . 6
Safety Instructions . . . . . . . . . . . . . . . . . . . . . . . . . . . . . . . . . . . . . . . . . . . . . . . . . . . . . . . . . . . . . . . . . . . . . . . . . . . . . 6
Operating Instructions . . . . . . . . . . . . . . . . . . . . . . . . . . . . . . . . . . . . . . . . . . . . . . . . . . . . . . . . . . . . . . . . . . . . . . . . . . 6
To Turn Off Gas to Heater . . . . . . . . . . . . . . . . . . . . . . . . . . . . . . . . . . . . . . . . . . . . . . . . . . . . . . . . . . . . . . . . . . . 6
Millivolt Lighting/Operation - Natural & Propane . . . . . . . . . . . . . . . . . . . . . . . . . . . . . . 7
Safety Instructions . . . . . . . . . . . . . . . . . . . . . . . . . . . . . . . . . . . . . . . . . . . . . . . . . . . . . . . . . . . . . . . . . . . . . . . . . . . . . 7
Lighting Instructions . . . . . . . . . . . . . . . . . . . . . . . . . . . . . . . . . . . . . . . . . . . . . . . . . . . . . . . . . . . . . . . . . . . . . . . . . . . . 7
To Turn Off Gas to Heater . . . . . . . . . . . . . . . . . . . . . . . . . . . . . . . . . . . . . . . . . . . . . . . . . . . . . . . . . . . . . . . . . . . 7
Operating (Controls) . . . . . . . . . . . . . . . . . . . . . . . . . . . . . . . . . . . . . . . . . . . . . . . . . . . . . . . . . . . . . . . . . . . . . . . . . . . 8
Heater Operation . . . . . . . . . . . . . . . . . . . . . . . . . . . . . . . . . . . . . . . . . . . . . . . . . . . . . . . . . . . . . . . . . . . . . . . . . . . . . . 8
General . . . . . . . . . . . . . . . . . . . . . . . . . . . . . . . . . . . . . . . . . . . . . . . . . . . . . . . . . . . . . . . . . . . . . . . . . . . . . . . . . 8
Controls Operation . . . . . . . . . . . . . . . . . . . . . . . . . . . . . . . . . . . . . . . . . . . . . . . . . . . . . . . . . . . . . . . . . . . . . . . . . 8
Maintenance . . . . . . . . . . . . . . . . . . . . . . . . . . . . . . . . . . . . . . . . . . . . . . . . . . . . . . . . . . . 11
Maintenance Instructions . . . . . . . . . . . . . . . . . . . . . . . . . . . . . . . . . . . . . . . . . . . . . . . . . . . . . . . . . . . . . . . . . . . . . . . 11
Energy Saving Tips . . . . . . . . . . . . . . . . . . . . . . . . . . . . . . . . . . . . . . . . . . . . . . . . . . . . . . . . . . . . . . . . . . . . . . . . 11
Spring and Fall Operation . . . . . . . . . . . . . . . . . . . . . . . . . . . . . . . . . . . . . . . . . . . . . . . . . . . . . . . . . . . . . . . . . . . 11
Winter Operation . . . . . . . . . . . . . . . . . . . . . . . . . . . . . . . . . . . . . . . . . . . . . . . . . . . . . . . . . . . . . . . . . . . . . . . . . 11
Chemical Balance . . . . . . . . . . . . . . . . . . . . . . . . . . . . . . . . . . . . . . . . . . . . . . . . . . . . . . . 12
Pool and Spa Water . . . . . . . . . . . . . . . . . . . . . . . . . . . . . . . . . . . . . . . . . . . . . . . . . . . . . . . . . . . . . . . . . . . . . . . . . . . 12
Installation Instructions . . . . . . . . . . . . . . . . . . . . . . . . . . . . . . . . . . . . . . . . . . . . . . . . . . 13
Specifications . . . . . . . . . . . . . . . . . . . . . . . . . . . . . . . . . . . . . . . . . . . . . . . . . . . . . . . . . . . . . . . . . . . . . . . . . . . . . . . . 13
Outdoor Installation . . . . . . . . . . . . . . . . . . . . . . . . . . . . . . . . . . . . . . . . . . . . . . . . . . . . . . . . . . . . . . . . . . . . . . . . . . . 13
Indoor Installation . . . . . . . . . . . . . . . . . . . . . . . . . . . . . . . . . . . . . . . . . . . . . . . . . . . . . . . . . . . . . . . . . . . . . . . . . . . . . 13
Plumbing Connections . . . . . . . . . . . . . . . . . . . . . . . . . . . . . . . . . . . . . . . . . . . . . . . . . . . 14
Manual Bypass . . . . . . . . . . . . . . . . . . . . . . . . . . . . . . . . . . . . . . . . . . . . . . . . . . . . . . . . . . . . . . . . . . . . . . . . . . . . . . . 14
Valves. . . . . . . . . . . . . . . . . . . . . . . . . . . . . . . . . . . . . . . . . . . . . . . . . . . . . . . . . . . . . . . . . . . . . . . . . . . . . . . . . . . . . . 14
Pressure Switch . . . . . . . . . . . . . . . . . . . . . . . . . . . . . . . . . . . . . . . . . . . . . . . . . . . . . . . . . . . . . . . . . . . . . . . . . . . . . . 14
Water Connections . . . . . . . . . . . . . . . . . . . . . . . . . . . . . . . . . . . . . . . . . . . . . . . . . . . . . . 15
Quick-Flange II Installation Instructions . . . . . . . . . . . . . . . . . . . . . . . . . . . . . . . . . . . . . . . . . . . . . . . . . . . . . . . . . . . . . 15
Gas Connections . . . . . . . . . . . . . . . . . . . . . . . . . . . . . . . . . . . . . . . . . . . . . . . . . . . . . . . 16
Gas Line/Installation . . . . . . . . . . . . . . . . . . . . . . . . . . . . . . . . . . . . . . . . . . . . . . . . . . . . . . . . . . . . . . . . . . . . . . . . . . . 16
Pipe Sizing Chart/Gas Pressure Requirements . . . . . . . . . . . . . . . . . . . . . . . . . . . . . . . . . . . . . . . . . . . . . . . . . . . . . . . 16
Regulated Manifold Pressure Test . . . . . . . . . . . . . . . . . . . . . . . . . . . . . . . . . . . . . . . . . . . . . . . . . . . . . . . . . . . . . . . . 16
Gas Pressure Settings . . . . . . . . . . . . . . . . . . . . . . . . . . . . . . . . . . . . . . . . . . . . . . . . . . . . . . . . . . . . . . . . . . . . . . . . . 16
Ventilation . . . . . . . . . . . . . . . . . . . . . . . . . . . . . . . . . . . . . . . . . . . . . . . . . . . . . . . . . . . . . 17
Outdoor Installation . . . . . . . . . . . . . . . . . . . . . . . . . . . . . . . . . . . . . . . . . . . . . . . . . . . . . . . . . . . . . . . . . . . . . . . . . . . 17
Indoor Installation . . . . . . . . . . . . . . . . . . . . . . . . . . . . . . . . . . . . . . . . . . . . . . . . . . . . . . . . . . . . . . . . . . . . . . . . . . . . . 18
Vent Test . . . . . . . . . . . . . . . . . . . . . . . . . . . . . . . . . . . . . . . . . . . . . . . . . . . . . . . . . . . . . . . . . . . . . . . . . . . . . . . . . . . 19
Stack Type Indoor Draft Hood Kit . . . . . . . . . . . . . . . . . . . . . . . . . . . . . . . . . . . . . . . . . . . . . . . . . . . . . . . . . . . . . . . . . 19
Indoor Draft Hood Kit . . . . . . . . . . . . . . . . . . . . . . . . . . . . . . . . . . . . . . . . . . . . . . . . . . . . . . . . . . . . . . . . . . . . . . . . . . 19
Electrical . . . . . . . . . . . . . . . . . . . . . . . . . . . . . . . . . . . . . . . . . . . . . . . . . . . . . . . . . . . . . . 19
Transformer Wiring Instruction . . . . . . . . . . . . . . . . . . . . . . . . . . . . . . . . . . . . . . . . . . . . . . . . . . . . . . . . . . . . . . . . . . . 19
Electronic Direct Spark Ignition Wiring Diagram . . . . . . . . . . . . . . . . . . . . . . . . . . . . . . . . . . . . . . . . . . . . . . . . . . . . . . 20
Millivolt Wiring Diagram. . . . . . . . . . . . . . . . . . . . . . . . . . . . . . . . . . . . . . . . . . . . . . . . . . . . . . . . . . . . . . . . . . . . . . . . . 20
Trouble Shooting (General). . . . . . . . . . . . . . . . . . . . . . . . . . . . . . . . . . . . . . . . . . . . . . . 21
Parts List & Exploded View . . . . . . . . . . . . . . . . . . . . . . . . . . . . . . . . . . . . . . . . . . . . 22, 23
3
Rev. H 10-16-07 P/N 471105

4
Introduction
MiniMax® 75 & 100
ABOVEGROUND POOL AND SPA HEATERS
Congratulations on your purchase of a MiniMax 100 high performance heating system. Proper installation and
service of your new heating system and correct chemical maintenance of the water will ensure years of
enjoyment. The MiniMax 100 is a compact, lightweight and efficient gas fired high performance aboveground
pool and spa heater that can be connected to schedule 40 CPVC or ABS pipe and has a built-in top. Unless
noted otherwise, all instructions refer to both the MiniMax 75 and MiniMax 100 heaters designated collectively
as the "MiniMax 100". The heater features include the following features.
• Reliable direct-spark ignition (DSI) system available in propane or natural gas versions.
• Millivolt standing pilot versions in propane and natural gas, when no convenient line power is present.
• Quiet and dependable operation from packaged burner system proven reliable in worldwide usage.
• Heat exchanger constructed of premium non-corroding materials including bronze headers standard.
• The controls have been designed to be very easy to troubleshoot and very easy to access and replace in
the rare event of a malfunction-making the MiniMax 100 user friendly.
IMPORTANCE NOTICES FOR THE INSTALLER AND OPERATOR
The manufacturer’s warranty may be void if, for any reason, the heater is improperly installed and /or operated.
Be sure to follow the instructions set forth in this manual.
These heaters are designed for the heating of chlorine, bromine or salt system swimming pools and spas, and
should never be employed for use as space heating boilers or general purpose water heaters.
CODES
The installation must conform with local codes or in the absence of local codes with the latest National Fuel Gas
Code, ANSI Z223.1, and the latest edition of the National Electrical Code, NFPA 70.
Installation in Canada to be made in accordance with the latest CAN/CGA-B149.1 or .2 and CSA C22.1
Canadian Electric Code, part 1.
P/N 471105 Rev. H 10-16-07
This instruction manual provides operating instructions, installation, and service information for the MiniMax 100
high performance heater. The information in this manual applies to the MiniMax 75, and 100, natural gas and
propane, DSI; and MiniMax 100 millivolt standing pilot heater models.
It is very important the owner/installer read and understand the section covering installation and recognize the
local code and state codes before installing the MiniMax 100. History and experience have shown that
most heater damage is caused by improper installation practices.
WARRANTY INFORMATION
The MiniMax 100 pool heater is sold with a limited factory warranty. Specific details are described on the
back cover of this manual and a copy of the warranty and warranty registration card are included with
the product. Return the warranty registration card after filling in the serial number from the rating plate inside the
heater. For ordering parts, you should indicate model and serial numbers of the heater. If the parts are
requested for warranty, you must also indicate the date of installation.
Pentair Water Pool and Spa's high standards of excellence include a policy of continuous product
improvement resulting in your state-of-the-art heater. We reserve the right to make improvements
which change the specifications of the heater without incurring an obligation to update current heater
equipment.
5
OperationOperation
Operation
OperationOperation
SAFETY RULES
1. Spa or hot tub water temperatures should never
exceed 104 °F (40 °C). A temperature of 100 °F
(38 °C) is considered safe for a healthy adult.
Special caution is suggested for young children.
2. Drinking of alcoholic beverages before or
during spa or hot tub use can cause drowsiness
which could lead to unconsciousness and
subsequently result in drowning.
3. Pregnant women beware! Soaking in water
above 102° F. (39° C.) can cause fetal damage
during the first three months of pregnancy
(resulting in the birth of a brain-damaged or
deformed child). Pregnant women should stick
to the 100° F. (38° C.) maximum rule.
4. Before entering the spa or hot tub, the user should
check the water temperature with an accurate
thermometer. Spa or hot tub thermostats may err
in regulating water temperatures by as much as
4° F. (2.2° C.).
5. Persons with medical history of heart disease,
circulatory problems, diabetes or blood pressure
problems should obtain their physician's advice
before using spas or hot tubs.
6. Persons taking medication which induce
drowsiness, such as tranquilizers, antihistamines or
anticoagulants should not use spas or hot tubs.
Should overheating occur or the gas supply fail to shut off, turn off the manual gas control valve to the
appliance. Do not use this heater if any part has been under water. Immediately call a qualified service
technician to inspect the heater and to replace any part of control system and gas control which has
been under water.
Rev. H 10-16-07 P/N 471105
WARNING
6
Operation (contd.)
MINIMAX 100 DIRECT-SPARK IGNITION LIGHTING/OPERATIONNATURAL GAS & PROPANE
FOR YOUR SAFETY: READ BEFORE LIGHTING
WARNING
If you do not follow these instructions exactly, a fire or explosion may result causing personal injury, loss of
life and property damage.
Since propane gas is heavier than air, escaping propane will accumulate and remain at ground level. Do not
attempt to light the heater. If you suspect a propane leak, lighting the heater can result in a fire or explosion
which can cause personal injury, death, and property damage.
A. This heater is equipped with an ignition device
which automatically lights the main burner. Do not
try to light the main burner by hand.
B. BEFORE OPERATING smell all around the
heater area for gas. Be sure to smell next to the
floor because some gas is heavier than air and will
settle on the floor.
WHAT TO DO IF YOU SMELL GAS
- Do not try to light any heater.
- Do not touch any electric switch; do not use any
phone in your building.
- Immediately call your gas supplier from a neighbor's
phone. Follow the gas supplier's instructions.
- If you cannot reach your gas supplier, call the Fire
Department.
C. Use only your hand to push in or turn the gas
control knob. Never use tools. If the knob will not
push in or turn by hand, don't try to repair it. Call a
qualified service technician. Forced or attempted
repair may result in a fire or explosion.
D. Do not use this heater if any part has been under
water. Immediately call a qualified service
technician to inspect the heater and to replace any
part of the control system and any gas control
which has been under water.
OPERATING INSTRUCTIONS
1. STOP! Read the safety information above.
2. Set the thermostat to lowest setting, fully counterclockwise.
3. Turn off electric power to the heater.
4. This heater is equipped with an ignition device which automatically lights the main burner. Do not try to light
the main burner by hand.
5. Remove the control access door.
6. Turn the gas control lever to "OFF".
7. Wait five (5) minutes to clear out any gas. If you then smell gas, STOP! Follow "B" in the safety
information above. If you don't smell gas, go to the next step.
8. Turn the gas control lever to "ON".
9. Replace the control access door.
10. Turn on the electrical power to the heater.
11. Set the thermostat to the desired setting.
12. If the heater will not operate, follow the instructions "To Turn Off Gas To Heater" and call your service
technician or gas supplier.
TO TURN OFF GAS TO HEATER
1. Set the thermostat to lowest setting.
2. Turn off all electric power to the heater if service
is to be performed.
P/N 471105 Rev. H 10-16-07
3. Remove control access door.
4. Turn gas control lever to "OFF". Do not force.
5. Replace control access door.
Operation (contd.)
MILLIVOLT LIGHTING/OPERATION- NATURAL GAS & PROPANE
FOR YOUR SAFETY: READ BEFORE LIGHTING
WARNING
If you do not follow these instructions exactly, a fire or explosion may result causing personal injury,
loss of life and property damage.
Since propane gas is heavier than air, escaping propane will accumulate and remain at ground level. Do
not attempt to light the heater. If you suspect a propane leak, lighting the heater can result in a fire or
explosion which can cause personal injury, death, and property damage.
7
A. This heater has a pilot that must be lit manually. When
lighting the pilot follow these instructions exactly.
B. BEFORE LIGHTING smell all around the heater area
for gas. Be sure to smell next to the floor because some
gas is heavier than air and will settle on the floor.
WHAT TO DO IF YOU SMELL GAS
- Do not try to light any heater.
- Do not touch any electric switch; do not use any phone
in your building.
- Immediately call your gas supplier from a neighbor's
phone. Follow the gas supplier's instructions.
- If you cannot reach your gas supplier, call the Fire
Department.
C. Use only your hand to push in or turn the gas control
knob. Never use tools. If the knob will not push in or
turn by hand, don't try to repair it. Call a qualified service
technician. Forced or attempted repair may result in a
fire or explosion.
D. Do not use this heater if any part has been under water.
Immediately call a qualified service technician to inspect
the heater and to replace any part of the control system
and any gas control which has been under water.
LIGHTING INSTRUCTIONS
1. STOP! Read the safety information above.
2. Set the thermostat to the lowest setting.
3. Turn off all electric power to the heater.
4. Remove the control access door.
5. Push in the gas control valve slightly and turn clockwise to "OFF".
6. The knob cannot be turned from "PILOT" to "OFF" unless the knob is
pushed in slightly. Do not force.
7. Wait five (5) minutes to clear out any gas. If you then smell gas, STOP! Follow "B" in the
safety information above. If you don't smell gas, go to next step.
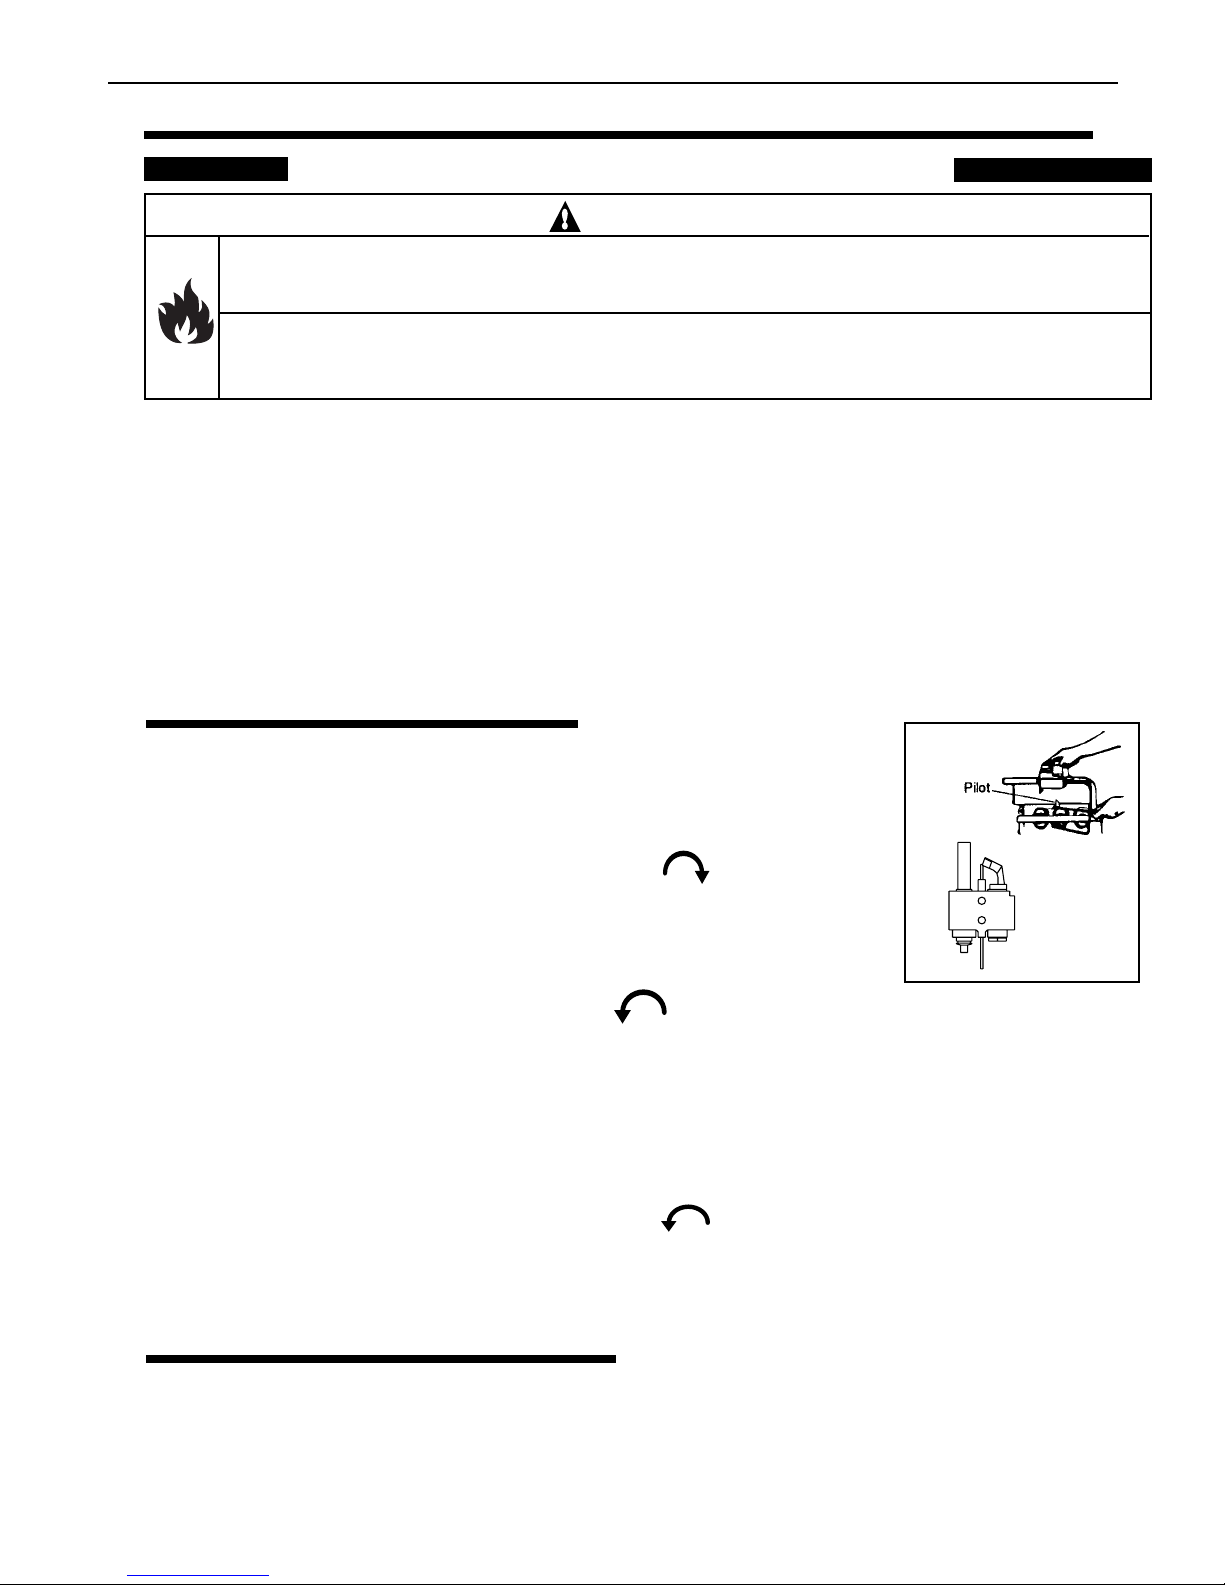
8. Turn the knob on the gas control to counterclockwise to "PILOT"; see Figure 1.
9. Push the control knob all the way and hold in. Immediately light the pilot with Presslite matchless ignition system
by pressing the red igniter button, (located at panel next to the gas valve). Continue to hold the control knob in
for about (1) minute after the pilot is lit. Release knob and it will pop back up. Pilot should remain lit. If it goes
out, repeat steps 4 through 7.
10. If the knob does not pop up when released, stop and immediately call your service technician or gas supplier.
11. If the pilot, see Figure 2, will not stay lit after several tries, turn the gas control knob to "OFF" and call your
service technician or gas supplier.
12. Turn the gas control knob counterclockwise to "ON".
13. Replace the control access door.
14. If the heater will not operate, follow the instructions "To Turn Off Gas To Heater" and call your service
technician or gas supplier.
Figure 1.
Figure 2.
TO TURN OFF GAS TO HEATER
1. Set the thermostat to lowest setting.
2. Turn off all electric power to the heater if service
is to be performed.
3. Remove control access door.
4. Turn gas control lever to "OFF". Do not force.
Rev. H 10-16-07 P/N 471105
5. Replace control access door.
 Loading...