

Page 1
TROUBLE GUIDE
35-7000
Re
v
.
B 5/2005
ag
er or more con
A
v
e
This warranty does not cover failure in service due to fire, wreckage, freezing, willful abuse, improper repackaging
., Sanf
ord, NC 27330 or 10951 West Los Angeles Ave., Moorpark, CA 93021, whichever is clos-
v
enient.
or damage incurred in shipping nor does it extend to consequential damages.
PR
All adjustments are to be based on list prices in effect at the time of adjustment. PENTAIR POOL
PRODUCTS, INC.
rees to prepa
y all shipping charges to and from
will not be liable for the cost of labor or removing or replacing parts. Purchase
PENT
w
chase
or
ODUCTS,
kmanship. Should any of the operating parts become defective within one year from date of pur-
AIR POOL PR
, the
y will be replaced or repaired if def
INC.
ODUCTS,
D. MOTOR WILL 1. Check that all power switches are on, fuse not blown, and circuit breaker
NOT TURN is not tripped.
2. Timer improperly set.
3. Impeller is against volute face.
c. Low voltage.
d. Wiring is incorrect size for load.
b. Poor ventilation.
C. MOTOR 1. Motors will run hot to the touch, however, they are designed this way. Thermal
RUNS HOT overload protector will function to turn the motor off if there is an overload problem.
2. Factors which will increase operating temperature:
a. Installed in direct sun.
e. Debris on impeller vanes.
a. Pump or skimmer strainer basket is clogged.
b. Skimmer or main drain valve is closed.
c. Air leak in suction line.
d. Impeller setting is incorrect.
B. LOW FLOW 1. If filter gauge reads high.
11. Check voltage at pump to be sure it is same as motor specs.
2. If filter pressure gauge reads low.
a. Filter is dirty.
b. Clogged return lines.
10. Remove and replace pump seal if needed.
9. Open all valves in return and suction lines.
5. Make sure strainer pot is full of water.
6. TIghten all fittings and seal all joints on suction side.
7. Clean skimmer and pump strainer baskets.
8. Remove pump lid and check for clogging.
A. PUMP WILL 1. Make sure pool water is midway of skimmer opening.
NOT PRIME: 2. Make sure strainer basket is not clogged.
PROBLEMS POSSIBLE CAUSES & SOLUTIONS
4. Tighten lid down snugly.
3. Make sure strainer basket is positioned properly!
THE FOLLOWING ARE SOME COMMON CAUSES OF PROBLEMS THAT MAY ARISE:
P
INC.
pumps are w
ect is pro
PENT
AIR
POOL PRODUCTS, INC.
ved to be the responsibility of
WARRANTY
PUMPS
arr
anted to be free from def
SAVE THESE INSTRUCTIONS.
LIMITED
P
ects in material and
1620 Ha
Pr
inted in the U
.S.A.
wkins
PENT
AIR POOL
& SERVICE MANUAL
INSTALLATION, OPERATION
HYDROPUMP
TWO SPEED POOL AND SPA PUMP
ENERGY MASTER
HYDROPUMP
AND
®
™
®
Page 2
R.T.V. or other sealing materials approved for pipe
diagram supplied with the motor. All wiring should be
and not supported by the pump.
voltage, and rotation, in accordance with the wiring
done by a licensed electrician in accordance with
grounded. Use lug on top of motor frame to bond
together motor and all metallic parts of pool, spa or
guide only.
.
W
ARNING:
NEVER
The f
ollo
wing tab
a
w and other motor inf
The wir
ing to motor should be k
Motor name plate has voltage, phase, ampere
inside walls of a swimming pool, spa or hot tub, when
of the swimming pool, spa or hot tub structure with a
metal conduit, and metal piping within 5 feet of the
the motor is installed within 5 feet of the inside walls
solid copper conductor not less than No. 8 A.W.G.
plate or name plate has wiring connection informa-
dr
tion.
possible and large enough to carry the necessary
current for required length without excessive voltage
drop
sure that the proper wire size is selected. Use as a
local codes, be certain that the motor frame is
hot tub structure and to all electrical equipment,
The piping should be supported independently
The pump motor must be wired for the proper
threads.
TIGHTEN.
required to insure a tight connection. DO NOT OVER
must be sealed with: pipe sealant, Teflon
long years of trouble-free operation.
Tighten the pump fitting only as much as is
The threads of pipe fittings screwed into pump
the pipe size on the inlet of the pump.
materials available today. A few simple precautions
taken during the initial installation, will insure many
The pump suction line should not be smaller than
Your pump is made of the finest engineering
near motor.
INSTALLATION:
floor to allow easy access to mounting screw. Locate
allow several inches of clearance below the motor to
away from pool chemicals to prevent spilling on or
future inspection and servicing of the unit. If possible,
LOCATION:
Provide the necessary space around the pump for
Locate the pump as close as possible to the pool.
indications of damage should be carefully noted on
designed to prevent transit damage. However, any
the delivery ticket and a claim filed promptly with the
carrier.
Our shipping container has been specifically
READ AND FOLLOW ALL INSTRUCTIONS
GENERAL:
W
ORK ON PUMP
WHILE IT IS R
2 7
UNNING OR POWER IS STILL CONNECTED.
Lid, tightening knobs by hand only. The pump seal
requires no lubrication. Refer to motor service center
f
or motors
.
le should be f
or
mation.
ept as shor
ollo
wed to be
and cleaned twice each w
Lid
clear lid. Remove the basket and clean. Inspect the
easy to clean. Loosen the knobs and remove the
“O”-Ring;
if damaged, replace
.
Install the Clear
The strainer basket in pump should be inspected
eek.
The str
ainer bask
et is
Terminal cover
®
t as
motor started, allow a few moments for the pump to
start pumping water. If flow does not start within four
GUIDE). Be sure all suction and discharge valves are
open when the pump is running. Operating the pump
damage.
WINTERIZING:
protect pump by removing both drain plugs, one from
the pump volute and one from the pot. Do Not
Replace Plugs, store them in strainer basket for the
winter.
from plumbing and store them indoors in a w
MAINTENANCE:
location.
An alternate is to remove the pump and motor
ar
m, dr
y
In areas subject to freezing winter temperatures,
minutes, stop motor and refer to (THE TROUBLE
with a closed valve in the system can cause pump
After the pump has been filled with water, and the
Tape,
Suction Lifts, require additional time for priming.
OPERATION:
pot accidentally or by draining purposely, it will be
necessary to refill it with liquid before starting. High
pump. This may be done by removing clear lid.
Pumps are self priming providing the pump pot is
filled with water. Should you lose this liquid from the
PRIMING:
closely supervised at all times.
permit children to use this product unless they are
Fill the pump pot with water before starting the
WARNING - To reduce the risk of injury, do not
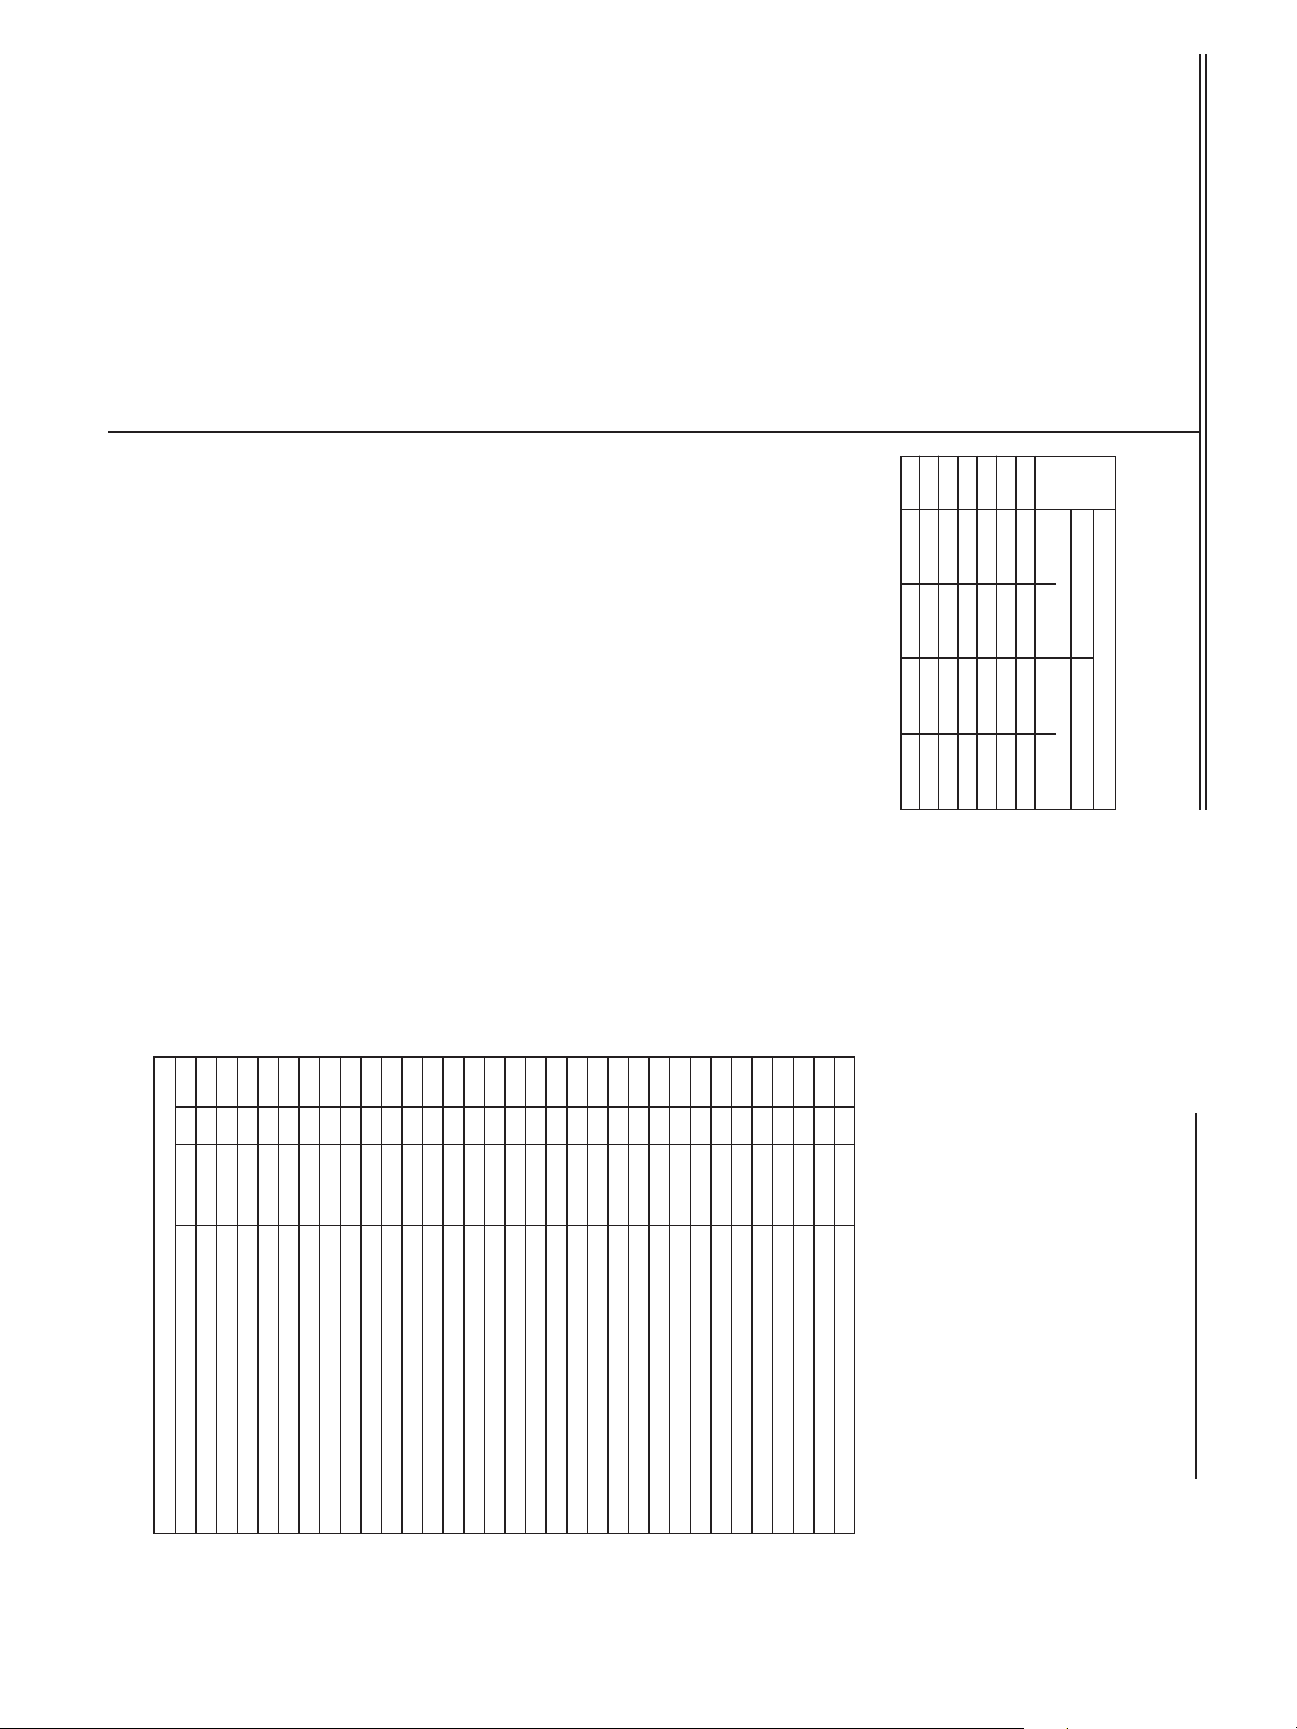
1 1/2 10 14 10 14
1/2 14 14 12 14
3/4 12 14 12 14
1 12 14 10 14
2 10 12 8 12
3 - 12 - 12
H.P.
1/3 14 14 14 14
SINGLE-PHASE POOL PUMP MOTORS
115 230 115 230
50 FEET 100 FEET
VOLTS VOLTS
WIRE LENGTH
FOR
INSTRUCTIONS
TABLE OF A.W.G. WIRE SIZE
H.P., PUMP SERIAL NO., MODEL NO. & ITEM NO.
Item Qty. Part No. NAME OR DESCRIPTION
1 Motor
LIST OF MATERIAL OR PARTS LIST
4
2 1 35-3750 Shaft Extension - Bronze
3 2 35-4294 Screw, Cap 3/8 - 16 x 1 1/4” Cad. Pltd.
1 35-3775 Seal Bracket - Plastic
7 1 35-3041 Impeller, RPA 1/2 HP
6 2 15-4445 Hex Nut 3/8 - 16 Cad. Pltd.
5 1 35-4894 Pump Tri Pod Base Plastic
7 1 35-3013 Impeller RPF 1HP, 1 1/2HP
7 1 35-3044 Impeller RFP 3/4HP, RPA 1HP
7 1 35-3043 Impeller RFP 1/2HP, RPA 3/4HP
7 1 35-3220 Impeller RPF 3HP
8 1 35-2626 O-Ring Volute to Bracket
7 1 35-3050 Impeller RPF 2HP, 21/2HP
7 1 35-3049 Impeller RPF 1 1/2HP, RPA 2HP
11 2 154699 Plug-Wing .25” Drain Lgr
10 1 19-2323 O-Ring (Pot to Volute)
9 1 35-3912 Volute - Plastic
12 1 35-4125 Strainer Pot 590 (Plastic)
14 1 35-3625 Clear Lid - 590 Plastic
13 2 35-4280 Knob - Pot Plastic
12 1 35-4127 Strainer Pot 700 (Plastic)
15 1 35-2600 Lid O-Ring 700
15 1 35-2602 Lid O-Ring 590
14 1 35-3525 Clear Lid - 700 Plastic
17 1 35-4001 3/4 Mechanical Seal
18 8 35-4265 Hex Washer Head Screw 5/16” - 18
16 1 35-2670 Basket w/Handle - Plastic 700
16 1 35-2656 Basket w/Handle - Plastic 590
19 4 35-4290 Cap Screw 3/8 - 16 x 1” S.S.
21 1 15-4909 Motor Outrigger
22 1 35-3450 Motor Support (for 5 1/2 Dia. Motor)
20 2 35-4256 Set Screw 1/4” x 20 x 3/8” S.S.
ARE LOCATED ON PUMP
H.P., PUMP SERIAL NO. & MODEL NO.
HOW TO ORDER PARTS
WHEN ORDERING PARTS, GIVE
TO YOUR LOCAL DEALER
--------------------
Page 3

tem friction. These lower friction losses result in
energy savings are 60%.
will drop GREATLY which is due to much lower sys-
operated mostly at low speed for cost savings, minor
rine dispenser, the skimmers and the heater due to
electrical cost savings. Since the pump should be
connected to the motor as follows:
removed and the BLACK wire discarded. See
speeds, the wiring connected to the switch should be
Diagram 2. The timer should then be installed and
If an automatic timer is installed to change
nameplate for the motor being installed. ALL electri-
cal connections should be made in the SIDE BOX
which also includes a prewired HI-LO switch. See
Diagram 1.
All electrical work MUST be done by a licensed
adjustments may be required in the automatic chlo-
the lower flow. (See the equipment manufacturers
operation manuals).
electrician. Before working on motors be certain that
the electrical power is OFF at the main junction
box. TWO SPEED pumps have SINGLE VOLTAGE
motors which cannot be changed. See the motor
or back washing of filter is required, for fast clean-up
of pool water, and for priming the system to rid it of all
air. Turn motor to lo
GREAT energy savings. On low speed the electrical
reading the pressure gauge to determine if cleaning
Turn motor to high speed for vacuuming the pool,
high speed as the same model single speed pump,
both hydraulically and prime wise. At low speed the
pump will produce one half the flow and the pressure
SPECIAL INSTRUCTION FOR TWO
SPEED ENERGY MASTER HYDROPUMP:
The performance of this pump will be the same at
w speed for quiet operation and
4 5
disconnected when HYDROPUMP
trolled by the timer or the motor will be damaged.
NOTE: When time switch is ON
When time switch is OFF
CAUTION: Manual switch on motor side box must be
be made in the side box.
screws if not needed.
2) Connect the timer to the motor following Diagram
*These models have skip-a-day wheel. Remove skip
3. All electrical connections to the motor should
Hydropump H.P. Voltage Timer Model
1, 1 1/2, 2 230 T176*
intermatic timers should be used.
modes at present intervals.
switch may be used to automatically switch the
HYDROPUMP
1) Check to see that timer voltage is the same as
that of the HYDROPUMP
TIMER INSTALLATION FOR HI-LO SWITCHING
OF 2 SPEED HYDROPUMP
An intermatic timer with single pole, double throw
3/4 115 T175*
®
between the high and low speed
- pump is on LO.
®
®
- pump is on HI.
motor. The following
®
is being con-
oper
motor side box. The 2 speed motor is designed to
only. Wiring with a different line voltage will damage
the motor.
the HYDRO-PUMP
A.W
.G.
ate on the v
NOTE: When time switch 1 is ON - pump is on HI.
When time s
All wiring connections should be made with 12
or larger wire siz
witch 1 is OFF - pump is on LO
oltage stamped on the nameplate
®
should be made inside the
e
.
All wiring connections to
Diagram 4.)
for the proper operation of the switching circuits.
Therefore it is necessary to make a connection
between line 1 and the clock input of timer No.1. (See
the HYDRO-PUMP
The clocks of both timers must run continuously
2) Timer No. 1 will be used to control the hi speed-
3) Timer No. 2 will be used to automatically switch
in-1 raintight case is ideal for this installation.
lo speed switching of the motor.
screws if not needed.
1) Mount the timers side by side, between the power
•These models have skip-a-day wheel. Remove skip
supply and the HYDRO-PUMP
1, 1 1/2, 2 230 T176* T102
H.P. Voltage S.P.D.T. S.P.S.T.
3/4 115 T175* T101
timers are recommended for this installation:
Hydropump Timer Model No.
PUMP
other types may be used if desired. The following
single throw switch. Both timers and the HYDRO-
same voltage.
Only Intermatic timers are discussed below, but
®
the ENERGYMASTER 2 speed pump can be
obtained by properly installing two appropriate
timers. One timer must have a single-pole, double
throw switch and the other must have a single-pole,
HYDROPUMP
ON-OFF, HI-LO SWITCHING OF 2 SPEED
TIMER INSTALLATION FOR PROGRAMMED
Automatic on-off and hi speed-lo speed control of
motor must be designed to operate on the
®
®
on and off.
®
an Intermatic 2-
Intermatic
.
marked.
imum wall height of 42 inches.
beneath the skirt of a hot tub or spa unless so
and has a maximum dimension of 18 feet and a max-
for storage and reassembled to its original integrity
is constructed so that it may be readily disassembled
pools. A permanently installed pool is constructed in
be readily disassembled for storage. A storable pool
and spas if so marked. Do not use with storable
or on the ground or in a building such that it cannot
Do not install within an outer enclosure or
at the same time.
CAUTION: This pump is for use with permanently
installed pools and may also be used with hot tubs
the HI and LO speed motor windings to be energized
CAUTION: Always turn power off at main panel
before servicing switches or pumps.
CAUTION: Be certain the wiring CANNO
4) The pump may be manually switched between hi
allows priming of the pump and evacuation of air
mum at hi speed when it is switched on. This
PUMP
from the piping system.
and lo speed by flipping the manual lever of timer
No. 1, and may be switched on and off by flipping
the manual lever of timer No. 2.
®
3) Locate the trippers on the clock dial of timer No.
1 to switch the HYDRO-PUMP
always be programmed so that the HYDRO-
lo speed at the desired time. The timers should
2) Locate the trippers on the clock dial of timer No.
desired times.
2 to switch the HYDRO-PUMP
OPERATING INSTRUCTIONS
1) Set both clock dials to the exact time of day.
will always operate for 10 minutes mini-
®
between hi and
®
on and off at the
T allow both
Page 4

6 3
a screwdriver between the motor bracket and
force the impeller face to touch the volute. Place
the shaft extension as depicted below. Move the
ment may be required.
this will allow the mechanical seal spring to
Loose the shaft extension set screws and
normal operating conditions it is not necessary
to make further adjustment, however, if the
which was precisely set at the factory. Under
pump draws excessive current a slight adjust-
The Hydropump has an open face impeller
IMPELLER CLEARANCE ADJUSTMENT
screwdriver handle away from the motor, this
ment needs to be redone.
rating or if the pump performs poorly the adjust-
draw. If the amperage exceeds the nameplate
will pull the impeller away from the volute. You
should move the shaft extension about 1/32”
and holding the screwdriver at this position firm-
ly tighten the shaft extension set screws.
Start the pump and check the amperage
 Loading...