

Page 1

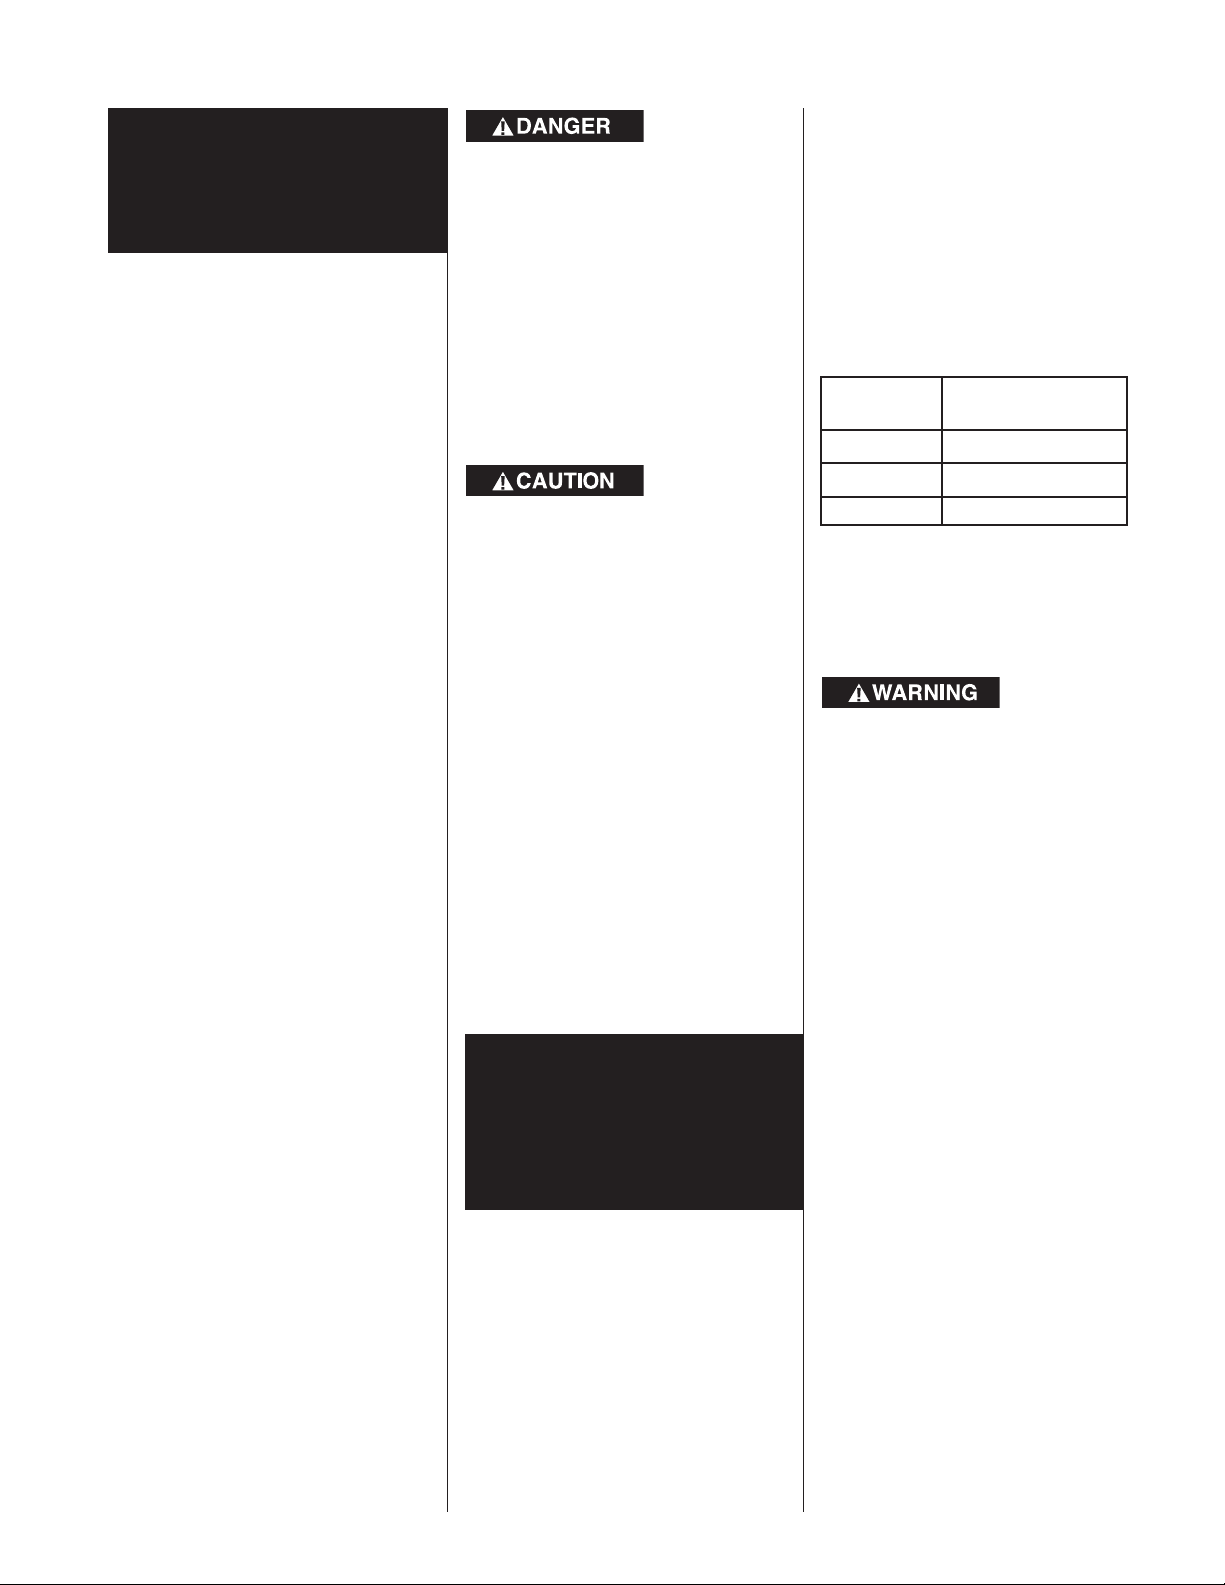
TG-PRO SYSTEM
COMPLETE GRINDER
PACKAGE OFFERING
INSTALLATION AND SERVICE MANUAL
For use with Hydromatic grinder pumps: HPG200, HPGR200 and HPD200 (shown on cover).
NOTE! To the installer: Please make sure you provide this manual to the owner of the equip ment or to the responsible
party who maintains the system.
Item # E-03-434 | Part # 5625-434-1 | © 2012 Pentair Pump Group, Inc. | 10/31/12
Page 2

General
Information
Thank you for purchasing your
Low Pressure Sewer Basin System.
Before Installation:
This manual contains important
information for the safe use of
this product. Read this manual
completely and follow the
instructions carefully. Reasonable
care and safe methods relating
to the installation and operation
of this product should be
practiced. Check local codes and
requirements before installation.
Risk of fire or explosion. Do not
smoke or use open flames in or
around this system. This system is
not intended for use in hazardous
locations per NFPA 70 National
Electric Code. Consult factory
for optional equipment rated for
this use.
Cutting risk. Risk of serious
cutting or amputation exists.
Disconnect all power sources
prior to servicing pump or
grinding mechanism. Pump may
start without warning. Grinding
mechanism is extremely sharp.
Use caution when handling
grinder mechanism.
Installation Skill
Requirements
The installation of a basin system
is a specialized skill, which
requires individuals with the basic
understanding of excavating, pipe
fitting, and electrical wiring.
These instructions are meant only to
be an installation guide; therefore,
unusual installation conditions not
covered in these instructions require
experienced personnel capable
of using reasonable engineering
principles for the installation and
operation of the system.
Excavation
Risk of electrical shock or
electrocution. May result
in serious injury or death or
fire hazard. Installer must
disconnect all electrical sources
prior to installation. Only
qualified personnel may install
this system. NFPA 70/National
Electric Code (NEC) or local
codes must be followed. System
must be properly grounded
according to NEC.
Biohazard risk. Once the
wastewater source has been
connected to system, biohazard
risk exists. Installer(s) and/
or service personnel must use
proper Personal Protective
Equipment and follow handling
procedures per OSHA 29 CFR
1910.1030 when handling
equipment after wastewater
source has been connected to
the system.
2
Hydromatic does not recommend
basins with base/bottom diameters
greater than 30" when installing
a simplex Positive Displacement
pump (HPD200) system. When
operational conditions require a
basin with base/bottom diameter
of greater than 30" it is necessary
to perform a sludge pump-out
on the basin at least once per
year to prevent any septic/odor
conditions.
DO NOT THROW AWAY OR
LOSE THIS MANUAL. Keep it
in a safe place so that you may refer
to it often for the continued safe
operation of the product.
CALIFORNIA PROPOSITION
65 WARNING:
This product and
related accessories contain
chemicals known to the State of
California to cause cancer, birth
defects or other reproductive
harm.
Instructions
Excavation location shall be
made according to local codes
and regulations. Check with
local utility companies for
the location of underground
utilities prior to excavation.
Care should be taken to avoid
buried utility lines, piping, and
other buried structures and
foundations. Failure to follow
these instructions may result
in serious personal injury or
death.
Excavation for Basin Systems:
Effect appropriate excavation
based on size of the basin, desired
entrance point of the influent line,
and entrance of power connection.
Page 3
Basin
Installation
Instructions
Basin System Handling:
Factory built basin systems must
not be dropped, dragged, rolled,
or handled with sharp objects.
Improper handling of basins may
result in damage to the basin,
damage to basin components, or
leaks in the piping assemblies.
Step 1:
The pad under the basin requires
4 to 6 inches of appropriate fill.
The ideal basin pad is concrete
in conjunction with antiflotation
tie-down studs. Basin antiflotation
tie-down kits are available from
Hydromatic. If concrete pad is
not used, the aggregate must be
compacted to a minimum 85%
standard proctor density per
ASTM D698, or as required by the
authority having jurisdiction.
Concrete pad or aggregate surface
must be leveled flat and free of
voids to conform to the basin
bottom. Basin bedding depth
should be calculated such that the
basin top will protrude 3" above
the normal grade upon final
installation.
Step 2:
Lifting of the basin may be
done with a nylon or other nondamaging type material sling. Do
not wrap a chain or steel cable
around the basin as damage may
result. The two t-shaped moldedin lugs (polybasin only) may be
used for lifting the basin. Do not
attach lifting mechanism around
the discharge hub or electrical hub.
Risk of electrical shock or
electrocution. May result in
serious injury or death or fire
hazard. Failure to properly
support electrical conduit,
lines and connections may
result in structural failure.
Electrical connections may be
damaged exposing live electrical
connections.
If the basin is not tied down
during installation, rain or
flood conditions may cause the
basin to float upward, causing
damage to the basin or basin
con nec tions. Claims for this type
of damage cannot be processed
by Hydromatic.
Step 3:
Lower the basin into excavation,
position and level properly.
Mount basin to base anchor bolts
if an antiflotation tie-down kit
is used. If basin is fiberglass,
inspect basin and seal off any cuts
or scratches to prevent fiberglass
deterioration.
Influent and
Discharge
Connections for
Fiberglass Basins
Step 1:
An inlet grommet is the standard
supplied influent connection
device. If another type of inlet
hub is used, refer to the directions
included with the hub.
Determine point at which influent
line will enter basin and, using
a properly maintained piloted
hole saw sized per chart below,
drill a hole through the basin
wall. If using a fiberglass basin,
clean cut hole and apply a sealant
coating to the cut section to
prevent fiberglass deterioration.
Insert the inlet grommet into the
drilled hole.
PIPE HOLE SAW
SIZE DI AM E TER*
3" 4"
4" 5"
6"** 7"
* Contact the factory for availability
of proper size hole saw if necessary.
** 6" pipe size requires use of a
fiberglass basin.
Failure to use a properly piloted
hole saw may result in damage
to basin which may result in
structural failure or serious leaks.
Step 2:
Lubricate inside lip of inlet
grommet with pipe soap. Clean
outer end of influent pipe and
push pipe through grommet.
Ensure pipe does not protrude
inside basin so as to interfere with
pump removal or float operation.
Step 3:
Close shut-off valve and make
discharge line connection. It is
strongly recommended that
an additional shutoff valve and
redundant check valve be located
outside the basin at any force main
entrances – check local codes for
specific requirements.
3
Page 4

Backfill
B. Stone or gravel crushings with
Instructions
The authority having
jurisdiction has the right to
require alternative materials or
procedures for backfilling the
installation.
Failure to properly backfill
may result in damage to the
basin which could cause leaks
or structural failure. Failure to
follow these backfill instructions
during the installation of the
basin voids the basin warranty.
In freezing conditions the backfill
must be dry and free of ice. Do
not use other backfill materials.
Failure to use the recommended
bed and backfill materials during
the installation of the basin voids
the basin warranty.
Step 1:
Obtain proper backfill material.
The backfill material provides
as much as 90% of the basin’s
support under certain stress
conditions. The installer must
be positive that correct bed and
backfill materials are used per
instructions as follows:
A. Gravel – clean and free
flowing with particle size not
less than 1/8" nor more than
3/4" in diameter. Use this
description when ordering or
specifying as material varies
upon geographical location.
This material is commonly
known as “pea gravel”.
4
Step 2:
At least a 4–6 inch wide band
of compacted aggregate must be
placed in successive layers (6"
lifts) around the entire periphery
of the basin. Carefully compact
aggregate under all piping and
electrical lines. Cover grade
should slope down 3" to the
normal surrounding grade. Care
must be taken to prevent damage
to any influent, discharge, or
electrical connections made to
the basin.
Unpacking Pump:
Remove pump from carton.
When unpacking unit, check for
concealed damage. Claims for
damage must be made at the
receiving end through the
delivery carrier. Damage cannot
be processed from the factory.
Systems Description:
Factory built basin systems are
available in 24" and 30" diameter
basins with 60" through 156"
depths in one-foot increments. In
a flex hose system, the pump is
raised and lowered in the basin
using rope or chain attached to
pump and lifting handle attached
to ball check valve. A hydraulic
sealing diaphragm on ball check
valve allows the pump to be
removed without disconnecting
piping.
angular particle size of not
less than 1/8" nor more than
1/2" diameter, washed and
free flowing, is acceptable as
an alternative material.
Internal Basin
Installation
Instructions
Application:
These pump systems are designed
for pumping effluent or sewage
water with a pH ranging from 5
to 9, specific gravities from 0.9 to
1.1, viscosities ranging from 28
to 35 S.S.U. and temperatures up
to 140°F.
Pump Models:
The basin system may employ any
1 through 2 HP submersible grinder
pump that uses cutter blades to
grind solids into a slurry. Refer
to the pump service manual when
adjusting, dismantling, or repairing
the pump.
Inspection:
Check to be sure that all items for
your particular system are included,
and that the phase and voltage on
the pump nameplate are correct
as ordered. Codes: All local codes
must be observed. Consult the local
inspector(s) before installation to
avoid costly delays or rework.
Grinder Pump Attachments:
Step 1:
Attach the stainless steel foot
bracket to bottom of the pump
with bolts and washers provided.
Apply Pipe:
Step 2:
Apply thread sealant to pipe
threads and screw the discharge
piping assembly into the pump
discharge.
Step 3:
Attach lifting chain, cable or rope
as supplied to the lifting eye bolts.
Page 5

Risk of electrical shock or
electrocution. May result
in serious injury or death or
fire hazard. To reduce risk of
electrical shock, do not connect
conduit to pump .
Internal Basin
Connections
Step 1:
If the system is supplied with a
float bracket, attach float switches to
the float bracket by clamping
strain relief bushings around the
float cords, then inserting and
twisting the bushings into the float
bracket slots.
Step 2:
After grinder pump attachments
have been made, lower the pump
unit down and ensure the ball check
valve sealing flange aligns and
connects properly with discharge.
Junction Box Systems:
Step 1:
Ensure power source is off or
dis con nect ed.
Step 2:
Push pump power, seal failure/heat
sensor, and float cords through
cord grips in the junction box and
tighten. To prevent corrosion or
electrical short, plug any unused
holes.
Step 3:
Remove junction box cover
and make all connections inside
junction box to all incoming
control panel wires.
Step 4:
It is recommended that the
customer furnish and install a
conduit seal outside the basin
to prevent surface water from
entering the junction box.
Electrical Connections:
NOTE: Failure to use a
Hydromatic approved control
panel voids the pump warranty
and guarantee.
IMPORTANT: Properly
connect the panel ground wire
to a grounding rod. Improper
grounding voids warranty.
Panel Wiring:
Step 1:
Ensure power source is off or
disconnected.
FINAL BACKFILL FOR BASIN SYSTEMS
Polyethylene Fiberglass
5
Page 6

Internal Basin
Connections
HPGR200 & HPD200
230 VOLT - 1 PHASE PUMP
BLACK WHITE GREEN
Step 2:
Open the shut-off valve to the
discharge line.
Step 2:
Connect pump power, seal failure/
heat sensor, and float cords to
panel terminals per the schematic
provided. All conduits and cables
entering the panel must be sealed
off.
For single-phase pumps: Check
panel wiring to ensure white,
black, and red pump leads are
connected according to the
schematic and panel wire labels.
Single phase pumps will run only
if connected one way.
Three phase pumps: Interchange
any two line leads to the motor
inside the panel if the pump rotates
in the wrong direction.
Do not leave pump in basin unless
it is placed in operation. If a
pump has been out of service for
an extended period of time, with
the power off, rotate the impeller
by turning the radial cutter with
a screwdriver to be sure it rotates
freely.
HPG200
ELECTRICAL CONNECTIONS
1 Phase 3 Phase
Green Ground Ground
Red Start Power Line Power Line
White Main Power Line Power Line
Black Common Power Line Power Line
Orange Seal Failure Seal Failure
Blue Heat Sensor Heat Sensor
White Heat Sensor Heat Sensor
w/ black
stripe
230
VAC
GREEN
POWER
CORD
Preoperational Grinder Pump
Checks:
Step 1:
Ensure power source is off or
disconnected.
Step 2:
Remove pump from basin.
Step 3:
With power off, turn radial cutter
with a screwdriver to be sure
it rotates freely. If necessary
to adjust, refer to pump service
manual.
Step 4:
Stand clear from pump and
with power on, check for proper
rotation of pump by turning
the H-O-A switch to Hand
momentarily and then Off.
The impeller should turn
counterclockwise when viewed
from the suction end.
Pump
Operations
Step 1:
Run clear water into the basin until
motor housing is covered.
Step 3:
Turn H-O-A switch to the Off
position and turn on main breaker.
Step 4:
Start the pump by turning the
H-O-A switch to the Hand position.
Step 5:
Check the pump amperage with
clamp on ammeter on black
pump lead. Readings higher than
nameplate indicate clogged pump,
miswiring, or improper voltage. If
basin is not being pumped down and
amperage readings are considerably
lower than nameplate, then the
pump is air locked.
NOTE: Nameplate amperage
is rated at the largest impeller
diameter trim. Pumps with
cut diameter impellers will
draw slightly fewer amps than
nameplate. If pump is air locked,
refer to the troubleshooting
section in this manual.
Step 6:
Float adjustment for simplex
systems: Adjust floats so that the
water level is above the pump motor
housing, and the pump shuts off
when the water level is 2 inches
above the pump volute discharge.
Float adjustment for duplex
systems: Adjust floats so that a
pump will start when the water
level is just above the pump motor
housing, and pump on override
water level is 5 inches above the
pump motor housing. Adjust pump
shut-off so that water level is
within 2 inches above pump volute
6
Page 7

discharge. Pumps should alternate
starting, between each other, upon
successive pump-down cycles.
To check override level, set both
H-O-A switches to Off position and
allow water to surpass the override
level, then set both H-O-A switches
to Auto position and both pumps
should start. Turn off one pump and
be sure second pump starts when
override level is reached on second
trial. If pumps fail to cycle in this
manner, retrace control float wiring
panel.
Step 7:
Ensure H-O-A switch is set to Auto
before placing system into service.
Pump
Troubleshooting
Below is a list of common problems
and possible solutions. Refer to
the pump and panel installation
and service manuals for details
regarding any necessary adjusting,
dismantling or repair work.
Pump runs but does not pump
down the basin with the H-O-A
switch on either Hand or
Automatic position.
1. Cutters may be clogged.
Amperage higher than
nameplate may indicate this
problem.
2. Pump rotation may be
reversed (on three-phase
pumps only). Switching any
two power leads on three
phase pumps will correct the
rotation.
3. Discharge gate valve may be
closed.
4. Pump may be air locked. Fill
basin approximately 10 inches
or more above the ball check
valve assembly. Raise pump
assembly so that the ball check
valve disengages the discharge
elbow (approximately 6
inches). Stand clear from the
sump opening to avoid spray
and turn pump on for a brief
second to clear trapped air in
the volute.
5. Clogging anywhere from
cutters to check valve. This is
evident if no water discharged
out of the check valve after
raising the pump to disconnect
the sealing flange. Pull pump
assembly and check for cause
of clogging.
6. Discharge head may be too
high. Check elevation against
design point of pump.
7. Clogging beyond the sealing
flange. This is evident if
water is discharged through
the check valve when raising
the pump to disconnect the
sealing flange. Inspect system
basin piping or discharge
piping from basin to locate
clogging.
Basin level is pumped down with
H-O-A switch on Hand position,
but is not pumped down with
H-O-A switch on Automatic
position.
1. Floats are not hanging free in
the basin or are covered with
grease. Pump the level down
with the H-O-A switch on
Hand, so that the floats can be
observed. Relocate and clean
float(s) as necessary.
2. If this is a new installation and
original start-up, the floats
may be miswired into the
control panel. If the On and
Off floats are reversed, the
pump will short cycle on and
off and will not pump the level
down.
3. Floats or alternator are
malfunctioning. Pull the floats
out of the basin and hang the
Off and On floats from your
hand. Turn the H-O-A switch
to Auto. Tilt the Off float so
that the large end is above
the cord end – nothing should
happen. While keeping the Off
float tilted, tilt the On float in
the same manner – the pump
should come on. Suspend the
On float again from your hand
– the pump should continue to
run. Finally, suspend the Off
float – the pump should stop
running. If this procedure does
not cause the pump to operate
as described, either replace
the float(s) or replace
the alternator relay if the
system is duplex.
Seal failure light comes on.
1. This indication means the
lower seal has failed and has
allowed water to enter the
lower seal chamber to make
contact with the electrode.
Pump must be scheduled for
maintenance. Refer to the
pump installation and service
manual for information on
replacing the lower seal.
NOTE: Use twisted shielded
cable for seal failure cable runs
in excess of 100 feet.
Pump run light stays on.
1. H-O-A switch may be in Hand
position.
2. Lower float may have failed
causing the pump to continue
operating below the Off level.
3. Pump may be air locked.
4. Cutters may be clogged.
7
Page 8

Pump
Troubleshooting
Circuit breaker trips when
pump tries to start.
1. Short circuit in pump motor.
2. Water may have entered the
motor housing through either
worn out mechanical seals or
O-rings.
3. Contactor failure for three
phase pumps. Check pump
contactor for burnt contacts.
4. Start component(s) failure for
single phase pumps. Check
TYPICAL INSTALLATIONS
start capacitor and start relay
for failure.
5. Single phase pump may be
miswired to panel. The white,
black, and red pump power
leads must be connected
correctly to panel.
Overload trips, is manually
reset, and then trips off again.
1. Cutters may be clogged. It
is possible that the pump
stalled during operation, and
starting and stopping cleared
the cutters. If resetting the
overloads solves this problem,
return the H-O-A switch to
Auto and observe operation.
2. Pump motor may have failed.
3. Start component(s) failure for
single phase pumps. Check
start capacitor and start relay
for failure.
4. Single phase pump may be
miswired to panel. The white,
black, and red pump power
leads must be connected
correctly to panel.
8
Page 9

Polyethylene
Simplex
Parts List
ORDERING REPLACEMENT PARTS: Product improvements are made from time to time. The latest part design will be furnished as long as it is in ter change able with the old part.When ordering re place ment parts, always furnish the fol low ing information:
(1) pump serial num ber, (2) pump model and size, (3) part description, (4) part number, (5) im pel ler diameter (if ordering impeller),
(6) quan ti ty required, and (7) shipping instructions.
Ref. Part Part
No. No. Description Qty.
1 21936D200 Cover – Sump 24" Plastic 1
1 21936D300 Cover – Sump 24" Poly 1
2 27570D001 Tank – Poly 24" x 60" 1
2 27570D002 Tank – Poly 24" x 72" 1
2 27570D003 Tank – Poly 24" x 84" 1
2 27570D004 Tank – Poly 24" x 96" 1
3 002380031 Cap – Screw (plastic) 6
3 19099A033 Cap – Screw (poly) 6
4 001560321 Washer – Flat (plastic) 6
4 05030A138 Washer – Flat (poly) 6
5 097813264 Brace – Valve Stem 1
6 085373165 Handle – Extension 2'-0" Deep 1
6 085373015 Handle – Extension 3'-0" Deep 1
6 085373035 Handle – Extension 4'-0" Deep 1
6 085373055 Handle – Extension 5'-0" Deep
7 145340083 Handle – 24" Discharge Deep 1
7 145340013 Handle – 36" Discharge Deep 1
7 145340163 Handle – 48" Discharge Deep 1
7 145340173 Handle – 60" Discharge Deep 1
8 010320031 Nut – Jam 1
9 24227B029 Hub – Tank Assy. 1-1/4" 1
10 24227B030 Plate – Backup 1
11 22251A004 Gasket 1
12 19101A017 Cap – Screw 4
13 010320031 Hex – Nut 4
14 05454A015 Washer – Lock 4
15 063750635 Gate Valve Assembly 1
16 149130035 Discharge Piping Assembly 1
17 129610783 Pipe – 1-1/4" x 23-1/4" SST 1
17 129610913 Pipe – 1-1/4" x 27-5/8" SST 1
18 07947A020 Cross – 1-1/4" SST 1
18a 05004A122 Bushing – 1-1/4" x 1/2" PVC 1
18b 149850001 Valve – Relief 1
19 148790001 Valve – Anti-Siphon 1
20 05004A114 Bushing – 1-1/4" x 3/4" PVC 1
21 05008A059 Nipple – 3/4" Close, PVC 1
22 24335A001 4" Inlet Grommet 1
23 2397A012 Rope – Liftout, 15' 1
24 140841001 Hub – Junction Box 2" NPT 1
25 001760081 Cap – Screw 4
26 001120021 Hex – Nut 4
27 131070021 Washer – Sealing 4
28 128700021 Box – Junction NEMA 6X 1
Ref. Part Part
No. No. Description Qty.
29 148870001 Stand – Wire 1
30 002380071 Cap – Screw 1
31 001560321 Washer – Flat 2
32 010320031 Hex – Nut 1
33 27012B505 Bracket, SST 1
Notes: S — Parts in Seal Kit C — Parts in Carbide Seal Kit I — Parts in Impeller Kit R — Parts in Rebuild Kit *Consult Factory
— Fill Oil to above the Motor Windings
9
Page 10

Fiberglass
Simplex
Parts List
ORDERING REPLACEMENT PARTS: Product improvements are made from time to time. The latest part design will be furnished as long as it is in ter change able with the old part.When ordering re place ment parts, always furnish the fol low ing information:
(1) pump serial num ber, (2) pump model and size, (3) part description, (4) part number, (5) im pel ler diameter (if ordering impeller),
(6) quan ti ty required, and (7) shipping instructions.
Ref. Part Part
No. No. Description Qty.
1 21936D200 Cover – Sump 24" Plastic 1
1 21936D300 Cover – Sump 24" Poly 1
2 23901D301 Tank – FRP 24" x 60" 1
2 23901D304 Tank – FRP 24" x 72" 1
2 23901D306 Tank – FRP 24" x 84" 1
2 23901D308 Tank – FRP 24" x 96" 1
3 002380031 Cap – Screw (plastic) 6
3 19099A033 Cap – Screw (poly) 6
4 001560321 Washer – Flat (plastic) 6
4 05030A138 Washer – Flat (poly) 6
5 097813264 Brace – Valve Stem 1
6 085373165 Handle – Extension 2'-0" Deep 1
6 085373015 Handle – Extension 3'-0" Deep 1
6 085373035 Handle – Extension 4'-0" Deep 1
6 085373055 Handle – Extension 5'-0" Deep
7 145340083 Handle – 24" Discharge Deep 1
7 145340013 Handle – 36" Discharge Deep 1
7 145340163 Handle – 48" Discharge Deep 1
7 145340173 Handle – 60" Discharge Deep 1
8 010320031 Nut – Jam 1
9 24227B029 Hub – Tank Assy. 1-1/4" 1
10 24227B030 Plate – Backup 1
11 22251A004 Gasket 1
12 19101A017 Cap – Screw 4
13 010320031 Hex – Nut 4
14 05454A015 Washer – Lock 4
15 063750635 Gate Valve Assembly 1
16 149130035 Discharge Piping Assembly 1
17 129610783 Pipe – 1-1/4" x 23-1/4" SST 1
17 129610913 Pipe – 1-1/4" x 27-5/8" SST 1
18 07947A020 Cross – 1-1/4" SST 1
18a 05004A122 Bushing – 1-1/4" x 1/2" PVC 1
18b 149850001 Valve – Relief 1
19 148790001 Valve – Anti-Siphon 1
20 05004A114 Bushing – 1-1/4" x 3/4" PVC 1
21 05008A059 Nipple – 3/4" Close, PVC 1
22 24335A001 4" Inlet Grommet 1
23a 2397A012 Rope – Liftout, 15' 1
23b 23828A005 Chain – Liftout, 8' (shown) 1
24 140841001 Hub – Junction Box 2" NPT 1
25 001760081 Cap – Screw 4
26 001120021 Hex – Nut 4
27 131070021 Washer – Sealing 4
Ref. Part Part
No. No. Description Qty.
28 128700021 Box – Junction Nema 6x 1
29 148870001 Stand – Wire 1
30 002380071 Cap – Screw 1
31 001560321 Washer – Flat 2
32 010320031 Hex – Nut 1
33 27012B505 Bracket, SST for Pressure Bell 1
33 22470B005 Tree Bracket, SST for Floats 1
37 21813A300 Float Switches 3
38 14755A002 Float Bushings (not shown) 3
Notes: S — Parts in Seal Kit C — Parts in Carbide Seal Kit I — Parts in Impeller Kit R — Parts in Rebuild Kit *Consult Factory
— Fill Oil to above the Motor Windings
10
Page 11

Fiberglass
Duplex
Parts List
ORDERING REPLACEMENT PARTS: Product improvements are made from time to time. The latest part design will be furnished as long as it is in ter change able with the old part.When ordering re place ment parts, always furnish the fol low ing information:
(1) pump serial num ber, (2) pump model and size, (3) part description, (4) part number, (5) im pel ler diameter (if ordering impeller),
(6) quan ti ty required, and (7) shipping instructions.
Ref. Part Part
No. No. Description Qty.
1 11400-074-5 Cord Cap Assy 25' 8-4 1
1 24951C036 Cover – Sump 36" Fiberglass 1
2 140020601 Tank – FRP 36" x 60" 1
2 140020721 Tank – FRP 36" x 72" 1
2 140020841 Tank – FRP 36" x 84" 1
2 140020961 Tank – FRP 36" x 96" 1
3 002380031 Cap – Screw 6
4 001560321 Washer – Flat 6
5 097813065 Brace – Valve Stem 2
6 085373165 Handle – Extension 2'-0" Depth 2
6 085373015 Handle – Extension 3'-0" Depth 2
6 085373035 Handle – Extension 4'-0" Depth 2
7 145340083 Handle – Lifting 24" Disch. Depth 2
7 145340013 Handle – Lifting 36" Disch. Depth 2
7 145340163 Handle – Lifting 48" Disch. Depth 2
7 145340173 Handle – Lifting 60" Disch. Depth 2
8 010320031 Nut – Jam 2
9 24227B026 Hub – Tank Assy. 1-1/4" 2
10 24227B030 Plate – Backup 2
11 22251A004 Gasket 2
12 19101A017 Cap – Screw 8
13 010320031 Hex – Nut 8
14 05454A015 Washer – Lock 8
15 063750635 Gate Valve Assembly 2
16 149130035 Discharge Piping Assembly 2
17 129610783 Pipe – 1-1/4" x 23-1/4" SST 2
17 129610913 Pipe – 1-1/4" x 27-5/8" SST 2
18 024660141 “T” – 1-1/4" SST 2
*18 07947A020 Cross – 1-1/4" SST 2
*18a 05004A122 Bushing – 1-1/4" x 1/2" PVC 2
*18b 149850001 Valve – Relief 2
19 148790001 Valve – Anti-Siphon 2
20 05004A114 Bushing – 1-1/4" x 3/4" PVC 2
21 05008A059 Nipple – 3/4" Close, PVC 2
22 24335A001 4" Inlet Grommet 1
23 2397A012 Rope – Liftout, 15' 2
24 140841001 Hub – Junction Box 2" NPT 1
25 001760081 Cap – Screw 4
26 001120021 Hex – Nut 4
27 131070021 Washer – Sealing 4
28 128070151 Box – Junction Nema 6x 1
29 148870001 Stand – Wire 2
30 002380071 Cap – Screw 4
31 001560321 Washer – Flat 8
Ref. Part Part
No. No. Description Qty.
32 010320031 Hex – Nut 4
37 143783365 Brace – Support, SST 1
38 063120011 Clamp – Muffler, SST 2
*For use with positive displacement pumps only.
NOTE: Typical installation shown;
actual installation may vary
11
Page 12

STANDARD LIMITED WARRANTY
Pentair Hydromatic® warrants its products against defects in material and workmanship for a period of 12 months
from the date of shipment from Pentair Hydromatic or 18 months from the manufacturing date, whichever
occurs first – provided that such products are used in compliance with the requirements of the Pentair Hydromatic
catalog and technical manuals for use in pumping raw sewage, municipal wastewater or similar, abrasive-free,
noncorrosive liquids.
During the warranty period and subject to the conditions set forth, Pentair Hydromatic, at its discretion, will repair
or replace to the original user, the parts that prove defective in materials and workmanship. Pentair Hydromatic
reserves the right to change or improve its products or any portions thereof without being obligated to provide such
a change or improvement for prior sold and/or shipped units.
Start-up reports and electrical schematics may be required to support warranty claims. Submit at the time of start up
through the Pentair Hydromatic website: http://forms.pentairliterature.com/startupform/startupform.asp?type=h.
Warranty is effective only if Pentair Hydromatic authorized control panels are used. All seal fail and heat sensing
devices must be hooked up, functional and monitored or this warranty will be void. Pentair Hydromatic will cover
only the lower seal and labor thereof for all dual seal pumps. Under no circumstance will Pentair Hydromatic be
responsible for the cost of field labor, travel expenses, rented equipment, removal/reinstallation costs or freight
expenses to and from the factory or an authorized Pentair Hydromatic service facility.
This limited warranty will not apply: (a) to defects or malfunctions resulting from failure to properly install, operate or
maintain the unit in accordance with the printed instructions provided; (b) to failures resulting from abuse, accident
or negligence; (c) to normal maintenance services and parts used in connection with such service; (d) to units that
are not installed in accordance with applicable local codes, ordinances and good trade practices; (e) if the unit is
moved from its original installation location; (f) if unit is used for purposes other than for what it is designed and
manufactured; (g) to any unit that has been repaired or altered by anyone other than Pentair Hydromatic or an
authorized Pentair Hydromatic service provider; (h) to any unit that has been repaired using non factory specified/
OEM parts.
Warranty Exclusions: PENTAIR HYDROMATIC MAKES NO EXPRESS OR IMPLIED WARRANTIES THAT EXTEND
BEYOND THE DESCRIPTION ON THE FACE HEREOF. PENTAIR HYDROMATIC SPECIFICALLY DISCLAIMS THE
IMPLIED WARRANTIES OF MERCHANTABILITY AND FITNESS FOR ANY PARTICULAR PURPOSE.
Liability Limitation: IN NO EVENT SHALL PENTAIR HYDROMATIC BE LIABLE OR RESPONSIBLE FOR
CONSEQUENTIAL, INCIDENTAL OR SPECIAL DAMAGES RESULTING FROM OR RELATED IN ANY MANNER TO
ANY PENTAIR HYDROMATIC PRODUCT OR PARTS THEREOF. PERSONAL INJURY AND/OR PROPERTY DAMAGE
MAY RESULT FROM IMPROPER INSTALLATION. PENTAIR HYDROMATIC DISCLAIMS ALL LIABILITY, INCLUDING
LIABILITY UNDER THIS WARRANTY, FOR IMPROPER INSTALLATION. PENTAIR HYDROMATIC RECOMMENDS
INSTALLATION BY PROFESSIONALS.
Some states do not permit some or all of the above warranty limitations or the exclusion or limitation of incidental or
consequential damages and therefore such limitations may not apply to you. No warranties or representations at any
time made by any representatives of Pentair Hydromatic shall vary or expand the provision hereof.
740 EAST 9TH STREET 490 PINEBUSH ROAD, UNIT #4
ASHLAND, OHIO, USA 44805 CAMBRIDGE, ONTARIO, CANADA N1T 0A5
419-289-1144 800-363-PUMP
WWW.HYDROMATIC.COM
Warranty Rev. 12/13
 Loading...