

RETROFIT SYSTEMS
INSTALLATION AND SERVICE MANUAL
Engineered for quick and easy replacement of existing
progressive cavity grinder systems.
• Fully assembled
• Uses existing ball valve and latch
• Uses existing underground wiring and alarm panel
This manual covers the following retrofit systems:
• HPD200 Float Control
• HPD200 Pressure Control
• HPGR200 Float Control
• HPGR200 Pressure Control
NOTE! To the installer: Please make sure you provide this manual to the owner of the equip ment or to the responsible
party who maintains the system.
Item # E-03-482 | Part # 5625-482-1 | © 2014 Pentair Ltd. | 03/28/14
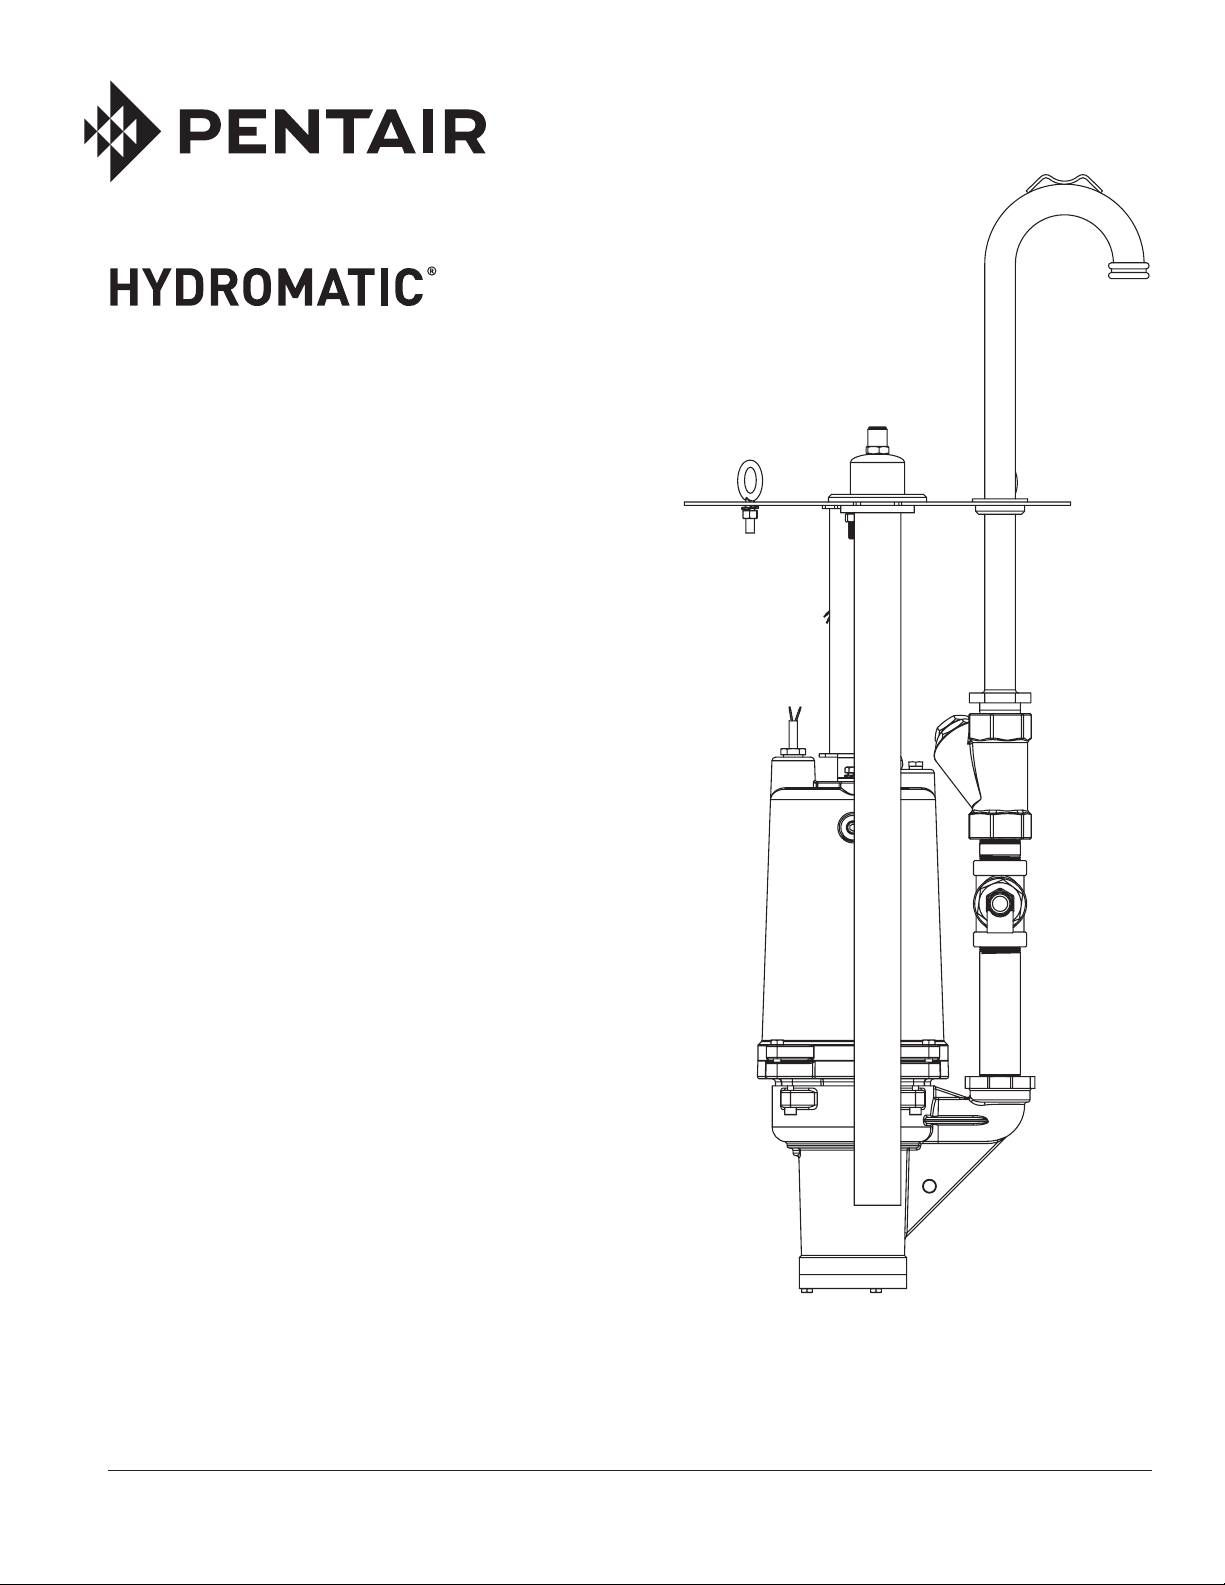
HPD200
Pressure Control
Shown

General
Information
ATTENTION: This manual
contains important information for
the safe use of this product. Read
this manual completely before
using this product and refer to it
often for continued safe product
use. DO NOT THROW AWAY
OR LOSE THIS MANUAL. Keep
it in a safe place so that you may
refer to it often.
Check local codes and
requirements before installation.
WARNING – Before handling
these pumps and controls, always
disconnect the power first. Do
not smoke or use sparkable
electrical devices or flames in a
septic (gaseous) or possible septic
sump.
CALIFORNIA PROPOSITION
65 WARNING:
This product and
related accessories contain
chemicals known to the State of
California to cause cancer, birth
defects or other reproductive
harm.
Grinder Installation
Instructions
1. Remove existing pump and
pipe system.
2. Make sure pump compartment
is clean of any debris.
3. Clean bolt hole (mating)
surface.
4. Make sure there is sufficient
amount of power/control/
alarm cord to be able to
splice into power/control/
alarm cords at the new
junction box.
5. Lift preassembled unit into
place using lift rope supplied.
6. Be sure that gasket stays in
place beneath cover.
7. Grease O-ring.
8. Guide tabs will line up with
existing alignment brackets.
Retrofit system discharge
piping should mate with
existing female socket.
9. After gooseneck is lined
up directly above ball
valve socket, drop into
place. Make certain that
adapter is forced all the
way into socket to ensure
a pressure-tight seal.
11. Attach cover with screws,
sleeves and washers provided.
12. Power, control cords, pressure
tubing (for PCP units only)
and high water alarm to be
routed through junction box.
13. Properly calibrate operation
of the unit by ensuring that
the liquid level in the basin
is at its lowest level when
the control panel cycles off.
Make sure to cut off excess
pressure tubing to prevent
condensation from forming
inside tubing.
Electrical Note: Ensure that
existing wiring is adequate for
the pump service requirements.
Pump
HPD200 12 20 amp
HPGR200 15 20 amp
Full Load
Amps
Circuit
Breaker
Installation
Instructions
This manual covers retrofit
systems with either semipositive
displacement (HPD200) or
centrifugal (HPGR200) grinder
pumps using either pressure
controls or mechanical floats.
Please make sure you know which
system you are installing.
2
10. Rotate ball valve handle/latch
to secure piping and open
valve. If gooseneck is not
completely forced into the
female socket as described
above, ball valve handle/latch
will not close completely over
gooseneck piping.
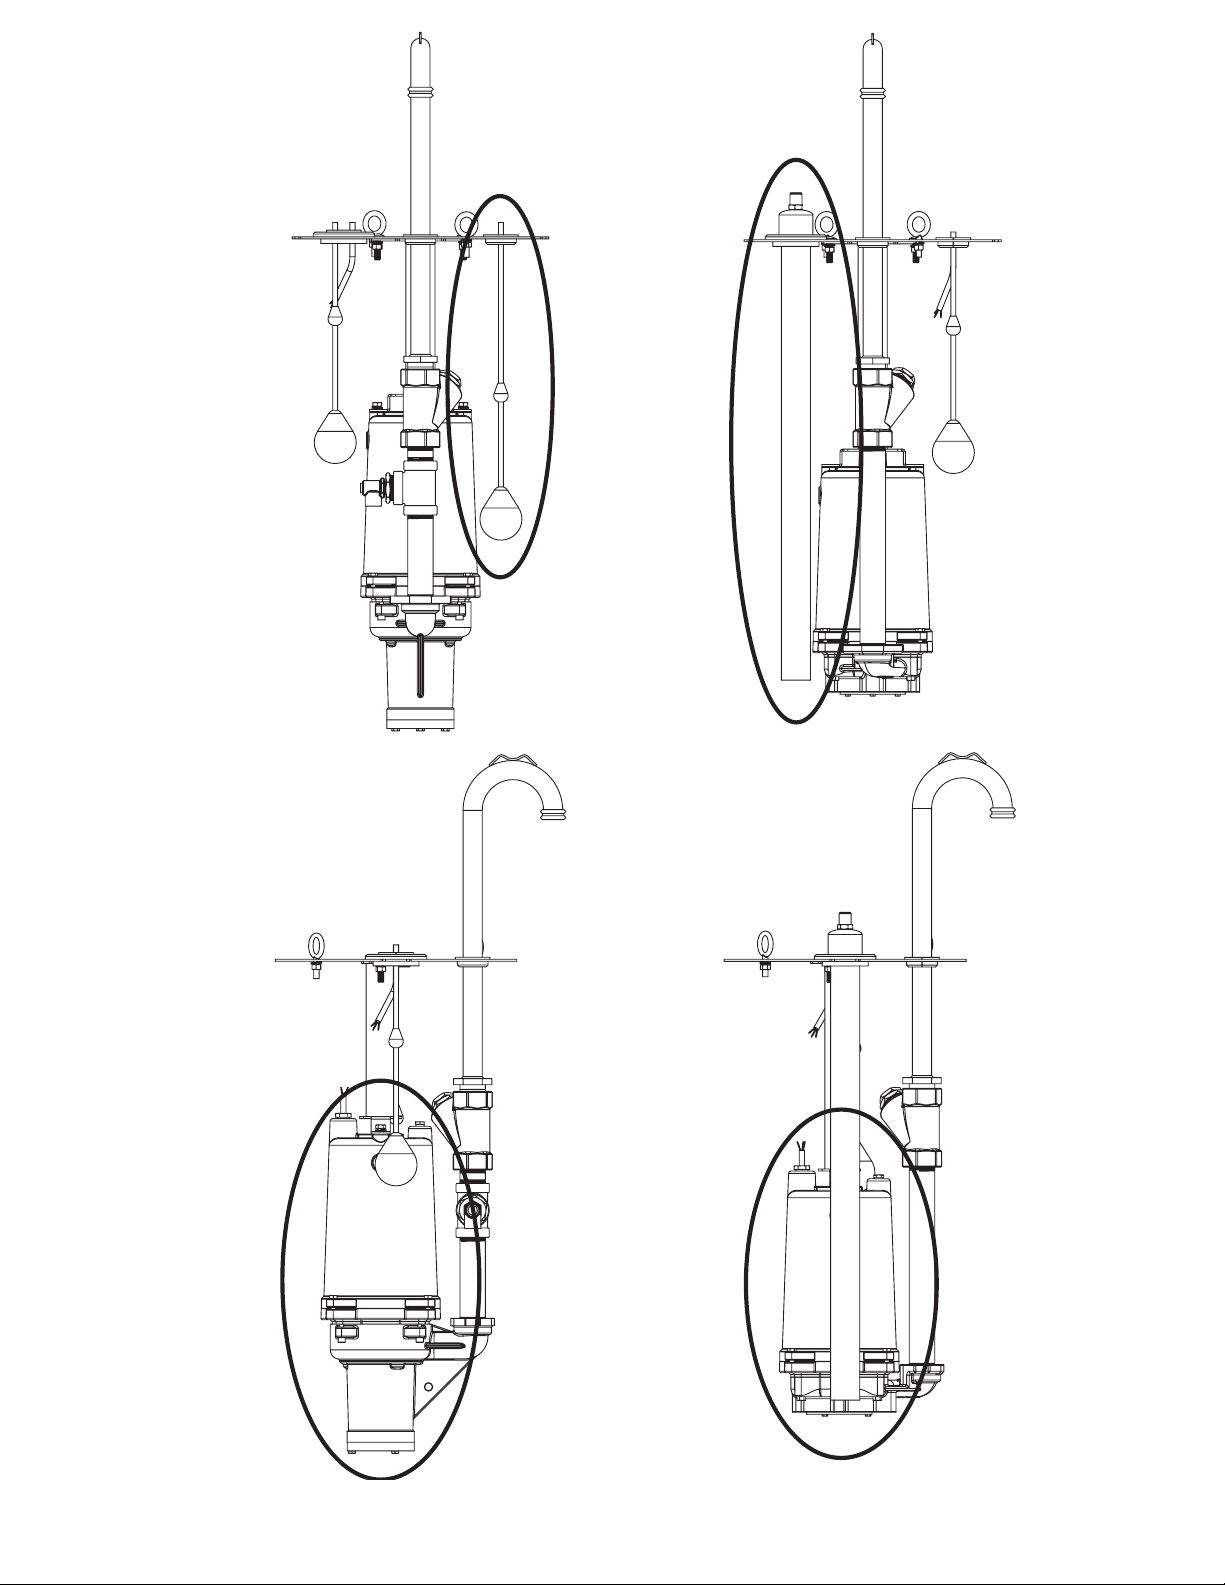
Pressure ControlFloat Control
Semipositive Displacement Pump
(HPD200)
Centrifugal Pump
(HPGR200)
3
 Loading...