

Page 1

Pentacon 6 TL
Designation of essential parts
1. Focusing Hood
2. Rapid wind lever
3. Unlocking lever
4. Release button
5. Cocking lever with self timer
6. Flash socket
Page 2

7. Camera back latch
8. Film speed end support
9. Button for opening the focusing hood
10. Frame finder (direct vision type)
11. Focusing good unlocking button
Page 3

12. Focusing magnifier
13. Exposure time scale
14. Film type indicator
15. Frame counter
16. Frame speed indicator
17. Shutter release lock
18. Knurled ring for lens mounting
19. Aperture lever
20. Diaphragm setting ring
21. Depth of field scale
Page 4

22. Thread for tripod
23. Focusing ring
Introduction
With the Pentagon 6 TL, you have purchased a genuine 6cm X 6cm S. L. R. camera. This camera is suited for roll
films 120 (12 frames) or roll films 220 (24 frames). All controls are arranged for convenient camera operation.
Lenses can be changed in no time due to the reliable bayonet mount. The Pentagon 6 TL focal plane shutter allows
exposure times from 1/1,000 second to 1 second, and of any longer time with the B setting.
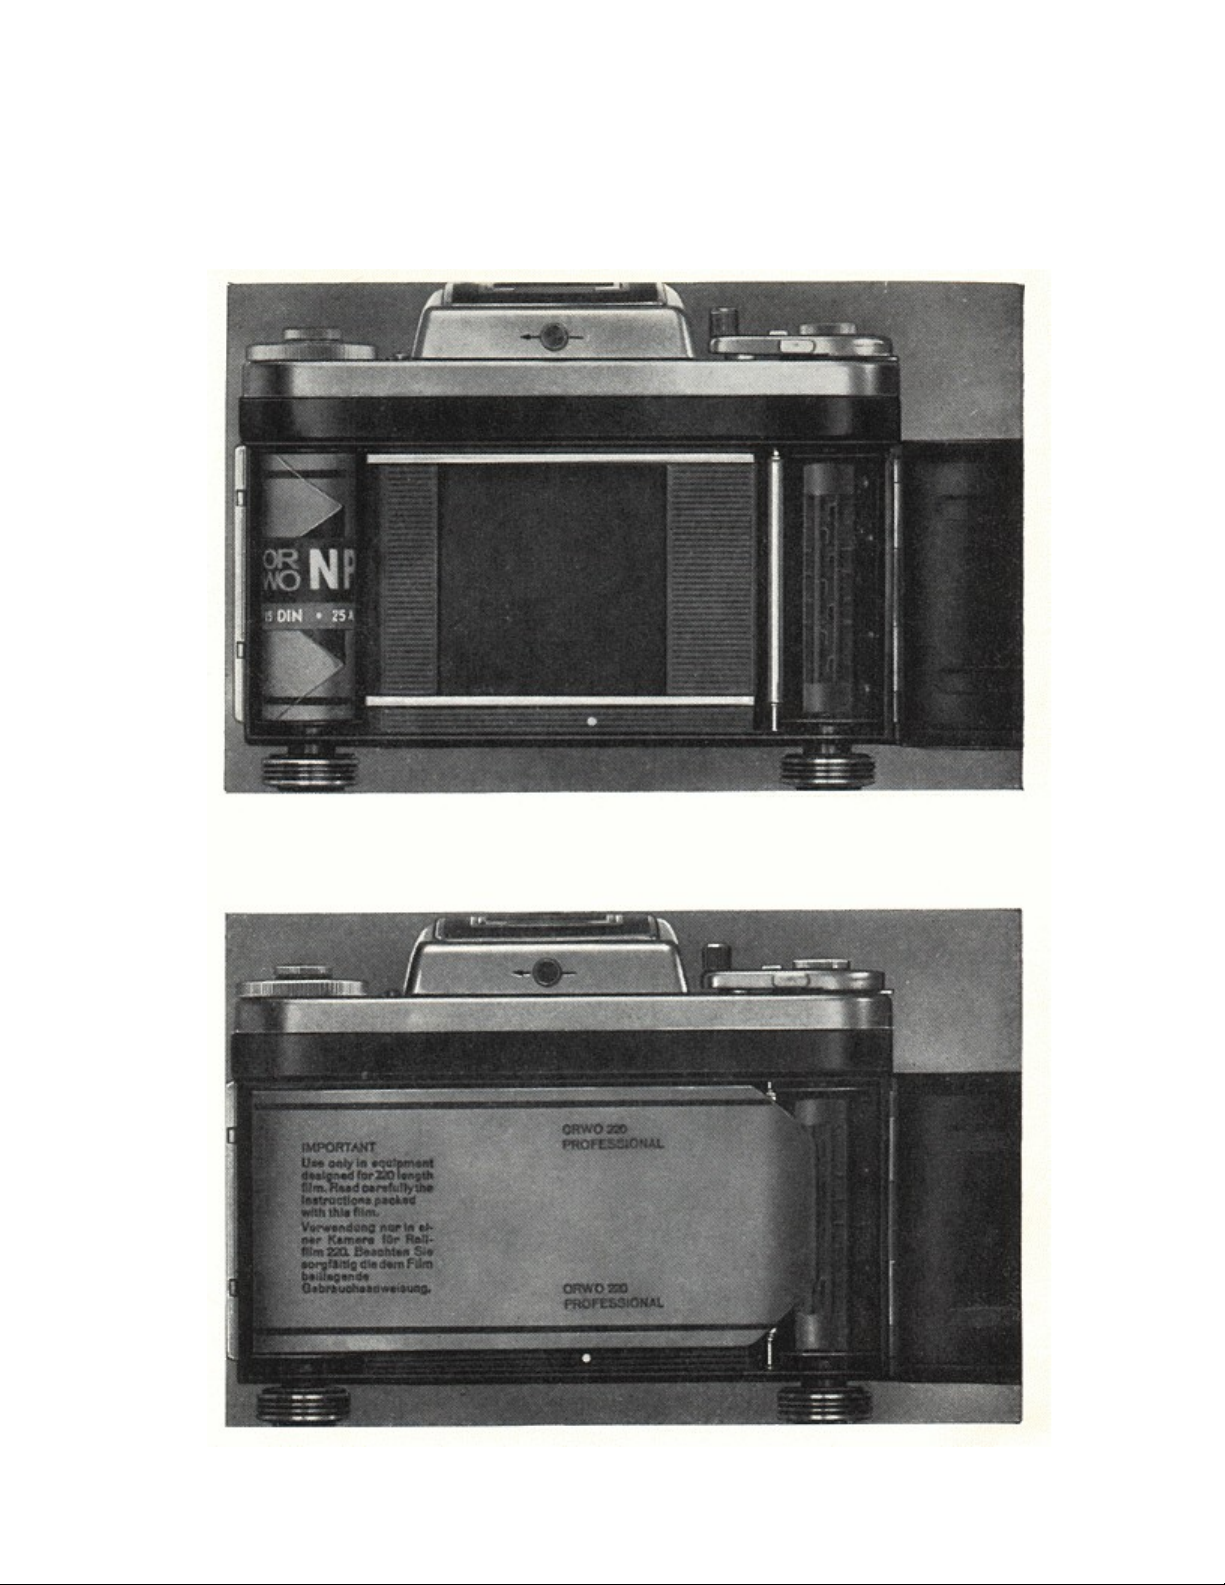
Film loading and cocking
Open the camera back by pulling latch (7). Push back the two spool end supports (8) and arrest them by turning.
Insert the empty film spool in the right space (dog shall engage the spool core), unlock the spool end supports and let
them spring back. The pivot pin will engage the spool core. Proceed in the same manner to load the film in the left
space. Completely remove the adhesive tape from the film spool and insert the paper header into the empty spool.
Frst cock the rapid wind lever (2) to the stop, then advance the paper header by repeated small cocking motions until
the printed mark matches the white point on the frame window. To ensure safe film transport and guarantee tight
wind up, exert a slight pressure with your thumb on the full film spool. See that the paper header runs smoothly in
between the spool plates. Return the rapid wind lever to its rest position after these repeated cocking motions. Close
the camera back. Cock and release 4 times, i.e. Turn the rapid wind lever (2) without interruption to the stop, let it
return, and press release button (4). The frame counter (15) will indicate 1; the camera is ready for taking pictures.
The rapid wind lever is blocked after the 12th frame (roll film 120) or after the 24th per frame (roll film 220). Use the
unlocking lever (3) for unlocking.
Note: Carrying out small cocking motions for film advancing is permitted on the following
Page 5
conditions only: a) When loading the film, with the camera back opened; b) after the exposure of the 12 or 24th frame
when the unlocking lever has been actuated to allow further film transport.
Actuating the rapid wind lever causes the shutter to be cocked, the film to be advanced, the diaphragm to be set to the
largest aperture, the mirror to be brought to " viewing "position, and the frame counter to be advanced by 1.
Unload the exposed film after the paper trailer has been wound up.
Page 6

Frame counter, film indicators
The frame counter (15) is designed to indicate 24 frames. It jumps back to its initial position when the camera back is
opened. It is automatically activated when the back is closed. Frame 1 is indicated after releasing and cocking the
camera for times.
Page 7

The film indicator (14) with symbols for black/white and color film is arranged above the exposure time scale (13).
The appropriate symbol is opposed on the exposure time scale to the number 12 for roll films 120 and to 24 for roll
films 220.
A second indicator (16) for the DIN and ASA film speed is arranged above the rapid wind lever.
Focusing Hood
The focusing Hood (1) opens as soon as the button (9) is shifted in direction of the arrow. It is closed by slight
pressing onto the cover. The 4X focusing magnifier (12) can be swiveled in for more accurate focusing. If you want
to use the direct vision viewfinder, fold up the inner part of the cover and pull out the frame (10). The focusing hood
(and the magnifier, too) is lockable with the body. To remove it, press the focusing hood unlocking button (11) on the
cover. The hood can then be shifted to the rear and lifted up.
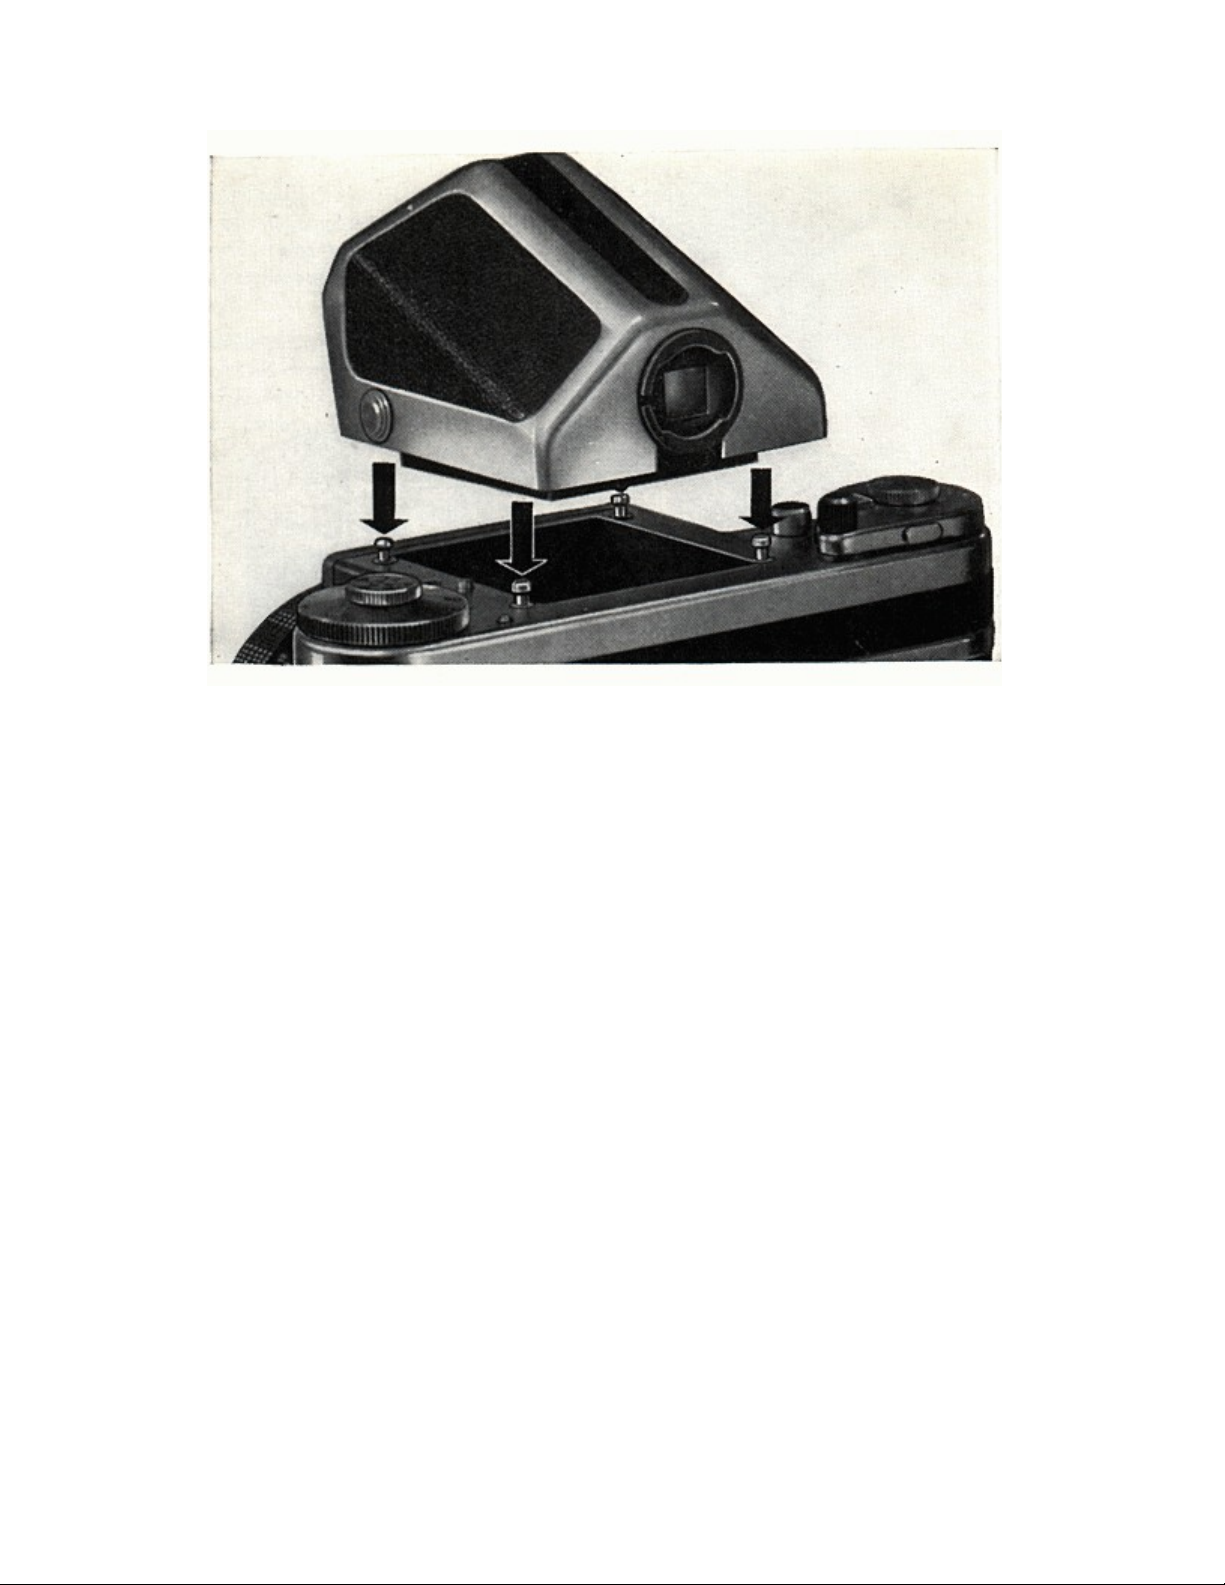
Prism finder
The prism finder permits viewing in taking direction. The picture appears laterally correct and upright with a 2.5X
magnification. The prism finder can be placed from above onto the four cover holders when the two lateral locking
buttons are pushed back simultaneously. It engages when the locking buttons are released and is then tightly
connected with the camera body. The finder is removed in reverse order.
See the separate instructions for the TTL prism.
Page 8
Focusing/diaphragm setting
Focusing is only possible with a mirror swiveled in and, thus, the shutter cocked. For the purpose, turn the focusing
ring (23) until the object to be taken is sharp in the field lens. The depth of focus can be read on the depth of field
scale (21). Example: distance: 5 meters; aperture: 8; depth of focus 3.5 meters to about 9.5 meters. Turn the
diaphragm setting ring (20) to set to required diaphragm number opposite to the red mark. Automatic diaphragm
lenses retain full aperture when the diaphragm number is set. The diaphragm is stopped down releasing the shutter.
Press lever (19) to check the depth of focus for the set diaphragm number in the field lens. The built-in field lens can
be replaced with other suited for specific photographic fields (see operating instructions, accessories for close-ups).
Page 9
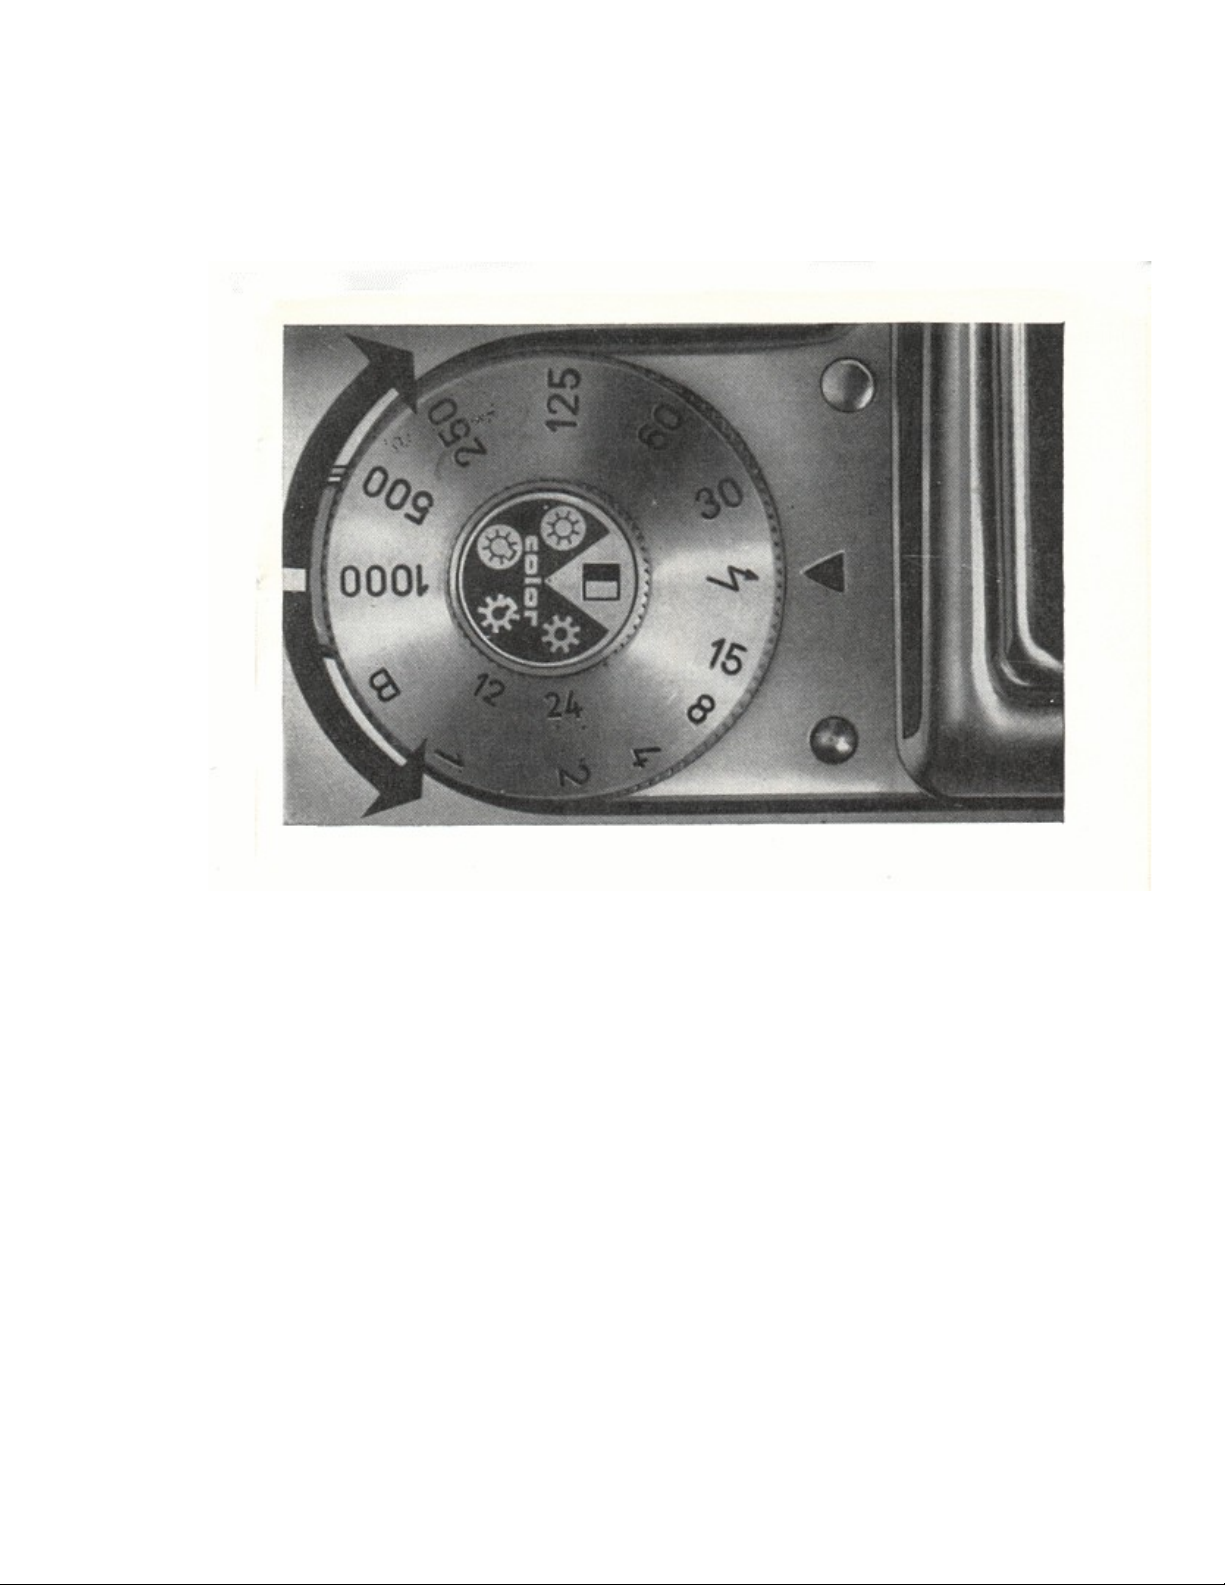
Exposure time
The exposure time can be set before or after cocking shutter. Setting exposure time on the scale (13) is possible in
both directions. To avoid unintentional missetting, the scale clicks in at the red triangular mark. It is not possible to
set intermediate values.
Release button and self-timer
You may lock the release button (4) by turning the lower knurled ring (17). The red mark shall point upwards. Cock
the self-timer by swiveling the cocking lever (5) by about 90 degrees; let it run down by actuating the release button
(4). Remember to cock the shutter before. The running time of the self-timer is about 10 seconds. It can be used with
all shutter speeds.
Page 10

X synchronization
An X switch is used for synchronization with electronic flash units and flash bulbs. The flash socket (6) is provided
with a knurled ring used to clamp the plug. To plug in or remove the flash plug, match the red marks on the flash
socket. For electronic flash units, use the time of symbol arrow or a longer time. Set a time of 1/15 second for quick
type flash bulbs, a time of 1/8 second for slow type flash bulbs. Making use of the self-timer requires the release
button to be pressed until flashing (use an locking cable release). Determine the diaphragm number by referring to
the operating instructions of the flash unit or its setting table.
Lens changing
Not much effort is involved in lens changing. Turn the knurled ring (18) of the bayonet mount counterclockwise to
the stop and remove the lens. Insert new lens so the red mark of the lens scale points upwards and lens arresting
screw engages the recess in the camera body lens support. Turn the knurled ring (18) clockwise to lock the lens.
When working with lenses of focal lengths exceeding 300 mm which are not provided with automatic diaphragm, the
automatic diaphragm lever in the camera is recommended to be swiveled off its normal working position as it may
Page 11

protrude into the optical path (swivel the lever only that far that does not contact the camera body when shutter is
cocked).
Note:
Page 12

Use the ever-ready case to protect a camera from shock and contamination. A shoulder strap is recommended to be
used in cases where the ever-ready case is of little use. e.g. with a flash unit or a telelens. Fasten it to the camera eyes.
Continued development of a camera may result in minor deviations from this manual. Please, observe the instructions
contained herein. Improper handling of the camera may cause damage, not coming within our guarantee provisions.
 Loading...