

Penpower WorldCard Color User Manual

PENPOWER WorldCard
User Manual
Version: 6.2
Edition: Fourth Released on September, 2007

Penpower Technology Ltd.
Software User License Agreement
You are licensed to legally use this software program (“the Software”) by Penpower
Technology Ltd (“Penpower”) under this license agreement (“The Agreement”). If you do
not agree with any of the provisions in this Agreement, please do not install, copy or use the
Software. By using the Software, you are deemed to fully understand and accept the provisions of this Agreement.
1. Intellectual Property
All intellectual property rights in the Software, together with all information and docu-
ments included in the packaging for the Software (including but not limited to copy-
rights), are property of Penpower, and are protected by relevant laws and regulations.
2. License to Use
You are authorized to use the Software on one (1) single computer only. You may not use
the Software on any other machines other than the said single computer.
3. Authority to Copy
The Software and all documents included with the Software, and copyright thereof, are
property of Penpower. You are licensed to make one (1) copy of the Software for your
personal backup purposes. All other acts of copying are strictly prohibited.
You may not sell, lease, dissemble, reverse engineer, copy, translate, adapt or derive the
Software, or obtain the source code of the Software by any other means. You may not use
the Software for any purposes other than those permitted under this Agreement.
4. Business Users
If you need to install or use the Software on more than one (1) computer, please contact
Penpower or our local distributor to purchase a license for the additional use.
5. Liability
You agree to indemnify Penpower against all losses, costs, debts, settlement payments or
other expenses (including but not limited to attorneys fees) arising from your breach of
this Agreement, and you agree to compensate Penpower for all of the abovementioned
damages.
6. No Warranty
Effectiveness of a packaged software in handling information is closely related to its soft-
ware and hardware environment. The Software is published following careful develop-
ment and product testing by Penpower, but Penpower is not able to conduct tests based on
all possible combinations of software and hardware environment. Therefore, Penpower is
unable to promise nor warrant that there will be absolutely no risk of loss or damage of

information, or any other kind of loss, during installation and/or execution of the Soft-
ware. You must be fully aware of your risks in using the Software.
Penpower will provide you with the Software and support services in respect of the Soft-
ware to the maximum extent permitted by law. However, Penpower does not warrant that
the Software and information included in the package of the Software contain no defects
or errors. Penpower is not liable for any indirect, special or incidental loss arising from
the Software, including but not limited to loss of prots, damage to business reputation,
cessation of work, hardware malfunction or damage, or any other commercial damage or
loss arising from commercial use of the Software.
7. Limitation of Liability and Damages
The maximum amount of compensation payable by Penpower, in respect of any damage
incurred by you for any reason under this Agreement, is limited to the amount you have
already paid to Penpower in respect of the Software.
Under no circumstances will Penpower be held liable for the possibility of loss, notwith-
standing Penpower may be aware of the possibility of such loss.
8. Prohibition Against Sublicense
You are prohibited to assign the license in respect of the Software granted to you under
this Agreement, or to grant a sublicense to another person.
9. Jurisdiction
With regards to any disputes arising from this Agreement, Penpower and you agree that
the court having jurisdiction over the business location of Penpower will be the court in
the rst instance.
10. Miscellaneous
In the event that any provision of this Agreement is found to be invalid at law, such
invalidity will not affect the validity of any other provisions, or the legal enforceability of
such other provisions.
In the event that the Software cannot be executed under conditions of normal use, due to
any damage to the original disk/s, Penpower will replace the disk/s free of charge.

Contents
Chapter 1 Product Introduction............................................................................1-1
Chapter 2 Getting Started.....................................................................................2-1
2.1 System Requirements..............................................................................................2-1
2.2 Installing Penpower WorldCard.............................................................................2-1
2.2.1 Software and Driver Installation............................................................................2-1
2.2.2 Connecting Hardware.............................................................................................2-3
2.3 Preparation for Card Scan.......................................................................................2-4
2.3.1 Calibration.............................................................................................................2-4
2.3.2 Start-up Wizard....................................................................................................2-4
Chapter 3 Overview..............................................................................................3-1
3.1 User Interface..........................................................................................................3-1
3.1.1 Menu Bar...............................................................................................................3-2
3.1.2 Alphabet............................................................................................................3-2
3.2 Scanning Wizard....................................................................................................3-3
3.2.1 Scanning Business Cards......................................................................................3-3
3.2.2 Batch Scanning....................................................................................................3-4
3.3 Scan Bussiness Card Directly................................................................................3-4
3.4 Viewing Contacts..................................................................................................3-5
3.4.1 List Mode View........................................................................................................3-5
3.4.2 Label Mode View.....................................................................................................3-6
3.4.1 Image Mode View........................................................................................................3-7
3.4.2 Dual Mode View..................................................................................................3-8
Chapter 4 Editing Cards...................................................................................4-1
4.1 Editing Window Overview............................................................................................4-1
4.2 Verifying Contacts..........................................................................................................4-1
4.3 Editing Contacsts.....................................................................................................4-2
4.3.1 Recognizing Partial Content of a Card Entry.................................................4-3
4.3.2 Adjusting Separation Rate.................................................................................4-3
4.3.3 Deframing Function...........................................................................................4-4
4.3.4 Fine Rotate...........................................................................................................4-4
4.3.5 Rotating Card ......................................................................................................4-5

4.3.6 Rescanning Card.................................................................................................4-5
4.3.7 Recognize Again............................................................................................4-6
4.3.8 Front and Back Business Card Image Exchange...............................................4-6
4.4 Viewing Cards.......................................................................................................4-7
4.4.1 Saving Card Image.................................................................................................4-7
4.4.2 Deleting Card Image............................................................................................4-7
Chapter 5 Managing Business Cards..........................................................................5-1
5.1 Categorizing Cards...................................................................................................5-1
5.1.1 Categorizing from Management Page...................................................................5-1
5.1.2 Categorizing from Editing Page............................................................................5-2
5.1.3 Sending Email by Category................................................................................5-2
5.2 Merging and Separating Cards................................................................................5-3
5.3 Adding New Cards....................................................................................................5-4
5.3.1 Adding an Empty Card......................................................................................5-4
5.3.2 Adding the Same Company Card...............................................................................5-4
5.4 Adding Cards from Other Resources......................................................................5-5
5.4.1 Photo File...............................................................................................................5-5
5.4.2 Twain Scanner........................................................................................................5-5
5.5 Searching Contacts....................................................................................................5-7
5.5.1 Text Search............................................................................................................5-7
5.5.2 Advanced Search...................................................................................................5-8
5.5.3 Finding Duplicate Data............................................................................5-9
5.6 Safeguarding your Contacts..................................................................................5-10
5.6.1 Save ....................................................................................................................5-10
5.6.2 Save As...............................................................................................................5-10
5.6.3 File Encryption..................................................................................................5-10
5.7 Printing Cards......................................................................................................5-12
5.7.1 Printing Preview.................................................................................................5-12
5.7.2 Editing Print Templates.....................................................................................5-13
5.8 Exchanging Contacts...........................................................................................5-14
5.8.1 Export..............................................................................................................5-14
5.8.2 Import..............................................................................................................5-17
5.8.3 Synchronize....................................................................................................5-19

5.9 Settings.....................................................................................................5-21
5.9.1 Export Option....................................................................................................5-21
5.9.2 Sync Option........................................................................................................5-22
5.9.3 Field Display......................................................................................................5-23
5.9.4 User Dene Field..............................................................................................5-23
5.9.5 Scan Option.......................................................................................................5-24
5.9.6 Revising the Results of Chinese Card Recognition..................................5-24
5.10 WorldCard Portable Disk..........................................................................5-25
5.10.1 Saving Card Data to a Portable Disk .............................................................5-25
5.10.2 Card Data Management for Portable Disk.....................................................5-26
Chapter 6 Scan Manager........................................................................................6-1
6.1 Scanning Contacts.........................................................................................................6-1
6.2 Scan business cards ..................................................................................................6-2
6.2.1 Scan and Edit business cards.............................................................................6-2
6.2.2 View business card image..................................................................................6-4
Chapter 7 WorldCard duet 2.......................................................................................7-1
7.1 Introduction................................................................................................................7-1
7.1.1 Hardware Introduction.........................................................................................7-1
7.2 Installation................................................................................................................7-2
7.3 Connecting Hardware.............................................................................................7-2
7.4 Using Hardware......................................................................................................7-3
7.5 Capturing Business Cards.......................................................................................7-4
7.6 Capture Option......................................................................................................7-10
FAQ


Chapter 1 Product Introduction
1-1
Chapter 1 Product Introduction
The PENPOWER WorldCard provides you with a total business card management solution by integrating card recognition, management, transmission, and printing functions in
a single digitized unit. So you can nd your business cards at anytime and anywhere when
you need them.
* Easy Card Reader
Scanning or snapping your business cards has never been quicker or easier.
* Organizing Business Card
After scanning or snapping your business cards, WorldCard Manager Software allows
you to organize, sort, search, add and delete. Also, you can easily edit and add comments
to any business card.
* Advanced Search
Full text search to nd your contacts easily and conveniently.
* Support 16 languages
Recognize business cards in 16 different languages: English, French, German, Italian,
Spanish, Dutch, Swedish, Norwegian, Russian, Polish, Turkish, Hungarian, Traditional
Chinese, Simplied Chinese, Japanese and Korean.
* Multiple Categories and Sub-categories
Organize card information into categories and sub-categories in anyway you want.
* Print Templates
WorldCard provides various print templates. You can also easily create your own tem-
plates and print contact information in different formats.
* Recognize contact from other resource
Recognize business card image les taken by digital cameras or advanced mobile phones.
It can also work with the atbed scanner.
* Data Exchange
Export/Import/Sync contacts to/from/with Outlook, Outlook Express, Lotus Notes, Palm,
Windows Mobile, ACT!, Goldmine, Salesforce and other PIM software.
Note: Vista version has not provided export/import/sync function for Pocket PC and
Goldmine.

1-2
WorldCard
* Unicode
Unicode design makes it possible to display various languages of business cards at the
same time.
Chapter 2 Getting Started
2-1
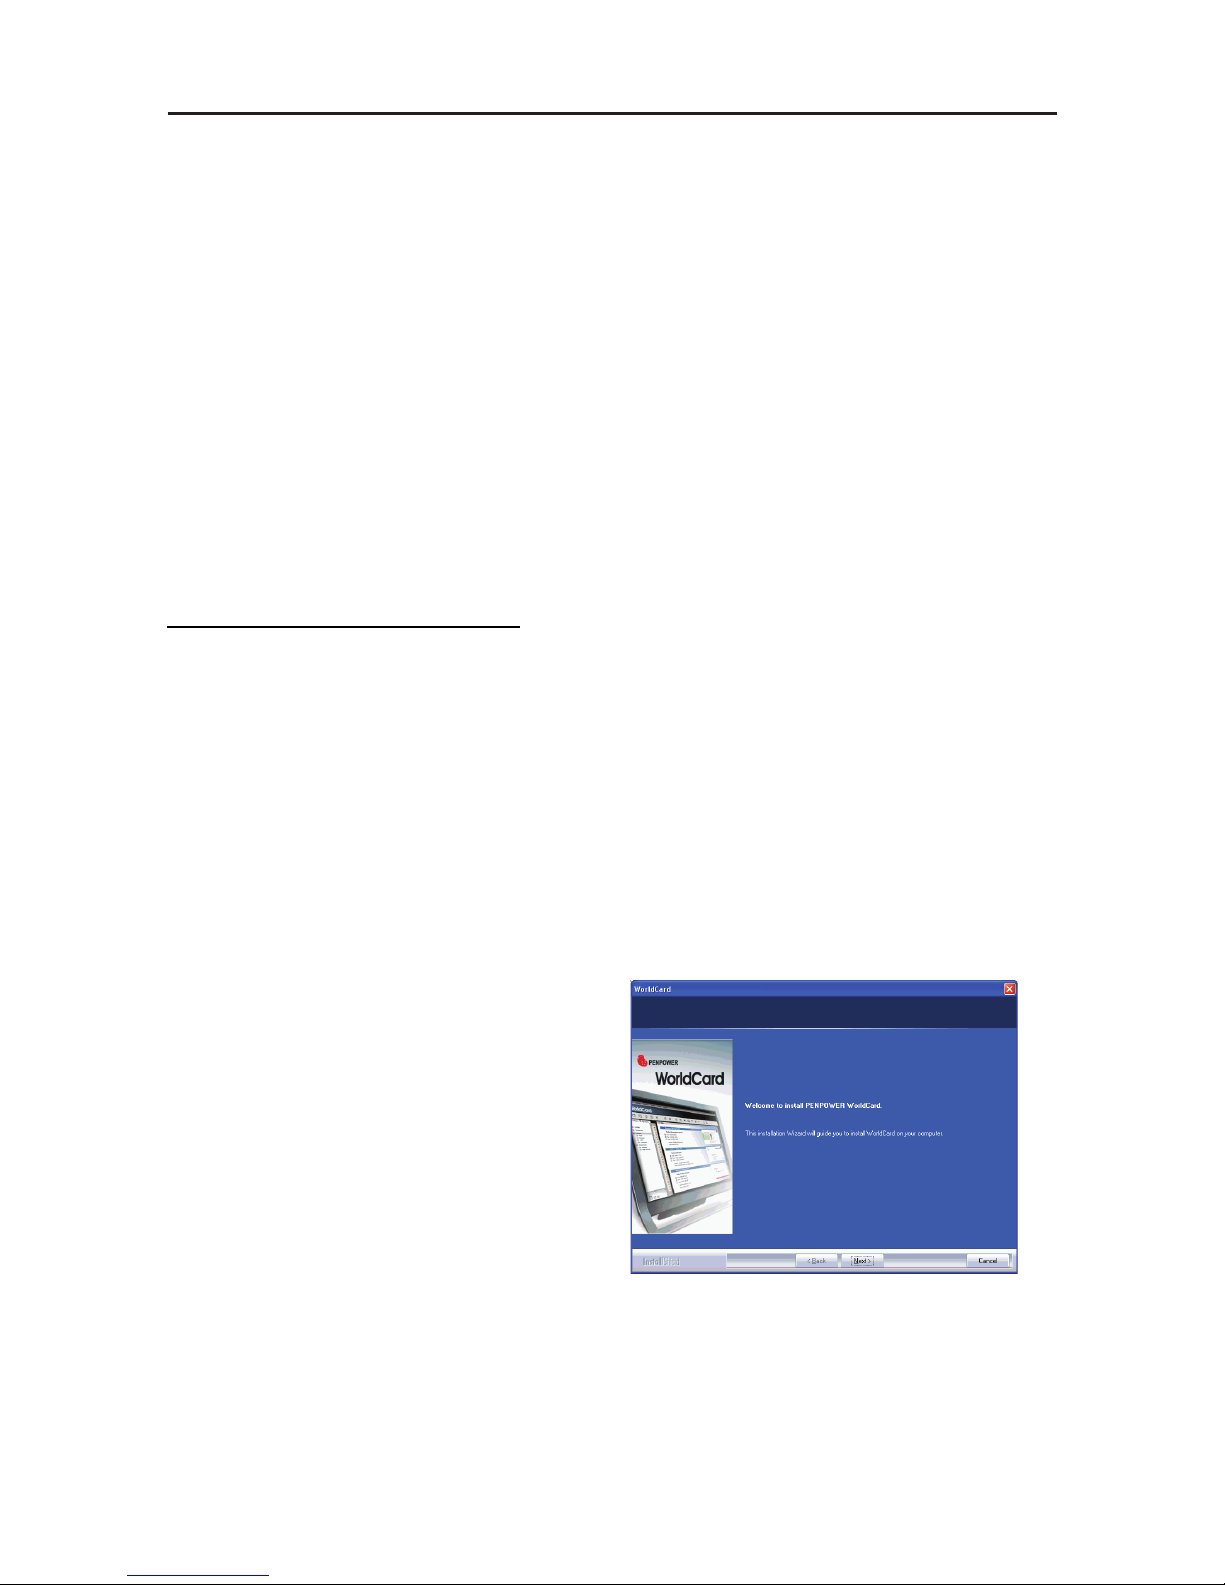
1. Please click <<Next>>.
Chapter 2 Getting Started
2.1 System Requirements
• Pentium III 800 CPU or above
• 256MB of RAM
• 200MB of available hard disk space
• Windows 2000/XP/Vista
• USB Port
2.2 Installing Penpower WorldCard
To properly use your WorldCard
1. Install the software included on the CD
2. Connect your WorldCard scanner to your PC
3. Scan or capture your business cards and enjoy
2.2.1 Software and Driver Installation
To save time, PENPOWER has combined the installation of the hardware and software
into one easy process. To start, insert the CD into your CD/DVD ROM (if the program does
not automatically start, simply double click the setup.exe le on the CD).

2-2
WorldCard
3. Please ll in your name and company
name. Click <<Next>> to continue.
2. Select <<I accept the terms of the li-
cense agreement>> to accept the license
agreement. Please read licensing agreement completely.
4. Please follow the on-screen notice. Click
<<Next>> to continue.
5. Please select the location to install. The
default location is c:\Program Files\
WorldCard. Click <<Next>> to continue.
Chapter 2 Getting Started
2-3
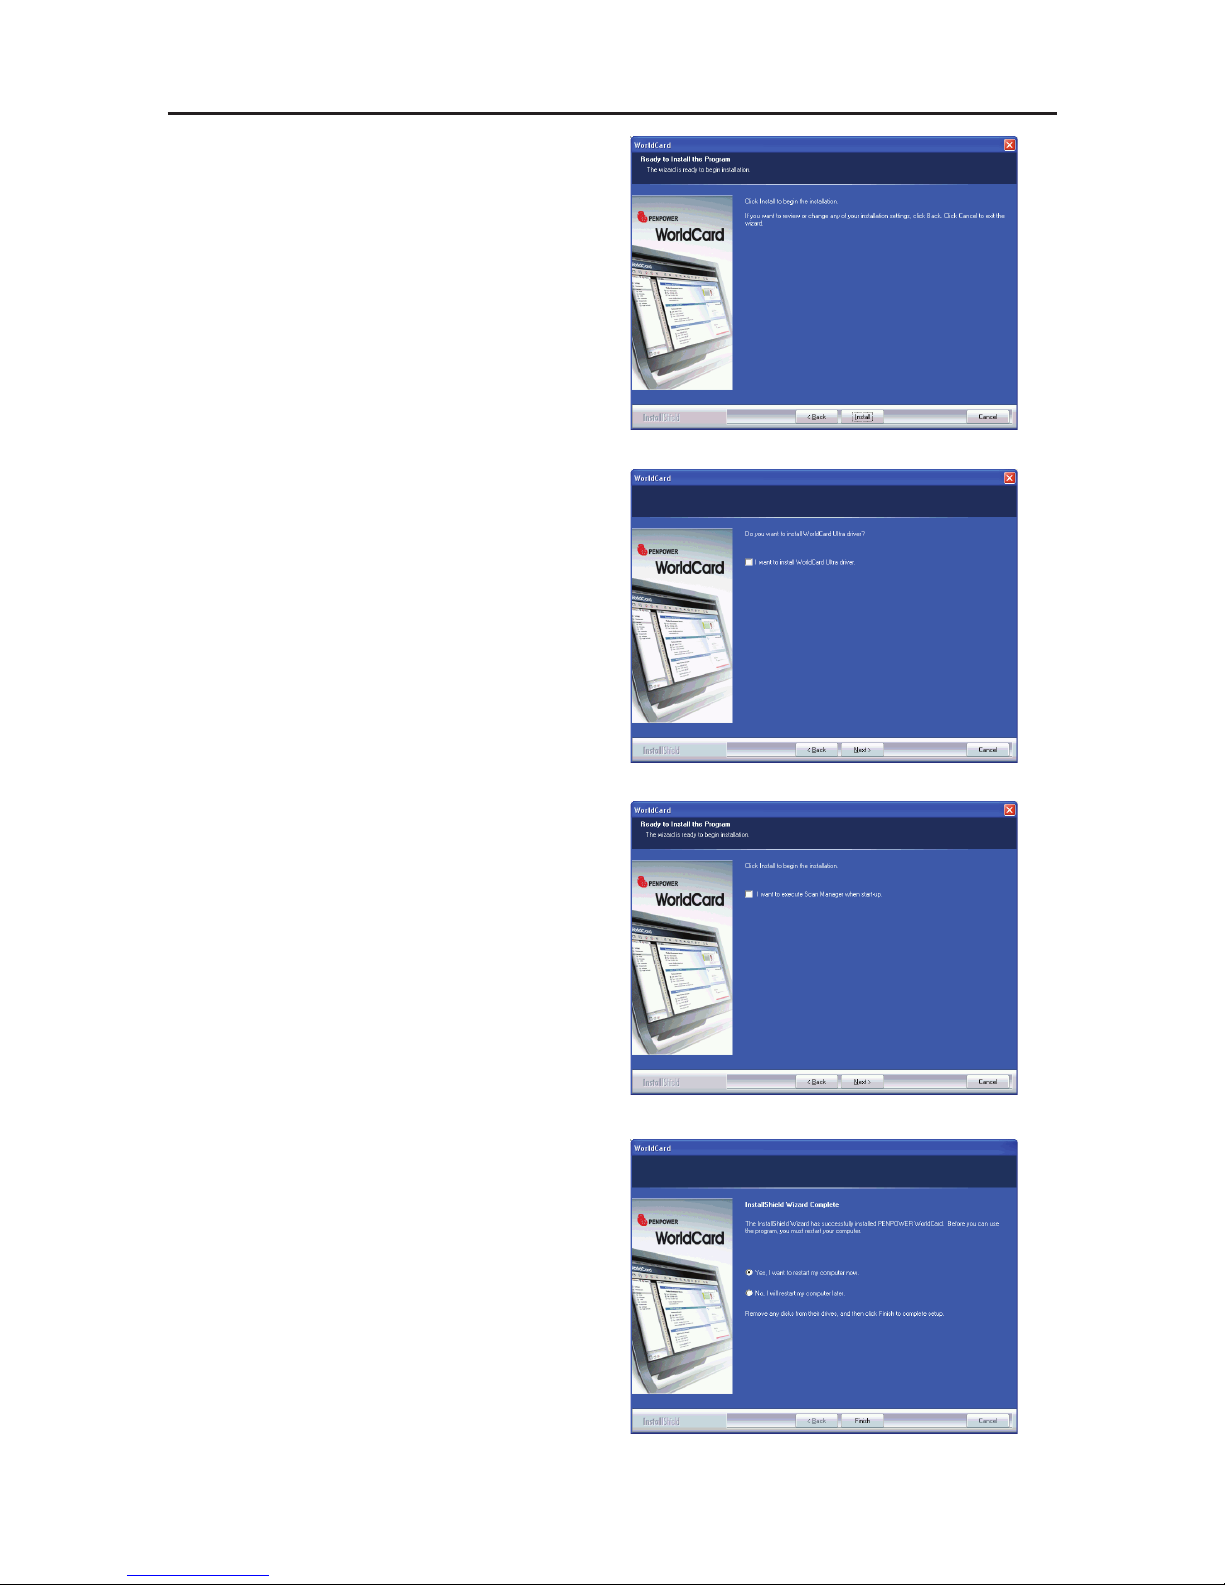
6. Click <<Install>> to begin installation.
9. Click <<Finish>> to complete installa-
tion. If you do not want to restart now,
click “No, I will restart my computer
later”.
7. If you want to install WorldCard Ultra
driver, please click <<I want to install
WorldCard Ultra driver>>, then click
<<Next>> to continue.
8. If you want to run Scan Manager when
start-up the computer for quick scanning
into Outlook, Outlook Express, Windows
Contacts or ACT! directly, please click
<<I want to execute Scan Manager
when start-up>>, then click <<Next>>
to continue.
2-4
WorldCard
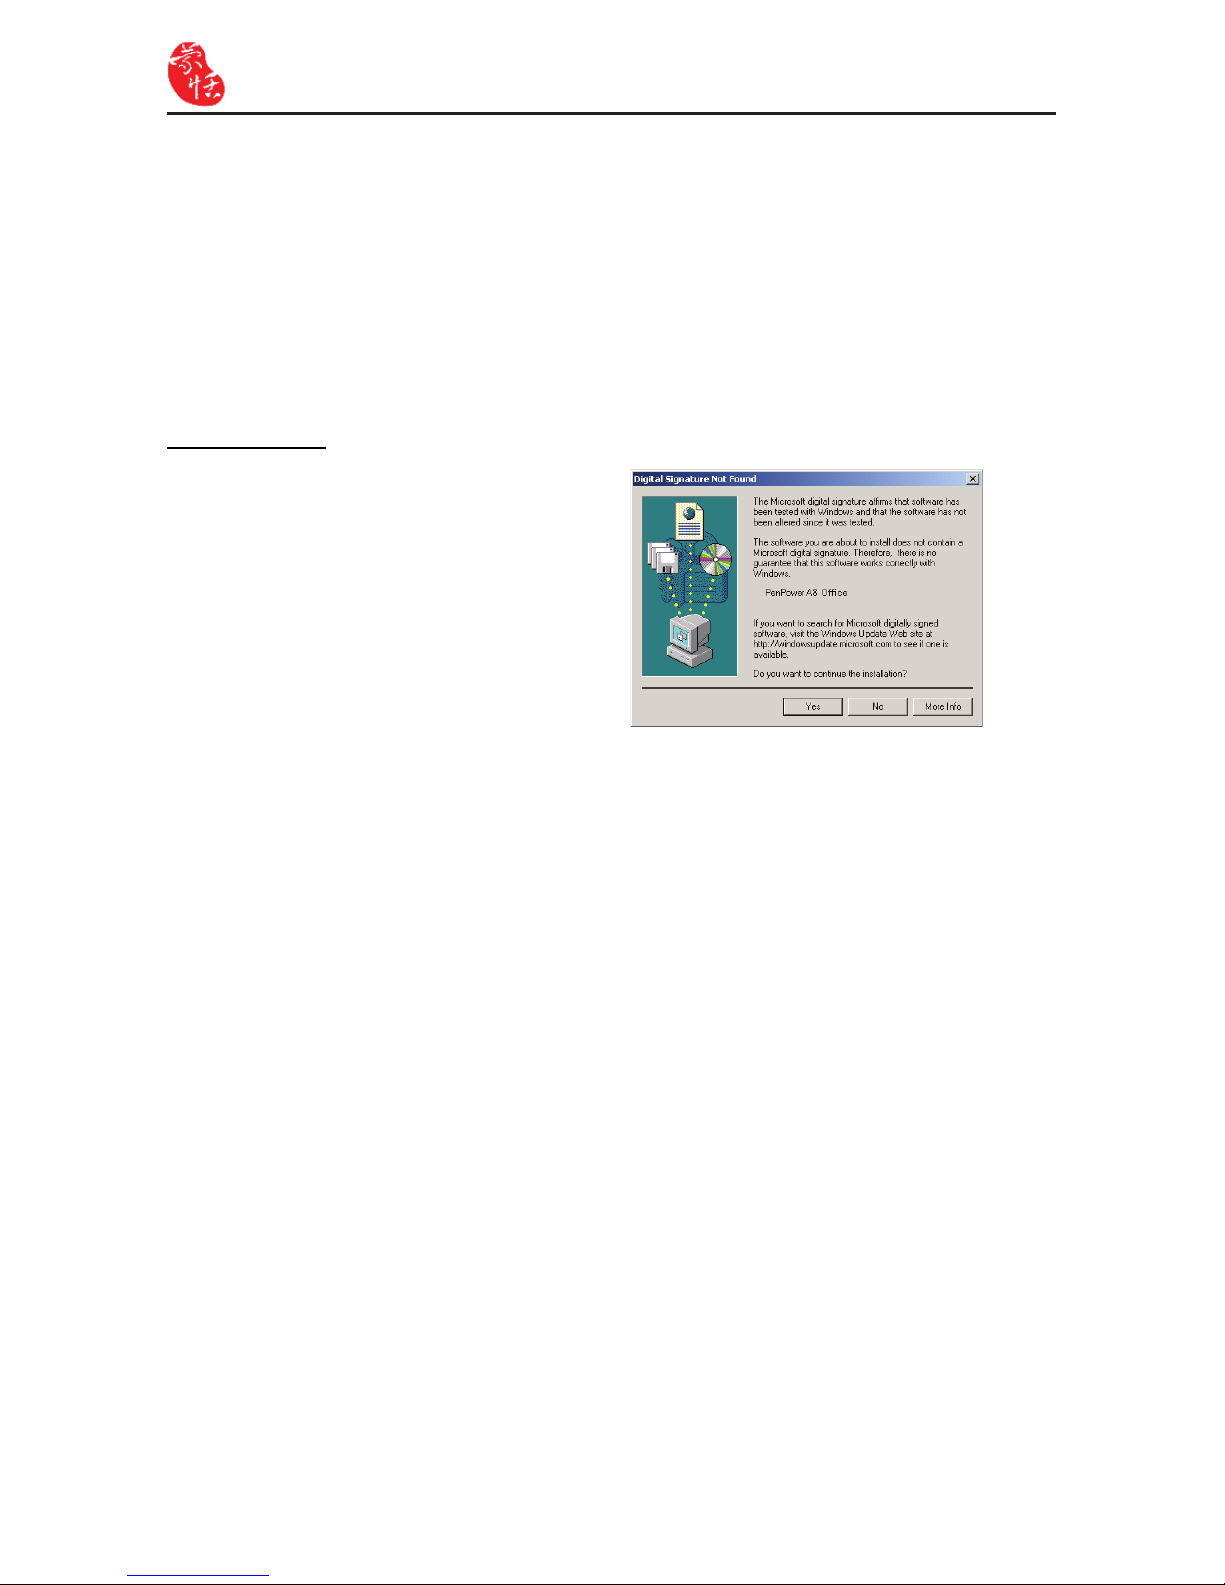
Windows 2000
After connecting your device, the
<<Digital Signature Not Found>>
window will appear on you computer,
please click <<Yes>> to complete the hard-
ware installation of Card Scanner.
2.2.2 Connecting Hardware
After installing the software, connect the USB connection of your WorldCard scanner or
business card camera to the USB port of your computer.
Note: Some computers may shut down accidentally after connection. This is due to lack of
power to support several USB devices. To avoid this problem, connect your WorldCard scanner/business card camera and other USB devices to an extra-powered
USB hub.
Chapter 2 Getting Started
2-5
2.3 Preparation for Card Scan
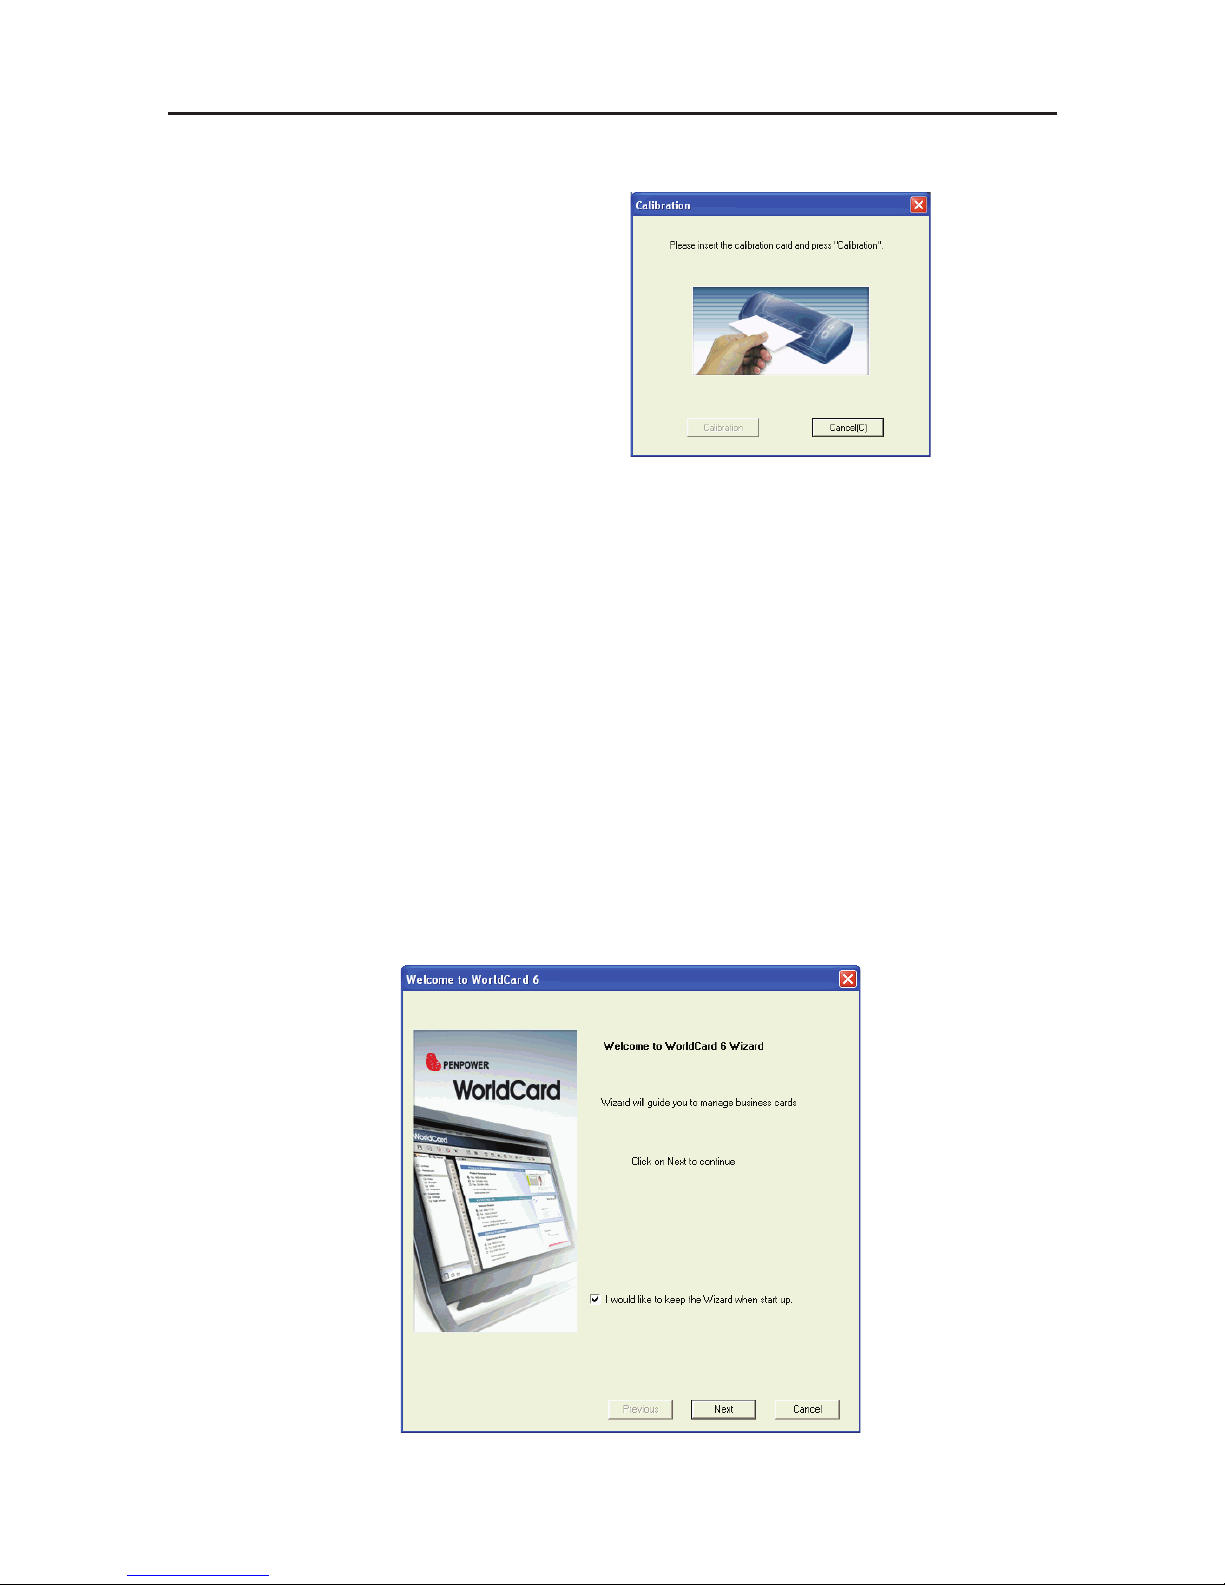
2.3.1 Calibration
After installing the software and drivers,
your WorldCard scanner must be calibrated
in order to ensure perfect results.
Place the calibration card into the
scanner. Make sure the calibration card is
ushed to the side with the mark.
Note: To calibrate the A6-sized Color and A8-sized gray-scaled scanner, insert the blank
side of the card face down. To calibrate the A8-sized Color scanner, insert the blank
side of the card face up.In case the calibration card is lost , you can use any same
size white card for calibration.
WorldCard duet 2 does not need to do the calibration.
Tip: If there is any color indifference after scanning a card, you can calibrate the scanner
via Tool/Calibration.
2.3.2 Start-Up Wizard
Start your WorldCard software by double-clicking the WorldCard icon on your Windows
screen. After the WorldCard Application opens, the following screen will appear.
1. To start the wizard, click <<Next>>.

2-6
WorldCard
2. The Wizard can help you quickly choose what you want to do:
Scan Card: allows you to add a card to your le
Load Card Image: allows you to take an existing picture of a business card and add it to
your le
Import data: Import data: allows you to import data from sources such as Lotus Notes,
Outlook, Outlook Express, PocketPC, Palm, ACT!, Goldmine and SalesForce etc.
Notes: Vista version has not provided importing data from Windows Contacts, Pocket PC
and Goldmine.
Import Old Version Data: allows you to import the previous version of WorldCard le into
your new WorldCard File
You may select a function and click the <<Finish>> icon to continue.
Chapter 3 Overview
3-1
Chapter 3 Overview
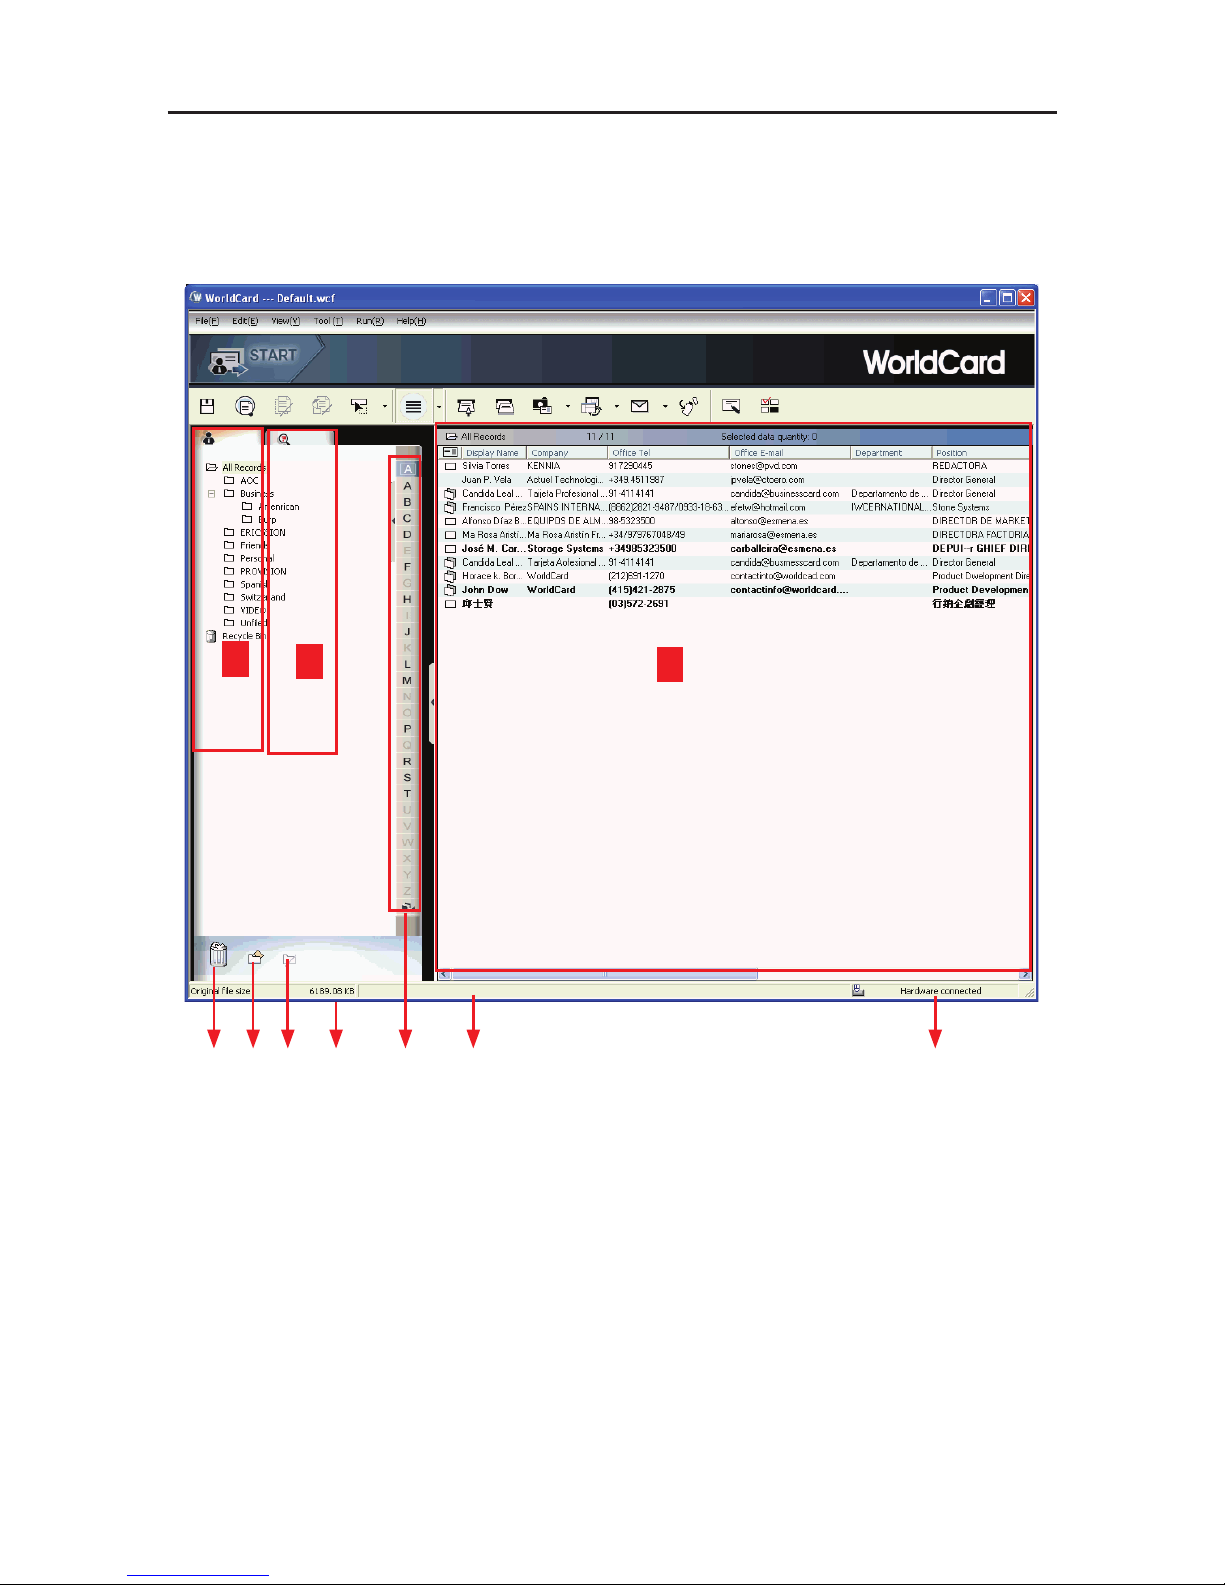
3.1 User Interface
A: Category tab
B: Search tab
C: Card Window
D: Recycle Bin
E: Add Category
D
E F G
A
H J
C
B
I
F: Delete Category
G: Disk space used
H: Status
I: Alphabet
J: Connection Status
3-2
WorldCard
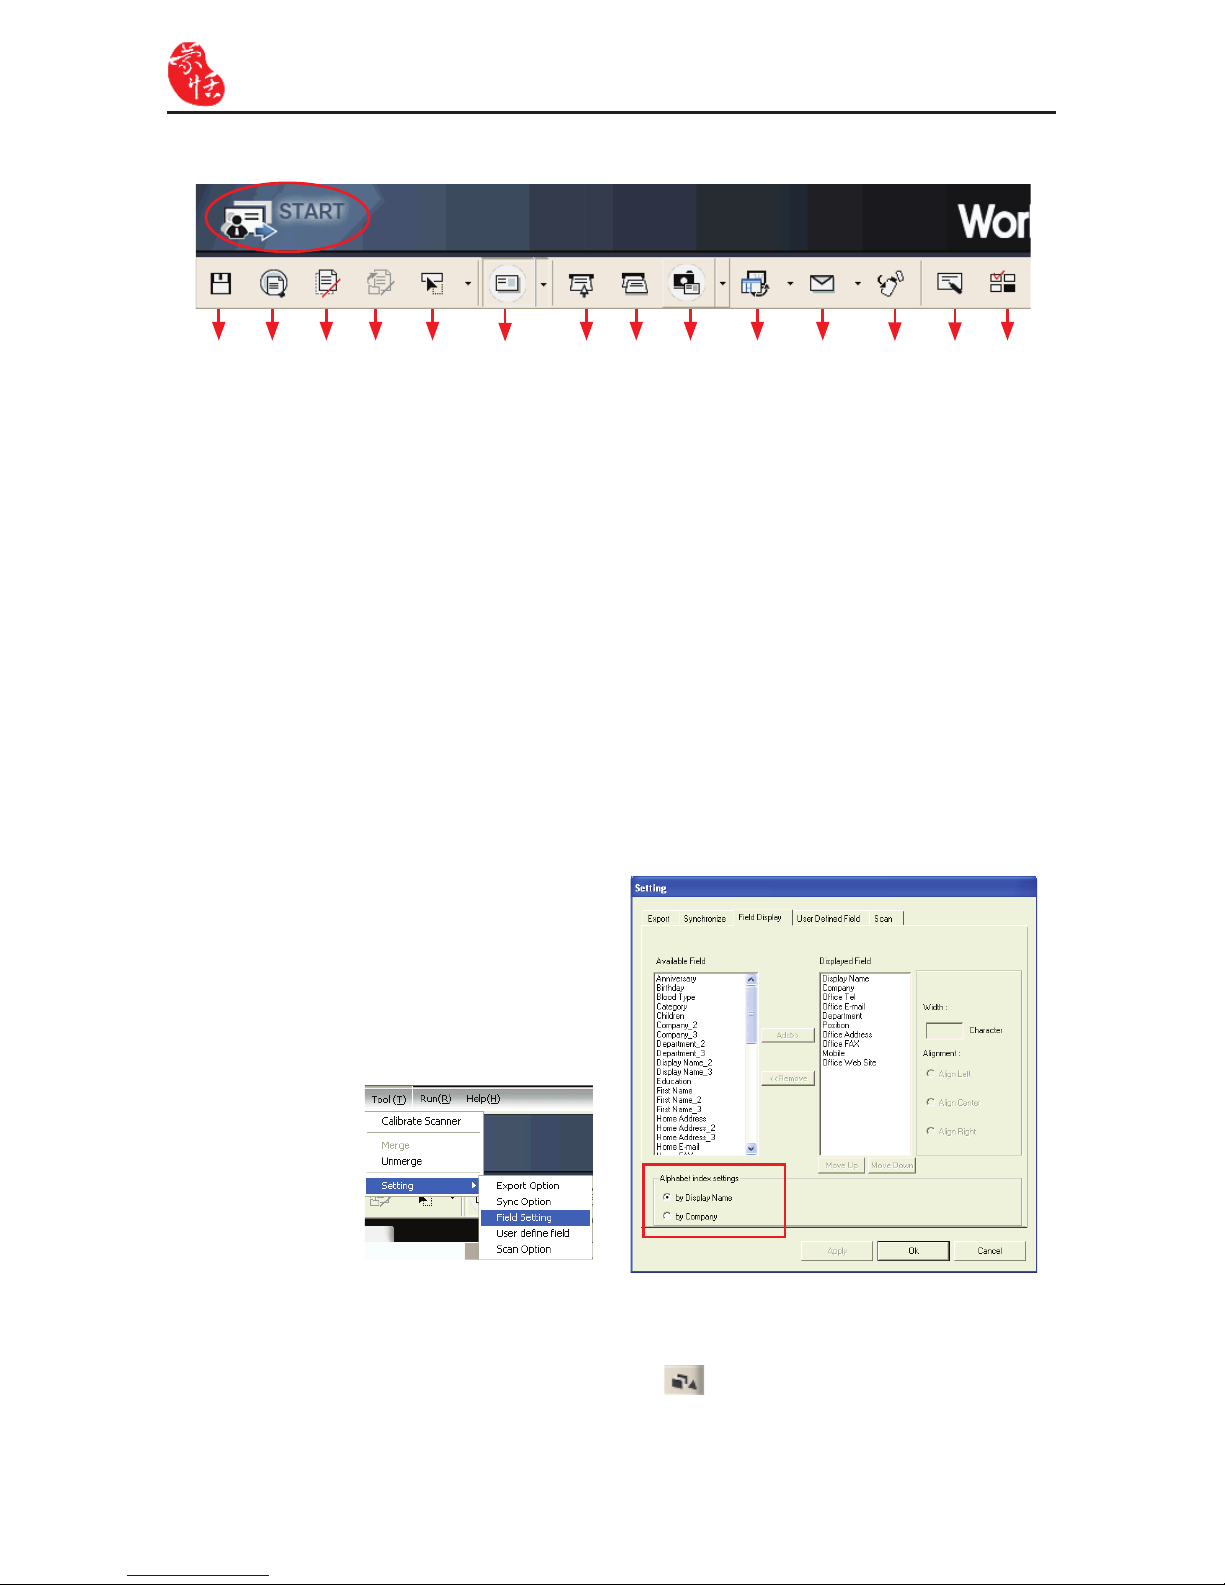
3.1.1 Menu Bar
A: Save your Card le
B: Print Preview
C: Delete Card
D: Delete card from Category
E: Settings
F: Mode button
G: Scan a new business card
H: Multiple scan business cards
I: Add a new card from another picture
source
A L M NIH
G
FEDCB J K
J: Synchronise with Outlook/PDA/Palm/
Lotus notes
K: Send an email to selected person
L: Export all your data and the portable
software to selected ash disk or
hard drive
M: Edit Card
N: Edit Print Template
When select by Display Name, the contacts will be index by Display name. When select
by Company, the contacts will be index by Company name. If the Display name or Company name is not English, the contact will be put in .
3.1.2 Alphabet
When the Alphabet index has contents,
the index letter appears in black.
Alphabet index can be index by Display
Name and by Company. To select it, go
to Tool\Setting\ Field Setting\Alphabet
index settings menu.
Chapter 3 Overview
3-3
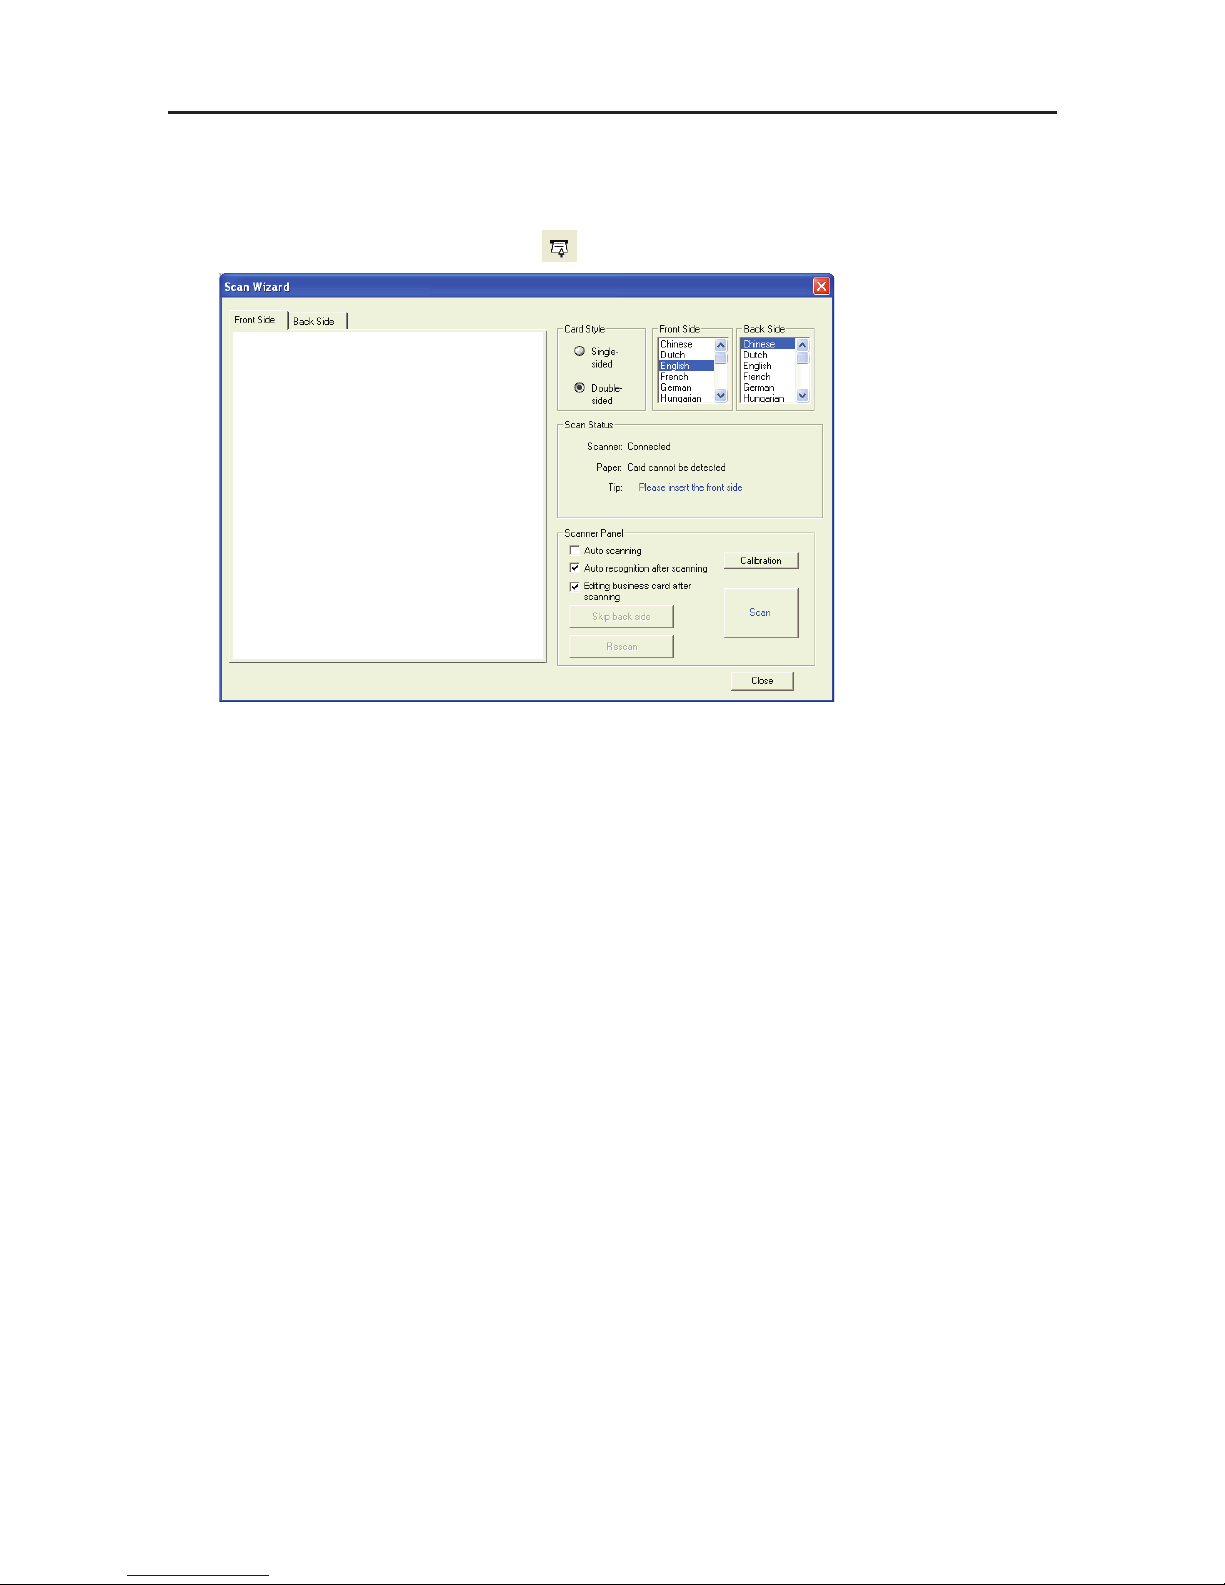
3.2 Scanning Wizard
3.2.1 Scanning Business Cards
To scan business cards, select Scan . The wizard will open:
1. Select if the card is single or double sided.
2. Select the language of the card, if the card is double-sided select the language of the both
sides.
3. Insert the card into your WorldCard Scanner, placing the card ush with the edge with the
symbol. Once inserted, the Scanner status frame should say Ready.
4. In the Scanner Panel frame:
- Select Auto Scanning, if you want the scan to automatically start when the paper is
inserted.
- Select Auto Recognition after scanning, if you want the card information to be
automatically added to your le. If you want to see the scanned card image before
recognition, do not select this. If you select Double-side, you can click Skip back side
to scan front side only.
- Select Editing business card after scanning, the edit window will be open when
closing Scan Wizard.
5. After you recognize the card, the information will automatically go into the Unled
category.
Note: To scan business card, face up and insert the business card to A6-sized and A8-sized
color business card scanner. Face down and insert the business card to A8-sized
gray-scale business card scanner. A6-sized business card scanner has two hardware
buttons. The one on the top is for scanning pictures via TWAIN interface, another

3-4
WorldCard
3.2.2 Batch Scanning
To batch scan business cards, select
Batch Scan .
With this function, you can scan many
cards easily, preview them, and then add
them to your Card File.
1. Select single or double-sided. Next, select
the languages of each side. Please note,
you can only multi-scan cards that are in
the same language regardless of single or
double sided.
3. This screen will allow you to quickly
recognize all the cards scanned during
this batch. When you are done, select
Finish.
2. The Scan status frame displays the status
of the scanner. Select Auto scanning if
you want to automatically feed in your
cards. If the card does not scan properly,
click on the Rescan to try again. If you
want to return to the previous screen,
select Previous.
3.3 Scan Business Card Directly
To Scan your card directly, click of the Setting icon and select Scan Option.
Select Scan card directly of the Scan Method and click OK. You may refer to Chapter 5.9
for detailed setting explanation.
Chapter 3 Overview
3-5
3.4 Viewing Contacts
WolrdCard provides [List mode], [Label mode], [Image mode] and [Dual Mode]. The
default setting is List mode. To select other modes, you may select View\View Mode or click
the pull down menu of the Mode button from the menu bar.
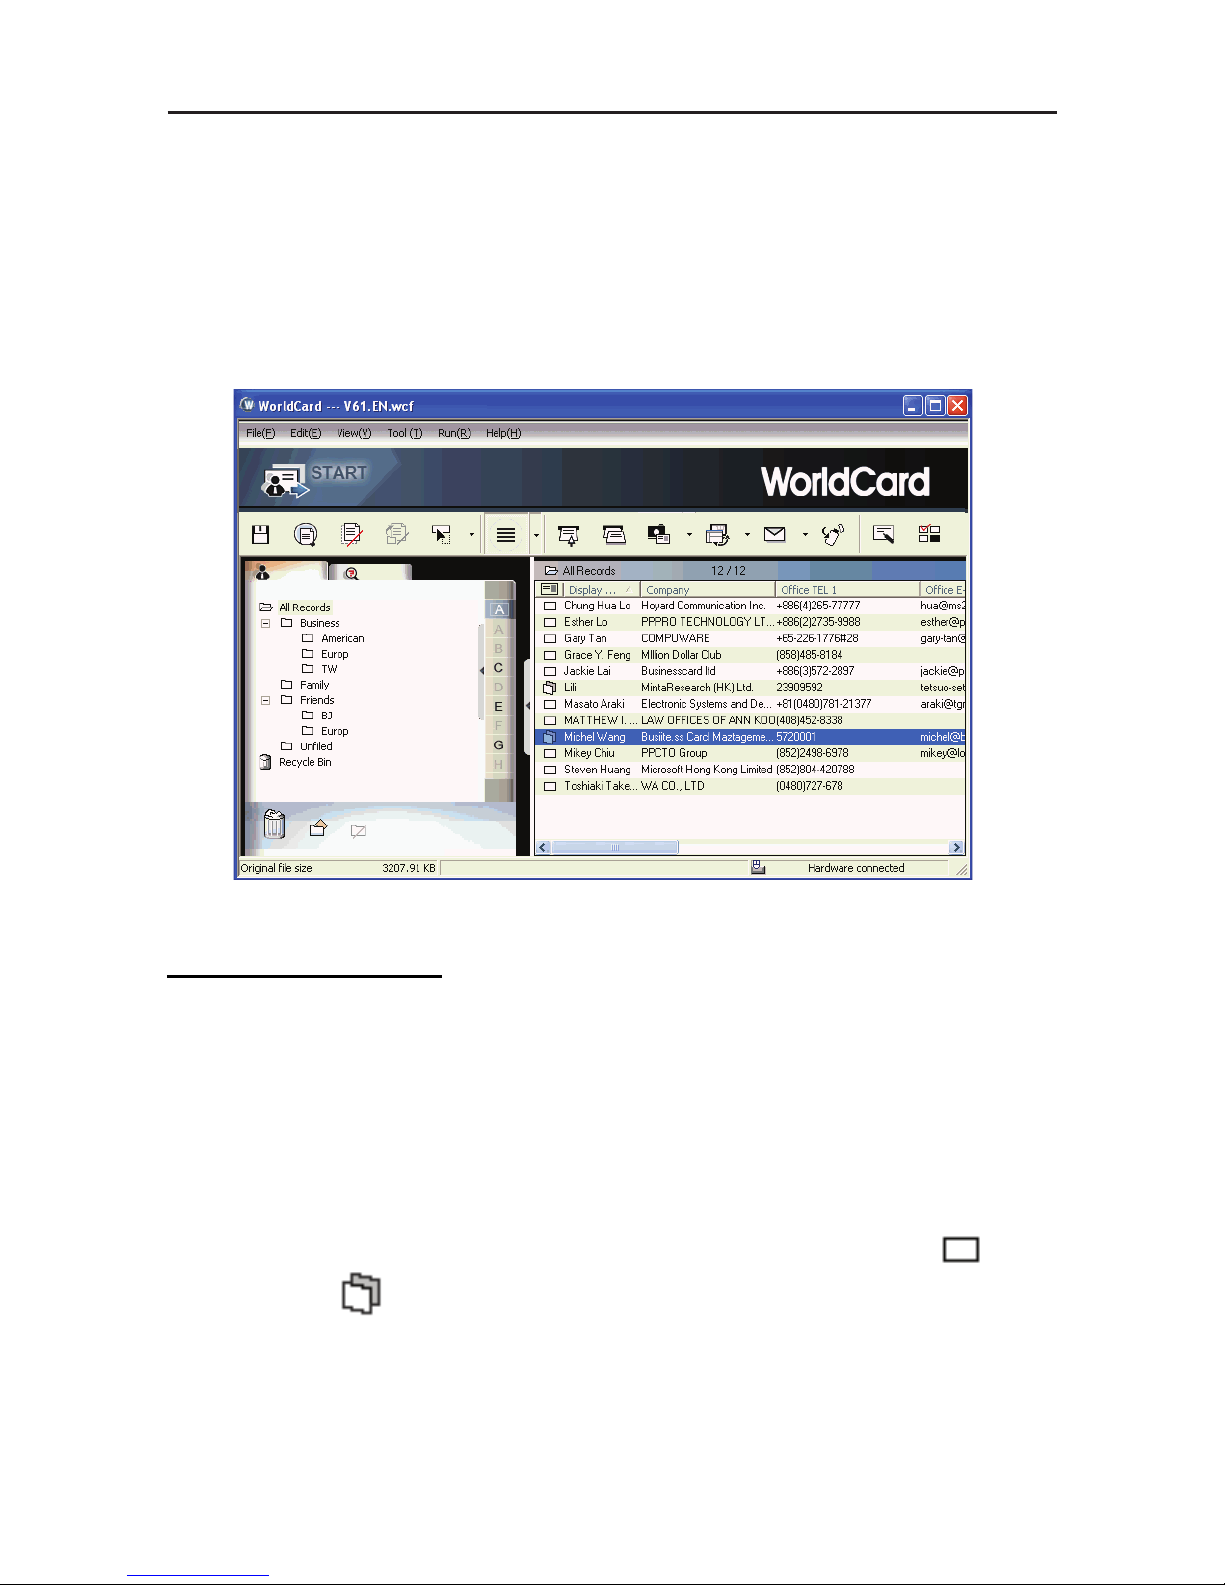
3.4.1 List Mode View
List Mode is the default view mode.
Contact Information List
After scanning business cards, you will see the scanned contact information list on the
right side of the management window.
At the top of the window, you can quickly see how many cards are in each category.
For easy organization, notice the dark-highlighted entries indicate cards that have not been
edited or veried yet.
To sort the contact information into alphabetical order, you may click on the eld name.
Besides the contact information, you can also quickly discriminate the single and
double sided card from their different image.
Tip: You may select the displayed elds from the Tool/Setting/Field Setting menu.

3-6
WorldCard
Category tab
You can manage your business cards by storing them in category groups. The Category
tab is on the left side of the management window. You can nd All Records category and
Unled category as the default. WorldCard allows you to add as many user specied catego-
ries and sub-categories to manage your business cards as you chose.
3.4.2 Label Mode View
Label Mode View displays contact information and business card at the same time.
The contact information shows display name, company, title, ofce address, mobile
phone number , ofce telephone number , ofce fax number , Email address and
website.
This icon means the business card is double sided.
Chapter 3 Overview
3-7
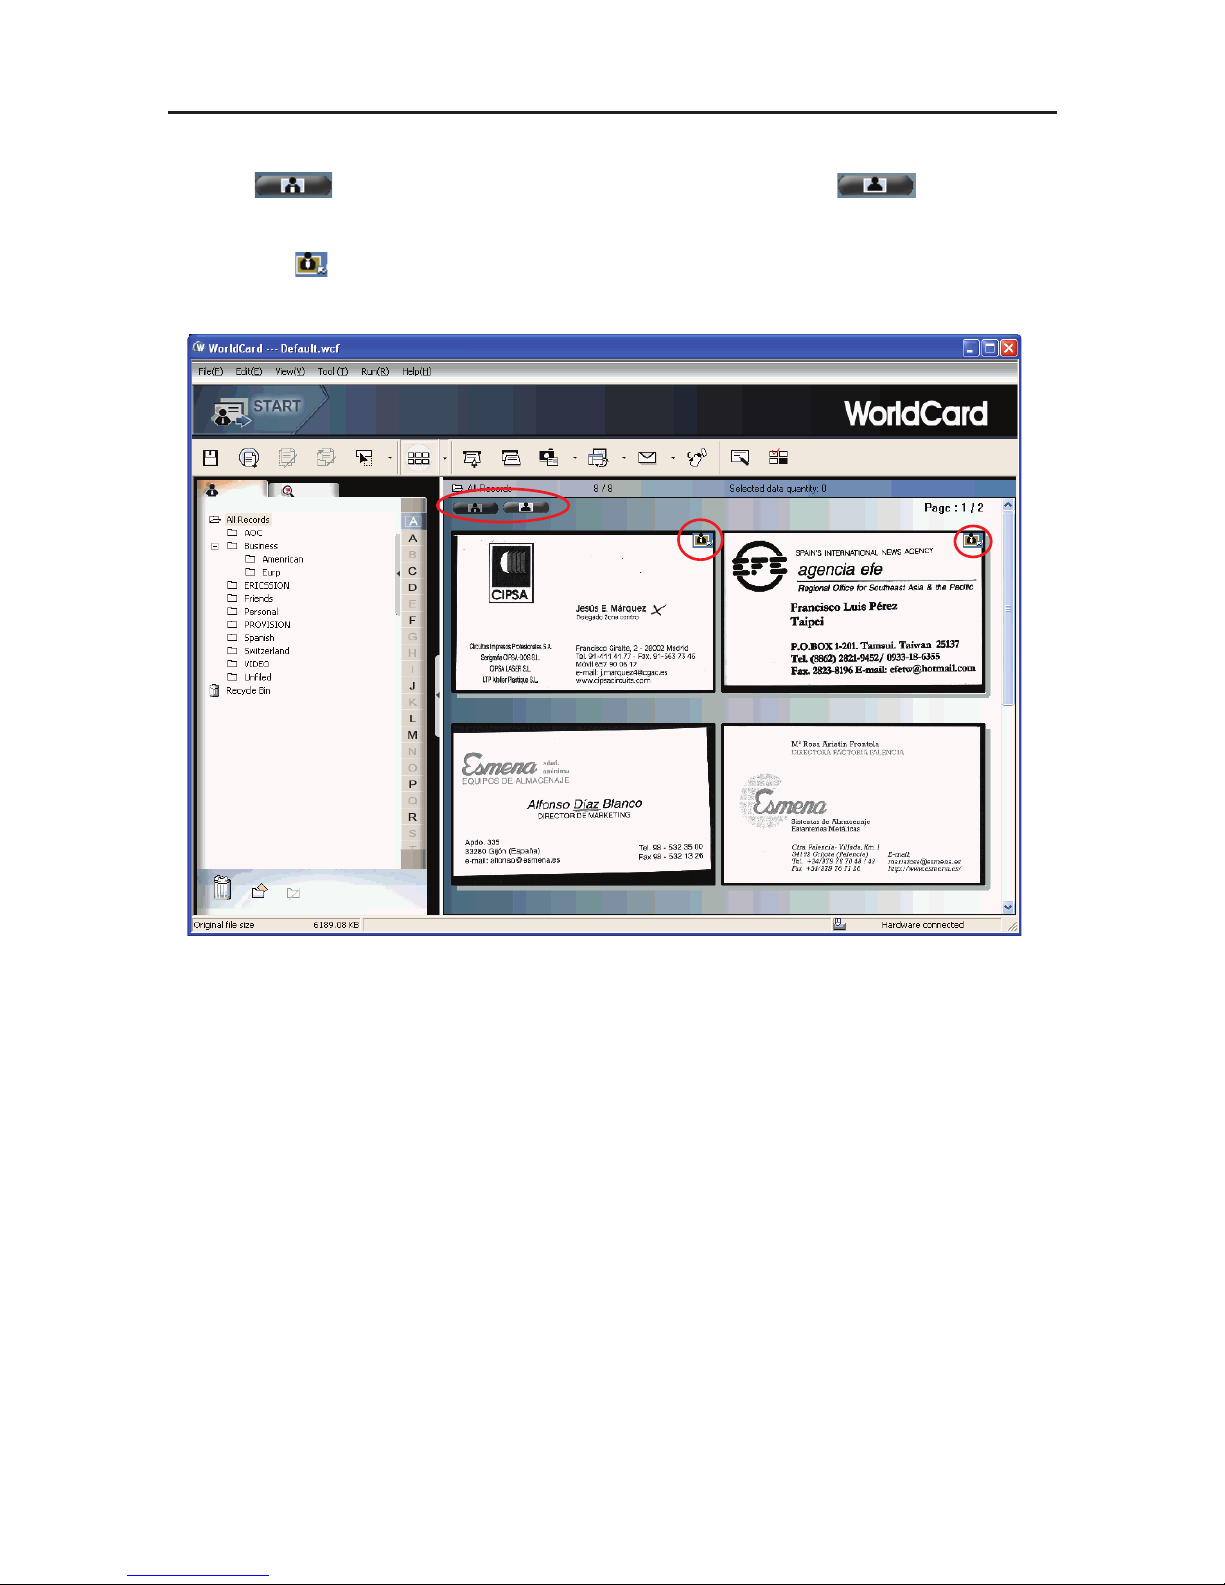
3.4.3 Image mode
Click button to view front side of all business cards, click button to
view back side of all business cards.
When the icon shows on the right top corner, it means the contact has double-sided
business card image. You can click on the icon to see another side of business card image.
 Loading...