

Page 1
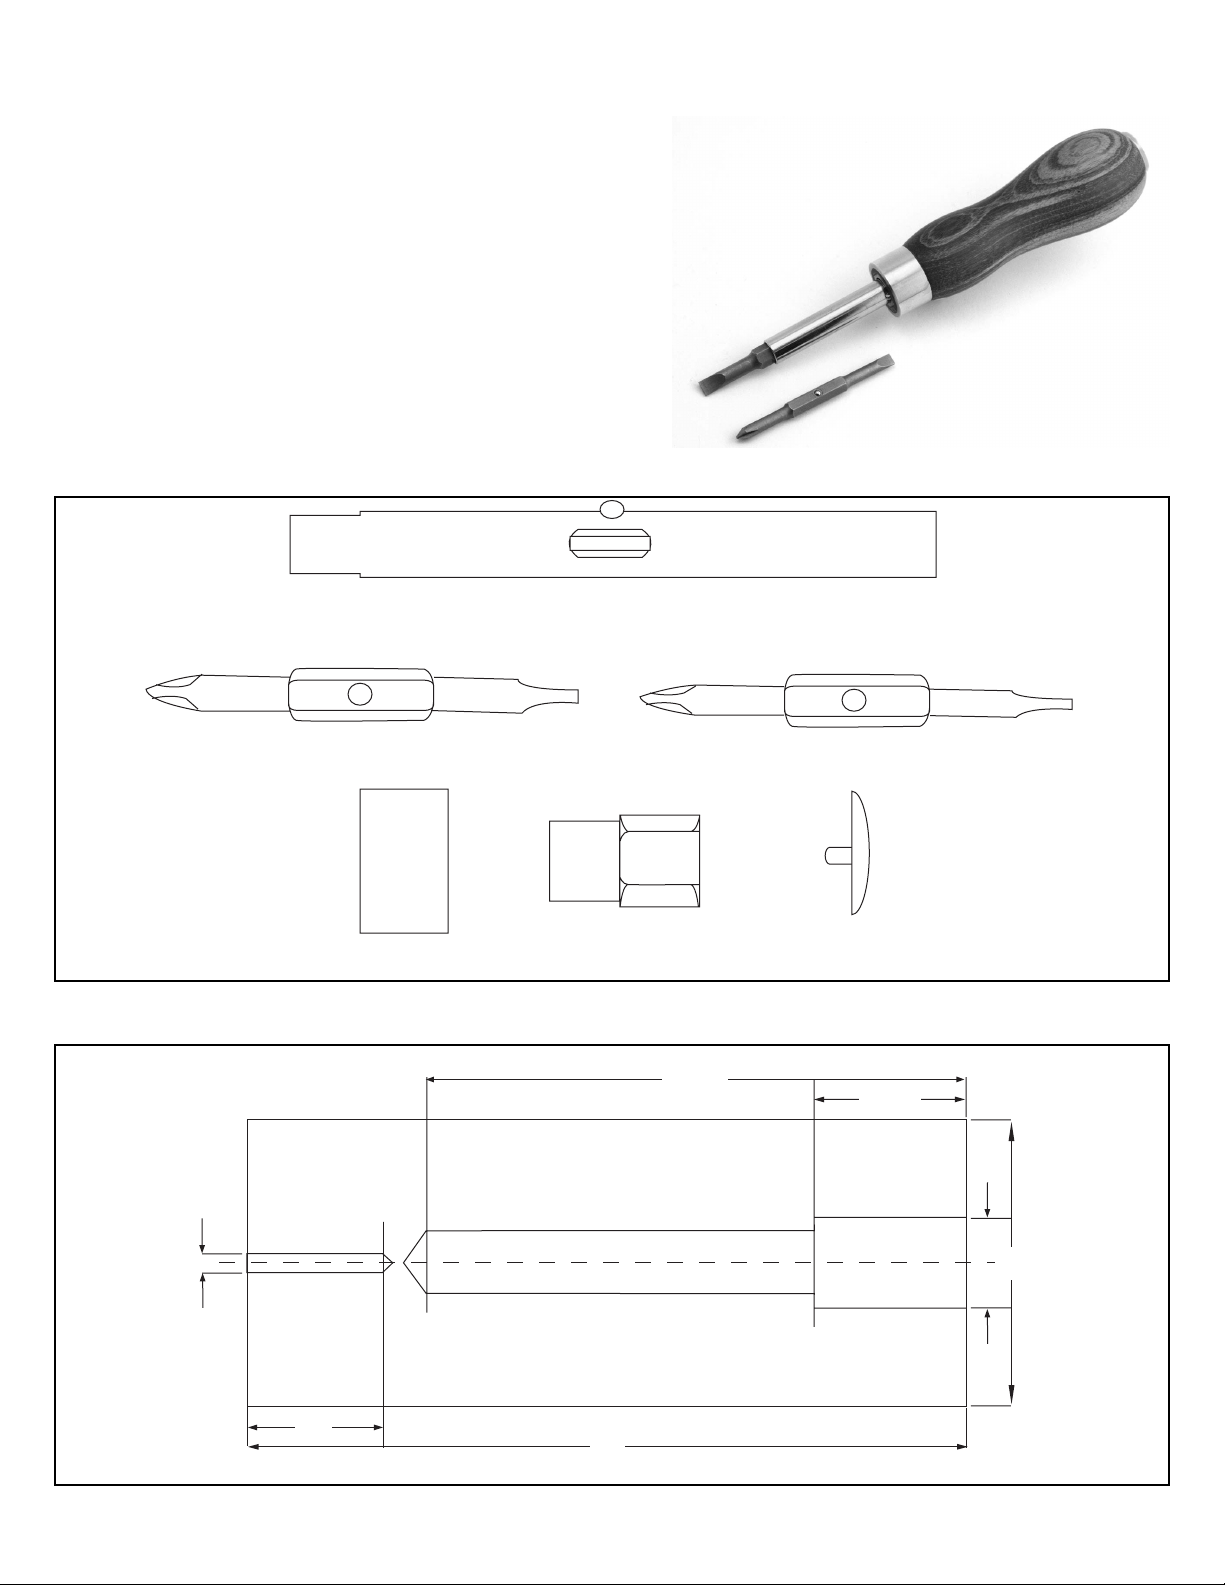
#PKSDK4 4-BIT MULTI SCREWDRIVER KIT
KIT FEATURES
Forged steel, with four screwdriver tool bits
Reversible Philips and slotted head, 2 sizes each, 3/16" and 1/4"
Quality brass ferrule and end cap
Fun, easy to turn your own handle design
REQUIRED ACCESSORIES
5/8" diameter Forstner drill bit (#FB58)
7/16" diameter drill bit
1/8" diameter drill bit
Heavy-duty tailstock center
PSI mid-cure, 2-part epoxy glue
DIAGRAM A - PARTS LISTS
DIAGRAM B - PREPARING THE WOOD BLANK
Bit Holder
1/8"
1/4" Tool Bit
Brass Ferrule Coupler Brass End Cap
3-3/4"
3/16" Tool Bit
1-1/16"
5/8"
2"
1"
Wood Blank
5"
Page 2
PREPARING THE BLANK
Prepare a wood blank, 2" square x 5" long. A dense hardwood is preferred. Mark the center on each end. Drill a 5/8" hole for the opening end,
1-1/16" deep. Use the center hole of the original bit as a pilot and drill a 7/16" hole to a total length of 3-3/4" deep. (See diagram B). Turn the
blank around and drill a 1/8" hole to about 1" deep at the opposite end.
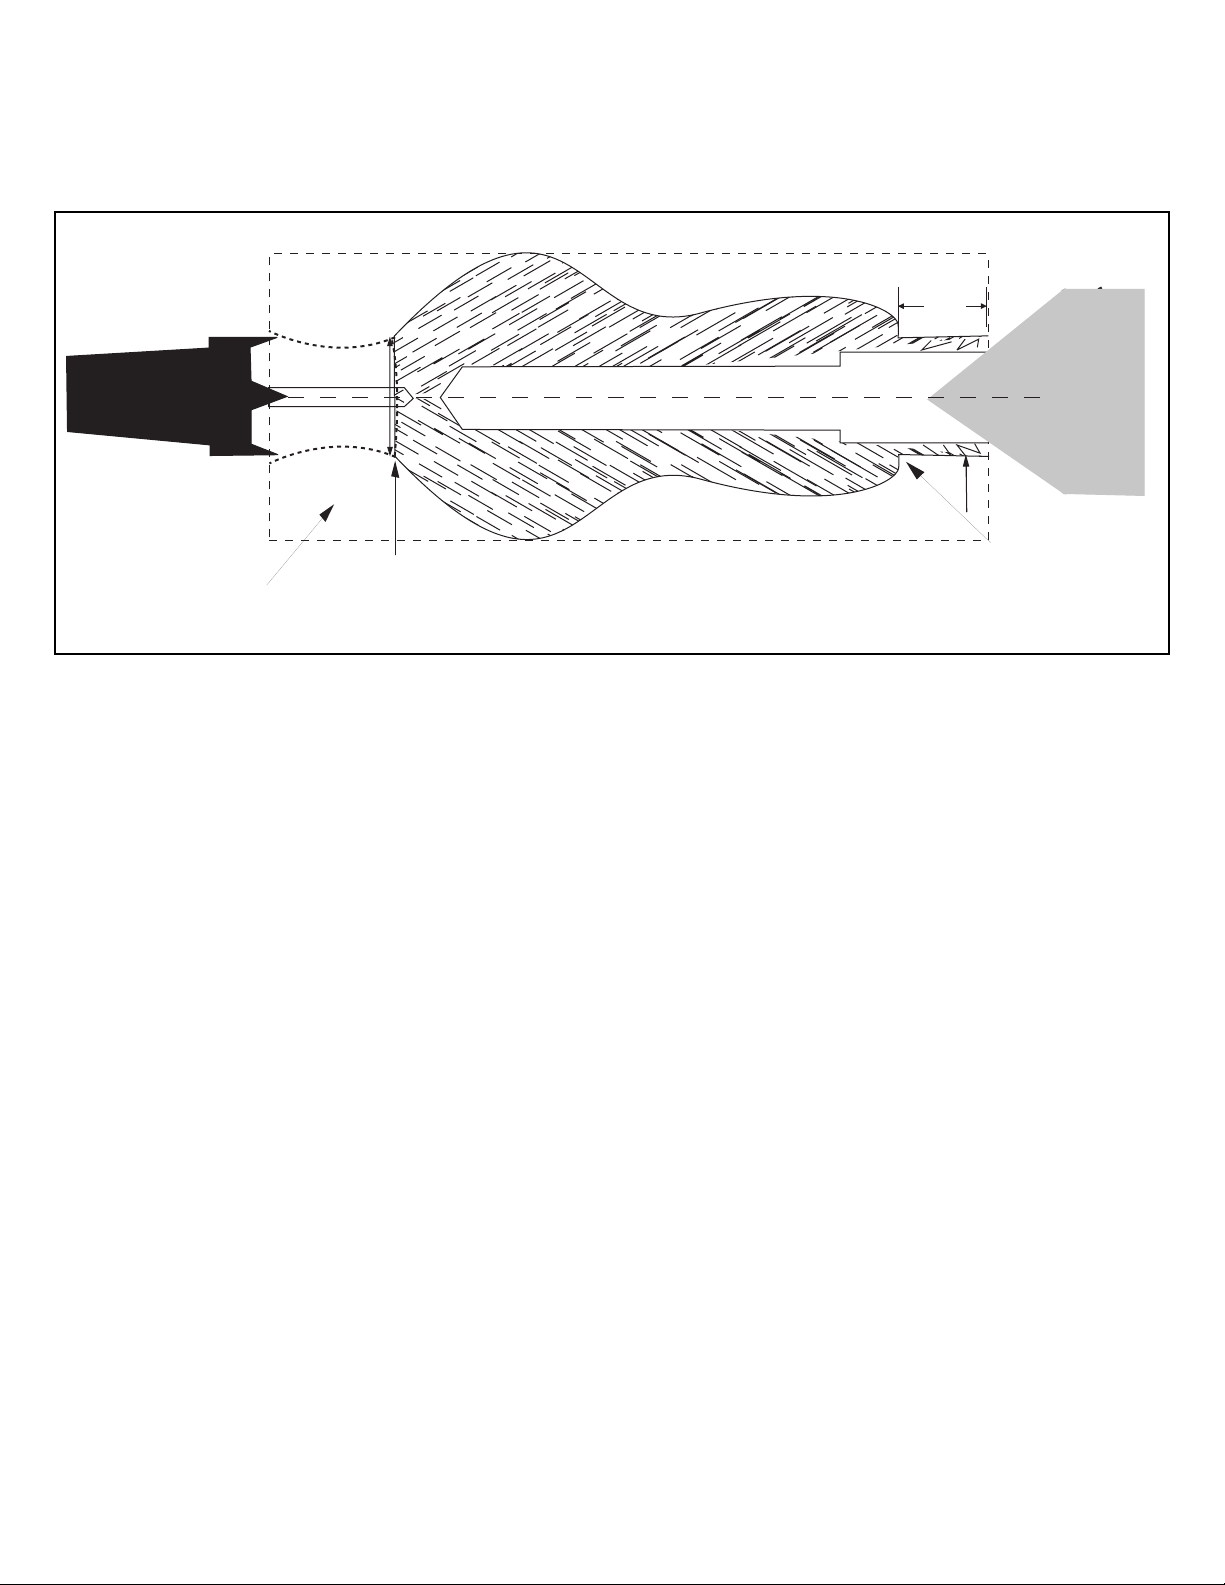
Diagram C / Turning the blank
TURNING THE BLANK
Insert the 4-prong drive center into the blank at the small hole, drive in. Use a heavy-duty live center at the opposite end (large hole). Mount the
blank on the lathe snug between the centers. Lock in place. Turn the blank into a handle with a profile of your choice.
Front end – Cut a tenon 5/8" long, with a 0.800" diameter. Turn the wood and test the fit with the supplied ferrule. Be sure to keep a sharp 90º
inside corner, and match the wood’s outside diameter to the diameter of the ferrule (see diagram C).
Rear end – Create a tenon about 1/2" long and 7/8" in diameter. You will have to undercut the wood where the end cap will be secured. Turn
the undercut recess to allow a parting tool to complete the final step. Form a rounded profile to about 7/8" diameter to mate with the end cap.
Sand and finish the handle with Danish tung oil, or other finish of your choice. Avoid finishing the recess. Part the wood with a slight concave
surface to give you a good flat fit with the end cap.
NOTE: To make a handle with a better gripping surface, you can sand a number of flats on the circumference of the largest diameter.
ASSEMBLY
Mix and prepare epoxy glue. Spread glue on the outside surface of the coupler and insert this, round end first it into the 5/8" hole at the opening of the handle. (to avoid glue on your fingers, use a tapered wood stick to hold the coupler). The epoxy must fill the gaps between the hex
coupler and the round hole. Be careful that no excess glue gets inside the coupler. Let dry.
To secure the ferrule, spread glue on the tenon on the handle. Slide the ferrule over the tenon. Clean off the excess glue if necessary.
When glue dries, sand the front of the handle to remove any excess glue that may have remained.
To secure the end cap, turn the handle around, spread glue in the small hole and over the flat (slight concave) surface. Insert the end cap flush,
let dry.
The screwdriver is ready to operate. To change bits, insert and remove as needed by pulling or pushing the tool bits.
© 2006 PSI Woodworking Products, Philadelphia, PA 19115
Heavy Duty
Live Center
5/8"
7/8"
4 Prong Drive Center
Wood Blank
Part Wood Here
Remove Excess Wood
ø.800 diameter
90° Sharp Corner
 Loading...