

Page 1
#PKMSCUP
Measuring Cup Kit
Kit Features:
• 4 Popular sizes set of measuring cups
• Decorative and useful
• Made with food safe plating
• Easy to turn with straight tubes
• Minimum parts - easy to assemble
• Supplied with hanging rings
• Overall size: 7” to 8” Long
Required Accessories:
• 7mm Pen Mandrel
• Drill Bit: #PK-7MM
• Bushing Set(2 pc): #PKABBU
• Barrel Trimming set: #PKTRIM7 or 7MM Squaring Jig
• Live Tailstock or Mandrel Saver
• 2 part Epoxy or Thick CA (Cyanoacrylate) Glue
• Pen Blank Minimum Size: 3/4” x 3/4” x 3-3/8”
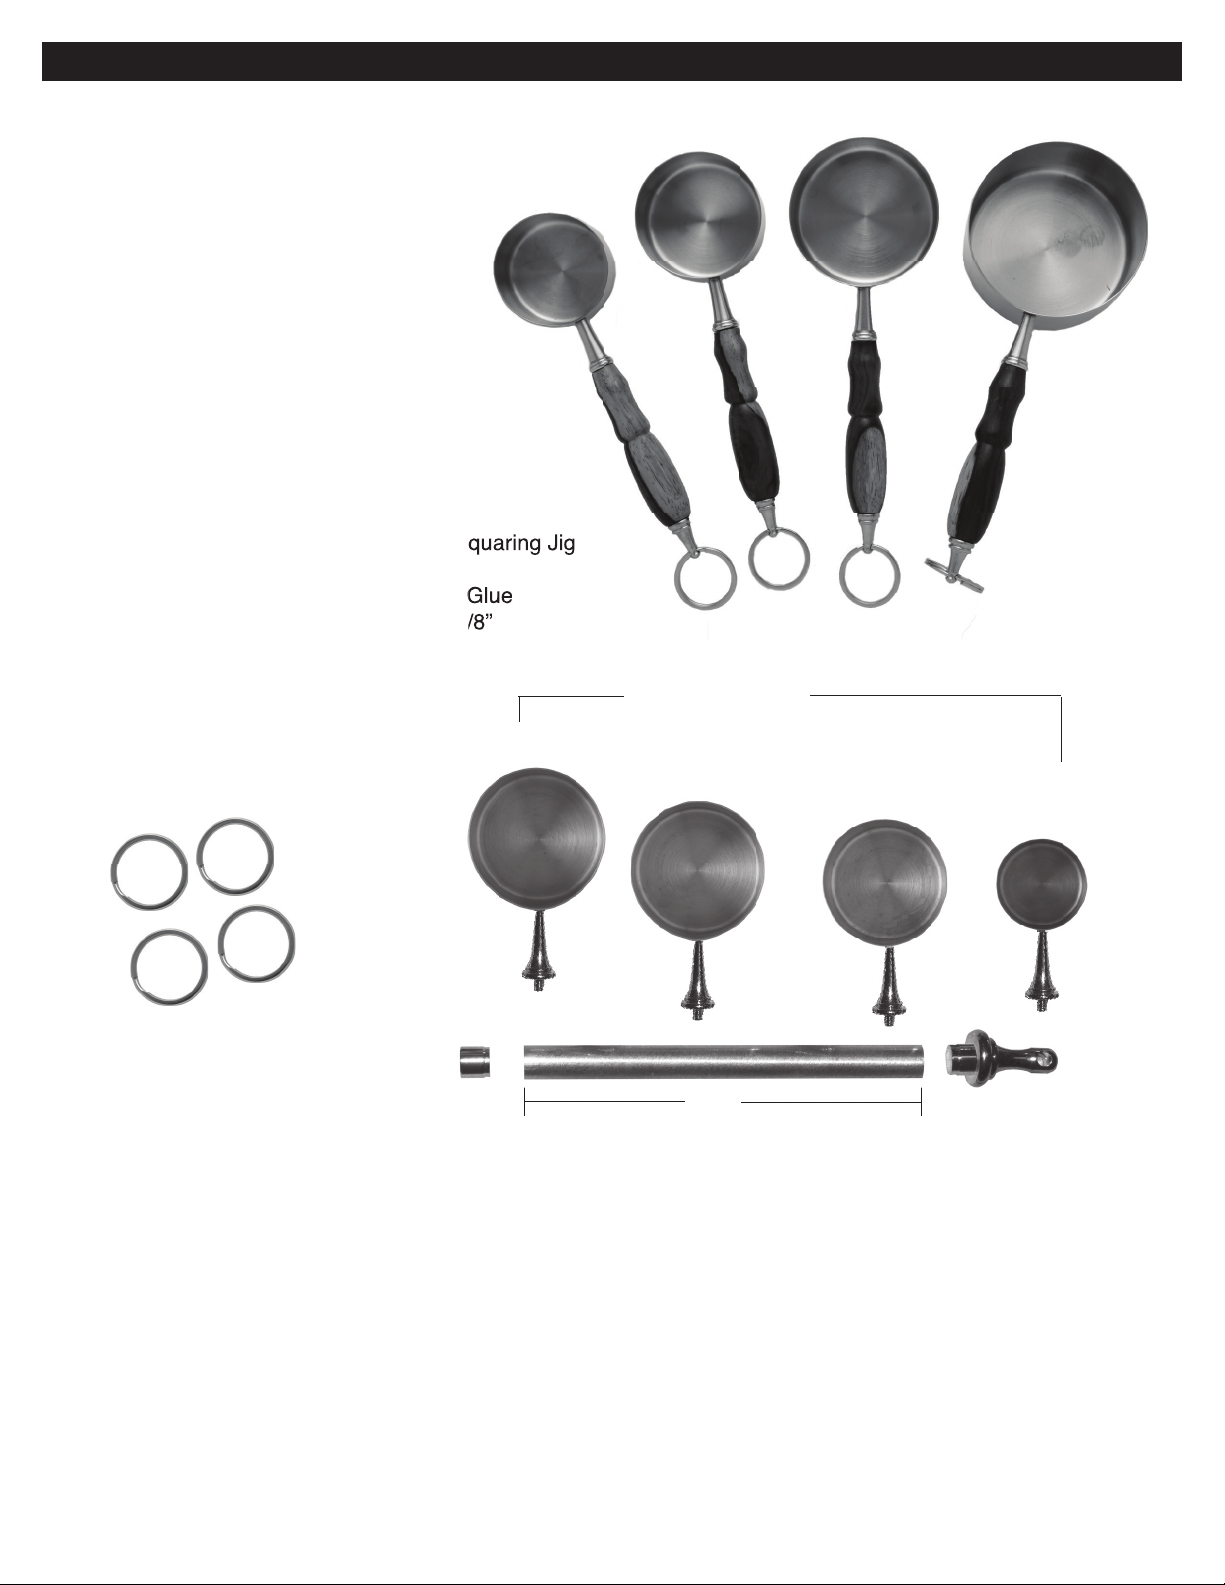
DIAGRAM A / PARTS LAYOUT
PSI Woodworking Products
(4) Cup Heads
(1) Cup
(4) Small Rings (1”)
(1) 1/2 Cup
(1) 1/3 Cup
(4) Tip Nuts
3.26”
(4) Barrels
(1) 1/4 Cup
(4) Finials
Preparing the Blank:
• Cut blank to the length of the tube, adding 1/16” for squaring off.
• Drill 7mm hole lengthwise through the blank.
• Spread glue over tube, insert the tube into the blank with a twisting motion to spread the glue evenly inside.
• Center the tube lengthwise inside the blank.
• When the glue is dry, square the ends of the blanks, making sure the trimmed ends are 90º to the tube. Use a 7mm
barrel trimmer, or a pen blank squaring jig on a disc sander. Take the excess material down fl ush to the ends of the
tubes. Do not trim past the end of the tube since this may interfere with the operation of the mechanism and
assembly. Use a barrel trimmer to clean the inside of the tube.
Page 2
#PKMSCUP
PSI Woodworking Products
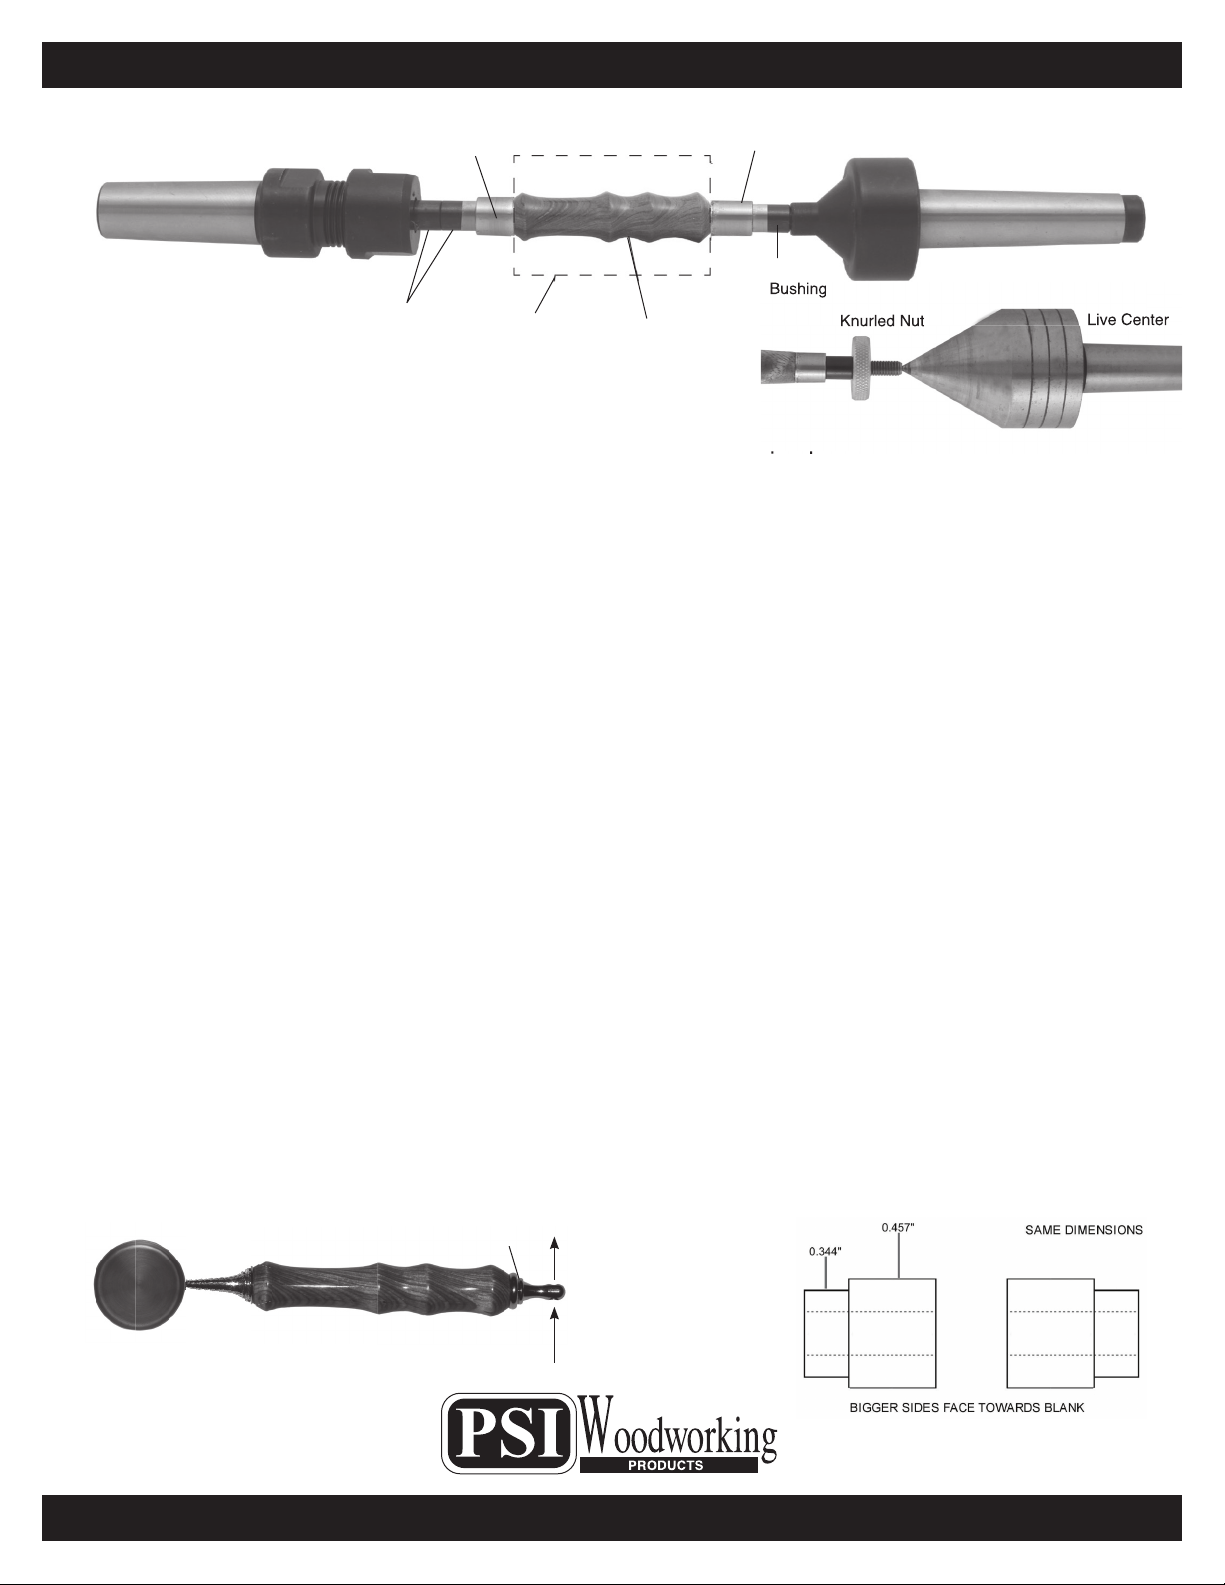
DIAGRAM B / TURNING THE BLANKS
Scoop Bushing
Spacer
Bushings
Blank
Finished profi le
Finial Bushing
Spacer
Bushing
Knurled Nut
Mandrel Saver
Or
Live Center
Turning the Blank
• Mount the bushings and blanks according to diagram B.
• Thread on the knurled nut and hand tighten to hold all components in place.
• Slide the Tailstock up snugly against the Mandrel shaft, inserting the live center point into the Mandrel
dimple. Lock Tailstock.
• Hand tighten the quill adjustment on the tailstock to steady the mandrel. Do not over tighten, it could damage the mandrel shaft.
• When using Mandrel Saver, there is no need for extra spacer bushings or the knurled nut. Slide tailstock
directly against bushings and tighten until blank and bushings are secure.
• Using sharp tools, turn the blank down close to the bushing diameter. Turn the barrel straight or to a pro-
fi le of your choice.
• Sand the blank down to be fl ush with the bushings, gradually increasing sandpaper grits.
• Finish the barrel using your choice of polish. Allow Suffi cient time for the polish to cure—refer to polish
instructions.
Assembly
• Line up handle parts according to Diagram A
• Press Finial into narrow/smaller end of handle.
• Thread Tip nut onto cup Head. Do not press on Cup – it may get damaged.
• Align Cup orientation in relation to Finial so that cup will align when linked on the ring. (Dia. C)
• Push Tip Nut/Cup Assembly in by hand until it wedges into tube.
• Unscrew cup, taking care not to alter Tip Nut. Press tip nut into barrel .
• Thread cup into Tip Nut
• Insert small ring into hole in Finial.
• Repeat assembly process for each handle.
Diagram D / Bushings #PKABBUDiagram C / Cup & Finial Alignment
Cup
Finial
Through hole
© 2018 PSI Woodworking Philadelphia PA 19115 - v01/20
 Loading...