

Page 1
#PKGOLFXX
Golf Pencil Kit
Kit Features:
• Customizable with personal Tee
• Fits many cart pencil holders*
• Easy to Turn with Straight Tube
• Minimal Parts - easy to assemble
• Includes sharpener
• Available in multiple nishes
• Overall Length:4-1/8”
• USES 2mm lead REFILL: #PKPOWLEAD (Break in half)
* May not t all carts depending on pencil holder style
Required Accessories:
• 7mm Pen Mandrel
• Drill Bit: 8mm #PKPARK-8MM for wood, #PK-8MMSG for plastic
• Bushing Set (2 pc): #PKGOLFBU
• Barrel Trimming set: #PKTRIM8 or 8mm sleeve from PKTRIMSET.
• Live Tailstock or Mandrel Saver
• 2 part Epoxy or Thick CA (Cyanoacrylate) Glue
• Pen Blank Minimum Size: 5/8” x 5/8” x 3-1/16”L
PSI Woodworking Products
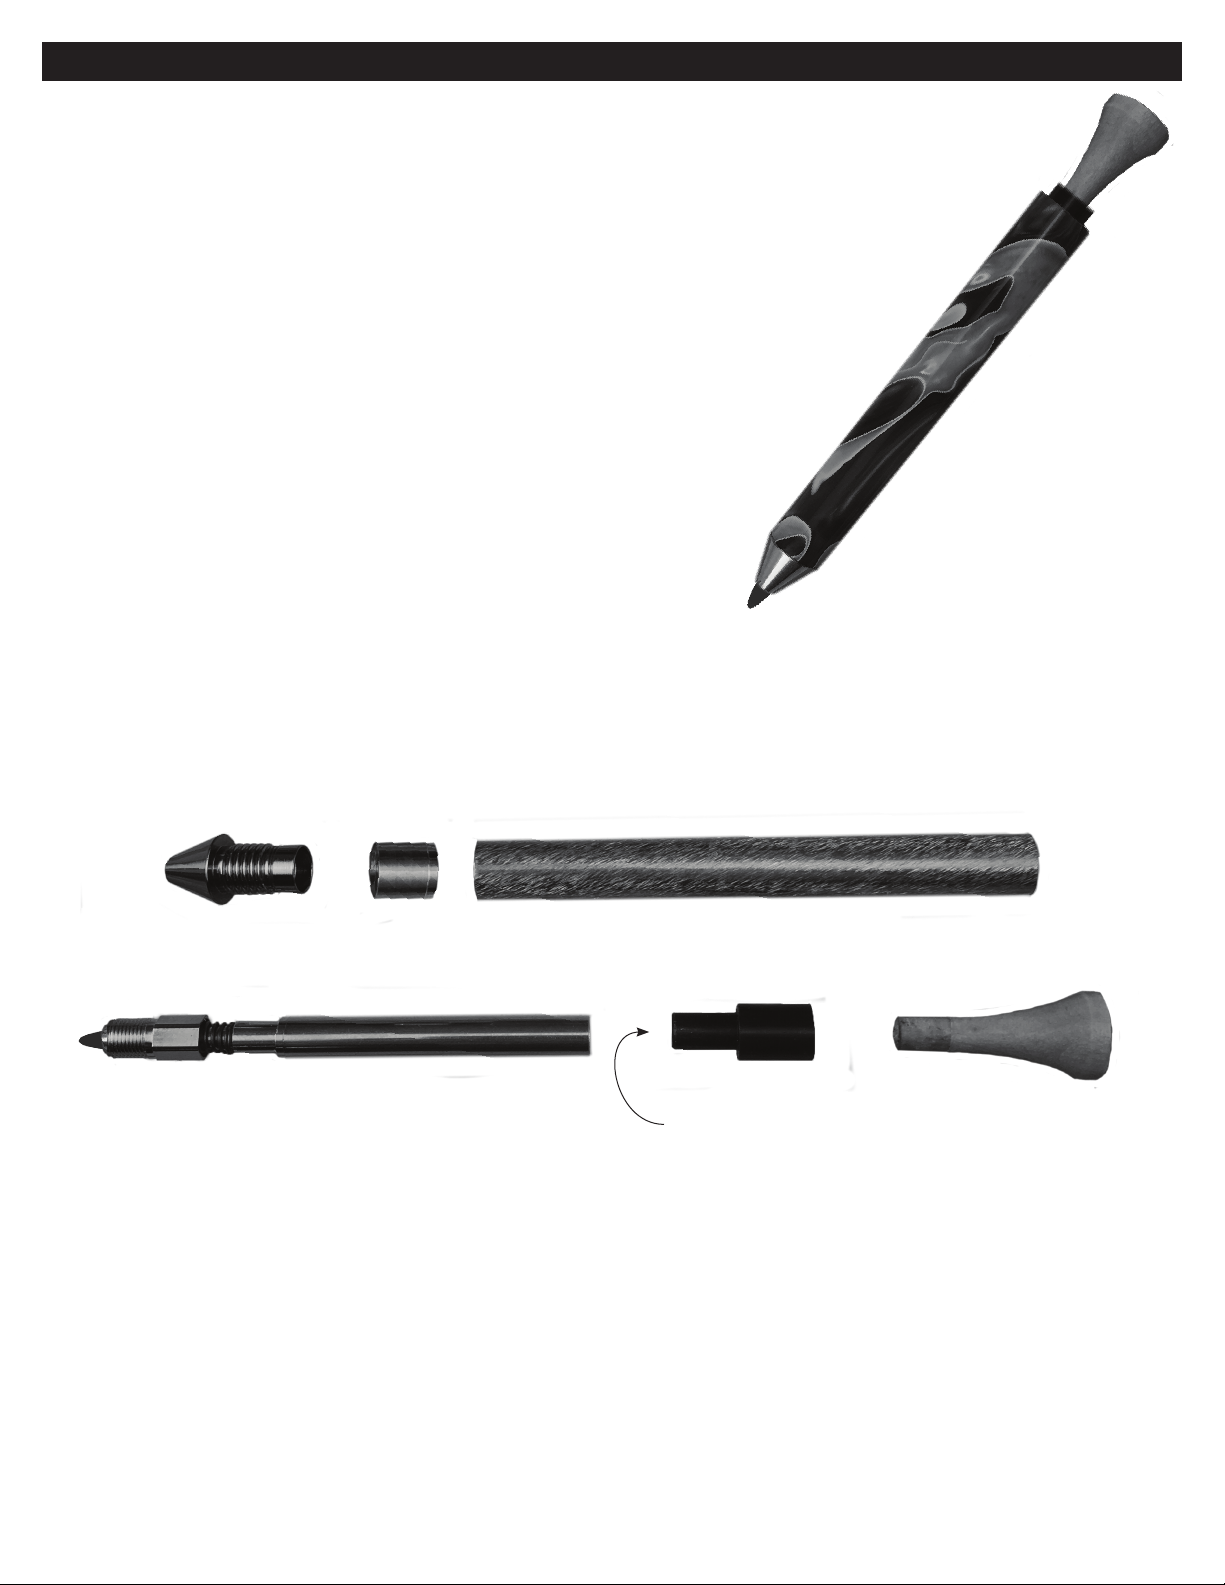
DIAGRAM A / PARTS LAYOUT
Tip
Threaded Tip Nut Tube - 2.96” (2-31/32”)
Mechanism TeeTee Holder
- Sharpener inside
Preparing the Blank:
• Cut blank to the to the length of the tube, adding 1/16” for squaring off.
• Drill 8mm hole lengthwise through the blank.
• Spread glue over tube, insert the tube into the blank with a twisting motion to spread the glue evenly inside.
• Center the tube lengthwise inside the blank.
• When the glue is dry, square the ends of the blanks, making sure the trimmed ends are 90º to the tube. Use a
barrel trimmer, or a pen blank squaring jig with a sleeve on a disc sander. Take the excess material down ush to the
ends of the tubes. Do not trim past the end of the tube since this may interfere with the operation of the mechanism
and assembly. Use a barrel trimmer to clean the inside of the tube.
Page 2
#PKGOLFXX
PSI Woodworking Products
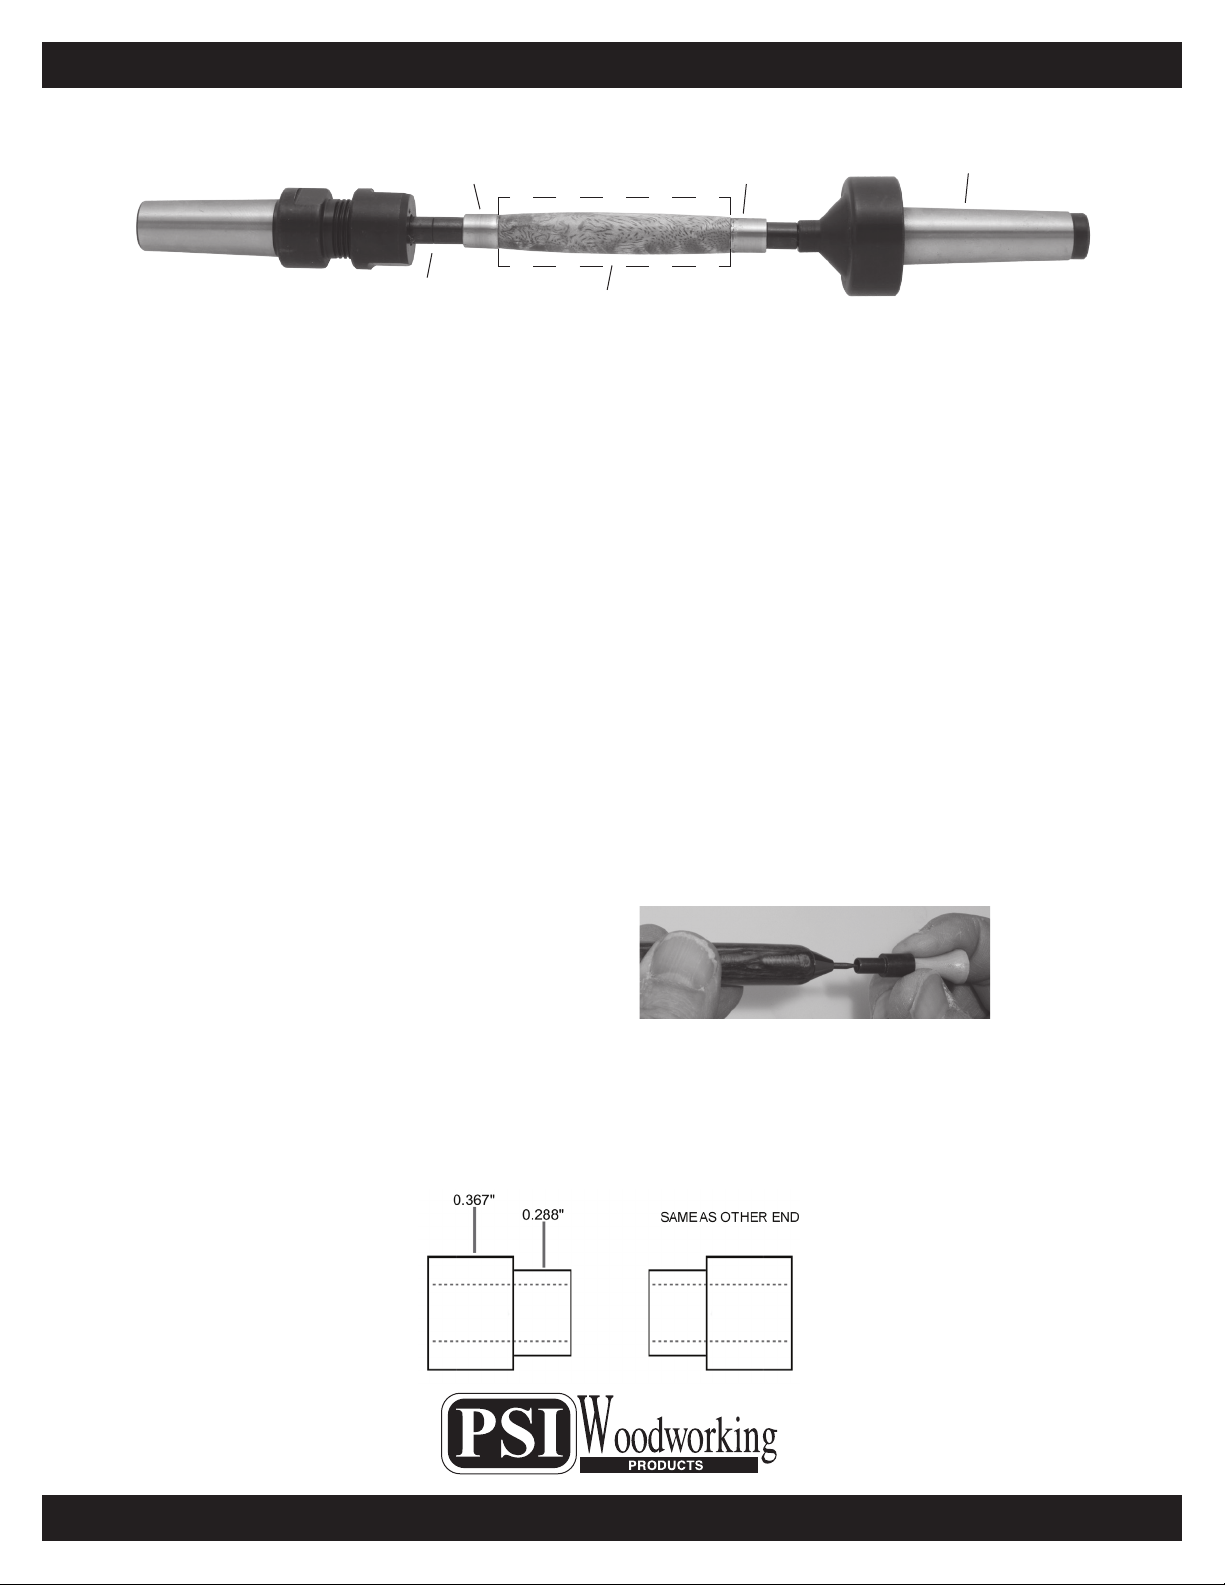
DIAGRAM B / TURNING THE BLANKS
Tip Bushing Cap Bushing
Spacer
Bushings
Blank
Mandrel Saver
Or
Live Center
Turning the Blank
• Mount the bushings and blanks according to diagram B.
• Thread on the knurled nut and hand tighten to hold all components in place.
• Slide the Tailstock up snugly against the Mandrel shaft, inserting the live center point into the Mandrel dimple. Lock Tailstock.
• Hand tighten the quill adjustment on the tailstock to steady the mandrel. Do not over tighten, it could damage the mandrel shaft.
• When using Mandrel Saver, there is no need for extra spacer bushings or the knurled nut. Slide tailstock directly against
bushings and tighten until blank and bushings are secure.
• Using sharp tools, turn the blank down close to the bushing diameter. Turn the barrel straight or to a prole of your choice.
• Sand the blank down to be ush with the bushings, gradually increasing sandpaper grits.
• Finish the barrel using your choice of polish. Allow Sufcient time for the polish to cure—refer to polish instructions.
Assembly
• Take Tee and Tee Holder to the pen press. Insert narrow end of Tee into the opening in the wider side of the Tee Holder.
• To prevent damage to jaw side of the press, the narrow sharpener side of Tee Holder should press against metal jaw of press.
• Press Tee into the Tee Holder until it bottoms out. This will hold the two together securely.
• Press the Tip Nut into either end of the nished barrel. There is a slight recess on one end of the Tip Nut. This end must press
into the barrel rst.
• Thread Mechanism into Tip.
• Slide mechanism through the barrel then securely thread Mechanism/Tip assembly into threaded Tip Nut.
• Use your pen press to push the Tee/Holder assembly into the open end of the mechanism until it is fully seated in back of
Mechanism tube. (only about an 1/8” of the tee holder should show after pressed in)
• Extend lead by pushing on Tee. Retract lead by pushing and holding Tee while pushing Lead back into tip.
• Diagram C: To sharpen advance the lead 1/4” beyond the tip. Pull the tee out (sharpening mechanism attached)
Diagram C
To use your own Tee
• Mark on the tee where straight section starts to widen.
• Make a second mark at least 5/16” below the rst one.
• Cut tee at the second mark. The straight section of the tee that is pressed into the Holder should insert no less than 5/16” to
ensure a full and secure t.
Diagram D / Bushings #PKGOLFBU
Tip End Cap End
© 2019 PSI Woodworking Philadelphia PA 19115 - v12/19
 Loading...