

Page 1
#PKDRAXX
Dragon Twist Pen Kit
Kit Features:
• Easy to turn with straight tubes
• Minimum parts - easy to assemble
• Available in multiple nishes
• Uses Parker® style rells
• Overall Length: 5-7/8”
Required Accessories:
• 7mm Pen Mandrel
• Drill Bit:#PKEXEC-38
• Bushing set(3 pc): #PKDRABU
• Barrel Trimming set: #PKTRIM38
• Live Tailstock Center
• 2 Part Epoxy Glue or Insta Cure (Cyanoacrylate) Glue
• Pen Blank: Minimum Size - 3/4” x 3-1/2”
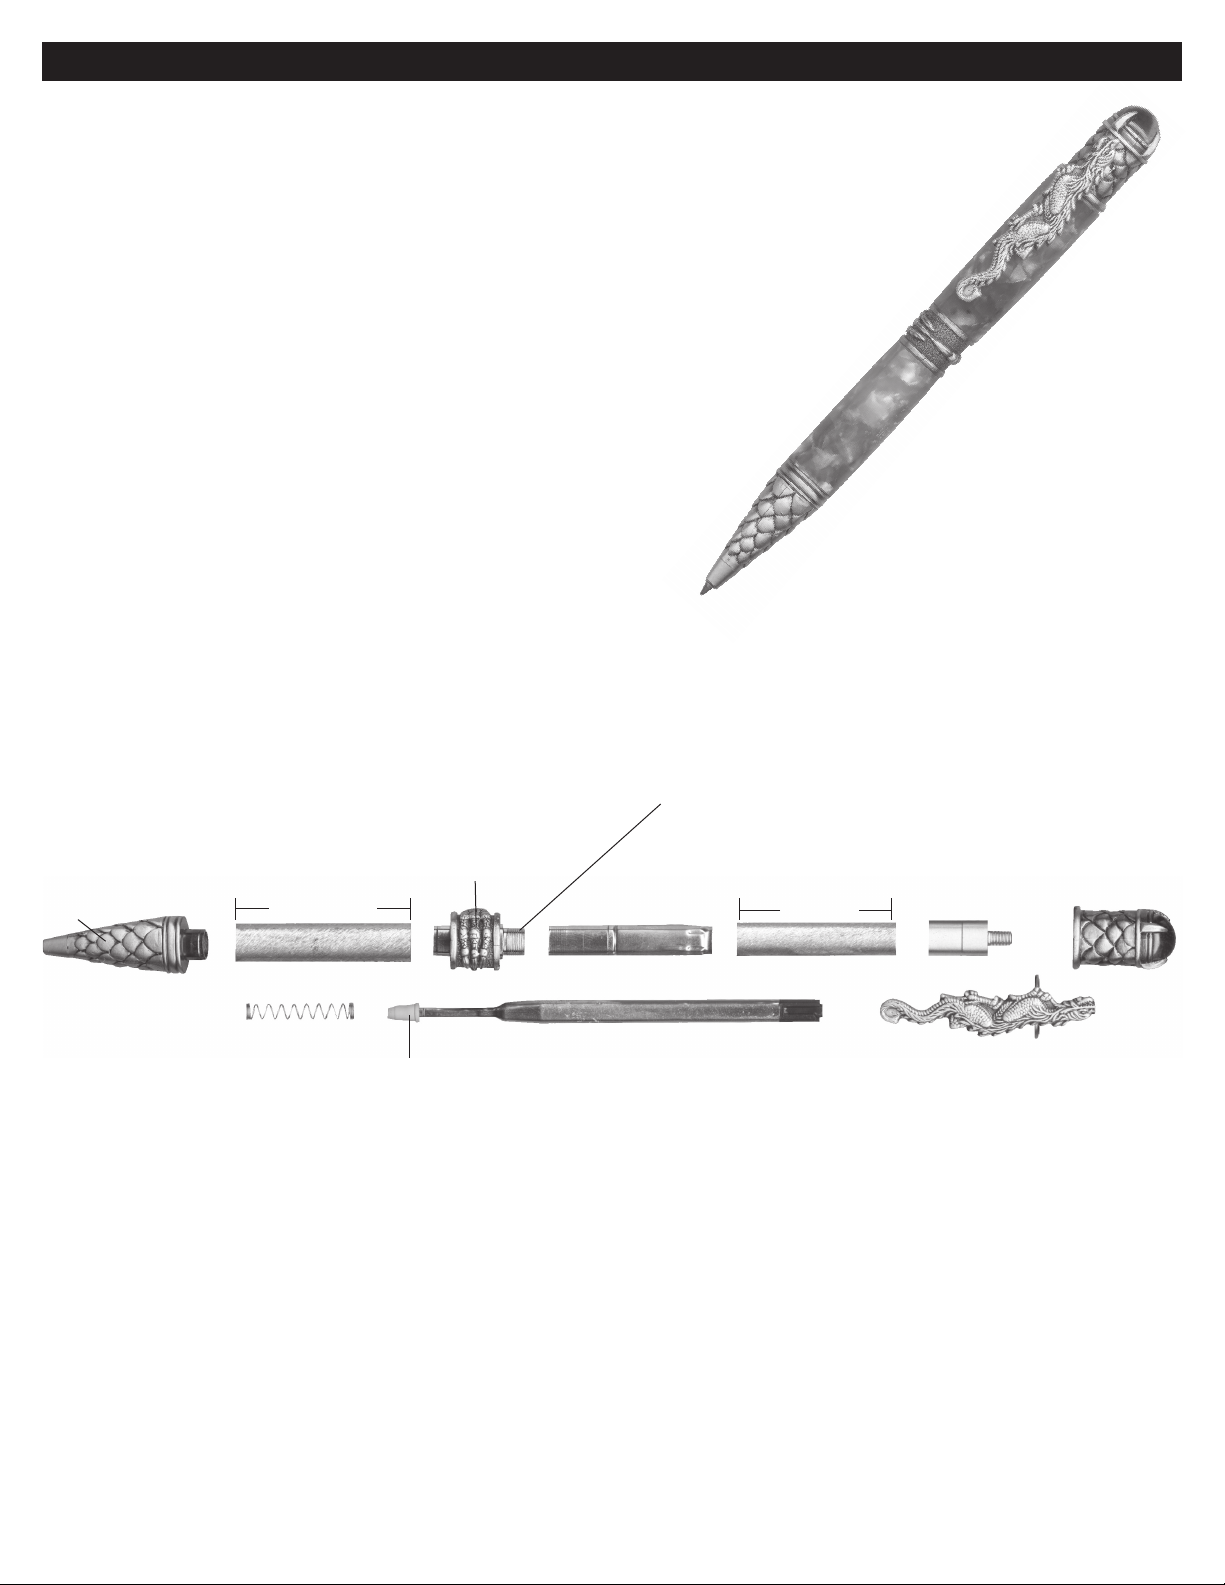
DIAGRAM A / PARTS LAYOUT
PSI Woodworking Products
(Note: DO NOT press
directly against threads) see assembly instructions
Tip
Shorter Front
Barrel/Tube
1.45”
Spring
Center Band
Assembly
Tip Protector
Twist Mechanism
Rell
Longer Upper
Barrel/Tube
1.60”
Cap
Connector
Clip
Cap
Preparing the Blank:
• Cut 2 blanks to the length of the tube(s) and add 1/16” for squaring off.
• Drill 3/8” holes lengthwise through the blanks.
• Spread glue over the tube(s), insert the blank with a twisting motion to spread the glue evenly inside.
• Center the tubes lengthwise inside the blanks.
• When the glue is dry, square the ends of the blanks. Use a 3/8” barrel trimmer, or a universal pen blank squaring jig
with a power disc sander. Take the excess material down ush with the ends of the brass tube. (do not trim beyond
the length of the tube since this may interfere with operation of the mechanism and assembly). Use a barrel trimmer
to clean the inside of the tube.
Page 2
#PKDRAXX
PSI Woodworking Products
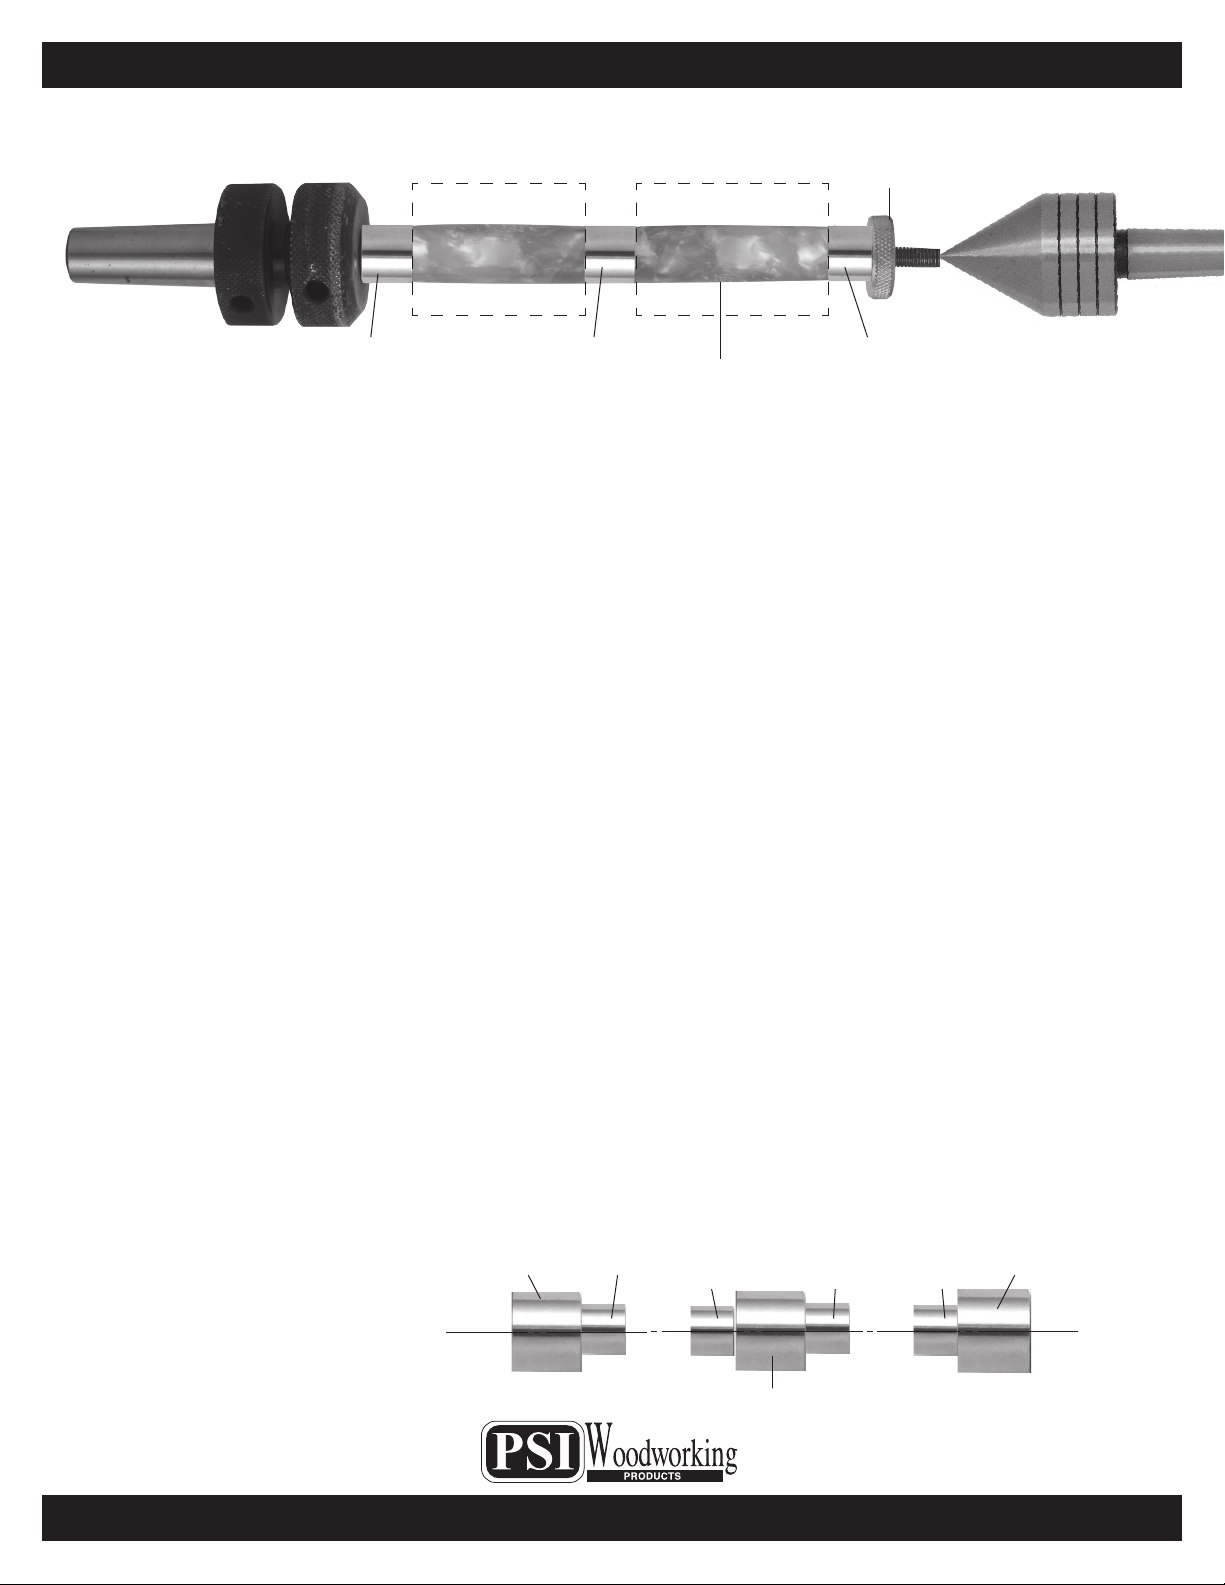
DIAGRAM B / TURNING THE BLANKS
Tip Bushing
(Smaller)
Lower Blank (shorter)
Center
Bushing
Upper Blank (longer)
Finished
Prole
Knurled Nut
Mandrel
Cap Bushing
(Larger)
Live Center
Or use
Mandrel
Saver
Turning the Blank
• Mount the bushings and blanks according to diagram B.
• Thread on the knurled nut and hand tighten to hold all components in place.
• Slide the tailstock up snugly against the mandrel shaft inserting the live center point into the mandrel
dimple, lock in place.
• Hand tighten the quill adjustment to rm up the mandrel. (DO NOT overtighten, it could damage the
mandrel.
• Using sharp tools, turn the blank down close to the bushing diameter. Turn the barrel (straight or to a
prole of your choice)
• Sand the blank down to be ush with the bushings gradually increasing the sandpaper grits.
• Finish the barrel with your choice of polish. Allow sufcient time for the polish to cure.
Refer to polish instructions.
Assembly
• Layout parts according to diagram A
• Press the tip into either end of the shorter barrel.
• Press the center band assembly into the opposite end of the barrel.
WARNING: It is not advised to press directly over the threads, instead use
a pen blank. Cut a section 5/8” long. Drill an 8mm hole through. Afx this
blank over the threads and press the band and coupler in.
• Remove the tip protector, afx the spring over the rell and drop into the opening at the band. Screw on
the mechanism over.
• Press the cap connector into the larger diameter end of the upper (longer) barrel, ush with the shoulder.
• Afx the clip into the threaded stem. Screw on the cap.
• Engage both ends to close the gap. Twist the upper cap so the clip aligns with the band as shown in the
photo of the nished pen.
• The pen operates by twisting the ends to advance or retract the rell.
• Replace the rell by unscrewing
the upper barrel from the
mechanism & exposing the top
of the rell to replace.
ø .540”
Diagram C / Bushings #PKDRABU
ø .345”
ø .345” ø .345”
ø .345”
ø .580”
Tip
ø .540”
© 2015 PSI Woodworking Philadelphia PA 19115 - v05/15
.248” Holes through
Cap
 Loading...