

Page 1
#PKBHAM
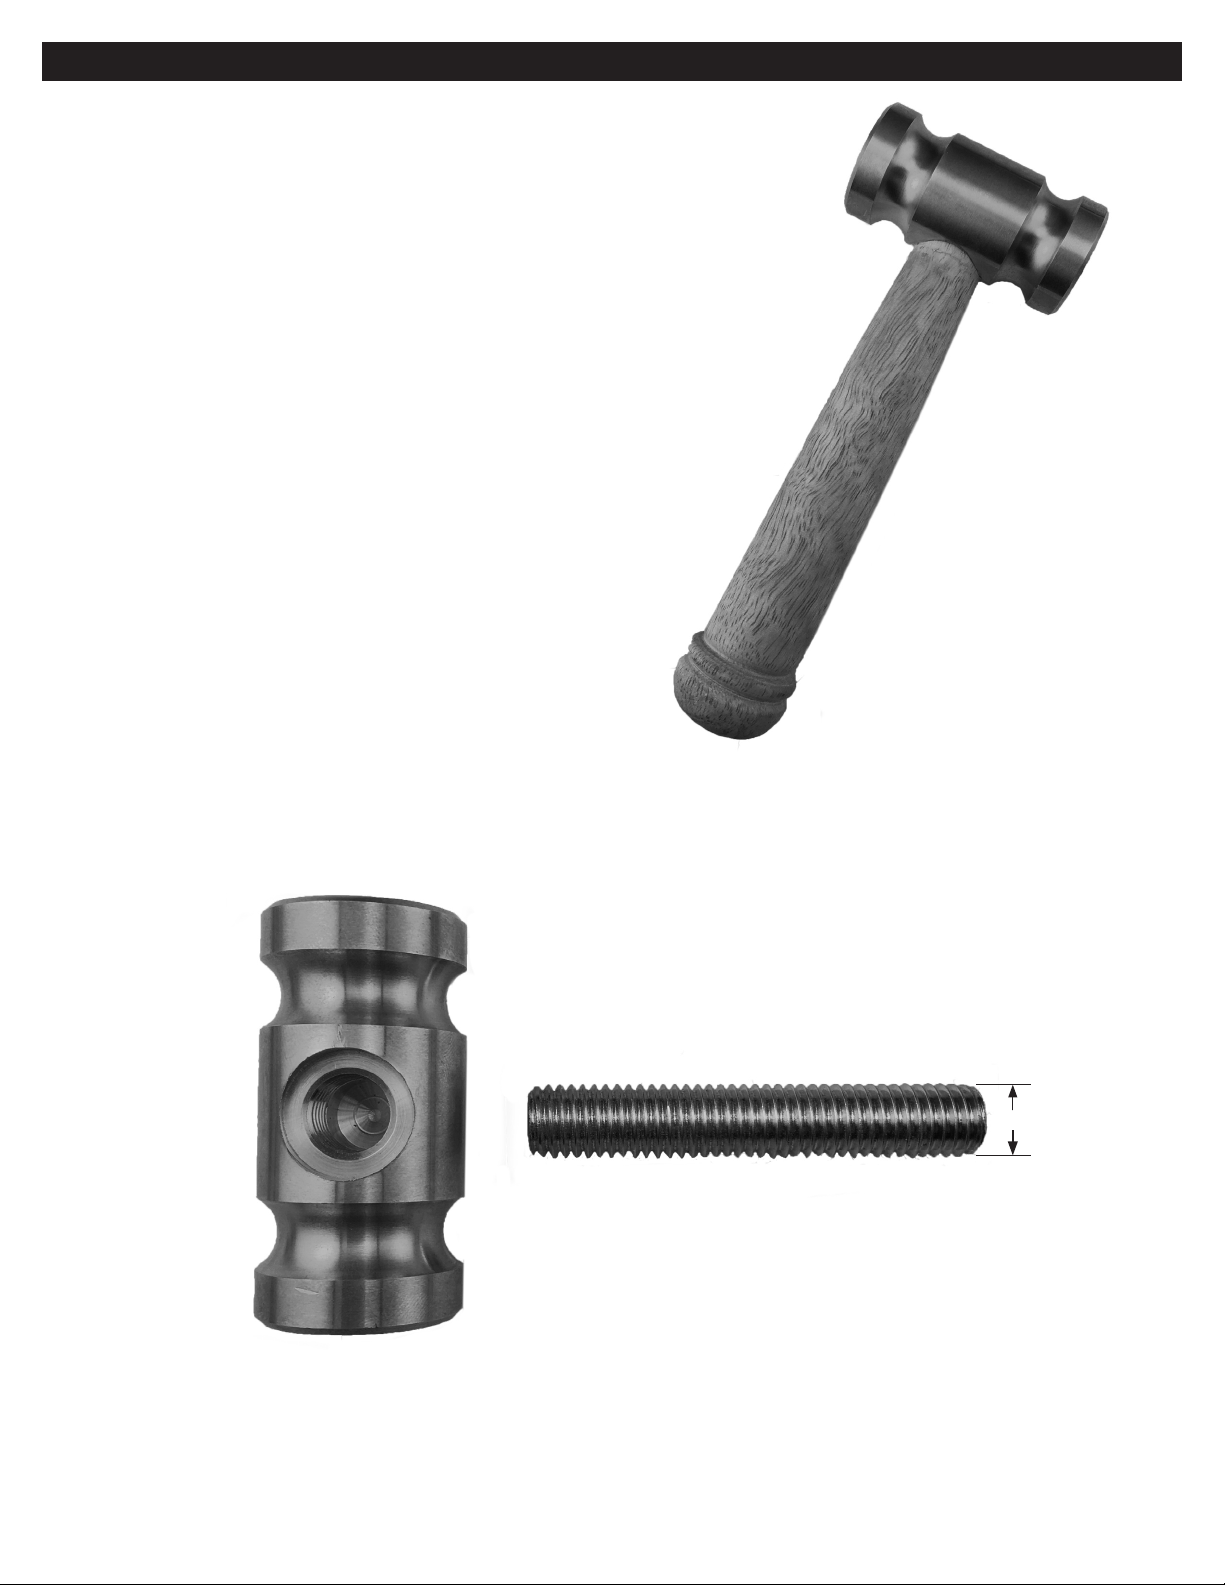
The Brass Hammer Kit
Kit Features:
• Easy to turn handle.
• Minimum parts - easy to assemble.
• Available in genuine brass.
• Any comfortable length
Required Accessories:
• Drill Bit: 1/2” #PKDB12
• Live Tailstock Center and Any Drive Center
• 2 part Epoxy Glue
• Blank Minimum Size: 1” to 1-1/2” x 5-1/2” to 7”
• Calipers - Optional
PSI Woodworking Products
Brass Hammer Head
DIAGRAM A / PARTS LAYOUT
Connecting Shank
1/2” x 13 tpi
Preparing the Blank:
• Cut a wood blank, 1” to 1-1/2” square x 5-1/2” to 7” Long.
• Mark the center on both square ends.
• Drill 1/2” hole, 2-3/4” deep at one end of the blank.
Page 2
#PKBHAM
PSI Woodworking Products
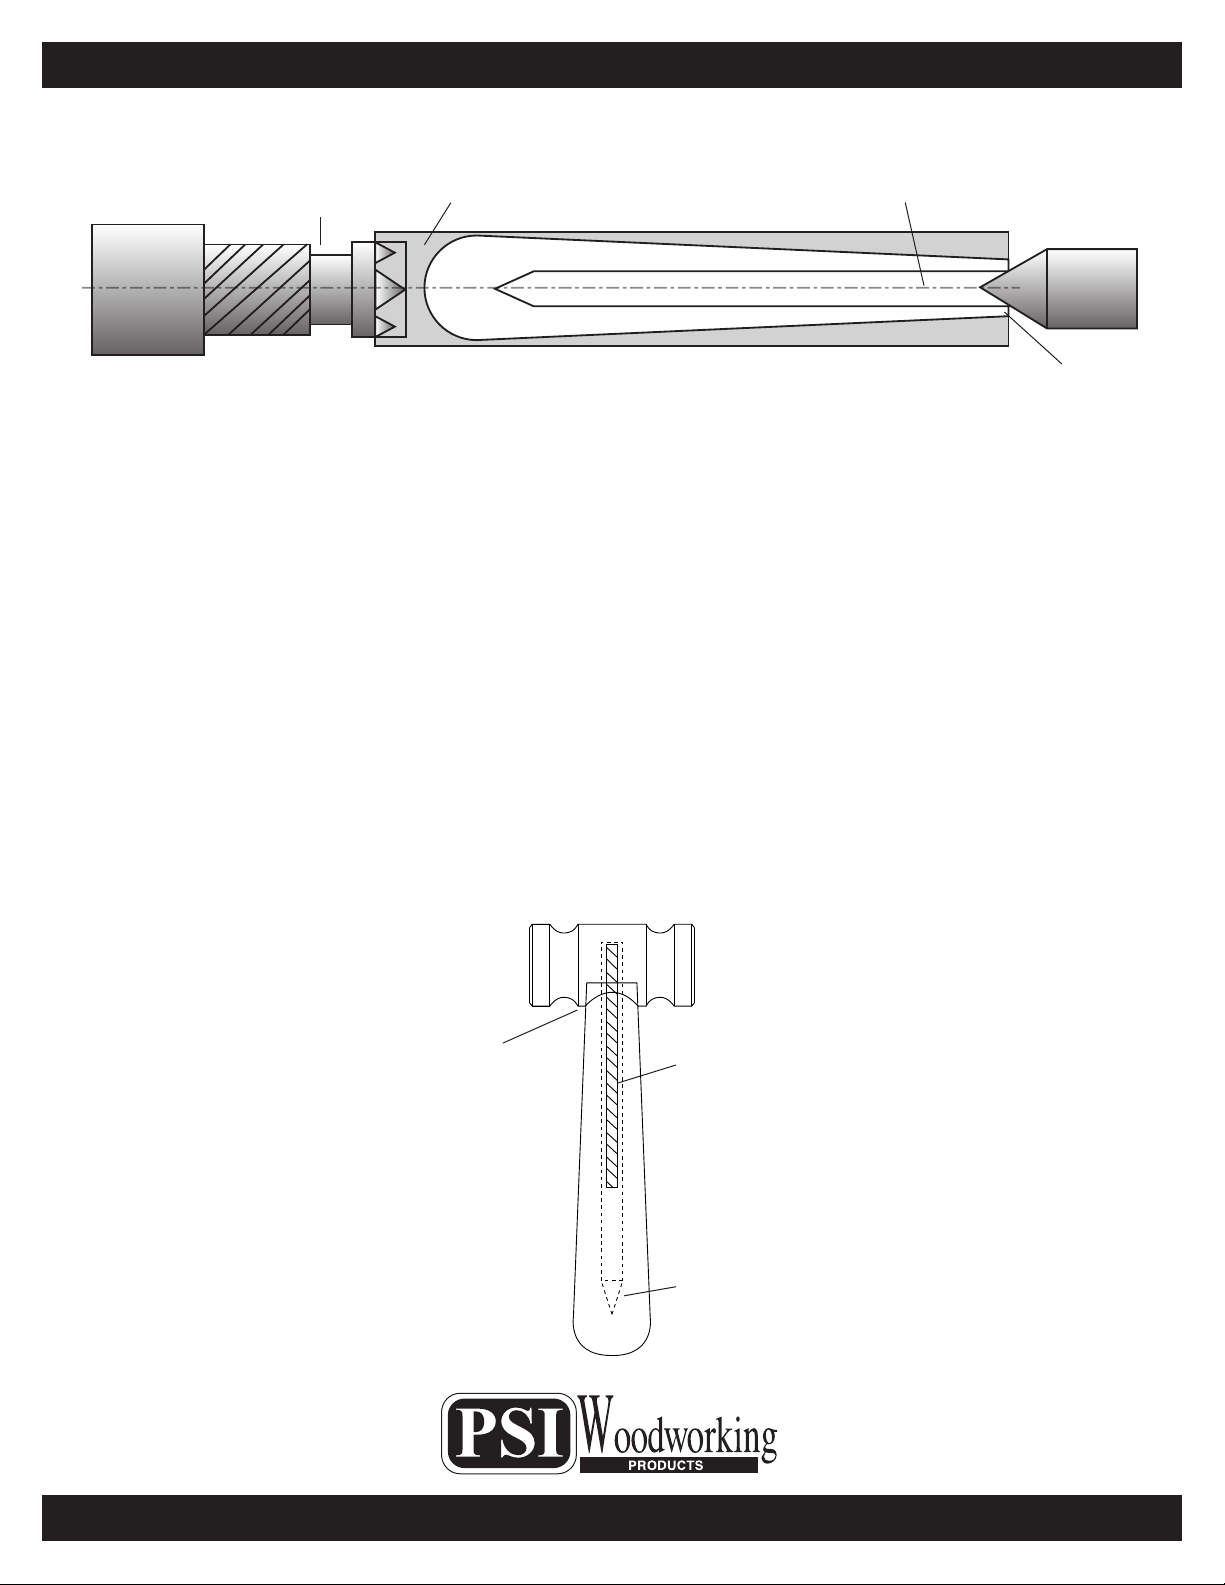
DIAGRAM B / TURNING THE BLANKS
Drive center
of any style
Wood Removed
1/2” Hole, 2 3/4 Deep
60 degree
Live Center
3/4” O.D.
Turning the Blank
• Mount the blank onto the lathe between centers according to diagram B.
• Turn the wood into a handle prole. Draw a design of your choice, but turn the drilled the end down to 3/4”
diameter for a snug t into the hammer recess.
• Sand and nish the wood. Use either Aussie Oil or use Mahney’s Utility Oil to nish the handle.
Assembly
• Screw the connecting shank into the hammer to bottom.
• Press the exposed shank into the drilled handle to check for t - i.e. Diameter of handle and depth of
hole. (See Diagram C)
• Re-machine the diameter or hole depth for a good t.
• Once the t is ok, remove the shank from the handle.
• Squeexe expoxy glue into the opening of the hole in the handle.
• Insert the handle assembly into the hole in a twisting motion, to spread the glue inside - push the wood
into the recess in the hammer - let dry.
Diagram C / Bushings #PKBHAM
Hammer Head
Handle ts
into recess in
hammer head
to bottom
Connecting
Shank
Dilled Hole
© 2018 PSI Woodworking Philadelphia PA 19115 - v10/19
 Loading...