

Page 1
#PKA1XX
Knight’s Armor Pen Kit
PKA100 • PKA110
Kit Features:
•Easytoturnwithastraightorproledbarrel
•Singletubedesign
•Minimumparts-easytoassemble
•AvailableinMultiplenishes
•UsesParker®StyleRell
•AttractiveMedievalTimesStyling
•Overalllength:5-1/16”
Required Accessories:
•7mmPenMandrel
•DrillBit:3/8”#PKEXEC-38
•Bushingset(2pc)#PKMAJSQBU
•BarrelTrimmingset#PKTRIM38
•LiveTailstockCenter
•2PartEpoxyGlueorInstaCure(Cyanoacrylate)Glue
•PenBlank:MinimumSize-3/4”x3-1/4”Long
PSI Woodworking Products
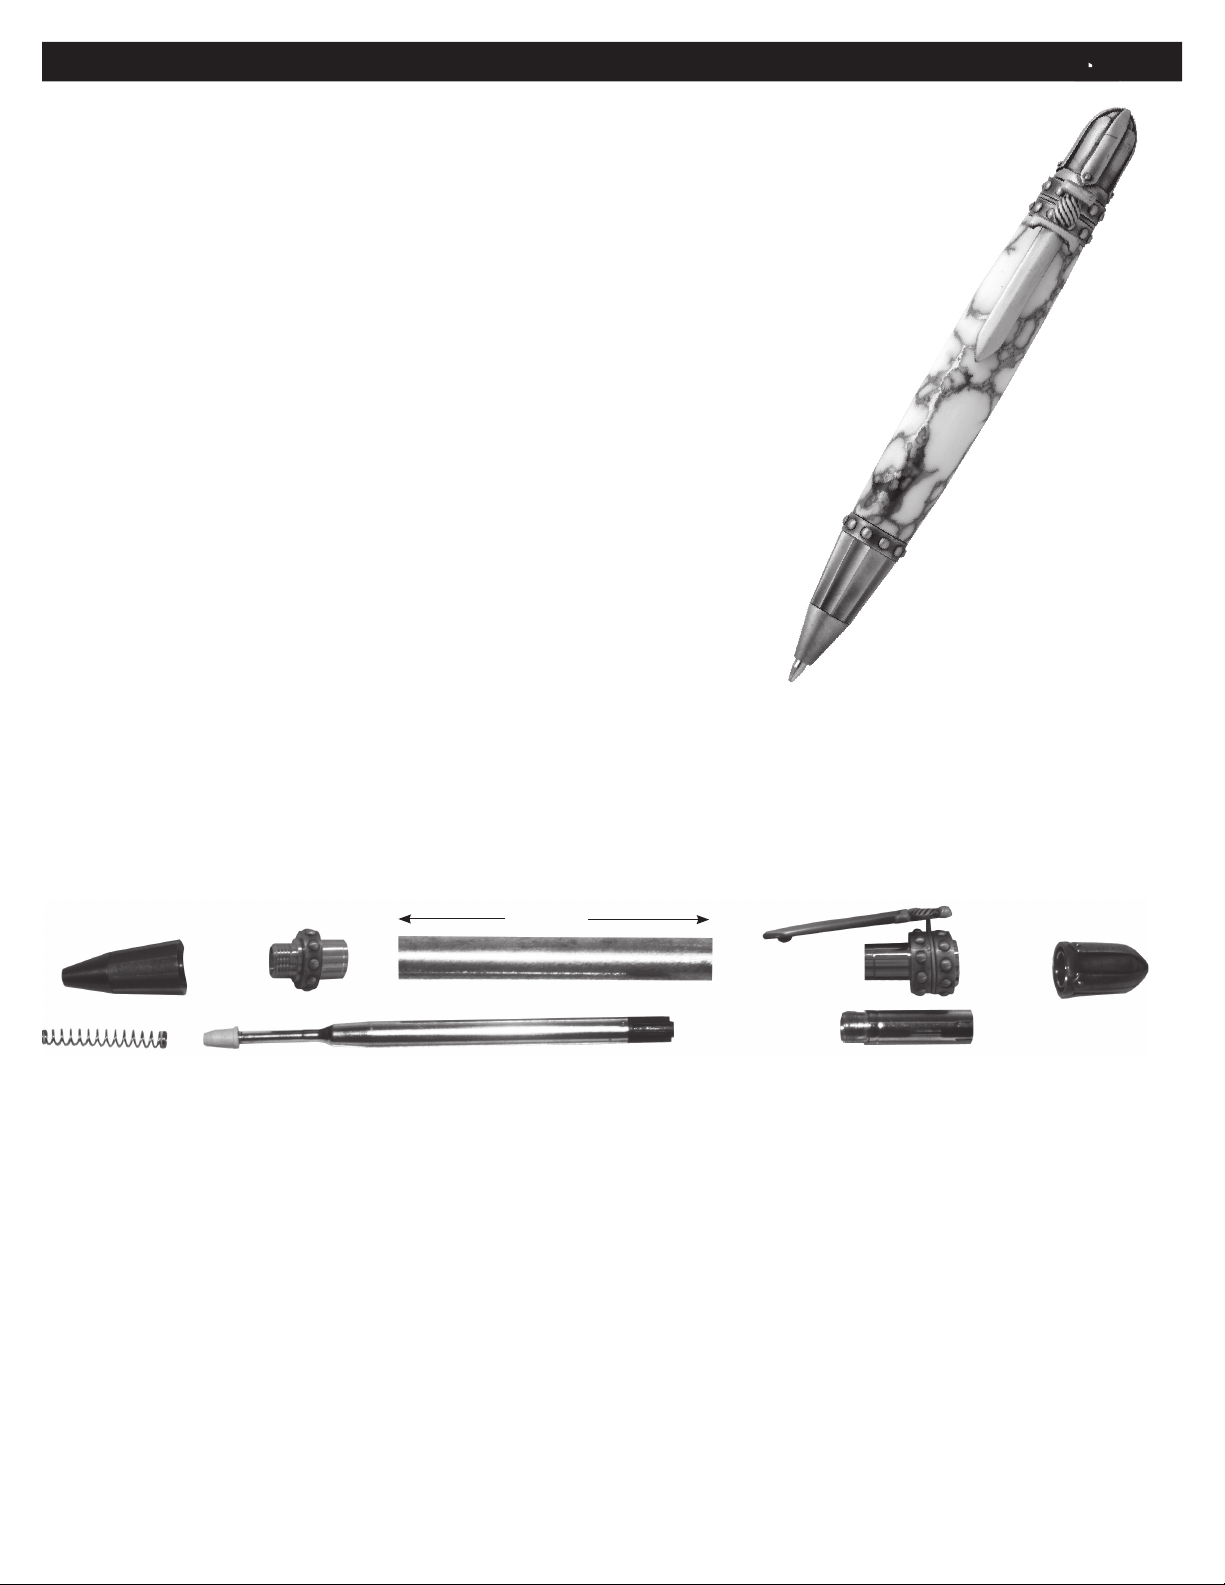
DIAGRAM A / PARTS LAYOUT
Tip
Spring
TipCoupler
Tube/Barrel
2.665”
Rell
ClipAssembly
Cap
TwistMechanism
Preparing the Blank:
•Cutablanktothelengthofthetubeandadd1/16”forsquaringoff.
• Drilla3/8”holelengthwisethroughtheblank.
•Spreadglueoverthetube,insertintotheblankwithatwistingmotiontospreadtheglueevenlyinside.
•Centerthetubelengthwiseinsidetheblank.
•Whentheglueisdry,squaretheendsoftheblank.Usea3/8”barreltrimmershaftorauniversalpenblanksquaringjigwithapowerdiscsander.Taketheexcessmaterialdownushwiththeendsofthebrasstube.(donottrim
beyondthelengthofthetubesincethismayinterferewithoperationofthemechanismandassembly).
Page 2
#PKA10X
PSI Woodworking Products
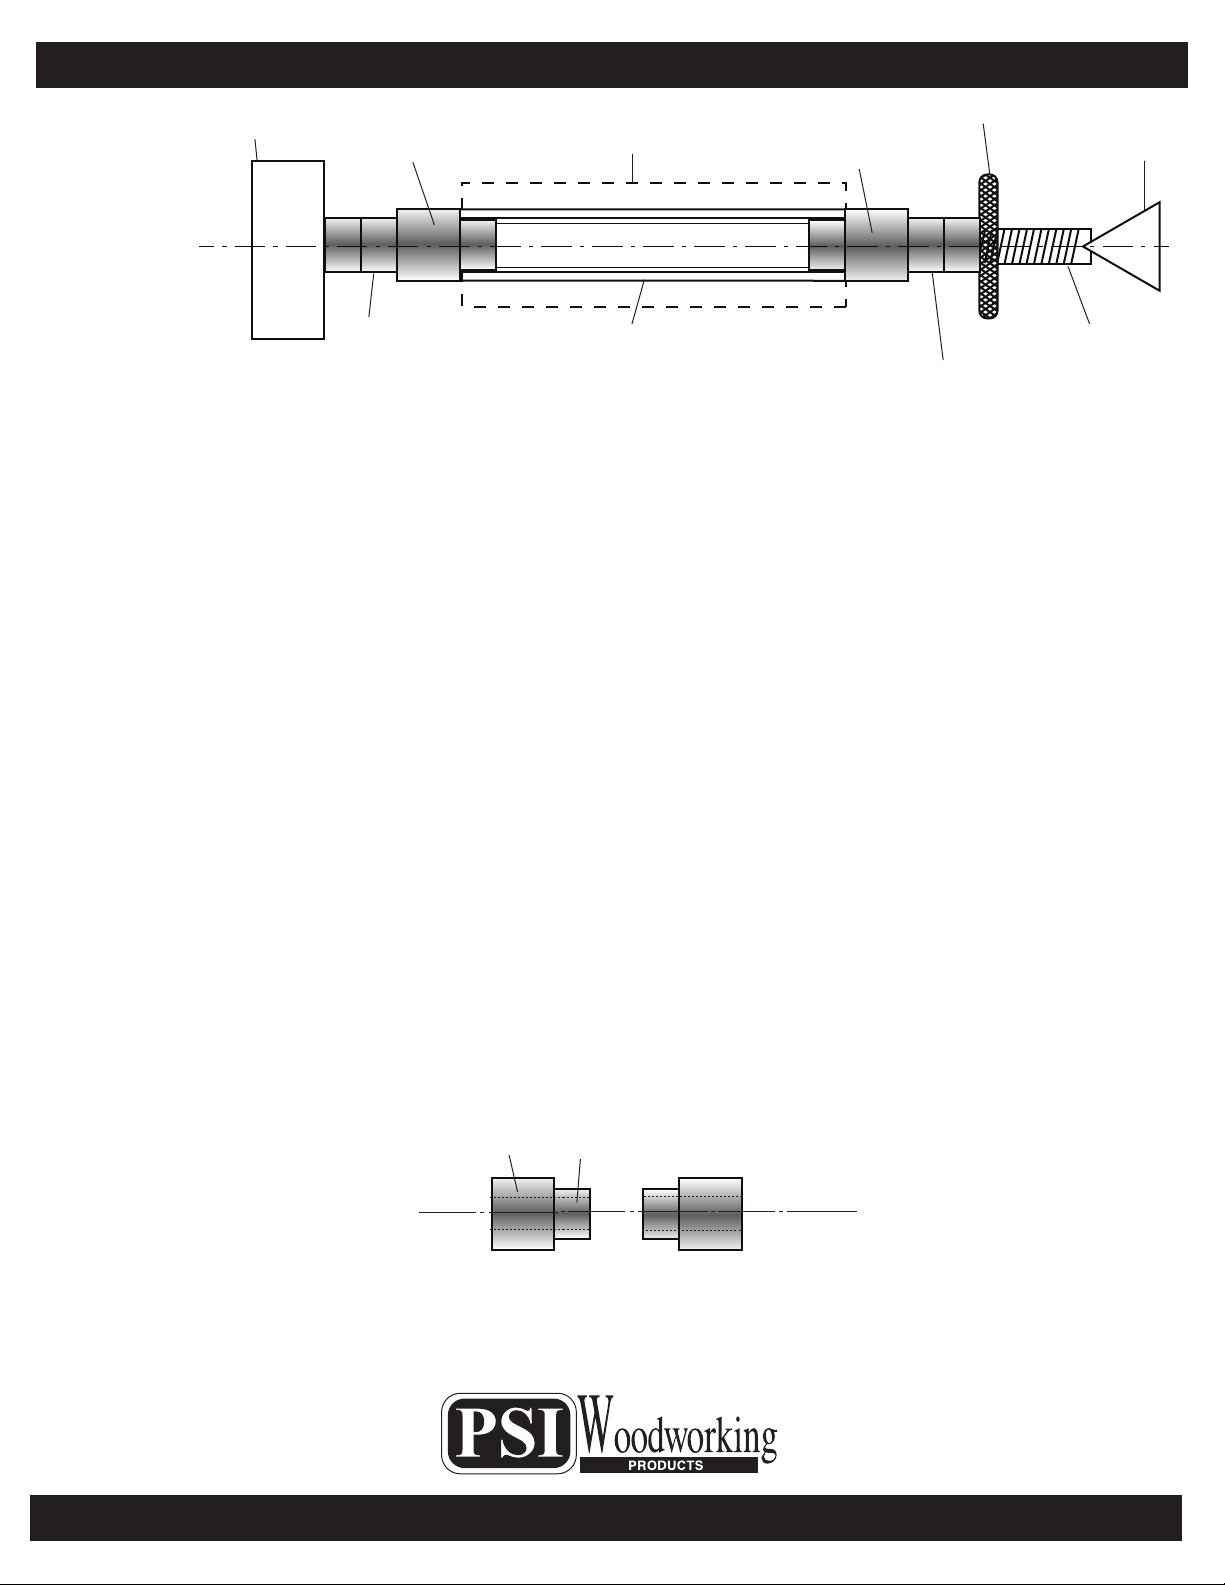
HeadStock
Turning the Blank
Bushing
7mmSpacer
Bushings
DIAGRAM B / TURNING THE BLANKS
Blank
FinishedProle
Bushing
KnurledNut
LiveCenter
Mandrel
7mmSpacer
Bushings
•MountthebushingsandblanksaccordingtodiagramB.
•Threadontheknurlednutandhandtightentoholdallcomponentsinplace.
•Slidethetailstockupsnuglyagainstthemandrelshaftinsertingthelivecenterpointintothemandrel
dimple,lockinplace.
• Handtightenthequilladjustmenttormupthemandrel.(DONOTovertighten,itcoulddamagethe
mandrel.
•Usingsharptools,turntheblankdownclosetothebushingdiameter.Turnthebarrel(straightortoa
proleofyourchoice)
• Sandtheblankdowntobeushwiththebushingsgraduallyincreasingthesandpapergrits.
• Finishthebarrelwithyourchoiceofpolish.Allowsufcienttimeforthepolishtocure.
Refertopolishinstructions.
Assembly
• LayoutpartsaccordingtodiagramA
• Pressthetipcoupler,longextensioninrst,intoeitherendofthebarrel.
•Presstheclipassembly,longextensioninrstintotheoppositeendofthebarrel.
•Screwthetipintothetipcoupler.
•Afxthespringovertherelltipendandinsertthisintotheopeningattheoppositeend.
•Screwthetwistmechanismintotheopeningbehindtherelltobottom
•Afxandpressthecapovertheextendedmechanism.
•Tochangetherell,justun-screwthecapcounterclockwiseandreplace.
•Thepenisreadytousebytwistingthecaptoextendorretracttherell.
Diagram C / Bushings #PKMAJSQBU
ø
.495”
ø
.345”
.248” Holes through
SAME
© 2013 PSI Woodworking Philadelphia PA 19115 - v10/13
 Loading...