

PELI 9440 User guide [ml]
WARRANTY RETURN POLICY
Send all items for repair or replacement directly to Pelican Products Customer Service Department (postage paid). Please call for a return authorization number. Per our guarantee, Pelican Products will replace or repair any broken or defective products. Upon receipt of goods, Pelican
Products will notify you of any handling and return postage charges. If your local retailer does not stock the above accessory parts, you may
order them directly from Pelican Products. Send check or money order in U.S. dollars, or order by phone using MasterCard or VISA
(ask for Customer Service). SORRY, NO C.O.D.’s. Subject to sales tax. Allow 2-3 weeks delivery time. Pelican Products pays postage and
handling charges. POSTAGE PAID FOR U.S. ZIP CODES ONLY.
POLÍTICA DE DEVOLUCIONES EN PERIODO DE GARANTÍA
Envíe todos los artículos para su reparación o sustitución directamente al Departamento de atención al cliente de Pelican Products (franqueo
pagado). Por favor, pida un número de autorización de devoluciones. En virtud de nuestra garantía, Pelican Products sustituirá o reparará
cualquier producto roto o defectuoso. Tras la recepción de los artículos, Pelican Products le notificará cualquier gasto de manipulación y envío.
Si su comercio local no tiene en existencias las piezas anteriormente indicadas, puede solicitarlas directamente a Pelican Products. Envíe un
cheque o un giro postal en dólares estadounidenses, o haga su pedido por teléfono utilizando MasterCard o VISA (pregunte por el Departamento de atención al cliente). LO SENTIMOS, no se admite pago contra reembolso. Deje que pasen 2-3 semanas para que le llegue el envío.
Pelican Products se hace cargo de los gastos de envío y manipulación. PORTES PAGADOS SÓLO PARA CÓDIGOS POSTALES DE ESTADOS UNIDOS.
CATALOG No. 9440
9440
USER MANUAL
DEPLOYMENT OPERATION
1. To deploy, gently pull the red latch (as per diagram on the leg)
2. Once all three legs have touched the floor, lift the switch housing
CAUTION, READ THIS NOTICE BEFORE USE:
Keep fingers clear of moving parts at all times – failure to comply could result in injury.
whilst lifting the outer collar upwards until all three legs release.
upwards (as per diagram on the leg) until the red latch clicks
into place.
GENTLY PULL
THE RED LATCH.
UNTIL ALL THREE
LEGS RELEASE.
POLITIQUE DE GARANTIE DE REMPLACEMENT
Envoyez tous les articles pour réparation ou remplacement directement au Département de réparation client des produits Pelican (port payé).
Veuillez appeler pour obtenir un numéro d’autorisation. En ce qui concerne notre garantie, Pelican Products remplacera ou réparera tout
produit cassé ou défectueux. À la réception des marchandises, Pelican Products vous informera de tous frais de retour ou de manutention. Si
votre détaillant local ne stocke pas les pièces accessoires ci-dessus, vous pouvez les commander directement auprès de Pelican Products.
Envoyez un chèque ou un mandat en dollars américains, ou commandez par téléphone avec votre MasterCard ou VISA (demandez le Service
Client). DÉSOLÉ, le paiement avec contre remboursement n’est pas accepté. 2 – 3 semaines. Pelican Products paye les frais de port et de
manutention. PORT PAYÉ POUR LES CODES POSTAUX AMÉRICAINS UNIQUEMENT.
Pelican guarantees its AALG products for 1 year against defects in materials and workmanship.
Refer to www.pelican.com/warranty for full details.
Pelican garantiza los productos del AALG durante 1 año contra defectos en materiales y mano de obra.
Más información en www.pelican.com/warranty .
Pelican garantit ses produits AALG sur 1 an contre tous défauts des matériaux et de fabrication.
Consultez la page Web www.pelican.com/warrantypour les détails complets.
MAST OPERATION
1. Release each of the cam clamps and raise until desired height, then clamp to hold in place.
2. To collapse the mast, reverse the procedure taking care to keep fingers clear of moving parts.
LIGHT OPERATION CAUTION: DO NOT DIRECT LIGHT INTO EYES.
1. Press keypad once for full power
2. Press again for low power
3. Press again to switch off
STORAGE OPERATION
1. To close, ensure light head is facing upwards then pull the red latch gently until the base of the product slides down to the floor.
2. Lift the outer collar upwards until level with the light head. Then pull all three legs in using both hands and lift them over their
locking fork at the base whilst holding the latch in the release position (as per diagram on main body). The legs are locked when
the window at the bottom of each leg is black and the latch is in its locked position.
Note: Please look closely at the bottom of the legs to understand how they are locked in place – the legs must lift upwards before
they can locate. The latch must be released for the legs to move upwards.
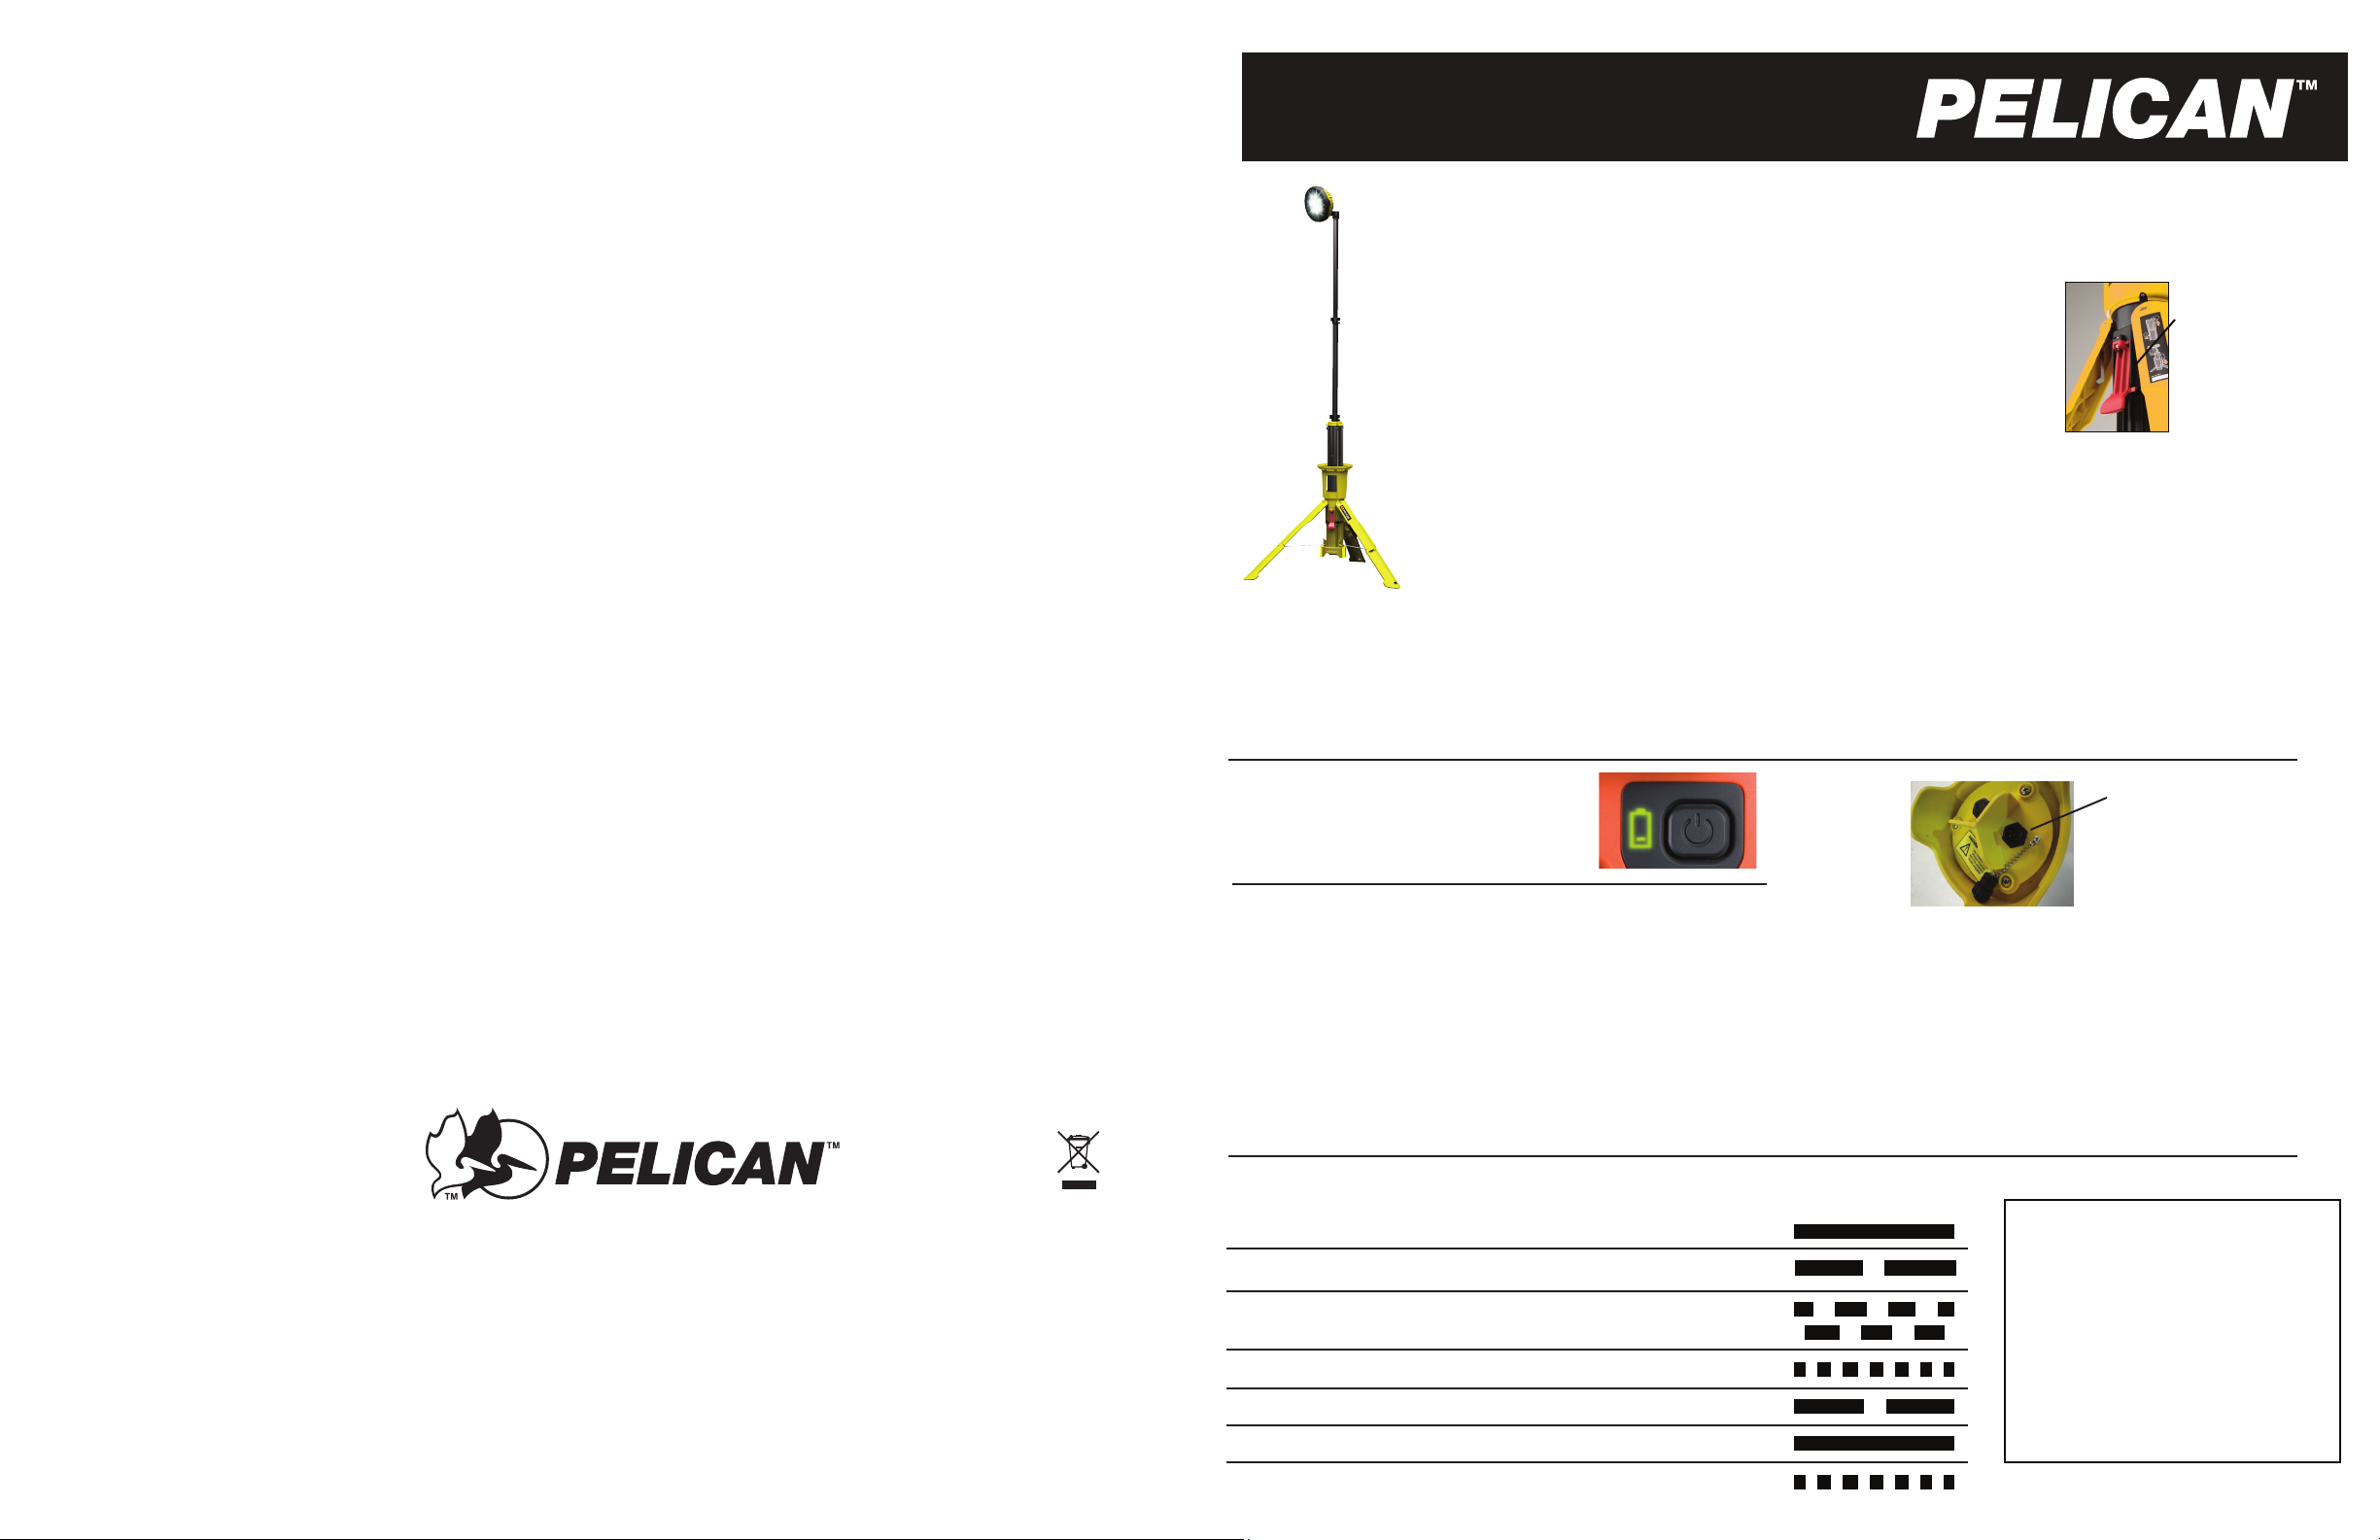
BATTERY STATUS INDICATION
Green = 60 – 100% capacity
Orange = 20 – 60% capacity
Red = 0 – 20% capacity
Remove dust cap
to connect the charger
CHARGING:
CAUTION: PLEASE READ BEFORE USE.
WARNING: Charging must be carried out with
the base of the product facing upwards
USE APPROVED CHARGER ONLY AND ALWAYS REMOVE
CHARGER ONCE PRODUCT IS FULLY CHARGED.
ONLY USE CHARGER IN DRY ENVIRONMENT.
1. Turn product upside down, remove dust cap on charging socket
and plug the charger in. Twist to lock.
2. Plug the charger into the electrical outlet and switch on.
PRODUCT CARE:
To ensure maximum product life please
observe the following points:
1. Keep moving parts free of foreign objects.
2. Do not stand on product.
3. Avoid use on extreme gradients.
4. Ensure charging dust cap is replaced
after charging.
5. Do not use if damaged – return to dealer.
23215 Early Ave. • Torrance, CA 90505 USA • Tel (310) 326-4700 • FAX (310) 326-3311 • www.pelican.com
PELICANTM CANADA
10221-184 St. • Edmonton, Alberta T5S 2J4 • Tel (780) 481-6076 • FAX (780) 481-9586
PELITM PRODUCTS, S.L.U.
c/ Casp, 33-B Pral. • 08010 • Barcelona, Spain • Tel (+34) 93.467.4999 • FAX (+34) 93.487.7393 • www.peli.com
© PELICAN PRODUCTS 2010 9443-311-000
All trademarks and logos displayed herein are registered and unregistered trademarks of Pelican Products, Inc. and others.
BATTERY MODE AND STATUS INDICATION LIGHTS
MODE DESCR IPTION LED INDICATION
Standby Yellow Permanent on YELLOW
Pre-Charge Yellow slow flashing YELLOW
Waiting to validate Yellow and Green alternating YELLOW
temperature GREEN
Rapid Charge Green fast flashing GREEN
Maintenance charge Green slow flashing GREEN
Ready Green Permanent on GREEN
Error Yellow fast flashing YELLOW
SPECIFICATIONS
LIGHT SOURCE LED
TESTED LUMEN VALUE 1200 (Low)
2400 (High)
BATTERY TYPE: NiMH
8 cell 9.6 volt
9 amp/hr.
BATTERY
CHARGING TIME: 8 hrs
BATTERY BURN TIME: 6 hrs.(Low)
3 hrs. (High)
Catálogo #9440
Catalogue n° 9440
MANUAL DEL
USUARIO DE PELICAN
ATENCIÓN: LEA ESTA NOTA ANTES DE UTILIZAR EL APARATO.
Mantenga los dedos alejados de las piezas móviles; de lo contrario
podría sufrir lesiones.
9440
DESPLIEGUE
1. Para desplegar, tirar suavemente del cierre rojo (según se indica
en el diagrama de la pata) levantando a la vez el collar exterior
hasta que se suelten las tres patas.
2. Una vez las tres patas hayan tocado el suelo, levantar el
alojamiento del interruptor (según se indica en el
diagrama de la pata) hasta que el cierre rojo encaje en
su sitio emitiendo un chasquido.
MANEJO DEL MÁSTIL
1. Soltar cada una de las abrazaderas de leva y elevar hasta la altura deseada, a
continuación apretar las abrazaderas para fijar el mástil en esa posición.
2. Para plegar el mástil, aplicar el procedimiento inverso teniendo cuidado de mantener
los dedos alejados de las piezas móviles.
MANEJO DE LA LINTERNA
PRECAUCIÓN: NO DIRIGIR LA LUZ DIRECTAMENTE A LOS OJOS.
1. Pulsar la tecla una vez para máxima potencia.
2. Pulsar de nuevo para potencia baja.
3. Pulsar de nuevo para apagar la unidad.
ALMACENAMIENTO
1. Para cerrar, asegurarse de que el cabezal de la lámpara mire hacia arriba, y a continuación empujar suavemente el cierre rojo
hasta que la base del producto se deslice hasta el suelo.
2. Levantar el collar exterior hasta que esté al mismo nivel que el cabezal de la lámpara. A continuación empujar las tres patas con
las dos manos y levantarlas por encima de su horquilla de sujeción en la base, sujetando a la vez el cierre en posición abierta
(según se muestra en el diagrama del cuerpo principal). Las patas estarán bloqueadas cuando la mirilla situada en la parte
inferior de cada pata se vea de color negro y el cierre esté en posición cerrada.
Nota: Fíjese bien en la parte inferior de las patas para entender cómo se bloquean. Las patas deben levantarse antes de poder
colocarlas. Es preciso soltar el cierre para poder mover las patas hacia arriba.
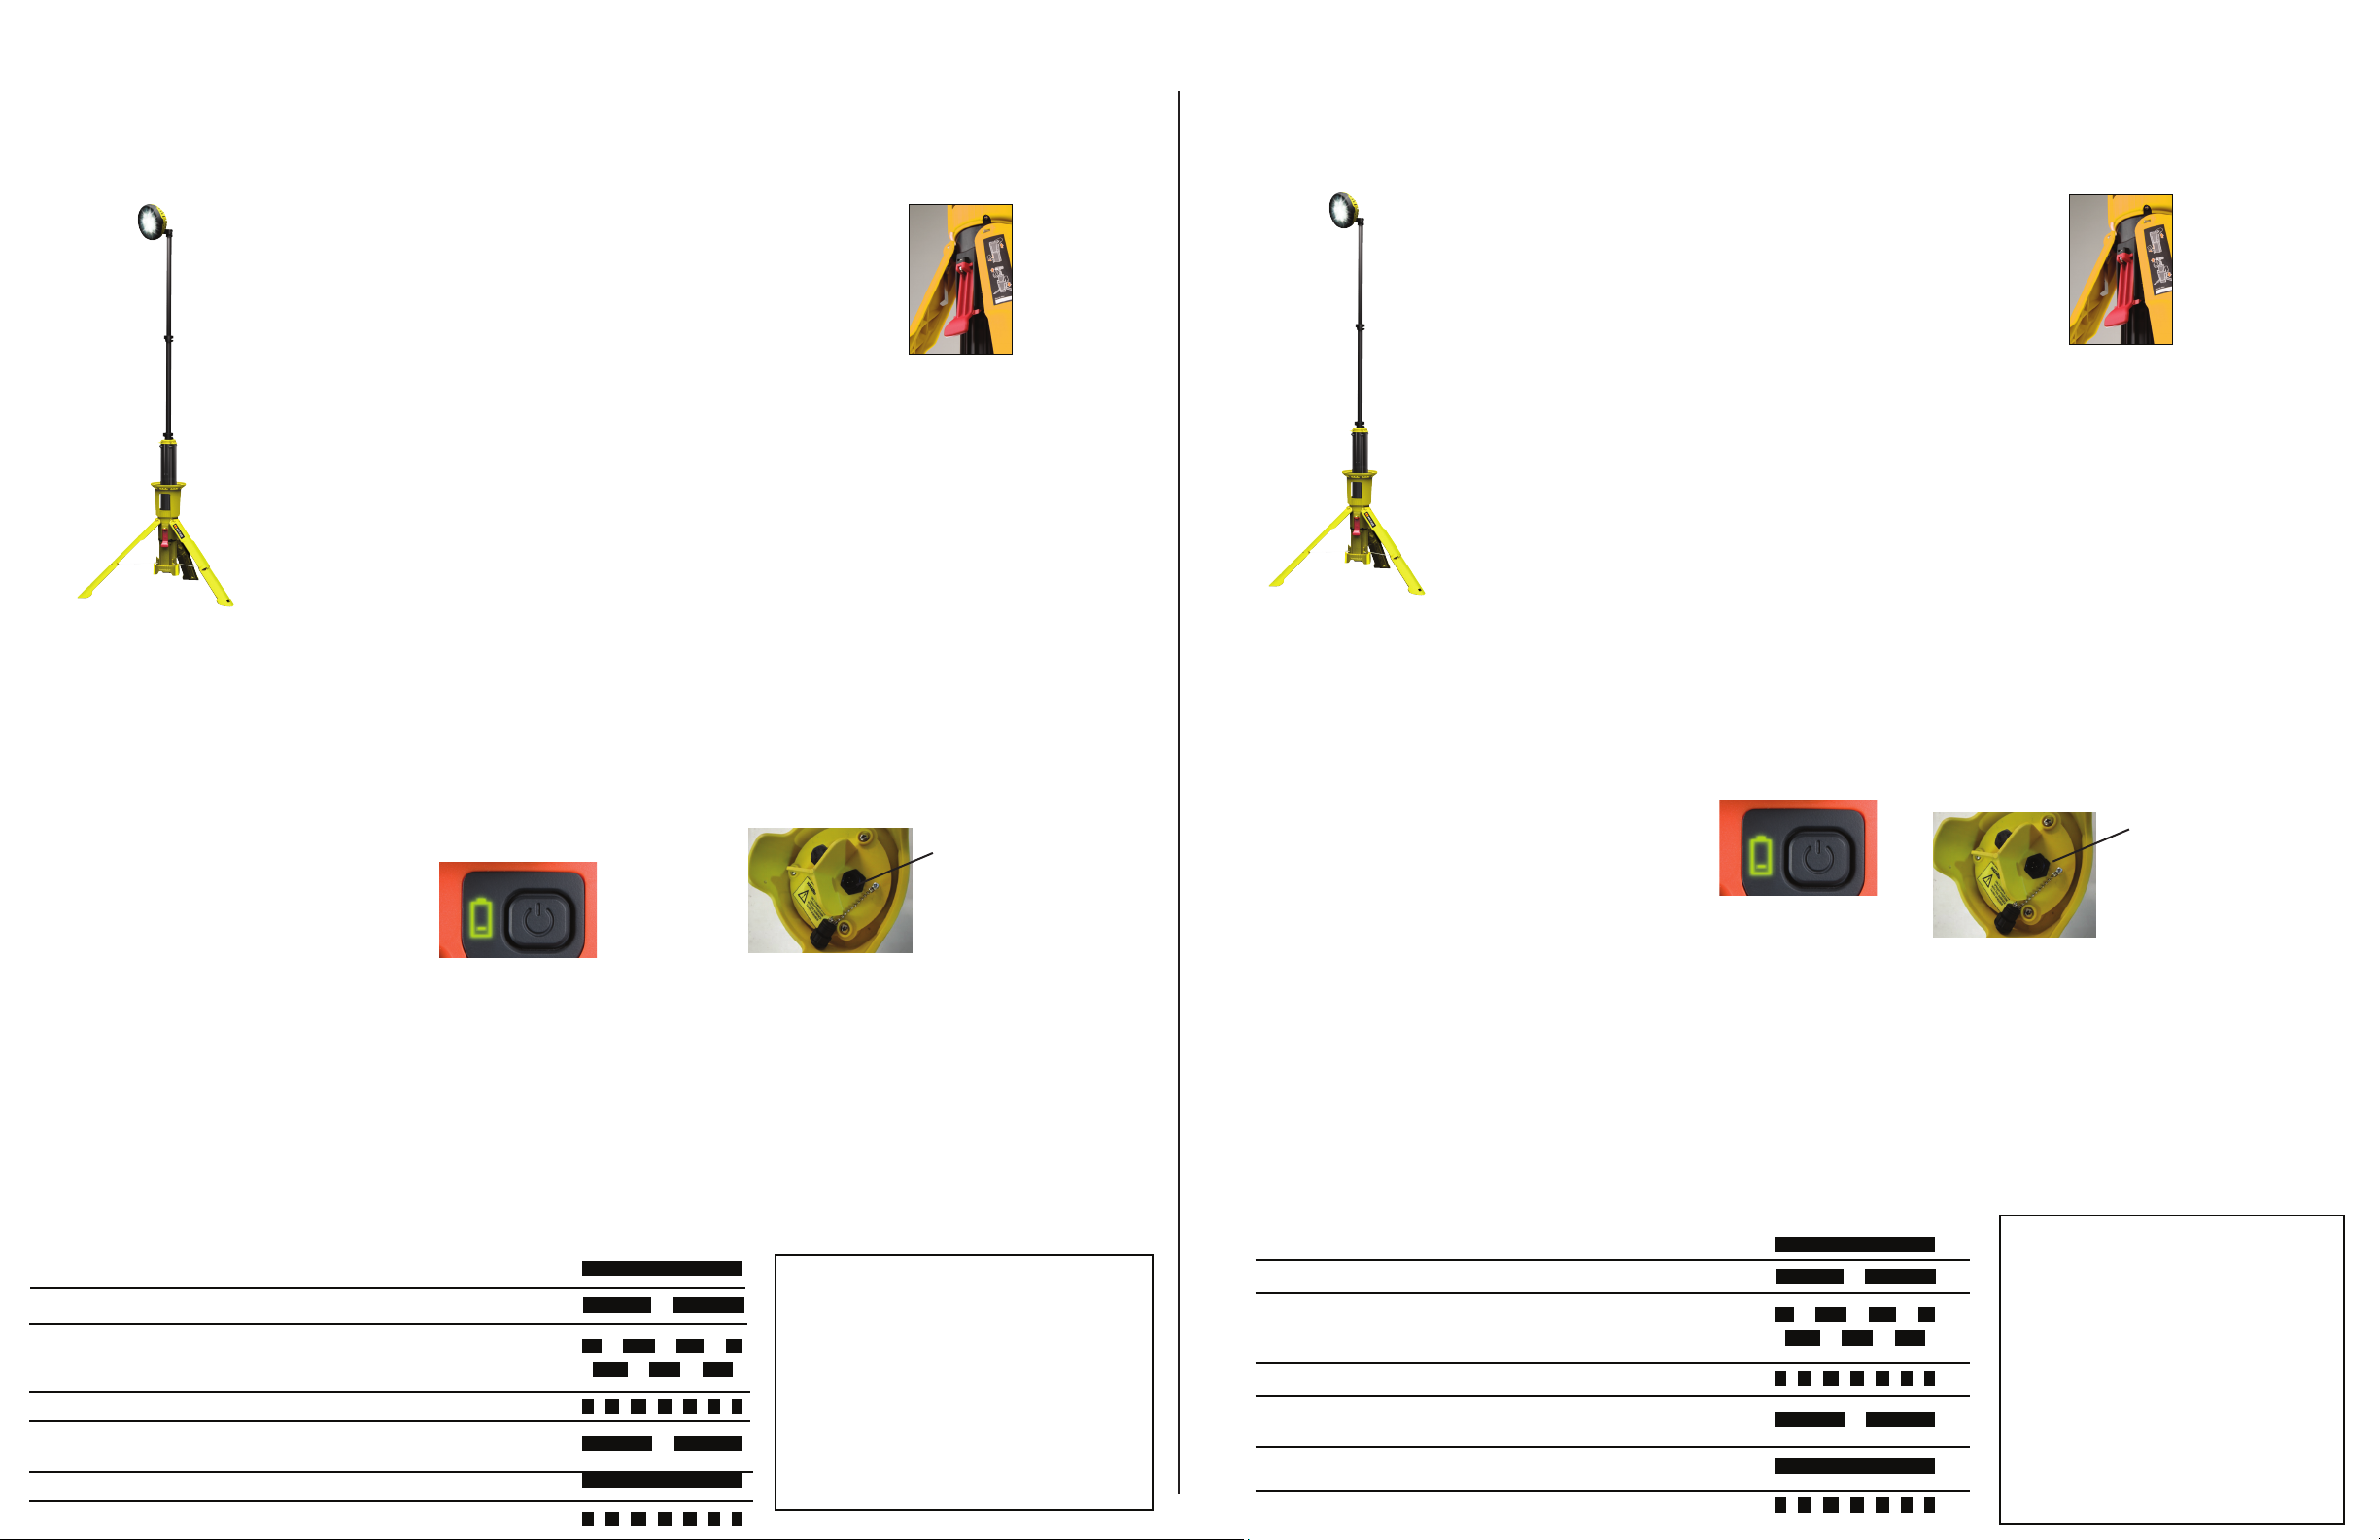
INDICACIÓN DEL ESTADO
DE LA BATERÍA
Verde: capacidad 60 – 100%
Naranja: capacidad 20 – 60%
Rojo: capacidad 0 – 20%
CARGA:
ADVERTENCIA: la carga debe realizarse con
la base del producto mirando hacia arriba
PRECAUCIÓN: USAR ÚNICAMENTE EL CARGADOR
HOMOLOGADO Y RETIRAR SIEMPRE EL CARGADOR
UNA VEZ FINALIZADA LA CARGA POR COMPLETO.
1. Poner el producto boca abajo, retirar la cubierta protectora
de la toma de carga y enchufar el cargador. Girar para bloquear.
2. Enchufar el cargador en la toma eléctrica y encenderlo.
INDICADORES LUMINOSOS DEL MODO Y ESTADO DE LA BATERÍA
MODO DESCRIPCIÓN INDICADOR LED
En espera Luz amarilla fija AMARILLO
Precarga Parpadeo lento luz amarilla AMARILLO
Esperando AMARILLO
temperatura y VERDE
palabra validar Luz verde y amarilla alternada
Carga rápida Parpadeo rápido luz verde VERDE
Carga de
mantenimiento Parpadeo lento luz verde VERDE
Listo Luz verde fija VERDE
Error Parpadeo rápido amarillo AMARILLO
CUIDADOS DEL PRODUCTO:
Para garantizar la máxima vida útil del producto,
tenga en cuenta lo siguiente:
1. Mantener las piezas móviles libres de objetos
extraños.
2. No subirse encima del producto.
3. Evitar el uso en pendientes muy pronunciadas.
4. No olvidar volver a colocar en su sitio la cubi-
erta protectora tras
la operación de carga.
5. No utilizar si se observan daños: devolver al
proveedor.
ESPECIFICACIONES
FUENTE LUMINOSA LED
POTENCIA EN LUMENS 1.200 (alta)
2.400 (baja)
TIPO DE BATERÍA: NiMH
8 pilas 9,6 V 9 A/h
TIEMPO DE CARGA
DE LA BATERÍA: 8 h
AUTONOMÍA/DURACIÓN
DE LA BATERÍA: 6 horas (baja)
3 horas (alta)
Eliminar la cubierta
protectora para conectar
el cargador
Tire del cierre
con suavidad
hasta que se
suelten las tres
patas.
MANUEL
UTILISATEUR PELICAN
ATTENTION, LIRE CETTE NOTICE AVANT USAGE :
maintenir à tous moments vos doigts à distance des pièces mobiles –
la non observation de cette règle pourrait entraîner de sérieuses blessures.
9440
OPÉRATION DE DÉPLOIEMENT
1. Pour déployer, tirer doucement sur le loquet rouge
(voir diagramme sur le pied) tout en relevant le collier externe
vers le haut jusqu’à ce que les trois pieds se libèrent.
2. Lorsque les trois pieds touchent le sol, relever le boîtier du
commutateur vers le haut (voir diagramme sur le pied)
jusqu’à ce que le loquet rouge clique en place.
FONCTIONNEMENT DU MÂT
1. Libérer chacun des clamps de came et soulever à la hauteur désirée,
puis serrer pour maintenir en place.
2. Pour rentrer le mât, inverser la procédure en faisant attention à garder vos
doigts à distance des pièces mobiles.
FONCTIONNEMENT DE LA LUMIÈRE
ATTENTION : NE PAS POINTER LA LUMIÈRE DANS LES YEUX.
1. Appuyer une fois sur le clavier pour une puissance maximum.
2. Appuyer à nouveau pour une faible puissance.
3. Appuyer à nouveau pour éteindre.
STOCKAGE
1. Pour fermer, s’assurer que la tête d’éclairage soit pointée vers le haut, puis tirer doucement le loquet rouge jusqu’à ce que la
base du produit glisse vers le bas jusqu’au sol.
2. Relever le collier externe vers le haut, jusqu’au niveau de la tête d’éclairage. Puis tirer sur les trois pieds avec les deux mains
et les relever par dessus leur fourche de verrouillage à la base tout en maintenant le loquet dans sa position de dégagement
(voir le diagramme sur le corps principal). Les pieds sont bloqués lorsque la fenêtre en bas de chacun d’eux est noire et le
loquet est en position de blocage.
Remarque : bien observer le bas des pieds pour comprendre comment ceux-ci sont maintenus en place – les pieds doivent être
relevés vers le haut avant de pouvoir se loger. Le loquet doit être soulevé pour que les pieds puissent être remontés.
INDICATION D’ÉTAT DE LA BATTERIE
Vert capacité à 60 – 100%
Orange capacité à 20 – 60%
Rouge capacité à 0 – 20%
CHARGEMENT :
AVERTISSEMENT: le chargement doit être exécuté avec
la base du produit tournée vers le haut.
ATTENTION : N’UTILISER QUE LES
CHARGEURS APPROUVÉS ET TOUJOURS
RETIRER LE CHARGEUR LORSQUE LE
CHARGEMENT EST TERMINÉ.
1. Renverser le produit, retirer la protection contre la poussière
sur la prise de chargement et brancher le chargeur sur le
produit. Tourner pour bloquer.
2. Brancher le chargeur dans une prise électrique et allumer.
MODE DE LA BATTERIE ET VOYANTS D’ÉTAT
MODE DESCRIPTION INDICATION DU VOYANT
Veille Allumé jaune xe JAUNE
Précharge Clignotant jaune lent JAUNE
Attente de JAUNE
température et VERT
mot de valider Clignotant jaune et vert alterné
Charge rapide Clignotant vert rapide VERT
Charge de
maintenance Clignotant vert lent VERT
Prête Allumé vert fixe VERT
Erreur Clignotant jaune rapide JAUNE
ENTRETIEN DU PRODUIT :
Pour assurer une durée de vie maximale, veuillez
observer les consignes suivantes :
1. Maintenir les pièces mobiles à distance de
tout objet étranger.
2. Ne pas se tenir debout sur le produit.
3. Éviter les pentes extrêmes.
4. Vérifier que la protection anti-poussière soit
remise en place après le chargement.
5. Ne pas utiliser en cas de dommage –
renvoyer alors le produit au distributeur.
SPÉCIFICATIONS
SOURCE DE LUMIÈRE LED
VALEUR EN
LUMENS TESTÉE 1200 (bas) /
2400 (haut)
PILES : NiMH
8 piles de
9,6 volts 9 amp/h
TEMPS DE CHARGE
DE LA BATTERIE : 8 h
AUTONOMIE
DE LA BATTERIE : 6 h (bas) /
3 h (haut)
Tirez doucement le
dispositif
de blocage
jusqu’à libérer
les trois pieds.
Retirez la protection
anti-poussière pour
brancher le chargeur
 Loading...