

PELI 9420 User guide [ml]
PEll
9420
LED
WORK
LIGHT USER
MANUAL
& CAUTION, READ
eomply eould result in injury.
DEPLOYMENT
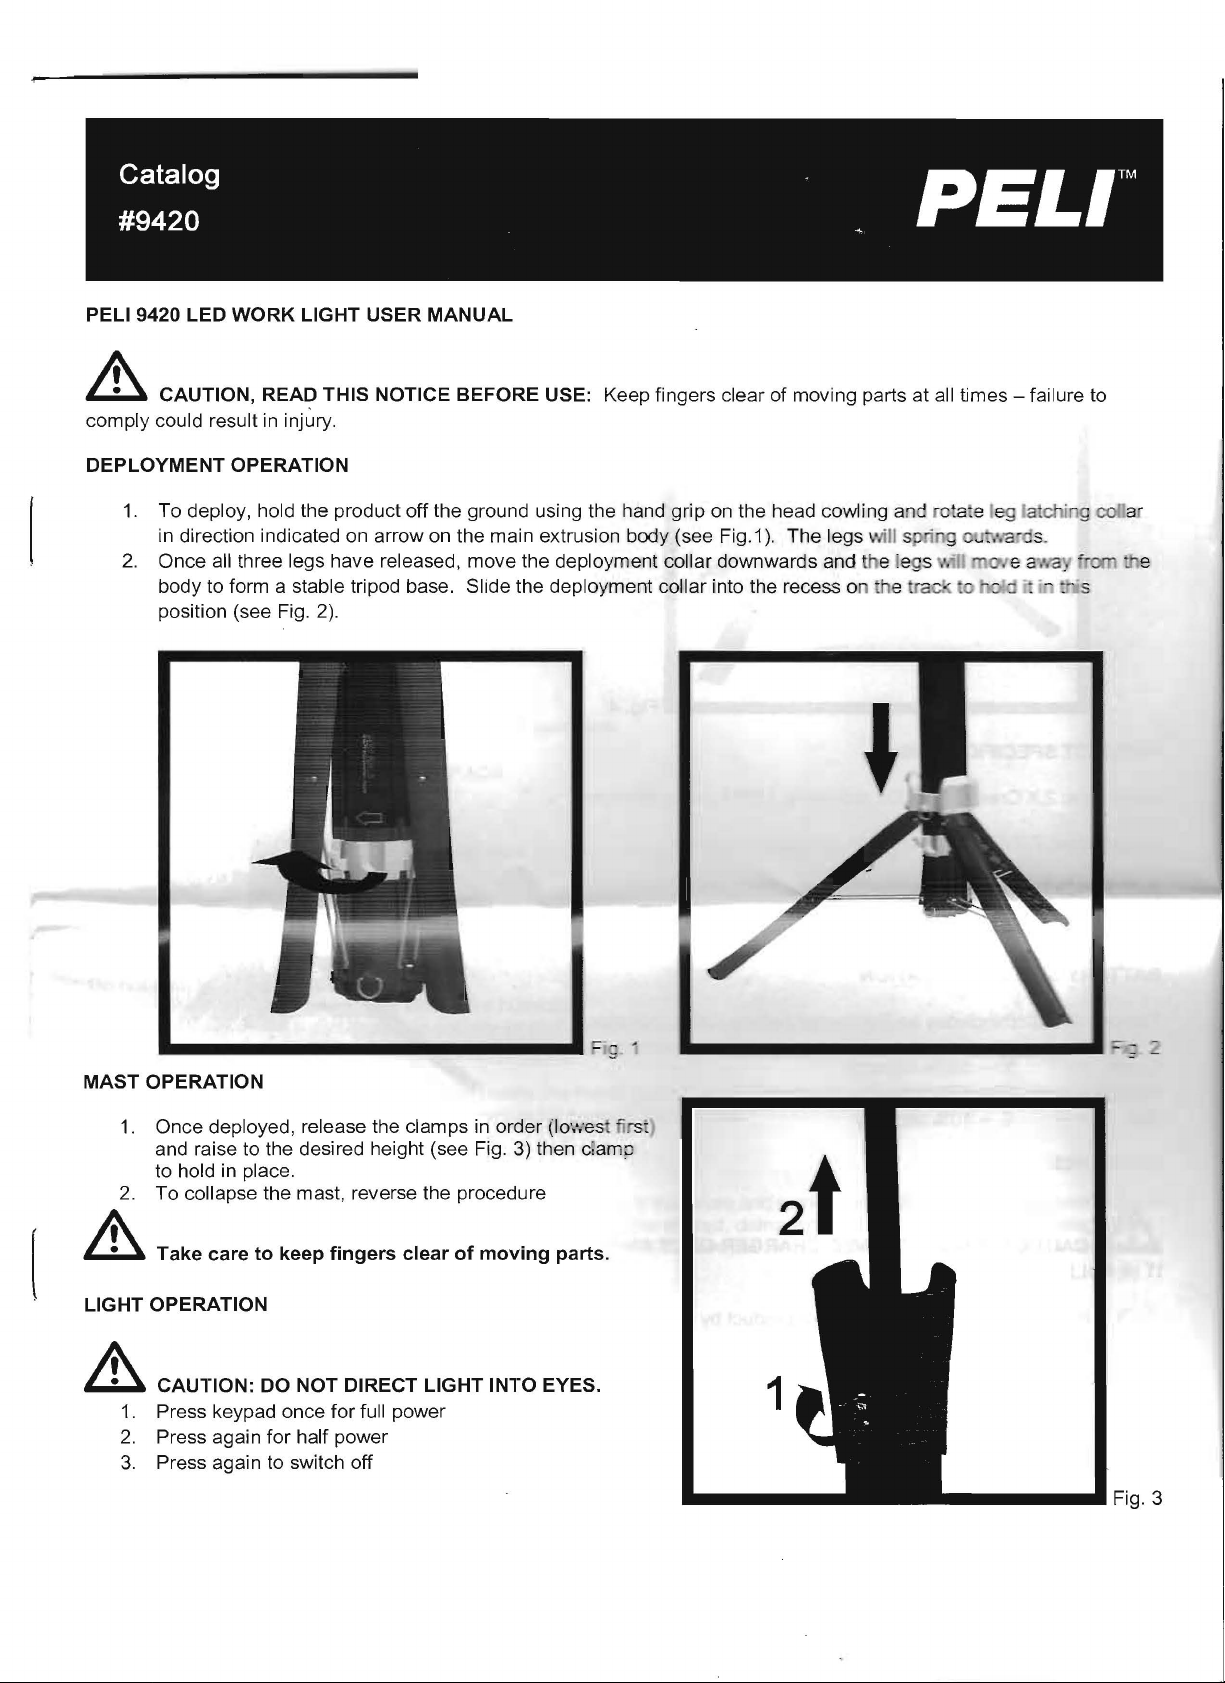
1.
To deploy, hold the produet off the ground using the hand grip on the head eowling a
in direetion indieated on arrow on the main extrusion bcxly (see Fig.1). The legs I.'lill s
2.
Onee all three legs have released, move the deployment eollar downwards and the legs
body to form a stable tripod base. Slide the deployment eollar into the reeess on
position (see Fig. 2).
OPERATION
THIS
NOTICE
BEFORE
USE: Keep fingers
dear
of moving parts at all times - failure to
nd
the
ro tate l
prin
tra,--l
\!
g 0
'
.
eg
latchin
",
e
,
MAST
&
LIGHT OPERATION
&
OPERATION
1.
Onee deployed, release the elamps
and raise to the desired height (see Fig. 3) then d amn
to hold in plaee.
2. To eollapse the mast, reverse the proeedure
Take
care
to
keep
fingers
CAUTION:
1.
Press keypad onee for full power
2.
Press again for half power
3.
Press again to switeh off
DO NOT DIRECT
clear
LIGHT
of
in
order
(Io·.·..est firs:
moving
INTO EYES.
parts.
'--
, '
=.
2t
1
_____
.'
Fig. 3

STORAGE OPERATION
1.
To
dose,
ensure light head is facing upwards and fully collapse the mast,
2.
Pull the deployment collar upwards sharply (to dislocate it - see Fig. 4)and continue sliding the collar up until it
of
runs out
travel. The legs can then all be pushed inwards and will automatically latch
in
place .
•'
_____________
PRODUCT SPECIFICATION:
Lamp type: 2 X Cree
Battery type: 7.2V
Burn time: 2 hours minimum
Charging time: less than 2 hours
BATTERY STATUS INDICATION
The on/
Green = 50 - 100% capacity
Orange
Red
CHARGING:
off
switch includes an illuminated battery status indicator.
=
=
XML
LEDs producing 1200 lumens at source
Li
Ion removable, rechargeable battery
10 - 50% capacity
o - 10% capacity
..
Fig. 4
'
Light fully deployed - approx. 5ft or 1500mm
& CAUTION: USE APPROVED CHARGER ONLY AND ALWAYS REMOVE BATTERY FROM CHARGER ONCE
IT
IS
FULL Y CHARGED.
1.
Remove the battery from base
the housing.
2.
Plug the power supply into the mains socket (or 12V
small plug into the jack into the side of the charger. Switch on AC mains/ vehicle power. Insert battery into the
charger (using the yellow tabs on the top of the battery pack to line up with the yellow charger latches to ensure
correct orientation, see Fig. 5.) secure it
battery pack into place; it should locate easily. If there is resistance, there
of
product by pressing the two yellow latches simultaneously and pulling it from
vehide
in
place using the latches and observe the LED status. Do not force the
charger plug into cigarette lighter socket) and the
may
be an obstruction!
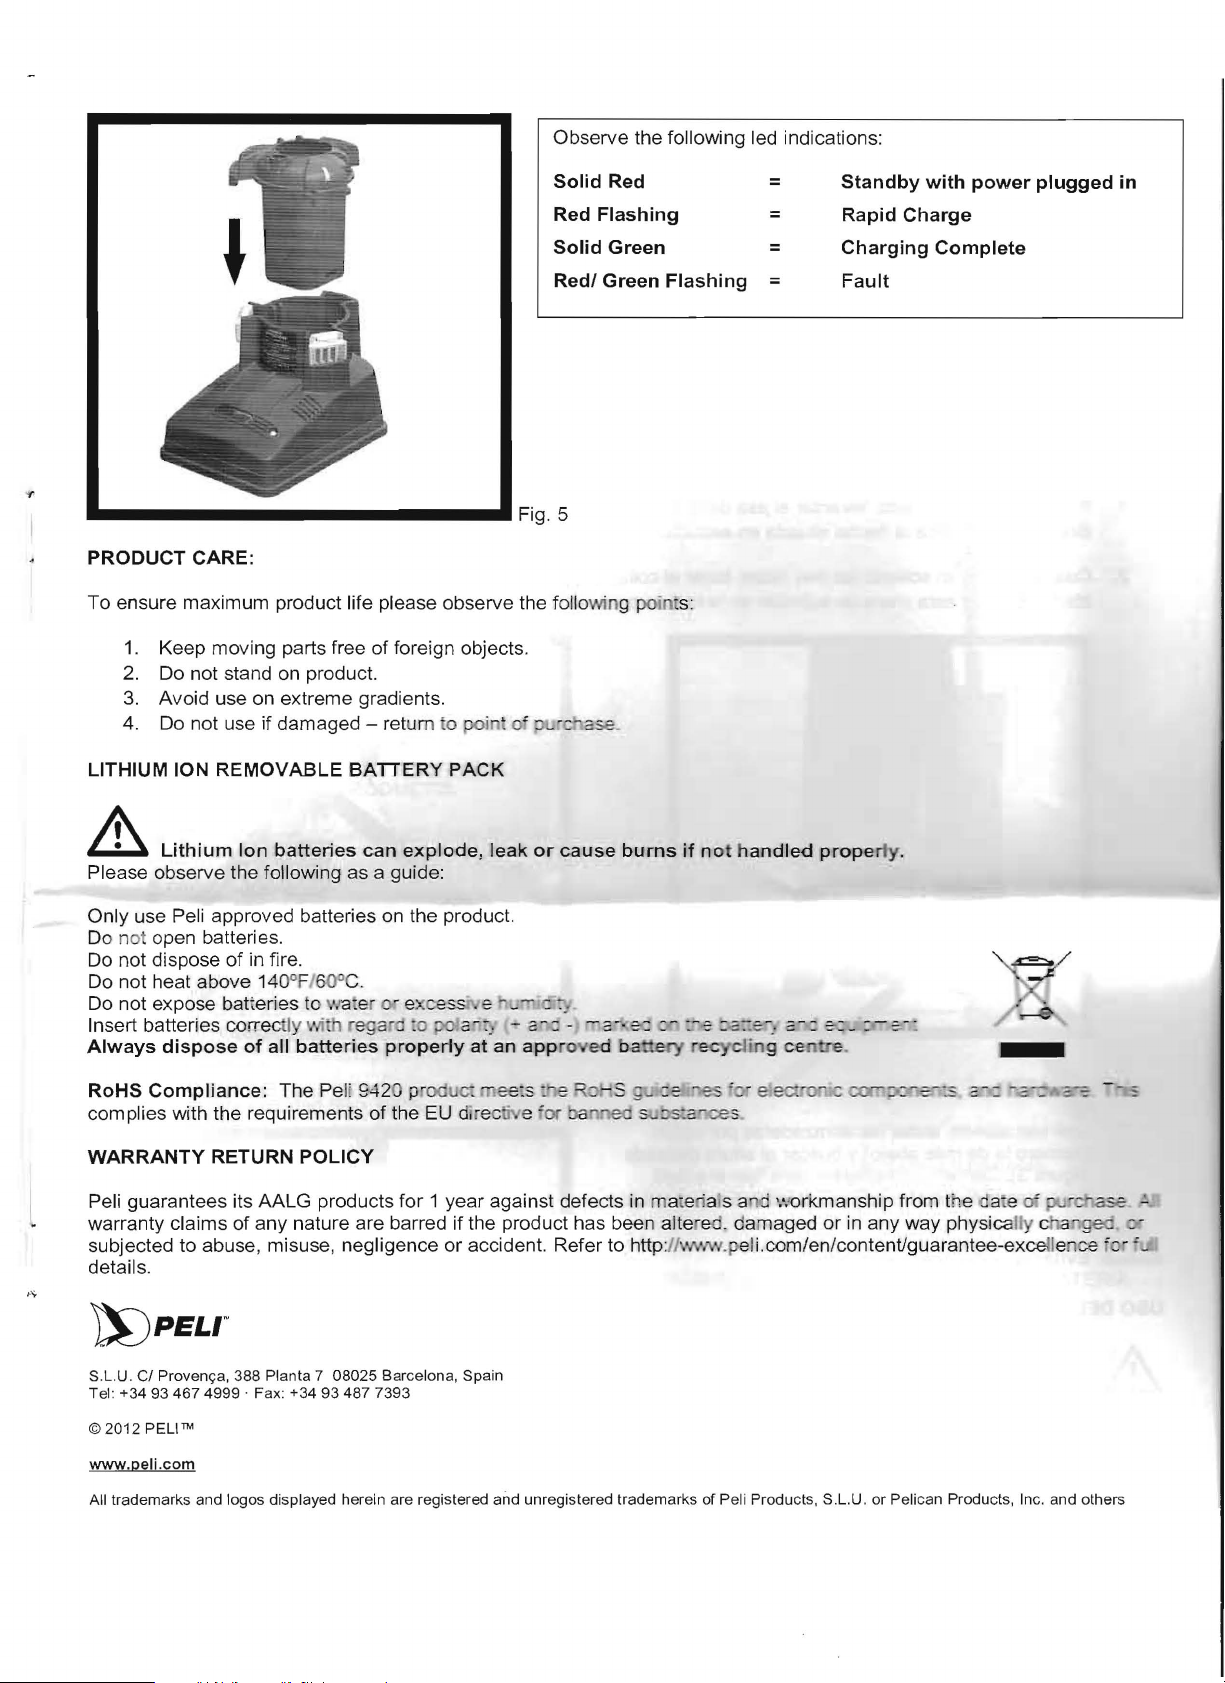
Observe the following led indications:
Solid
Red
Red
Flashing
Solid
Green
Redl
Green
'V
• •
Fig. 5
Flashing
=
=
=
=
Standby
Rapid
Charge
Charging
Fault
with
power
Complete
plugged
in
PRODUCT CARE:
To ensure maximum product life please observe the foliowing point
1.
Keep moving parts free of foreign objects.
2. Do not stand on product.
3.
Avoid use on extreme gradients.
4. Do not use if damaged - retum to ooi
LITHIUM ION
&
REMOVABLE
Lithium
Ion
batteries
BATIERY
can
explode,
PACK
leak
or
cause
burns
Please observe the following as a guide:
Only use Peli approved batteries on the product.
Do not open batteries.
of
Do not dispose
Do not heat above 140
Do not expose batteries to
Insert batteries correctly with regar-j :o
Always
RoHS
dispose
Compliance:
complies with the requirements
WARRANTY
in fire.
of
all
The Pe
RETURN
o
F/W
C.
\-v
ater
batteries
li
POLICY
or
excess".
jXI,a--::
properly
9420
p
rodu~
of
the EU direcm e f
:3 ~ - .,.. - ' J e
. -
c-:
-
-2-<'~::-
at an
approved battery rec
'lJ€€
:S :.":8
qo
or
Oaw.
-S
eo
~~
s"':)S:z
s:
if
not
~-~ :=::~
:e
"':~ :=--
...
,ces
handled
-:
ycl
ing ce.
ei
·
2-
::::
earo"-
prope
s.
__
_
rty
.
~
.~
Peli guarantees its AALG products for 1 year against defects
in
maleriais
warranty claims of any nature are barred if the product has been altered. damaged
subjected to abuse, misuse, negligence or accident. Refer to http:/Ny'\'/w.peli.com/en/contentlguarantee-excetlense fc
details.
,"
roPELr
S.L.U. CI
Tel:
©
www.peli.com
All trademarks and logos displayed herein are registered and unregistered trademarks of Peli Produets, S.L.U. or Peliean Produets, Ine. and others
Proven<;:a.
+34934674999,
2012
PEll
TM
388
Planta 7
Fax:
08025
+34934877393
Barcelona, Spain
a
n~
'.'iorkmanship from the (fate
or
in any way physically
if.
pur::-asa
char
.ged
~
r
~_
..:.
MANUAL DE USUARIO DEL SISTEMA DE ILUMINACION LED
PEll
9420 PARA USO PROFESIONAL
& ATENCION: LEER ESTE DOCUMENTO ANTES DE UTILIZAR EL APARATO. Evitar tocar las piezas moviles
para evitar lesiones.
MONTAJE
1. Para montar
direccion que indica la flecha situada en estructura principal (ver figura 1). Las patas bajaran.
2. Cuando se hayan soltado las tres patas, bajar
solida. Encajar esta pieza de sujeci6n en la ranura para fijar
,
.,
_____________
el
producto, levantar
el
asa de la cubierta dei cabezal y rotar la pieza que sujeta las patas en la
el
collar de sujeciOn hasta que las patas conformen una base
el
trfpode (ver figura 2) .
_____________
.'
Fig. 1
•'
..
' Fig. 2
USO DEL
MAsTIL
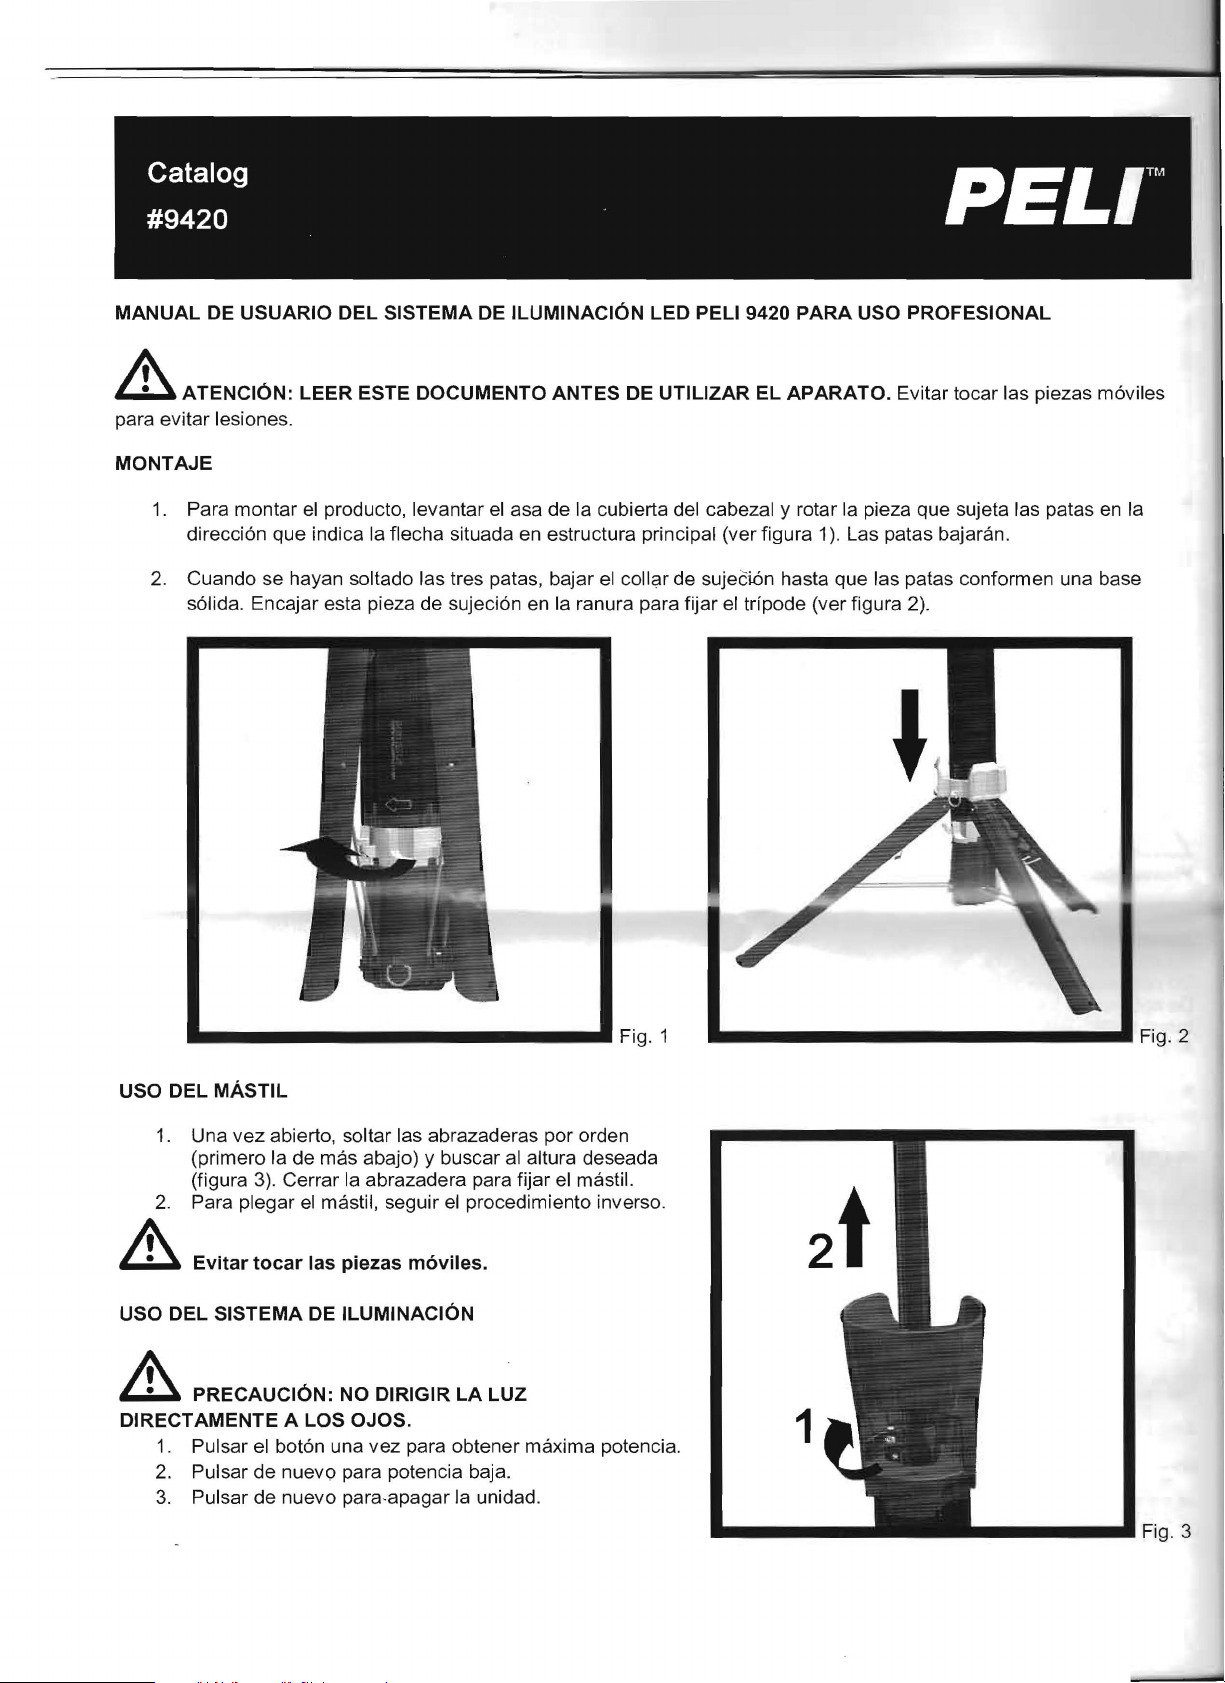
1.
Una
vez
abierto, soltar las abrazaderas por orden
(primero la de mas abajo) y buscar
(figura
2.
Para plegar
3)
. Cerrar la abrazadera para fijar
el
mastil, seguir
al
el
procedimiento inverso .
& Evitar tocar las piezas m6viles.
USO DEL SISTEMA DE ILUMINACION
& PRECAUCION: NO DIRIGIR LA LUZ
DIRECT AMENTE A LOS OJOS.
1.
Pulsar
2.
Pulsar de nuevo para potencia baja.
3. Pulsar de nuevo para·apagar la unidad.
el
boton una vez para obtener maxima potencia.
altura deseada
el
mastil.
2t
1
_____
..
' Fig. 3
...
 Loading...