

Page 1
Het toestel-identifi catieplaatje bevindt zich aan de binnenzijde van het toestel.
La plaque d’identifi cation de l’appareil se trouve sur l’intérieur de l’appareil.
Das Gerätetypenschild befi ndet sich innen am Gerät.
The appliance identifi cation card is located on the inside of the appliance.
Plak hier het toestel-identifi catieplaatje.
Placez ici la plaque d’identifi cation de l’appareil.
Kleben Sie hier das Gerätetypenschild ein.
Stick the appliance identifi cation card here.
Houd, wanneer u contact opneemt met de serviceafdeling, het complete typenummer bij de hand.
En cas de contact avec le service après-vente, ayez auprès de vous le numéro de type complet.
Halten Sie die vollständige Typennummer bereit,
wenn Sie mit der Kundendienstabteilung Kontakt aufnehmen.
When contacting the service department,
have the complete type number to hand.
Adressen en telefoonnummers van de serviceorganisatie vindt u op de garantiekaart.
Les adresses et les numéros de téléphone du service après-vente se trouvent sur la carte de garantie.
Adressen und Telefonnummern der Kundendienstorganisation fi nden Sie auf der Garantiekarte.
You will fi nd the addresses and phone numbers of the service organisation on the guarantee card.
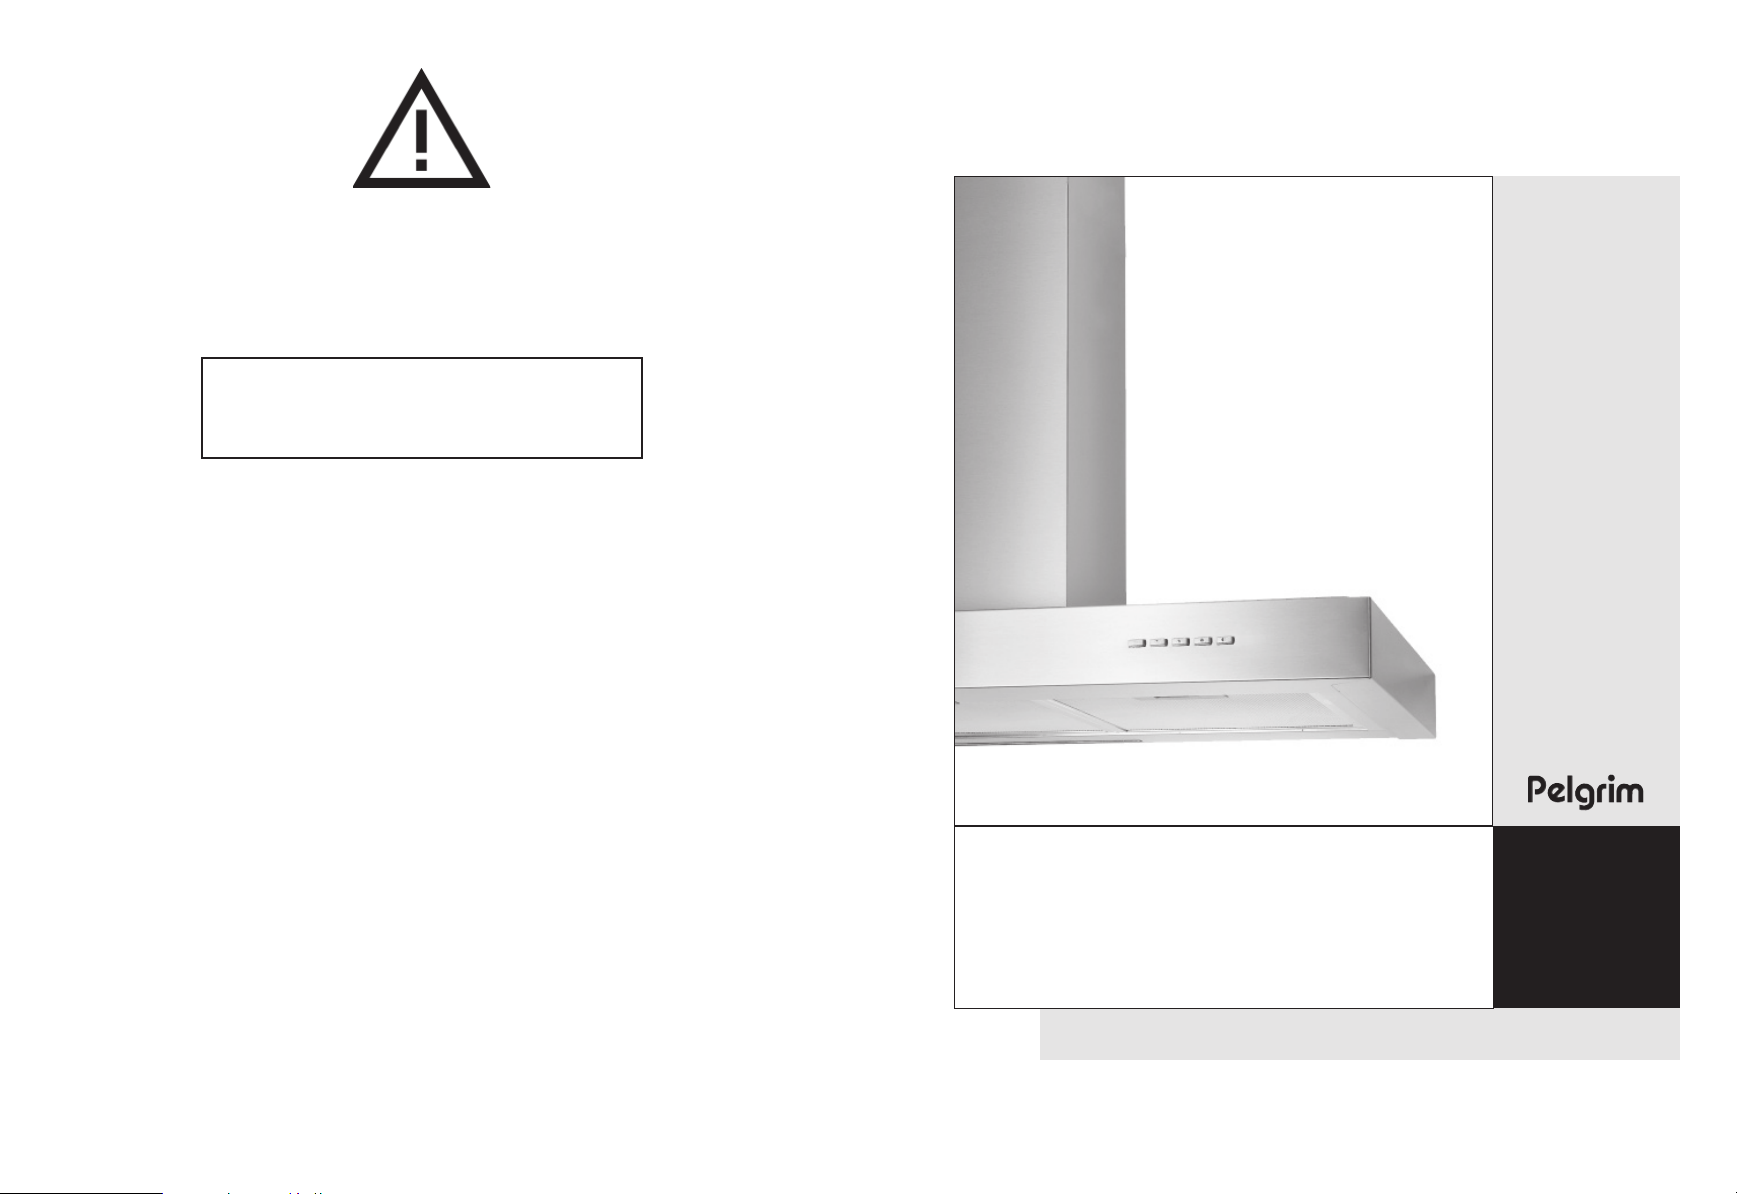
BSK600
BSK700
BSK900
3LIK0728_rev1
Handleiding
Notice d’utilisation - Anleitung - Manual
700003130100
Page 2
NL
Handleiding 3 - 12
FR
Notice dútilisation 14 - 24
DE
Anleitung 25 - 35
GB
Manual 36 - 46
Gebruikte pictogrammen - Pictogrammes utilisés
Benutzte Piktogramme - Pictograms used
Belangrijk om te weten - Important à savoir
Wissenswertes - Important information
Tip - Conseil - Tipp - Tip
2
Page 3
Inhoud
Uw schouwkap
1
1.1 Beschrijving 4
1.2 Inleiding 4
2
Veiligheid
2.1 Waar u op moet letten 5
2.2 Afvoersystemen 6
3
Gebruik 7
4
Onderhoud
4.1 Vetfi lters verwijderen 8
4.2 Het koolstoffi lter vervangen 8
4.3 Lampen vervangen 8
4.4 Reinigen 9
5
Installatie
5.1 Algemeen 10
5.2 Elektrische aansluiting 11
5.3 Montage van de schouwkap 12
Bijlage 13
6
3
Page 4
1 Uw schouwkap
12345
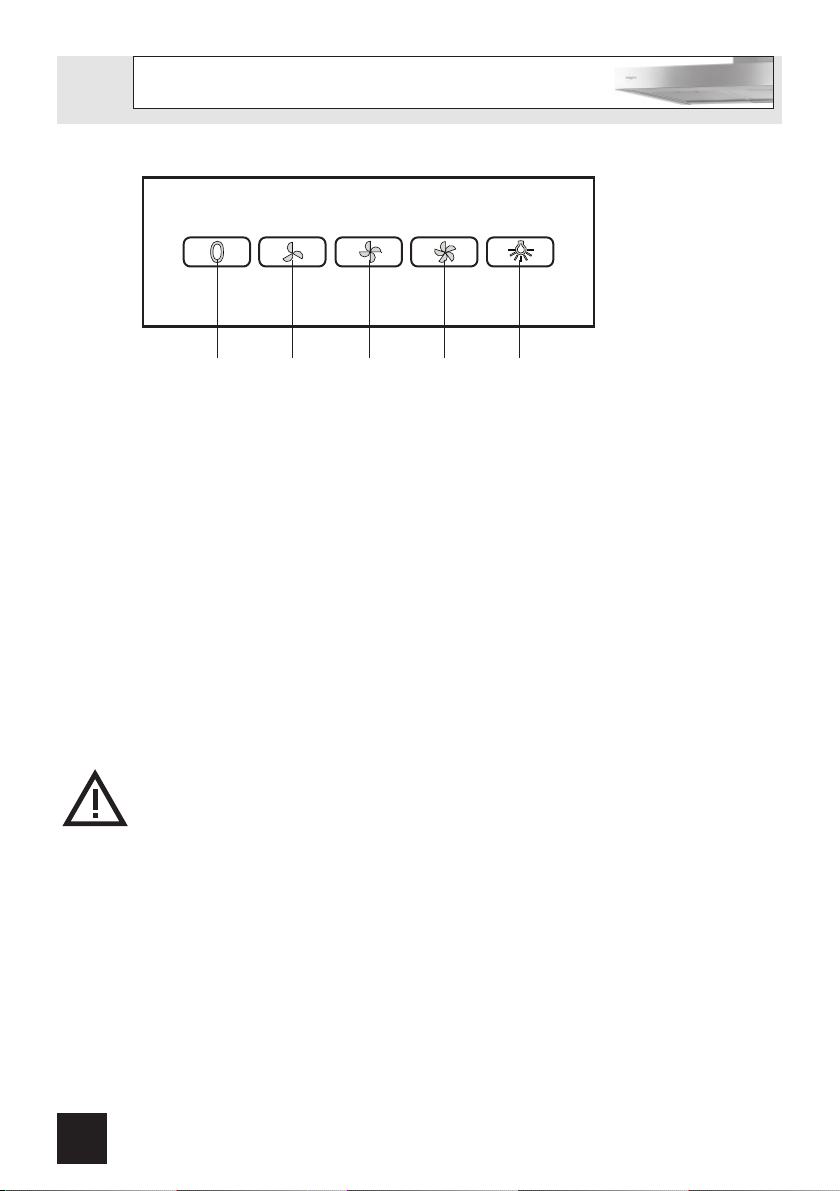
1.1 Beschrijving
1. Aan-/uittoets
2. Ventilator stand 1
3. Ventilator stand 2
4. Ventilator stand 3
5. Verlichting
1.2 Inleiding
Als u deze gebruiksaanwijzing doorleest, bent u snel op de hoogte van alle
mogelijk heden die dit toestel u biedt. U vindt informatie voor uw veiligheid en over
het onderhoud van het toestel.
Bewaar de gebruiksaanwijzing en het installatievoorschrift. Een eventueel volgende
gebruiker van dit toestel kan daar zijn voordeel mee doen.
4
Page 5
2 Veiligheid
2.1 Waar u op moet letten
Attentie! Laat het toestel aansluiten door een erkend installateur (zie
hoofdstuk “Installatie”). Sluit het apparaat niet aan op het elektriciteitsnet
voordat de installatie volledig is voltooid.
• Sluit het toestel aan conform de plaatselijk geldende installatievoorschriften.
• In verband met eventuele scherpe randen adviseren wij u tijdens de montage van
de wasemkap werkhandschoenen te gebruiken.
• Het apparaat is gefabriceerd volgens de meest recente veiligheidsstandaarden.
Desondanks adviseren wij personen met psychische of motorische stoornissen,
mentale achterstand of zwakbegaafdheid het apparaat niet te gebruiken zonder
toezicht van een bekwaam persoon. Hetzelfde geldt voor kinderen.
• De wasemkap nooit gebruiken als het vetfi lter niet of niet goed gemonteerd is!
• Gebruik de wasemkap niet om tegenaan te leunen.
• Zorg voor voldoende ventilatie wanneer u de wasemkap samen gebruikt met een
gaskookplaat.
• De afvoer mag niet worden aangesloten op een rookkanaal dat voor andere
toestellen in gebruik is.
• Flambeer nooit onder de afzuigkap en maak de fi lters op tijd schoon. Het frituren
moet geschieden onder voortdurend toezicht, om te voorkomen dat verhit vet in
brand raakt.
• De wasemkap moet regelmatig (minstens 1 x per maand) schoongemaakt worden,
zowel het exterieur als het interieur. Onvoldoende reinigen of te laat vervangen van
de fi lters kan brandgevaar veroorzaken.
• Wanneer de aansluitkabel is beschadigd mag deze alleen worden vervangen door
de fabrikant, zijn serviceorganisatie of gelijkwaardig gekwalifi ceerde personen, om
gevaarlijke situaties te voorkomen.
• Haal eerst de stekker uit het stopcontact als u de lampen wilt vervangen! Gebruik
uitsluitend dezelfde lampen met aangegeven wattage. Gebruik de wasemkap alleen
met gemonteerde lampjes om het risico van een elektrische schok te verminderen.
• De vetfi lters kunnen heet worden tijdens gebruik. Wacht, na het koken, minimaal
30 minuten met schoonmaken.
5
Page 6
2 Veiligheid
• Bij reparatie of schoonmaakbeurten moet de stroom uitgeschakeld worden.
Neem de stekker uit het stopcontact of draai de schakelaar in de meterkast op nul.
• Vet en olie zijn bij oververhitting brandbaar. Blijf in de buurt tijdens het bereiden van
gerechten.
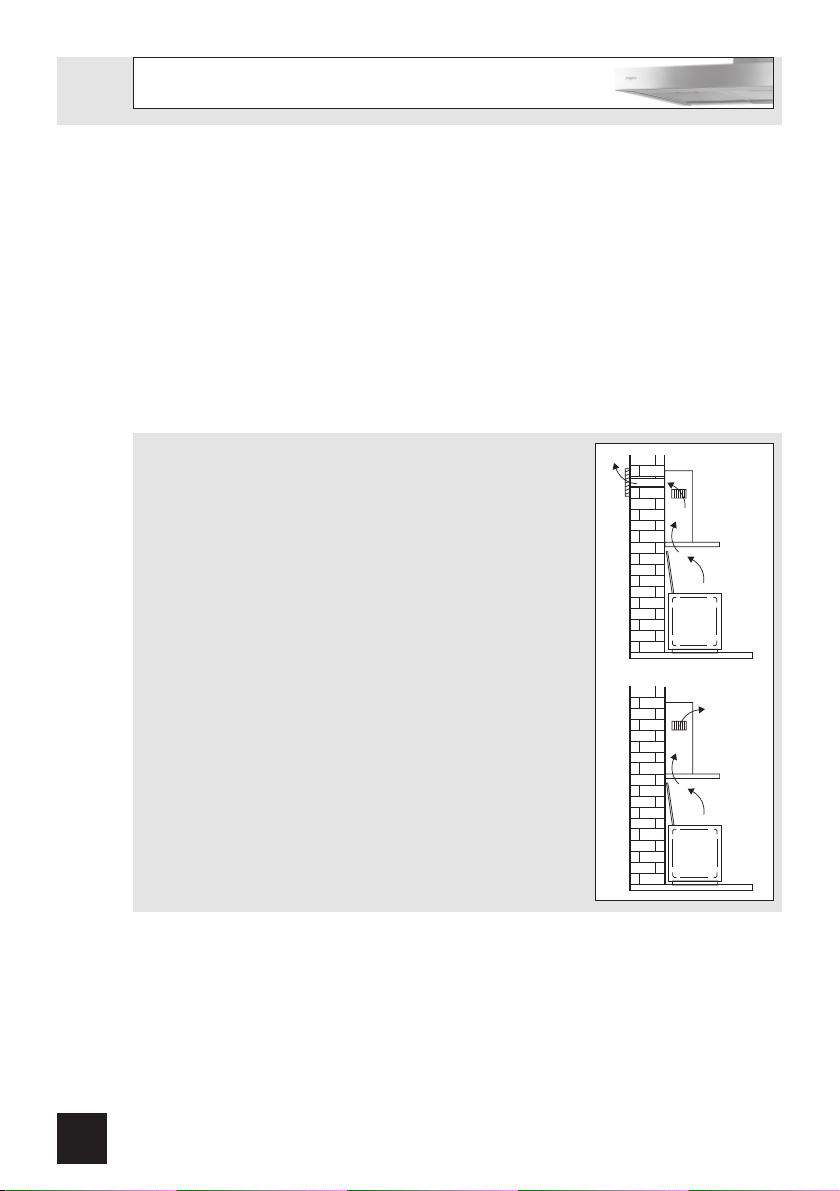
2.2 Afvoersystemen
De afzuigkap kan, afhankelijk van het model, op twee manieren
worden aangesloten:
1. Als afzuigkap op een afvoerkanaal. De aangezogen en
gefi lterde kookdampen worden naar buiten afgevoerd.
Dit is de beste manier!
2. Als recirculatie afzuigkap. De vetdeeltjes en de geur uit de
aangezogen kookdampen worden gefi lterd. De aangezogen
lucht wordt niet afgevoerd maar teruggeblazen in de keuken.
U moet dan wel een koolstoffi lter plaatsen.
Let op! Het koolstoffi lter moet apart besteld worden.
6
Page 7
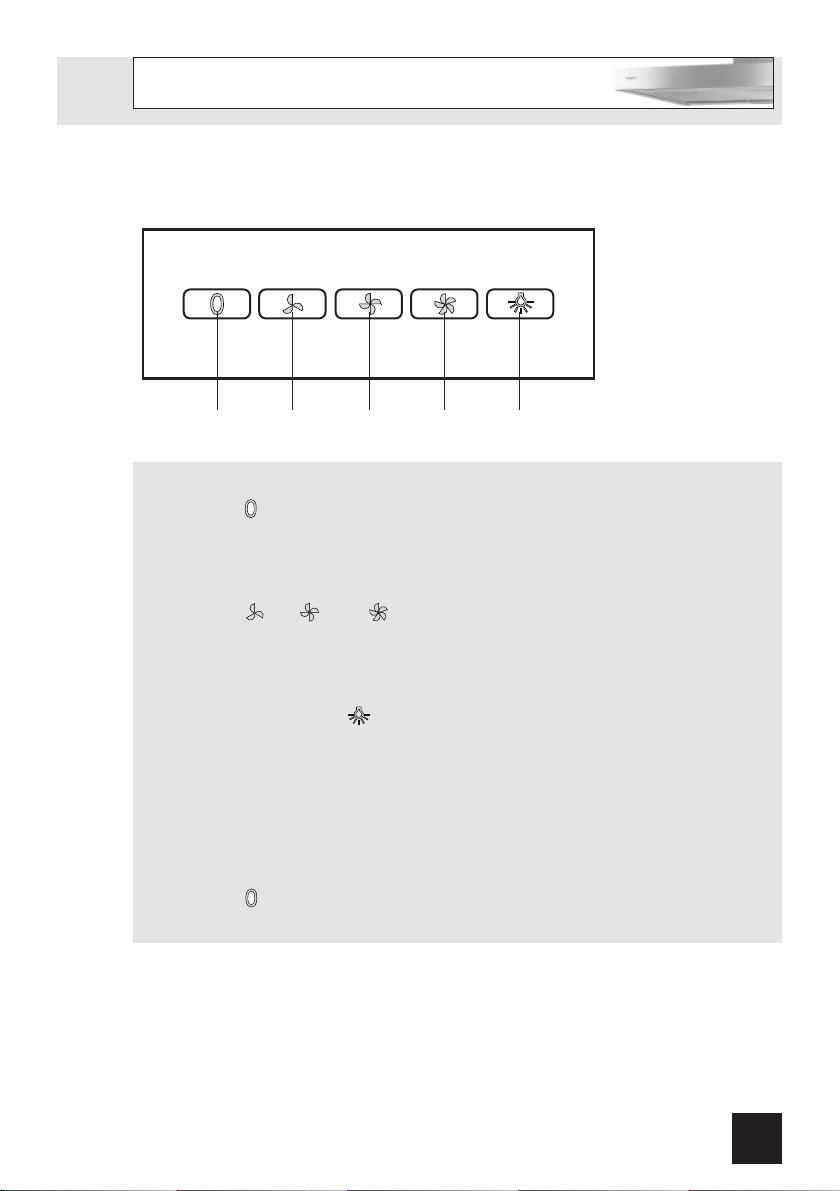
3 Gebruik
Bediening
12345
Ventilator inschakelen
Druk op toets (1).
De afzuigkap schakelt in op de laatst gekozen stand.
Ventilator inschakelen
Druk op toets (2), (3) of (4).
De afzuigkap schakelt in op de gekozen stand.
Verlichting in- en uitschakelen
Druk op de verlichtingstoets (5).
De verlichting gaat branden.
Druk nogmaals op de toets.
De verlichting gaat uit.
Ventilator uitschakelen
Druk op toets (1).
De afzuigkap schakelt uit.
7
Page 8
4 Onderhoud
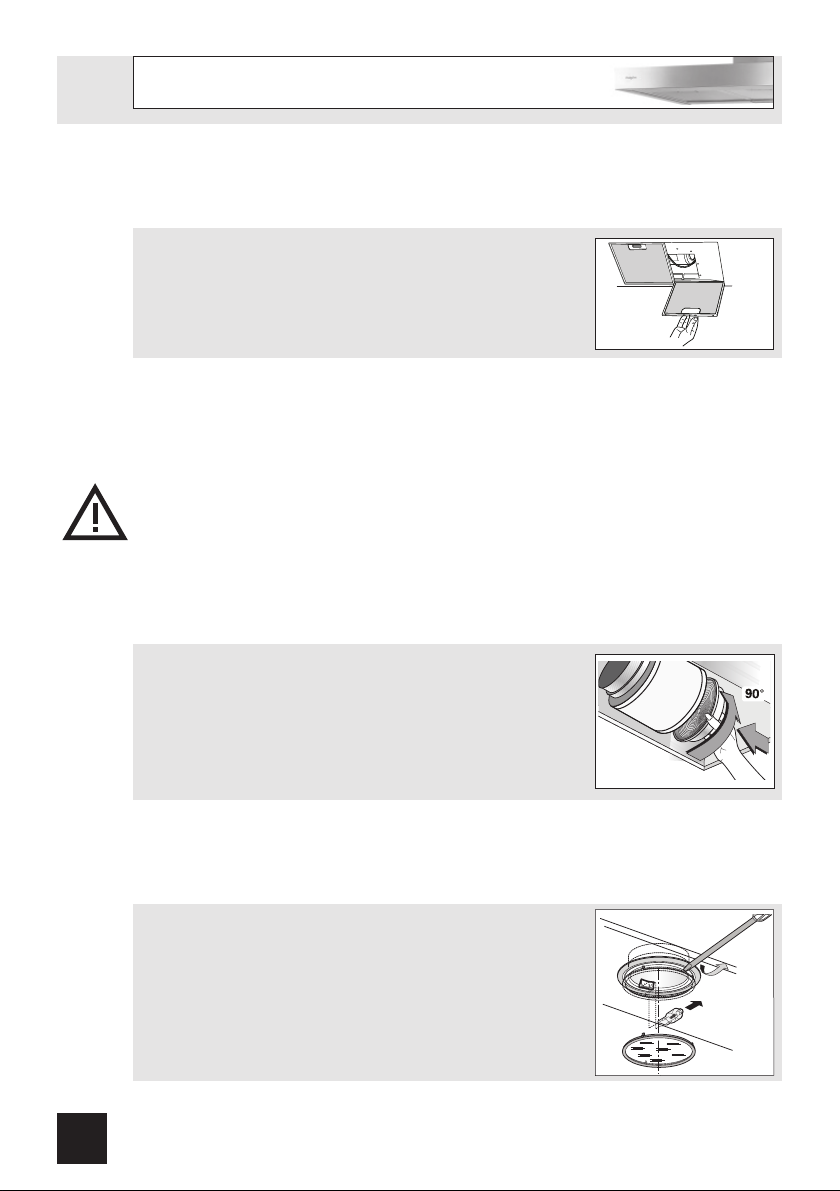
4.1 Vetfi lters verwijderen
Schakel de netspanning uit! Neem de stekker uit het stopcontact of zet de schakelaar in de meterkast op nul. Trek het
vetfi lter naar u toe en kantel het naar voren toe omlaag.
4.2 Het koolstoffi lter vervangen
Gebruik een koolstoffi lter als de afzuigkap niet is aangesloten op een afvoerkanaal.
Belangrijk:
• De verzadiging van het fi lter is afhankelijk van de intensiteit van het gebruik, de
manier van koken en de regelmaat waarmee de vetfi lters worden schoongemaakt.
• Het koolstoffi lter moet minimaal iedere vier maanden worden vervangen.
• Koolstoffi lters zijn niet uitwasbaar voor hergebruik. Verzadigd koolstof is niet
milieuvriendelijk, vervang het fi lter tijdig.
Verwijder de vetfi lters.
Bevestig de koolstoffi lters aan de motor.
Plaats de vetfi lters.
4.3 Lampen vervangen
Verwijder het afdekkapje van de lamp.
Vervang de halogeenlamp door een nieuwe lamp van
maximaal 20 Watt. Plaats het afdekkapje terug. Vervanging
van defecte LED verlichting dient door een professioneel
installateur te gebeuren.
8
Page 9
4 Onderhoud
4.4 Reinigen
Afzuigkap
Maak de afzuigkap schoon met een sopje en een zachte doek. Daarna met schoon water
nabehandelen. Gebruik geen agressieve schoonmaakmiddelen zoals bijvoorbeeld soda.
Het lakwerk van de afzuigkap blijft mooi als u zo nu en dan de lak met was inwrijft.
Roestvrijstalen schouwkappen
Behandel roestvrijstalen schouwkappen niet met schuursponsjes of andere
schuurmiddelen. Behandel na met een niet schurend, niet polijstend middel en poets met
de structuur van het roestvrijstaal mee.
Metalen vetfi lters
De metalen vetfi lters kunnen voor reiniging in de vaatwasmachine geplaatst worden.
Plaats de vetfi lters met de openingen naar beneden in de vaatwasmachine zodat het
water eruit kan lopen. Aluminium vetfi lters worden door de reinigingsmiddelen in de
vaatwasser dof. Dit is normaal en beïnvloedt de werking niet.
Glazen panelen
Reinig de glazen panelen niet in de vaatwasser in verband met het risico op het ontstaan
van kleurverschillen. Glazen panelen kunnen het best handmatig, met een
sopje gereinigd worden. Raadpleeg www.pelgrimservice.nl voor onderhoudstips.
9
Page 10
5 Installatie
5.1 Algemeen
De aansluiting van dit apparaat op het lichtnet moet worden uitgevoerd door een erkend
installateur, die de juiste veiligheidsvoorschriften kent en toepast. Het apparaat voldoet
aan de Europese voorschriften.
Belangrijk om te weten:
• De afstand tussen het laagste punt van de wasemkap en een gaskookplaat moet
minimaal 65 cm bedragen. Bij een elektrische-, keramische- of inductiekookplaat
moet deze afstand minimaal 55 cm zijn.
• Als de afzuigkap wordt aangesloten op een bestaand afvoerkanaal, mogen geen
andere apparaten op dat kanaal aangesloten zijn (zoals een geiser of kachel).
• Neem de plaatselijk geldende voorschriften in acht met betrekking tot de beluchting
van gasapparaten.
• Hoe korter de afvoerpijp en hoe minder bochten, des te beter is de werking van de
afzuigkap.
10
• Controleer voordat u met boren begint of er geen installatieleiding(en) aanwezig is
(zijn).
• De aansluitpijp van de schouwkap heeft een diameter van 125 mm of 150 mm. Het
beste is de afvoerpijp ook met deze diameter uit te voeren.
• Het installatiemateriaal dat bij deze afzuigkap geleverd wordt, is geschikt voor
versterkt beton en bakstenen muren. Voor bepaalde wanden heeft u speciale
pluggen en schroeven nodig.
Page 11
5 Installatie
5.2 Elektrische aansluiting
Dit is een (isolatie) klasse II (dubbel geïsoleerd) toestel. Het snoer hoeft derhalve
niet op een geaard stopcontact aangesloten te worden.
Controleer of de op het typeplaatje vermelde spanning overeen komt met de spanning
van de huisinstallatie.
De aansluiting op het elektriciteitsnet moet als volgt uitgevoerd worden:
• BRUIN = L fase
• BLAUW = N nulleiding
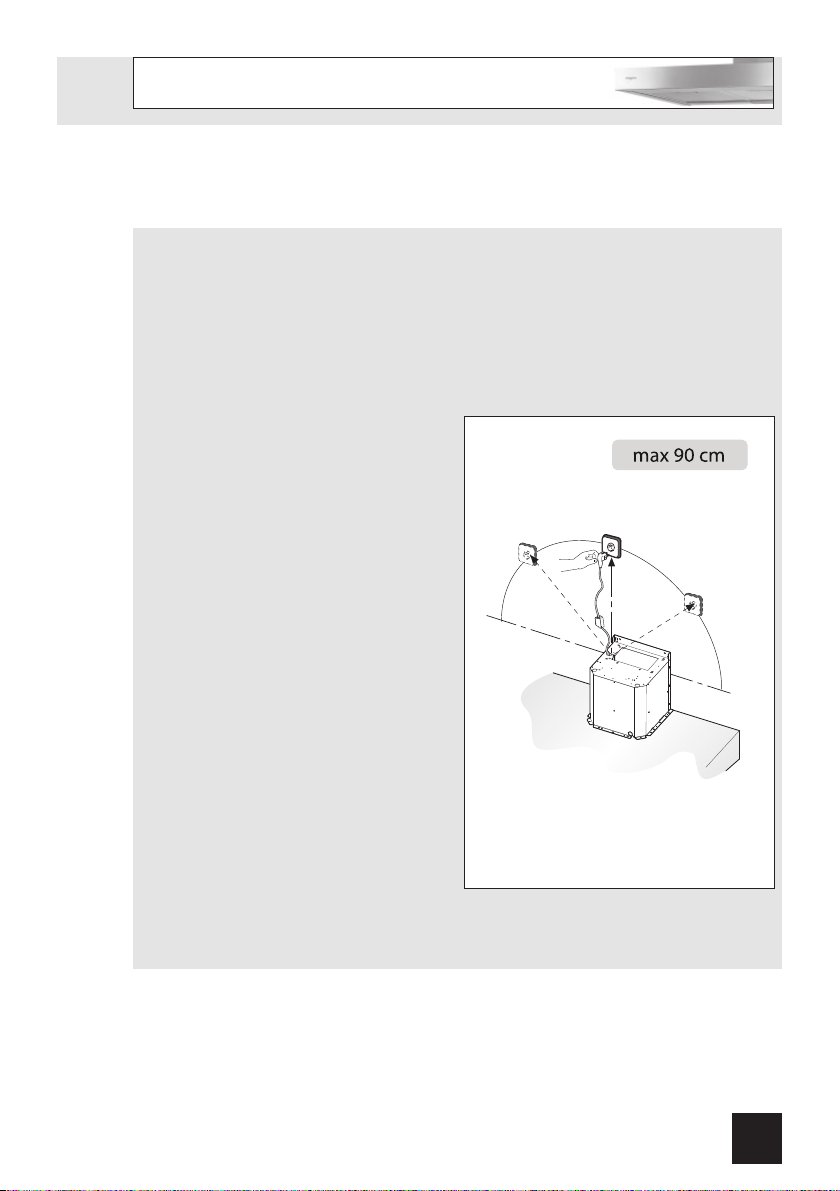
Deze afzuigkap is voorzien van een
aansluitstekker. Installeer de afzuigkap
zodanig dat de stekker bereikbaar is.
Plaats de wandcontactdoos bij voorkeur
uit het zicht, achter de sierkoker.
Let op:
Als u een vaste aansluiting maakt
moet u ervoor zorgen dat er een
omnipolaire schakelaar met een
contactafstand van minimaal 3 mm in
de toevoerleiding wordt aangebracht.
11
Page 12

5 Installatie
5.3 Montage van de schouwkap
• Schroef de kap op de muur met
behulp van de pluggen en de
schroeven (A). Zie maatvoering.
• Stel eerst de breedte van de beugels
in op de breedte van de bovenste
koker. Schroef vervolgens de beugel
op de muur met de pluggen en
schroeven (B). Let op de afstand
tussen de beugel en het plafond (zie
maatvoering).
• Plaats de afvoerbuis op de fl ens (C)
en vervolgens op de aansluiting van
het afvoerrooster.
• Steek de stekker in de
wandcontactdoos.
• Plaats de bovenste koker in de
onderste koker.
• Schroef de onderste koker aan de
afzuigkap met de schroeven (D).
beugel
beugel
E
12
• Klap de bovenste koker om de
beugel en schroef deze vast met de
schroeven (E).
D
Page 13
6 Bijlage
Verpakking en toestel afvoeren
Bij de vervaardiging van dit toestel is gebruik gemaakt van duurzame materialen.
Dit toestel moet aan het eind van zijn levenscyclus op verantwoorde wijze worden
afgevoerd. De overheid kan u hieromtrent informatie verschaffen.
De verpakking van het toestel is recyclebaar. Gebruikt kunnen zijn:
• karton;
• polyethyleenfolie (PE);
• CFK-vrij polystyreen (PS-hardschuim).
Deze materialen op verantwoorde wijze en conform de overheidsbepalingen afvoeren.
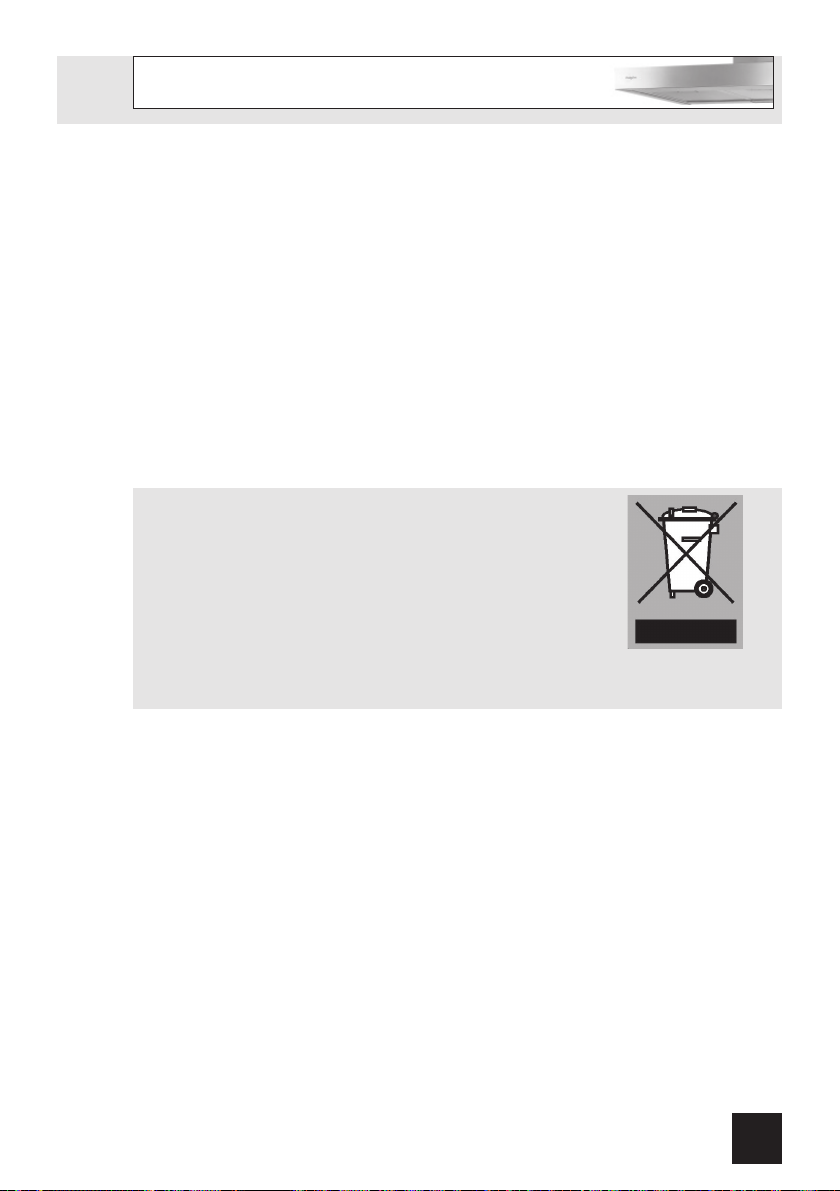
Om op de verplichting tot gescheiden verwerking van
elektrische huishoudelijke apparatuur te wijzen, is op het
product het symbool van een doorgekruiste vuilnisbak
aangebracht. Dit betekent dat het apparaat aan het einde
van zijn levensduur niet bij het gewone huisvuil mag worden
gevoegd. Het toestel moet naar een speciaal centrum voor
gescheiden afvalinzameling van de gemeente worden gebracht
of naar een verkooppunt dat deze service verschaft.
Het apart verwerken van een huishoudelijk apparaat voorkomt mogelijk negatieve
gevolgen voor het milieu en de gezondheid die door een ongeschikte verwerking
ontstaat. Het zorgt ervoor dat de materialen waaruit het apparaat bestaat, teruggewonnen kunnen worden om een aanmerkelijke besparing van energie en grondstoffen
te verkrijgen.
13
Page 14

uw espressomachine
Contenu
Votre hotte cheminée
1
1.1 Description 15
1.2 Introduction 15
2
Sécurité
2.1 Recommandations 16
2.2 Système d’évacuation 17
3
Utilisation 18
4
Entretien
4.1 Elimination des fi ltres 19
4.2 Remplacement des fi ltres à charbon 19
4.3 Changement d’ampoules 19
4.4 Nettoyage 20
5
Installation
5.1 Généralités 21
5.2 Connexion électrique 22
5.3 Montage de la hotte cheminée 23
14
Annexe 24
6
Page 15

uw espressomachine
1 Votre hotte cheminée
12345
1.1 Description
1. Marche/arrêt
2. Ventilateur position 1
3. Ventilateur position 2
4. Ventilateur position 3
5. Éclairage
1.2 Introduction
Ce manuel est un aperçu des possibilités offertes par cet appareil. Il vous fournira des
renseignements précieux sur le plan de la sécurité.
Conservez le mode d’emploi et les directives d’installation. Ainsi, un éventuel prochain
usager de l’appareil pourra en profi ter.
15
Page 16

uw espressomachine
2 Sécurité
2.1 Ce à quoi vous devez prêter attention
Attention ! Faites brancher l’appareil par un installateur agréé (voir
chapitre “Installation”). Ne branchez pas l’appareil sur le réseau avant
que l’installation ne soit complètement terminée.
• Raccordez l’appareil conformément aux prescriptions d’installation locales.
• Les bords de l’appareil pouvant être coupants, nous vous conseillons de porter des
gants de travail durant le montage de la hotte aspirante.
• L’appareil a été fabriqué conformément aux standards de sécurité les plus récents.
Nous vous conseillons, cependant, d’éviter que les personnes souffrant de troubles
psychiques ou moteurs, de retard mental ou étant mentalement handicapées
n’utilisent l’appareil en l’absence d’une personne compétente. Ceci vaut également
pour les enfants.
• N’utilisez jamais la hotte aspirante lorsque le fi ltre n’est pas (correctement) monté !
• Ne vous appuyez pas sur la hotte aspirante.
• Veillez à ce que l’aspiration soit suffi sante lorsque la hotte aspirante est utilisée en
même temps que la plaque de cuisson.
• L’évacuation ne peut pas être raccordée à un conduit de fumée, également, utilisé
pour d’autres appareils de chauffage.
• Ne fl ambez jamais de plats sous la hotte aspirante et nettoyez les fi ltres à temps.
La préparation d’aliments frits doit se faire sous surveillance constante pour éviter
que le graisse surchauffée ne s’enfl amme.
• La hotte aspirante doit être régulièrement nettoyée (au moins 1x par mois) à
l’intérieur comme à l’extérieur. Le non-nettoyage, un nettoyage insuffi sant ou le nonremplacement des fi ltres peuvent entraîner un risque d’incendie.
• Si le câble de raccordement est endommagé, il devra être remplacé par le service
après-vente du fabricant ou par des monteurs qualifi és pour éviter tout danger.
• Débrancher la fi che de la prise de courant lors du remplacement des ampoules !
Utilisez, uniquement, des ampoules identiques à celles d’origine et ayant le même
voltage. Utilisez, uniquement, la hotte aspirante, lorsque les ampoules sont
montées, pour réduire tout risque de choc électrique.
• Les fi ltres chauffent lors de l’utilisation. Après avoir cuisiné, il convient d’attendre au
moins 30 minutes avant de procéder au nettoyage.
16
Page 17

2 Sécurité
uw espressomachine
• Le courant doit être coupé lors d’une réparation ou d’un nettoyage. Débrancher la
fi che de la prise de courant ou mettez le disjoncteur en position d’interruption de
courant.
• La graisse et l’huile s’enfl amment en cas de surchauffe. Restez vigilant lorsque vous
cuisinez.
2.2 Système d’évacuation
En fonction du modèle, la hotte aspirante peut être raccordée
de deux manières :
1. Version canal d’évacuation. Les vapeurs de cuisson aspirées
et fi ltrées sont évacuées vers l’extérieur via la partie de la
hotte. C’est la meilleure manière !
2. Version recyclage. Les particules de graisse et les odeurs
contenues dans les vapeurs de cuisson sont fi ltrées.
L’air aspiré n’est pas évacué, mais renvoyé dans la cuisine.
Il convient de placer un fi ltre à charbon actif dans la hotte.
Attention ! Le fi ltre à charbon actif doit être commandé
séparément.
17
Page 18

uw espressomachine
3 Utilisation
Commande
12345
Mise en service du ventilateur
Appuyez sur la touche (1).
La hotte se met en marche sur la position programmée dernier.
Mise en service du ventilateur
Appuyez sur la touche (2), (3) ou (4).
La hotte se met en marche sur la position programmée.
18
Mise en/hors service de l’éclairage
Appuyez sur la touche pour l’éclairage (5).
L’éclairage va s’enclencher.
Appuyez encore une fois sur la touche pour éteindre la lumière.
Mise hors service du ventilateur
Appuyez sur la touche (1).
La hotte est hors service.
Page 19

uw espressomachine
4 Entretien
4.1 Elimination des fi ltres
Coupt ! Débrancher la fi che de prise de courant ou mettre
le disjoncteur en position d’interruption du courant.
Déverrouillez les fi ltres (tirer l’avant) et enlevez les fi ltres.
4.2 Remplacement des fi ltres à charbon
Vous devez utiliser le fi ltre à charbon lorsque la hotte n’est raccordée à aucun conduit.
Remarque :
• Le charbon de bois activé sature après une utilisation plus ou moins prolongée,
selon le type de cuisson et la fréquence de nettoyage du fi ltre à graisse.
• Dans tous les cas, le fi ltre à charbon doit, cependant, être remplacé au moins tous
les 4 mois.
• Les fi ltres à charbon actif ne sont pas lavables et donc pas réutilisables.
Le charbon actif saturé est polluant, donc remplacez le fi ltre à temps.
Enlevez les fi ltres à graisse.
Fixez les fi ltres à charbon au moteur.
Placez les fi ltres à graisse.
4.3 Changement d’ampoules
Enlevez la protection de l’ampoule.
Remplacez l’ampoule halogène par une nouvelle ampoule de
maximum 20 watts. Replacez la protection.
Les commandes LED défectueuses doivent être remplacées par
un installateur professionnel.
19
Page 20

uw espressomachine
4 Entretien
4.4 Nettoyage
Hotte
Vous pouvez nettoyer la hotte à l’eau savonneuse et une serviette douce, puis rincer à
l’eau claire. Ne pas utiliser de produits d’entretien abrasifs. Frotter la peinture laquée de
votre hotte avec de la cire pour qu’elle conserve sa beauté.
Hottes à cheminée en acier inoxydable
Ne pas nettoyer la cheminée avec une éponge à récurer ou avec des produits abrasifs.
Frotter la cheminée en acier inoxydable avec un nettoyant pour acier inoxydable.
Filtres métalliques
Il est possible de laver les fi ltres métalliques dans le lave-vaisselle. Placez les fi ltres en mettant
les ouvertures vers le bas dans le lave-vaisselle pour permettre à l’eau de s’écouler.
Les produits d’entretien donnent aux fi ltres en aluminium une couleur terne. Cela
est tout à fait normal.
Panneaux en verre
Les panneaux en verre ne doivent pas être nettoyés dans le lave-vaisselle pour éviter de
causer des différences de couleurs. Les panneaux en verre doivent être lavés à la main à
l’aide d’une solution savonneuse.
20
Page 21

uw espressomachine5 Installation
5.1 Généralités
Le raccordement électrique de cet appareil doit être effectué par un installateur
agréé, qui connaît et applique les normes de sécurité en vigueur. Cet appareil est
conformément aux directives Européens.
Important:
• La distance entre le point le plus bas de la hotte aspirante et la plaque de cuisson
doit être d’au moins 65 cm. Sur les taques de cuisson électriques, céramique ou à
induction, cette distance doit être d’au moins 55 cm.
• Si la hotte est raccordée à un conduit d’évacuation existant, aucun autre appareil
électroménager ne doit être raccordé au même conduit (exemples : chauffe-eau,
poêle).
• Ne pas oublier les règlements locaux en vigueur concernant l’aération des appareils
à gaz.
• Un conduit d’évacuation court et un nombre limité de coudes assurent un meilleur
fonctionnement de la hotte.
• Avant de commencer à percer, assurez vous qu’il ne passe pas de conduites à
l’endroit choisi.
• Le tuyau de connexion a un diamètre de 125 mm ou de 150 mm. Il est conseillé
d’utiliser aussi ces diamètres pour le tube de connexion.
• Le matériel d’installation livré avec la hotte en question, est approprié pour des murs
en béton renforcé et en briques. Certains types de murs demanderont des chevilles
et des vis spéciales.
21
Page 22

5 Installation
5.2 Connexion électrique
L’appareil est construit en classe II, pour cela aucun cable ne doit être connecté
avec la prise terre.
Il faut s’assurer que la tension du réseau correspond à la valeur indiquée à la plaque
signalétique de la hotte. La connection avec le réseau électrique doit être éxécutée
comme suit:
• BRUN = Phase L
• BLEU = Phase N
Cette hotte aspirante est équipée d’une
fi che de raccordement. Installez la hotte de
manière à ce que la prise soit accessible.
Placez la prise murale de préférence hors de
vue et derrière la gaine décorative.
Attention:
Pour le branchement fi xe, veillez à ce que
le câble d’alimentation soit muni d’un
interrupteur omnipolaire avec une distance
de contact d’au moins 3 mm.
22
Page 23

5 Installation
5.3 Montage de la hotte cheminée
• Vissez la hotte au mur à l’aide des
chevilles et des vis (A). Reportez-vous
aux dimensions.
• Commencez par déterminer la
largeur des étriers selon la largeur de
la gaine supérieure. Vissez ensuite
l’étrier au mur à l’aide des chevilles
et des vis (B). Faites attention à la
distance entre l’étrier et le plafond
(reportez-vous aux dimensions).
• Placez le tuyau d’évacuation sur le
fl asque (C) et ensuite sur le raccord
de la grille d’évacuation.
• Insérez la fi che dans la prise murale.
• Placez la gaine supérieure dans la
gaine inférieure.
• Vissez la gaine inférieure à la hotte
aspirante à l’aide des vis (D).
Étrier
Étrier
E
• Rabattez la gaine supérieure sur
l’étrier et fi xez celui-ci à l’aide des
vis (E).
D
23
Page 24

6 Annexe
Mise au rebut de l’appareil et de l’emballage
Des matériaux solides ont été utilisés pour fabriquer cet appareil. Evacuez ces matériaux
correctement et conformément aux dispositions administratives. Les autorités de votre
pays pourront vous fournir des informations à ce sujet.
L’emballage de l’appareil est recyclable. Pour l’emballage, il peut être fait usage :
• de carton ;
• de fi lm polyéthylène (PE) ;
• de polystyrène exempt de CFC (mousse dure PS).
Ces matériaux doivent être mis au rebut de manière responsable
et conforme aux dispositions gouvernementales.
Pour rappeler l’obligation de traiter séparément les appareils
électro-ménagers, a été apposé sur le produit un symbole
représentant un conteneur à ordures barré d’une croix. Cela
signifi e qu’à l’issue de sa durée de vie, l’appareil ne peut être
mis au rebut avec les déchets ménagers classiques. L’appareil
doit être déposé dans un centre de collecte sélective de
déchets prévu par l’administration communale ou dans un point
de vente fournissant ce service.
Le traitement séparé d’un appareil électroménager permet d’éviter, pour l’environnement et la santé, les retombées négatives qui pourraient découler d’un traitement
incorrect et permet de récupérer les matériaux qui le composent dans le but d’une
économie importante en termes d’énergie et de ressources.
24
Page 25

Inhalt
Ihre Haube
1
1.1 Beschreibung 26
1.2 Einleitung 26
2
Sicherheit
2.1 Worauf Sie achten müssen 27
2.2 Abluftsystem 28
3
Gebrauch 29
4
Pfl ege
4.1 Fettfi lter entfernen 30
4.3 Austausch der Kohlefi lter 30
4.3 Lampen auswechseln 30
4.4 Reinigen 31
5
Installation
5.1 Allgemein 32
5.2 Elektroanschluss 33
5.3 Montage der Haube 34
Anlagen 35
6
25
Page 26

1 Ihre Haube
12345
1.1 Beschreibung
1. Ein/Aus
2. Ventilator Stufe 1
3. Ventilator Stufe 2
4. Ventilator Stufe 3
5. Beleuchtung
1.2 Einleitung
Wenn Sie diese Gebrauchsanleitung lesen, sind Sie rasch über alle Möglichkeiten
informiert, die dieses Gerät Ihnen bieten kann. Sie können sich über Sicherheit und
Pfl ege des Gerätes informieren.
26
Bewahren Sie diese Gebrauchsanweisung und die Installationsanweisungen
sorgfältig – einem eventuell folgenden Benutzer des Gerätes kann dies von
Nutzen sein.
Page 27

2 Sicherheit
2.1 Worauf Sie achten müssen
Achtung! Lassen Sie das Gerät durch einen anerkannten Installateur anschließen
(Siehe das Kapitel „Installation“). Schließen Sie das Gerät nicht an das Stromnetz an,
bevor die Installation vollständig abgeschlossen ist.
• Schließen Sie das Gerät gemäß den vor Ort geltenden Installationsvorschriften an.
• Aufgrund eventuell vorhandener scharfer Kanten empfehlen wir, bei der Montage
der Dunstabzugshaube Arbeitshandschuhe zu tragen.
• Das Gerät wurde gemäß den aktuellsten Sicherheitsstandards gefertigt. Dennoch
empfehlen wir, dass Personen mit psychischen oder motorischen Störungen oder
geistigen Behinderungen das Gerät nicht ohne Aufsicht bedienen sollten. Dies gilt
auch für Kinder.
• Verwenden Sie die Dunstabzugshaube nicht, wenn der Fettfi lter nicht oder nicht
korrekt angebracht ist!
• Lehnen Sie sich nicht gegen die Dunstabzugshaube.
• Sorgen Sie für ausreichende Belüftung, wenn Sie die Dunstabzugshaube zusammen
mit einem Gaskochfeld verwenden.
• Die Luftabfuhr darf nicht an einen Abzugskanal angeschlossen werden, der auch für
andere Geräte verwendet wird.
• Unter der Dunstabzugshaube darf nicht fl ambiert werden; reinigen Sie den Filter
rechtzeitig. Beim Frittieren ist eine ständige Aufsicht erforderlich, um zu verhindern,
dass heißes Fett in Brand gerät.
• Die Dunstabzugshaube muss regelmäßig (mindestens ein Mal pro Monat) innen und
außen gereinigt werden. Wenn Sie diese Vorschrift nicht beachten und die Filter
nicht vollständig reinigen oder ersetzen, kann dies zu Brandgefahr führen.
• Eine beschädigte Zuleitung muss vom Kundendienst des Herstellers oder gleichwertig qualifi zierten Personen ausgetauscht werden, um Gefahren auszuschließen.
• Ziehen Sie den Stecker aus der Steckdose, bevor Sie die Lampen wechseln!
Verwenden Sie ausschließlich die gleichen Lampen mit der angegebenen Wattzahl.
Verwenden Sie die Dunstabzugshaube nur mit montierten Lampen, um das Risiko
eines Stromschlags zu vermindern.
• Die Fettfi lter werden bei Verwendung des Geräts heiß. Warten Sie nach dem Kochen
mindestens 30 Minuten vor der Reinigung.
27
Page 28

2 Sicherheit
• Bei Reperatur oder Reinigung des Geräts muss der Strom ausgeschaltet werden.
Ziehen Sie den Stecker aus der Steckdose oder drehen Sie den Schalter im
Stromkasten auf Null.
• Fett und Öl können bei Überhitzung Feuer fangen. Bleiben Sie während der
Zubereitung von Speisen stets in der Nähe.
2.2 Abluftsysteme
Die Dunstabzugshaube kann je nach Modell auf zwei
verschiedene Weisen angeschlossen werden:
1. Als Dunstabzugshaube an einem Abluftkanal.
Die angezogenen und gefi lterten Küchendämpfe werden
nach außen abgeführt. Dies ist die beste Methode!
28
2. Als Rezirkulations-Dunstabzugshaube. Die Fettteile der
angezogenen Küchendämpfe werden gefi ltert.
Die angesaugte Luft wird nicht abgefüht, sondern wieder
in die Küche abgegeben. In diesem Fall müssen Sie einen
Kohlefi lter einsetzen.
Achtung! Sie müssen den Kohlefi lter getrennt bestellen.
Page 29

3 Gebrauch
Bedienung
12345
Gebläse einschalten
Drücken Sie Taste (1).
Die Dunstabzugshaube schaltet sich in der zuletzt eingegebenen Stufe ein.
Gebläse einschalten
Drücken Sie Taste (2), (3) oder (4).
Die Dunstabzugshaube schaltet sich in der eingegebenen Stufe ein.
Beleuchtung ein- und ausschalten
Drücken Sie für die Beleuchtung die Taste (5).
Die Beleuchtung ist eingestellt.
Drücken Sie nochmals die Taste zur Ausschaltung der Beleuchtung.
Gebläse ausschalten
Drücken Sie Taste (1).
Die Dunstabzugshaube schaltet sich aus.
29
Page 30

4 Pfl ege
4.1 Fettfi lter entfernen
Netzspannung ausschalten! Den Stecker aus der Wandsteckdose ziehen oder den Schalter im Sicherungskasten auf Null
stellen. Das Fettfi lter nach vorne ziehen und dann von vorne
nach unten kippen.
4.2 Austausch der Kohlefi lter
Wenn die Dunstabzugshaube nicht mit einem Abzug verbunden ist, muss der Kohlefi lter
verwendet werden.
Achtung:
• Nach mehr oder weniger langem Gebrauch ist die Aktivkohle gesättigt, je nach Art
der Kochvorgänge und der regelmäßigen Reinigung des Fettfi lters.
• Es ist auf jeden Fall erforderlich, die Kartusche mindestens alle vier Monate
auszutauschen.
• Kohlefi lter sind nicht zur Wiederverwendung auswaschbar. Gesättigter Kohlenstoff ist
nicht umwelt-freundlich, tauschen Sie den Filter rechtzeitig aus.
Entfernen Sie die Fettfi lter.
Befestigen Sie die Kohlefi lter am Motor.
Setzen Sie die Fettfi lter ein.
4.3 Lampen auswechseln
Entfernen Sie die Abdeckkappe von der Lampe.
Tauschen Sie die Halogenlampe gegen eine neue Lampe mit
maximal 20 Watt aus. Setzen Sie die Abdeckkappe wieder auf.
Fehlerhafte LEDs dürfen nur durch eine qualifi zierte Fachkraft
ersetzt werden.
Page 31

4 Pfl ege
4.4 Reinigen
Dunstabzugshaube
Die Dunstabzugshaube können Sie mit Seifenlauge und einem weichen Tuch reinigen,
danach mit klarem Wasser nachspülen. Gebrauchen Sie keine agressiven Putzmittel, wie
z. B. Soda. Der Lack der Dunstabzugshaube bleibt gut, wenn Sie ihn ab und zu mit Wachs
einreiben.
Rostfreie Hauben
Nicht mit einem Scheuerschwamm oder anderen Scheuermitteln behandeln.
Nachbehandeln mit Stahlreiniger und in Strukturrichtung des Edelstahls putzen.
Fettfi lter
Die Fettfi lter (aus Metall) können im Geschirrspüler gereinigt werden. Setzen Sie die
Fettfi lter mit den Öffnungen nach unten in den Geschirrspüler, so dass das Wasser
herauslaufen kann. Der Aluminiumfi lter wird durch die Reinigungsmittel stumpf, das ist
normal.
Glasfl ächen
Reinigen Sie die Glasfl ächen nicht im Geschirrspüler, da es hierdurch zu Verfärbungen
kommen kann. Sie können die Glasfl ächen am besten manuell mit Seifenwasser reinigen.
Page 32

5 Installation
5.1 Allgemein
Der Anschluß dieses Gerätes an das Lichtnetz muß durch einen anerkannten Installateur
geschehen, der die Sicherheitsvorschriften gut kennt und anwendet. Dieses Gerät
entspricht den europäischen Vorschriften.
Wichtig zu wissen:
• Der Abstand zwischen dem niedrigsten Punkt der Dunstabzugshaube und einem
Gaskochfeld muss mindestens 65 cm betragen. Bei einer elektrischen Kochplatte,
einer Induktionskochplatte oder einem Keramikfeld muss dieser Abstand mindestens
55 cm sein.
• Wenn die Dunstabzugshaube an einen bestehenden Abluftkanal angeschlossen
wird, dürfen auf diesem keine anderen Geräte angeschlossen sein, wie:
Gasdurchlauferhitzer und Gasofen.
• Denken Sie an die örtlichen Vorschriften bezüglich Entlüftung von Gasgeräte.
• Je kürzer das Abluftrohr und je weniger Krümmungen es hat, um so besser ist die
Wirkung der Dunstabzugshaube.
32
• Kontrollieren Sie, bevor Sie zu bohren beginnen, ob in der Mauer keine
Installationsleitung(en) vorhanden ist/sind.
• Das Anschlussrohr der Kaminhaube hat einen Durchmesser von 125 mm oder 150 mm.
Es empfi ehlt sich, das Abluftrohr auch mit diesem Durchmesser auszuführen.
• Das gelieferte Installationsmaterial für diese Dunstabzugshaube ist für Stahlbeton
und Ziegelmauern geeignet. Für manche Mauertypen sind spezielle Dübel und
Schrauben erforderlich.
Page 33

5 Installation
5.2 Elektroanschluss
Die Küchenhaube gehört zur Geräteklasse II, daher muss keine der Leitungen
geerdet werden.
Kontrollieren Sie, dass die Spannung Ihres Hausanschlusses mit dem auf dem
Typenschild angegebenen übereinstimmt. Der Anschluss an das Stromnetz ist
folgendermassen durchzuführen:
• BRAUN = Phase L
• BLAU = Phase N
Diese Dunstabzugshaube ist mit einem
Stecker versehen. Installieren Sie die
Dunstabzugshaube so, dass der Stecker
erreichbar ist.
Bringen Sie die Steckdose am besten
verdeckt, also hinter dem Rohr an.
Achtung:
Wenn Sie einen festen Anschluß anbringen
möchten, sorgen Sie bitte dafür, daß in der
Zuführungsleitung ein omnipolarer Schalter
mit einem Kontaktabstand von mindestens
3 mm angebracht wird.
33
Page 34

uw espressomachine
5 Installation
5.3 Montage der Haube
• Schrauben Sie die Haube mit den
Dübeln und Schrauben an der
Wand fest (A). Beachten Sie die
angegebenen Maße.
• Stellen Sie zuerst die Breite der Bügel
auf die Breite des oberen Rohrs ein.
Schrauben Sie anschließend den
Bügel mit den Dübeln und Schrauben
an der Wand fest (B). Beachten Sie
den Abstand zwischen Bügel und
Decke (siehe Maßangaben).
• Setzen Sie das Abluftrohr in das
Ansatzstück (C) und anschließend in
den Anschluss am Luftaustrittgitter
ein.
• Stecken Sie den Stecker in die
Steckdose.
• Platzieren Sie das obere Haubenrohr
im unteren.
Bügel
Bügel
E
34
• Befestigen Sie das untere
Haubenrohr mit den Schrauben an
der Abzugshaube (D).
• Klappen Sie das obere Haubenrohr
um den Bügel und schrauben sie es
fest (E).
D
Page 35

6 Anlagen
Entsorgung Gerät und Verpackung
Bei der Herstellung dieses Gerätes wurden dauerhafte Werkstoffe verwendet.
Dieses Gerät ist am Ende seiner Nutzzeit ordnungsgemäß und gemäß den
behördlichen Vorschriften zu entsorgen. Sie erhalten hierzu Informationen bei
den zuständigen behörden.
Die Verpackung des Gerätes ist wiederverwendbar. Verwendet können sein:
• Pappe;
• Polyethylenfolie (PE);
• CFK-freies Polystyrol (PS-Hartschaum).
Diese Werkstoffe sind ordnungsgemäß und gemäß den behördlichen Vorschriften
zu entsorgen.
Zur Erinnerung an die Verpfl ichtung, die Elektrohaushaltsgeräte
getrennt zu beseitigen, ist das Produkt mit einer Mülltonne,
die durchgestrichen ist, gekennzeichnet. Dies bedeutet das am
Ende seiner Nutzzeit das Produkt NICHT zusammen mit dem
Siedlungsabfall beseitigt werden darf. Es kann zu den eigens
von den städtischen Behörden eingerichteten Sammelstellen
oder zu den Fachhändlern, die einen Rücknahmeservice
anbieten, gebracht werden.
Die getrennte Entsorgung eines Haushaltsgerätes vermeidet mögliche negative
Auswirkungen auf die Umwelt und die menschliche Gesundheit, die durch eine
nicht vorschriftsmäßige Entsorgung bedingt sind. Zudem ermöglicht wird die
Wiederverwertung der Materialien, aus denen sich das Gerät zusammensetzt, was
wiederum eine bedeutende Einsparung an Energie und Ressourcen mit sich bringt.
35
Page 36

uw espressomachine
Content
Your canopy hood
1
1.1 Description 37
1.2 Introduction 37
2
Safety
2.1 Precautions you must take 38
2.2 Extraction systems 39
3
Use 40
4
Maintenance
4.1 Removing the grease fi lters 41
4.2 Replacing the carbon fi lter 41
4.3 Changing the light bulbs 41
4.4 Cleaning 42
5
Installation
5.1 General 43
5.2 Electrical connection 44
5.3 Mounting the canopy hood 45
36
Appendice 46
6
Page 37

uw espressomachine
1 Your canopy hood
12345
1.1 Description
1. On/off
2. Fan setting 1
3. Fan setting 2
4. Fan setting 3
5. Lightning
1.2 Introduction
When you have read these instructions for use, you will quickly be aware of all the
facilities the appliance can offer you. You can read about safety and how you should look
after the appliance.
Keep the instructions for use and the installation instructions. Any later user of this
appliance could benefi t from them.
37
Page 38

uw espressomachine
2 Safety
2.1 What you need to take into account
Attention! Make sure the appliance is installed by an authorised installer
(see “Installation” chapter). Do not connect the appliance to the fl ow network
before completing the installation.
• Connect the appliance in accordance with the applicable regulations in your area.
• We advise you to wear protective work gloves during the installation of the cooker
hood due to possible sharp edges.
• The appliance has been manufactured in accordance with the latest safety standards.
However we do advise that mentally handicapped, disabled or retarded individuals
do not use this appliance without the proper supervision of a competent person. The
same applies to children.
• Never use the cooker hood when the grease fi lter has not been properly installed!
• Do not lean against the cooker hood.
• Make sure there is suffi cient circulation when you use the cooker hood on a gas
cooker.
• The exhaust exit must never be connected to a smoke duct which is also used for
other heating appliances.
• Never fl ambé under the cooker hood and always clean the fi lters on time. Frying
needs to be done under constant supervision to prevent the heated fat from
catching fi re.
• The cooker hood needs to be cleaned regularly (at least once a month) on the inside
as well as on the outside. When the fi lters are insuffi ciently cleaned or replaced, this
will result in a fi re hazard.
• If the connection cable becomes damaged, it should be replaced by the
manufacturer’s service department or by a person with equivalent qualifi cations, in
order to prevent dangerous situations from arising.
• First disconnect the appliance from the socket when you replace the lights! Only use
identical lamps with the wattage indicated. Only use the cooker hood with lamps
installed to reduce the risk of electrical shock.
• The grease fi lters become hot during operation. Wait a minimum of 30 minutes after
cooking before cleaning it.
38
Page 39

2 Safety
uw espressomachine
• The main current must be switched off during reparation or cleaning. Remove the
plug from the mains current or turn the switch in the meter cupboard to zero.
• Grease and oil are fl ammable when they are overheated. Stay in the vicinity of the
cooker when preparing food
2.2 Extraction systems
Depending on the type, the cooker hoods can be connected in
one of two ways:
1. To a duct. To a duct, the cooking vapours extracted by
suction are carried outside, once the grease particles have
been fi ltered. This is the best method.
2. Recirculation hood. As a recirculation hood, the grease
particles and the smell in the extracted vapours are fi ltered.
The air that has been sucked in is not carried outside but
recirculates in the kitchen. In this case you must have a
carbon fi lter fi tted.
Attention! The carbon fi lter needs to be ordered separately.
39
Page 40

uw espressomachine
3 Use
Controls
12345
Switching on the fan
Press the button (1).
The cooker hood switches on at the setting that was selected the last time.
Switching on the fan
Press the button (2), (3) or (4).
The cooker hood switches on at the setting selected.
40
Switching lighting on and off
Press the lighting button (5).
The lighting switches on.
Press the button again and the lighting goes out.
Switching off the fan
Press the button (1).
The cooker hood switches off.
Page 41

uw espressomachine
4 Maintenance
4.1 Removing the grease fi lters
Switch off the electricity! Remove the plug from the socket
or switch the electricity off at the mains. Pull the grease fi lter
towards you and tilt it downwards at the front.
4.2 Replacing the carbon fi lter
The carbon fi lter must always be used if the cooker hood is not ducted.
Note:
• Saturation of the activated charcoal will eventually occur after more or less prolonged
use, depending on the type of cooking and how frequently the grease fi lter is
cleaned.
• In all cases it is necessary to replace the cartridge at least every four months.
• DO NOT wash or reuse the carbon fi lter. Saturated carbon is not environmentally
friendly, change the fi lter regularly.
Remove the grease fi lters.
Attach the carbon fi lters to the motor.
Replace the fi lter grids in the extractor hood.
4.3 Changing the light bulbs
Remove the lamp cover.
Replace the halogen light bulb with a replacement bulb with
a maximum output power of 20 Watts.
Re-close the lamp cover.
Faulty LEDs must be replaced by a professional installer.
41
Page 42

uw espressomachine
4 Maintenance
4.4 Cleaning
Cooker hood
Clean the cooker hood with soapy water and a soft cloth. Then wipe with clean water to
rinse. Do not use aggressive cleaning agents such as soda. The cooker hood paintwork
will stay looking nice if you wax it occasionally.
Stainless steel canopy hoods
Do not use any sort of scourer. Treat with a stainless steel care product and polish with the
structure of the stainless steel.
Metal grease fi lters
The grease fi lters can be placed in the dishwasher for cleaning. The openings must be
placed downwards to let the water run out of the fi lters. The cleaning agents will
make the aluminium fi lter turn dull, this is normal.
Glass panels
Do not clean the glass panels in a dishwasher in connection with the risk of discolouration.
Glass panels can best be cleaned by hand with soapsuds.
42
Page 43

uw espressomachine5 Installation
5.1 General
This appliance should be connected to the power supply by a recognized fi tter who is
familiar with, and works according to the correct safety regulations. This appliance meets
the European requirements.
Important that you know:
• The minimum distance between the supporting surface for the cooking vessels on
the gashob and the lowest part of the range hood must be not less than 65 cm.
For use with an electric, ceramic or induction hob, this distance must be at
least 55 cm.
• If the cooker hood is to be fi tted to an existing duct no other appliances, such as a
geyser or heater, may be connected to that same duct.
• Consider local regulations with respect to the ventilation of gas appliances.
• The shorter the duct, and the fewer the bends in it, the better the cooker hood will
work.
• Before you start drilling check that there are no installation cables present.
• The connecting pipe for the cooker hood has a diameter of 125 mm or 150 mm.
It is best also to use a fl ue pipe of the same diameter.
• The installation material supplied with this range hood is designed for fi xing to
reinforced concrete or masonry walls. For some types of walls you may need special
plugs and screws.
43
Page 44

5 Installation
5.2 Electric connection
The appliance has been manufactured as a class II, therefore no earth cable is
necessary.
Make sure the supply voltage ratings correspond with those stated on the appliance data
plate. The connection to the mains is carried out as follows:
• BROWN = phase L
• BLUE = phase N
This canopy hood has been provided with a
power plug. When installing the hood, make
sure that this plug remains accessible. We
recommend installing the wall socket out of
view, behind the chimney cover.
Attention:
If you want to make a fi xed connection,
ensure that a multi-pole switch with a
distance between contacts of 3 mm is
installed in the supply cable.
44
Page 45

5 Installation
5.3 Mounting the canopy hood
• Mount the hood on the wall using the
plugs and screws provided bracket
(A). Check size specifi cations.
• Adjust the width of the brackets to
the width of the upper chimney. Next,
mount the bracket on the wall using
the plugs and the screws (B). Take
into account the distance between
the brackets bracket and the ceiling
(Check size specifi cations).
• Install the vent duct on the fl ange (C)
and then onto the connecting surface
of the exhaust grid.
• Put the plug in the wall socket.
• Slide the upper chimney into the
lower chimney.
• Attach the lower chimney to the hood
using the screws provided (D).
bracket
bracket
E
• Slide the upper chimney around the
bracket and attach with the screws
provided (E).
D
45
Page 46

6 Appendice
Disposal of appliance and packaging
By ensuring this product is disposed of correctly, you will help prevent potential negative
consequences for the environment and human health, which could otherwise be caused
by inappropriate waste handling of this product. The local authorities can provide you
with the relevant information.
The packaging of this appliance is recyclable. It could have been made from:
• cardboard;
• polythene foil (PE);
• CFK-free polystyrene (PS-hard foam).
You need to dispose of these materials responsibly in accordance with offi cial
regulations.
To draw attention to the fact that the segregated processing
of electric household appliances is compulsory, this appliance
carries the symbol of a crossed-out dustbin. This means that at
the end of its working life, you may not dispose of the appliance
as household refuse. Instead, you should hand it in at a special
refuse collection centre run by the local authority or at a dealer’s
providing this service.
46
Segregated processing of household appliances avoids any negative effects on the
environment and public health that might otherwise occur.
It enables the recovery of the materials used in the production of this appliance, thus
realising considerable savings in terms of raw materials and energy.
 Loading...