

Page 1

QUICK START
Utility Device for
Pelco IP Cameras
IP110 Camclosure® Series
IP3701H Series
C3437M (8/07)
Page 2

Page 3

Welcome
This manual explains how to download and use Pelco’s Device Utility software. Use this software to do the
following:
• Locate the IP address of the Pelco IP camera.
• Identify the MAC
• Perform system upgrades to the Pelco IP camera.
The Pelco Device Utility software is accessible on the CD shipped with the product or at www.pelco.com/
software/downloads/.
NOTES:
• Only use a cable modem router or a switch with a DHCP server when installing the Pelco IP camera
on a network. Refer to the installation manual shipped with the Pelco IP camera for installation
instructions.
• Do not use a HUB in the network setup of the camera.
• To secure access to the Pelco IP camera, place the camera behind a firewall when it is connected to
a network.
• For optimum image quality and bandwidth efficiency use the IP110 Camclosure
Enabled
• If the camera is part of an Endura
and display it as a camera within the system manager. Refer to the documentation for the Endura
System Manager.
• For a list of compatible API interfaces go to www.pelco.com/ipcam.
• Network and processor bandwidth limitations may cause the video stream to pause or appear
pixilated when an increased number of web-interface users connect to the camera. Decrease the
images per second (IPS) of the web-interface video streams to compensate for network/processor
limitations.
®
address of the Pelco IP camera.
TM
device or with an approved Pelco API interface.
TM
system, the Endura GUI will automatically discover the device
®
as an Endura
C3437M (8/07) 3
Page 4
Installation
To install the Device Utility software, complete the following steps:
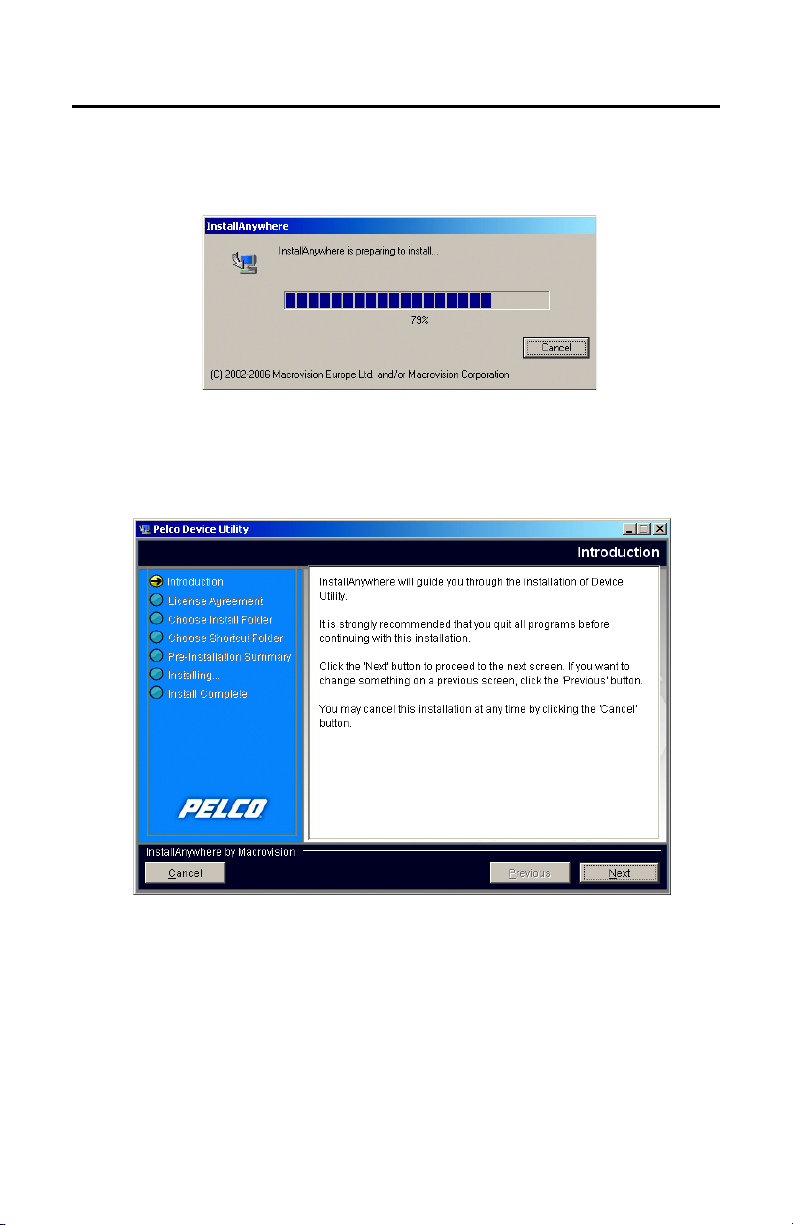
1. Insert the Pelco Device Utility CD (shipped with the product) into the CD drive of your PC. The CD will
automatically run the installation software (refer to Figure 1).
Figure 1. Preparing to Install
NOTE: If you do not have a CD, go to http://www.pelco.com/software/downloads/IPdeviceutility.aspx to
download the Device Utility software.
2. The Introduction dialog box opens, click Next (refer to Figure 2).
.
Figure 2. Introduction Dialog Box
4 C3437M (8/07)
Page 5

3. The License Agreement dialog box opens. Select the, “I accept the terms of the license agreement”
option. Click Next to continue the installation (refer to Figure 3).
.
Figure 3. License Agreement
4. Choose the install folder (refer to Figure 4). The default folder is C:\Program Files\Pelco\Device
Utility. If you want to download the software to a different folder click Choose, and then select a
different folder. Click Next to continue with the installation.
Figure 4. Choose Install Folder
C3437M (8/07) 5
Page 6

5. The Choose Shortcut Folder screen opens (refer to Figure 5). Select where you would like to create
product icons. The default setting is Other (C:\Program Files\Pelco\Device Utility). Click a location,
and then click Next.
Figure 5. Choose Shortcut Folder
6. The Pre-Installation Summary screen opens (refer to Figure 6). Review the installation summary, and
select one of the following:
• Click Install to install the software.
• Click Previous to return to the previous screen and make changes.
• Click Cancel to stop the installation.
.
Figure 6. Pre-Installation Summary
6 C3437M (8/07)
Page 7

7. The Installing Device Utility screen opens. The installation progress bar is displayed at the bottom of
the screen.
Figure 7. Installing Device Utility
8. Install Complete appears on the screen. Click Done to finish the installation.
Figure 8. Install Complete
C3437M (8/07) 7
Page 8

Operation
LOCATE NETWORK DEVICES
1. To open the device utility software go to the Windows® Start Menu, select Programs, and then
select Pelco Device Utility software. Click the Pelco Device Utility icon.
The Pelco Device Utility software opens and displays “Searching for devices” in the top, left-hand
corner of the screen. Wait for the software to discover the IP devices connected to the network. This
process may take several minutes.
IMPORTANT: You must have the JRE
receive an error message or an X is displayed on the page, install JavaSE
(shipped with the product). You can also download a copy at http://www.java.com/en/download/.
Figure 9. Searching For Devices
2. The Utility Device lists all IP devices found on the network. The following information for each IP
device is displayed:
• Vers ion: The latest software version of the IP device.
• Update: The updated firmware and language files, when required.
• Model: The model number of the IP device.
• Device Name: The user-friendly name of the IP device.
• MAC Address: The unique serial number that identifies that IP camera from all other devices
connected to the network.
• IP Address: The address of the device connected to the network.
• Status: The text box displays Online is a device is available. The text box displays Offline if
the device is found but not available, or Updating Camera if the device firmware is updating.
The Connect button is also located in this text box.
TM
installed on your machine to view the Device Utility. If you
TM
JRE available on the CD
Figure 10. List of IP Cameras
8 C3437M (8/07)
Page 9

VIEW THE DEVICE USING A WEB BROWSER
1. Select the device to view, and then click Connect in the status field.
2. The IP device Login screen opens.
3. Enter admin (all lowercase) in the User ID and Password text boxes (admin is the default password).
NOTE: For security purposes, after you log on for the first time, change the password.
4. Click Login.
NOTE: For detailed information on how to use IP cameras with a Web browser, refer to Web Browser
Interface for Pelco IP Cameras operation manual.
SEARCH NETWORK
1. Click Search Now to locate any new devices connected to the network.
2. “Searching for devices” is displayed in the top, left-hand corner of the screen.
3. Wait for the software to discover the IP devices connected to the network. This process may take
several minutes.
4. All IP devices found on the network are listed.
UPDATE FIRMWARE
NOTE: Perform system upgrades only when necessary. Firmware upgrades do not need to be performed if
the system is operating properly.
Updated firmware and language files can be uploaded to the camera. To update firmware, complete the
following steps:
1. Open the Pelco Device Utility software.
2. Locate any device or devices that need to be updated in the Update field.
3. Click the Update Firmware button.
4. Select the file to upload and then click Open.
5. The Perform Update dialog box opens, do one of the following:
• Click OK to accept.
• Click Cancel to close the dialog box.
6. The Status field changes from Online to Updating Camera. When the update is complete, the field
status will change back to Online.
WARNING: Do not cycle power to the system during the upload process. The upload process
is not complete until the system reboots and “Online” appears in the status field of the Device
Utility.
REMOVE DEVICE
Select an IP device, and then Click Remove Offline Devices. “Searching for devices” is displayed in the top,
left-hand corner of the screen, and then the status field for the device will change from green to red and
display “Offline”.
C3437M (8/07) 9
Page 10

Page 11

PRODUCT WARRANTY AND RETURN INFORMATION
WARRANTY
Pelco will repair or replace, without charge, an y merchandise proved defective in material or workmanship for a period of one year after the date of
shipment.
Exceptions to this warranty are as noted below:
• Five years on fiber optic products and TW3000 Serie s unshielded twisted pair transmission products.
• Three years on Spectra® IV products.
• Three years on Genex® Series products (multiplexers, server, and keyboard).
• Three years on Camclosure® and fixed camera models, except the CC3701H-2, CC3701H-2X, CC3751H-2, CC3651H-2X, MC3651H-2, and
MC3651H-2X camera models, which have a five-year warranty.
• Three years on PMCL200/300/400 Series LCD monit ors.
• Two years on standard motorized or fixed focal length lenses.
• Two years on Legacy®, CM6700/CM6800/CM9700 Series matrix, and DF5/DF8 Series fixed dome products.
• Two years on Spectra III™, Esprit®, ExSite®, and PS20 scanners, including when used in continuous mot ion applications.
• Two years on Esprit and WW5700 Series window wiper (excluding wiper blades).
• Two years (except lamp and color wheel) on Digital Light Processing (DLP®) displays. The lamp and color wheel will be cover ed for a period of
90 days. The air filter is not covered un der warranty.
• Eighteen months on DX Series digital video recorders, NVR300 Series network video recorders, and Endura™ Series distributed network-based video
products.
• One year (except video heads) on video cassette recorders (VCRs). Video heads will be covered for a period of six months.
• Six months on all pan and tilts, scanners or prese t lenses used in continuous motion applications (that is, preset scan, tour and auto scan mode s).
Pelco will warrant all replacement p arts and repairs for 90 days from the date of P elco shipment. All goods requiring warranty rep air shall be sent freight
prepaid to Pelco, Clovis, California. Repairs made necessary by reason of misuse, alteration, normal wear, or accident are not covered under this
warranty.
Pelco assumes no risk and shall be subject to no liability for damages or loss resulting from the sp ecific use or application made of the Products. Pelco’s
liability for any claim, whether based on breach of contract, negligence, infringement of an y rights of any party or product liability, relating to the Products
shall not exceed the price paid by the Dealer to Pelco for such Products. In no event will Pelco be liable for any special, incidental or consequential
damages (including loss of use, loss of prof it and claims of third parties) however caused, whether by the negligence of Pelco or otherwise.
The above warranty provides the Dealer with spe cific legal rights. The Dealer may also have additional right s, which are subject to variation from state
to state.
If a warranty repair is required, the Dealer must contact Pelco at (800 ) 289-9100 or (559) 292-1981 to obtain a Repair Authorization number (RA), and
provide the following information:
1. Model and serial number
2. Date of shipment, P.O. number, Sales Order number, or Pelco invoice number
3. Details of the defect or problem
If there is a dispute regarding the warranty of a p roduct which does not fall under the warranty conditions stated above, please include a written
explanation with the product wh en returned.
Method of return shipment shall be the same or equal to the method by which the item was received by Pelco.
RETURNS
In order to expedite parts returned to the factory for repair or credit, plea se call the factory at (800) 289-9100 or (559) 292-1981 to obtain an autho rization
number (CA number if returned for credit, and RA number if returned for repair).
All merchandise returned for credit may be subject to a 20% restocking and refurbishing charge.
Goods returned for repair or credit sh ould be clearly identified with the assigned CA or RA number and fr eight should be prepaid. Ship to the appropriate
address below.
If you are located within the continental U.S., Alaska, Hawaii or Puerto Rico, send goods to:
Service Department
Pelco
3500 Pelco Way
Clovis, CA 93612-5699
If you are located outside the continental U.S., Alaska, Hawaii or Puerto Rico and are instructed to return goods to the USA, you may do one of the
following:
If the goods are to be sent by a COURIER SERVICE, send the go ods to:
Pelco
3500 Pelco Way
Clovis, CA 93612-5699 USA
If the goods are to be sent by a FREIGHT FORWARDER, send the good s to:
Pelco c/o Expeditors
473 Eccles Avenue
South San Francisco, CA 94080 USA
Phone: 650-737-1700
Fax: 650-737-0933
REVISION HISTORY
Manual # Date Comments
C3437M 8/07 Original version.
Pelco, the Pelco logo, Camclosure, Esprit, Genex, Legacy, and Spectra are registered trademarks of Pelco. ©Copyright 2007, Pelco.
Endura, ExSite, and Spectra III are trademarks of Pelco. All rights reserved.
DLP is a registered trademark of Texas Instruments Corporation.
MAC is a registered trademark of Apple Computer, Inc.
Windwos is a registered trademark of Microsoft Corporatio n.
JRE and JavaSE are trademarks of Sun Microsystems, Inc.
Page 12

Worldwide Headquarters
3500 Pelco Way
Clovis, California 93612 USA
USA & Canada
Tel: 800/289-9100
Fax: 800/289-9150
International
Tel: 1-559/292-1981
Fax: 1-559/348-1120
www.pelco.com
ISO9001
Australia|Canada|Finland|France|Germany|Italy|Macau|The Netherlands|Russia|Singapore
South Africa
Spain|Sweden|United Arab Emirates|United Kingdom|United States
|
 Loading...