

Page 1
C3611M (12/07)
EDI5000-AD2088 Data Interface
Quick Start Guide
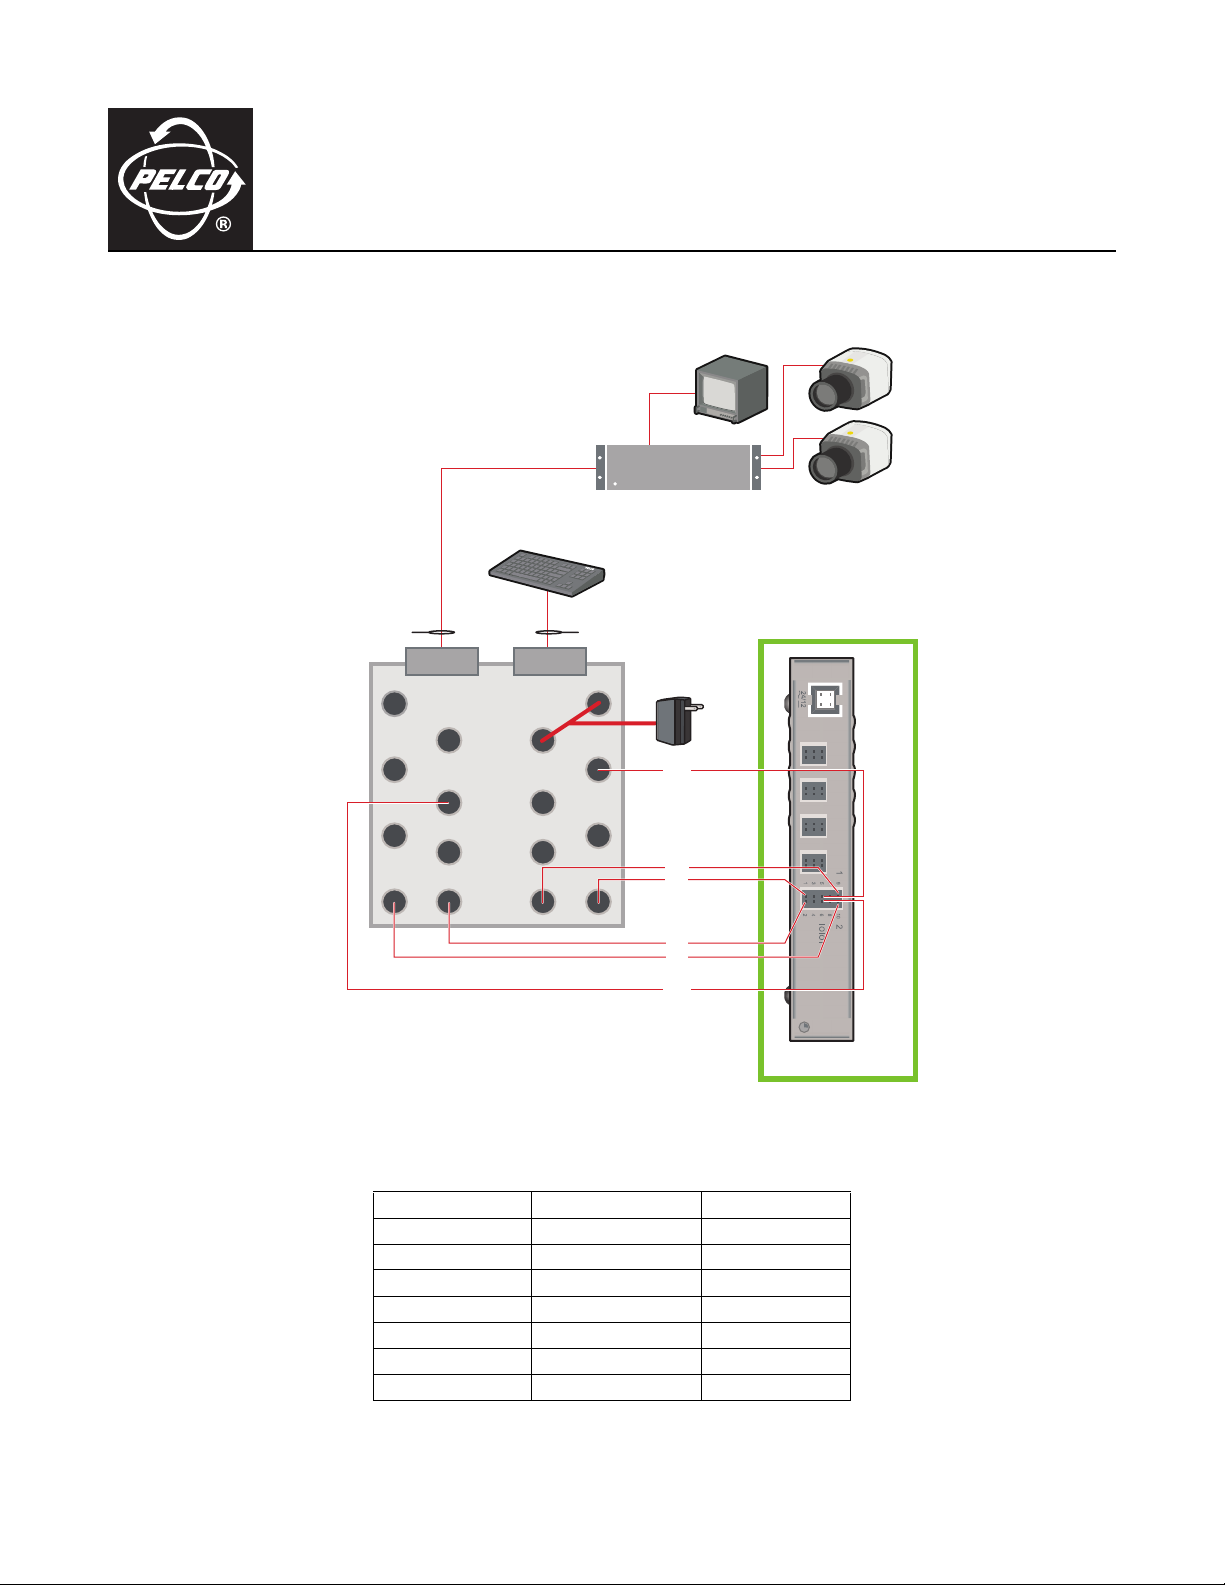
CONNECT THE EDI5000-AD2088 TO AN AD MATRIX SYSTEM
DATA CABLE
AD DUAL 8-PIN
TERMINAL BLOCK
REVERSED
1
2
3
4
AD2088 MATRIX KEYBOARD
8
7
6
1
2
3
4
MATRIX MONITOR
AD MATRIX
REVERSED
DATA CABLE
8
7
6
55
9 VAC
GND
Tx+
Rx+
Rx+
Tx+
GND
910
21
7
8
5
6
3
4
1
2
CAMERA 1
CAMERA 2
COM 1
COM 2
EDI5000-AD2088
Figure 1. Connect the EDI5000 to the AD Matrix System
z
Table A. EDI5000 and AD2088 RS-232 Pin Assignments
Pin Assignment AD2088 Keyboard EDI5000 COM 1
RS-232 Data Rx+ PIN 5 PIN 1
Ground PIN 7 PIN 5
RS-232 Data Tx+ PIN 4 PIN 9
Pin Assignment AD Matrix EDI5000 COM 2
RS-232 Data Rx+ PIN 5 PIN 2
Ground PIN 7 PIN 6
RS-232 Data Tx+ PIN 4 PIN 10
NOTE: The alarm and relay inputs on the data interface are reserved for
future use, and are not included in this table.
C3611M (12/07) 1
Page 2
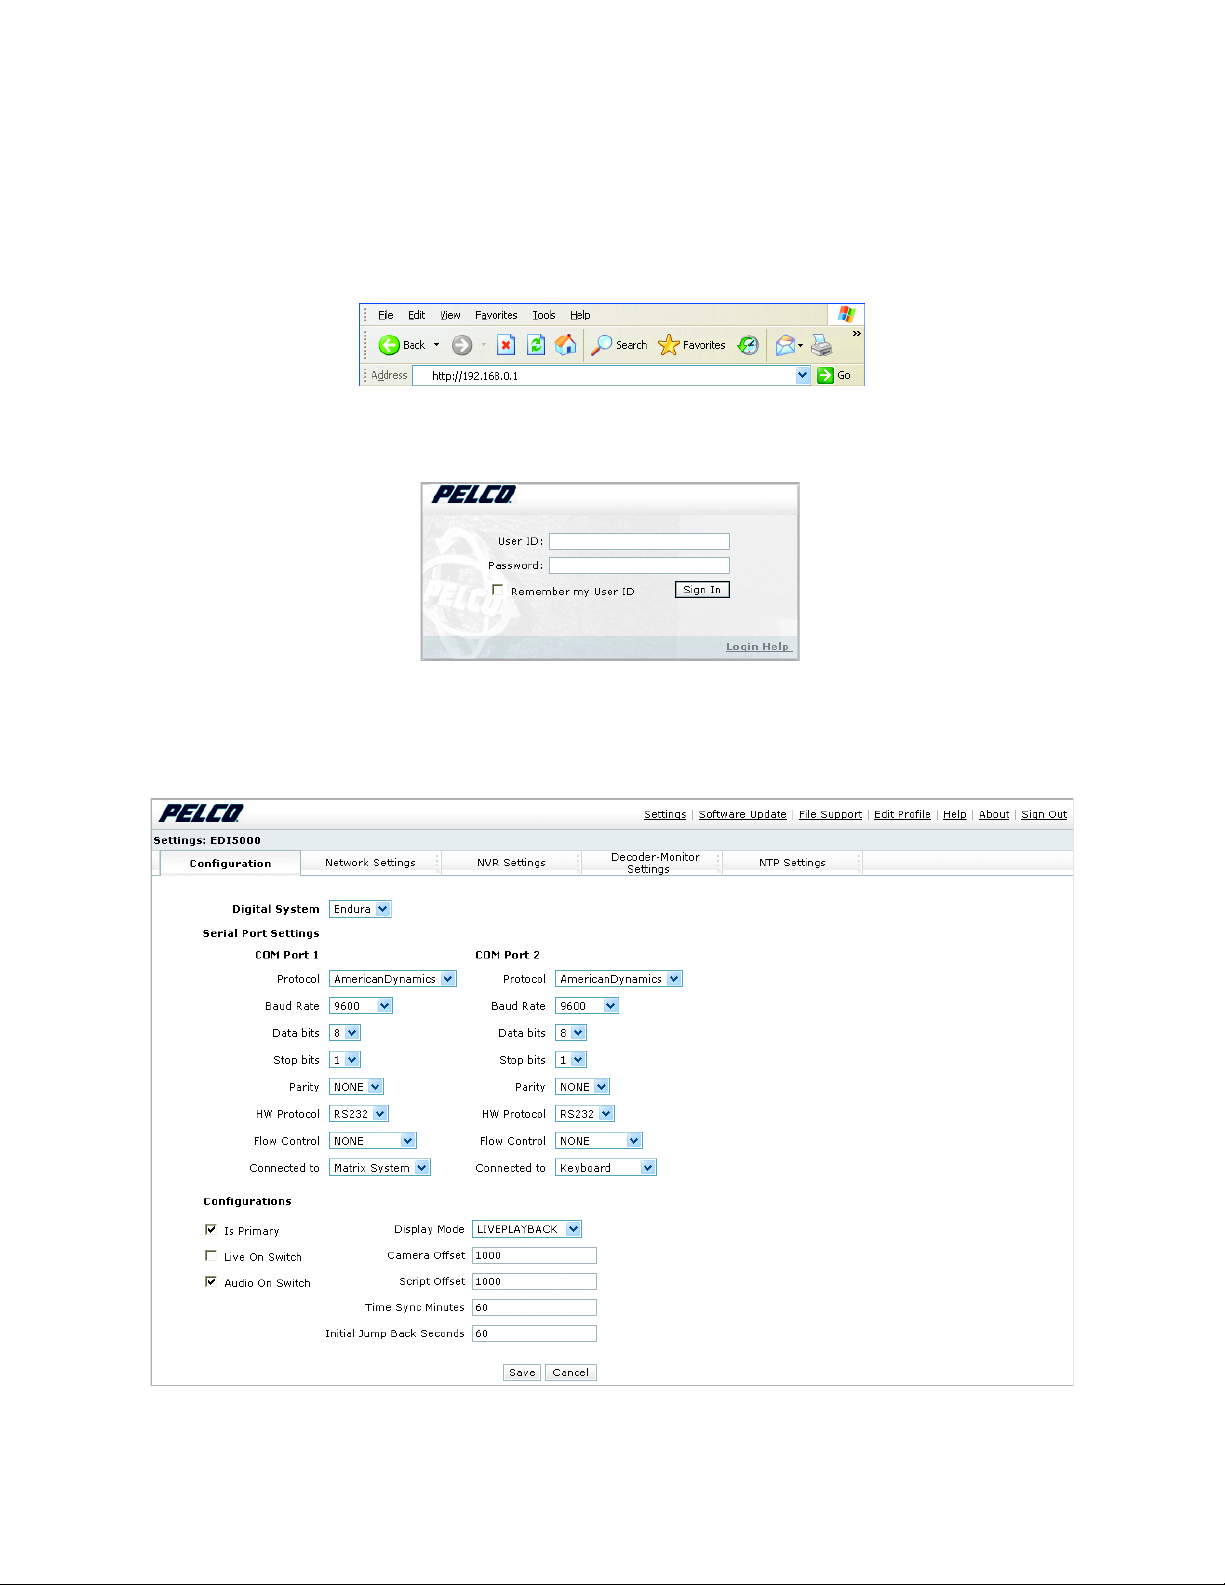
CONFIGURE THE EDI5000-AD2088
1. From the Endura® workstation (or from any other computer connected to the Endura network) open a Web browser window. The EDI5000
system configuration software is compatible with the following Web browsers:
•Microsoft® Internet Explorer® version 6.0 or higher
• Mozilla® Firefox® version 2.0 or higher
2. Type the IP address of the EDI5000 data interface unit in the Web browser address. The default IP address is 192.168.0.1.
3. Press Enter. The EDI5000 system configuration software Login dialog box opens.
Figure 2. EDI5000 Default IP Address
Figure 3. EDI5000 Login Dialog Box
4. Type the administrator user ID (admin) and password (admin), and then click Sign In. The user ID and password are case sensitive.
5. Configure the serial port connection settings as shown in Figure 4.
Figure 4. The EDI5000 System Configuration Software
2 C3611M (12/07)
Page 3

OPERATE THE EDI5000-AD2088
When an operator is viewing live video from the matrix system, the keyboard commands and options are controlled by the matrix system, and
they function as described in the matrix system documentation.
When an operator is viewing either live video from an Endura system camera or recorded video, the keyboard commands and options are
controlled by the EDI5000 data interface, and they function as described in this section.
START ENDURA SCRIPT STOP ENDURA SCRIPT
SITE
F1
PROG SITE
OPERATE
PROGRAM
F2
MENU
MONITOR
VCR
RUN
SALVO
LAST
HOLD
NEXT
CAMERA
CRAPS
SLOTS
POKER PIT
BLACK
JACK
COUNT
ROOM
CLEAR
NEXT EVENT
PREVIOUS EVENT
MARK EVENT
Figure 5. Operating the EDI5000 with the AD2088 Keyboard
PLAY
PAUSE
ENTER AUXILIARY
1253
46
8
79
MON
CAM
0
JUMP BACK
ON
OFF
IRIS
OPEN
CLOSE
FOCUS
FAR
NEAR
TASK
VCR
ACK
ON-SCREEN DISPLAY
REWIND/STEP BACK
CONTROL
PRE
SET
E
D
I
W
UP
PATRN
PLAY
E
L
E
FAST FORWARD/
STEP FORWARD
T
DIGITAL ZOOM INDIGITAL ZOOM OUT
FORWARDREWIND
RIGHTLEFT
TOGGLE BETWEEN
LIVE AND RECORDED
VIDEO
PAU SE
Figure 6. Controlling Recorded Video with the Joystick
Figure 7. Using Digital Zoom to Control Recorded Video
DOWN
C3611M (12/07) 3
Page 4

Worldwide Headquarters
3500 Pelco Way
Clovis, California 93612 USA
USA & Canada
Tel: 800/289-9100
Fax: 800/289-9150
International
Tel: 1-559/292-1981
Fax: 1-559/348-1120
www.pelco.com
ISO9001
Australia|Canada|Finland|France|Germany|Italy|Macau|The Netherlands|Russia|Singapore
South Africa
The materials used in the manufacture of this document and its components are compliant to the requirements of Directive 2002/95/EC.
Pelco, the Pelco logo, Endura, and the E ndura logo are registered trademarks of Pelco. © Copyright 2007, Pelco. All rights reserved.
Microsoft and Internet Explorer are r egistered trademarks of Microsoft Corporation.
Mozilla and Firefox are registered trademarks of the Mozilla Foundation.
Spain|Sweden|United Arab Emirates|United Kingdom|United States
|
 Loading...