

Page 1

INSTRUCTIONS
W1500
Series
2 or 3-needle flatbed interlock stitch machine
Thank you very much for purchasing Pegasus W1500
Series machine.
This instruction manual describes daily routine
maintenance and safety precautions to keep the
machine in the best possible conditions.
Please study this manual very carefully before operating
the machine.
Page 2

Page 3

C
CONTENTS
CONTENTS
Adjusting the feed dog height
. . . . . . . . . . . . . . . . . . . . . . . . . . . . .21
Adjusting the presser foot lift
. . . . . . . . . . . . . . . . . . . . . . . . . . . . .
21
Adjusting the needle height
. . . . . . . . . . . . . . . . . . . . . . . . . . . . . . .
22
Adjusting the looper
. . . . . . . . . . . . . . . . . . . . . . . . . . . . . . . . . . . . . . . . .
23
Adjusting the needle guard (rear)
. . . . . . . . . . . . . . . . . . . . . . .
24
Adjusting the needle guard (front)
. . . . . . . . . . . . . . . . . . . . . . .
24
Changing the maximum differential feed ratio
. . . . . . . . . . . . . .
25
Checking and cleaning the oil filter
. . . . . . . . . . . . . . . . . . . . . .
26
Adjusting the amount of backward tilt on the presser
foot (for W1562-05)
. . . . . . . . . . . . . . . . . . . . . . . . . . . . . . . . . . . . . . . . .
27
FT device (for W1562-05)
Manual lubrication
. . . . . . . . . . . . . . . . . . . . . . . . . . . . . . . . . . . . . . . . . . . .
27
Adjusting the fabric guide
. . . . . . . . . . . . . . . . . . . . . . . . . . . . . . . . . . . .
27
Replacing the upper knife
. . . . . . . . . . . . . . . . . . . . . . . . . . . . . . . . . . . .
27
Replacing the lower knife
. . . . . . . . . . . . . . . . . . . . . . . . . . . . . . . . . . . .
28
Adjusting overlap of the knife cutting edges
. . . . . . . . . . . . . . . . .
28
Adjusting the lower knife holder left to right
. . . . . . . . . . . . . . . . . .
28
MD device (for W1562-05)
Installing the lace guide
. . . . . . . . . . . . . . . . . . . . . . . . . . . . . . . . . . . . . .
29
Greasing
. . . . . . . . . . . . . . . . . . . . . . . . . . . . . . . . . . . . . . . . . . . . . . . . . . . . .
29
Adjusting the lace guide (lower)
. . . . . . . . . . . . . . . . . . . . . . . . . . . . . .
29
Adjusting the elastic guide
. . . . . . . . . . . . . . . . . . . . . . . . . . . . . . . . . . .
30
Adjusting the feeding amount of the elastic
. . . . . . . . . . . . . . . . . .
30
Adjusting the roller pressure
. . . . . . . . . . . . . . . . . . . . . . . . . . . . . . . . .
30
Inserting the elastic into the roller
. . . . . . . . . . . . . . . . . . . . . . . . . . . .
31
Adjustment dimensions
Comparison table of equivalent sizes
Standard needle
. . . . . . . . . . . . . . . . . . . . . . . . . . . . . . . . . . . . . . . . . . . . .
32
Subclass specifications
. . . . . . . . . . . . . . . . . . . . . . . . . . . . . . . . . . . .
33
Copyright
. . . . . . . . . . . . . . . . . . . . . . . . . . . . . . . . . . . . . . . . . . . . . . . . . . . . . .
1
Directives
. . . . . . . . . . . . . . . . . . . . . . . . . . . . . . . . . . . . . . . . . . . . . . . . . . . . .
1
1.Introduction
. . . . . . . . . . . . . . . . . . . . . . . . . . . . . . . . . . . . . . . . . . . . . . .
2
2.I
ndications of dangers, warnings & cautions
.
2-3
3.Safety precautions
. . . . . . . . . . . . . . . . . . . . . . . . . . . . . . . . . .
3-4
4.Notes for each procedure
. . . . . . . . . . . . . . . . . . . . . . . .
4-6
5.Location of warning labels and safety devices
. . . .
7
6.Protectors for safety
. . . . . . . . . . . . . . . . . . . . . . . . . . . . . . . . . .
8
Assembling the machine rest board
. . . . . . . . . . . . . . . . . . . . . .
9
Sewing machine installation
. . . . . . . . . . . . . . . . . . . . . . . . . . . . . . . .
9
Installing the belt cover
. . . . . . . . . . . . . . . . . . . . . . . . . . . . . . . . . . . . . .
9
Operating direction of the machine pulley
. . . . . . . . . . . . . .
9
Lubrication
. . . . . . . . . . . . . . . . . . . . . . . . . . . . . . . . . . . . . . . . . . . . . . . . . . . .
10
Silicone oil for H.R. device
. . . . . . . . . . . . . . . . . . . . . . . . . . . . . . . .
11
Threading
. . . . . . . . . . . . . . . . . . . . . . . . . . . . . . . . . . . . . . . . . . . . . . . . .
12-13
Adjusting presser foot pressure
. . . . . . . . . . . . . . . . . . . . . . . . . .
14
Adjusting the differential feed ratio
. . . . . . . . . . . . . . . . . . . . . .
14
Adjusting stitch length
. . . . . . . . . . . . . . . . . . . . . . . . . . . . . . . . . . . . . .
14
Adjusting the thread tension
. . . . . . . . . . . . . . . . . . . . . . . . . . . . . .
15
Cleaning the machine
. . . . . . . . . . . . . . . . . . . . . . . . . . . . . . . . . . . . . .
15
Replacing the needle
. . . . . . . . . . . . . . . . . . . . . . . . . . . . . . . . . . . . . . .
16
Oil replacement
. . . . . . . . . . . . . . . . . . . . . . . . . . . . . . . . . . . . . . . . . . . . . .
16
To drain the oil
. . . . . . . . . . . . . . . . . . . . . . . . . . . . . . . . . . . . . . . . . . . . . . .
16
Adjusting the needle thread guard
. . . . . . . . . . . . . . . . . . . . . .
17
Adjusting the needle thread guides
. . . . . . . . . . . . . . . . . . . . .
17
Adjusting the looper thread take-up
. . . . . . . . . . . . . . . . . . . .
18
Adjusting the looper thread guides
. . . . . . . . . . . . . . . . . . . . . .
18
Adjusting the spreader
. . . . . . . . . . . . . . . . . . . . . . . . . . . . . . . . . . . . . .19
Adjusting the top cover thread guide
. . . . . . . . . . . . . . . . . . . .20
Page 4

Copyright@@@@@@@@@@@@@@@@
●This instruction manual may not be reproduced, transcribed, transmitted, distributed or translated into any
language, in whole or part, in any form or through a paper or electronic medium, without the prior written
permission from Pegasus Sewing Machine Mfg. Co., Ltd.
●Disclaimer
The contents described in this instruction manual are intended for giving information and subject to change
without notice. We assume no responsibility for these information, and any errors and/or incorrect descriptions
that may appear in this instruction manual.
●Pegasus Sewing Machine Mfg. Co., Ltd. has a policy that we always modify the performance and/or
specifications of this product introducing the state-of-the-art technology. Accordingly we reserve the right to
change the specifications and/or design without notice.
●This instruction manual is valid for all the models and subclasses listed in the chapter "Specifications."
Directives@@@@@@@@@@@@@@@@
This machine is constructed in accordance with the European regulations contained in the conformity and
manufacturer's declarations. In addition to this instruction manual, strictly observe all the generally accepted,
statutory regulations, legal requirements and all the environmental protection regulations.
Also rigidly adhere to the regionally valid regulations of the social insurance society for occupational accidents or
other supervisory organizations.
Besuretostudyverycarefully
for
for
safety.
safety.
1
Page 5
Indicates an immediate hazard to life or limb.
Indicates a potential hazard to life or limb.
Indicates a possible mistake that could result in injury or damage.
DANGER
WARNING
CAUTION
1.Introduction@@@@@@@@@@@@@@
●This is the instruction manual that describes how to use this product safely.
●Read this instruction manual and learn very carefully how to operate, adjust and service this sewing machine
before beginning any of the procedures.
●You should realize first that there is always the risk of contacting moving parts, such as needles because you
have to work at point-blank range to them when you are operating industrial sewing machines.
For safety it is essential that we supply safe products and you use them correctly and safely.
There may be some safety measures that you yourself must take.
Therefore, you should read and understand very carefully this instruction manual together with that of the driving
equipment and take necessary safety measures in order to use this machine efficiently and effectively.
2.
Indications of dangers, warnings and cautions
@
To prevent accidents and ensure safety, warning indications which show the degree of danger are used on our
products and in this manual.
Study the contents of these indications carefully and follow all warnings and instructions.
Indication labels should be found easily.
Attach new labels when they are stained or removed.
Contact our sales office when new labels are needed.
Symbols,signsand/orsignalwordswhich
Symbols,signsand/orsignalwordswhich
attractusers'attention
attractusers'attention
2
Page 6
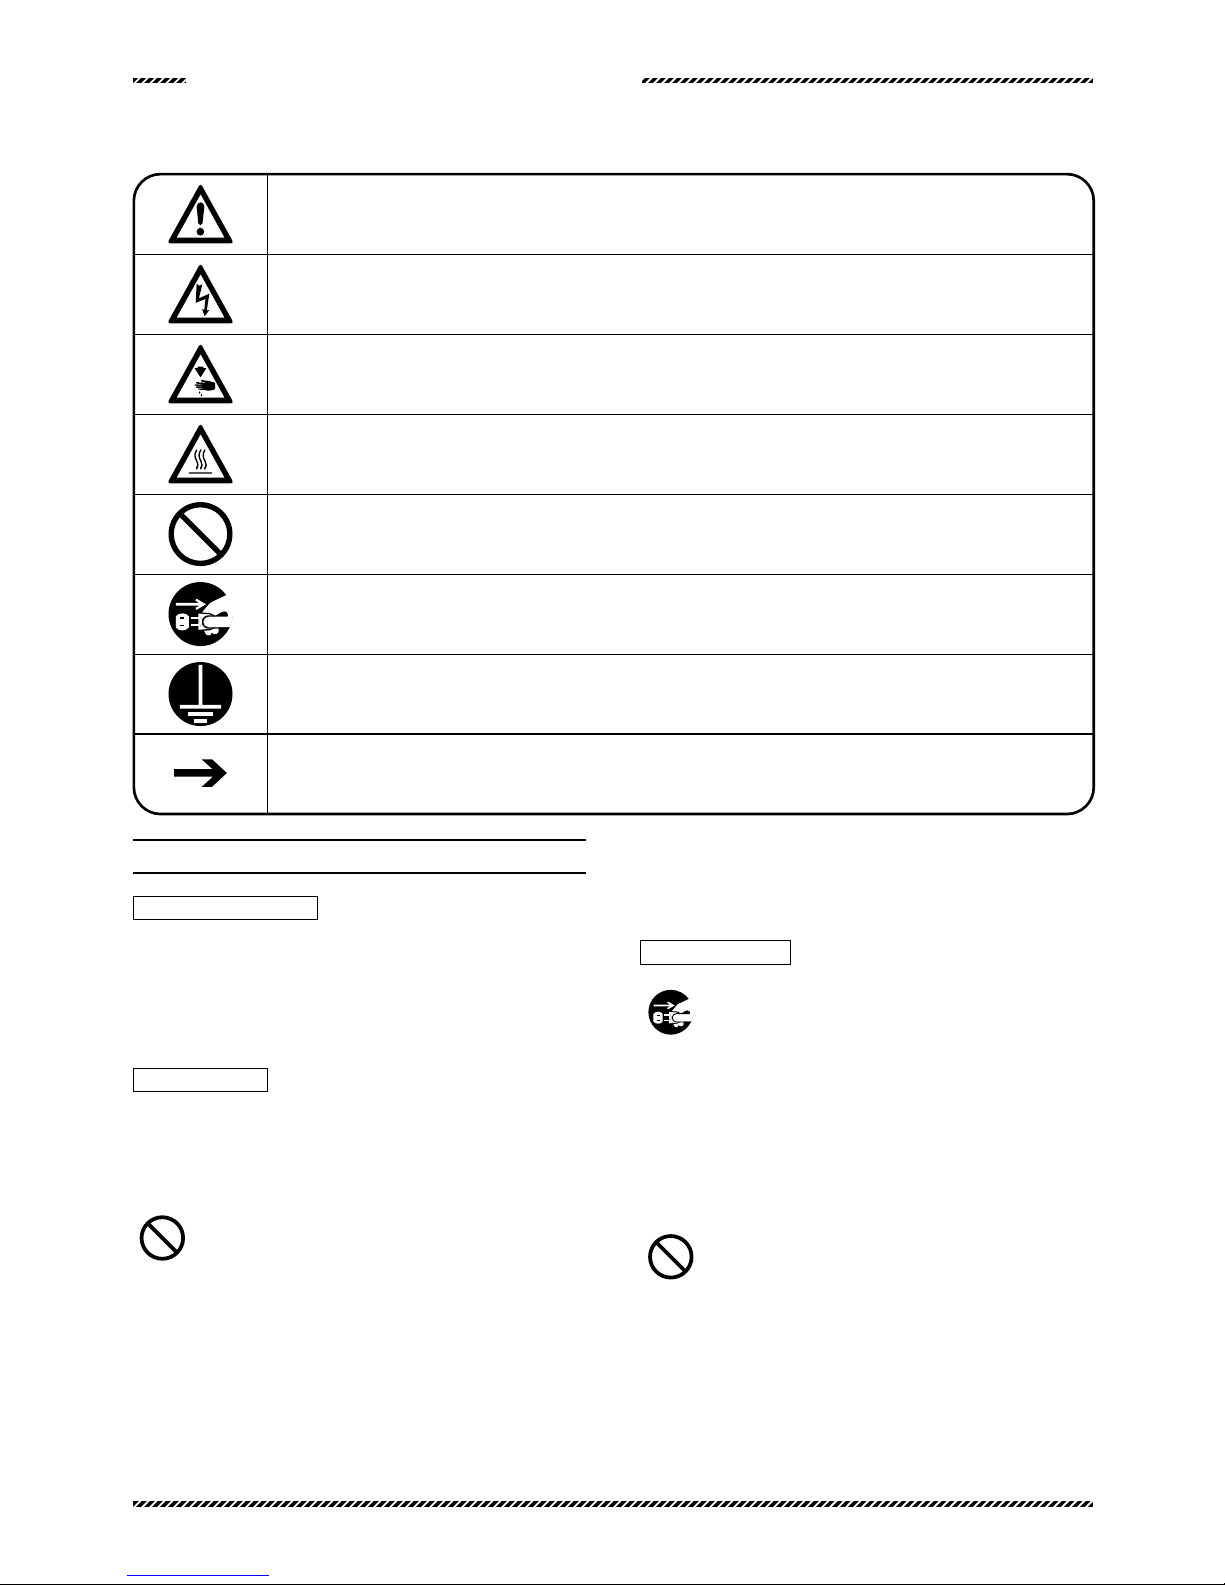
Be sure to ground the machine and labor saving device securely.
If you use the machine and/or labor saving device incorrectly, you may get an electrical shock.
If you use the machine and/or labor saving
device incorrectly, your hands and/or fingers may
be injured.
Be sure to follow the instructions when you operate the machine and/or labor saving device.
Unplug the machine or shut off the power when checking, adjusting and/or repairing the
machine and/or labor saving device, or when lightning may strike.
Denotes the normal rotating direction of the machine pully.
Never do this.
Indicates a danger of burn injury due to high temperature.
3.Safety precautions
①Applications, purpose
Our industrial sewing machines have been developed in order to
increase quality and/or production in the sewing industry.
Accordingly never use our products for other than intended use
described above.
②Circumstances
The environment in which our industrial sewing machines are used
may seriously affect their lives, functions, performance and/or
safety.
For safety, do not use the machine under the
circumstances below.
1.Do not use the machine near objects which make noise such as a
high-frequency welder, etc.
2.Do not use or store the machine in the air which has vapor from
chemicals, or do not expose the device to chemicals.
3.Do not leave the machine outside, in high temperatures or the
direct sun.
4.Do not use the machine in the places of high ambient
temperature and humidity that seriously affects sewing machines.
Symbolsandmessages
Symbolsandmessages
5.Do not use the machine on the condition that the voltage fluctua-
tion range is more than ± 10% of the rated voltage.
6.Do not use the machine in the place where the supply voltage
specified for the control motor cannot be properly obtained.
③Safety measures
(1)Safety precautions when you perform maintenance on
the machine.
●Always turn off the power, unplug the machine and then make
sure that the machine does not run by pressing the treadle
before performing any maintenance, such as checking, repairing,
cleaning, etc. However, if you need to perform these procedures
with the power on, to prevent accidents due to the unexpected
start of the machine and users' misoperation, estabish your oun
procedures for safety and follow them.
●Always turn off the power and unplug the machine
before performing the procedures shown below.
・Lubrication
・Threading
・Cleaning
・Replacing the needle
・Checking/replacing the oil element
・Replacing the oil
Besuretostudyverycarefully
for
for
safety.
safety.
3
Page 7
●Always turn off the power before performing the procedures
shown below.
・Adjusting the stitch length
・Adjusting the differential feed ratio
●Only well-trained people should perform routine daily
maintenance and/or repair the machine.
●Do not modify the machine yourself.
※Consult your local Pegasus' sales office or representative for
modification.
(2)Before operating the machine
●Check the machine head and unit for any damage and/or faulty
function at the start of each day.
If there should be something wrong with the machine,
immediately perform repairs and/or other necessary procedures.
●Check by hand to see if the needle holder is secured.
※Be careful of the needle point.
●Before starting the machine, make sure that the presser foot is
positioned correctly (turn the machine pulley slowly by hand to
see if the needle point is centered in the needle drop hole on the
presser foot).
●Check to see if the presser foot is secured (raise the presser foot
by the foot lifter and press it by hand front to back and left to
right).
(3)Training
●To prevent accidents, operators and service/maintenance
personnel should have proper knowledge and skills for safe
operation.
To ensure so, managers must design and conduct training for
these people.
4.Notes for each procedure
CA
CA
UTION
UTION
①Unpacking
1.The machine is packaged in a cardboard box before shipping.
Unpack your machine in orderly sequence while checking them
right-side up by referring to the indications, such as logo, etc.
printed on the boxes.
2.Never hold the area near the needle and/or thread guide related
parts when taking out the machine from the cushion.
Otherwise it may cause injury and/or damage to the machine.
3.Take out the machine very carefully while checking the position of
the center of the gravity.
4.Keep the cardboard box and packing carefully in case secondary
transport is needed in the future.
Disposal of the packaging
●The packaging material of the machine consists of wood, paper,
cardboard and VCE fiber. The proper disposal of the packaging
is the responsibility of the customer.
Disposal of machine waste
1.The proper disposal of machine waste is the responsibility of the
customer.
2.The materials used on the machines are steel, aluminum, brass
and various plastics.
3.The machine waste is to be disposed of in accordance with the
locally valid environmental protection regulations. A specialist
should be commissioned if necessary.
※The parts contaminated with lubricants should be disposed off
separately according to the locally valid environmental protection
regulations.
Transport within the customer's premises
●The manufacturer assumes no liability for transport within the
customer's premises. Care should be taken to transport the
machine in an upright position avoiding it from dropping or falling
down to the ground when it is moved.
4
Page 8
WWARNING
ARNING
Cables
1.When connecting the cables between the machine and the motor,
be sure to turn off the power and connect each cable connectors
securely.
2.Do not strain the cables in use.
3. Do not bend the cables excessively.
4.When connecting the cables that are close to the moving parts,
such as pulley or V belt, keep a distance of 25mm at least
between them.
5.Protect each cable using a cover or adjusting its position if
necessary.
6. Never use staples to fasten the cables.
Otherwise it causes a short circuit and/or a fire.
CA
CA
UTION
UTION
Motor
1.Install the machine motor correctly by referring to the instruction
manual supplied by the manufacturer.
2.Select the machine motor equipped with the pulley cover so that
any part of your body etc. is not caught in the belt.
CA
CA
UTION
UTION
Ground
1.Connect each of the ground wires in the sewing machine system
to the ground terminal. Do not connect to another devices'.
2. Connect the ground wires securely to the indicated ground
points on the machine head.
WWARNING
ARNING
④Handling machine oil
1.Never start the machine with no oil in the reservoir.
Use HIGHSPEED SEWING MACHINE OIL specified by Pegasus
(Equivalent of ISO requirements: Viscosity Index of VG22).
2.If machine oil gets in your eyes, it may cause eye irritation.
To prevent the machine oil from getting in your eyes, wear a pair
of protective glasses.
※Should machine oil gets in your eyes, wash them with fresh water
for 15 minutes and then go to see a doctor.
Besuretostudyverycarefully
for
for
safety.
safety.
5
WWARNING
ARNING
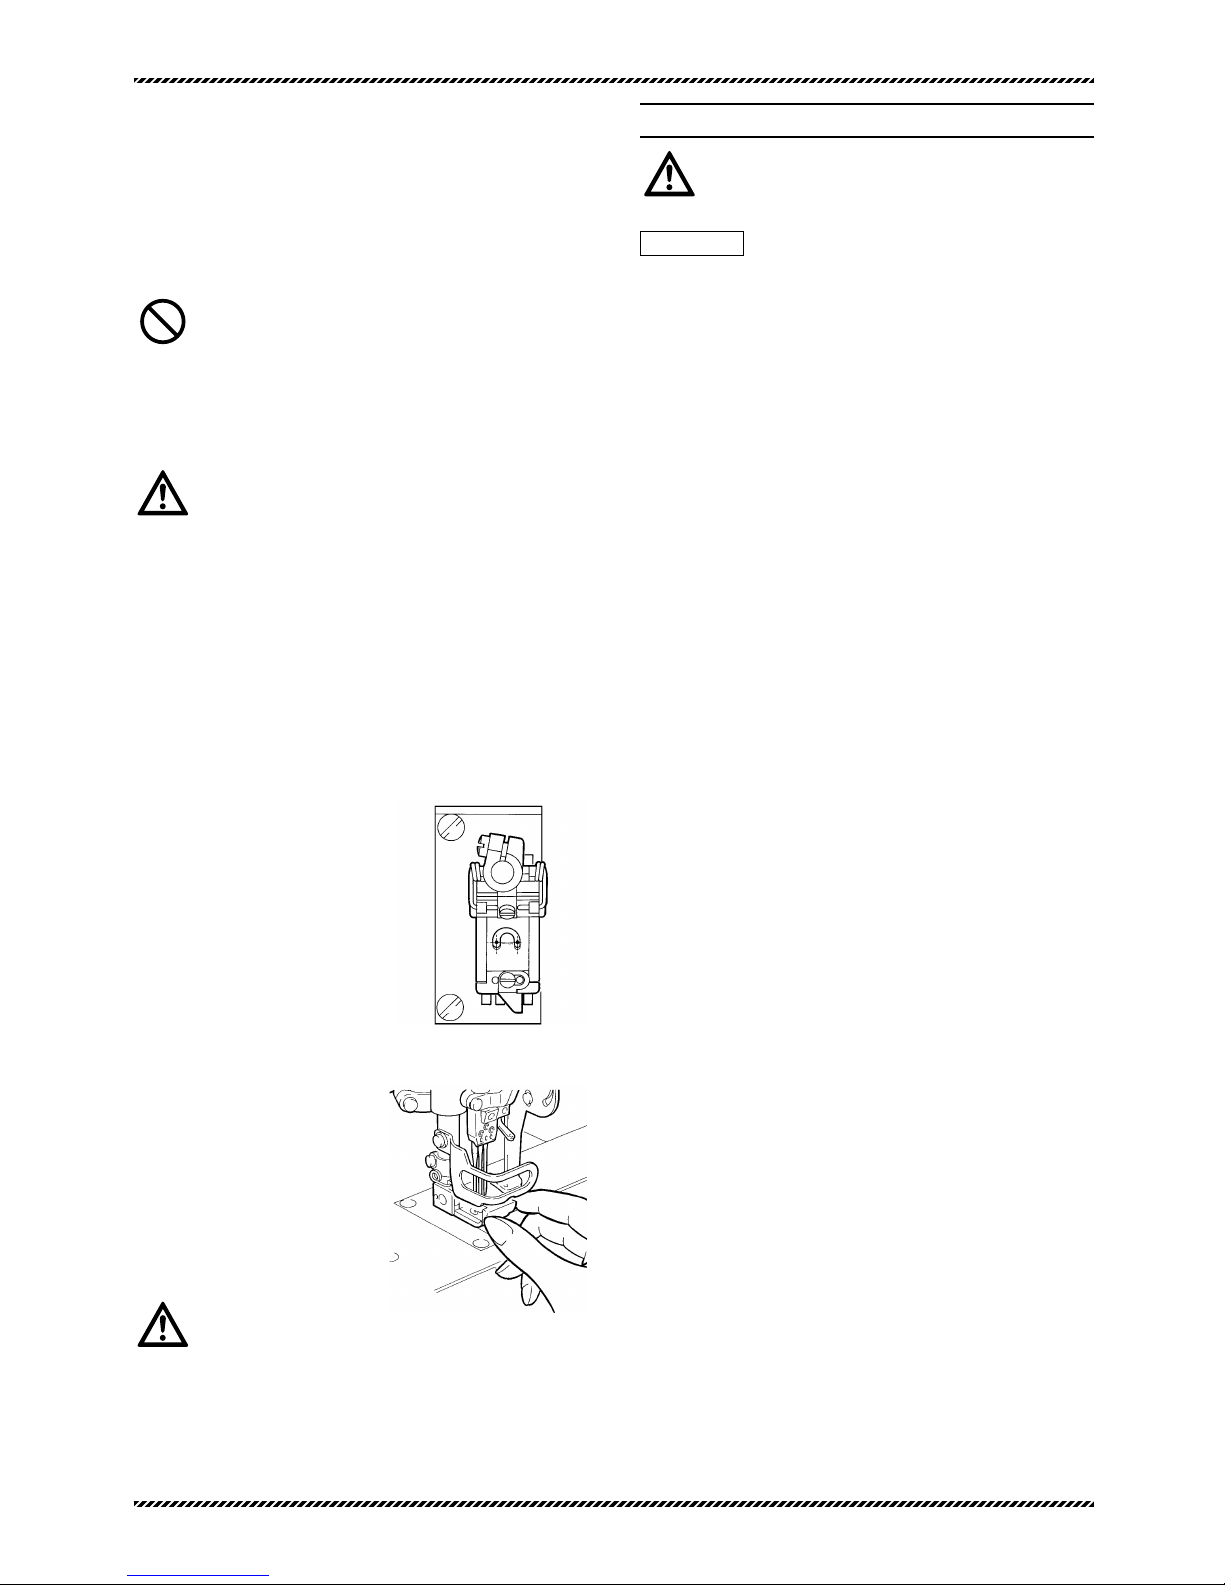
②Transportation
1.The machine should be carried by at least more than two people
when it is mounted on the table and/or a hand truck.
Be sure to use a hand truck for other transportation.
2.To carry the machine, hold
the machine pulley tightly
with your right hand and the
machine arm with your left
upper arm.
If the machine and/or your
hands are stained with oil,
the machine may be easy to
slip out of your hands and
fall to the floor.
Therefore, wipe off the oil carefully.
3.Care should be taken to avoid excessive shock and shake when
the machine is mounted on the table and/or transferred using a
hand truck. Otherwise the machine may fall down.
4.Wipe off the oil from the machine before packaging it again for
secondary transport. Otherwise the machine may easily slip out
of your hands or the bottom of the box may come off while in
transit.
CA
CA
UTION
UTION
③Installation, preparation
Machine table
1.Use the machine table (table board, metal legs) that completely
carries the machine and is fully resistant to warping while the
machine is running.
2.Arrange the working environment for easy operation by
considering where to place the machine and the brightness
around the working area. If the illumination is insufficient, control
or change lighting as required.
3.Attach a non-slip pad to the treadle (foot switch).
Otherwise the operator may slip off the treadle while running the
machine, causing trouble.
4.Adjust the height of the table according to a working posture of
the operator.
Page 9
3.Avoid skin contact. Immediately wash contacted areas
completely with water and soap.
4. Never swallow machine oil.
5.Keep machine oil out of the reach of children.
※If swallowed, do not induce vomiting.
Immediately go to see a doctor.
6.Dispose of the waste oil and/or containers properly as demanded
by law. If you have further questions on its disposal, consult the
store or shop at which you purchased it.
7.After opening the oil container, be sure to seal it to prevent dust
and water from getting into the oil and keep it in the dark to avoid
direct sunlight.
WWARNING
ARNING
⑤Before starting the machine
Machine table
1.Before turning the power on, visually check the cables and
connectors for defective conditions, such as damage,
disconnection and/or loosening.
2.Never bring your hands close to the needle and/or pulley when
turning on the power.
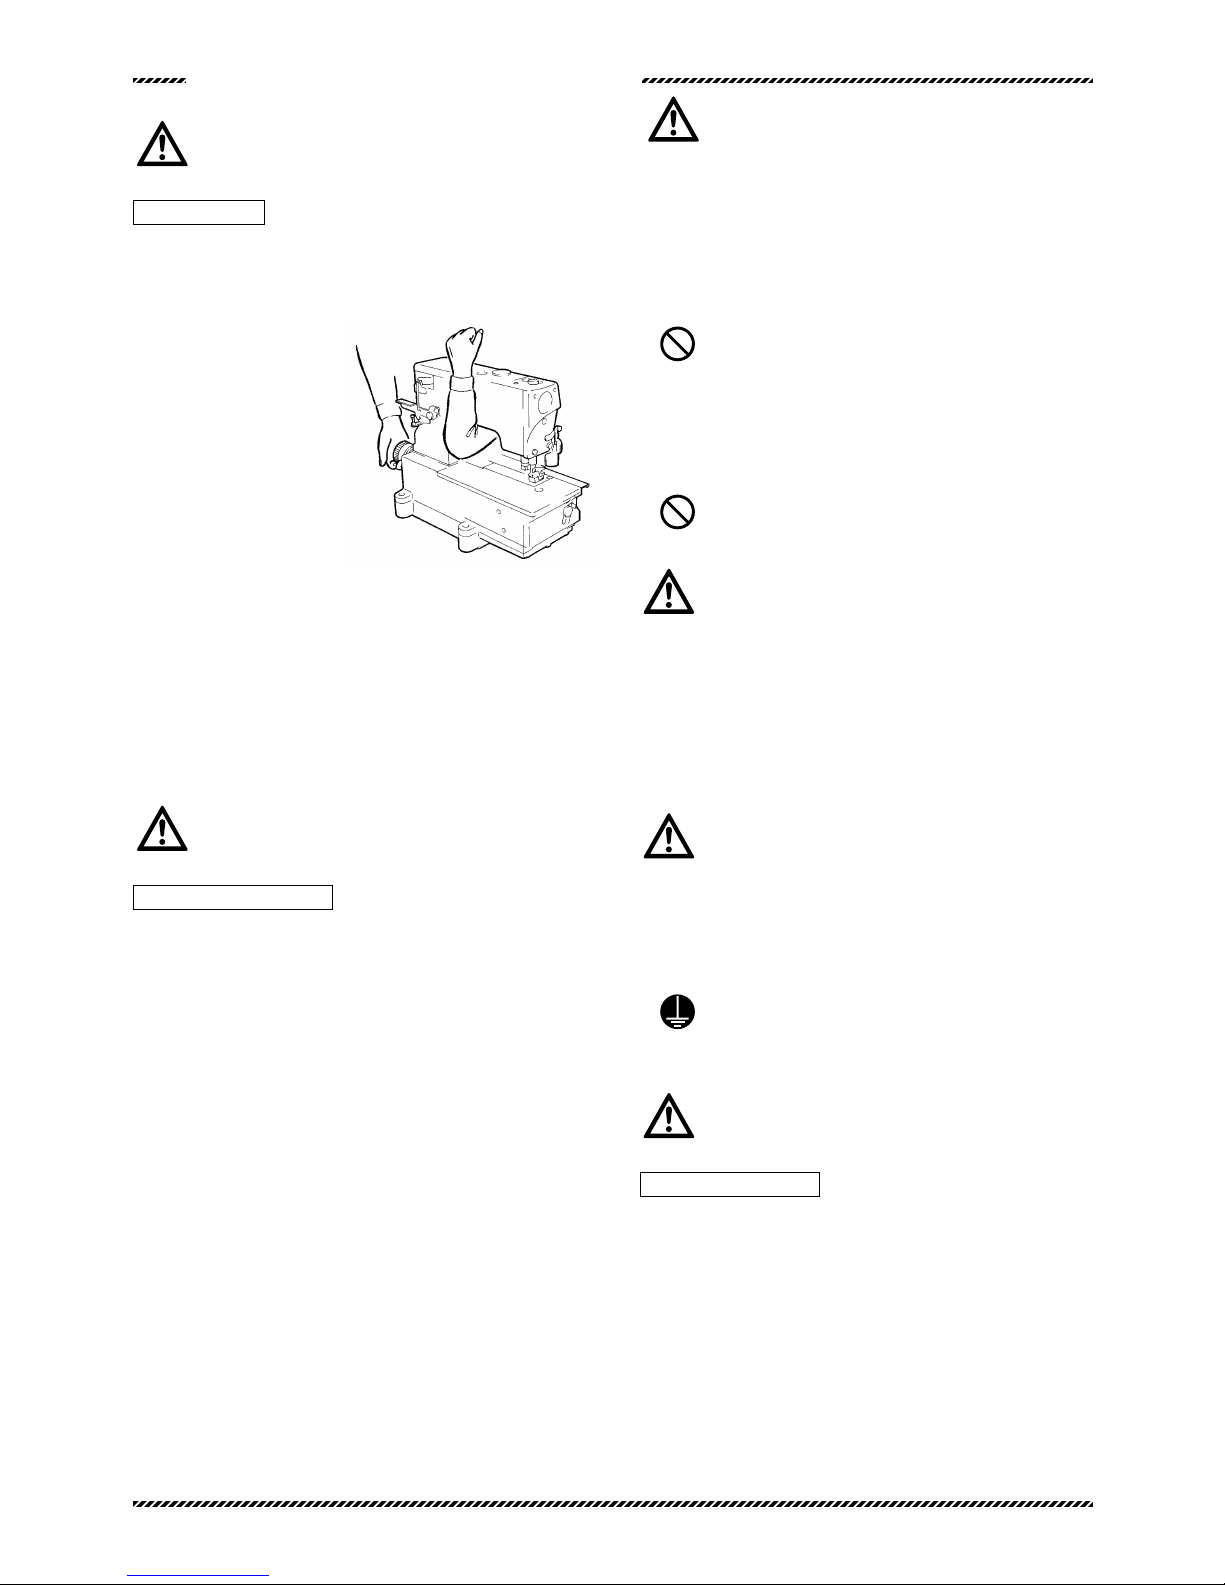
3.When the machine is used
for the first time, turn on the
power and then check the
rotating direction of the
machine pulley.
The machine pulley should
turn clockwise as seen
from the machine pulley.
4.Well trained operators should use the machine after studying
these precautions and the instruction manual carefully.
5.Regarding symbols that indicate a danger or a warning, read and
study "2. Waning indications" carefully and give training on safety
to the operators as required.
6.Run the machine at the speed less than 3/4 of its maximum for
the first one month.
WWARNING
ARNING
⑥Precautions while you are running the machine
1. Do not run the machine with the safety devices removed,
such as eye guard, finger guard, pulley cover, etc.
2. Never bring your hands under the needle while running the
machine.
3.A clutch motor keeps on running for a while after the power is
turned off. Therefore, be careful even after the power is turned
off as the machine could start running by pressing the machine
treadle.
4. To prevent accidents, never bring any part of your fingers,
hair and clothes near the machine pulley, V belt, motor pulley,
thread take-up and needle bar. Also never leave scissors,
tweezers, tools, etc. around these areas.
5. If you use the machine with the FT device, do not bring any
part of your hands and fingers too close to the FT during sewing.
Otherwise it may cause accidents and physical in jury.
6.Always turn off the power while the machine is not used or before
leaving the machine table.
7.In the event of a power failure, be sure to turn off the power.
8.While operating the machine, wear clothes that cannot be caught
in the machine.
9. Do not put any tools or other unnecessary objects on the
machine table while running the machine.
CA
CA
UTION
UTION
⑦Maintenance, Check, Repair
1.Well trained people should perform maintenance, check and
repair of the machine after studying these precautions and the
instruction manual carefully.
2. If it is necessary to lay the machine backward for
maintenance, check and repair, always turn off the power, unplug
the machine and press the treadle to make sure that the machine
dose not operate before beginning any of the procedures.
3. Before installing/removing the V belt, always turn off the
power, unplug the machine and press the treadle to make sure
the machine does not operate.
4.Carry out daily maintenance work and periodical inspections
properly by following these precautions and the instruction
manual.
5.Employ Pegasus' genuine parts when repairing the machine
and/or replacing the parts. We are not responsible for accidents
caused by any improper repair/adjustment and substituting other
parts for thoes manufactured by Pegasus.
6.Do not attempt to modify the machine at your own discretion.
We are not responsible for accidents caused by the modification.
7.Be sure to replace the safety devices and/or safety covers that
are temporarily removed for maintenance and/or adjustment.
8.After performing maintenance, check and repair, make sure that
turning on the power does not pose any danger to you.
6
Page 10

Eye guard
Side cover
Sliding plate Front cover
Pulley cover
5.
Location of warning labels and safety devices
Besuretostudyverycarefully
for
for
safety.
safety.
Finger guard
7
Page 11

6.Protectors for safety
This chapter describes each protector for safety. Therefore, read
and study the following carefully.
CA
CA
UTION
UTION
Protectors for safety
(1) Eye guard
Never leave the eye guard open.
For the safety of eyes, do not operate the machine with the eye
guard open. The eye guard will prevent any pieces of the broken
needle from getting into your eyes if the needle should break during
sewing.
(2) Finger guard
Never insert any of your fingers.
To prevent the needle that moves up and down from contacting any
of your body, the finger guard is installed close to the needle.
However, there is clearance above the finger guard for easy
threading. Be careful that the needle may penetrate any of your
fingers if you insert it into this clearance.
(3) Pulley cover
Never remove.
The machine pulley and V belt are covered with the pulley cover.
The machine pulley and the V belt rotate at high speed during
sewing. To prevent accidents, operate the machine with the pulley
cover installed in place.
(4) Pulley
Check the direction in which the machine pulley rotates.
It should rotate clockwise as seen from the pulley.
(5) Presser foot
Never insert any of your fingers.
There is a clearance of more than 5mm between the top
surface of the needle plate and the presser foot.
Be careful that none of your fingers are caught in this clearance.
Never insert any of your fingers under the presser foot when raising
the presser foot with the knee switch or automatically raising it with
the treadle.
(6)Front cover
Never leave the front cover open.
The looper travels left to right while drawing an arc as seen from the
front of the machine. To prevent the looper from contacting any
part of your body, be sure to operate the machine with the front
cover closed securely.
(7) Side cover
Never leave the side cover open.
The looper travels left to right while drawing an arc as seen from the
front of the machine. To prevent the looper from contacting any of
your body, be sure to operate the machine with the side cover
closed securely.
(8) Sliding plate
Never leave the sliding plate open.
The looper thread take-up rotates in order to supply the required
amount of looper thread during sewing. To prevent the looper
thread take-up from contacting any of your body, be sure to operate
the machine with the sliding plate closed securely.
8
Page 12
9
1
2
3
4
4
2cm
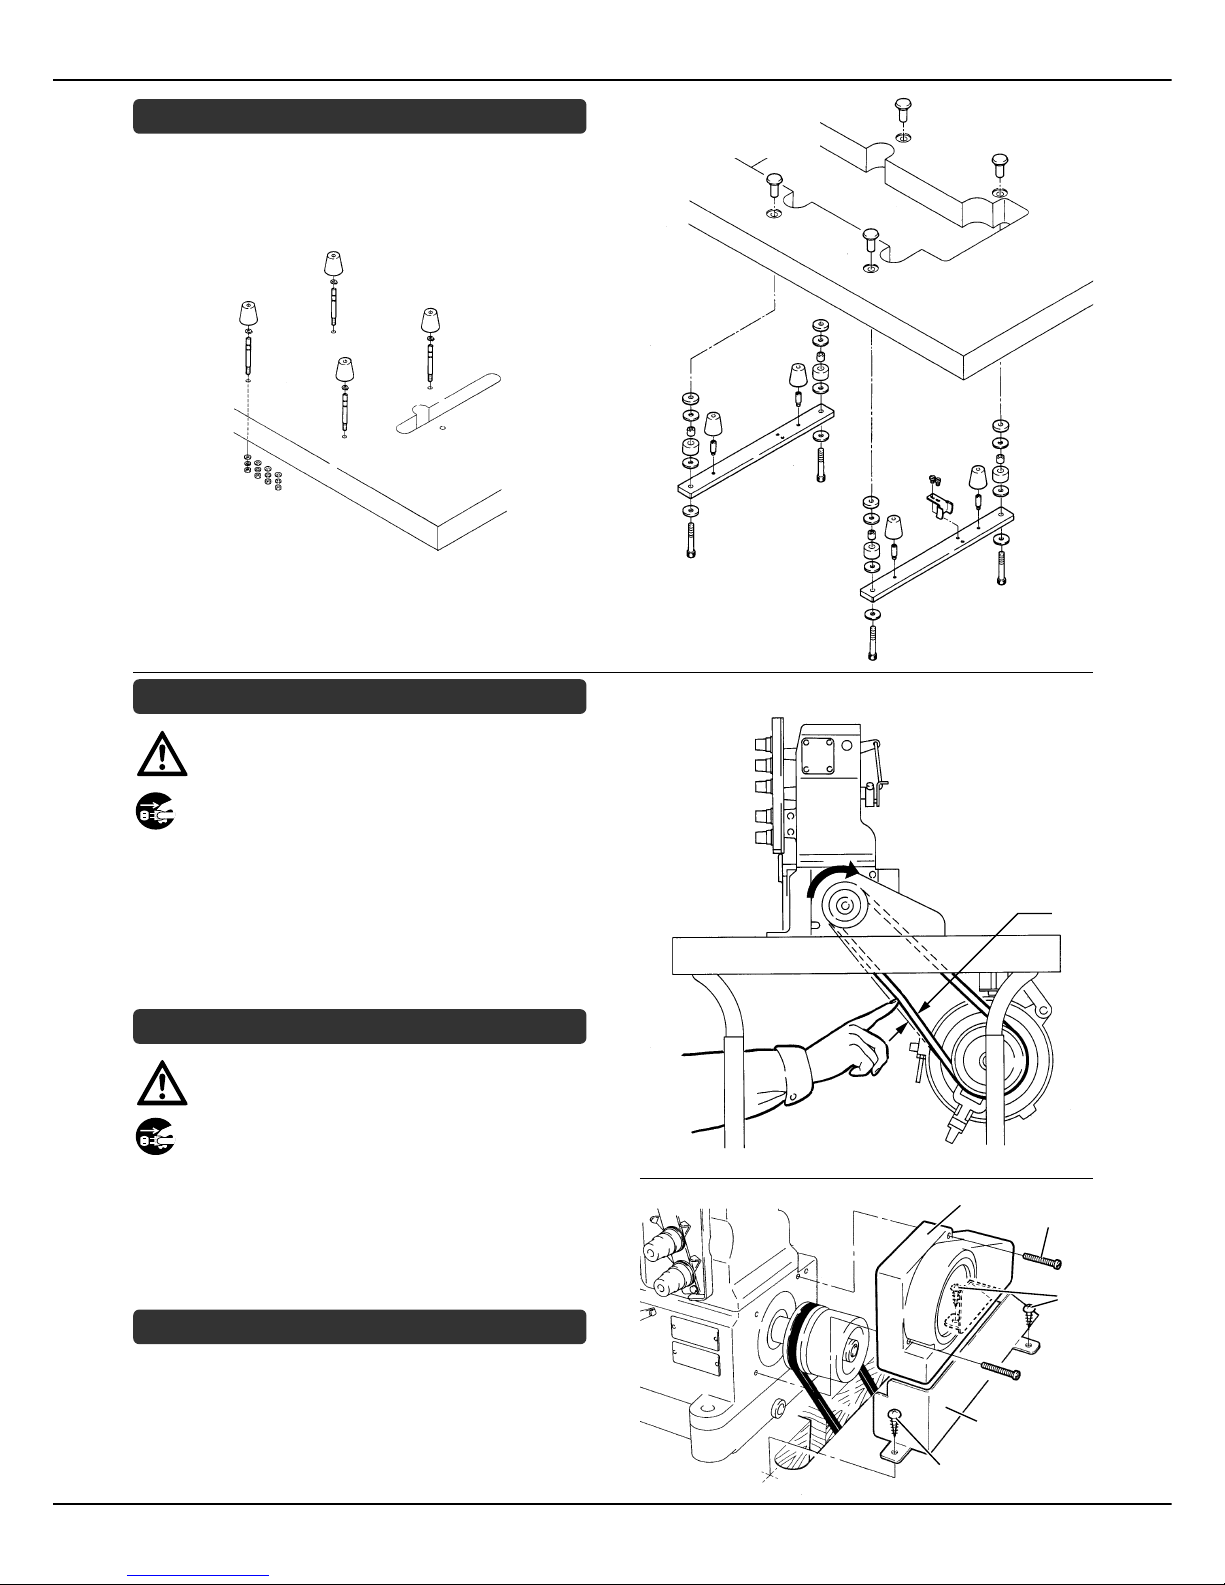
Assembling the machine rest board
Assemble the components comprising the machine rest board by
referring to the illustration below. Be sure to secure all rods, nuts
and bolts firmly with no shake.
Sewing machine installation
CA
CA
UTION
UTION
Always turn off the power, unplug the machine and then well-
qualified technicians should install the machine.
Mount the machine on the machine rest board first. Put the V belt
in place. Position the machine motor so that an approx. 2cm
deflection can be obtained by pressing the center of the belt
(see the illustration).
Installing the belt cover
CA
CA
UTION
UTION
Always turn off the power, unplug the machine and then well-
qualified technicians should install the belt cover.
Install belt cover 1 on the machine with screws 2.
For non-submerged installation, install belt guard 3 onto the
machine table with wood screws 4.
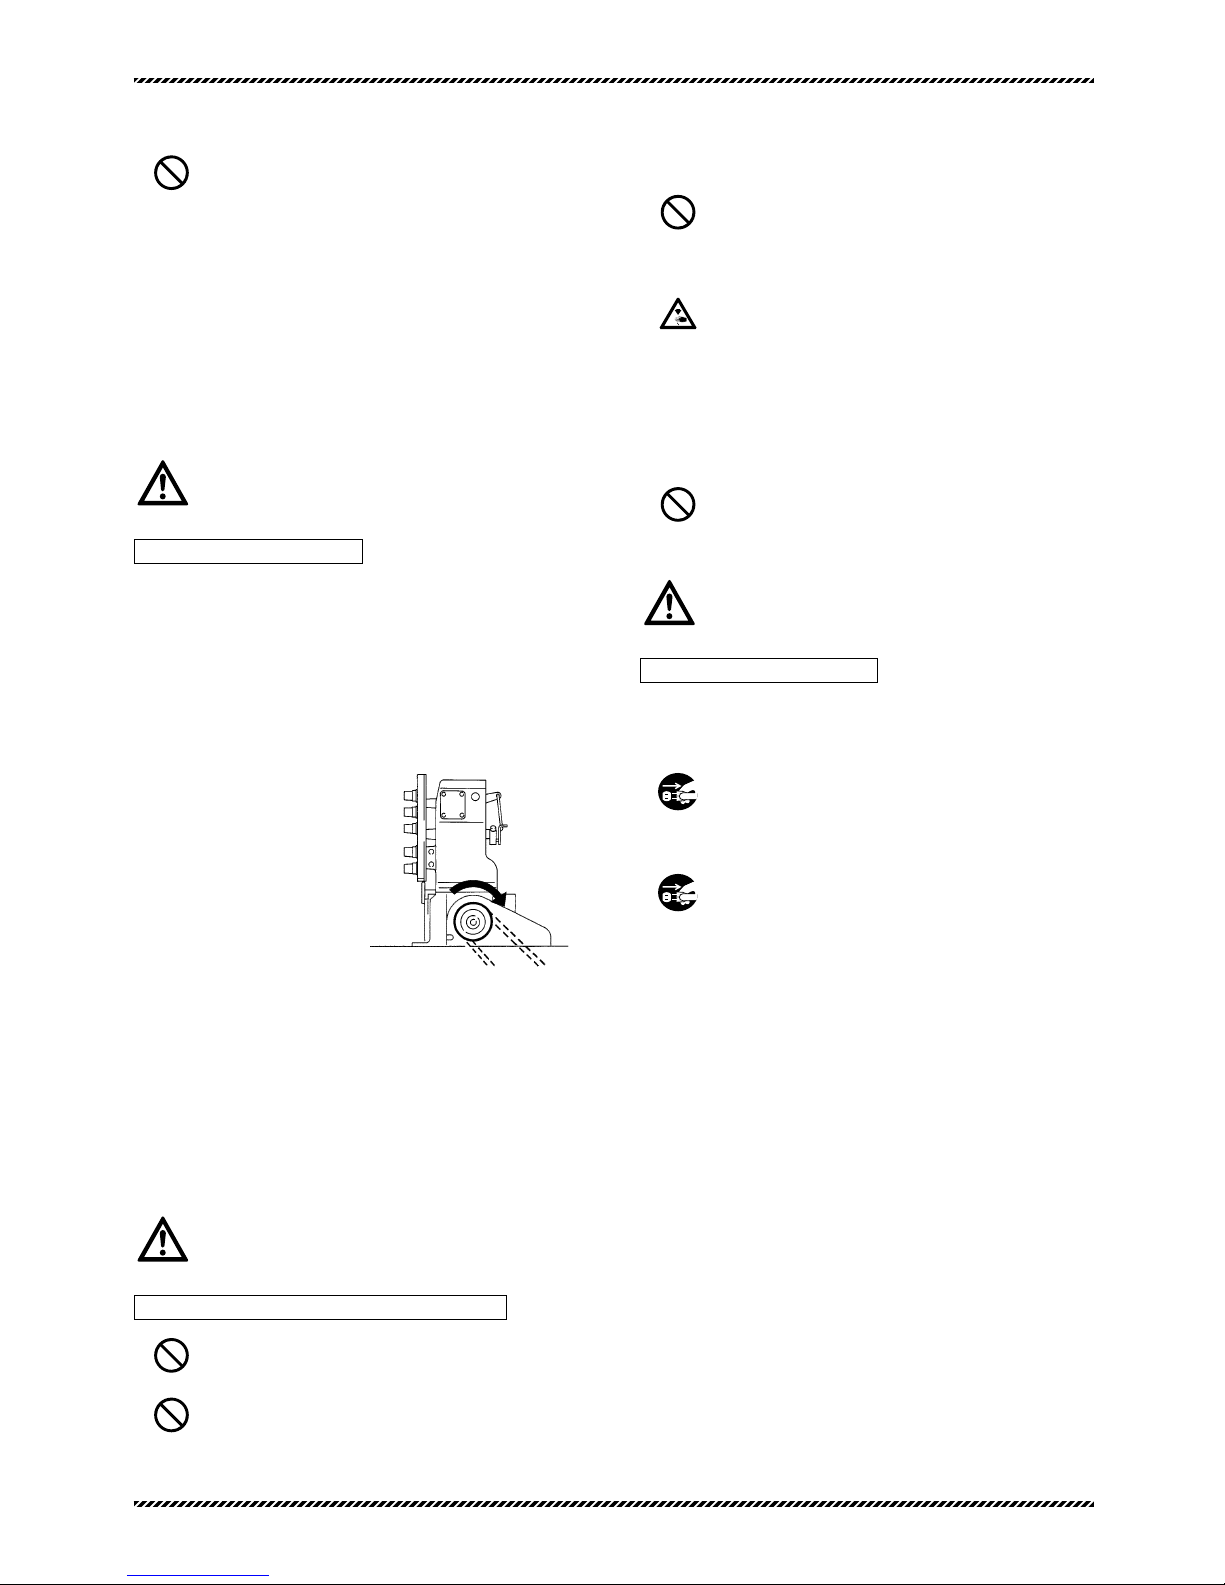
Operating direction of the machine pulley
The machine pulley rotates clockwise as seen from the end of the
machine pulley.
(Semi-submerged
installation)
(Non-submerged
installation)
Page 13

10
2
1
HIGH
S
P
EE
D
SEW
I
NG
MACHI
N
EO
IL
H
L
3
HIGH SPEED SEWING
MACHINE OIL
4
Lubrication
CA
CA
UTION
UTION
When lubricating the machine and/or replacing the oil, use
Pegasus recommended oil. Using other oils may damage the
machine.
1. Oil
Use the oil "HIGH SPEED SEWING MACHINE OIL" specified by
Pegasus (ISO Viscosity Grade 22).
2. To fill the machine with oil
Remove cap 1.
Add the oil until the oil level (see oil gauge 2) reaches (H).
After filling the tank with oil, replace cap 1.
3. Required amount of oil
(H) on oil gauge 2: Upper limit
(L ) on oil gauge 2: Lower limit
The oil level should always lie between (H) and (L).
4. Manual lubrication
CA
CA
UTION
UTION
Always turn off the power and unplug the machine when you
apply oil by hand.
Apply two or three drops of oil to needle bar 3 by
hand when the machine is used for the first time or left unused for
some time.
5. Checking oil circulation
Once the machine has been properly filled with oil, press the
machine treadle to run the machine and check oil gauge
window 4 to see if the oil is flowing.
Page 14

11
2
1
Silicone oil for H.R. device
CA
CA
UTION
UTION
Always turn off the power and unplug the machine when you
fill the HR device with silicone oil.
Fill silicone oil tanks 1, 2 with silicone oil.
To prevent thread breakage or fabric damage, add the silicone oil
before it is too low.
Page 15

12
Threading
CA
CA
UTION
UTION
Always turn off the power and unplug the machine when you
thread the machine.
1.
Open eye guard 1 and covers 2 , 3 and 4.
2.
Press lever 5 and bracket 6 comes out toward you. After
threading, press bracket 6 into place.
3.
In case the machine is threaded previously
A:Knot the preset thread and the thread being used together
to thread the machine.
B:
Needle thread
Trim the knots off neatly before
passing through the eye of the
needle to thread.
C:
Looper thread,
Top cover thread
Trim the knots off neatly after
passing through the eye of the
looper.
Be sure to thread the machine correctly by referring to the threading
diagram. (See page 13)
1
4
2
3
A
B
C
5
6
6
Page 16

13
For more
stretchable thread.
4.
Threading diagram
Page 17

14
Adjusting presser foot pressure
The presser foot pressure should be as light as possible, yet
sufficient to feed the fabric correctly and provide the uniform stitch
formation.
Loosen nut 1. Adjust the presser foot pressure. Adjustment is
made by turning screw 2 clockwise or counterclockwise using a
coin. Tighten nut 1.
Adjusting the differential feed ratio
1.
Loosen nut 3 for the differential feed ratio adjustment.
To increase the differential feed ratio, lower lever 4.
The finished fabric is shrunk.
To decrease the differential feed ratio, raise lever 4.
The finished fabric is stretched.
2.
After this adjustment tighten nut 3.
Adjusting stitch length
CA
CA
UTION
UTION
Always turn off the power and unplug the machine when
adjusting the stitch length.
1
. While pressing the push button 5, turn the handwheel 6 to
seek the position at which the push button 5 goes further into
the depth.
2.
Then, keeping the push button 5 pressed, turn the handwheel
6 and set the desired scale to the aligning mark A.
Note
Stitch length adjustment must only be made after the differential
feed ratio has been changed.
1
2
HeavyLight
3
4
To stretch
To shrink
5
A
6
Coarse
Fine
Page 18

15
4
5
6
7
Adjusting the thread tension
To obtain the proper thread tension, adjust needle thread tension
knobs 1, top cover thread tension knobs 2 and looper thread
tension knob 3.
To tighten the thread, turn each knob clockwise.
To loosen the thread, turn each knob counterclockwise.
Each thread tension should be as light as possible, yet be sufficient
to produce balanced and beautiful stitches.
Cleaning the machine
CA
CA
UTION
UTION
Always turn off the power and unplug the machine when you
clean the machine.
1.
Open front cover 4 and slide plate 5. Loosen screws 6 and
remove needle plate 7.
2.
Clean the grooves of the needle plate and the area around the
feed dogs.
3.
Replace needle plate 7 with screws 6. Then close front
cover 4 and slide plate 5.
1
2
3
To loosen
To tighten
Page 19

16
2
OK! NO!
Scarf
1
OK! NO!
Replacing the needle
CA
CA
UTION
UTION
Always turn off the power and unplug the machine when you
replace the needle(s).
1.
Loosen screw(s) 1 using a red-handled key wrench (1.5mm).
2.
Remove the old needle(s) by using a pincette (provided as
accessories).
3.
Fix the needle so that its scarf faces the rear side of machine.
4.
Insert a new needle into the needle hole as far it will go by
using a pincette.
5.
Tighten screw(s) 1 using a red-handled key wrench (1.5mm).
Oil replacement
Replace the oil one month after the first use and thereafter
every six months. If you keep using the old oil, it may cause the
damage to the machine.
To drain the oil
1.
Drain the oil by removing screw 2 on the left side of the oil
pan.
2.
Tighten screw 2 after draining.
Page 20

17
4
5
3
To loosen the
needle thread
To tighten the
needle thread
For cotton
threads
For woolly
threads
For spun/polyester
threads
1
1
1
Not activated
(1) (2) (3)
Left needle thread
93 mm
5
Adjusting the needle thread guard
CA
CA
UTION
UTION
Always turn off the power, unplug the machine and then well-
qualified technicians should adjust the needle thread guard.
Loosen screw 2. Adjust needle thread guard 1 to the appropriate
position according to the type of thread being used (see the
illustration right). Tighten screw 2 temporarily.
・To decrease the size of the needle thread loop, move needle
thread guard 1 up.
・To increase the size of the needle thread loop, move needle
thread guard 1 down.
Move guard 1 up and down so that the needle thread loop is formed
properly.
Tighten screw 2 after this adjustment.
(1)In the case of the threads that are not stretchable, such as
cotton threads (The needle thread loop tends to be formed
large and lie down.)
(2)In the case of the stretchable threads, such as woolly threads
(The needle thread loop tends to be formed small.)
(3)In the case of the threads that are slightly stretchable, such as
spun threads
Adjusting the needle thread guides
The distance from the center of the eyelet on left needle thread
guide 5 to the top surface of the needle plate should be 93mm
(standard).
Adjustment is made by loosening screws 3 and moving thread
guide 4 up or down (see the illustration on the right). After this
adjustment tighten screws 3 temporarily.
・To loosen the needle thread, move needle thread guide 4 up.
・To tighten the needle thread, move needle thread guide 4 down.
Tighten screws 3 after this adjustment.
2
1
Page 21

18
3 5
4 2
The point of the left needle has reached the bottom
end of the looper blade.
Position of the point of the left needle when
the looper thread is released from point A on
looper thread take-up 1.
1
2
A
Adjusting the looper thread take-up
CA
CA
UTION
UTION
Always turn off the power, unplug the machine and then well-
qualified technicians should adjust the looper thread take-up.
When the left needle has reached the point shown in the illustration
while the looper is moving to the right from the extreme left end of
its travel, the looper thread should be released from point A on the
looper thread take-up.
To make this adjustment, loosen screws 2 and turn looper thread
take-up 1 as required.
After the above adjustment, tighten screw 2.
Adjusting the looper thread guides
CA
CA
UTION
UTION
Always turn off the power, unplug the machine and then well-
qualified technicians should adjust the looper thread guides.
Loosen screws 2 and 3. Center screws 2 and 3 in the slots on
looper thread guides 4 and 5 respectively (standard) by adjusting
looper thread guides 4 and 5 (see the illustration on the right). After
this adjustment tighten screws 2 and 3 temporarily.
・To increase the supply of looper thread, move looper thread
guides 4 and 5 in the direction of A.
・To decrease the supply of looper thread, move looper thread
guides 4 and 5 in the direction of B.
After this adjustment is made, tighten screws 2 and 3.
2
3
5
4
To increase the supply
of looper thread
To decrease the supply
of looper thread
A
B
To decrease
To increase
Page 22

19
6
4
5
7
D
1
4
B
0.5 mm
B
1
4
7
5
1.0 mm
0.5 mm
1
5.0 mm
17.0 mm
B
1
3
2
A
Adjusting the spreader
CA
CA
UTION
UTION
Always turn off the power, unplug the machine and then well-
qualified technicians should adjust the spreader.
1. To adjust the spreader
(1) To adjust the spreader height :
Adjust distance A from the top surface of the needle plate to the
bottom surface of spreader 1. Select the distance according to
the machine being used by referring to the table of adjustment
dimensions (see page 32). Adjustment is made by loosening
screw 2 and moving spreader 1 up or down.
After the above adjustment is made, tighten screw 2 temporarily.
To adjust the spreader front to back :
When point B on the spreader has comes close to the left
needle while spreader 1 is moving to the left from the extreme
right end of its travel, there should be a distance of 0.5mm from
point B to the left needle. Adjustment is made by moving
spreader 1 front to back.
After this adjustment is made, tighten screw 2.
(2) Left-to-right adjustment
When spreader 1 is at the extreme left end of its travel, there
should be a distance of 5.0mm from the center line of the left
needle to point B on the spreader. Adjustment is made by
loosening screw 3 and moving spreader 1 left to right.
After this adjustment is made, tighten screw 3.
2. Adjusting the spreader thread guide
(1) When spreader 1 is at the extreme right end of its travel, there
should be a clearance of 0.5mm between the bottom surface of
spreader thread guide 4 and spreader 1. Adjustment is made
by loosening screws 6. After this adjustment is made, tighten
screws 6 temporarily.
(2) Align the center of the slot of spreader thread guide 4 with point
B on the spreader. Adjustment is made by moving spreader
thread guide 4 left to right. After this adjustment is made, tighten
screws 6.
3. Adjusting the thread guide
(1) When the needles are at the bottom of their stroke, position
thread guide 5 just above front end D of the slot on thread guide
4. Adjustment is made by loosening screw 7.
After this adjustment is made, tighten screw 7 temporarily.
(2) There should be a clearance of 1.0mm between thread guide 5
and spreader thread guide 4. Adjustment is made by
moving thread guide 5 front to back.
After this adjustment is made, tighten screw 7.
Page 23

20
Adjusting the top cover thread guide
CA
CA
UTION
UTION
Always turn off the power, unplug the machine and then well-
qualified technicians should adjust the top cover thread guide.
Loosen screw
1 so that there should be a distance of approximately
20mm (see the illustration) between the left end of spreader thread
guide 2 and the left end of top cover thread guide 3 (standard
position). Then, tighten screw 1 temporarily.
・To decrease the supply of top cover thread, move top cover
thread guide
3 to the right.
・To increase the supply of top cover thread, move top cover
thread guide
3 to the left.
Tighten screw 1 after this adjustment.
A fine adjustment can be made by knob 4.
・To decrease the supply of top cover thread, turn knob 4
clockwise.
・To increase the supply of top cover thread, turn knob 4
counterclockwise.
3
1
4
To increase
3
To increase the
supply of top
cover thread
To decrease the
supply of top
cover thread
To decrease
2
Approximately
20mm
Page 24

21
7
6
8
5
B
4
3
Adjusting the feed dog height
CA
CA
UTION
UTION
Always turn off the power, unplug the machine and then well-
qualified technicians should adjust the feed dog height.
When the feed dogs are at their highest point of travel, there should
be a distance of 0.8~1.2mm from the top surface of the needle plate
to extended line A from the tips of main 1 and differential 2 feed
dogs. Adjustment is made by loosening screws 3 and 4, and
moving feed dogs 1 and 2 up or down.
After the above adjustment, tighten screws 3 and 4.
Adjusting the presser foot lift
CA
CA
UTION
UTION
Always turn off the power, unplug the machine and then well-
qualified technicians should adjust the presser foot lift.
When presser foot 5 is raised, adjust distance B from the top
surface of the needle plate to the bottom surface of the presser foot.
Select the distance according to the machine being used by
referring to the specifications (see page 33).
1.
Turn the machine pulley until the feed dogs are at their lowest
point of travel.
2.
Adjust the presser foot lift by lowering lever 8.
Note that the presser foot should not be in contact with the
spreader.
3.
Loosen nut 6. Adjust screw 7 so that it contacts lever 8.
Then tighten nut 6.
1 2
A
Page 25

22
a
b
Adjusting the needle height
CA
CA
UTION
UTION
Always turn off the power, unplug the machine and then well-
qualified technicians should adjust the needle height.
Adjust distance a from the point of the left needle to the top surface
of the needle plate when the needle is at the top of its stroke.
The distance varies according to the machine being used.
Refer to the table of adjustment dimensions (see page 32).
1.
Turn handwheel 1 and align mark A on the machine with
mark
P
○
on the handweel to bring the needle bar to the top of
its stroke.
2.
Loosen screw 2. Adjust the needle height by moving needle
holder 3 up or down.
●Adjust the relationship between each needle and needle drop
hole so that clearance b is equal after the needle height
adjustment (see the illustration). Then tighten screw 2.
A
1
P
2
3
Page 26

23
0.05 - 0.1 mm
2
3
Adjusting the looper
CA
CA
UTION
UTION
Always turn off the power, unplug the machine and then well-
qualified technicians should adjust the looper.
1.
Adjusting the looper-needle setting distance
Adjust looper-needle setting distance A from the center of the
right needle to the point of looper 1 when the looper is at its
farthest position to the right. Select the distance according to
the machine being used by referring to the table of adjustment
dimensions (see page 32).
Adjustment is made by loosening screw 3 on looper holder 2
and moving looper holder 2 to the left or right.
After the adjustment, tighten screw 3.
2.
Adjusting the looper avoiding distance
When the point of the looper has reached the center of the left
needle from the extreme right end of its travel, there should be
0.05~0.1mm front-to-back clearance between the left needle
and the point of the looper.
● For 3-needle machines
When the point of the looper has reached the center of the
middle needle from the extreme right end of its travel, there
should be 0-0.05mm front-to-back clearance between the
middle needle and the point of the looper.
Adjustment is made by loosening screw 3 on looper holder 2
and moving looper holder 2 forward or backward.
After the adjustment, tighten screw 3.
● When the point of the looper is passing the center of the
right needle from the extreme right end of its travel (the
rear needle guard is not effective), the right needle slightly
contacts the point of the looper.
1
A
Page 27

24
4
5
6
B
0.3 - 0.5 mm
0-0.05mm
0-0.05mm
1 1
1
3
2
Adjusting the needle guard (rear)
CA
CA
UTION
UTION
Always turn off the power, unplug the machine and then
well-qualified technicians should adjust the needle guard (rear).
1.
Line A on needle guard (rear) 1 should be positioned 1/3
below the top end of the right needle's eye when the needle is
at the bottom of its stroke. To make this adjustment, loosen
screw 2, move needle guard (rear) 1 up or down. After this
adjustment, tighten screw 2.
2.
When the point of the looper has reached the center of the
right needle from the extreme right end of its travel, there
should be 0~0.05mm front-to-back clearance between the
right needle and the point of the looper. Adjustment is made
by loosening screw 3 and moving needle guard (rear) 1
forward and backward. After adjusting, tighten screw 3.
3.
For 3-needle machines :
When the point of the looper has reached the center of the
middle needle, the middle needle must slightly contact needle
guard (rear) 1 with 0~0.05mm front-to-back clearance
between the middle needle and the point of the looper.
Adjustment is made by loosening screw 2 and swing needle
guard (rear) 1 to the left or right. After adjusting, tighten screw
2.
Adjusting the needle guard (front)
CA
CA
UTION
UTION
Always turn off the power, unplug the machine and then well-
qualified technicians should adjust the needle guard (front).
There should be a clearance of 0.3~0.5mm (See B) between the
needles and needle guard (front) 5 when looper 4 is moving to the
left in the back side of the needles. To make this adjustment, loosen
screw 6 and move needle guard (front) 5 backwards or forwards.
Finally, tighten screw 6.
1
2
A
1/3
5
6
Page 28

25
1
:1.
8
8
6
7
Changing the maximum differential feed ratio
The differential feed ratio is set to 1:0.9~1:1.3 at the factory.
Always turn off the power, unplug the machine and then well-
qualified technicians should adjust the differential feed ratio.
In the case of a differential feed ratio of 1:1.3~1:1.8
CA
CA
UTION
UTION
If you use the machine with a differential feed ratio of
1:1.3~1:1.8, the feed dogs may strike the needle plate and be
damaged. Check to make sure the movement amount of the
feed dogs is less than 3.2mm.
1.
Setthestitchlength(mainfeeddogmovement)at
lessthan3.2mm.
2.
Removescrew1,nut2 andspringwasher3.
3.
Removesidecover5 byremovingscrews4.
4.
Loosenscrew7.Movestopper6 downallthewayto
thebottom.Tightenscrew7.
5.
Replacesidecover5 withscrews4,andattachnut2
andspringwasher3 ontoadjustinglever8 with
screw1.
To shrink
To stretch
1:1
.3
1
:
0.9
6
9
9
6
7
7
1
4
5
2
3
Page 29

26
Checking and cleaning the oil filter
CA
CA
UTION
UTION
Always turn off the power, unplug the machine and then well-
qualified technicians should check and clean the oil filter.
Checkandcleantheoilfiltereverysixmonths.
Tocheckandcleantheoilfilter
1.
Remove screws 1 and 2. Remove oil reservoir 3.
2.
Loosen screw 4. Remove inner and outer filters 5 and 6.
Then check and/or clean these filters.
3.
Reinstall oil reservoir 3, filters 5 (inner) and 6 (outer).
1
4
5
6
3
2
Page 30

27
1
3
2
4
5
6
7
9
8
7
9
8
Adjusting the amount of backward tilt
on the presser foot (for W1562-05)
CA
CA
UTION
UTION
Always turn off the power, unplug the machine and then wellqualified technicians should adjust the amount of backward tilt on
the presser foot.
For W1562-05 Adjust the amount of backward tilt on presser foot
1 according to the elastic lace and fabric to be used. Adjustment is
made by loosening nut 2 and turning screw 3 as required.
●To increase the amount of backward tilt, turn screw 3 clockwise.
●To decrease the amount of backward tilt, turn screw 3 counter-
clockwise.
FT device (for W1562-05)
Manual lubrication
CA
CA
UTION
UTION
Always turn off the power and unplug the machine when you
apply oil by hand.
When the machine is used for the first time or left unused for some
time, put oil to upper knife crank 4 until the oil wick is fully lubricated.
Adjusting the fabric guide
Adjust the amount of the fabric to be trimmed.
Adjustment is made by loosening screws 6 and moving fabric guide
5 to the left or right.
Replacing the upper knife
CA
CA
UTION
UTION
Always turn off the power, disconnect the power cord and
then only well-qualified technicians should replace and adjust the
knife.
Pay close attention to the knife edges not to injure your
hands and/or finger.
1.
Turn the machine pulley until upper knife 7 is at the top of its
travel. Remove screw 8. Then replace the upper knife with
the new one.
2.
To replace the upper knife, press end a of the upper knife to
upper knife holder 9, and then tighten screw 8.
9
a
Page 31

28
3
1
4
2
6
5
a:0.5mm
48
9
10
7
Replacing the lower knife
CA
CA
UTION
UTION
Always turn off the power and shut down the air compressor
first, and then well-qualified technicians should replace the knives.
Pay close attention to the knife edges not to injure your
hands and/or finger.
1.
Remove the side cover. Loosen screw 2. Remove lower
knife 1. Replace it with the new one.
2.
Move upper knife holder 3 away to the right. Fit lower knife 1
onto the groove on lower knife holder 4. Check to see if the
cutting edge is flush with the top surface of the needle plate.
Tighten screw 2.
Adjusting overlap of the knife cutting edges
CA
CA
UTION
UTION
Always turn off the power and shut down the air compressor
first, and then well-qualified technicians should adjust overlap of the
knife cutting edges.
Pay close attention to the knife edges not to injure your
hands and/or finger.
Turn the machine pulley until the upper knife is at the bottom of its
travel. Obtain 0.5mm overlap of the upper and lower knives (see a
in the illustration). Adjustment is made by loosening screw 6, moving upper knife holder 5 up or down. After this adjustment tighten
screw 6.
Adjusting the lower knife holder left to right
CA
CA
UTION
UTION
Always turn off the power and shut down the air compressor
first, and then well-qualified technicians should adjust the lower
knife holder left to right.
The distance from the right needle to where the fabric is to be cut is
determined by left-to-right position of lower knife holder 4.
Adjustment is made by loosening screw 7 and turning adjustment
screw 8 as required.
To move lower knife holder 4 to the left, turn adjustment screw 8
clockwise. To move lower knife holder 4 to the right, turn adjustment screw 8 counterclockwise. Loosen screw 9 and move auxiliary presser foot 10 to the left or right while moving the lower knife
holder. After this adjustment tighten screws 7 and 9.
Page 32

29
12
5
4
3
2
4
5
1
6
A
B
grease
7
grease
9
8
10
MD device (for W1562-05)
Installing the lace guide
Remove screw 1. Install the lace guide by referring to sequence 2
to 5 in the illustration on the right.
Greasing
CA
CA
UTION
UTION
Always turn off the power, unplug the machine and then well-
qualified technicians should lubricate the machine.
Put grease on the clutch and the bearing before they lack the
grease.
To put grease on the clutch
Turn the machine pulley until mark A is aligned with mark B.
Remove screw 6. Then put the proper amount of grease on the
clutch.
To put grease on the bearing
Remove screw 7. Then put the proper amount of grease on the
bearing.
Adjusting the lace guide (lower)
CA
CA
UTION
UTION
Always turn off the power, unplug the machine and then well-
qualified technicians should adjust the lace guide (lower).
Bring lace guide (lower) 8 as close to the needles as possible.
Check that lace guide (lower) 8 does not contact the spreader.
Adjustment is made by loosening screw 9 and turning stopper 10
as required. After this adjustment tighten screw 9.
Page 33

30
11
9
5
6
1
3
2
4
7
8
12
10
1314
To increase the
feeding amount
To increase
To decrease
To decrease the
feeding amount
16
15
Adjusting the elastic guide
CA
CA
UTION
UTION
Always turn off the power, unplug the machine and then well-
qualified technicians should adjust the elastic guide.
To adjust elastic guides 1 and 2
To feed the elastic onto the proper position on the fabric, adjust
elastic guides 1 and 2 according to the width of the elastic.
Adjustment is made by loosening screws 3 and 4 and moving elastic guides 1 and 2 to the left or right. After this adjustment tighten
screws 3 and 4.
To adjust elastic guides 5 and 6
To feed the elastic that is fed from the roller straight to elastic
guides 1 and 2, adjust elastic guides 5 and 6 according to the
width of the elastic. Adjustment is made by loosening screws 7 and
8 and moving elastic guides 5 and 6 to the left or right. After this
adjustment tighten screws 7 and 8.
To adjust elastic guides 9 and 10
To feed the elastic straight to elastic guides 5 and 6, adjust elastic
guides 9 and 10 according to the width of the elastic. Adjustment
is made by loosening screws 11 and 12 and moving elastic guides
9 and 10 to the left or right. After this adjustment tighten screws
11 and 12.
Adjusting the feeding amount of the elastic
CA
CA
UTION
UTION
Always turn off the power, unplug the machine and then well-
qualified technicians should adjust the feeding amount of the elas-
tic.
The feeding amount is adjustable from 1.0 to 2.7mm/stitch.
Adjustment is made by loosening screw 13 and turning adjustment
screw 14 as required.
●To increase the feeding amount, turn adjustment screw 14 clock-
wise.
●To decrease the feeding amount, turn adjustment screw 14 coun-
terclockwise.
Adjusting the roller pressure
CA
CA
UTION
UTION
Always turn off the power, unplug the machine and then well-
qualified technicians should adjust the roller pressure.
Adjust the roller 15 pressure according to the elastic to be used.
Adjustment is made by turning adjustment screw 16 as required.
To increase the roller pressure, turn adjustment screw 16 clockwise. To decrease the roller pressure, turn adjustment screw 16
counterclockwise.
Page 34

31
1
Inserting the elastic into the roller
CA
CA
UTION
UTION
Always turn off the power and shut down the air compressor
first, and then well-qualified technicians should insert the elastic into
the roller.
Open the roller first by pressing lever 1. Then insert the elastic into
the roller (see the illustration).
Page 35

32
♯
Nm
9
65
10
70
11
75
14
90
16
100
18
110
21
130
W1562-01J
-02G
-05B
×□□□□
232
□
9S
240
□
9S
248
□
9S
356
□
10S
364
□
10S
W1562-01J
-02G
-05B
×
□□□□
240
□
248
□
(-01Jnotincluded)
356
□
232
□
364
□
Standard lift
Standard lift
Standard lift
Standard lift
Standard lift
9.8
9.3
8.9
8.5
8.1
S
S
S
S
S
〃〃〃
〃
〃
9.3
8.8
8.4
8.0
7.6
T
T
T
T
T
8.8
8.8
8.8
8.8
8.8
4.6〜4.9
4.2〜4.5
3.8〜4.1
3.4〜3.7
3.0〜3.3
17.0
17.0
17.0
17.0
17.0
5.0
5.0
5.0
5.0
5.0
0.8〜1.2
0.8〜1.2
0.8〜1.2
0.8〜1.2
0.8〜1.2
(mm)
S : Needle plate finger 2.8mm thick (washer used onto looper)
T : Needle plate finger 3.3mm thick
Adjustment dimentions
Comparison table of equivalent sizes Standard needle
Organ
UY128GAS
Japanese size (Organ)
Metric size (Schmetz)
Page 36

33
Stitch type 602,605 Netweight(headonly) 44.4Kg
Needle size UY128GAS#9S
UY128GAS#10S
Gross weight (with accessories) 50.4Kg
Machine size(WxDxH) W:520mmD:265mmH:395mm Working noise level
n=5,400rpm:LpA≦78.0dB
Noise measurement according to
DIN4563548A-1
W1500 Series subclass specifications
W1500
Series
Application Subclass
Number
of
needles
Number
of
threads
Needle space (mm)
Max.
stitch
length
(mm)
Diff. feed tatio
Presser foot lift
(mm)
Max. speed
(rpm)
Remarks
Versatile W1562-01J
2 4 3.2・4 4.4 0.5〜1.3 6.3 6,000
3 5 5.6・6.4 4.4 0.5〜1.3 6.3 6,000
Binding tape W1562-02G
2 4 3.2・4・4.8 4.4 0.5〜1.3 6.3 6,000
3 5 5.6・6.4 4.4 0.5〜1.3 6.3 6,000
Attaching elastic
lace
W1562-05B
2 4 3.2・4 4.4 0.5〜1.3 5.3
5,500
(5,000withMD)
3 5 5.6・6.4 4.4
0.5〜1.3
5.3
5,500
(5,000withMD)
*If you use the machine with a differential feed ratio of more than 1:1.3, the main feed dog movement amount should be less than 2.5mm.
Page 37

34
Page 38

35
Page 39

36
Page 40

PEGASUS SEWING MACHINE MFG. CO., LTD.
5-7-2, Sagisu, Fukushima-ku, Osaka 553-0002, Japan.
Phone :(06)6458-4739
Telefax
:(06)6454-8785
Cat. No. 9A2175E1 July 2002
2002
PEGASUS SEWING MACHINE MFG. CO., LTD.
The description in this INSTRUCTIONS is subject to change without prior
notice for improvement.
 Loading...