

Page 1
Installation and Assembly:
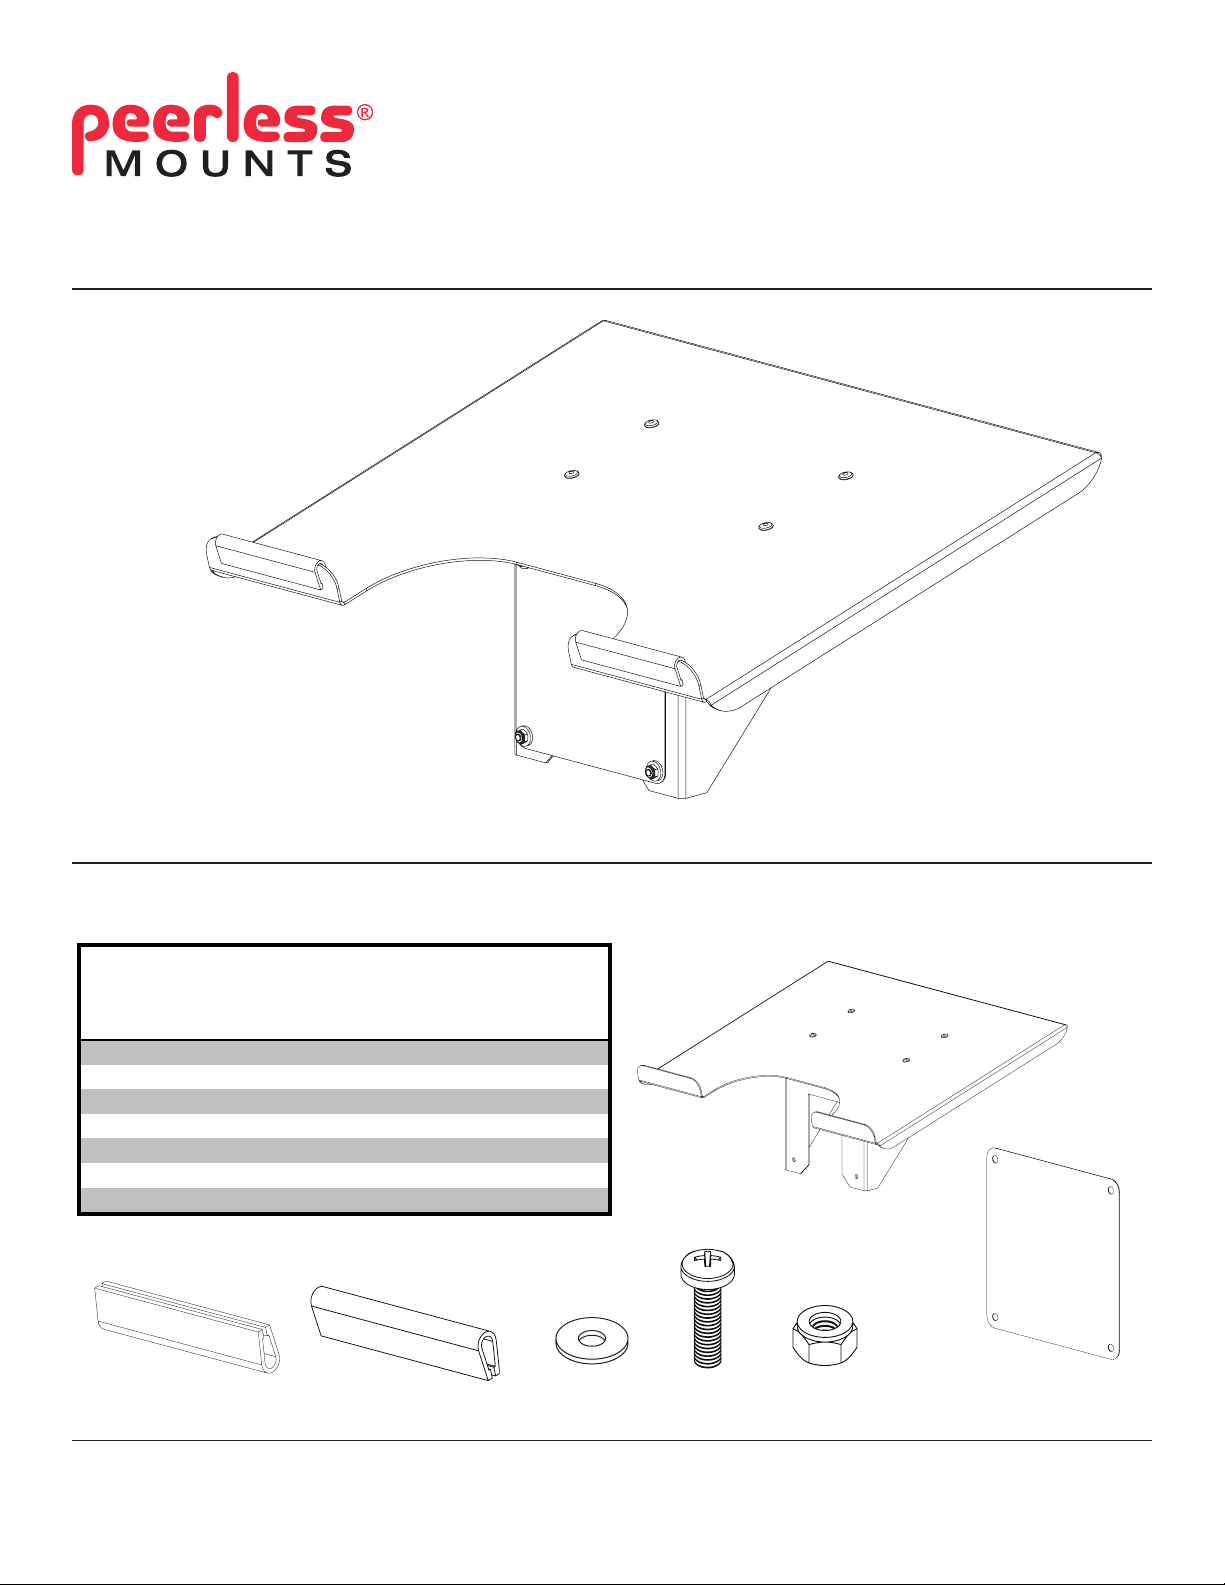
Parts List
Description Qty. Part Numbe
r
A
laptop shelf 1 021-1040
B plastic cover 1 600-0120
C plastic edging 1 600-0121
D 3" rubber edging 2 600-0122
E washer 8 540-1001
F M4 x 16 mm screw 4 520-1119
G M4 nylock nu
t
4 530-1055
Laptop Shelf
Model: ACC328
Compatible with models (sold separately):
LCT-A1B1C, LCT-A1B1H, LCT-A1B4C, LCT-A1B4H
NOTE: Read entire instruction sheet before you start installation and assembly.
Before you begin, make sure all parts shown are included with your product.
Max Load Capacity per Arm: 17.5 lb (8 kg)
Parts may appear slightly different than illustrated.
C
D
For customer care call (800) 865-2112 or (708) 865-8870.
3215 W. North Ave. • Melrose Park, IL 60160 • (800) 729-0307 or (708) 865-8870 • Fax: (708) 865-2941 • www.peerlessmounts.com
E
A
B
F
G
ISSUED: 10-08-09 SHEET #: 120-9071-2 11-05-09
Page 2
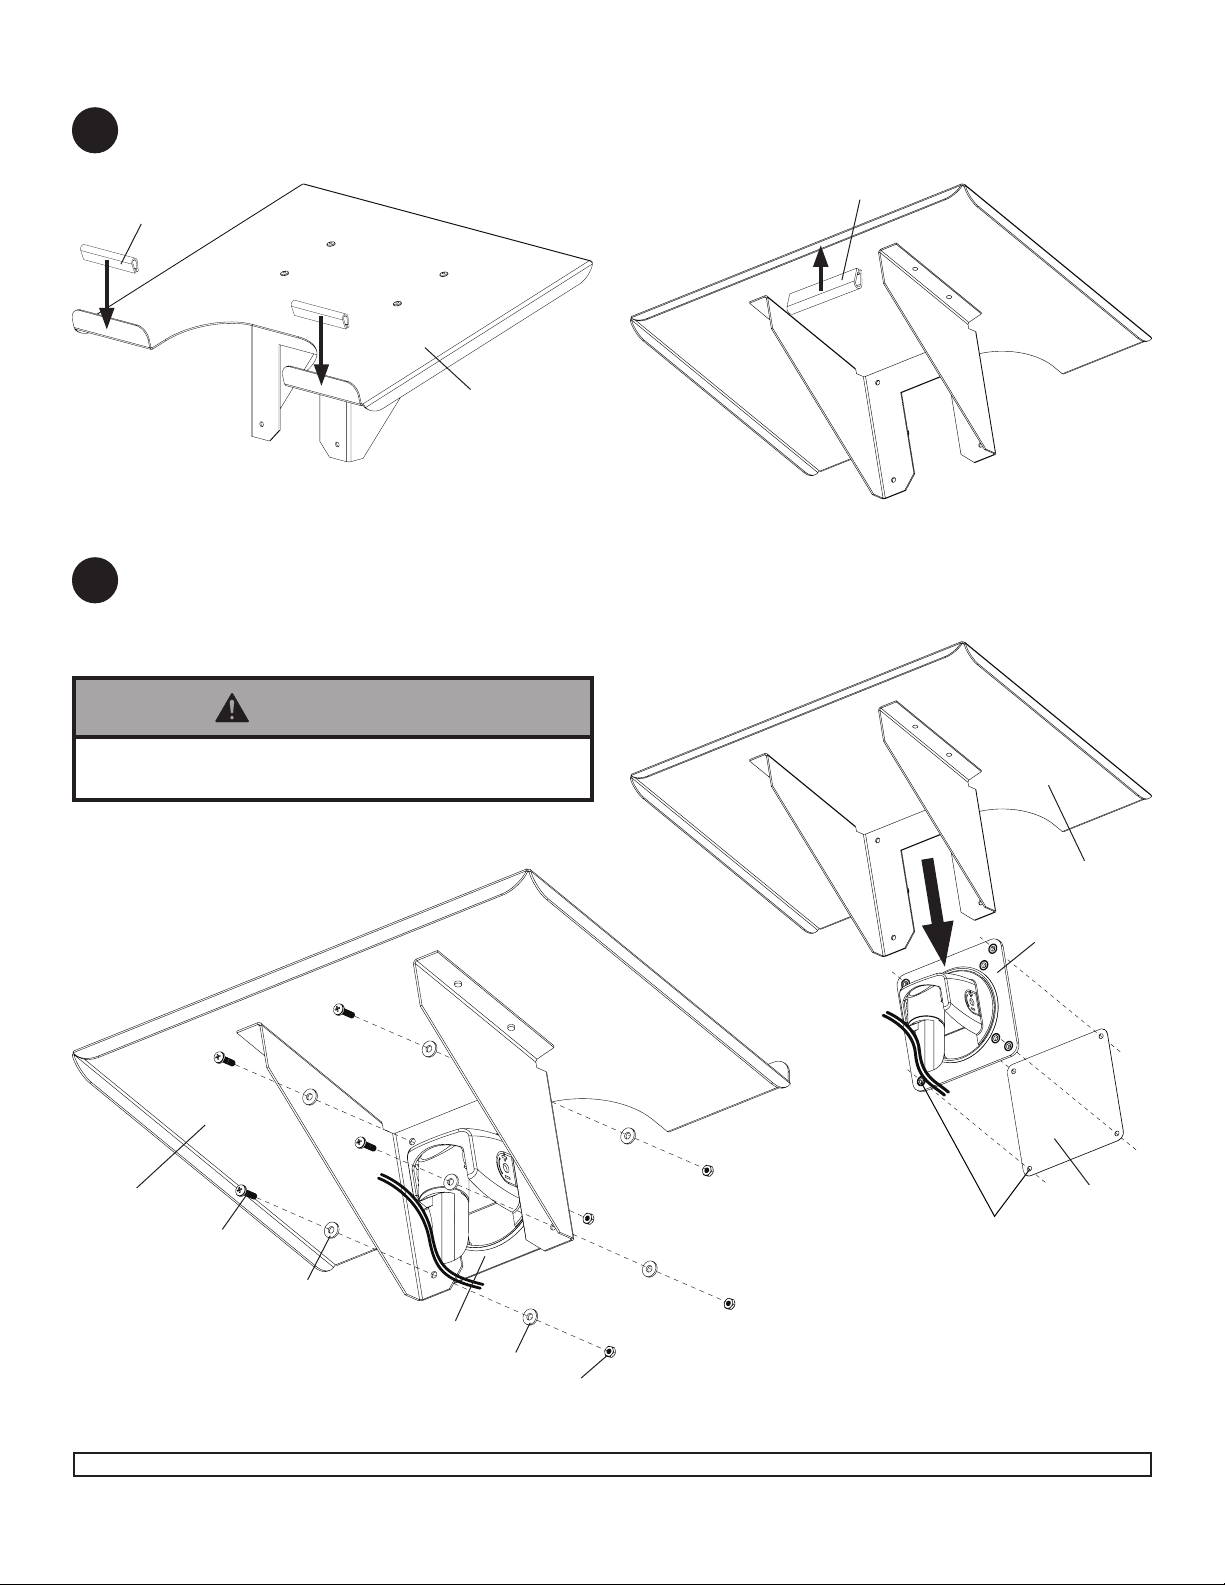
Attaching Edging to Laptop Shelf
Attach rubber edging (D) to laptop shelf (A) as shown in gure 1.1. Attach plastic edging (C) to laptop shelf as
1
shown in gure 1.2. NOTE: Plastic edge (C) may already be attached.
FIGURE 1.1
C
FIGURE 1.2
D
A
Attaching Laptop Shelf to Arm Plate
Remove protective backing from plastic cover (B). Adhere plastic cover (B) to the arm plate of the desktop mount
2
(sold separately) while keeping the holes aligned as shown in gure 2.1. Slide laptop shelf (A) down, over the back
of the arm plate as shown in gure 2.1. Secure laptop shelf to arm plate with four screws (F), eight washers (E)
and four nylock nuts (G) as shown in gure 2.2.
FIGURE 2.1
WARNING
• Desktop mount arm springs under tension. Must
adjust to weight of laptop.
FIGURE 2.2
A
F
A
ARM PLATE
B
Make sure
holes are
aligned
E
ARM PLATE
E
G
2 of 2
Visit the Peerless Web Site at www.peerlessmounts.com
All other brand and product names are trademarks or registered trademarks of their respective owners.
ISSUED: 10-08-09 SHEET #: 120-9071-2 11-05-09
© 2009, Peerless Industries, Inc. All rights reserved.
Peerless Industries, Inc.
3215 W. North Ave.
Melrose Park, IL 60160
www.peerlessmounts.com
 Loading...