

Page 1
Installation and Assembly - Video Conferencing Shelf
IMPORTANT! Read entire instruction sheet before you start inst allation and assembly .
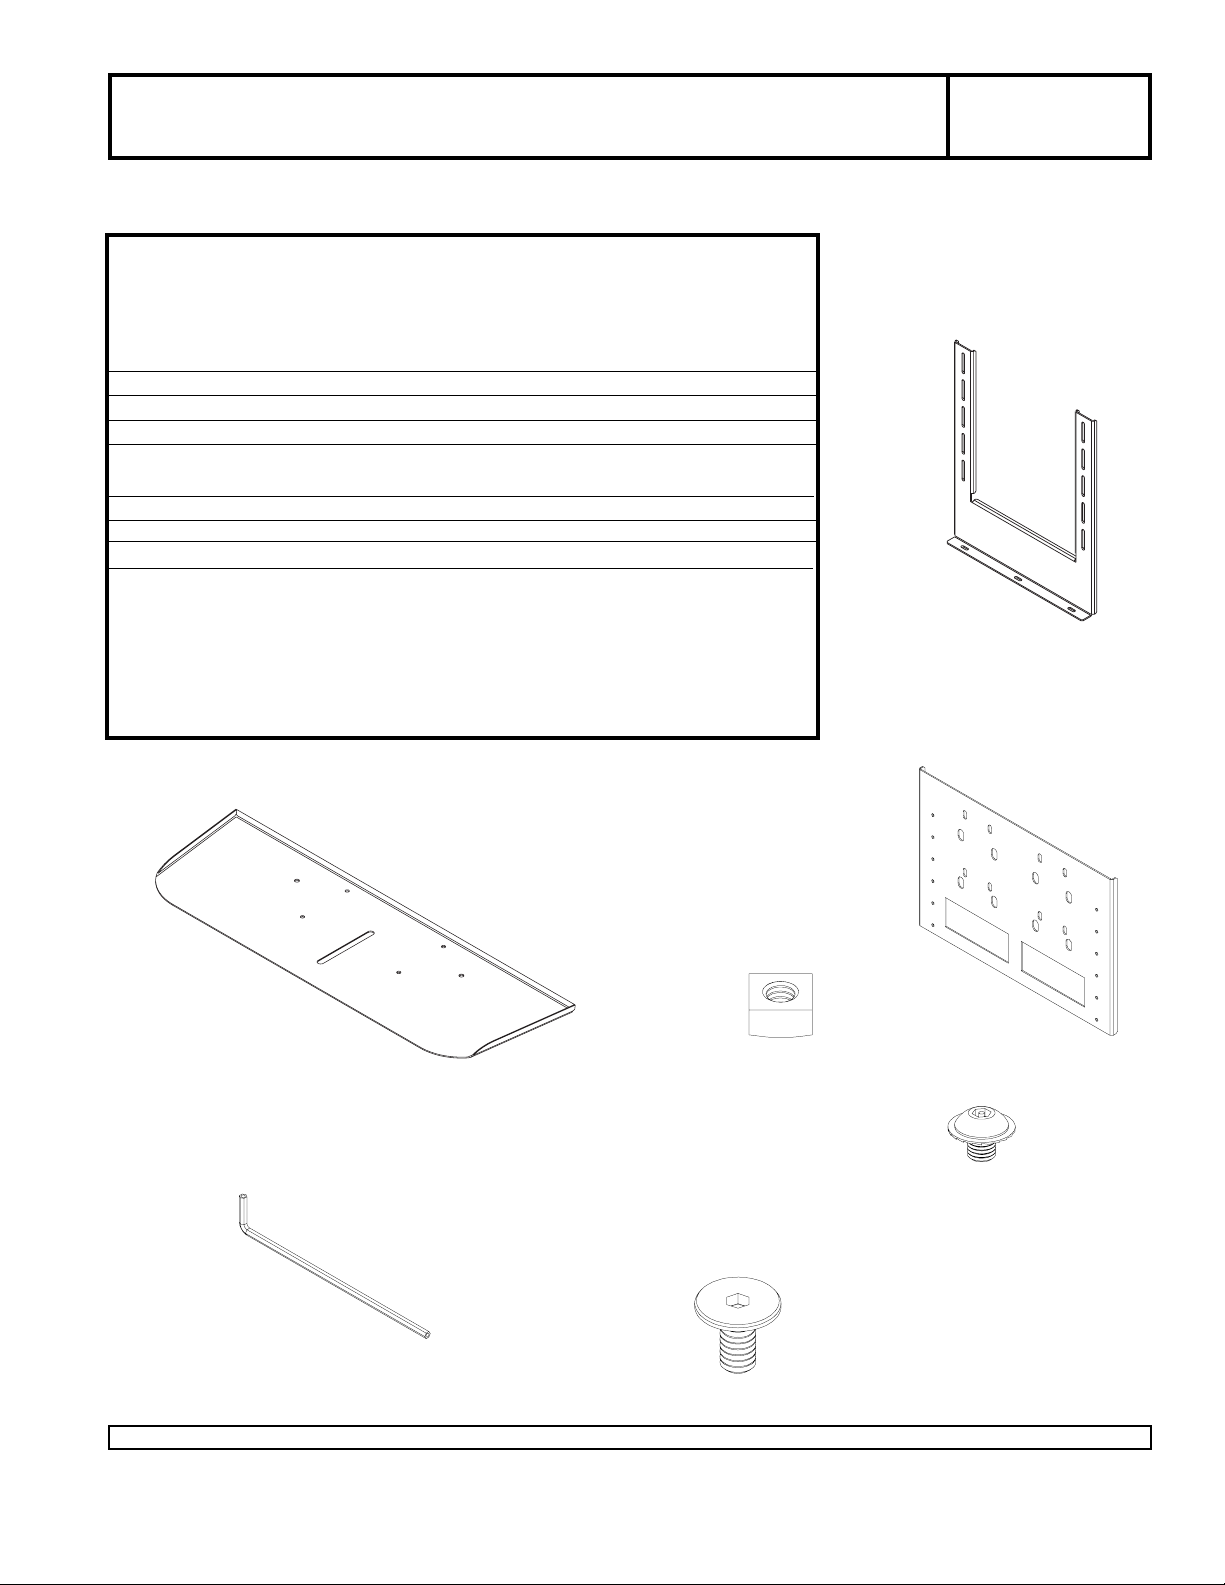
Parts List
DESCRIPTION QTY. PART #
A center mount 1 087-1039
B interface bracket 1 087-1047
C video conference shelf 1 009-1232
D M5 x 6 mm socket pin serrated 4 510-1114
washer head screw
E square nut 2 530-1022
F 1/4 x 12 mm decorative screw 2 520-2325
G 4 mm security allen wrench 1 560-9646
Note: some parts may not appear exactly as illustrated.
Models: ACC319
MAXIMUM LOAD CAPACITY :
25.00 lb (11.4 kg)
A
G
C
B
E
D
F
1 of 2
Visit the Peerless Web Site at www.peerlessmounts.com For customer care call 1-800-729-0307 or 708-865-8870.
ISSUED: 02-01-07 SHEET #: 009-9038-1
Page 2
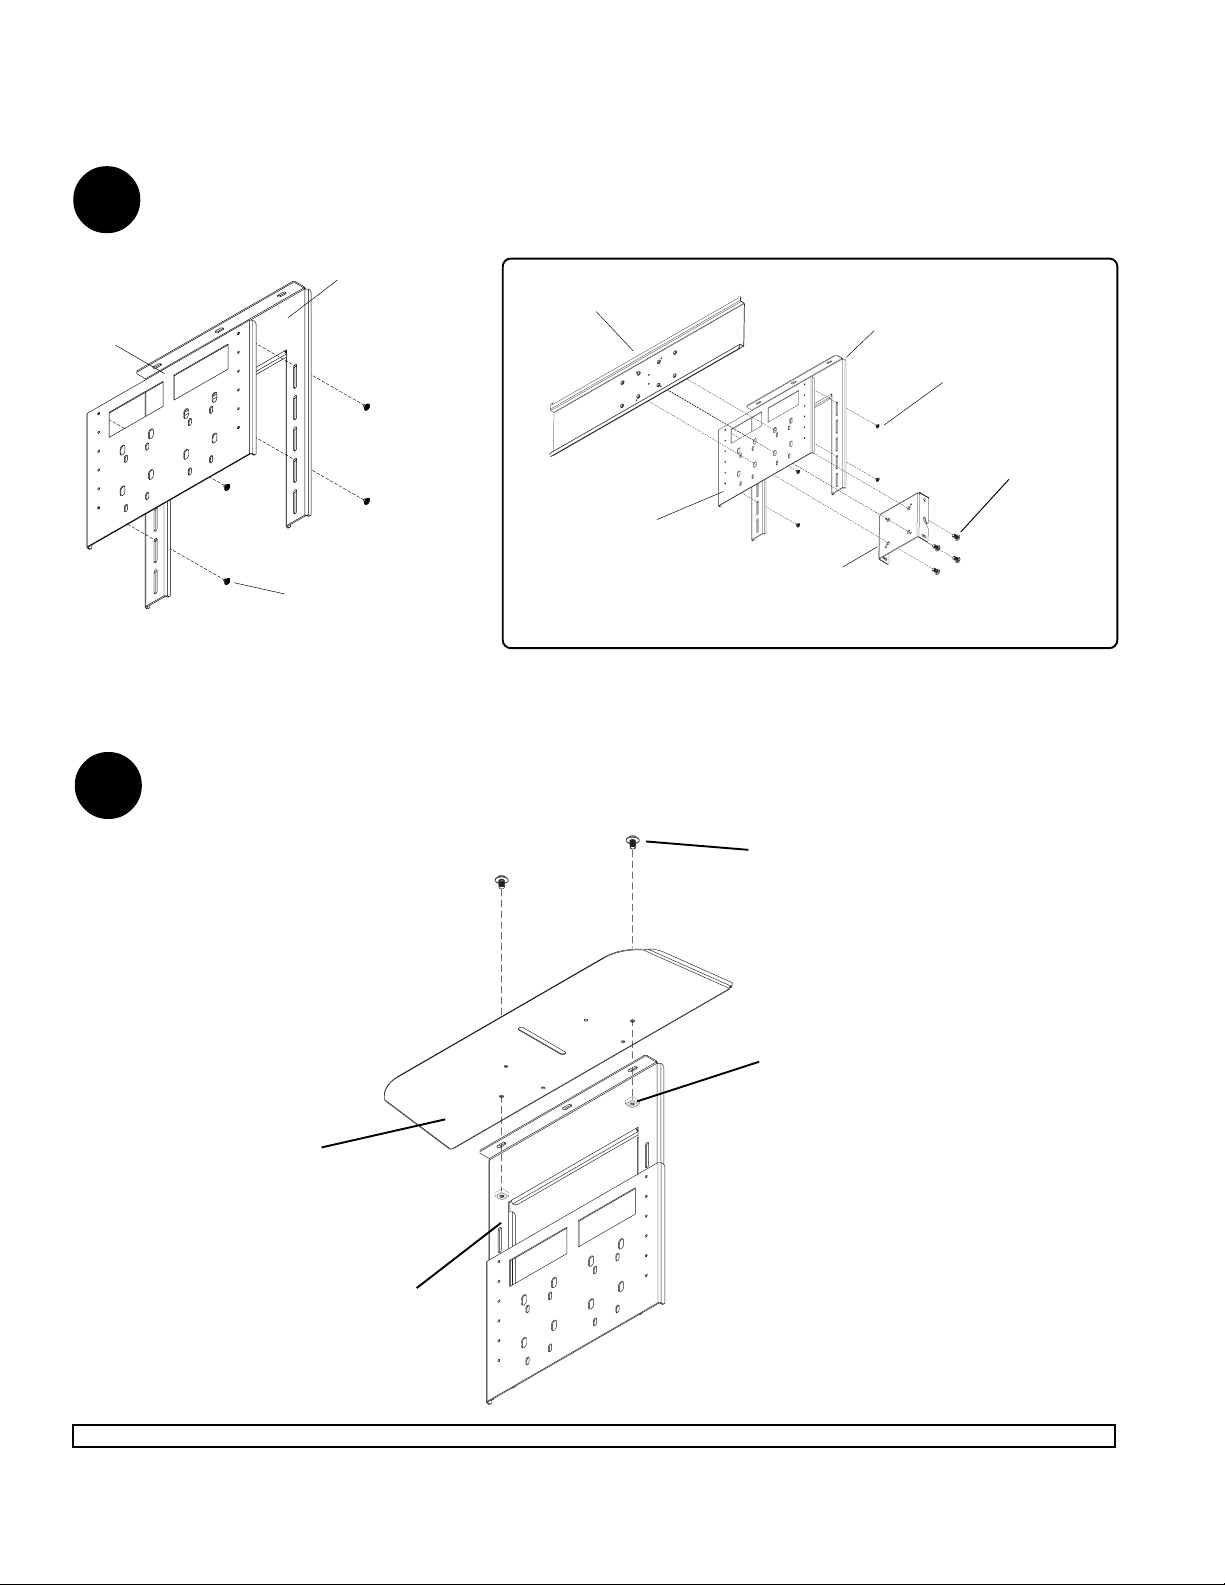
NOTE: If you are adding a new video conferencing shelf to an already assembled product, reverse steps up to the
universal plate installation step (removing screen and adapter plate) following the main instruction sheet. Refer to
Fig. 1.2 for reinstallation.
Attach interface bracket (B) onto center mount (A) using four M5 x 6 mm socket pin serrated washer head
1
screws (D). Tighten screws using 4 mm security allen wrench (G).
Note: For best results use holes closest to the edge of the brackets as shown in Fig. 1.1.
B
2
A
UNIVERSAL PLA TE
A
D
M10 x 15 mm
SOCKET SCREWS
B
HOOK PLA TE
D
FIG. 1.1
Attach video conference shelf (C) to center mount (A) using two 1/4 x 12 mm decorative screws (F) and two
square nuts (E) as shown below.
FIG. 1.2
F
E
C
A
2 of 2
Visit the Peerless Web Site at www.peerlessmounts.com For customer care call 1-800-729-0307 or 708-865-8870.
ISSUED: 02-01-07 SHEET #: 009-9038-1
 Loading...