

Page 1
Supplemental Instructions - Wall Plate and Ceiling Plate Attachment
IMPORTANT! Read entire instruction sheet
before you start installation and assembly.
Peerless Industries, Inc.
1980 Hawthorne Avenue
Melrose Park, IL 60160
For customer service call
1-800-729-0307 or 708-865-8870.
WARNING! Installer must verify that the wall or ceiling will safely
support the combined weight of all attached equipment and hardware.
Note: For each step see corresponding illustration.
IMPORTANT: IT IS THE RESPONSIBILITY OF THE INSTALLER
TO VERIFY THAT THE MOUNTING SURFACE WILL SAFELY
SUPPORT THE COMBINED LOAD OF ALL ATTACHED
HARDWARE AND COMPONENTS.
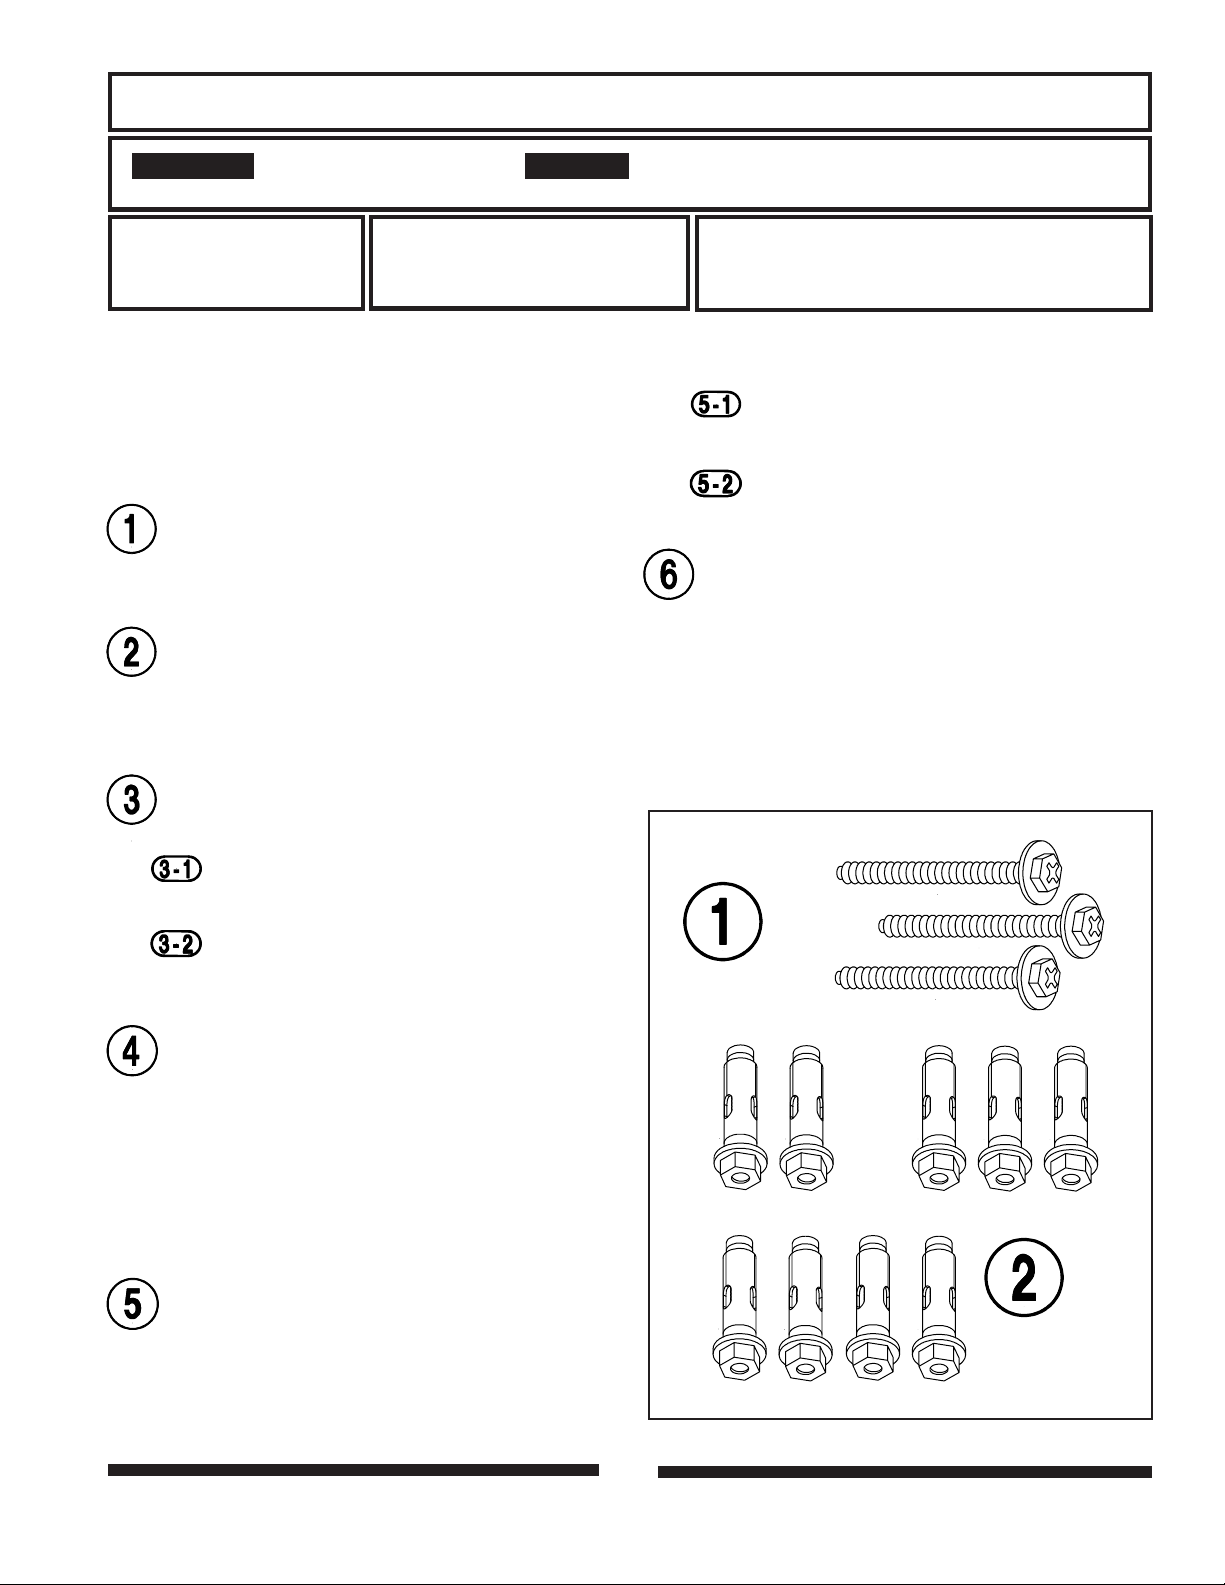
#14 x 2.5"(6mm x 65mm) wood screws for attachment
to wood studs, wood beams, or wood ceiling joists are
provided with most Peerless products in quantities of
2, 3, or 4, depending on the product and application.
For attachment to solid concrete or concrete block
order one of the concrete anchor accessory kits
pictured (some products may already include concrete
anchors). Accessory kits contain RAWL
TM
HL814 CONCRETE EXPANSION ANCHORS.
HILTI
TM
#5005 OR
[.312 x 1.625 (8mm x 41mm)].
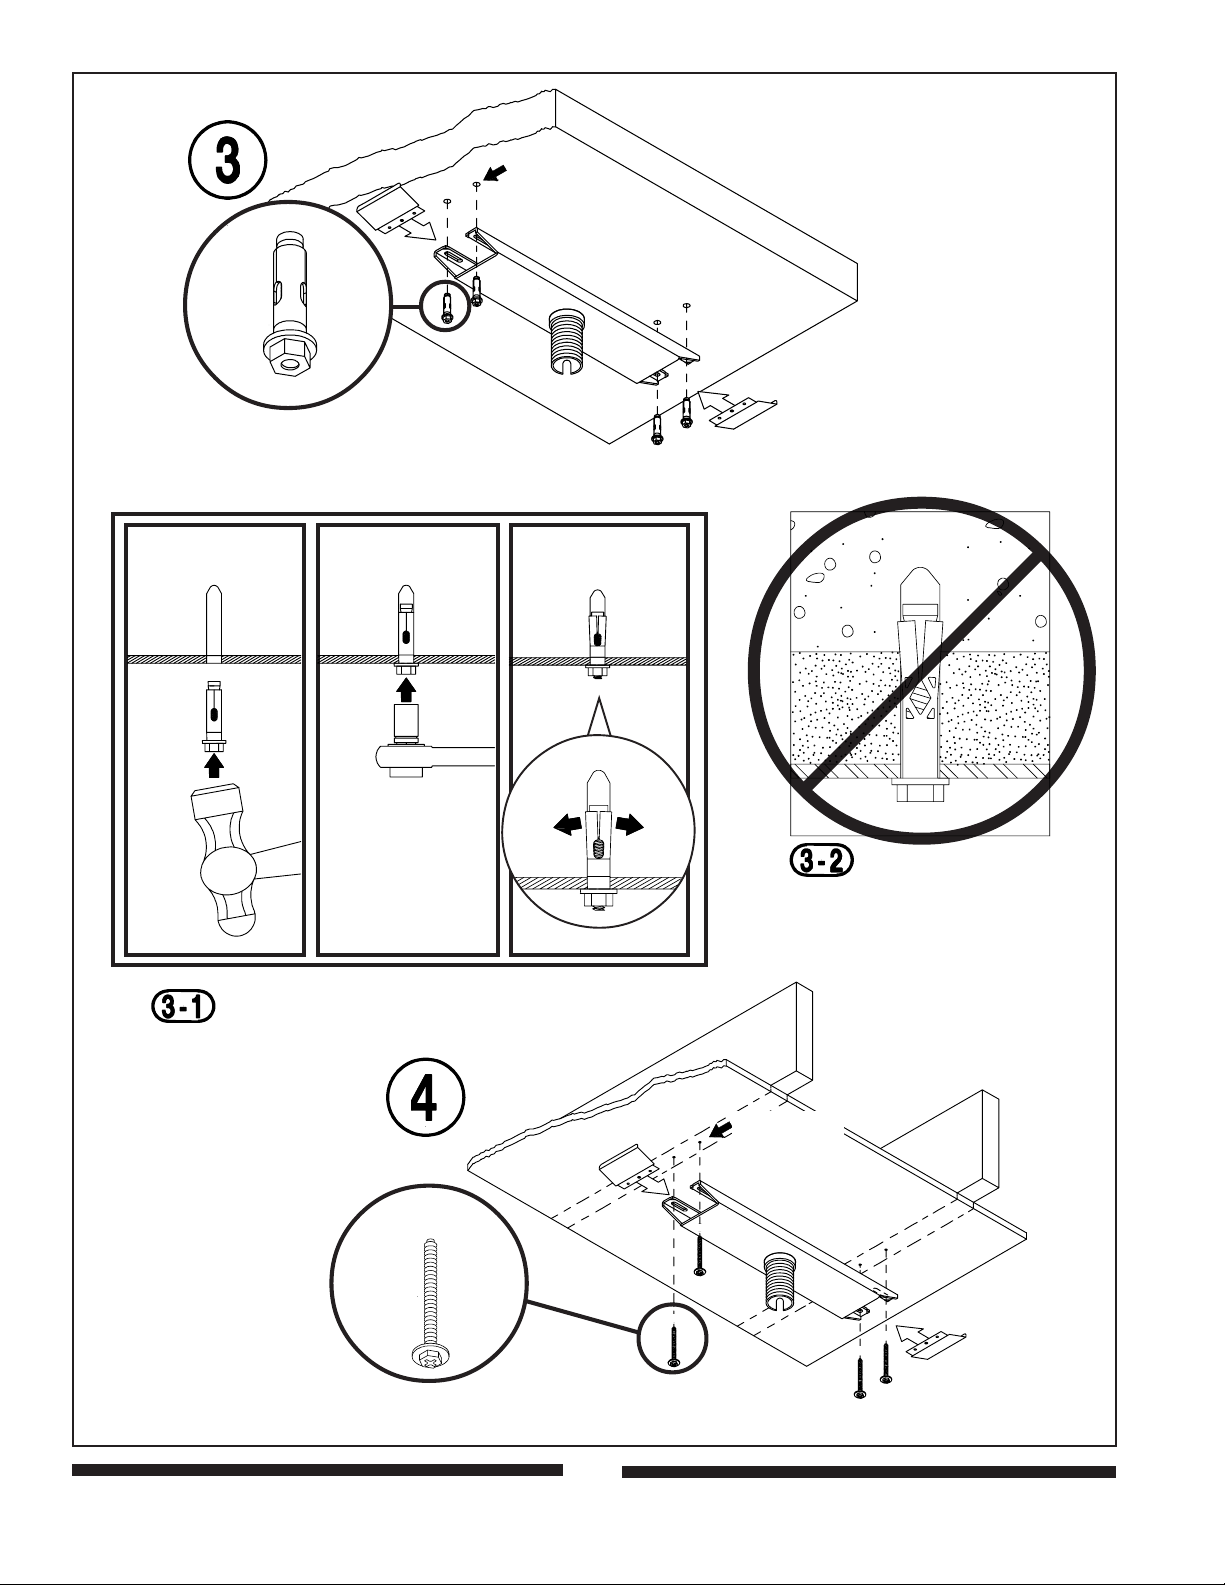
For ceiling plate attachment to a concrete ceiling drill
5/16" (8mm) dia. holes to a minimum depth of 1 3/4"
(45mm). Attach using concrete expansion anchors.
This product is intended for indoor use only. Use of
this product outdoors could lead to product failure
and personal injury.
Hammer in concrete expansion anchors, then
tighten to 80 in. lbs. (9 N.M.) torque using a
10mm wrench.
NOT FOR ATTACHMENT TO CONCRETE WALLS
COVERED WITH PLASTER, DRYWALL, OR
OTHER FINISHING MATERIAL!
For wall plate attachment to a wood stud wall or
beam locate stud center using a stud finder. Drill 5/32"
(4mm) dia. holes 2.5" (65mm) deep into stud center.
Attach wall plate using #14 x 2.5" (6mm x 65mm) wood
screws.
CAUTION: Tighten wood screws so wall plate is firmly
attached. But DO NOT TIGHTEN WITH EXCESSIVE
FORCE! Overtightening can cause stress damage to
wood screws greatly reducing their holding power!
Tighten to 80 in. lbs. (9 N.M.) maximum torque.
Hammer in concrete expansion anchors, then
tighten to 80 in. lbs. (9 N.M.) torque using a
10mm wrench.
NOT FOR ATTACHMENT TO CONCRETE CEILINGS
COVERED WITH PLASTER, DRYWALL, OR
OTHER FINISHING MATERIAL!
For ceiling plate attachment to a wood joist finished
ceiling, exposed wood joists, or a wood beam ceiling
locate joist centers using a stud finder. Drill 5/32"
(4mm) dia. holes 2.5" (65mm) deep into joist centers.
Attach ceiling plate using #14 x 2.5" (6mm x 65mm)
wood screws.
CAUTION: Tighten wood screws so ceiling plate is
firmly attached. But DO NOT TIGHTEN WITH EXCES-
SIVE FORCE! Overtightening can cause stress damage to wood screws greatly reducing their holding
power! Tighten to 80 in. lbs. (9 N.M.) maximum torque.
For wall plate attachment to a solid concrete or
concrete block wall drill 5/16" (8mm) dia. holes to a
minimum depth of 1 3/4" (45mm). Attach with concrete
expansion anchors. If attaching to concrete block
DO NOT DRILL HOLES INTO MORTAR JOINTS!
ACC200
ACC210
ACC205
1 1
1 of
1 1
33
3
33
ISSUED: 6-25-96 SHEET #: 120-8012-4 12-15-09
Page 2
10mm
∅ 5/16"(8mm)
2 2
2 of
2 2
∅ 5/32"(4mm)
33
3
33
ISSUED: 6-25-96 SHEET #: 120-8012-4 12-15-09
Page 3

∅ 5/16"(8mm)
10mm
∅ 5/32"(4mm)
3 3
3 of
3 3
33
3
33
ISSUED: 6-25-96 SHEET #: 120-8012-4 12-15-09
© 2009 Peerless Industries, Inc. All rights reserved.
Peerless is a trademark of Peerless Industries, Inc.
 Loading...