


Peak Atlas DCA Pro
Advanced Semiconductor Component Analyser
with Graphics Display and PC connectivity
Model DCA75
Designed and manufactured with pride in the UK
User Guide
©
Peak Electronic Design Limited 2012/2015
In the interests of development, information in this guide is subject to change without notice - E&OE
GB75-1.4

Atlas DCA Pro User Guide April 2015 – Rev 1.4
Page 2
Want to use it now?
We understand that you want to use your Atlas DCA Pro right now.
The unit is ready to go and you should have little need to refer to this
user guide, but please make sure that you do at least take a look at the
notices on page 5.
Contents Page
Introduction....................................................................................4
Important Considerations...............................................................5
Analysing Semiconductors - Standalone mode..............................6
Diodes......................................................................................8
Zener Diodes............................................................................9
Diode Networks .....................................................................10
LEDs......................................................................................11
Bicolour LEDs (2-lead types) ................................................12
Bicolour LEDs (3-lead types) ................................................13
Bipolar Junction Transistors (BJTs).......................................14
Darlington Transistors ...........................................................18
Enhancement Mode MOSFETs .............................................21
Depletion Mode MOSFETs ...................................................22
Enhancement Mode IGBTs....................................................23
Depletion Mode IGBTs..........................................................24
Junction FETs (JFETs) ..........................................................25
Thyristors (SCRs) and Triacs.................................................27
Voltage Regulators ................................................................28
Contents continued on next page…

Atlas DCA Pro User Guide April 2015 – Rev 1.4
Page 3
Contents (continued) Page
PC Software Installation............................................................29
Windows XP Installation .......................................................30
Windows Vista, 7 and 8 Installation ......................................31
Running the DCA Pro software for the first time ........................32
Analysing Semiconductors – PC mode ........................................33
PC mode - Curve Tracing functions.......................................34
PC mode - Exporting your data..............................................35
PC mode - Special functions..................................................36
Audible Settings...........................................................................37
Care of your Atlas DCA Pro........................................................38
Self Test Procedure ......................................................................39
Appendix A - Troubleshooting ....................................................40
Appendix B - Technical Specifications........................................41
Appendix C - Analysis test circuits..............................................43
Transistor test circuit .............................................................43
JFET/MOSFET/IGBT test circuit..........................................44
Diode test circuit....................................................................45
Voltage regulator test circuit..................................................46
Appendix D - Warranty Information............................................47
Appendix E - Disposal information .............................................47

Atlas DCA Pro User Guide April 2015 – Rev 1.4
Page 4
Introduction
The Peak Atlas DCA Pro is an advanced semiconductor analyser that
combines simplicity, ease of use and a range of advanced features. You can use
your DCA Pro on its own or in combination with a laptop or desktop PC.
Summary Features:
• Automatic component type identification and schematic display:
Bipolar transistors.
Darlington transistors.
Enhancement Mode and Depletion Mode MOSFETs.
Enhancement Mode and Depletion Mode IGBTs.
Junction FETs.
Low power sensitive Triacs and Thyristors.
Light Emitting Diodes.
Bicolour LEDs.
Diodes and Diode networks.
Zener diodes.
Voltage regulators.
• Automatic pinout identification, just connect any way round.
• Special feature identification such as free-wheeling diodes and
resistor shunts.
• Gain measurement for bipolar transistors.
• Leakage current measurement for bipolar transistors.
• Silicon and Germanium detection for bipolar transistors.
• Gate threshold measurement for Enhancement Mode MOSFETs.
• Semiconductor forward voltage measurement for diodes, LEDs and
transistor Base-Emitter junctions.
• Zener voltage measurement.
• PC connectivity providing:
Larger component identification display.
Detailed characteristics measurement.
Curve tracing functions.
• Single alkaline AAA battery (not used when USB connected).
• Automatic and manual power-off.
Atlas DCA Pro User Guide April 2015 – Rev 1.4
Page 5
Important Considerations
Please observe the following guidelines:
•
This instrument must NEVER be connected to powered
equipment/components or equipment/components with any
stored energy (e.g. charged capacitors). Failure to comply
with this warning may result in personal injury, damage to
the equipment under test, damage to your DCA Pro and
invalidation of the manufacturer’s warranty.
•
The DCA Pro is designed to analyse semiconductors that
are not in-circuit, otherwise complex circuit effects will
result in erroneous measurements.
•
Avoid rough treatment, hard knocks and extreme
temperatures.
•
This unit is not waterproof.
•
Only use a good quality AAA Alkaline battery.
Atlas DCA Pro User Guide April 2015 – Rev 1.4
Page 6
Testing...
Analysing Semiconductors – Standalone mode
The DCA Pro is designed to analyse discrete,
unconnected, unpowered components. This
ensures that external connections don’t
influence the measured parameters. The three
test probes can be connected to the component any
way round. If the component has only two terminals, then
any pair of the three test probes can be used.
The DCA Pro will start component analysis when the on-test button is
pressed.
For the first analysis (after the unit has
been switched off) the tests are
performed while displaying the Peak
logo.
For subsequent testing when the unit
is already powered-up, the unit
displays the “Testing…” screen.
Depending on the component type, analysis may take a few seconds to
complete, after which, the results of the analysis are displayed.
Information is displayed a “page” at a time, each page can be smoothly scrolled
by briefly pressing the scroll-off button.
Although the DCA Pro will switch itself off if left unattended, you
can manually switch the unit off by holding down the scroll-off
button for a couple of seconds.
Atlas DCA Pro User Guide April 2015 – Rev 1.4
Page 7
No component
detected.
Unknown/faulty
component.
Red & Blue
leads shorted.
Red, Green & Blue
leads shorted.
If the DCA Pro cannot detect any
component between any of the test
probes, the following message will be
displayed:
If the component is not a supported
component type, a faulty component or
a component that is being tested incircuit, the analysis may result in the
following message being displayed:
Some components may be faulty due to
a shorted junction between a pair of the
probes. If this is the case, the following
message (or similar) will be displayed:
If all three probes are shorted (or very
low resistance) then the following
message will be displayed:
It is possible that the DCA Pro may detect one or more diode
junctions or other component type within an unknown or faulty part.
This is because many semiconductors comprise of PN (diode)
junctions. Please refer to the section on diodes and diode networks for
more information.
Atlas DCA Pro User Guide April 2015 – Rev 1.4
Page 8
Diode junction
Green-K Blue-A
V
F
=0.694V at 5.00mA
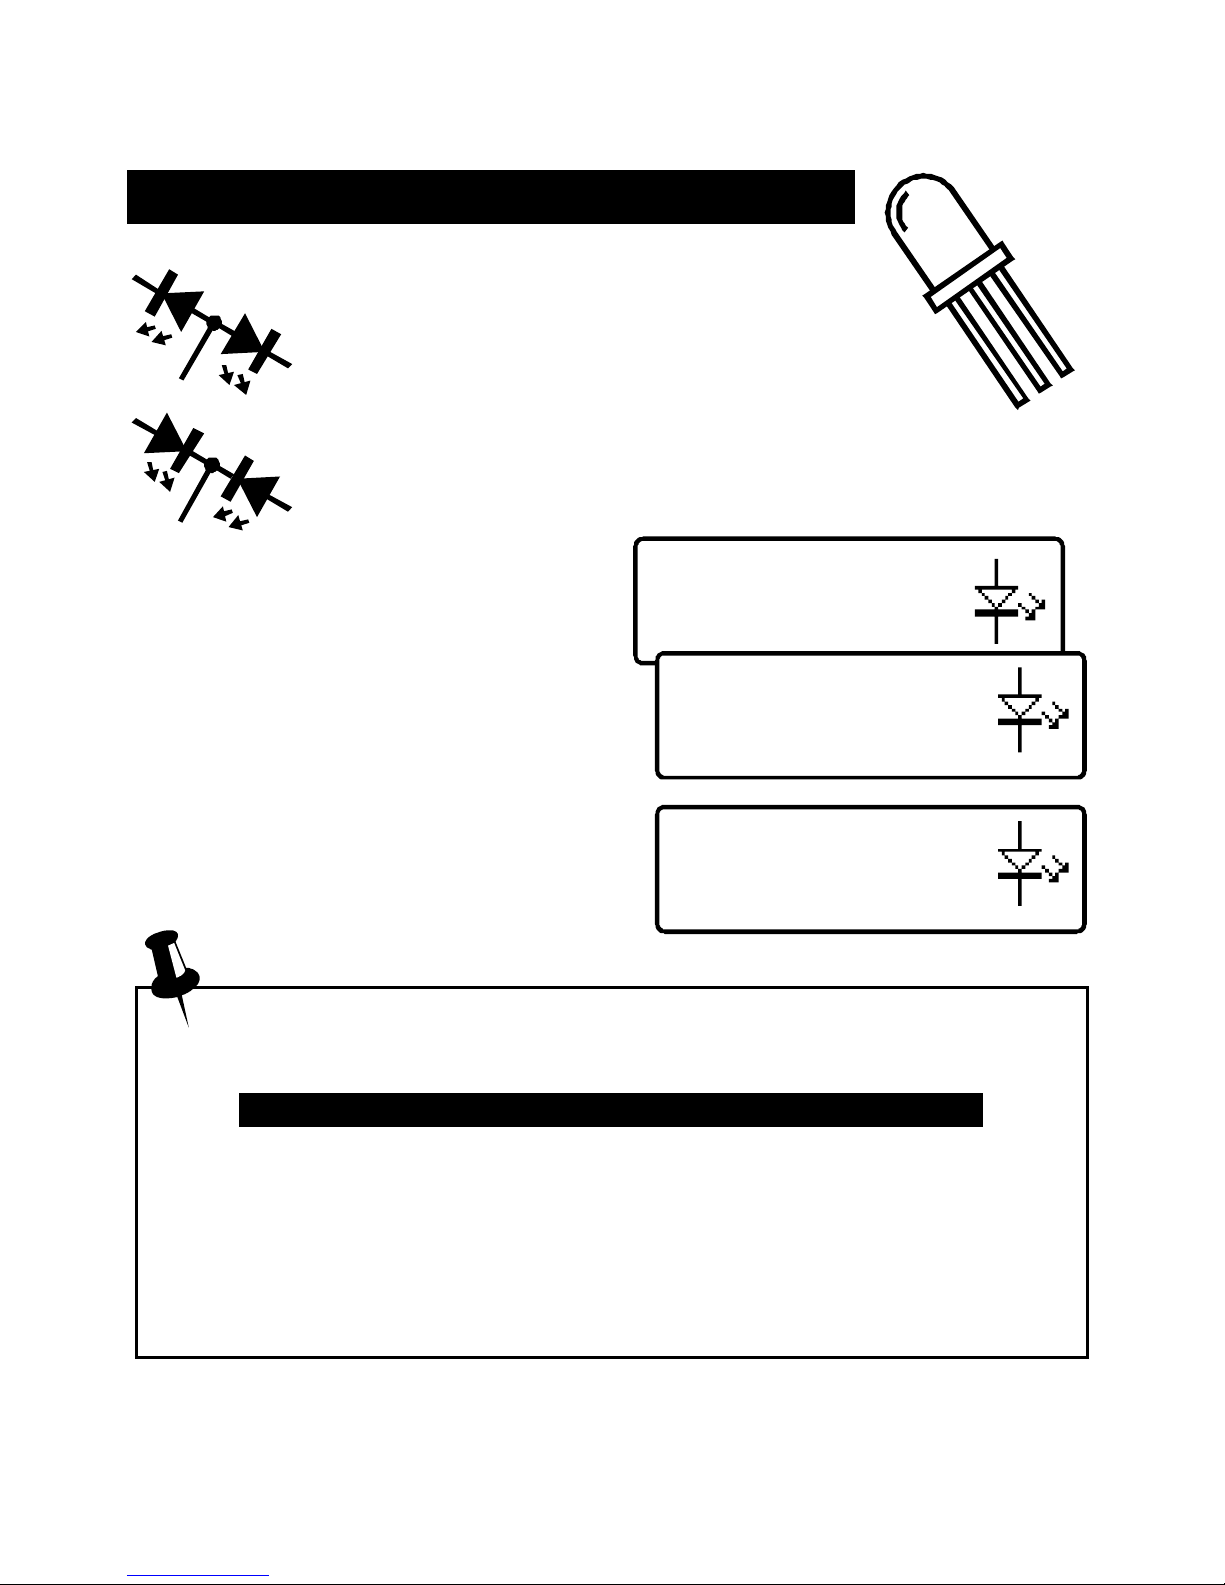
Diodes
The DCA Pro will analyse almost any type of diode. Any
pair of the three test clips can be connected to the diode, any way
round. If the unit detects a single diode, a message similar to the following
will be displayed:
In this example, the Cathode (symbol of
K) is connected to the Green test clip
and the Anode (symbol of A) is
connected to the Blue test clip,
additionally, the Red test clip is unconnected.
The forward voltage drop is also displayed; this gives an indication of the
diode technology. In this example, it is likely that the diode is a standard
silicon diode. A germanium or Schottky diode may yield a forward voltage of
about 0.25V. The current at which the diode was tested is also displayed. The
DCA Pro typically tests diodes (PN junctions) at a forward current of 5mA.
Note that the DCA Pro will detect only one diode even if two diodes
are connected in series when the third test clip is not connected to the
junction between the diodes. The forward voltage drop displayed
however will be the voltage across the whole series combination.
The DCA Pro will determine that the diode(s) under test is an LED if
the measured forward voltage drop exceeds 1.50V. Please refer to the
section on LED analysis for more information.
Atlas DCA Pro User Guide April 2015 – Rev 1.4
Page 9
Zener diode
Red-K Blue-A
V
R
=5.094V at 5.00mA
Red-K Blue-A
V
R
=5.094V at 5.00mA
V
F
=0.702V at 5.00mA
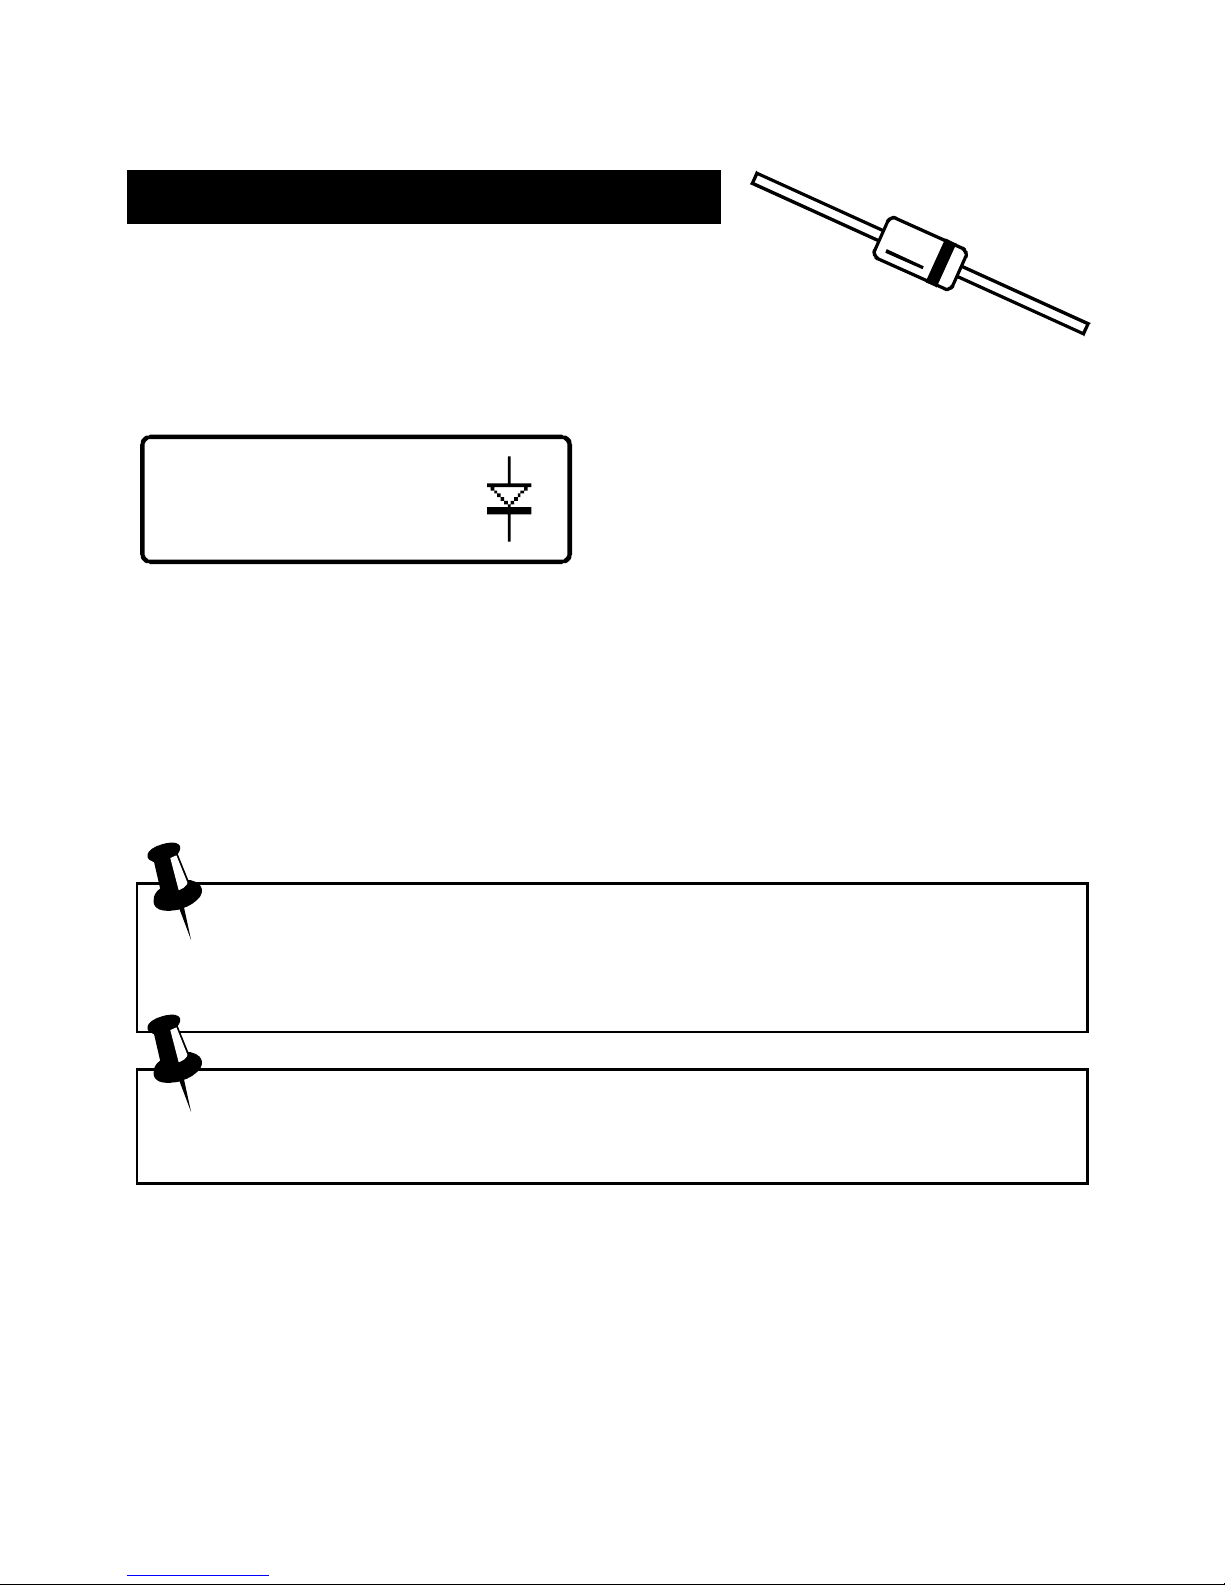
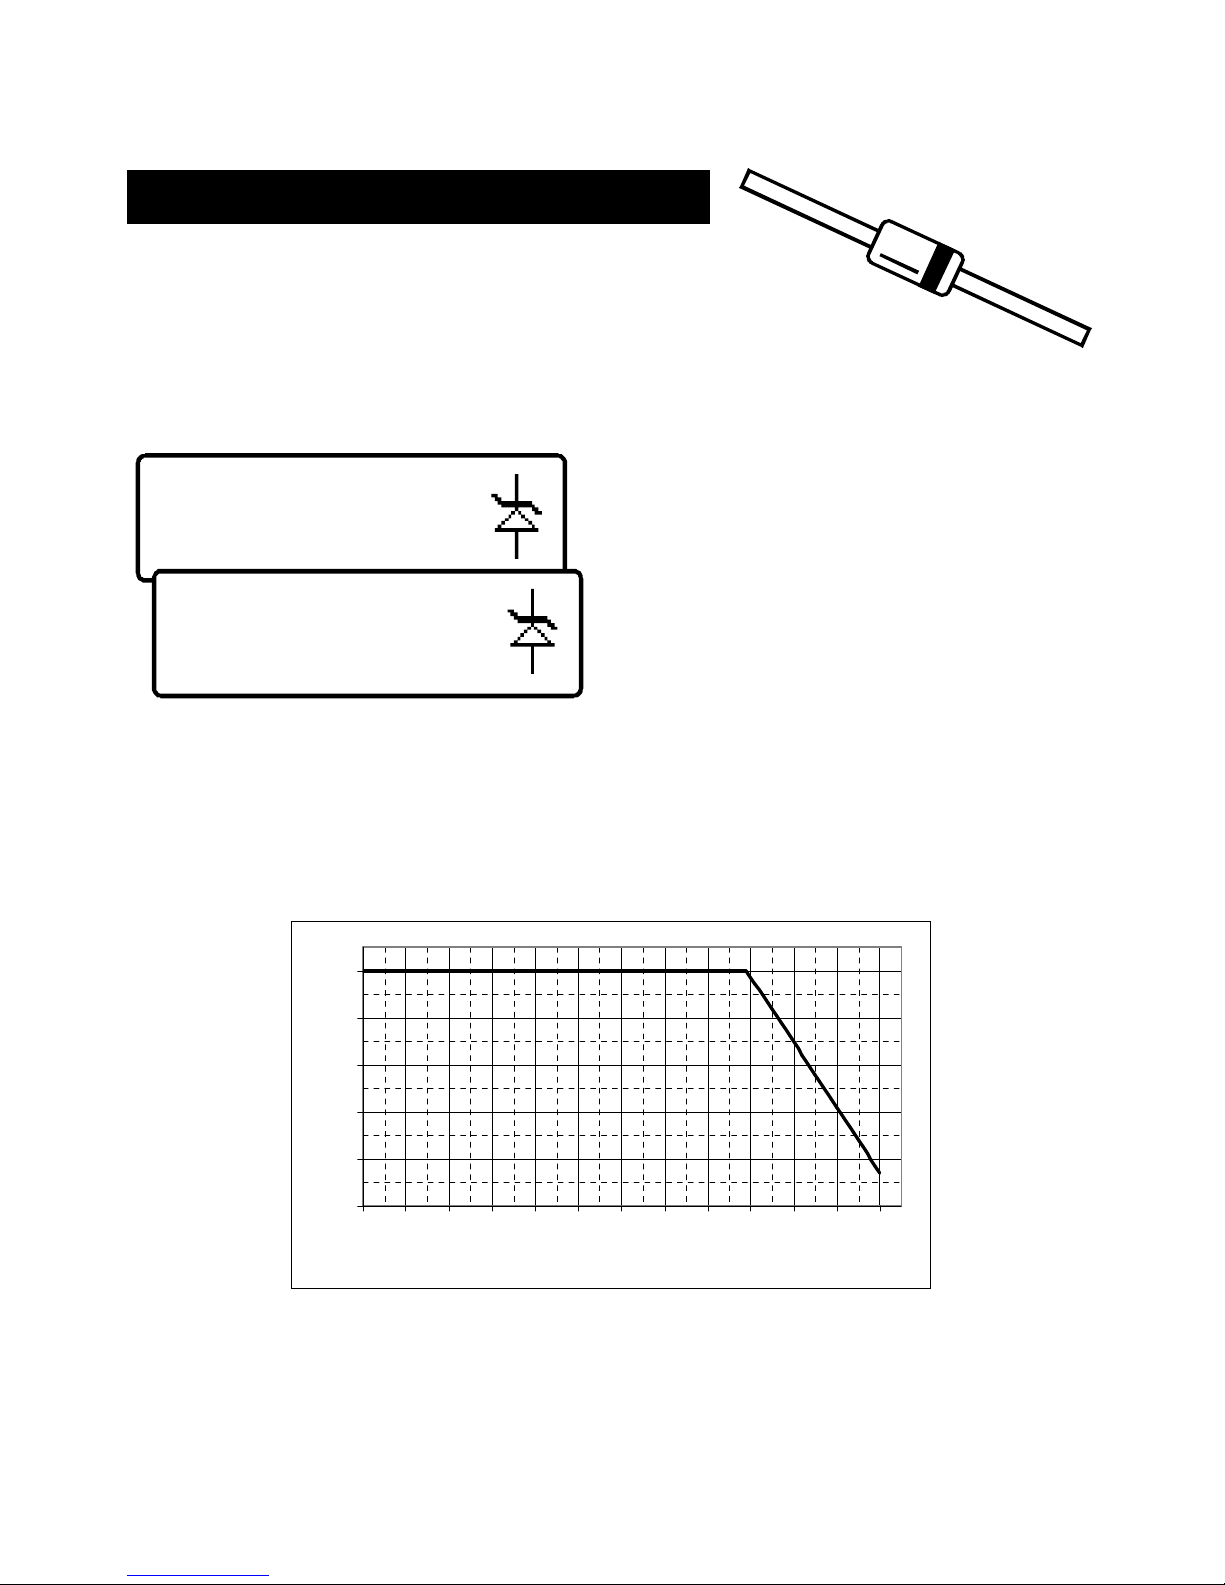
Zener Diodes
The DCA Pro supports Zener diodes (and Avalanche
diodes). Additionally, the instrument can measure the Zener
voltage*.
Connect any pair of the 3 test leads to the Zener diode.
Following analysis, the component
details are displayed.
In this example, a Zener diode with a
reverse voltage (Zener voltage) of
nearly 5.1V has been detected.
Additionally, the forward biased
voltage characteristic is measured, 0.702V at 5mA for this example.
The DCA Pro attempts to test the Zener diode with a current of nominally
5mA. For Zener diodes with a Zener voltage of more than about 9V, a lower
test current will be used. This is illustrated in the following graph:
0
1
2
3
4
5
0 1 2 3 4 5 6 7 8 9 10 11 12
Zener Voltage (Volts)
Test Current (mA)
*The DCA Pro may not be able to identify Zener diodes with a Zener voltage
of more than 11V. It will however still identify the diode junction in its
forward biased mode.
Atlas DCA Pro User Guide April 2015 – Rev 1.4
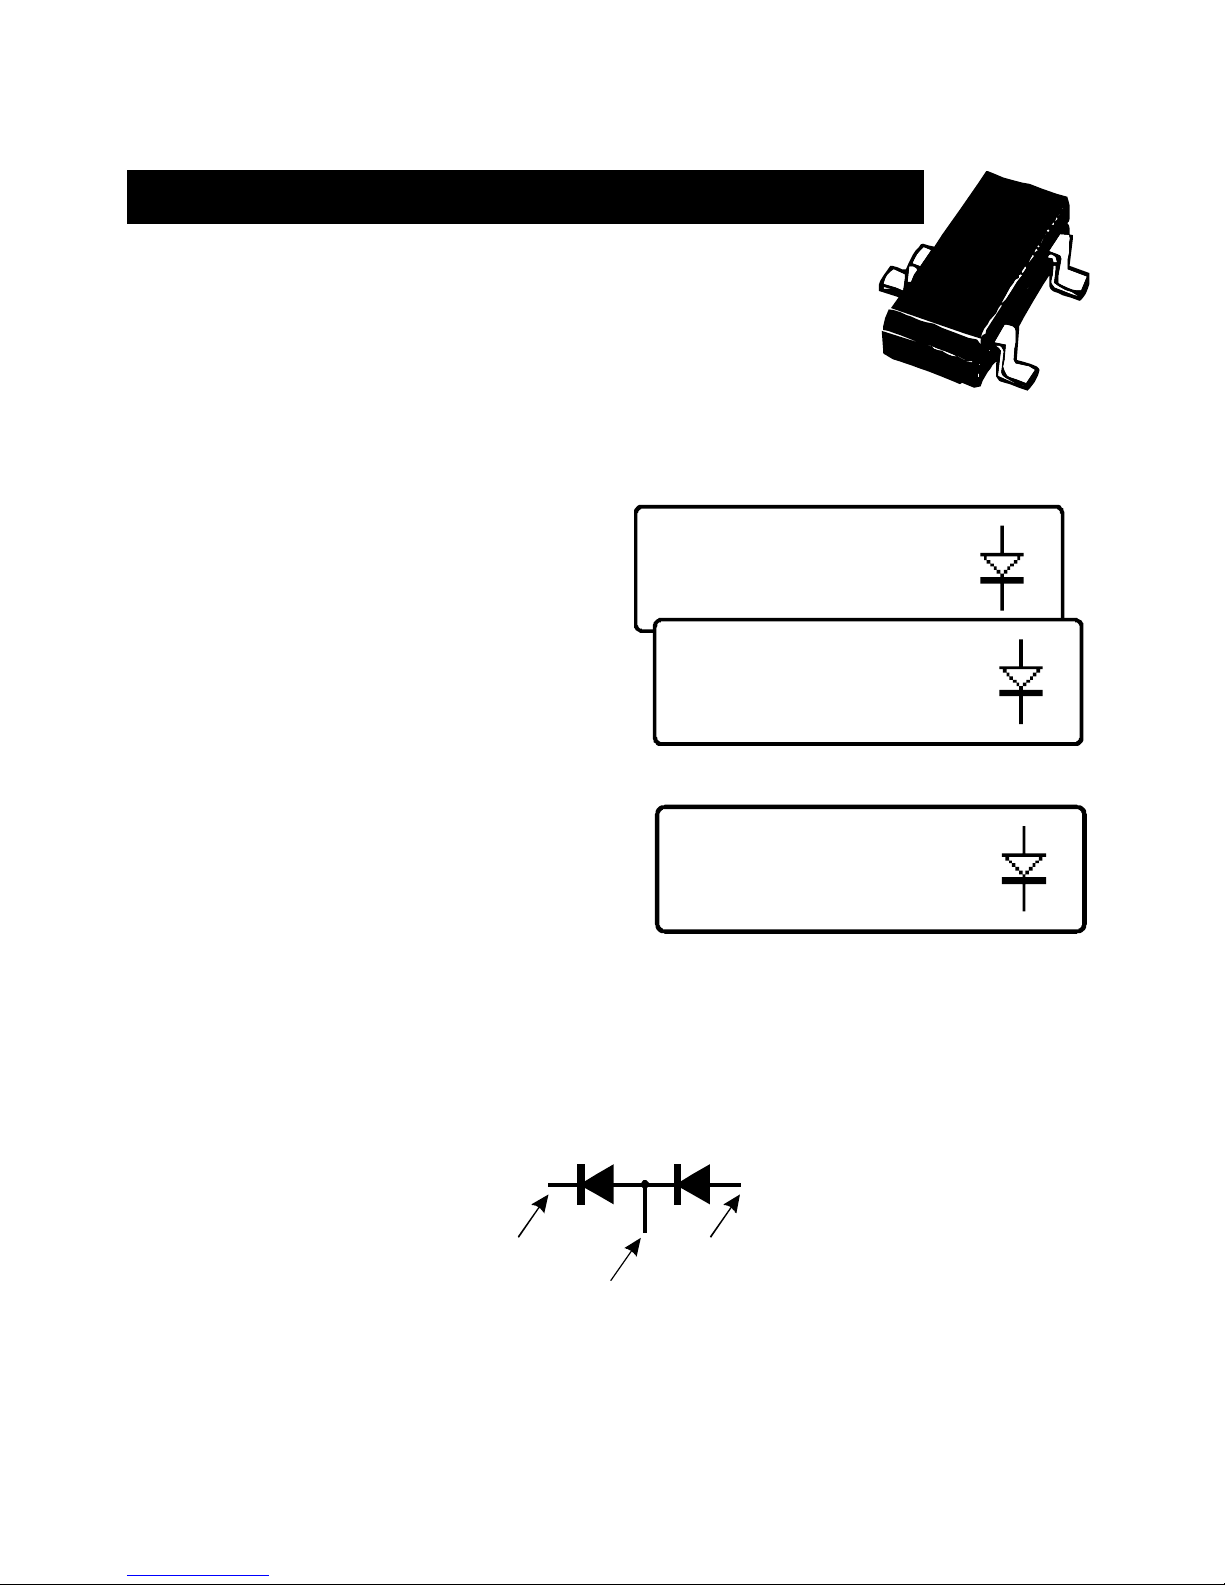
Page 10
2 diode junctions
#1: Diode junction
Green-K Blue-A
#1: Diode junction
Green-K Blue-A
VF=0.699V at 5.00mA
#2: Diode junction
Red-A Blue-K
VF=0.683V at 5.00mA
Diode Networks
The DCA Pro will identify multiple diode junctions
between the probes. For three terminal devices such as
SOT-23 diode networks, all three test clips must be
connected.
The instrument will show the results for each diode junction in turn.
Firstly, the unit will show that it has
found a number of diode junctions:
The details for the first diode are then
displayed (Diode #1). In this example,
the Green test clip is on the Cathode of
diode #1 and the Blue test clip is on the
Anode.
The details for the second diode are
then displayed (by briefly pressing
scroll-off):
It can be seen in the above example, that the blue test clip is connected to both
the anode on Diode #1 and to the cathode of Diode #2. This means that the two
diodes are effectively connected in series, with the blue clip at the mid point.
This example is illustrated below:
#1
Green Red
Blue
#2
In the same way as the single diode analysis, the forward voltage for each
diode is measured for a nominal test current of 5mA.
Atlas DCA Pro User Guide April 2015 – Rev 1.4
Page 11
LED
Red-K Blue-A
V
F
=1.962V at 5.00mA
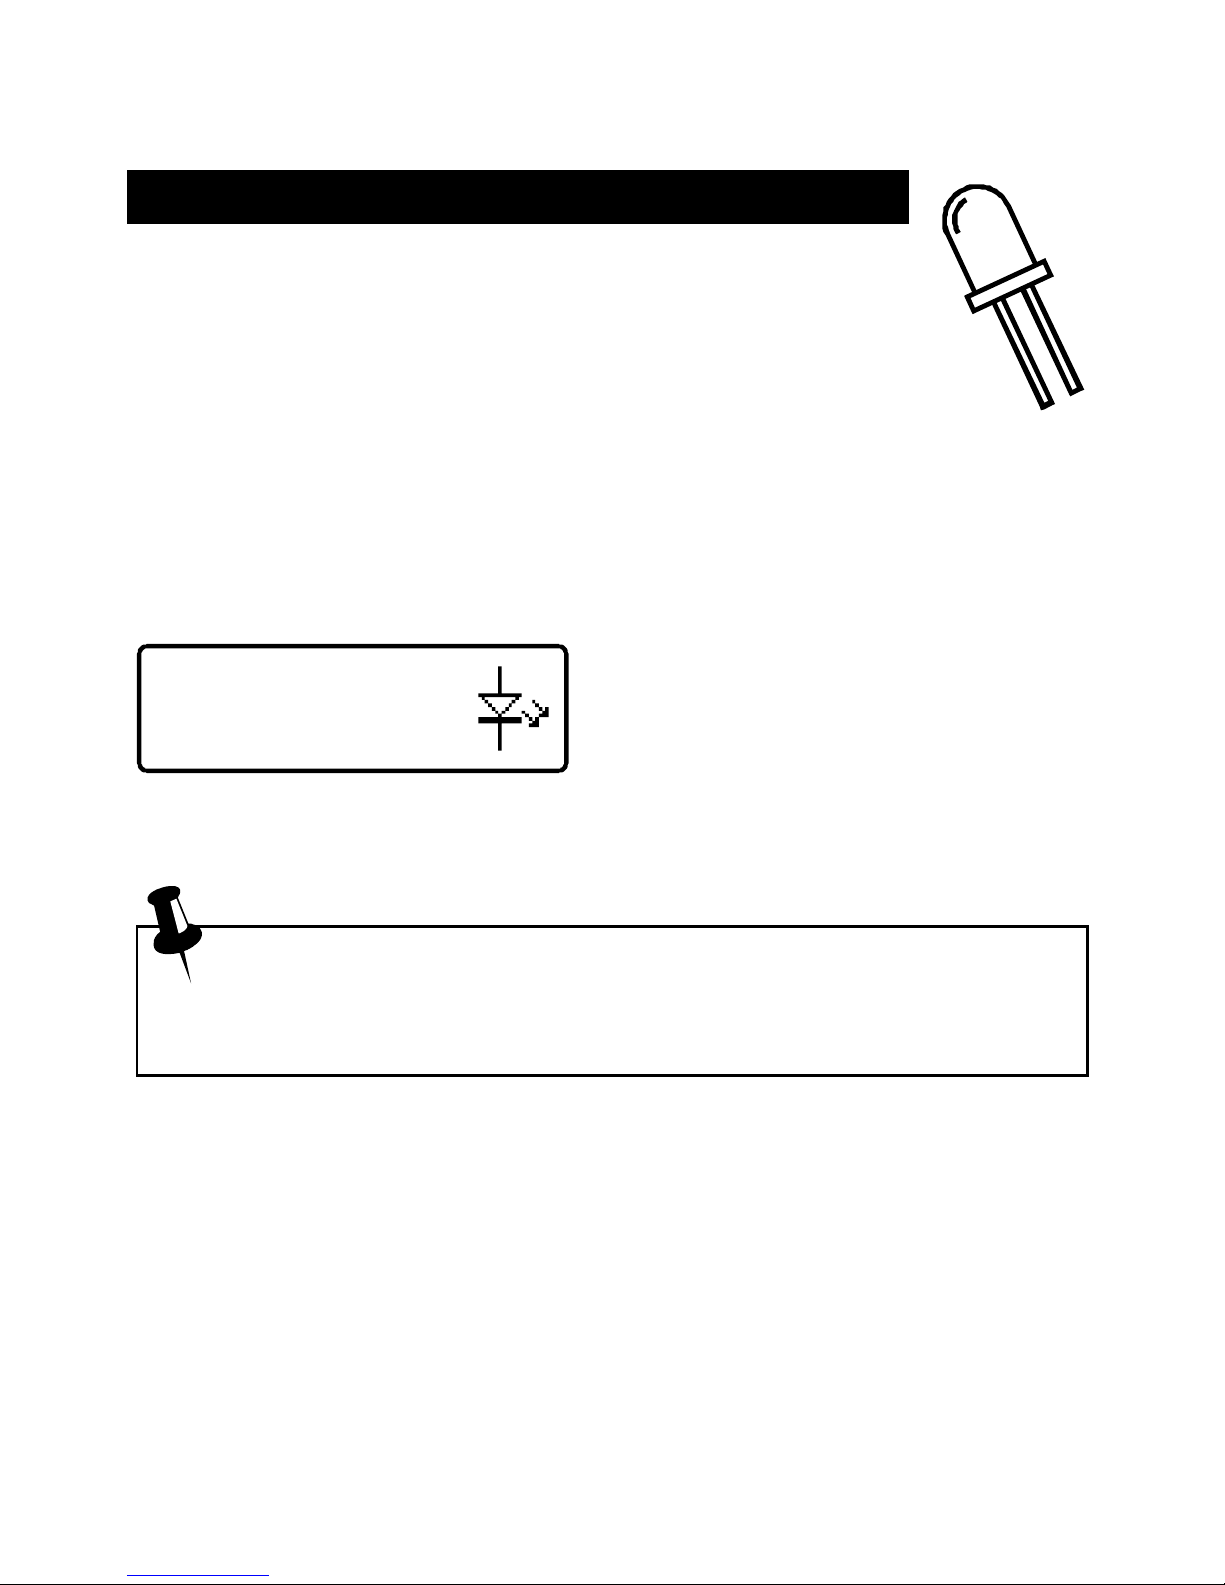
LEDs
An LED (light emitting diode) is really just another type of
diode, however, the DCA Pro will determine that an LED or
LED network has been detected if the diode’s measured
forward voltage drop is larger than 1.5V. This also enables the
DCA Pro to intelligently identify bicolour LEDs, both two-lead
and three-lead varieties. See the section on bicolour LEDs for more
information.
For two leaded parts, connect any pair of the 3 test clips to your LED. Leave
the 3rd lead unconnected.
In this example, the Red test clip is
connected to the LED’s Cathode
(negative) and the Blue test clip is
connected to the Anode (positive).
The forward voltage of the LED is measured at a nominal current of 5mA.
During the analysis process, the LED will briefly illuminate (so you
can see it’s illumination colour). The test current of 5mA means that it
may not be as bright as you expect, LEDs are often used at currents of
10-20mA. Power LEDs are sometimes driven at 350mA or more.
Atlas DCA Pro User Guide April 2015 – Rev 1.4
Page 12
Bicolour LED (2 lead)
#1: LED
Red-K Blue-A
#1: LED
Red-K Blue-A
VF=1.823V at 5.00mA
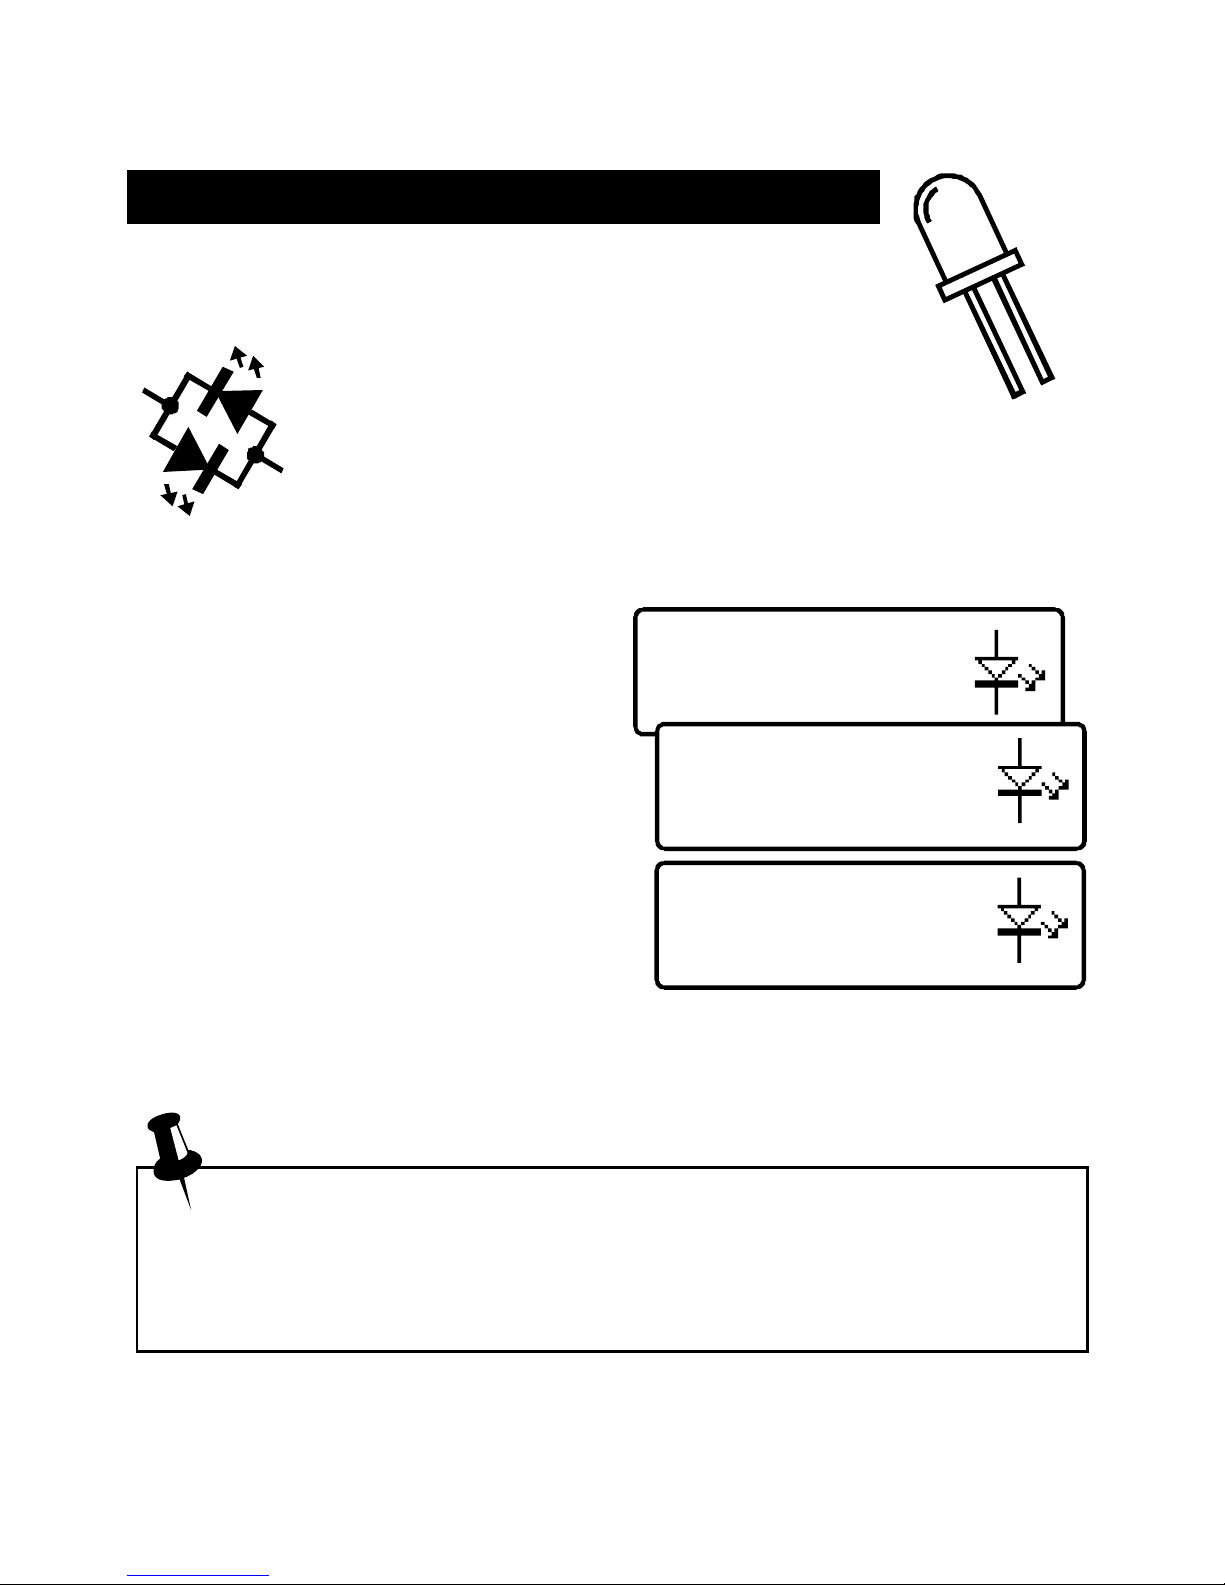
Bicolour LEDs (2-lead types)
Bicolour LEDs are generally available in two main varieties;
2-lead and 3-lead types.
This section describes the testing of 2-lead
bicolour LEDs. These types are internally
connected in inverse parallel (back-to-back).
Similar to the diode network analysis, each LED within the
bicolour LED is detailed in turn.
This example shows that LED #1 has
its Cathode connected to the Red test
clip and its Anode connected to the
Blue test clip. The forward bias
characteristic is shown for LED#1,
1.823V at 5mA in this example.
Pressing scroll-off then shows the
details for the 2nd LED in the bicolour
LED package.
As expected for 2-lead bicolour LEDs,
we can see in this example that LED#2 has its connections in exactly the
opposite configuration to LED#1.
Note that it is common for the two LEDs within a bicolour LED to
have different forward voltage characteristics. Red is often the lowest
forward voltage, progressing through amber, yellow, green and then
blue (or white) with the highest forward voltage. See the table at the
bottom of the next page.
#2: LED
Red-A Blue-K
VF=1.944V at 5.00mA
Atlas DCA Pro User Guide April 2015 – Rev 1.4
Page 13
Bicolour LED (3 lead)
Common Cathode
#1: LED
#1: LED
Red-A Green-K
VF=1.935V at 5.00mA
#2: LED
Green-K Blue-A
VF=1.877V at 5.00mA
Bicolour LEDs (3-lead types)
3-lead bicolour LEDs are available in
common cathode and common anode
varieties. The DCA Pro supports both types.
In the same way as the 2-lead bicolour LED
analysis, each internal LED is detailed separately on the
DCA Pro screen.
The type of bicolour LED is shown
here, in this example we have a
common cathode variety.
The details for each internal LED are
then shown.
It can be seen here that our example has
its common cathode terminal connected
to the Green test clip.
Typical values of forward voltage for LED colours are shown here:
(LED types/manufacturers may vary significantly)
LED Colour Typical VF @ 5mA
Red 1.81V
Amber 1.86V
Yellow 1.90V
Green (standard type) 1.95V
Green (deep green / emerald) 2.84V
Blue (and white) 2.95V
Atlas DCA Pro User Guide April 2015 – Rev 1.4
Page 14
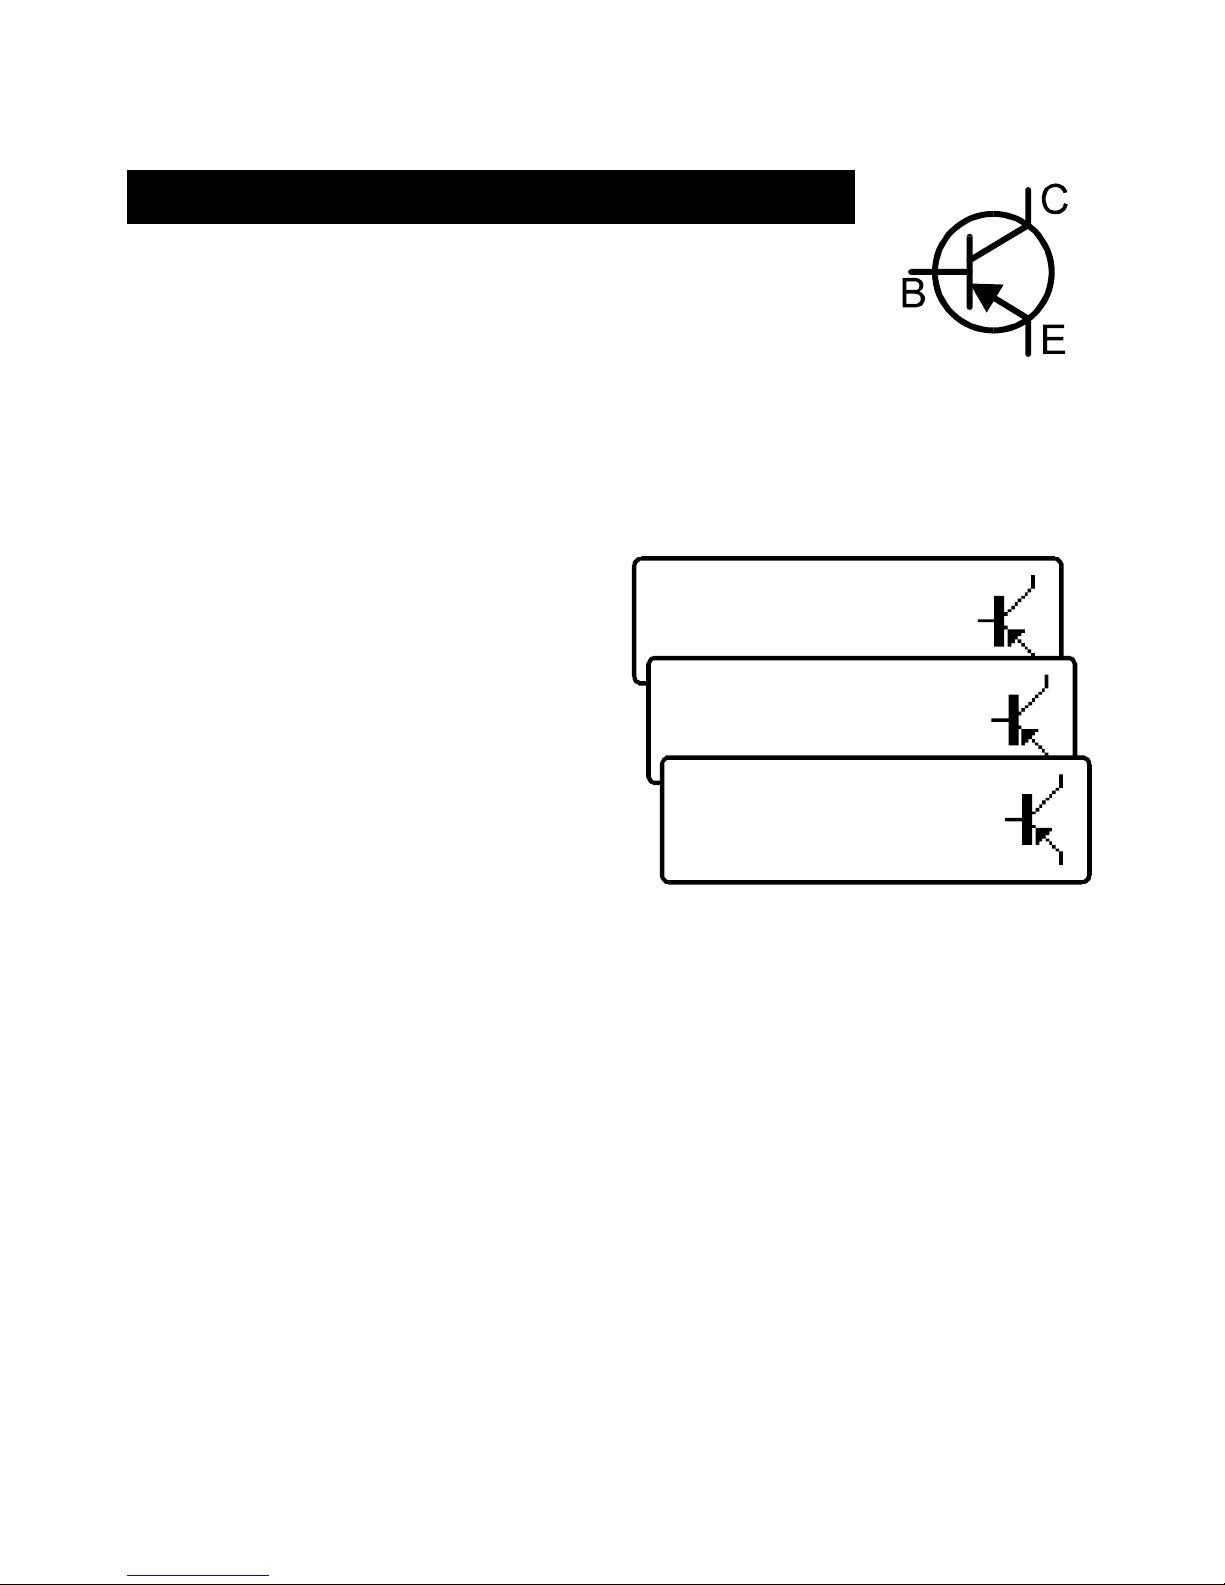
Bipolar Junction Transistors (BJTs)
Bipolar Junction Transistors are simply “conventional”
transistors, although variants of these do exist such as
Darlingtons, devices with free-wheeling diodes, resistor
shunted types and combinations of these types. All of these
variations are automatically identified by the DCA Pro and their schematic
symbol is displayed on the screen. Both NPN and PNP types are supported.
The 3 test clips can be applied to the transistor in any configuration.
As an example, testing a common
PNP transistor such as the 2N5401
will result in a display similar to this:
This example shows that the Red test
clip is connected to the Emitter, the
Green is connected to the Base and
the Blue test clip is connected to the
Collector.
Pressing scroll-off allows further details to be displayed.
The DC current gain (hFE), base emitter voltage drop (VBE) and collector
leakage current (ICLeak) are all shown along with their test conditions.
Refer to the following sections for more details on these measurements.
PNP Silicon BJT
Red-E Green-B Blue-C
hFE=106
hFE=106
at IC=5.00mA
VBE=0.754V
VBE=0.754V
at IB=5.00mA
I
C
Leak=0.000mA
Atlas DCA Pro User Guide April 2015 – Rev 1.4
Page 15
Current Gain (h
FE
)
DC current gain (hFE) is the ratio of the
collector current (less leakage) to the
base current for a particular operating
condition.
The DCA Pro measures hFE at a collector
current of nominally 5.0mA and a
collector-emitter voltage of between 3V
and 9V.
The gain of all transistors can vary
considerably with collector current,
collector voltage and also temperature.
The displayed value for gain therefore
may not represent the gain experienced at other collector currents and voltages.
This is particularly true for large devices.
The displayed value of gain is very useful however for comparing transistors of
a similar type for the purposes of gain matching or fault finding.
Darlington transistors can have very high gain values and more variation of
gain will be evident as a result of this.
The current gain of germanium transistors can vary a large amount
with changes in temperature. Even the warmth from your fingers can
alter the gain of a germanium device.
It is quite normal for transistors of the same type to have a wide range
of gain values. For this reason, transistor circuits are often designed so
that their operation has little dependence on the absolute value of
current gain.
I
C
=5.0mA
I -I
(I = leakage
current)
C Cleak
Cleak
h
FE
=
I
B
I
B
hFE=167
at IC=5.00mA

Atlas DCA Pro User Guide April 2015 – Rev 1.4
Page 16
VBE=0.703V
at IB=5.00mA
Base-Emitter Voltage Drop
The DC characteristics of the base-emitter
junction are displayed, both the base-emitter
forward voltage drop (VBE) and the base
current (IB) used for the measurement.
This example shows an NPN base-
emitter voltage (VBE) of 0.703V for a
base test current (IB) of 5mA.
The forward base-emitter voltage drop can aid in the identification of silicon or
germanium devices. Germanium devices can have base-emitter voltages as low
as 0.2V, Silicon types exhibit readings of about 0.7V and Darlington transistors
can exhibit readings of about 1.2V because of the multiple base-emitter
junctions being measured.
It is important to note that the DCA Pro does not perform the base-
emitter voltage drop tests at the same base current as that used for the
current gain measurement. VBE is measured at a base current of
approximately 5mA. The base current used during the gain
measurement is equal to IC/hFE.
I
B
V
BE

Atlas DCA Pro User Guide April 2015 – Rev 1.4
Page 17
VBE=0.270V
at IB=5.00mA
ICLeak=0.177mA
Collector Leakage Current
The collector current that takes place
when no base current is flowing is
referred to as Leakage Current.
Most modern transistors exhibit
extremely low values of leakage
current, often less than 1µA, even for
very high collector-emitter voltages.
Older Germanium types however can
suffer from significant collector leakage
current, particular at high temperatures (leakage current can be very
temperature dependant).
Leakage current is automatically taken into account for the gain measurement
(unlike many multimeters’ gain measurement that can be fooled by leakage
current).
If your transistor is a Silicon type, you should expect to see a leakage
current of close to 0.000mA unless the transistor is faulty.
The leakage current of germanium transistors can vary a large amount
with changes in temperature (roughly doubling with every 5°C
increase). Even the warmth from your fingers can alter the leakage
current of a germanium device. Conversely, a cooling transistor (after
a little handling) can result in a falling leakage current measurement
over the period of a few seconds/minutes. This is completely normal.
I
C
Leakage
IB = 0

Atlas DCA Pro User Guide April 2015 – Rev 1.4
Page 18
Darlington Transistors
If the device is a Darlington transistor (two BJTs connected
together), the unit will display a similar message to this:
As expected, for Darlington devices
that do not have internal resistors, the
gain (hFE) can be very high.
This second example however, (left)
shows the display for a Darlington
transistor that has internal resistors
connected to the base-emitter
connections. This causes the hFE measurement to become much lower at the
test currents used by the DCA Pro. This is normal and is not a fault with the
transistor or the DCA Pro.
It is important to note that if a Darlington does contain a base-emitter
shunt resistor network, any measurements of current gain (hFE) will be
very low at the test currents used by the DCA Pro. This is due to the
resistors providing an additional path for the base current. The
readings for gain however can still be used for comparing transistors
of a similar type for the purposes of matching or gain band selecting.
Note that the DCA Pro will determine that the transistor under test is a
Darlington type if the base-emitter voltage drop is greater than 1.00V
for devices with a base-emitter shunt resistance of greater than 60kΩ
or if the base-emitter voltage drop is greater than 0.80V for devices
with a base-emitter shunt resistance of less than 60kΩ. The measured
base-emitter voltage drop is displayed as detailed later in this section.
NPN Darlington
Red-B Green-E Blue-C
h
F
E
=9410
NPN Darlington
Red-C Green-E Blue-B
h
F
E
=67

Atlas DCA Pro User Guide April 2015 – Rev 1.4
Page 19
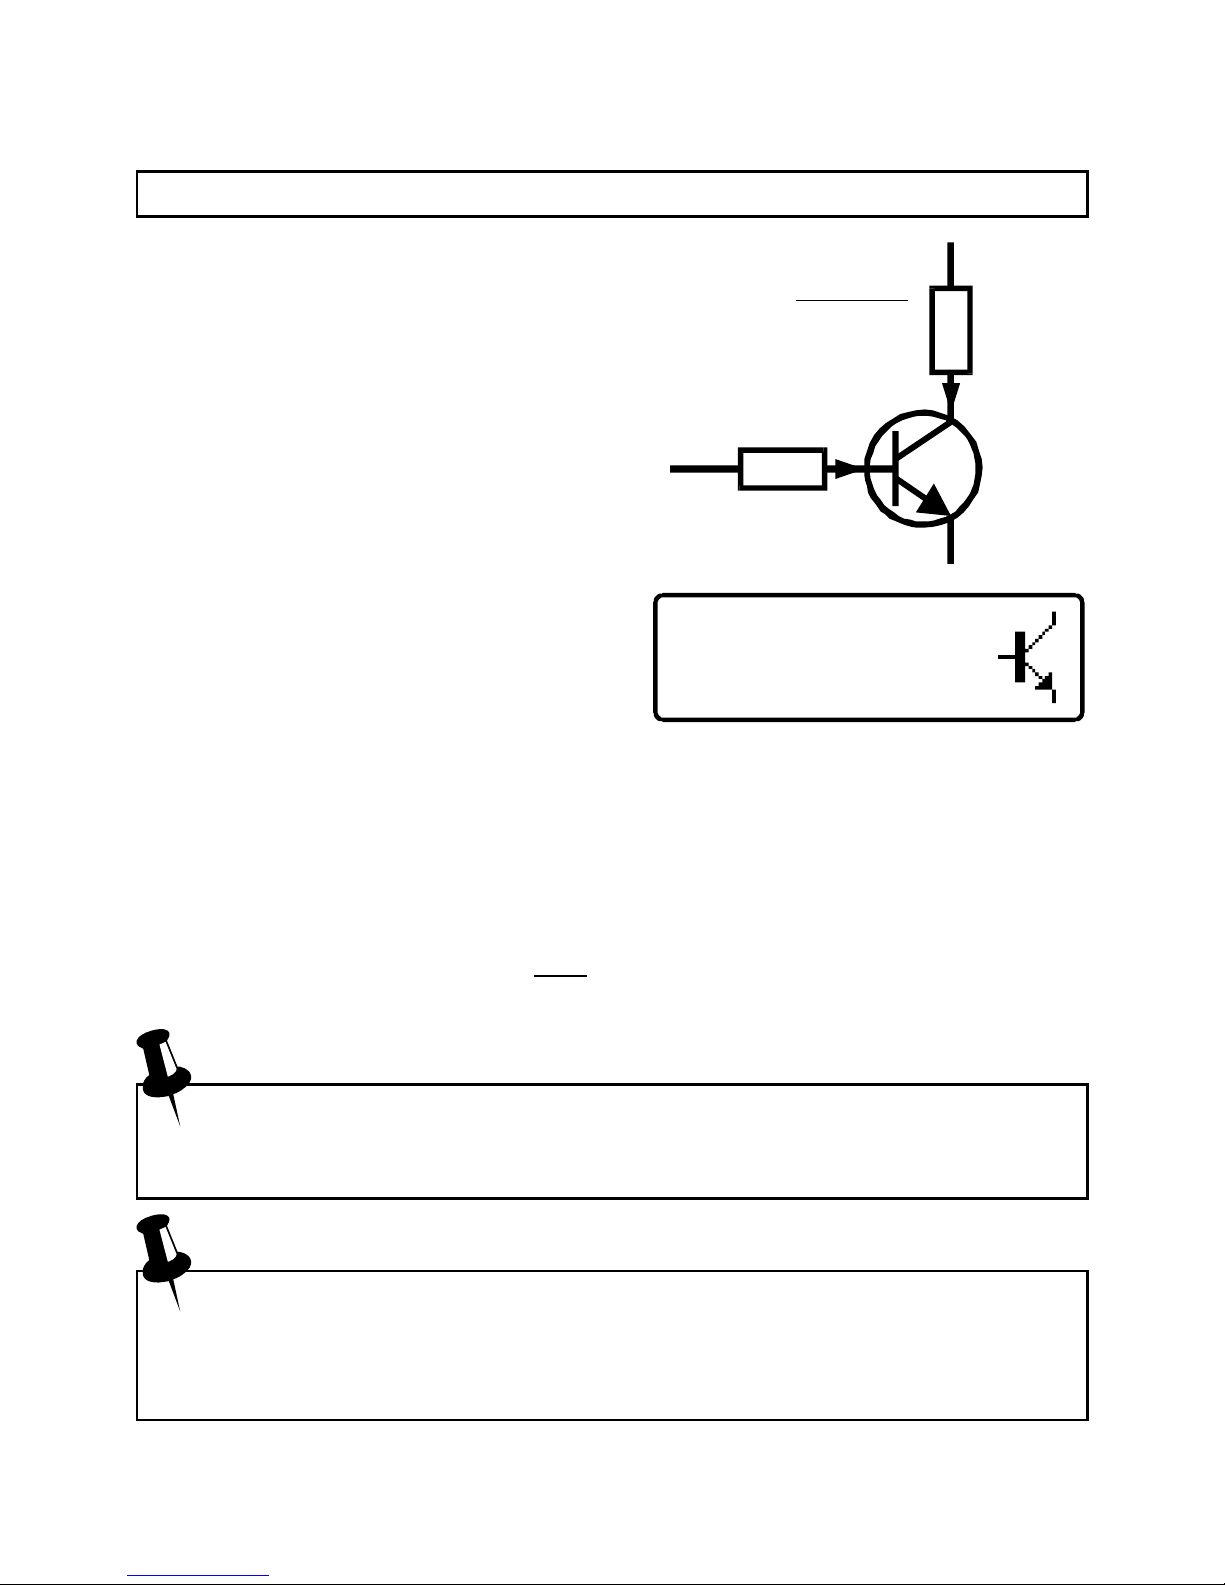
Free Wheeling Diode
Some transistors, particularly CRT deflection transistors and many large
Darlingtons have a protection diode (“free wheeling diode” or “body diode”)
inside their package connected between the collector and emitter.
If a free-wheeling diode has been detected, it is shown on the schematic
symbol. Some examples are shown here:
PNP Silicon BJT
Red-B Green-C Blue-E
h
F
E
=61
The Philips BU505DF is a typical example of a diode protected bipolar
transistor. Remember that the diode (if present) is always internally connected
between the collector and the emitter so that it is normally
reverse biased.
For NPN transistors, the anode of the diode is connected to
the emitter of the transistor. For PNP transistors, the anode
of the diode is connected to the collector of the transistor.

Atlas DCA Pro User Guide April 2015 – Rev 1.4
Page 20
No component
detected.
Unknown/faulty
component.
Faulty or Very Low Gain Transistors
Faulty transistors that exhibit very low gain
may cause the DCA Pro to only identify one or
more diode junctions within the device. This is
because NPN transistors consist of a structure
of junctions that behave like a common anode
diode network. PNP transistors can appear to be
common cathode diode networks. The common
junction represents the base terminal. This is normal for situations where the
current gain is so low that it is immeasurable at the test currents used by the
DCA Pro.
Please note that the equivalent diode pattern may not be correctly
identified by the DCA Pro if your transistor is a darlington type or has
additional diode(s) in its package (such as a collector-emitter
protection diode). This is due to multiple pn junctions and current
paths that cannot be uniquely resolved.
In some circumstances, the unit may not be able to deduce anything sensible
from the device at all, in which case you may see one of these messages:
B
C
E

Atlas DCA Pro User Guide April 2015 – Rev 1.4
Page 21
N-Ch Enhancement
mode MOSFET
Red-G Green-S Blue-D
Gate threshold
VGS(on)=3.625V
at ID=5.00mA
Enhancement Mode MOSFETs
MOSFET stands for Metal Oxide Semiconductor Field Effect
Transistor. Like bipolar transistors, MOSFETs are available in
two main types, N-Channel and P-Channel. Most modern
MOSFETs are of the Enhancement Mode type, meaning that
the bias of the gate-source voltage is always positive (For N-Channel types).
The other (rarer) type of MOSFET is the Depletion Mode type which is
described in a later section.
MOSFETs of all types are sometimes known as IGFETs, meaning Insulated
Gate Field Effect Transistor. This term describes a key feature of these
devices, an insulated gate region that results in negligible gate current for both
positive and negative gate-source voltages (up to the maximum allowed values
of course, typically ±20V). IGFETs are not to be confused with IGBTs
(Insulated Gate Bipolar Transistors), these are dealt with in a later section.
The first screen to be displayed gives
information on the type of MOSFET
detected and the pinout.
Pressing scroll-off will then result in
the gate threshold of the MOSFET being
displayed.
The (on) gate threshold voltage is the gate-source voltage at which conduction
between the source and drain starts. The DCA Pro determines that drain-source
conduction has started when it reaches a current of 5.00mA, this is confirmed
on the display.
An enhancement MOSFET will always have a gate threshold voltage of greater
than 0V (i.e. always positive relative to the source pin for N channel devices).
The DCA Pro can drive the gate from 0V to 10V for enhancement mode
MOSFETs.

Atlas DCA Pro User Guide April 2015 – Rev 1.4
Page 22
N-Ch Depletion
mode MOSFET
Red-S Green-G Blue-D
Gate threshold
VGS(on)=-2.918V
at ID=5.00mA
Depletion Mode MOSFETs
The fairly rare Depletion Mode MOSFET is very similar to the
conventional Junction FET (JFET) except that the gate
terminal is insulated from the other two terminals. The input
resistance of these devices can typically be greater than
1000MΩ for negative and positive gate-source voltages.
Depletion Mode devices are
characterised by the gate-source
voltage required to control the drainsource current.
Modern Depletion Mode devices are
generally only available in N-Channel
varieties and will conduct some current
between its drain and source terminals even with a zero voltage applied across
the gate and the source. The device can only be turned completely off by taking
its gate significantly more negative than its source terminal, say –5V. It is this
characteristic that makes them so similar to conventional JFETs.
V
GS
Depletion mode
MOSFET
Enhancement mode
MOSFET
I
DS
5.0mA

Atlas DCA Pro User Guide April 2015 – Rev 1.4
Page 23
N-Ch Enhancement
mode IGBT
Red-G Green-C Blue-E
Gate threshold
VGE(on)=5.778V
at IC=5.00mA
Enhancement Mode IGBTs
IGBT is an acronym for Insulated Gate Bipolar Transistor.
It combines the input characteristics of a MOSFET with
the output characteristics of a Bipolar Junction Transistor.
IGBTs are available in N or P channel types, enhancement mode or depletion
mode and with or without a free-wheeling diode.
Generally, their operation is very similar to MOSFETs. The saturation
capability of an IGBT is often better than an equivalent sized MOSFET at high
currents. At low currents, the saturation voltage of an IGBT is often worse than
an equivalent sized MOSFET.
In this example we have an NChannel IGBT with an integral free
wheeling diode.
Note the names of the leads; Gate,
Collector and Emitter.
Similar to the MOSFET analysis, the gate threshold is the voltage between the
gate and emitter that causes the device to start conducting (between the
collector and emitter). The DCA Pro determines that conduction has started if
the collector current has reached 5.0mA.
The DCA Pro can drive the gate from 0V to 10V for enhancement mode
IGBTs.
(IGBT symbol based on EN60617: 05-05-19)
G
C
E

Atlas DCA Pro User Guide April 2015 – Rev 1.4
Page 24
N-Ch Depletion
mode IGBT
Red-E Green-G Blue-E
Gate threshold
VGE(on)=-3.955V
at IC=5.00mA
Depletion Mode IGBTs
Like MOSFETs, IGBTs are available as enhancement
mode and depletion mode types.
Depletion mode IGBTs are characterised by the fact that
current can flow between the collector and emitter when there is zero voltage
across the gate-emitter terminals.
For an N-Channel depletion mode IGBT, the device can only be turned off
fully if the gate terminal is taken more negative with respect to the emitter lead.
In this example we have an NChannel depletion mode IGBT with
no free wheeling diode.
Note the negative gate threshold
voltage, characteristic of a depletion
mode device.
G
C
E

Atlas DCA Pro User Guide April 2015 – Rev 1.4
Page 25
Junction FETs (JFETs)
Junction FETs are conventional Field Effect Transistors.
The voltage applied across the gate-source terminals controls
current between the drain and source terminals. N-Channel
JFETs require a negative voltage on their gate with respect to their source, the
more negative the voltage, the less current can flow between the drain and
source.
Unlike Depletion Mode MOSFETs, JFETs have no insulation layer on the gate.
This means that although the input resistance between the gate and source is
normally very high (greater than 100MΩ), the gate current can rise if the
semiconductor junction between the gate and source or between the gate and
drain become forward biased. This can happen if the gate voltage becomes
about 0.6V higher than either the drain or source terminals for N-Channel
devices or 0.6V lower than the drain or source for P-Channel devices.
The internal structure of JFETs is
essentially symmetrical about the gate
terminal, this means that the drain and
source terminals are often
indistinguishable by the DCA Pro. The JFET type, gate terminal and measured
parameters are displayed however.
Pinch-Off
A common parameter to be specified for JFETs is “Pinch-Off”. This is the
voltage needed between the gate-source
to turn off the JFET. The DCA Pro will
determine that the JFET is off when the
drain current is less than 5µA.
N-Ch Junction FET
Green-G
Symmetrical Src/Drn
VGS(off)=-6.65V
at ID=5.0uA

Atlas DCA Pro User Guide April 2015 – Rev 1.4
Page 26
VGS(on)=-1.10V
at ID=5.00mA
“On” Characteristics
The DCA Pro measures the gate-source
voltage required to reach the onset of
good conduction through the JFET’s
drain-source. Good conduction is determined when the drain-source current
reaches 5mA. For JFETs that have a lower saturation current than 5mA, the
DCA Pro will try to use a lower “on” current.
Transconductance
While the JFET is conducting, the JFET’s gain (transconductance) is measured.
Transconductance is often measured in mA/V, mmhos or mSiemens. This
refers to the change in drain current resulting from a change in gate-source
voltage:
gfs = ∆IDS / ∆VGS
The DCA Pro measures transconductance by determining the gate voltage
change necessary to obtain a drain current change from 3.0mA to 5.0mA. If the
JFETs saturation current is less than
5.0mA then a proportionately lower
current span will be used.
I
DSS
Drain Current (for VGS=0)
Finally, the drain current for a zero
gate-source voltage is measured. This is
measured for a drain-source voltage of
nominally 3.0V but may be lower if the
drain current exceeds 12mA.
Transconductance is measured by the DCA Pro over a small range of
drain current (typically a span of 3mA-5mA). Values of
transconductance higher than 20mA/V can yield a coarse
measurement resolution as the required change in gate voltage is so
tiny. Values above 99mA/V are displayed as “>99mA/V”.
I
DSS
=6.67mA
at VDS=3.00V

Atlas DCA Pro User Guide April 2015 – Rev 1.4
Page 27
Thyristor (SCR)
Red-G Green-K Blue-A
Triac
Red-MT1 Green-G
Blue-MT2
Thyristors (SCRs) and Triacs
Sensitive low power thyristors (Silicon Controlled
Rectifiers - SCRs) and triacs that require gate
currents and holding currents of less than 10mA
can be identified and analysed with the DCA Pro.
Thyristor terminals are the anode (A), cathode (K) and the gate (G).
This example shows that a thyristor has
been detected:
Triac terminals are MT1, MT2 (MT
standing for main terminal) and gate.
MT1 is the terminal with which gate
current is referenced.
1. The unit determines that the device under test is a triac by checking
the gate trigger quadrants that the device will reliably operate in.
Thyristors operate in only one quadrant (positive gate current, positive
anode current). Triacs can typically operate in three or four quadrants,
hence their use in AC control applications.
2. The gate trigger currents used by the DCA Pro are limited to less
than 10mA. Some thyristors and triacs will not operate at low currents
and these types cannot be analysed with this instrument. Note also that
if only one trigger quadrant of a triac is detected then the unit will
conclude that it has found a thyristor. Please see the technical
specifications for more details. The Atlas SCR (model SCR100)
instrument is designed for analysing triacs and thyristors that require
currents up to 100mA to operate.

Atlas DCA Pro User Guide April 2015 – Rev 1.4
Page 28
Voltage Regulator
Red-IN Green-OUT
Blue-GND
V
OUT
=5.024V
IQ=2.54mA
V
DO
=1.83V
Voltage Regulators
Voltage regulators are available in many different types and
different packages.
The DCA Pro is able to identify many types of regulator,
typically regulators with outputs less than 8V, depending on
current requirements.
When a regulator is identified, its
pinout, output voltage, quiescent current
consumption and drop-out voltage are
displayed.
Negative voltage regulators (such as
the popular 79L05) will be shown with
a negative V
OUT
figure.
The displayed drop-out voltage (VDO) is the voltage that is required
between input and output of the regulator to enable voltage regulation
to take place. Common regulators have a drop-out voltage of around
2V. Many “Low drop-out” regulators may have a drop-out voltage of
0.5V or less. The DCA Pro measures drop-out at very low load
currents on the regulator’s output (typically less than 1mA). The dropout voltage of a regulator increases significantly with load current.
Some voltage regulators are not stable when used outside of their
intended circuitry (decoupling capacitors, proper loads etc). The
DCA Pro may not be able to identify the regulator correctly if it is not
stable during analysis.

Atlas DCA Pro User Guide April 2015 – Rev 1.4
Page 29
PC Software Installation
The DCA Pro can be used in conjunction
with a PC running Windows XP or later.*
Software is provided on the included USB
flash drive. Alternatively, you can download the
latest PC software package from:
www.peakelec.co.uk/downloads/dcaprosetup.exe
Before you install the software, ensure you have sufficient (administrator)
rights on your machine. Additionally, ensure your PC meets the following
requirements:
Windows XP(SP3), Vista, 7 or later.*
1GB RAM.
1GB Hard Disk free.
Display size 1024 x 600 minimum (typical netbook resolution).
16 bit colour or better.
USB 1.1 or better.
.NET framework 4 (automatically installed if required).
Internet connection required for online updates.
* Verified on UK localisation of Windows 8 at time of this user guide going to
print.
The installation process varies depending on your version of Windows. Select
the appropriate section over the next few pages and follow the step-by-step
instructions very carefully.
Please don’t connect your DCA pro just yet

Atlas DCA Pro User Guide April 2015 – Rev 1.4
Page 30
Windows XP Installation
1. Make sure you have the latest Windows Updates and Service Pack 3.
2. Run “Setup.exe” on the supplied USB flash drive. Alternatively, you can
download and run the digitally signed installation file from our website:
www.peakelec.co.uk/downloads/dcaprosetup.exe
3. During the setup process, you may be asked to install .NET Framework 4.
The installation files for that are included on the USB flash drive and don’t
need to be downloaded. If you are running the installation from a
downloaded copy of our software then you may be prompted to download
the .NET package. You need to accept the Microsoft agreement and the
process will complete in a few minutes (sometimes up to 10 minutes).
4. When the DCA Pro software installation
is complete, you can plug in your
DCA Pro to a convenient USB socket.
It’s best to choose a socket directly on
your computer rather than a hub. After a
few seconds, you should be presented
with the “Found New Hardware
Wizard”. Make sure you select “Install
from a list or specific location” and then click Next.
5. You will then be presented with this
window. Make sure the box “Include
this location in the search” is checked.
It should already be filled with the
location for the Peak Driver. Then click
Next.
6. Your DCA Pro should chime when
your software is ready to use.

Atlas DCA Pro User Guide April 2015 – Rev 1.4
Page 31
Windows Vista, 7 and 8 Installation
1. Make sure you have the latest Windows Updates and Service Pack.
2. Run “Setup.exe” on the supplied USB flash drive. Alternatively, you can
download and run the digitally signed installation file from our website:
www.peakelec.co.uk/downloads/dcaprosetup.exe
3. During the setup process, you may be asked to install .NET Framework 4.
The installation files for that are included on the USB flash drive and don’t
need to be downloaded. If you are running the installation from a
downloaded copy of our software then you may be prompted to download
the .NET package. You need to accept the Microsoft agreement and the
process will complete in a few minutes (sometimes up to 10 minutes).
4. Some systems may warn you that the
driver is not signed. The driver is in
fact a standard Microsoft WinUSB
driver that is set to look for the
DCA Pro identifier, so it is fine to
accept the warning and proceed.
5. When the DCA Pro software installation is complete, you can plug in your
DCA Pro to a convenient USB socket. It’s best to choose a socket directly
on your computer rather than a hub. Windows should install the drivers
automatically although it can take a minute or
two. You should see the driver installation
activity in the bottom right of your screen.
6. If prompted, let Windows download the latest WinUSB drivers. Don’t
worry if it takes a few minutes.
7. Your DCA Pro should chime when your software is ready to use.

Atlas DCA Pro User Guide April 2015 – Rev 1.4
Page 32
Running the DCA Pro PC software for the first time
Now you’re ready to start the DCA Pro
companion software. You can start the software in
the following ways:
All Windows Versions
Double click on the desktop icon.
or
Click on the “DCA Pro” item in the “Peak” folder
of your start menu.
Windows Vista, 7 and 8 (Desktop mode)
Type “DCA Pro” into your start menu search box.
It doesn’t matter if you connect your DCA Pro before or after starting the
software.
When your DCA Pro is connected and your software is running, you should see
the green message DCA Pro connected in the bottom left corner of the
program window.
For the first time you use the software, if you see the message:
DCA Pro disconnected then try unplugging the USB cable, wait a few
seconds and plug back in. If that doesn’t work (depending on your version of
Windows) then you may need to restart your PC to allow the WinUSB drivers
to initialise.
If you’re still having problems then you may wish to try uninstalling the
software and drivers and then re-trying the installation process by following the
step-by-step instructions shown earlier.
Please contact us if you have any difficulties, we’re here to help.

Atlas DCA Pro User Guide April 2015 – Rev 1.4
Page 33
Analysing Semiconductors – PC mode
When the DCA Pro is connected to the PC and the PC is running the
companion software, the instrument can be used from the PC screen or from
the instrument itself.
Pressing “Test” will initiate a component analysis in just the same way as the
standalone mode.
Any test results are automatically passed to the PC software and displayed in a
text window. Additionally, the component schematic and the colour-coded
pinout are also displayed:
Note that the component schematic is displayed in colour to illustrate which
colour test lead is connected to each component lead.
or

Atlas DCA Pro User Guide April 2015 – Rev 1.4
Page 34
Curve Tracing
After a component has been analysed, you can perform further tests on the
component, such as curve tracing various component parameters.
Curve tracing is best performed after the DCA Pro has correctly identified the
component and correctly identified the pinout.
Depending on the component type, various curve options will become
available from the “Graphs” menu.
Selecting the desired curve type will take you to a fresh curve tab.
In many cases, you can simply start a new curve with the
automatically selected parameters by clicking the curve
“start” button.
You may adjust the parameters, but any parameters that are out of range may
lead to unexpected results. Refer to Appendix C in this user guide that shows
the analysis test circuits to see how test parameters are applied.
You may not be able to perform curve tracing in the following circumstances:
Transistor gain is very low and the DCA Pro is unable to generate
sufficient base current to obtain a sufficient span of collector current.
Transistor (Darlington) gain is extremely high which means that the tiny
base currents cannot be generated with fine enough resolution.
If the component requires more than 12mA (into a short circuit) to analyse.
If the component requires more than 12V (into an open circuit) to analyse.
If the component requires a combination of voltage and current that cannot
be generated (due to 700 Ohm current limiting resistance).
If you want to test other components using the same test parameters
(to easily compare parts), connect your component in exactly the same
configuration and press “Start” on the graph tab. Don’t press “Test” as
that will cause the test parameters to be re-evaluated for the new
component and you won’t be able to plot with the same values as your
previous test.

Atlas DCA Pro User Guide April 2015 – Rev 1.4
Page 35
Curve Tracing – Export Raw Data
After the curve tracing operation has completed, you can copy the raw
measurement data into the clipboard ready to be pasted into your spreadsheet
program.
Pasting the data into a spreadsheet is an ideal way of documenting important
test results.
Simply right-click on one of the curves and select “Copy all”. All the raw
measurement data that created the curves is now in the clipboard. You can then
paste the data into your spreadsheet.
This feature has been tested with Microsoft Excel™©, Softmaker Planmaker©
and Apache Open Office™©. Other spreadsheet programs should work fine
too.
Once the raw data is pasted into your spreadsheet, you can perform your own
tasks such as charting and mathematical analysis.

Atlas DCA Pro User Guide April 2015 – Rev 1.4
Page 36
Special Functions
Firmware Upgrade
From the program’s “Help” menu, select “Check for Updates”.
If you are connected to the internet, the program will check for new PC
Software (that includes the latest firmware). If newer software is available, you
will be guided to the download location.
The programming operation should take no more than a minute or so. Don’t
interrupt the process and wait for the confirmation that the programming
operation has been successfully completed.
Don’t worry if the firmware upgrade process doesn’t succeed first
time. Windows sometimes takes time to prepare the built-in HID
driver that is used during the firmware upgrade process. If the
firmware upgrade process fails, don’t panic, just try again, it should be
fine once Windows gets its built-in driver initialised.
LCD Contrast
The PC software allows you to adjust the instrument’s LCD contrast.
From the program’s “DCA Pro” menu, select “LCD Contrast”.
You will then be presented with a simple slider to make your contrast
adjustments. When you’re finished, you can click on the cross of the slider
window. Your new contrast value is automatically saved within the DCA Pro.

Atlas DCA Pro User Guide April 2015 – Rev 1.4
Page 37
Audible Settings
Your DCA Pro has a built-in sounder for alerting you to various
test results and conditions. Additionally, the sounder produces
short tones to reinforce the tactile feedback when pressing
buttons.
Here is a summary of the various tone types:
Condition Tone Type
Power-up. Rising 3 notes.
Power-down, including auto-off. Falling 3 notes.
Button press. Very short “blip”.
Component detected. Short Low-High.
Faulty, unknown or no part detected. Long High-Low.
If you wish, you can switch the audible alerts on or off.
To change the current setting for audible alerts, while the unit is already on,
simply press and hold the on-test button for a few seconds.
The new sound setting will then be confirmed on the screen.
Sound is Off
Sound is On
To change back again, simply press and hold the on-test button again for a
few seconds.

Atlas DCA Pro User Guide April 2015 – Rev 1.4
Page 38
Please replace
the battery.
Care of your Atlas DCA Pro
Your DCA Pro should provide many years of service if used in
accordance with this user guide. Care should be taken not to expose
your unit to excessive heat, shock or moisture. Additionally, the
battery should be replaced at least every 12 months to reduce the
risk of leak damage.
If a low battery warning message
appears, immediate replacement of the
battery is required.
The battery can be replaced by carefully opening the DCA Pro by removing
the three screws from the rear of the unit. Take care not to damage the
electronics.
Avoid touching
this area
We recommend that the battery is replaced with a high quality battery
equivalent to an Alkaline AAA, LR03 or MN2400 (1.5V). Replacement
Alkaline AAA batteries are available from many retail outlets.
DO NOT OVER-TIGHTEN THE SCREWS

Atlas DCA Pro User Guide April 2015 – Rev 1.4
Page 39
Self test failed
CODE: 2
Self Test Procedure
Each time the DCA Pro is powered up, a self test procedure is performed. In
addition to a battery voltage test, the unit measures the performance of many
internal functions such as the voltage and current sources, amplifiers, analogue
to digital converters and test lead multiplexers. If any of these function
measurements fall outside tight performance limits, a message will be
displayed and the instrument will switch off automatically.
If the problem was caused by a
temporary condition on the test clips,
such as applying power to the test clips,
then simply re-starting the unit may
clear the problem.
If a persistent problem does arise, it is likely that damage has been caused by
an external event such as excessive power being applied to the test clips. If the
problem persists, please contact us for further advice, quoting the displayed
fault code.
If there is a low battery condition, the automatic self test procedure
will not be performed. For this reason, it is highly recommended that
the battery is replaced as soon as possible following a low battery
warning.

Atlas DCA Pro User Guide April 2015 – Rev 1.4
Page 40
Appendix A – Troubleshooting
First thing to do:
It is important that you ensure you’ve got the latest version of firmware
(software that’s inside the DCA Pro instrument) and the latest version of PC
software. You can do this by connecting the unit to your PC and selecting the
“Help” menu and then click on “Check for Updates”.
It is possible that a firmware update and/or a PC software update will resolve
your problem.
Here’s a further guide to helping you with your DCA Pro if you’re having
problems:
Problem Possible Solutions
PC software always says
“Disconnected” even when
the DCA Pro is connected
and powered up.
Unplug USB, wait a few seconds and plug
back in.
Try a different USB socket on your PC.
Restart your PC.
Uninstall and then Re-install the software.
Unit displays
Boost timeout.
It is possible that your battery is in poor
condition. Replace with a new Alkaline
AAA battery.
Measured parameters don’t
agree with the component
datasheet.
Most semiconductors have very wide
tolerances and even identical transistor types
can show huge gain variation between them.
Characteristics shown in datasheets may be
specified at different test conditions
compared to the test conditions used by the
DCA Pro.
Much more help is available at www.peakelec.co.uk/content/support.html
Feel free to contact us for technical assistance. Our contact details are shown at
the end of this user guide.

Atlas DCA Pro User Guide April 2015 – Rev 1.4
Page 41
Appendix B – Summary Technical Specifications
All values are at 25°C unless otherwise specified. Specifications subject to change.
Parameter Min Typ Max Note
Bipolar Transistors
Measurable current gain (hFE) range 2 32000 2
hFE accuracy (hFE<2000) ±3% ±5 hFE 2,8
hFE test voltage (V
CEO
) 3.0V 9.0V 2
hFE collector test current
4.75mA 5.00mA 5.25mA
Base current for VBE measurement 4.75mA 5.00mA 5.25mA
VBE accuracy ±1% ±0.006V 8
VBE resolution 3.0mV 6.0mV
VBE for Darlington identification 0.95V 1.00V 1.80V 3
VBE for Darlington (shunted types) 0.75V 0.80V 1.80V 4
VBE threshold for germanium 0.55V
Acceptable VBE 1.80V
Base-emitter shunt threshold
50kΩ 60kΩ 70kΩ
Acceptable collector leakage 1.5mA 6
Leakage current accuracy ±2% ±0.02mA
MOSFETs/IGBTs
Enhancement mode V
GS(ON)
range 0.0V 10.0V 5
Depletion mode V
GS(ON)
range -5.0V 0.0V 5
V
GS(ON)
accuracy ±2% ±0.01V 5
Drain current at V
GS(ON)
4.75mA 5.00mA 5.25mA
Drain-Source voltage at V
GS(ON)
3.5V 9.0V 5
Acceptable gate-source resistance
8kΩ
IGBT collector saturation threshold 0.40V 9
JFETs
Pinch-off V
GS(OFF)
range -10.0V 2.5V
Pinch-off drain-source current 2.5µA 5.0µA 10.0µA
Turn-on V
GS(ON)
range -9.0V 2.5V
Turn-on drain-source test current 4.75mA 5.00mA 5.25mA
VGS accuracy ±2% ±0.01V
Transconductance (gfs) range 99mA/V
gfs test drain current span 3.0mA to 5.0mA
gfs accuracy (<20mA/V) ±5% ±2mA/V
gfs accuracy (>20mA/V) ±10% ±5mA/V
VDS for I
DSS
measurement (VGS=0) 3.0V 3.25V

Atlas DCA Pro User Guide April 2015 – Rev 1.4
Page 42
Summary Technical Specifications continued:
All values are at 25°C unless otherwise specified. Specifications subject to change.
Parameter Min Typ Max Note
Thyristors and Triacs
Gate trigger test current 8.0mA 10.0mA 12.0mA 7
Load hold test current 10.0mA 15.0mA
Diodes and LEDs
Diode forward test current 4.75mA 5.00mA 5.25mA
Diode forward voltage accuracy ±1% ±0.006V
Acceptable VF for a diode @ 5mA 0.15V
VF for LED identification 1.50V 4.00V
Zener Diodes
Zener voltage range at 5mA 1.8V 9.0V
Zener voltage range below 5mA 9.0V 12.0V
Zener diode test current 0.50mA 5.00mA 5.25mA
Voltage Regulators
Input test voltage range (IQ<3.0mA) 1.10V 10.0V
Input test voltage range (IQ<5.0mA) 8.0V
Quiescent current range (IQ) 0.00mA 5.00mA
Quiescent current accuracy ±2% ±0.02mA
Dropout voltage range (VDO) 0.00V 3.00V
Dropout voltage accuracy ±2% ±0.02V
Output voltage accuracy ±1% ±0.006V
Load test current 0.13mA 1.25mA
General Parameters
Peak test current into S/C -15.5mA 15.5mA 1
Peak test voltage across O/C -13.5V 13.5V 1
Short circuit threshold
5Ω 10Ω 20Ω
1
Battery type 1 x AAA, LR03, MN2400, Alkaline 1.5V
Battery voltage range 1.00V 1.50V 1.60V
Battery warning threshold 1.00V
USB current consumption 500mA peak active. ≤2mA sleep.
Dimensions (body) 103 x 70 x 20 mm
1. Between any pair of test clips.
2. Collector current of 5.0mA. Gain accuracy valid for gains less than 2000.
3. Resistance across reverse biased base-emitter > 60kΩ.
4. Resistance across reverse biased base-emitter < 60kΩ.
5. Load current of 5.0mA.
6. Collector-emitter voltage of 10.0V.
7. Thyristor quadrant I, Triac quadrants I and III.
8. BJT with no shunt resistors.
9. Load current typically 10.0mA.

Atlas DCA Pro User Guide April 2015 – Rev 1.4
Page 43
Appendix C – Analysis Test Circuits
The DCA Pro analyses components by applying signals to the
component under test while in a “test circuit”. The test circuits that the
DCA Pro uses to analyse various components are shown below.
These test circuits are presented here to assist in your understanding of
the test conditions that are possible when testing in standalone mode
and in the PC mode (for curve tracing etc).
Transistor Test Circuit
Example shown is for an NPN transistor. Polarities are reversed for
PNP devices.

Atlas DCA Pro User Guide April 2015 – Rev 1.4
Page 44
JFET/MOSFET/IGBT Test Circuit
It’s important to note that the gate-source voltage can be driven
negative by making the source voltage drive higher than the gate
voltage drive. When this is done however, there is less voltage
available to be across the drain-source nodes and the load resistor.
Example shown is for an N-Channel JFET. Polarities are reversed for
P-Channel devices.

Atlas DCA Pro User Guide April 2015 – Rev 1.4
Page 45
Diode Test Circuit
This test circuit is used for testing both the forward and reverse
characteristics of diodes. Reverse characteristics are particularly
useful for the testing of Zener diodes.
For the standalone mode, the voltage is automatically adjusted to
obtain a “target” current of 5mA. For Zener diodes that have a
breakdown voltage of more than about 9V, the target current of 5mA
cannot be obtained.

Atlas DCA Pro User Guide April 2015 – Rev 1.4
Page 46
Voltage Regulator Test Circuit
The test circuit shown here is used for the analysis of voltage
regulators (positive regulators in this example). Note that the range of
regulator voltages supported will depend on the quiescent current (IQ).
A higher quiescent current will cause more voltage to be dropped
across the sense resistor and yield less voltage for the regulator itself.
Note also that some voltage regulators, particularly low dropout types
(LDO), are not stable when tested by the DCA Pro.

Atlas DCA Pro User Guide April 2015 – Rev 1.4
Page 47
Appendix D – Warranty Information
Peak Satisfaction Guarantee -
If for any reason you are not completely
satisfied with your DCA Pro within 14 days of purchase you may return the
unit to your distributor. You will receive a refund covering the full purchase
price if the unit is returned in perfect condition.
Peak Warranty
- The warranty is valid for 24 months from date of
purchase. This warranty covers the cost of repair or replacement due to defects
in materials and/or manufacturing faults. The warranty does not cover
malfunction or defects caused by:
a) Operation outside the scope of the user guide.
b) Unauthorised access of the unit (except for battery replacement).
c) Accidental physical damage or abuse.
d) Normal wear and tear.
Statutory rights unaffected. Claims must be accompanied by proof of purchase.
Appendix E – Disposal Information
WEEE (Waste of Electrical and Electronic Equipment),
Recycling of Electrical and Electronic Products
In 2006 the European Union introduced regulations (WEEE) for the collection
and recycling of all waste electrical and electronic equipment. It is no longer
permissible to simply throw away electrical and electronic equipment. Instead,
these products must enter the recycling process. Each individual EU member
state has implemented the WEEE regulations into national law in slightly
different ways. Please follow your national law when you want to dispose of
any electrical or electronic products. More details can be obtained from your
national WEEE recycling agency. If in doubt, you may send your Peak
Product to us for safe and environmentally responsible disposal.
At Peak Electronic Design Ltd we are committed to continual product development and improvement.
The specifications of our products are therefore subject to change without notice.
© 2012/2015 Peak Electronic Design Limited - E&OE
Designed and manufactured in the UK
www.peakelec.co.uk Tel. +44 (0) 1298 70012 Fax. +44 (0) 1298 70046
 Loading...