

PDi SQUID Operation Manual

Shaft Quantitative Inspection Device (SQUID)
Field Operations Manual
Pile Dynamics, Inc.
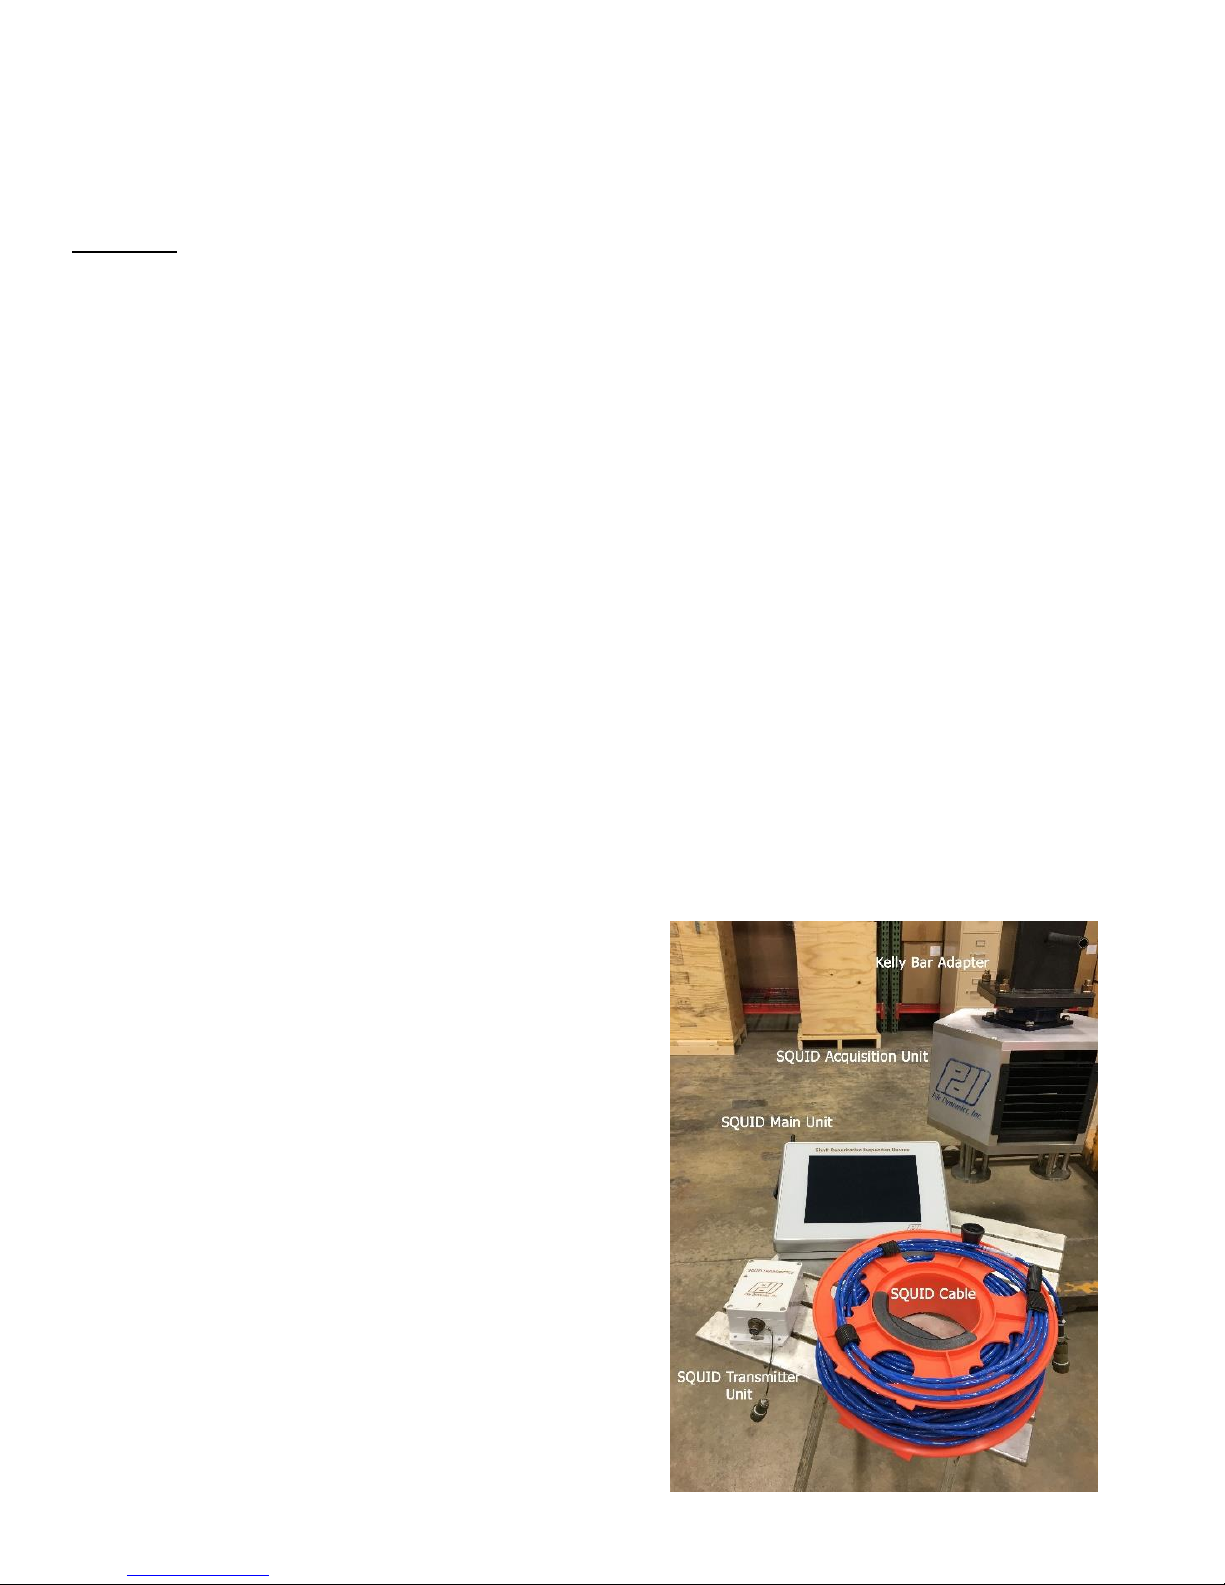
Device Nomenclature:
SQUID Main Unit: Hand held data collection device
SQUID Acquisition Unit: Down-hole sensor device
SQUID Transmitter Unit: Wireless communication adapter between the Acquisition Unit and the Main Unit.
Setup:
1. Place SQUID Acquisition Unit on level ground
2. Attach appropriate Kelly bar adapter
3. Verify that the penetrometers and the guide bars for the displacement plates are not damaged
4. Connect one end of the SQUID cable to the connector on the SQUID Acquisition Unit
5. Connect the other end of the SQUID cable to either the Transmitter Unit or the Main Unit
6. If a Transmitter Unit is used, connect power connector and verify the green light is lit
7. Turn on power to the SQUID Main Unit
8. Using the Main unit, enter the SQUID program located on the Windows 7 Desktop
9. Verify that the drop down box next to the connect button is set to “COM7”
10. Press “Connect”
If wired operation, skip to step 16
11. The “Configure Bluetooth” menu should open in the upper right hand corner
12. Press “Scan” to scan for the Transmitter box
a. The scan command will last for 30 seconds
b. If no Transmitter IDs appear, verify power to the SQUID Transmitter Unit and press “Drop” then
“Reset” then “Scan”
13. Select the appropriate Transmitter ID: SQUID_v_2_3+<Your serial number>
14. Press “Connect”
15. When the connection is valid, the status bar in the lower right hand corner will read “connected”
16. Press “SG Read” to import strain gauge data from the SQUID Acquisition Unit
17. Press “Balance” to balance the gauges – wait 20 seconds for the balance to apply
18. Press “Clear Data” to erase all accumulated data and zero the sensors
19. Move the position sensing plates and observe changes on the graph
20. The SQUID system is now setup and operational
Operation:
Note: The SQUID Acquisition Unit can be damaged in the case of non-uniform loading. Always monitor the
force and position measurements during testing. The test should be stopped immediately and restarted if the
difference in force on the penetrometers exceeds 5 kips.
1. Connect Kelly bar to SQUID Acquisition Unit, tighten adapter
2. Lift the SQUID Acquisition Unit above the drilled shaft to be tested
3. While the SQUID is free hanging – Press “Clear Data”
4. “Locate” the bottom of the hole by lowering the SQUID slowly and applying the Kelly Bar weight to
the unit
5. Data will be recorded from the penetrometers and position sensors
6. Monitor the force and position sensors on the SQUID Main unit
7. Lift the SQUID so that it is an estimated 12 inches above the bottom sediment layer
8. Press “Clear Data” to prepare for the test
9. Press “Begin Test”
a. The status bar will read “ready”
b. The test will trigger when a sediment layer is detected
10. Lower the SQUID to the bottom of the hole and apply Kelly Bar weight again slowly
11. Return the SQUID to its initial position of 12 inches above the sediment layer
12. The status bar will read “capture” when the record is done
a. If a “capture” event does not occur, the record can still be saved by pressing “Save Data”
13. Press “Save Data” to save the test
14. Press “Clear Data” to prepare for the next test
 Loading...