

Page 1
PCS digital ™
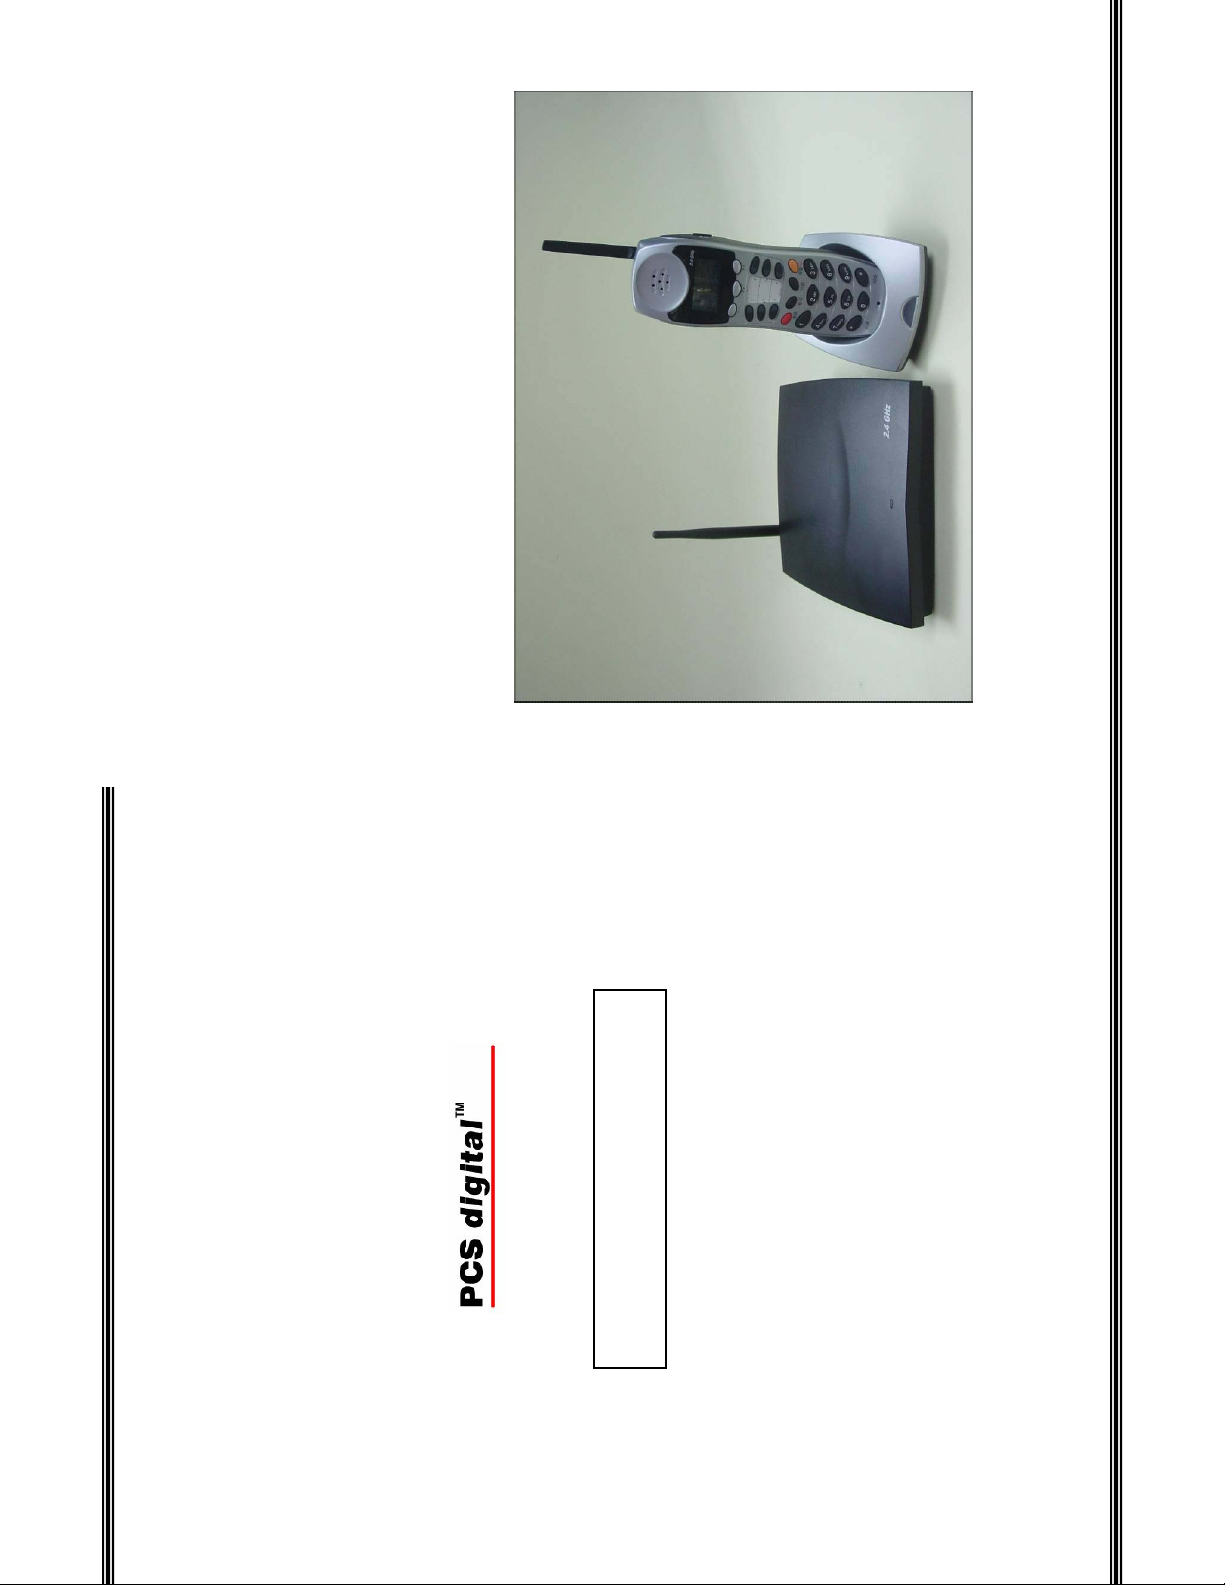
2.4 GHz Wireless Handset
Part Number
www.pcsdigital.net
Copyright © 2005 PCS digital™ All rights reserved
- 44 -
Page 2
43 -
-
Wireless Handset
Notes:
Revision Description of Changes Date Released
Preliminary Release – PAL 12/2004
Version 1.0 - PAL Reformat to Booklet size 1/2005
Notes:
Revision Table
- 2 -
Page 3

3 -
-
Table of Contents
Three (3) Soft Buttons................................................................................. 8
Dial Keypad................................................................................................ 9
Talk............................................................................................................. 9
Flash (Transfer) ......................................................................................... 9
Function / Feature...................................................................................... 9
Hold (Power).............................................................................................. 9
Programmable Feature Buttons................................................................. 9
Mute............................................................................................................ 9
Volume...................................................................................................... 10
Headset Jack ............................................................................................ 10
Speaker..................................................................................................... 10
TELEPHONE CALLOUTS .................................................................................... 6
Wireless Handset
TABLE OF CONTENTS .................................................................................. 3
INTRODUCTION ............................................................................................. 5
INTRODUCTION ............................................................................................. 5
FEATURES ........................................................................................................ 5
COMPARISON TABLE ................................................................................... 7
FEATURE MATRIX......................................................................................... 7
PART NUMBERS.............................................................................................. 8
FIXED BUTTON DESCRIPTIONS (HANDSET) ...................................................... 8
DEFAULT BUTTON LAYOUT....................................................................... 8
QUICK SETUP GUIDE.................................................................................. 11
Wireless Key Telephone Handset ............................................................. 12
Wireless Base Unit ................................................................................... 12
Wall Mount............................................................................................... 13
INSTALLATION ............................................................................................... 11
GETTING STARTED......................................................................................... 11
POWER ON / OFF ............................................................................................ 16
OPERATION ................................................................................................... 16
Ring .......................................................................................................... 17
NORMAL OPERATION ..................................................................................... 16
DISPLAY ICONS............................................................................................ 17
Telephone Callouts .............................................................................................. 6
Termnate a Call.................................................................................................. 38
Tone Ring Mode ................................................................................................ 26
Transfer................................................................................................................ 9
Troubleshooting ................................................................................................. 29
U
User's Guide....................................................................................................... 37
V
Vibration ............................................................................................................25
Vibrator.............................................................................................................. 25
Voice Announce ................................................................................................ 26
Volume Bar........................................................................................................ 10
- 42 -
Page 4

41 -
-
Base Unit....................................................................................................... 30
Dip Switches ................................................................................................. 30
Handset ......................................................................................................... 29
Procedure ...................................................................................................... 29
Wireless Handset
O
Operation ........................................................................................................... 16
Out of Range...................................................................................................... 18
P
Part Numbers ....................................................................................................... 8
Power Button .......................................................................................................9
Power On/Off............................................................................................... 16, 37
Private mode ...................................................................................................... 26
Programmable Buttons......................................................................................... 9
Programming Fields........................................................................................... 21
Q
Quick Setup Guide............................................................................................. 11
R
Registration.................................................................................................. 18, 23
Reset Handset .................................................................................................... 28
Ring.................................................................................................................... 25
Ring and Vibrate................................................................................................ 25
Ring Mode ......................................................................................................... 25
S
Soft Buttons ................................................................................................... 8, 20
Base Unit....................................................................................................... 36
Beep Cadence................................................................................................ 35
Speaker Button................................................................................................... 10
Specification
Electrical ....................................................................................................... 35
Frequency Range........................................................................................... 35
Lamp Cadence............................................................................................... 35
Ring Cadence ................................................................................................ 35
T
Talk Button .......................................................................................................... 9
Battery ...................................................................................................... 17
Out of Range............................................................................................. 18
No Link to Base ........................................................................................ 18
Registration .............................................................................................. 18
Key Lock (Flash / Transfer) .....................................................................18
Key Unlock ............................................................................................... 19
PROGRAMMING FIELDS .................................................................................. 21
LANGUAGE .................................................................................................... 22
REGISTRATION ............................................................................................... 23
DE-REGISTRATION......................................................................................... 24
RING MODE ................................................................................................... 25
AUTO PICK UP................................................................................................ 26
RESET HANDSET ............................................................................................ 28
HANDSET PROGRAMMING....................................................................... 20
Handset Registration................................................................................ 29
De-registering a Handset ......................................................................... 31
De-registering a Handset ......................................................................... 32
FREQUENCY RANGE....................................................................................... 35
ELECTRICAL SPECIFICATION (HANDSET) ....................................................... 35
LAMP CADENCE (HANDSET) .......................................................................... 35
BEEP / RINGER CADENCE (HANDSET) ............................................................ 35
BASE UNIT ..................................................................................................... 36
FCC RULES AND REGULATIONS .................................................................... 36
REGISTRATION AND TROUBLESHOOTING......................................... 29
SPECIFICATIONS ......................................................................................... 35
BELT CLIP...................................................................................................... 37
POWER ON/OFF ............................................................................................. 37
USER’S GUIDE ............................................................................................... 37
Hold.......................................................................................................... 38
Transfer .................................................................................................... 38
KEY LOCK ..................................................................................................... 37
ANSWER A CALL............................................................................................ 38
TERMINATE A CALL....................................................................................... 38
PLACE A CALL ............................................................................................... 38
- 4 -
Page 5

5 -
-
PCS digital™ designed the Wireless Key Telephone Handset to function similar to
the 31-button telephone with the mobility of a wireless environment. The handset
has a hot keypad, allowing telephone numbers to be dialed without having to press
the “Talk” or “Speaker” buttons and it can be used for hands free communications.
The Wireless Handset has 3 interactive soft buttons, 6 programmable flexible
buttons, and 7 fixed buttons –including the volume bar (to increase or decrease the
volume) and speaker buttons which are found on the sides. And to make the most of
the Wireless Handset , it has a 2.5 mm headset jack and it can be programmed to
ring, vibrate or ring and vibrate for each incoming call, making the PCS digital
Wireless Key Telephone Handset one of the most versatile key telephone available
Wireless Handset
Introduction
The Wireless Key Telephone Handset was designed to allow you to move freely
while maintaining access to any number of outside lines, and resources of your
office telephone system. It can be used for administrative and system programming
as well as function in a hands free environment. Most of the PCS digital™ systems
support a maximum of 4 wireless handsets using 2 remote base units; each can
support 2 simultaneous (Central Office or Intercom) conversations.
Features (Handset)
for businesses today.
Hold................................................................................................................. 9
Programmable Buttons.................................................................................... 9
Soft Buttons..................................................................................................... 8
Speaker.......................................................................................................... 10
Talk ................................................................................................................. 9
Transfer ........................................................................................................... 9
Volume Bar................................................................................................... 10
Flash..................................................................................................................... 9
Frequency Range ...............................................................................................35
G
Getting Started ................................................................................................... 11
H
Handset Programming ....................................................................................... 20
Handsfree........................................................................................................... 26
Headset Jack ...................................................................................................... 10
Hold ................................................................................................................... 38
Hold Button ......................................................................................................... 9
Hot Keypad.......................................................................................................... 5
Base Unit....................................................................................................... 12
Handset ......................................................................................................... 11
I
Installation ......................................................................................................... 11
Introduction.......................................................................................................... 5
K
Key Lock ........................................................................................................... 37
Key Unlock........................................................................................................ 19
L
Language............................................................................................................ 22
N
No Link to Base ................................................................................................. 18
Normal Operation
Display Callouts............................................................................................ 16
Normal Operation Mode
Dip Switches ................................................................................................. 33
- 40 -
Page 6
r
39 -
-
LED Cadence ................................................................................................ 14
Wireless Handset
INDEX
A
Answer a Call..................................................................................................... 38
Auto Pick up ...................................................................................................... 26
B
Background Music............................................................................................. 17
Base Unit
Belt Clip............................................................................................................. 37
C
Comparison Table................................................................................................ 7
D
Default Button Layout .........................................................................................8
Handset 1 ...................................................................................................... 34
De-Register
Handset 2 ...................................................................................................... 34
De-Registration.................................................................................................. 24
Base Unit....................................................................................................... 33
Dip Switches ................................................................................................. 33
Handset ......................................................................................................... 32
Battery........................................................................................................... 17
Key Lock....................................................................................................... 18
Ring Modes................................................................................................... 17
Dial Keypad ......................................................................................................... 9
Display ICON .................................................................................................... 17
F
FCC Rules and Regulations ............................................................................... 36
Feature Buttons.................................................................................................... 9
Feature Matrix...................................................................................................... 7
Dial Keypad ....................................................................................................9
Feature Button................................................................................................. 9
Flash................................................................................................................ 9
Function Button............................................................................................... 9
Features................................................................................................................ 5
Fixed Buttons....................................................................................................... 8
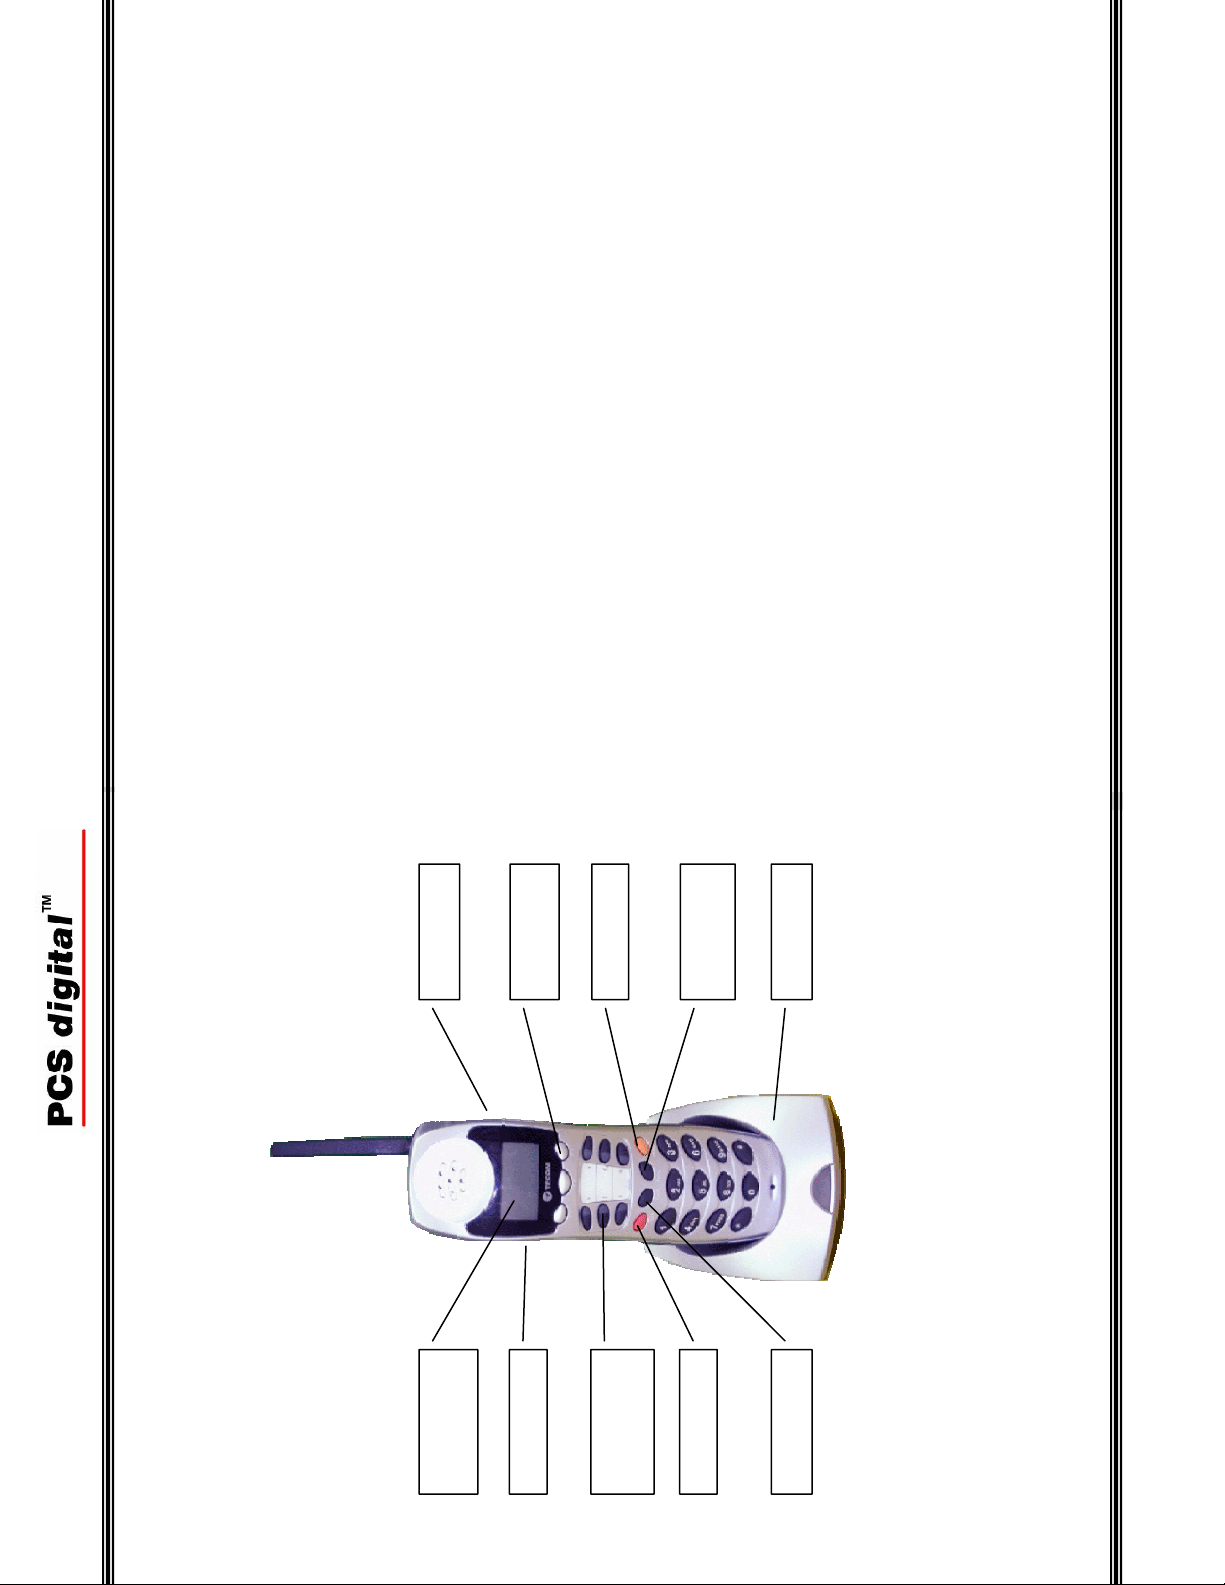
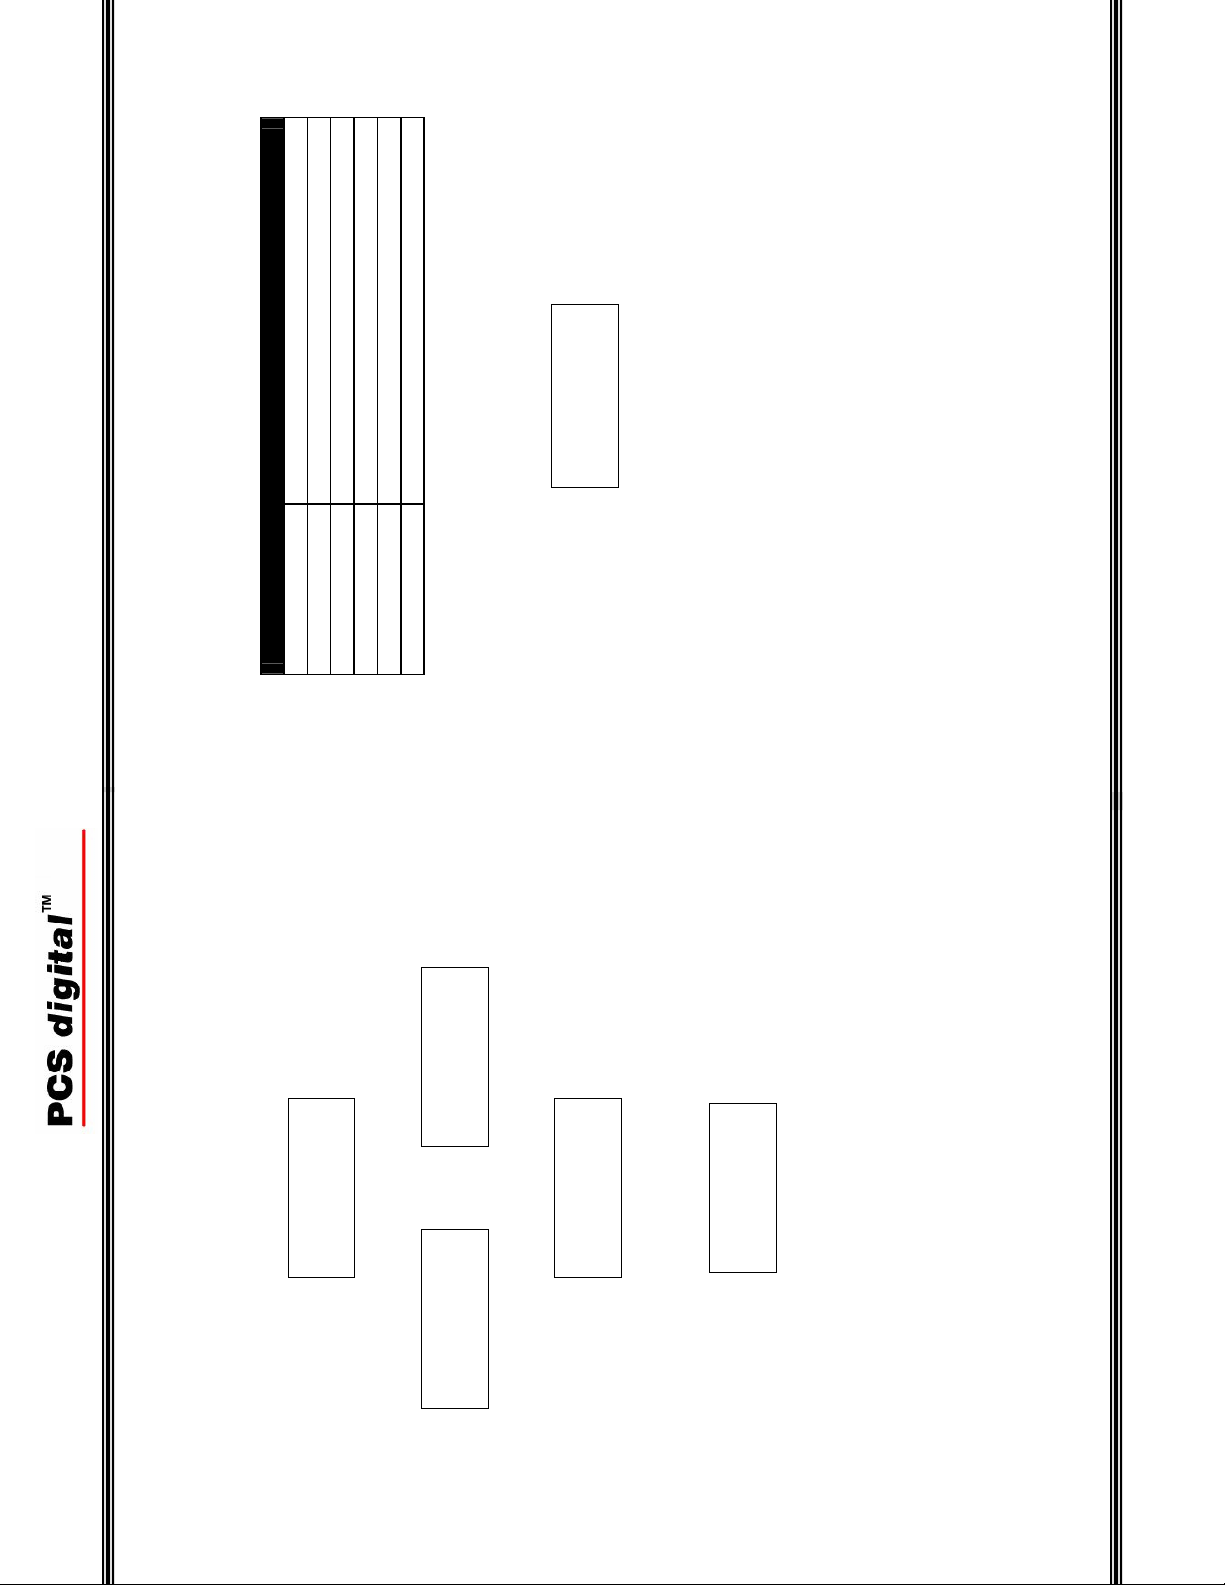
Speaker
Interactive Soft
Buttons
Hold Button
Function Button
Feature Button
Charging Base
6-Programmable
Back Lit, 3 line
Telephone Callouts
LCD
Volume Ba
Buttons
Talk Button
Flash / Transfer
- 6 -
Page 7
Handset
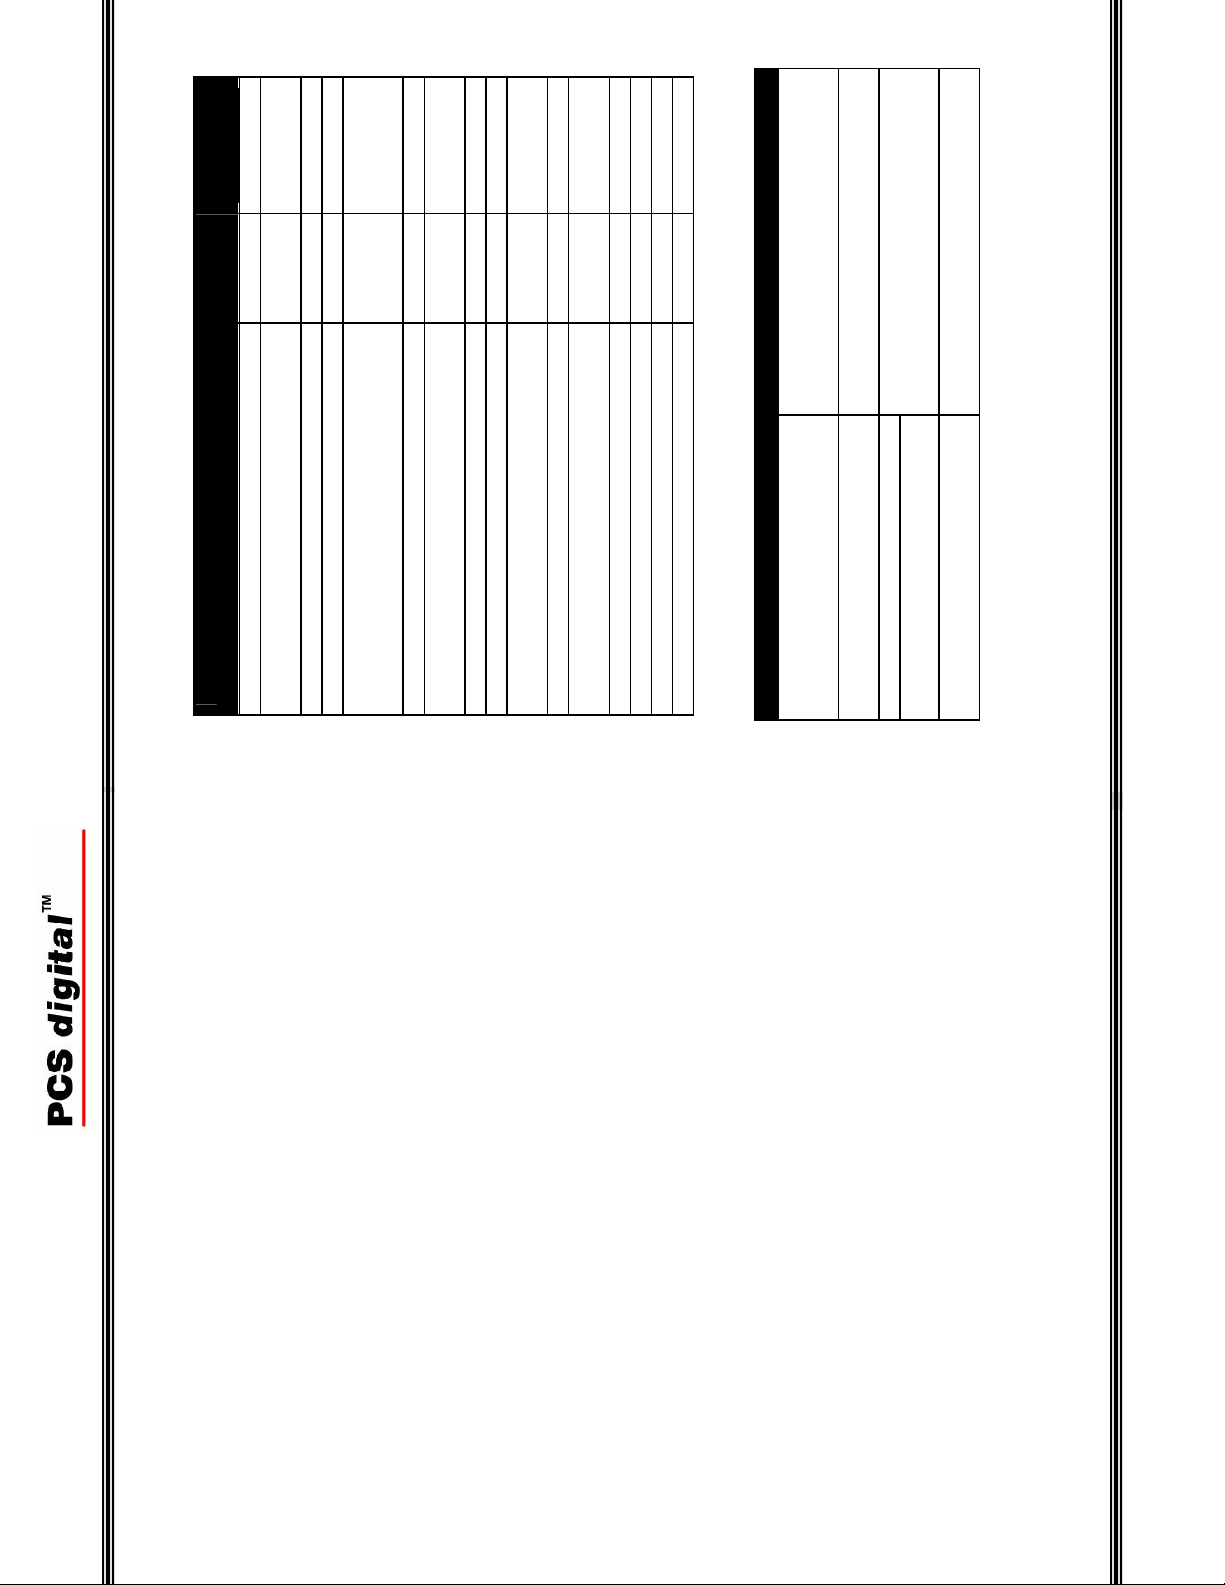
Feature 31-Button Wireless
button)
3 – Line
16 – Character
16 –
Yes (On LCD)
Character
LED)
button)
Yes
LED)
per second) helps eliminate frequency
interference.
Nickel Metal Hydride Battery (depending on
environmental conditions)
Operating Range (depending on the
environment)
2
Telephones
7 -
-
Battery Charge Indicator N/A Yes (On LCD)
Conference or Page Yes Yes (Requires a
Dial Keypad (12 key touch tone®) Yes Yes
Hold Yes Yes
LCD 2 – Line
LCD Backlit N/A Yes
Message Waiting Indicator Yes (with
Off-Hook Voice Announce Yes No
Programmable Buttons 20 6
Redial Yes Yes (Requires a
Soft Buttons 3 3
Speaker Yes (With
System Programming Yes Yes
Talk N/A Yes
Transfer / Flash Yes Yes
Wireless Handset
Comparison Table
31-Button display telephone and the Wireless Key Telephone Handset
Volume UP/Down Yes Yes – Left Side
Feature Description
2.4 GHz Frequency Hopping (90 Channels/100 times
Feature Matrix
Up to 250 Feet or 62,000 ft
Up to 9 hours of Talk Time
Up to 160 hours of Stand By time
Headset Jack 2.55 mm – commonly used on Cellular
Answer a Call
Intercom calls can be answered in hands free mode, allowing you to converse with
the calling party without press any buttons. If the handset rings, press either the
“Talk” or the “Speaker” button to answer the call. Depending on the “Auto Pickup”
parameter, you can also answer a call just by removing the handset from the
charging base.
Hold
To place a call on hold, press the hold button. To retrieve the call press the hold
button again, or select the CO Line on hold.
Transfer
There are several ways to transfer a call.
Option 1:
While on a telephone call, press the Hold button
Dial the destination (extension number, voicemail or hunt group)
Press the Transfer button to complete the transfer
Option 2:
While on a telephone call, press one of the 6-preprogrammed buttons
containing the extension number where the call will be transferred to.
Terminate a Call
Press the “Talk” button to terminate an active telephone call. Pressing the speaker
button may not terminate the call, depending on the conversation mode.
Place a Call
Dial the intercom telephone number or press one of the 6-
preprogrammed buttons, with an intercom or Central Office line
programmed on it.
- 38 -
Page 8

37 -
-
Wireless Handset
User’s Guide
The Wireless Handset takes the place of the 31-Button key telephone; it has an easy
to read 3-line LCD, 3 interactive soft buttons and a Hot Keypad. 6-programmable
buttons can be assigned as a CO Line, an extension or a feature, allowing calls to be
answered, transferred, placed on hold, or forwarded from the Wireless Handset, just
like the 31-Button Key Telephone.
The “Hot Keypad” is a step saver dialing feature, which allows calls to be placed
without having to press extra buttons. Simply dial the extension that you are trying
to reach, or press the CO line and dial the telephone number. There is no need to
press the speaker or talk button before dialing.
Belt Clip
To help eliminate misplacing the Wireless Handset, we’ve included a belt clip. The
belt clip is attached to the back of the handset by inserting the plastic posts, found on
the belt clips, into the indentation found on the handset.
Power On/Off
To turn the power on or off, press the hold button for 3 seconds. When powered up,
the back lit LCD display, will show the current date and time, extension number and
ring mode. To conserve energy, the back lit display will turn off in 10 seconds and
after 20 seconds, the handset will go into sleep mode and only displaying, ring
mode, current battery charge, and the extension number. Any activity on the
telephone will wake the call up, and the handset will become fully functional.
Key Lock
Press the Flash key for 3 seconds, to lock and unlock the keys on the handset. This
will prevent the handset from dialing unintended digits. Although the keys are
locked, incoming calls can still be answered by pressing the talk or speaker keys.
The “Ç” in the display is the indication that the handset is locked. To unlock the
keys, after pressing the Flash button for 3 seconds, the third soft button will have to
be pressed as well.
Hold
Programmable Button 6
Feature
Function /
The Red LED lights
when the feature is active
Flash
Three Line A
16-Character
Display
F 1 F 2 F 3
Part Numbers Description
6006-00 2.4 GHz Wireless Key Telephone with Charging Base and Base
Part Numbers
Station
6006-61 2.4 GHz Wireless Key Telephone with Charging Base
1 2 3
4 5 6
Talk Transfer /
Soft Button 1 (F1) Soft Button 2 (F2) Soft Button 3 (F3)
Programmable Button 1 Programmable Button 4
Programmable Button 2 Programmable Button 5
Programmable Button 3
Default Button Layout
7 8 9
* 0 #
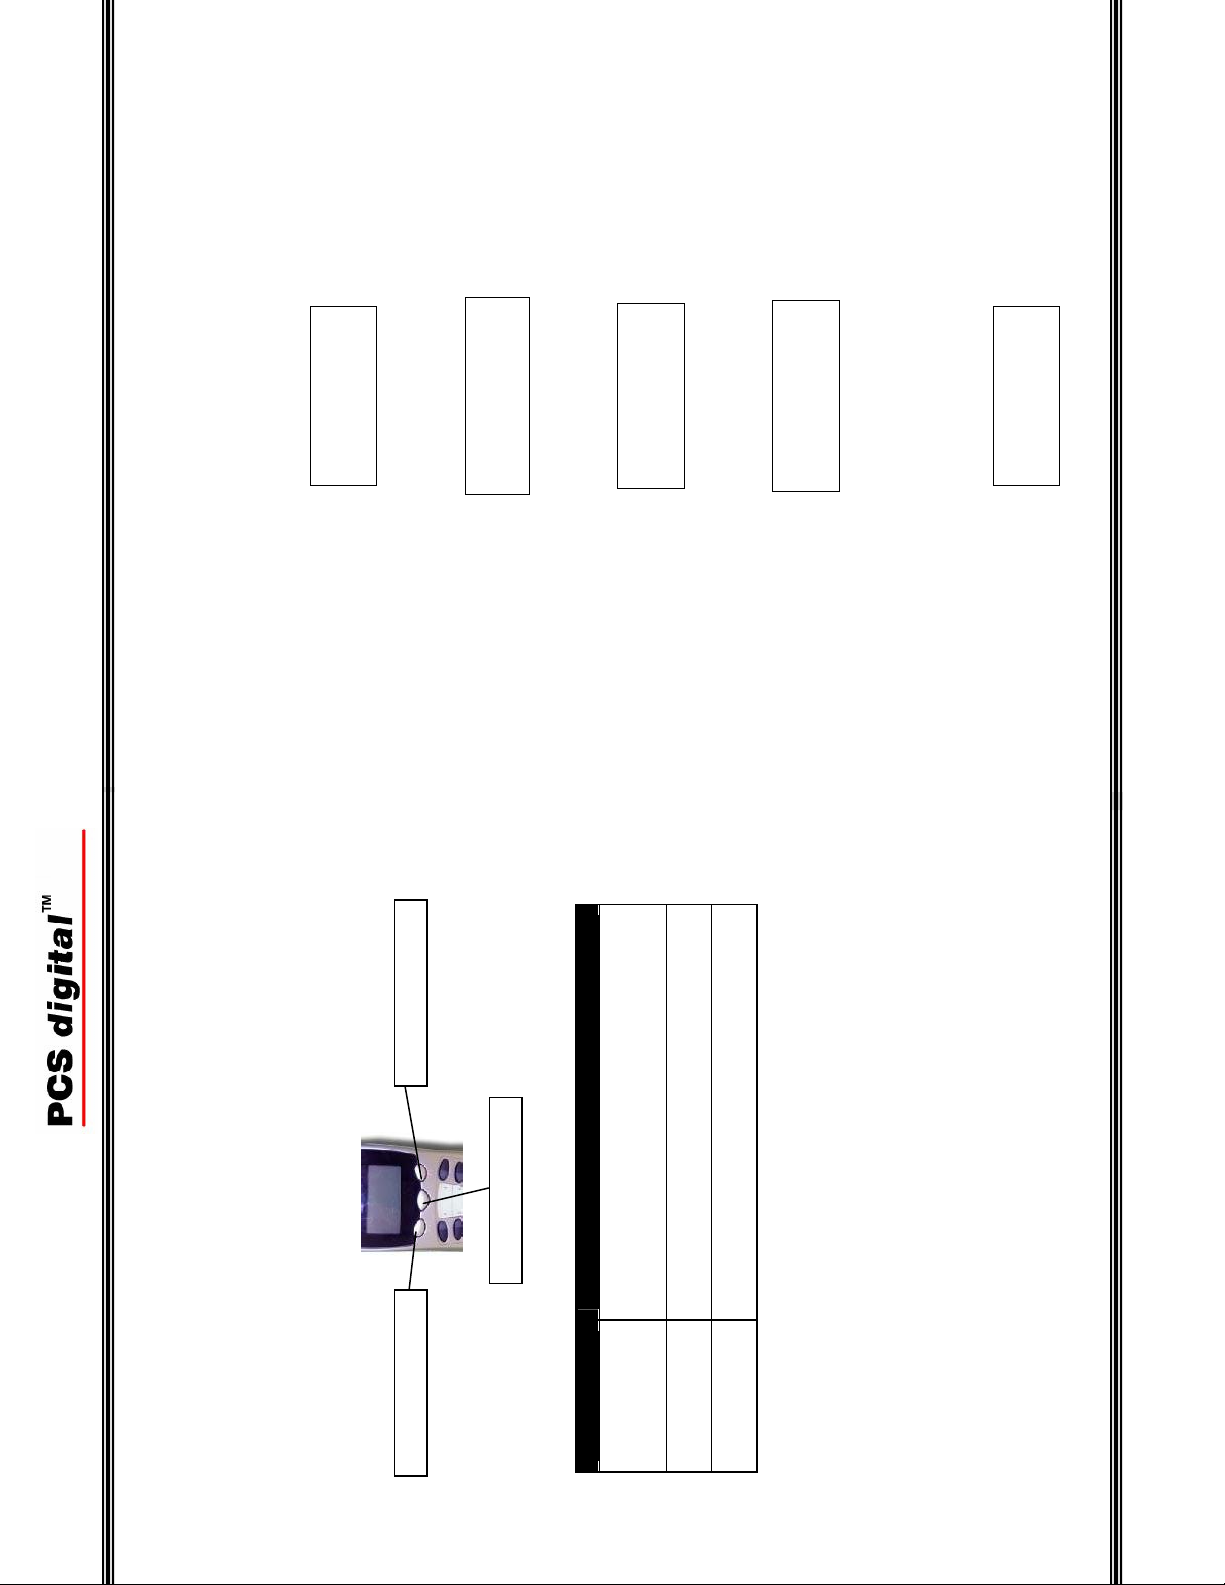
Fixed Button Descriptions (Handset)
Three (3) Soft Buttons
The Soft Buttons are interactive buttons that update based on the status of the
handset, designed to make programming and feature operation easier. In the manual
they are referred to as F1, F2 and F3.
- 8 -
Page 9

1) Press f [#] + [3]
2) Press the button to be programmed
3) Select the desired feature using the soft buttons
9 -
-
Wireless Handset
Dial Keypad
The dial keypad is used to dial telephone numbers.
Talk
The Talk Button is used to answer or originate an Intercom or Central Office calls.
Flash (Transfer)
The Transfer Button is used to transfer calls to other stations in the system. When
used as Flash, it will refresh the external dial tone from the telephone service
provider. To help eliminate the Wireless Handset from dialing erroneous numbers,
the key can be locked by pressing the Flash (Transfer) button for three (3) seconds.
To Unlock the keys press and hold the Flash (Transfer) button for three (3) seconds,
followed by the right soft button.
Function / Feature
The Function / Feature Button is used to activate features, enter the Attendant
administration mode or to enter System programming mode.
Hold (Power)
The Hold Button is used to place Intercom and Central Office telephone calls on
hold. Additionally, pressing the hold button for three (3) seconds will power the
handset on and off.
Programmable Feature Buttons
The Programmable Feature Buttons, with red LED’s, can be programmed with a
desired feature/function including Central Office Lines, Intercom, and Extension
Features such as Call Forward, Do-Not-Disturb, etc. To program a feature/function
button:
Mute
Although Mute can not be programmed on a button, it can be (De)activated by
dialing the code “f76”
Base Unit
standard RJ11C
Line Jack Two port digital (2-wire) to the telephone system, using a
Port Jack The voltage for the base unit is supplied by the telephone
system over the digital port, connected through port 1.
Power Jack AC Power port is reserved for special environments only.
This product has been tested and found to be compliant with Part 15, and is eligible
to use the telephone system’s registration number.
FCC Rules and Regulations
- 36 -
Page 10

35 -
-
2
90
Up to 62, 500 ft
Frequency Range 2.4 to 2.4835 GHz
Operating
Wireless Handset
Specifications
Frequency Range
Channels
Electrical Specification (Handset)
Battery Rechargeable Nickel Metal Hydride
Power Rating 3.6 V DC – 700 mAh
Stand-by Time Up to 160 hours
2
Talk Time Up to 9 hours
Line of Sight Up to 250 feet
Ft
Lamp Cadence (Handset)
Dark Line or Intercom is idle, or the feature is not active
Lit Feature is active
Slow 0.5 seconds on, 0.5 seconds off, repeating
0.05 seconds repeating
Fast 0.1 seconds on, 0.1 seconds off, repeating
I-Use 1.85 seconds on, 0.05 seconds off, 0.05 seconds on,
Beep / Ringer Cadence (Handset)
Key Tone 50 milliseconds
Single Beep 500 milliseconds
Double Beep 250 milliseconds on, 250 milliseconds off, 250 milliseconds
on, then off
on, 2 seconds off repeating
Intercom Ring 300 milliseconds on, 400 milliseconds off, 300 milliseconds
CO/Trunk Ring 1 second on, 2 seconds off, repeating
Hold Recall Ring 300 milliseconds on, 400 milliseconds off, repeating
Headset Jack 2.55
mm
Speaker Button
The volume bar is used to increase or decrease the receiver, ringer, speaker and
Volume (Left Side)
headset volumes.
(Right Side)
Headset Jack (Left Side)
The headset becomes active when it is plugged in. However, for proper operation the
feature code f [9] + [#] may be required. When a headset is plugged into the
handset, the speakerphone becomes disabled.
Volume Bar
Speaker
The Speaker Button is used to active the Speakerphone on an idle or busy handset
- 10 -
Page 11

11 -
-
Wireless Handset
Quick Setup Guide
This section is designed to get the wireless handset on line quickly and easily, using
a brief outline format.
Installation
The Wireless Key Telephone Handset is actually a full function key set without
wires. Therefore, each unit requires its own digital extension in the telephone
system. The digital extensions are plugged into the back of the base station, which is
connected wirelessly with up to two (2) handsets. Each telephone system can have a
total of four (4) wireless handsets (2 base units, each with 2 handsets).
Getting Started
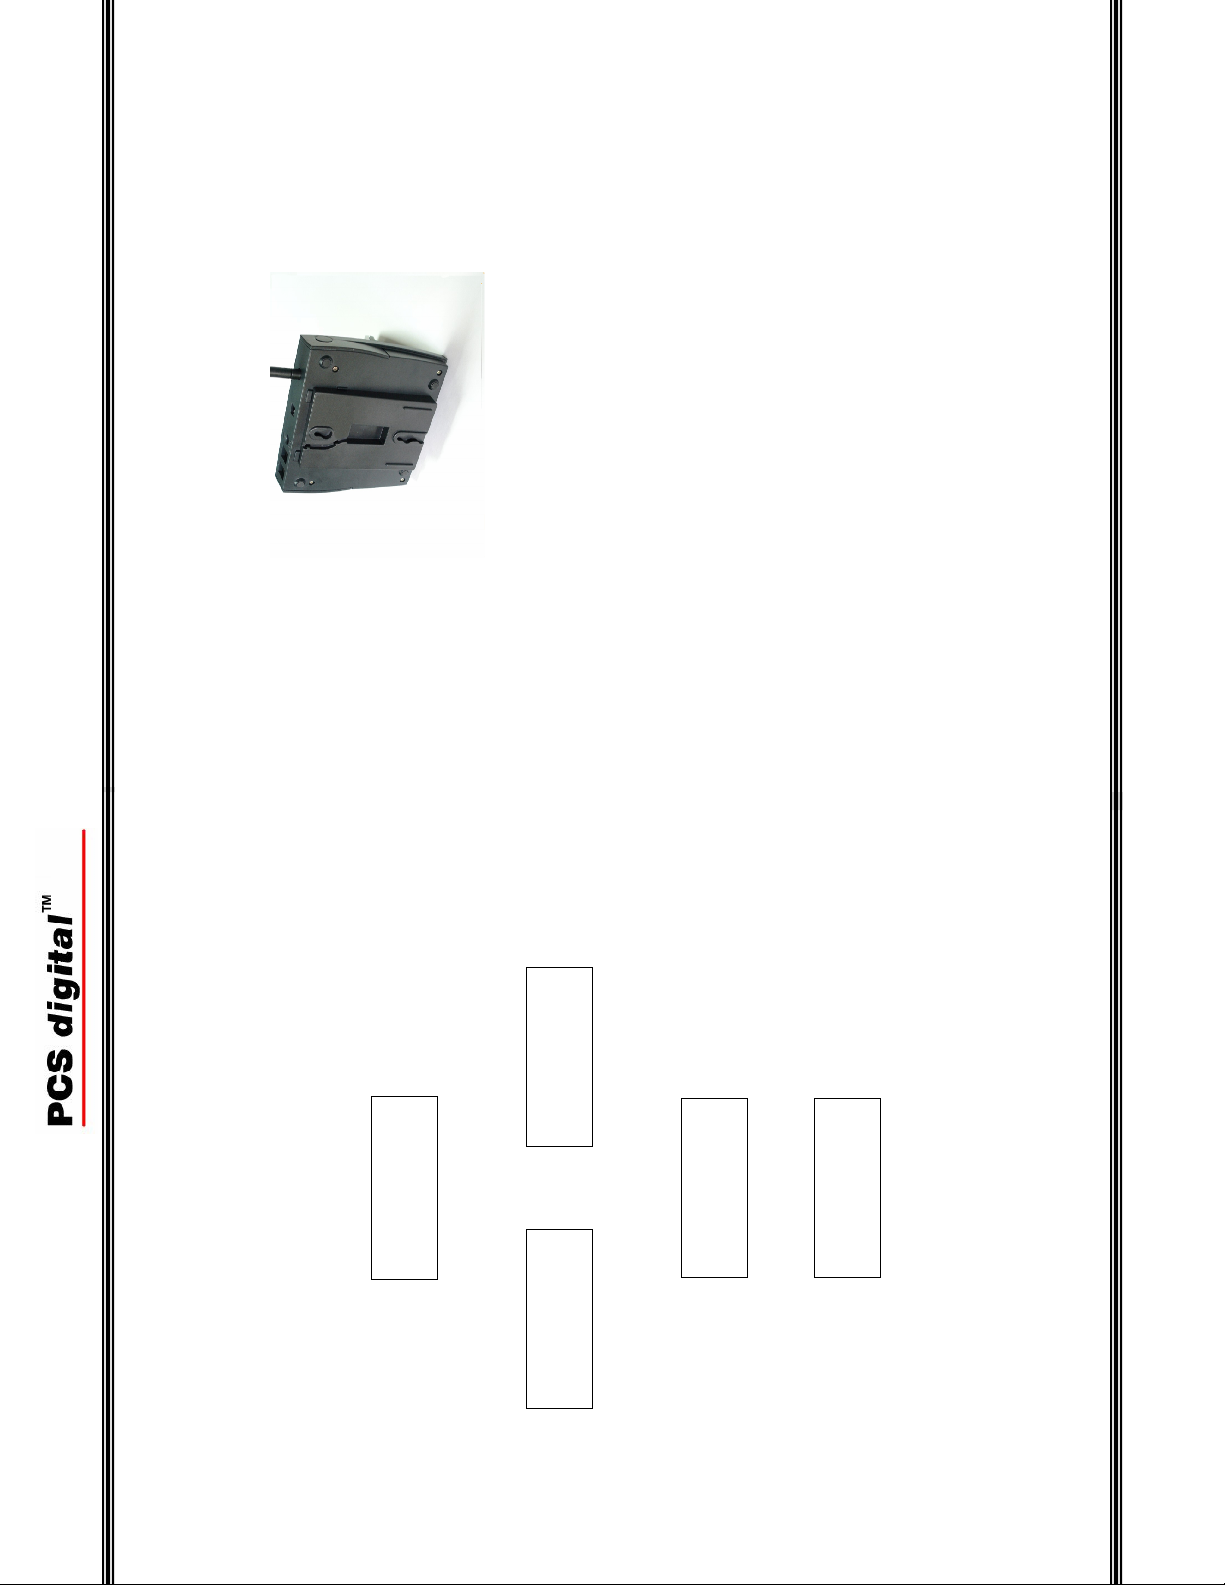
The base unit, handset, charging base and electrical plug come as a kit. Before you
begin, make sure that all of these items are in good working order. Not shown here
is the wall mount plate that gets mounted under the base unit and the belt clip that
attaches to be back of the handset.
ON
1 2 3
ON
1 2 3
(())
PLEASE
REGISTER!
ON
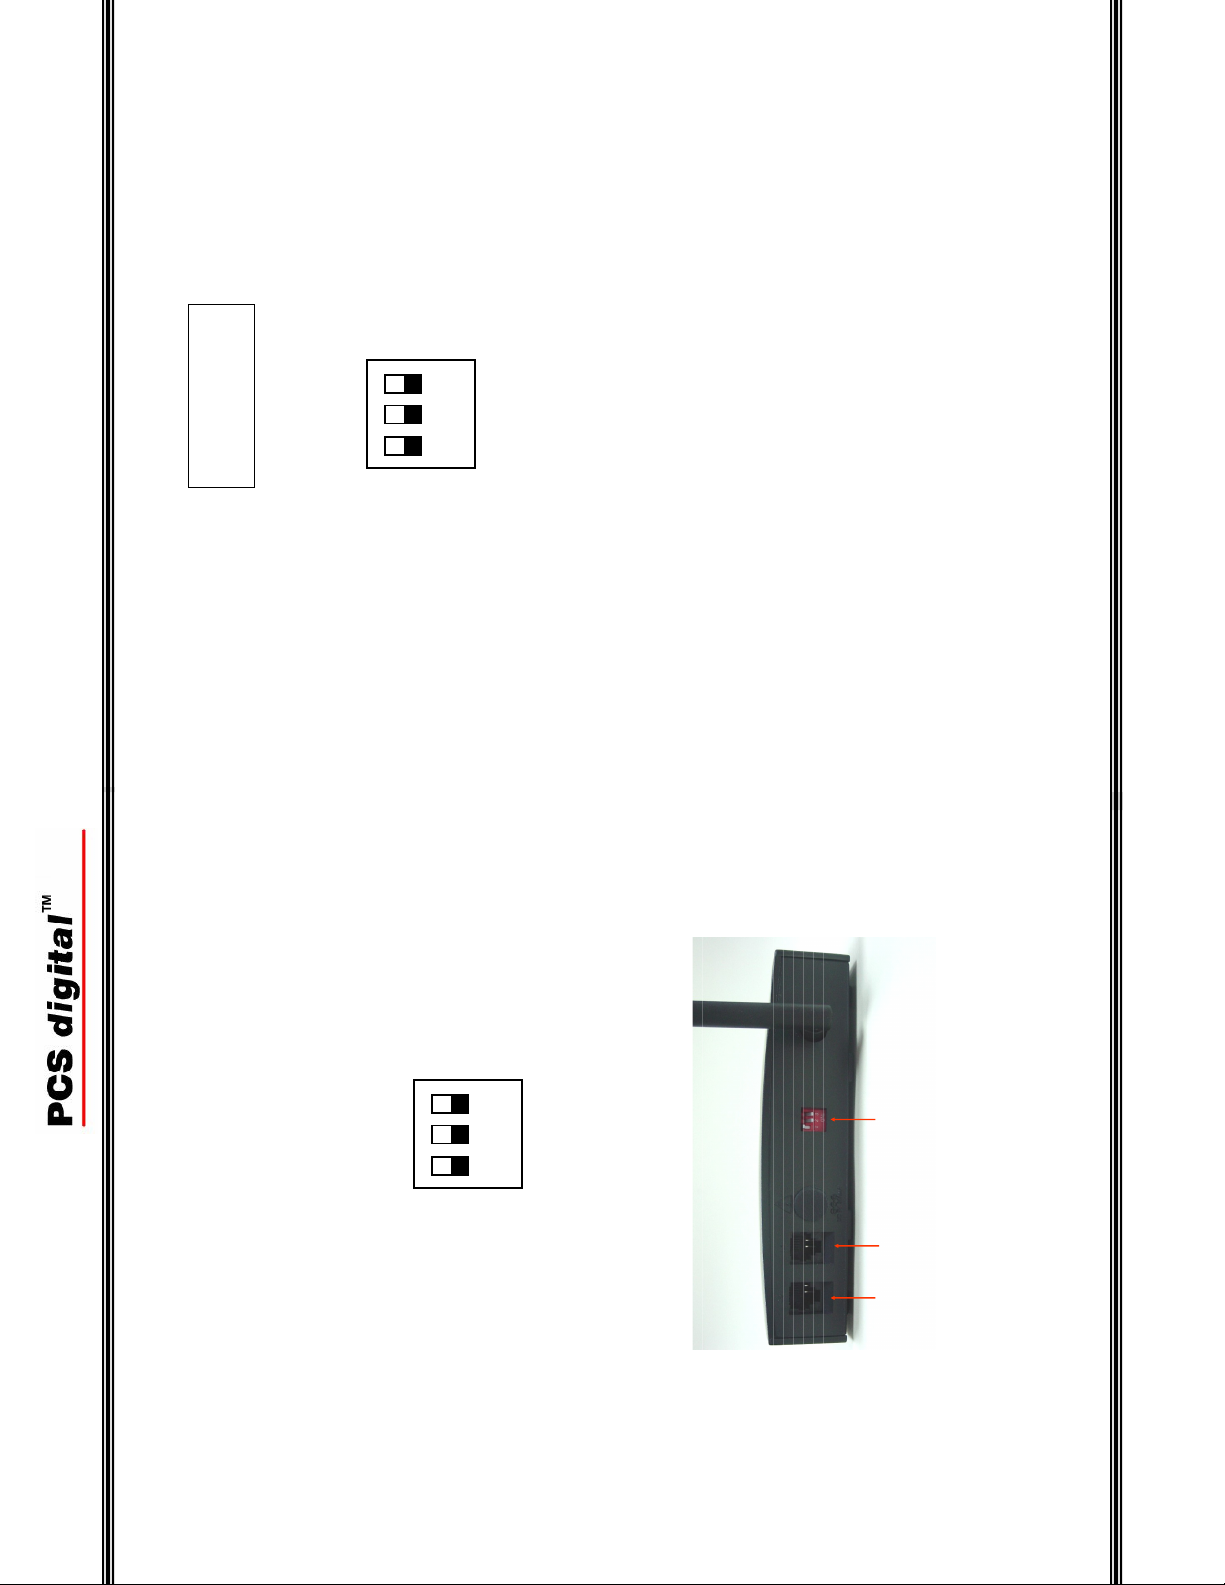
Handset 1 – Place switches 1 and 2 in the down position (On)
and switch 3 in the up position (Off).
Handset 2 – Place switch 1 in the down position (On) and
switches 2 and 3 in the up position (Off).
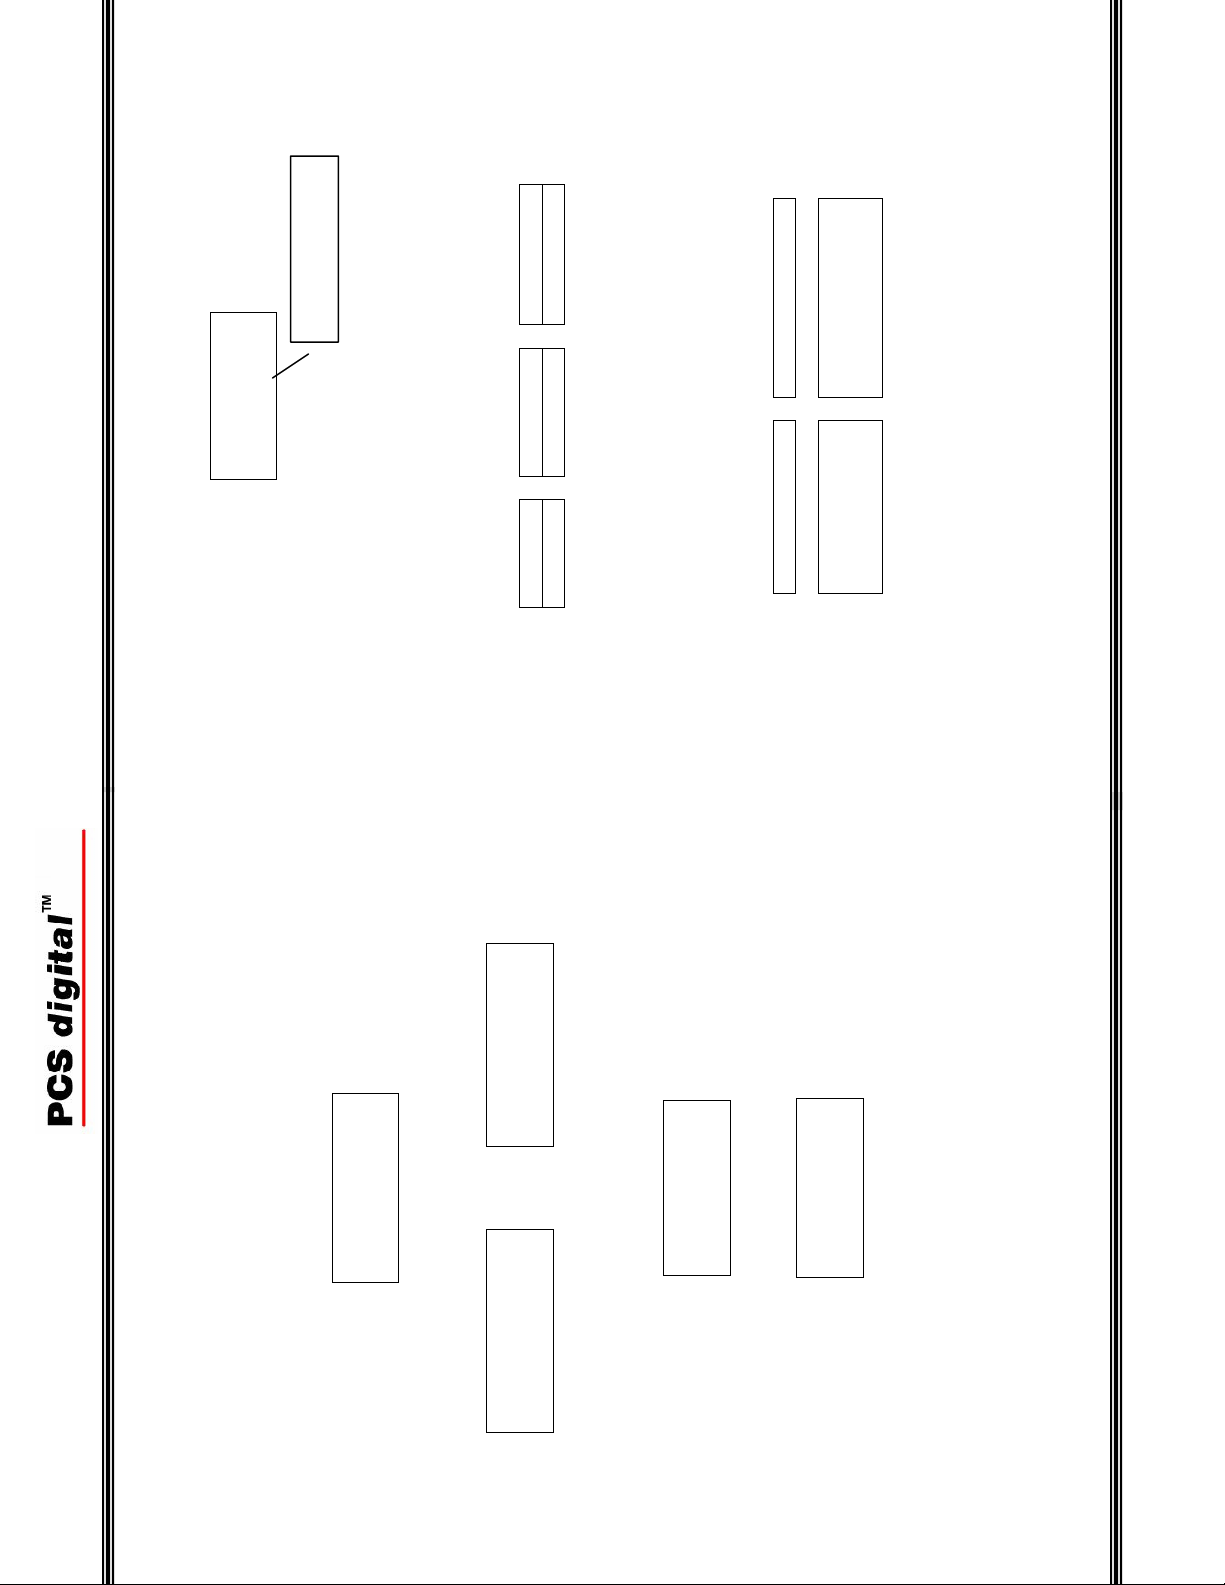
De-register Individual Handsets
To remove power form the base unit, unplug port 1
Reposition the dip switches as follows:
1 2 3
De-register Handset 1 De-register Handset 2
Re-plug port on into the base unit to restore power. During the de-
registration process the LED on the base unit will flash at a unique rate;
125 milliseconds on, 125 milliseconds off. The de-registration process will
take approximately five (5) seconds.
When the process is complete, remove power from the base unit by
unplugging port 1. Place the dipswitches back into the “Normal
Operation” mode, by placing all switches up or off position.
Because the de-registration process is initiated from the base unit, the handset
remains passive and will update once the de-registration process is complete. To
confirm that the de-registration process is successful, the de-registered handset(s)
will display:
- 34 -
Page 12

33 -
-
ON
1 2 3
De-register All Handsets
To remove power form the base unit, unplug port 1
Reposition the dip switches as follows – Place switches 1 and 2 in the up
position (Off) and switches 3 in the down position (On).
Wireless Handset
Base Unit
The Dip Switches are used to de-register one, or both, handsets form the base unit.
To de-register a handset, it must be idle.
Re-plug port on into the base unit to restore power. During the de-
registration process the LED on the base unit will flash at a unique rate;
125 milliseconds on, 125 milliseconds off. The de-registration process will
take approximately five (5) seconds.
When the process is complete, remove power from the base unit by
unplugging port 1. Place the dipswitches back into the “Normal
Operation” mode, by placing all switches up or off position.
ON
1 2 3
10% AC outlet. When the handset is placed into the
charging unit, the red charging light will illuminate.
into a 117 +
a. The charging base requires electricity and it should be plugged
a. Unpack the battery
b. Plug the battery cable into the small white connector found at the
battery.
1) Unpack the wireless handset and charging base unit
2) Open the back of the handset, found at the bottom, to install the supplied
Wireless Key Telephone Handset
bottom of the handset; then clip the battery into place.
c. Replace the back cover
display will say:
3) The handset will power up, if the battery has enough stored power, and the
INITIALIZING
PLEASE WAIT…
NO LINK TO BASE
before use. While programming, each handset is identified by the
port that it is plugged into, port 1 = line 1, port 2 = line 2.
a. Ensure the handset is fully charged, by charging it for 24 hours
Note: If the handset does not power up automatically, don’t worry, just press the hold button
for three (3) seconds to power it up manually.
yet active. The display will update:
4) The handset will try to establish a connection to the base unit, which is not
Wireless Base Unit
The wireless base unit is a compact radio transmitter that connects the telephone
system with the Wireless Key Telephone Handset. It contains Printed Circuit Boards
(PCB’s) that can be susceptible to excessive heat or cold. Therefore, it should be
mounted in a clean, heat regulated area with a relative temperature of 50 to 80
degrees with a relative humidity of 40 to 80 percent. It is complete line powered, by the telephone system through the RJ11C jack so
there is no need to locate it near an AC outlet. It is more important that it is a
centrally located area.
- 12 -
Page 13
13 -
-
Wireless Handset
Wall Mount
The Wireless Base Unit can be surface or wall mounted. The wall mount kit is a
standard wall place mounting bracket and the antenna can be kept straight for wall
mount, or bent at a 90 degree angle for surface mounting
DE-REGISTER
YES?
A (())
(())
> DE-REGISTER
(())
> DE-REGISTER
VIBRATION
PLEASE WAIT…
(())
PLEASE
REGISTER
De-registering a Handset
ON occasion a handset needs to be de-registered. This would happen if the handset
were going to be used on the different base unit. There are two methods for de-
registering handsets: From the base unit using the dipswitches all handsets, or the
individual handsets can be De-register or from the handset, each can be de-register
individually. Handset
While in the programming mode, select the “De-registration” parameter:
(())
Press (F1) or (F2) to toggle between “No” and “Yes”, press “OK” (F3) when the
desired answer is in the display.
DE-REGISTER
NO?
Select “No” to back out of this area without de-registering the handset. Select “Yes”
to de-register the handset. The display will update:
If it is successful the display will update:
- 32 -
Page 14
(())
FAILED!
TRY AGAIN!
31 -
-
ON
1 2 3
Wireless Handset
If the registration process is unsuccessful the following will be seen:
Before proceeding remember to place the dipswitches in the “Normal” position (All
switches up, in the off position) as seen below.
Antenna
ON
1 2 3
Dip Switch
Line 2
an optimum height and location for the coverage area. Like all
wireless systems, the wireless handset works best when it is in the
line-of-sight of the base unit. Obstacles such as concrete or metal
walls can substantially limit the range. Although rare, other
equipment in the same frequency range may cause interference.
When using more than one base unit, be sure to place them at
least 15 feet apart.
a. To provide the best possible signal the unit should be located at
1) Unpack the Wireless Base Unit
should all be set to the “Off” position. (All switches follow the
white squares and are in the up position.)
b. For proper operation, the dipswitches on the back of the base unit
port for each wireless key telephone handset.
c. Connect the base unit to the telephone system using one digital
i. If both extensions will be used, plug port 2 in first
ii. Plug in port 1 to power up the base unit
Line 1
Line Power
base unit. There are three (3) different cadences and they are:
d. To ensure proper operation, locate the red LED on the front of the
Note: The base station is completely powered by the telephone system so there is no need for an
external power supply or AC outlet.
- 14 -
Page 15

Operation Cadence
Normal Operation 500 milliseconds on, 500 milliseconds off
Transition Mode 1000 milliseconds on, 1000 milliseconds off
(De) Register Mode 125 milliseconds on, 125 milliseconds off
The Wireless Handset that comes with a Base Unit is factory
e. Handset Registration
registered and should be operational right out of the box. If the
handset does not become operational, please see the
troubleshooting section for directions to manually register the
handset.
REGISTERED a
HANDSET # 1
15 -
-
Wireless Handset
ON
1 2 3
(())
REGISTRATING
PLEASE WAIT...
(())
> REGISTERED
HANDSET # 1
(())
JAN01 TUE 4:14
NAME 12
Base Unit
To remove power from the Base Unit by unplugging port 1
Place Dip Switch 1, in the up position, turning if off, while leaving switches 2 and 3
in the down position, turning them on. Switches follow the white squares, See
below:
Note: The LED will flash in the “Registration Mode” Cadence (125 milliseconds on, 125
milliseconds off). Dipswitch 1 is off (up) and Dipswitches 2 and 3 are on (Down), which takes
about five (5) seconds.
Plug port 1 in – restoring power to the base unit
Wait 5 seconds – the LED begins flashing rapidly. For the next 30 seconds, while
the LED is rapidly flashing, PRESS THE “OK” (F3) BUTTON on the Handset.
If successful, the handset will update:
Note: If Handset 2 is being register the display will say “HANDSET #2”
The display shows that the handset is now on line:
- 30 -
Page 16

(())
PLEASE
29 -
-
REGISTER!
(())
> REGISTRATION
DE-REGISTER
(())
REGISTRATION
NO?
(())
REGISTRATION
YES?
Wireless Handset
Registration and Troubleshooting
The Wireless Handset will be pre-register to a base unit, if they are purchased as a
package. If the handset is not registered perform the following steps:
Handset Registration
If the handset power is on, press the Hold button for 3 seconds to turn the handset
off. Wait 10 seconds before beginning the registration process Handset
Press the Hold button for 3 seconds to power up the wireless handset
Press the first soft button (F1) to enter the programming mode
Press the “OK” button (F3) to select “Registration”
Press either the first or second (F1 or F2) soft button, changing from “NO?” to
“YES?”
DO NOT PRESS “OK” (F3) AT THIS TIME
Battery Indication
Battery Indication
Station Number
POWER OFF
(()) Ç
JAN 01 TUE 4:11
NAME 12
(()) Ç NAME 12
Operation
The Wireless keyset is designed for people on the go. The interactive display and
soft buttons make it easy to program and operate. This section is to help you
understand the displays.
Power On / Off
To turn the handset on, press the “Hold” button for three (3) seconds. The handset
will go through a start up procedure and the display will say “POWER ON”.
Although it is not necessary to turn the power off when not in use, the Wireless
Handset can be turned off by pressing the “Hold” Button for three (3) seconds.
When the telephone is idle, it will automatically go into standby mode to preserve
the battery charge. The Handset becomes active when a call is received or when any
key is pressed.
The display will indicate a change in status:
POWER ON
extension number.
Station Lock
ring mode(s), battery indication, date, time, user name, if supplied, and the
1) Once the Wireless Handset is registered the display will update to show the
Normal Operation
Ring Mode
Station Name
standby mode. Once in standby mode, the display updates, see below, and
the handset becomes passive and does not update until a button is pressed.
2) To extend the battery standby time, the handset is designed to go into
- 16 -
Page 17
Caller ID call log
(()) Ç
JAN 01 TUE 4:12
NAME CID 12
(( )) (())
17 -
-
LOW BATTERY
Ring Mode Vibrate Mode Ring & Vibrate
individual call log, with the following display:
3) Depending on the PCS digital System, the Wireless Handset could have an
Wireless Handset
Display ICONS
The Display ICONS are pictures that are designed to help the user understand the
status of the Wireless Key Telephone Handset.
Ring
There are three ring modes: Ring, Vibrate, and both Ring and Vibrate. The visual
indication is located at the top left hand side of the display.
Battery
The Wireless Handset is powered by a long life rechargeable Nickel Metal Hydrate
battery pack. The Battery ICON, which is located on the top right hand side of the
display, shows how much change is left on the installed battery. As the charge
decreases so does the size of the battery ICON. If the charge gets too low, the ICON
gets very small the display will show, “Low Battery”. If the handset is in use an
audible tone is heard once every 15 seconds.
Battery Full Charge Low Battery Indication
When the wireless handset is not in the charging base, background music, when
enabled (f52), will drain the current telephone charge.
RESET HANDSET
YES?
Reset Handset
Reset Handset is used to initialize the handset back to factory default for these 6-
programming parameters. Extension features, programmed by the telephone system
and the programmable buttons are unaffected by this reset function.
Select “Reset Handset” to initialize the handset, press “OK” (F3).
(())
> RESET HANDSET
LANGUAGE
Press (F1) or (F2) to toggle between “No” and “Yes”, press “OK” (F3) when the
desired answer is in the display.
A (())
(())
RESETTING
PLEASE WAIT…
(())
RESET HANDSET
NO?
If “NO” is selected, the handset will not be initialized and will return to the initial
menu. If “YES” is selected, the display will update and the handset will initialize
and restart automatically.
(())
INITIALIZING
PLEASE WAIT…
After the reset is complete, the handset restarts:
- 28 -
Page 18

27 -
-
(())
AUTO PICKUP
HANDSFREE
(())
AUTO PICKUP
DISABLE
(())
AUTO PICKUP
RECEIVER OK!
Wireless Handset
When set to “Hands free” the user can converse with intercom callers without
pressing any buttons or taking the handset out of the charging base. Central Office
calls still require the handset to be taken out of the base unit, press the Talk or
Speaker Button.
When set to “Disable” the user must remove the handset from its charging base and
press either the “Talk” or “Speaker” buttons to answer the incoming call.
Once the Desired Auto Pick up mode is selected, press the “OK” Button (F3). A
confirmation tone will be heard and the display will update:
OUT OF RANGE
NO LINK TO BASE
PLEASE REGISTER
(()) Ç
Out of Range
When the handset is carried out of signal range from the base unit, a warning tone
will be repeated every 5 seconds and the display will update.
No Link to Base
If the connection from the Wireless Handset is lost, due to a power failure or lost
connection to the telephone system, the display will say “No Link to Base”. This is
an indication that the handset and the base unit are unable to communicate with each
other. To reestablish the link, return to the base unit to make sure that it is operating
correctly. Reestablishing link may take up to 30 seconds.
Registration
If the Wireless Handset is not registered to the Base Unit, the LCD display “Please
Register” and not the extension name and number. To register the handset, refer to
the “Troubleshooting” section.
Key Lock (Flash / Transfer)
When the Wireless Handset is idle, press the “Flash/Transfer” button for three (3)
seconds to lock and unlock the buttons (keys). This will prevent the handset from
dialing unintended digits. Although the keys are locked, incoming calls can still be
answered by pressing the talk or speaker keys. The “Ç” in the display is the
indication that the handset is locked.
- 18 -
Page 19

F 3
LONG KEY PRESS
[TRANSFER]
TO UNLOCK
F 1 F 2
Note: “Long Key Press” = Press and hold the “Flash/Transfer” key for an extended period of
19 -
-
TO UNLOCK
PRESS [F3]
time, usually up to 3 seconds.
Wireless Handset
Key Unlock
To Unlock the Handset, Press the “Flash/Transfer” button for three (3) seconds the
display updates:
To ensure that the keys are not accidentally unlocked, the right “Soft Button” must
be pressed within three seconds to complete the “unlock” procedure. If the button is
not pressed the Handset remains locked.
Rings, answer in
“Speaker” mode
when removed from
the charging unit
Rings, answers in
“Talk” mode
when removed
Answer Hands free
from the base unit
(())
> AUTO PICKUP
RELEASE CALL
(())
AUTO PICKUP
RECEIVER
Auto Pick up
Auto pick up allows the user to select how calls will be answered. There are three
(3) ways that a call can be answered, Hands free, Receiver and Disabled. In Hands
free mode the user can converse with incoming callers without removing the handset
from its charging base. In Receiver mode the user must remove the handset for the
charging base in order to converse. When Auto Pick up is disabled, the user will
have to remove the handset from the base unit and press either the Talk or the
speaker button to converse with the calling party. The Auto Pick up functionality can be affected by the H-T-P (f98) feature.
To ensure proper operation please refer to the following matrix: Wireless Handset Auto Pick-up Operation:
Disabled Receiver Handsfree
VA-HF
(Handsfree)
answer when
VA – Private Announce only. User must dial “f76”to disable Mute
Tone Ringing Rings, does not
removed from the
charging base unit.
Select auto pickup to customize the way each handset will answer incoming calls.
When set to “Receiver” the user can answer a ringing call by removing the handset
from the charging base or by pressing either the “Talk” or “Speaker Button”.
- 26 -
Page 20
(
)
g
(
)
(
)
25 -
-
(())
> VIBRATION
AUTO PICKUP
VIBRATION
√RING VIBRATION
(( ))
VIBRATION
RING √VIBRATOR
(())
VIBRATION
√RING √VIBRATOR
(())
VIBRATION
√RING + VIB OK!
Wireless Handset
Ring Mode
The Handset has three different ring modes. Ring, Vibrate, and Ring and Vibrate.
The Default setting is Ring only.
Select Vibration to set the type of ringing for this handset.
When set to “Ring” – the handset will ring when the extension number is dialed.
Press “OK” (F3), the ICON will update.
When set to “Vibrator” – the handset will vibrate when the extension number is
dialed. Press “OK” (F3), the ICON will update.
When set to “Ring and Vibrator” – the handset will ring and vibrate when the
extension number is dialed. Press “OK” (F3), the ICON will update.
Once the desired language is in the display, press OK (F3). A confirmation tone will
be heard and the word “OK” will appear in the display.
Once the desired Ring mode is selected press the “OK” (F3). A confirmation tone
will be heard and the display will update:
F1
ht Soft Button
F1
Left Soft Button
Scroll up
Yes
No
Ri
F1
Handset Programming
To enter the Handset programming mode, press and hold the first soft button (F1) for
3 seconds. The soft keys assist in the programming process. In programming the
soft keys do double duty. When scrolling through the main programming screen,
soft keys (F1) and F2) are used for “Up” and “Down”. However, once a parameter
is selected, they are used for “Yes” and “No”. The right soft key (F3) is used for
“Select” and “OK”.
Left Soft Button
Soft Buttons Function
Left (F1) Enter/Exit Handset Programming Mode
F2 (Center) Scroll down
OK
F3 (Right) Select
- 20 -
Page 21
Heading Parameters
Language English, French Spanish
Register
Deregister
Vibration Ring, Vibrate, Ring and Vibrate
Auto Pick up Receiver, Hands free, disable
Reset Handset
= Default Value
21 -
-
(())
> LANGUAGE
REGISTRATION
Wireless Handset
Programming Fields
There are six (6) programming fields that can be customized for each Wireless
Handset.
Select the programming parameter from the programming menu by scrolling through
the choices. When the “>” sign is on the parameter to be programmed, press OK
(F3). In the example below, the “Language parameter will be programmed.
From this point on, the manual assumes that the Wireless Handset is in programming
mode.
> DE-REGISTER
(())
> DE-REGISTER
VIBRATION
YES?
A (())
(())
DE-REGISTERING
PLEASE WAIT…
OK!
(())
> DE-REGISTER
De-Registration
Occasionally it may be necessary to de-register a handset. Once de-registered, the
handset is no longer considered part of the system. To de-register a handset, select
“De-register” fin the programming menu and press “OK” (F3).
Select “Yes” to begin the de-registration process.
Note: If the procedure fails, please see the Troubleshooting section.
(())
> DE-REGISTER
NO?
While the de-registration process takes place the following will be displayed:
If the de-registration process is successful the display will update and a confirmation
tone will be heard.
- 24 -
Page 22

23 -
-
> REGISTRATION
YES?
A (())
(())
>REGISTRATION
DE-REGISTER
(())
>REGISTRATION
NO?
(())
> REGISTERING
PLEASE WAIT…
(())
>REGISTERED
HANDSET #
Note: The “#” is the number of the handset being registered. If the procedure fails please see
the Troubleshooting section.
(())
FAILED
TRY AGAIN!
If this procedure fails, the display will update and the registration process will
have to be tried again.
Wireless Handset
Registration
Each Wireless Handset becomes an extension on the system after it has been
registered. To register a new phone, set the Dip Switches on the host base unit, as
demonstrated in the troubleshooting section. Select Registration from the
programming menu and press “OK” (F3).
Select “Yes” to begin the registration process.
While the registration process takes place the following will be displayed:
If the registration process is successful the display will update and a confirmation
tone is heard.
(())
> LANGUAGE
(())
LANGUAGE
ENGLISH (())
LANGUAGE
ESPANOL
(())
LANGUAGE
FRANCAIS
(())
>LANGUAGE
ENGLISH OK!
REGISTRATION
Language
The Wireless Handset can be personalized to display the prompts in three (3)
different languages: English, French, and Spanish. The default language is English. Press the down button (F2) to scroll through the languages.
The telephone system may deliver some information in English, depending on the host system
and the application
Once the desired language is in the display, press OK (F3). A confirmation tone will
be heard and the word “OK” will appear in the display.
After three (3) seconds the display will update to the upper level menu. The
following display will be seen:
To continue programming press the down button or to exit programming press the
hold button.
- 22 -
 Loading...