

Page 1
Version 1.1
www.pce-instruments.com
User Manual
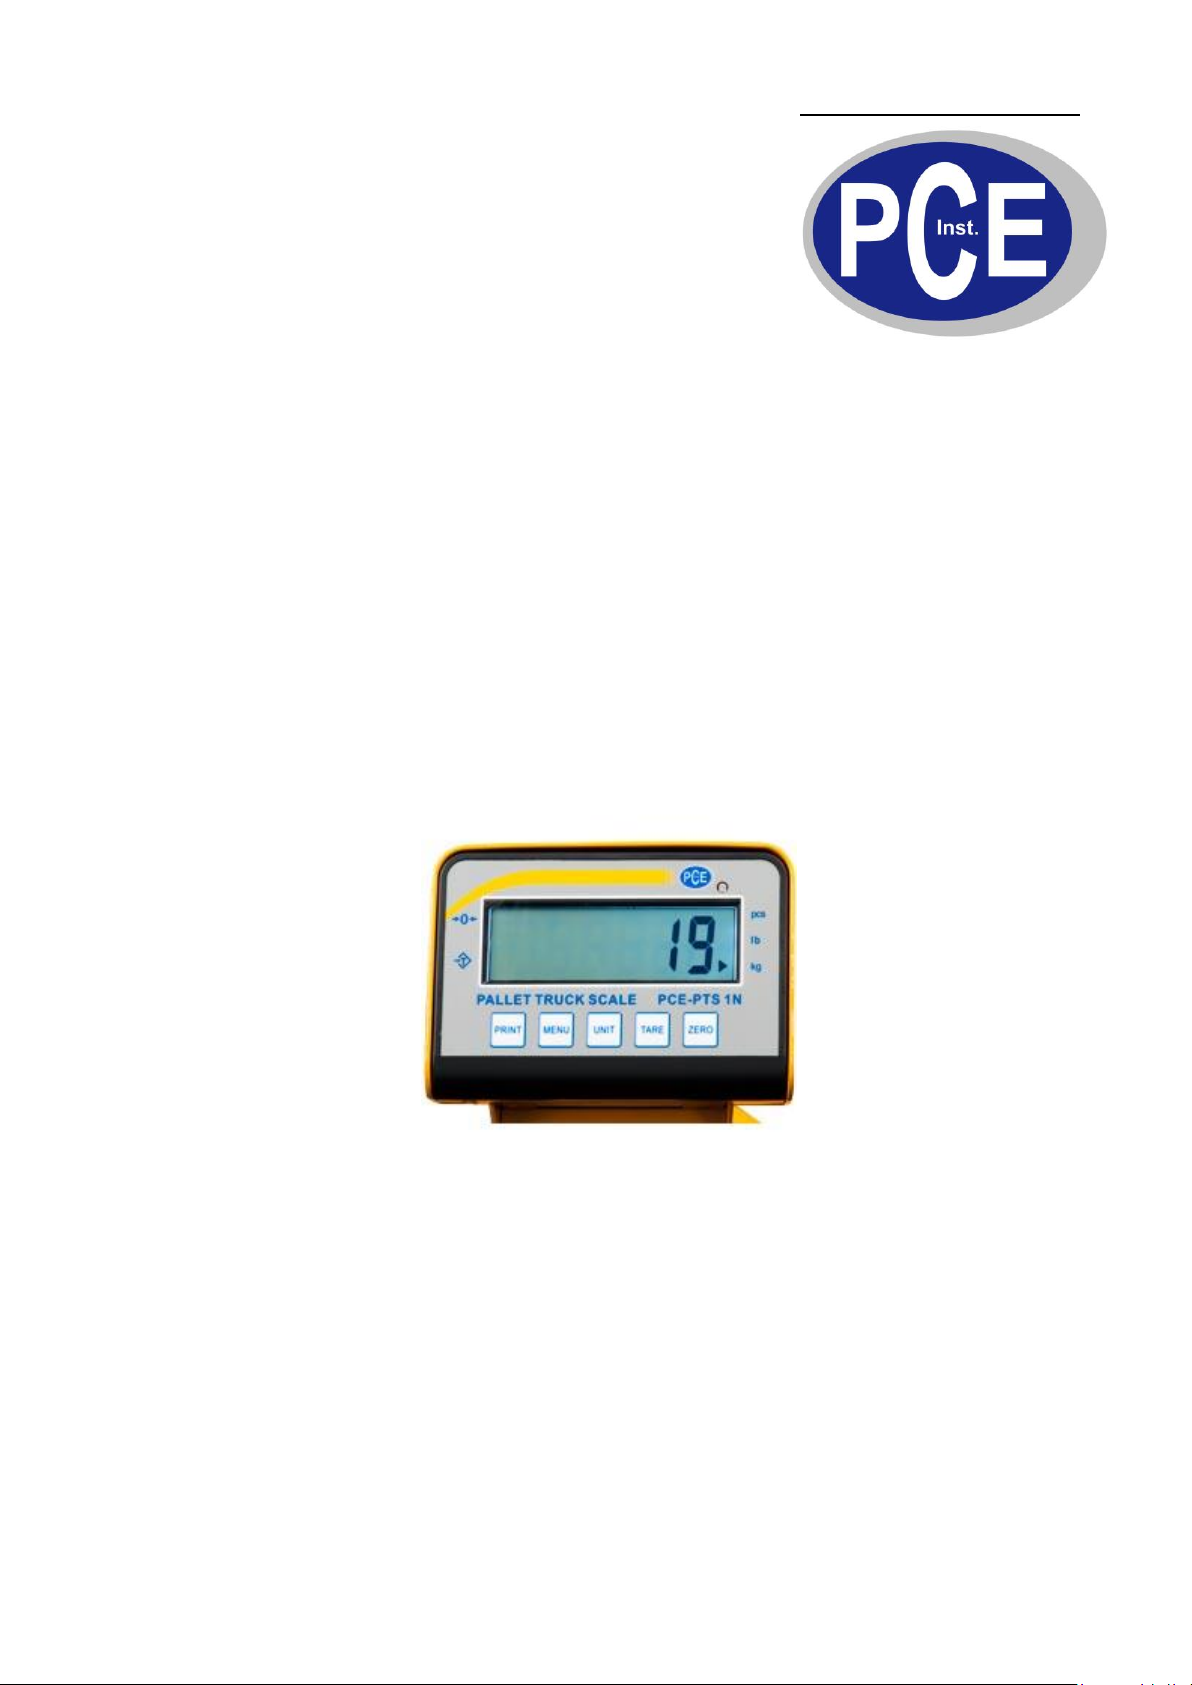
PCE-PTS 1N
Americas Inc. PCE Instruments UK Ltd.
PCE
711 Commerce Way Units 12/13, Southpoint Business Park
Suite 8 Ensign Way
Jupiter, FL 33458 Hampshire / Southampton
USA United Kingdom, SO31 4RF
Phone: 561-320-9162 Phone: (0) 2380 98703 0
07.20.2016
Page 2

OPERATING MANUAL
____________________________________________________________________________________________________________________
www.pce-instruments.com
Contents
Before using the scale ............................................................................................................................................................. 3
Instruction for use ..................................................................................................................................................................... 3
Preparing to use the scale....................................................................................................................................................... 3
Chapter I Introduction .............................................................................................................................................................. 4
1.1 Features and specification ........................................................................................................................................ 4
1.2 Display ......................................................................................................................................................................... 5
1.3 Keypad ......................................................................................................................................................................... 5
1.4 Operating the scale .................................................................................................................................................... 6
1.5 Power Supply.............................................................................................................................................................. 8
1.6 Rechargeable Battery Instruction
Chapter II Advanced functions .............................................................................................................................................. 8
2.1 Checking battery voltage .......................................................................................................................................... 8
2.2 Display Parameters Setting ...................................................................................................................................... 9
2.3 Auto off setup.............................................................................................................................................................. 9
2.4 Division setup ............................................................................................................................................................. 9
2.5 RS232 Connection with Computer(Optional) ................................................................................................... 9
Chapter Ⅲ Calibration.......................................................................................................................................................... 10
3.1. Setting up division, decimal point, max. capacity and calibration .................................................................... 10
3.1.1 Division Setting: ............................................................................................................................................ 10
3.1.2. Decimal point setting: .................................................................................................................................. 10
3.1.3. Maximum capacity setting: ......................................................................................................................... 10
3.1.4. Zero point calibration: ................................................................................................................................. 11
............................................................................................................................. 8
3.1.5. Second point calibration: (Unit is in kg/ lb) .............................................................................................. 11
3.2. Fast calibration mode: ............................................................................................................................................ 11
3.2.1. Zero point calibration: ................................................................................................................................. 11
3.2.2. Second point calibration: (Unit is in kg/ lb) .............................................................................................. 11
Chapter Ⅳ T15C/E-Time & Date Setting(This function is suitable for T15E/C-PC, T15E/C-A) ................................... 12
APPENDIX: Word Table ..................................................................................................................................................... 13
Page 3

OPERATING MANUAL
____________________________________________________________________________________________________________________
www.pce-instruments.com
Before using the scale
Thank you for purchasing this high precision electronic weighing scale. In order to use the scale
properly, please read this User Manual carefully before use. If you have any problem with scale,
please contact your supplier.
Instruction for use
1) Please keep the scale in a cool dry place. Do not store it at high temperature.
2) Do not allow any small life to stay in the scale.
3) Avoid impact and overload (less than max. load).
4) Clean it and store in dry conditions when it is not in usage.
Preparing to use the scale
1. Avoid operating the scale in direct sunlight or drafts of any kind.
2. If possible avoid connecting the scale to ac power outlet sockets which are adjacent to other
appliances to minimize the possibility of interference.
3. Remove any weight that might be on the fork before the scale is switched on and avoid leaving
weight on the fork for a long time.
4. All goods weighed should be placed in the centre of the fork. The overall dimensions of the
goods being weighed should not exceed the dimension of the fork.
5. Once the scale is powered on, it will go through a display test and it is ready for use when the
display displays zero.
6. The scale requires about 15 minutes warm up before operation.
7. Please note when the battery symbol keeps on the screen and it buzzes, the batteries need to
be charged.
3
Page 4
OPERATING MANUAL
Load Cells
Minimum 350 ohm load cells
Maximum 1000 ohm
(Up to 4 load cells of 350 ohm)
Readability
Selectable, 0.0
Tare Function
Full
Units of
measure
Kg , lb
Power supply
Rechargeable battery or Charger DC 7.2V 1A
Connector
4 pin socket
2
5
____________________________________________________________________________________________________________________
www.pce-instruments.com
Chapter I Introduction
1.1 Features and specification
Features:
Large display (digit height 30mm x 13mm) with backlight
Kilogram (kg), and pound (lb) weighing modes
Application include: simple counting , hold, accumulation
Low power indication and auto power off
Options:
RS-232 or Serial printer
Specifications:
1. Load cell connection:
Red connects with EXC+
Yellow connects with EXC Green connects with SIG+
White connects with SIG-
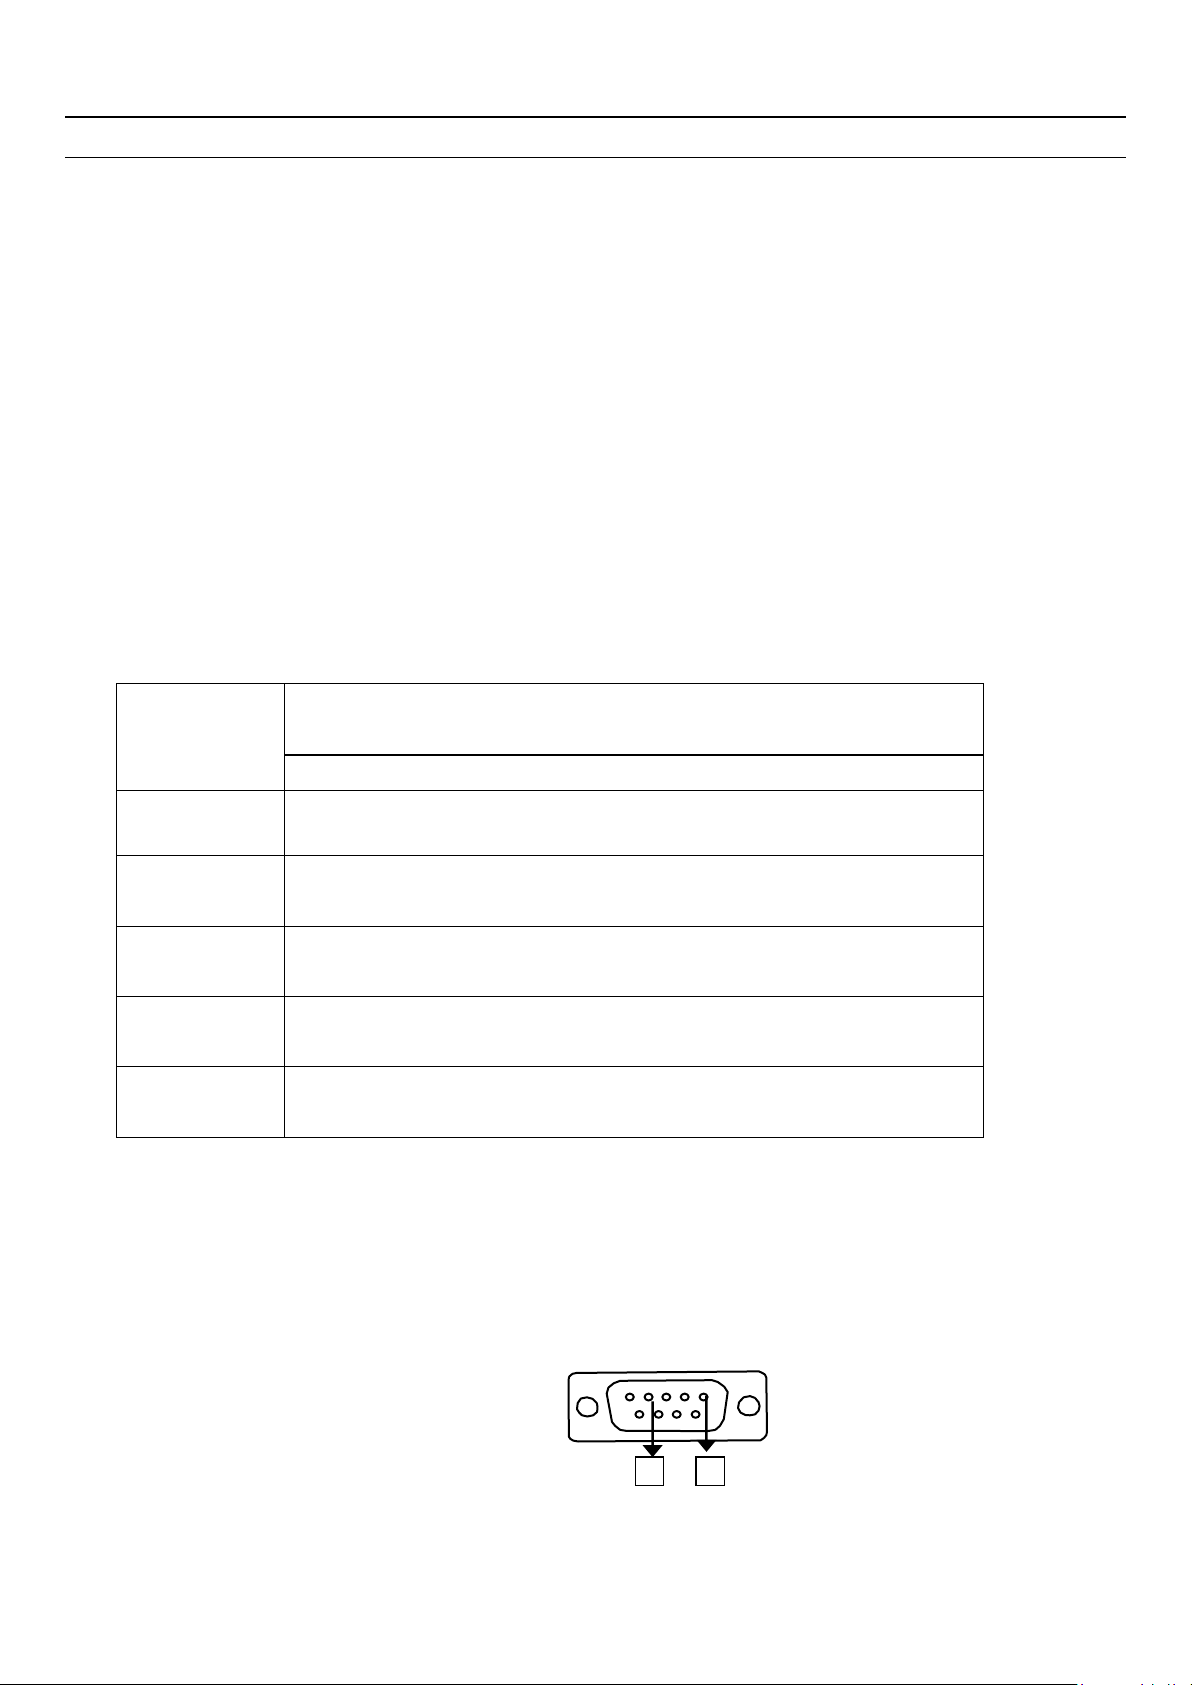
2. RS-232 connection:
·2- pin = Data output (TXD)
·5- pin = Ground (GND)
4
Page 5
____________________________________________________________________________________________________________________
1 2 4 3 5
PRINT
FUNC
UNIT
TARE
ZERO
0
T
3. Printer connection:
1.2 Display
OPERATING MANUAL
www.pce-instruments.com
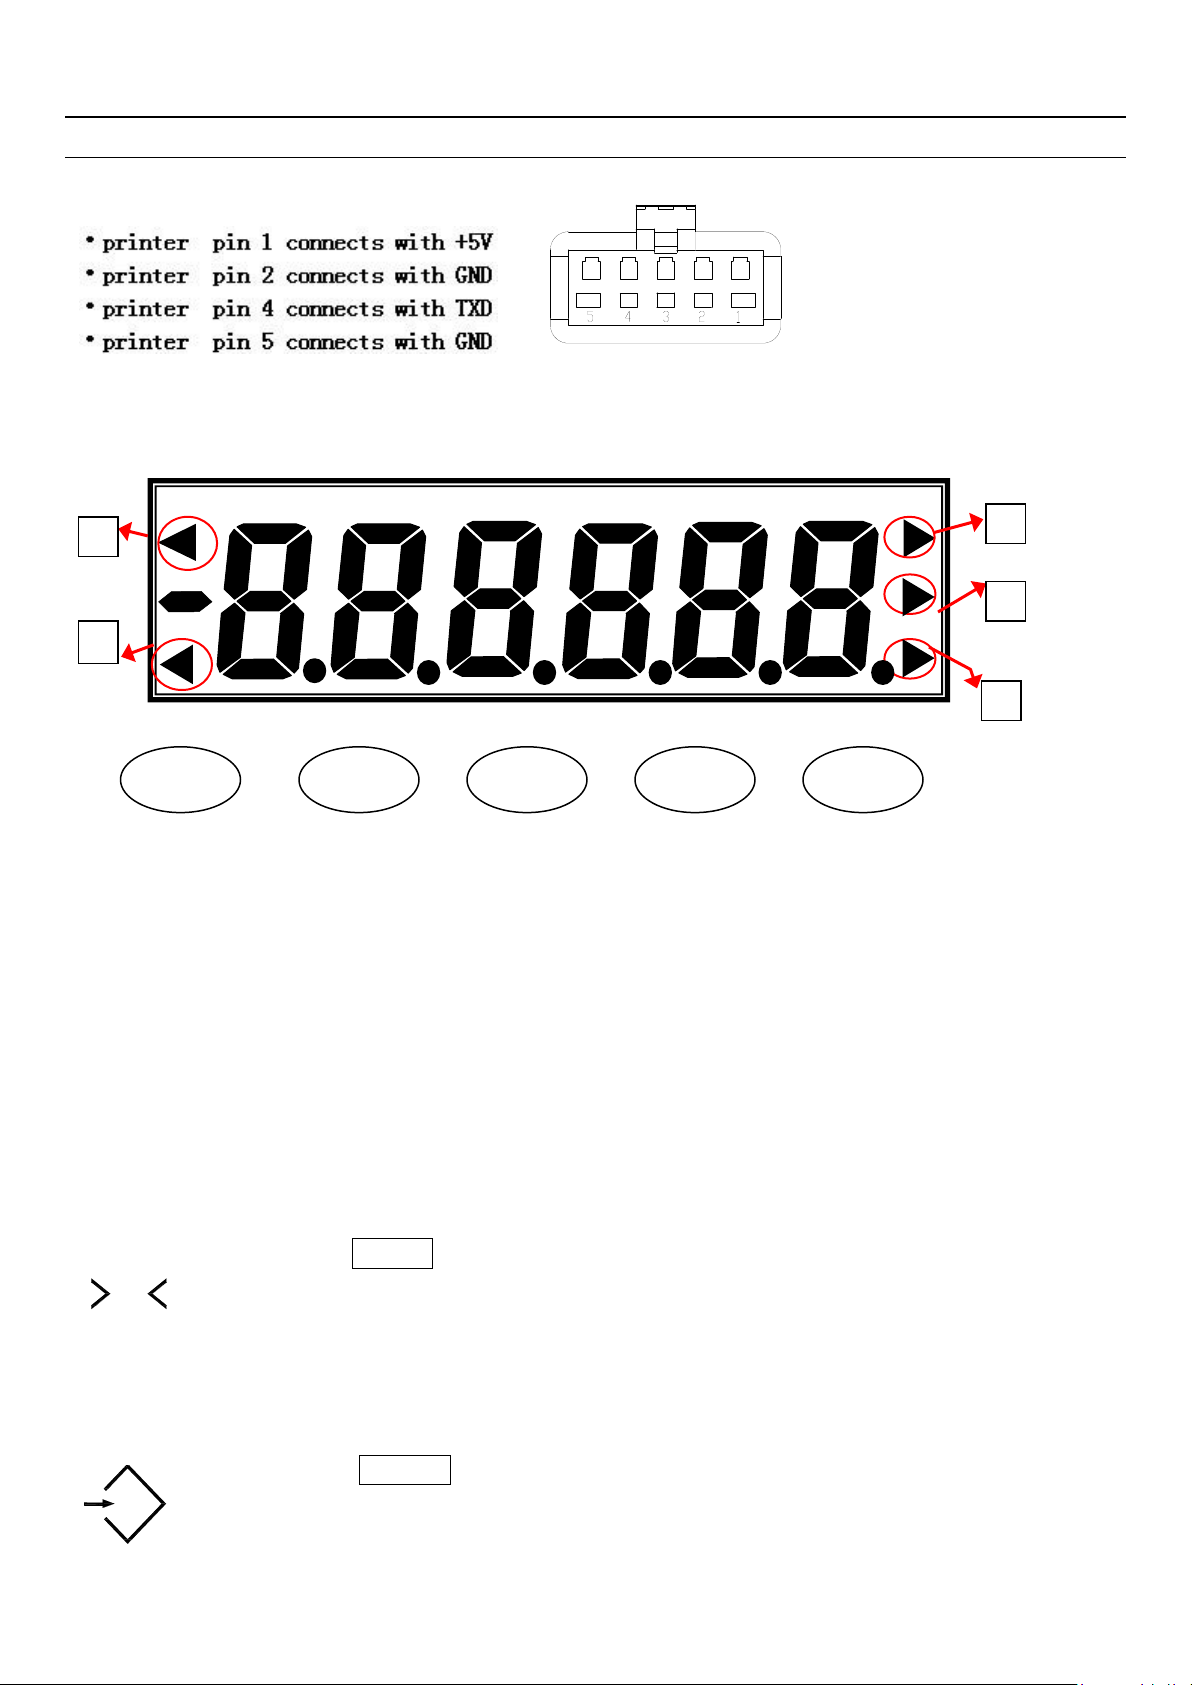
1. Zero status indication, Displayed when the scale is at the centre of its zero band.
2. Tare status indication, Displayed when the weight has been tare.
3. Simple counting indication, Displayed when the scale is in simple counting mode.
4. Unit indication, Displayed when the scale is in g or lb unit.
5. Kg indication, Displayed when the scale is in kg unit.
1.3 Keypad
ZERO KEY:
This key is ZERO key; in the menu use as “UP“ key
When the weigh pan is empty (free of load) and the display is not showing zero,
press the “ZERO” key to zero the scale.(The weight can be zero is only at the 2%
of Max. capacity)
TARE KEY:
This key is TARE key; in the menu use as “RIGHT“ key
The tare function will not operate during the following conditions:
5
Page 6
OPERATING MANUAL
U
____________________________________________________________________________________________________________________
(1) When the scale powers on if the weight is negative and after a container is
placed on the weigh pan if the weight is still below zero.
(2) The tare value is over the full scale capacity.
www.pce-instruments.com
This key is UNIT key
UNIT KEY:
Use this key to switch between kg and g or lb units.
FUNCTION KEY:
This key is FUNCTION key
Use this key to choose the functions: Simple counting, Check weighing, Accumulation
PRINT KEY:
This key is PRINT key; in the menu use as “CONFIRM“ key
Use this key to print data when the printer is connected.
1.4 Operating the scale
1.4.1 Introduction of Power on and Power off
Turn on the switch at the back of the indicator and indicator turns to self-checking mode.
When power on, if loading weight on the scale deviates from the zero point, but still within
zero set range, the indicator will set zero automatically and enter weighing mode.
Turn off the power and battery will stop working. If indicator is power on and in auto off mode,
it will turn off automatically after 10minutes’ rest. But battery is still at work and will be out of
work after turning off the indicator manually.
If indicator’s voltage is lower than 5.8V, it cannot work normally. The screen will display
“—LO—“and buzzer will sing to remind the user to charge. If Voltage is lower than 5.6V, the
indicator will turn off automatically.
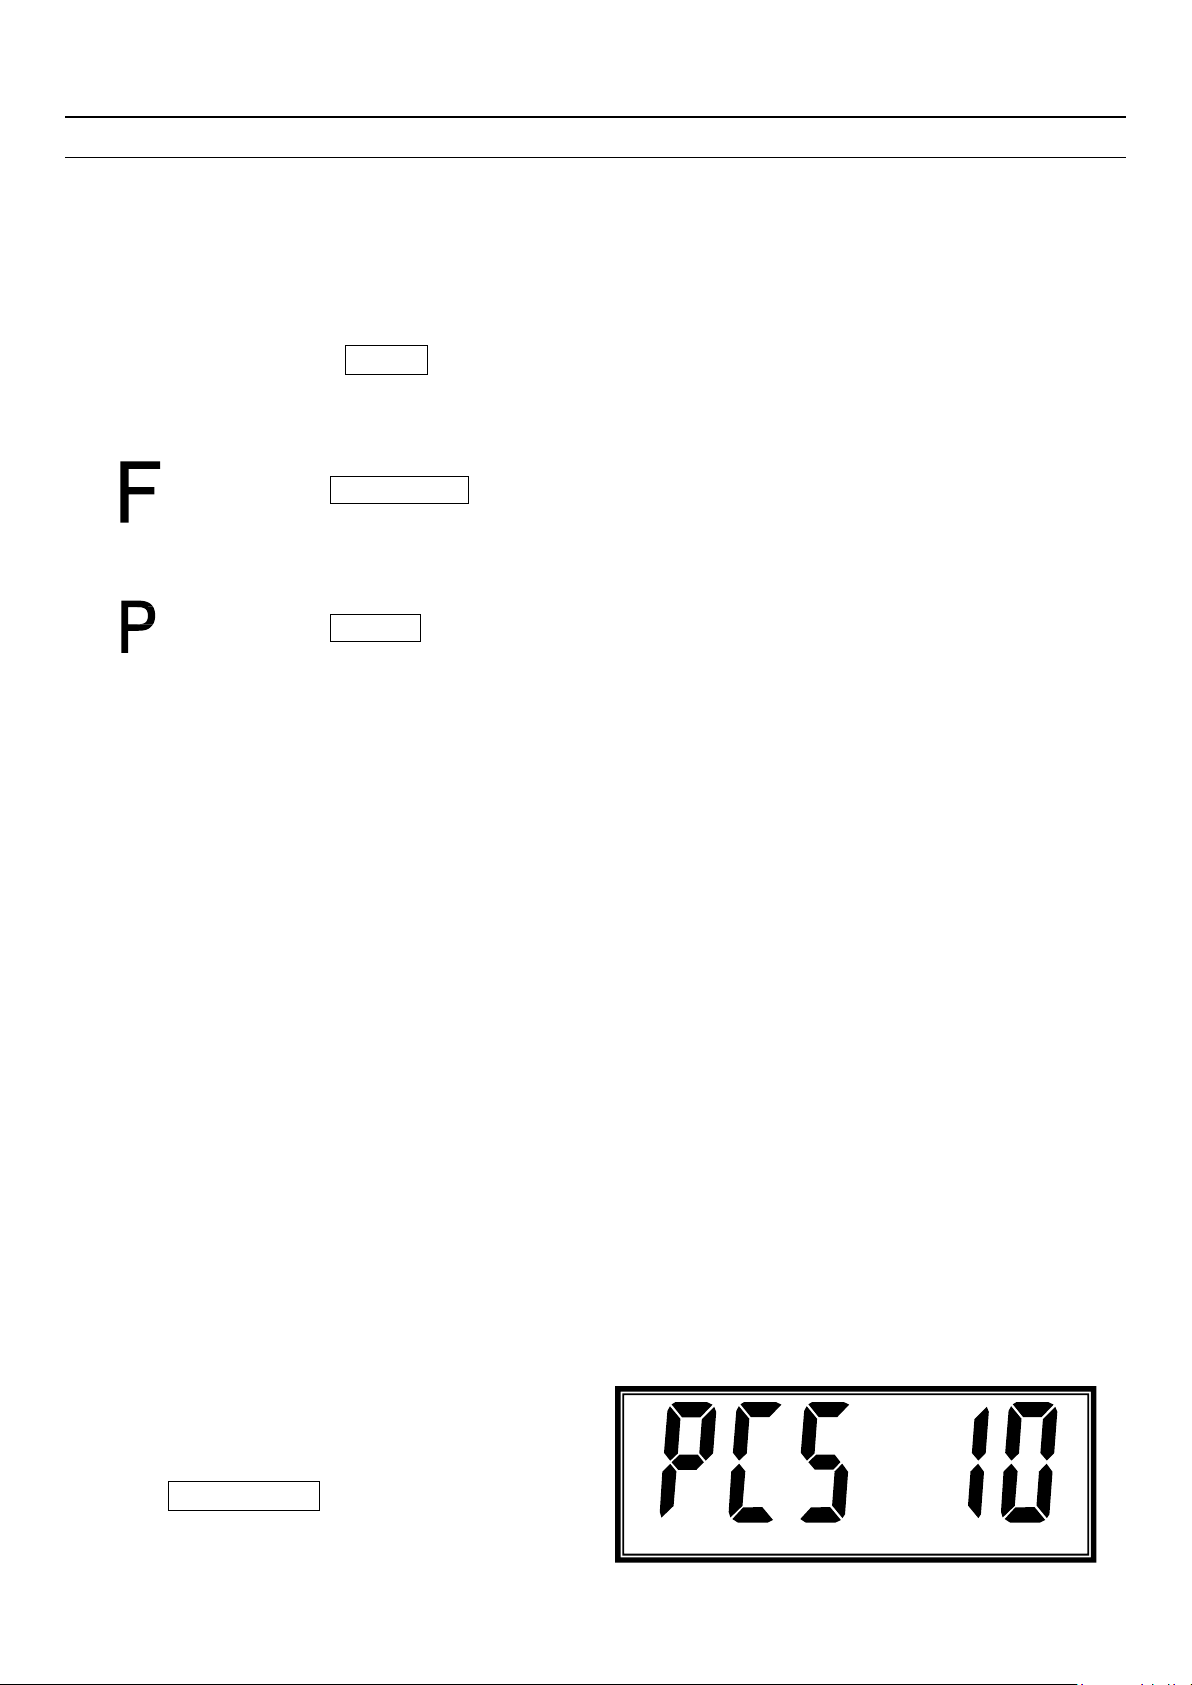
1.4.2 Simple Counting Mode
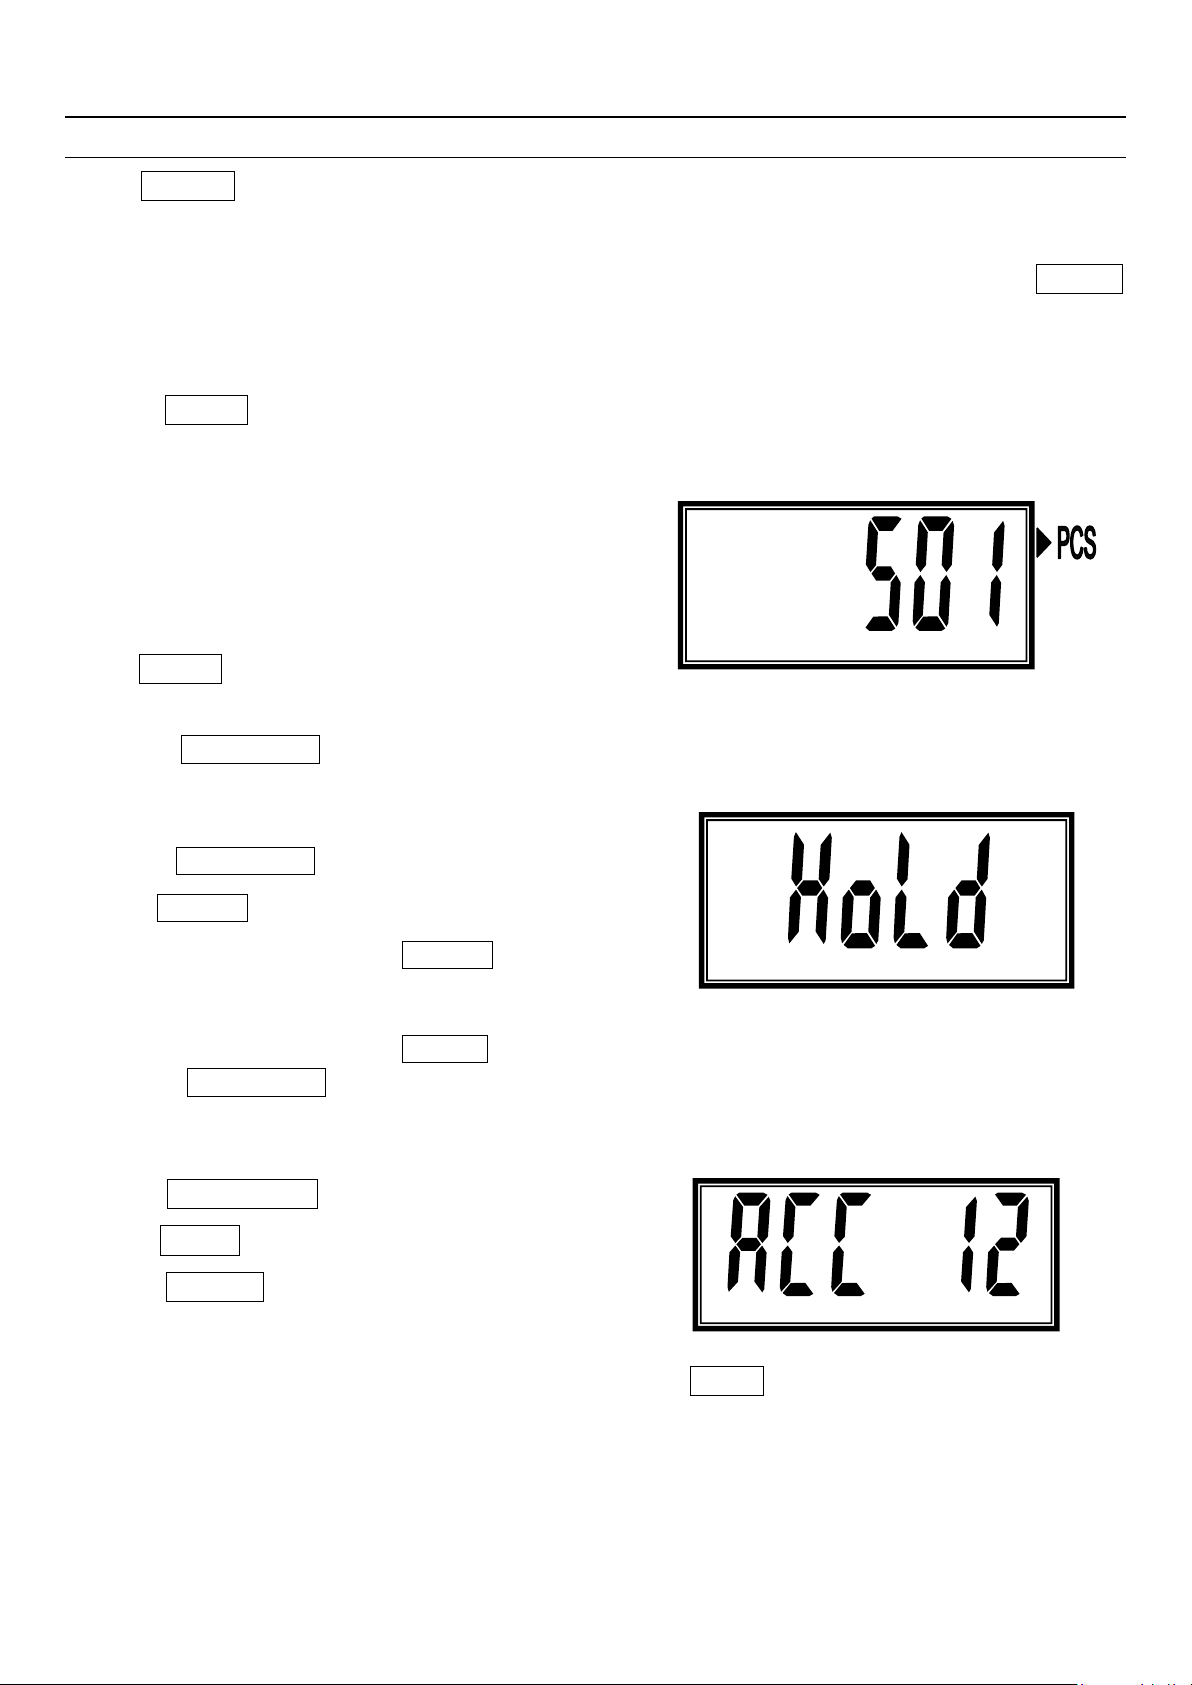
1. Press FUNCTION key once, display shows :
6
Page 7
OPERATING MANUAL
____________________________________________________________________________________________________________________
www.pce-instruments.com
Press ZERO key to choose sample numbers
from 10, 20, 50 to 100 pcs, then place the number of samples on the weighing pan. The number
should match the options for parts counting. i.e., 10, 20, 50, 100, 200 pieces. Then press PRINT
key to start the simple counting mode.
2.Press UNIT key to check the unit weight and total weight, display will shows unit weight and
shows total weight then back to simple counting mode.
3. After display shows unit weight and total
weight the scale back to simple counting
mode, user can continue to use this mode or
press UNIT key move back to weighing
mode.
Press FUNCTION key to exit simple counting mode and move back to weighing mode.
1.4.3 Weight Hold Mode
1. Press FUNCTION key two times, display shows:
Press PRINT key to start the HOLD mode, When choose
this mode, user needs to press PRINT key after the
objects are put on pan and the scale is stable.
2. Take off the object and press ZERO key the until back to zero and continue to weigh.
Press FUNCTION key to exit HOLD mode and move back to weighing mode.
1.4.4 Accumulation Mode
1. Press FUNCTION key three times, display shows:
Press TARE key to choose accumulation mode and
Press PRINT key to confirm.
“1” stands for manual accumulation.
When this mode is chosen and scale is stable, PRINT key should be pressed to do
accumulation; After taking away the object and scale back to zero point, user can do the second
accumulation.
“2” stands for auto accumulation.
7
Page 8

OPERATING MANUAL
____________________________________________________________________________________________________________________
When this mode is chosen and scale is stable, the software does accumulation automatically.
After taking away the object and scale back to zero point, user can do the second accumulation.
2. Press UNIT key to overview the total accumulated numbers and total accumulated weight;
display will shows total accumulated numbers then shows the total accumulated weight.
3. Scale will back to accumulation mode after showing the total accumulated numbers and weight.
Press FUNCTION key to exit accumulation mode and move back to weighing mode.
www.pce-instruments.com
1.5 Power Supply
POWER SELECTION
1. 6V4Ah rechargeable battery
2. 110V or 220V AC/DC adaptor
POWER CONSUMPTION
1. Approximately DC 17mA (Scale)
2. Approximately DC 37mA (Scale + Display backlight)
1.6 Rechargeable Battery Instruction
1. To charge the battery to full electricity at the first time.
2. Please use specified charger and connect charger plug with the charge window back the
indicator firmly. Red light means on charge and green light means full electricity.
3. The rechargeable battery is not among maintenance range.
Chapter II Advanced functions
2.1 Checking battery voltage
When scale is on and at zero and stable, long press ZERO key around 3-5 seconds(beeper
sounds) then release the key, display sill shows the battery voltage for 3 seconds ten back to
weighing mode.
8
Page 9
OPERATING MANUAL
____________________________________________________________________________________________________________________
www.pce-instruments.com
2.2 Display Parameters Setting
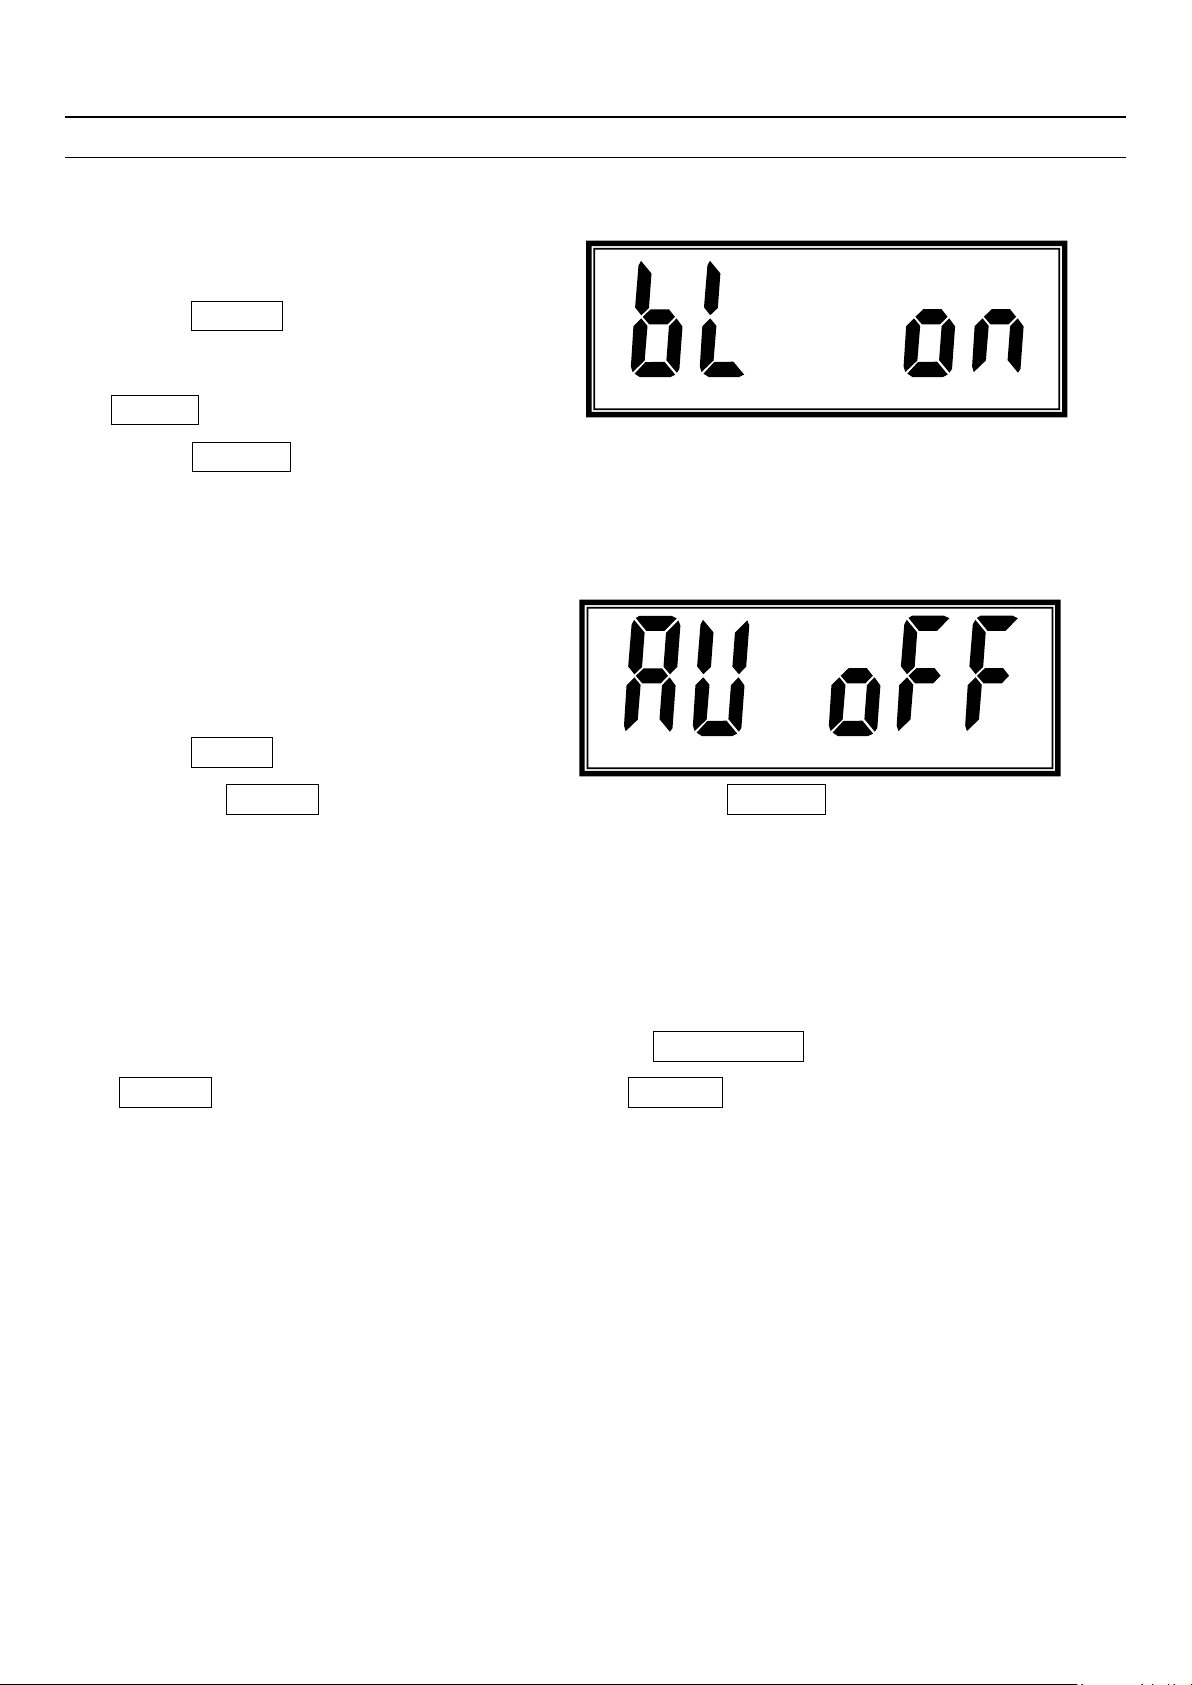
When scale is on and at zero and stable,
long press TARE key enter the display
parameters setting, the screen display:
Use ZERO key to enable or disable,
then press PRINT key to confirm and back to weighing mode.
On ( T15C has auto backlight, T15E is in electricity-saving mode) T15E Systematically
Off (T15C’s backlight is intelligent, T15E is in normal mode) T15C Systematically
2.3 Auto off setup
When scale is on and at zero and stable,
long press UNIT key enter the auto
off setup, use ZERO key to enable or disable, then press PRINT key to confirm and back to
weighing mode. on enable (scale will turn off after 10 minutes haven’t been use; to be able to use
the scale, needs to turn on the on/ff switch) off disable
2.4 Division setup
When scale is on and at zero and stable, long press FUNCTION key enter the division setup,
use ZERO key to select the divisions, then press PRINT key to confirm and back to weighing
mode.
2.5 RS232 Connection with Computer(Optional)
Make sure that communication interface output lead and computer are correctly connected, if there
is something wrong with connection, damage will happen to output port of instrument and input port
of computer, sometimes, the damage is so big that instrument, computer and corresponding
peripherals are got involved.
Necessary computer technology and programming expertise are required for computer
9
Page 10

OPERATING MANUAL
____________________________________________________________________________________________________________________
www.pce-instruments.com
communication, which should be participated and instructed by professionals. Non-professional
staff is supposed not to be involved in this regard.
1. Serial communication interface use RS232 plug with 9 cores.
2. All data are ASCII code, every set of which is composed of 10 bits: the 1st is starting bit, the 10
is stop bit, the middle in between are 8 data bits.
3. Baud rate can be 2400/4800/9600/19200
4. Communication type:Command mode
Chapter Ⅲ Calibration
3.1. Setting up division, decimal point, max. capacity and calibration
th
Press and hold “PRINT” key, then turn on the scale, to enter division setting:
3.1.1 Division Setting:
Display shows [d x] then press “ZERO” key to select 1、2、5、10、20、50, and then press
“PRINT” key to confirm, and enter the decimal point setting.
Ex. When display shows [d 5], press “PRINT” key, the division set as 5, then enter the decimal
point setting.
3.1.2. Decimal point setting:
Display shows [p x] then press “ZERO” key to select 0、0.0、0.00、0.000、0.0000, P.00000,
and then press “PRINT” key to confirm, and enter the maximum capacity setting.
Ex. When display shows [p 0.000], Press “PRINT” key, the division set as 0.000, then enter the
maximum capacity setting.
3.1.3. Maximum capacity setting:
Display shows [ FULL ] around 2-3 seconds then display shows [000.000] the decimal point was set
as 3 decimal points, then press “TARE” key to move the flashing digits to the right in circle to select
the digits that will increase the number, then press “ZERO” key to increase the number until the
number appears, then repeat the above moves until display shows the maximum capacity then
10
Page 11

OPERATING MANUAL
____________________________________________________________________________________________________________________
www.pce-instruments.com
press “PRINT” key to enter calibration setting.
Ex. Display shows [50.000] then press “PRINT” key to enter calibration setting.
3.1.4. Zero point calibration:
Display shows [CaL 0 ] Do not put any objects on the pan when display shows this, then scale
will move to next calibration setting.
3.1.5. Second point calibration: (Unit is in kg/ lb)
Display shows [00.000] the decimal point was set as 3 digits. (This depends on what user sets
in the last moves). Put on the weights on the pan which will be calibrate as second point then use
“TARE” key to move the flashing digits to the right in circle to select the digits that will increase the
number, then press “ZERO” key to increase the number until the number appears, then repeat the
above moves until display shows the numbers which is equal to the weights put on the pan, then
wait until the scale is stable then press “PRINT” key, scale will move into the weighing mode then
press “calibration” key to confirm calibration finished.
3.2. Fast calibration mode:
Press and hold “PRINT” key, then turn on the scale, then press “FUNCTION” key to enter
calibration mode: (the division, decimal point and max. point will remain the same)
3.2.1. Zero point calibration:
Display shows [CaL 0 ] Do not put any objects on the pan when display shows this, then scale
will move to next calibration setting.
3.2.2. Second point calibration: (Unit is in kg/ lb)
Display shows [00.000] the decimal point was set as 3 digits. (This depends on what user sets in
the last moves). Put on the weights on the pan which will be calibrate as second point then use
“TARE” key to move the flashing digits to the right in circle to select the digits that will increase the
number,then press “ZERO” key to increase the number until the number appears, then repeat the
above moves until display shows the numbers which is equal to the weights put on the pan, then
11
Page 12

OPERATING MANUAL
____________________________________________________________________________________________________________________
www.pce-instruments.com
wait until the scale is stable then press “PRINT” key, scale will move into the weighing mode then
press “calibration” key to confirm calibration finished.
Chapter Ⅳ T15C/E-Time & Date Setting(This function is suitable for
T15E/C-PC, T15E/C-A)
Long pressing “Tare” and “Zero” key together enter time checking mode, then press “Tare” key (Down) to check
Year, Month, Date, Hour, Minute, Second etc. At this time, press “Unit” key, checking mode and revising mode can
be exchanged.
1. Revising mode: When the time begins to flicker, change related data, press “Print” key to save the time
and then back to checking mode.
2. Checking mode: If the data not saved, the time will not change after back to checking mode.
Data show as follows:
1. Clk 24/12: (clock) choose between 24-hour system and 12-hour system. Press “Zero” key to make
change.
2. APM A/P: (am pm) 12-hour system. “a” for “morning”, “p” for “afternoon. Press “Zero” to make a
change. In 24-hour system mode, it cannot be set, showing”—“.
3. YEA 00: (year) Input number for the accordingly year. “12” for “2012”. The largest number is 99.
Press”Function” key once, the decimal digit adds by“1”. Press “Zero” key once, the other digit adds by
“1”.
4. Mon 00: (month) Input number for the accordingly month. “4” for April. The largest number is 12.
Press “Function” key once, the decimal digit adds by“1”. Press “Zero” key once, the other digit adds by
“1”.
5. Dte 00: (date ) Input number for the accordingly date. “15” for the 15th day of a month. The largest
number is 31. Press “Function” key once, the decimal digit adds by“1”. Press “Zero” key once, the other
digit adds by “1”.
6. Hou 00: (hour) Input number for the accordingly hour. “8” for 8:00. In 12-hour system, the largest
number is 12. In 24-hour system, the largest number is 23. Press “Function” key once, the decimal digit
adds by“1”. Press “Zero” key once, the other digit adds by “1”.
7. Min 00: (minute) Input number for the accordingly minute. “30” for 30 minutes. The largest number is
59. Press “Function” key once, the decimal digit adds by“1”. Press “Zero” key once, the other digit adds
12
Page 13
OPERATING MANUAL
0 1 2 3 4
5 6 7 8 9
A B C D E
F G H I J
K L M N O
P Q R S T
U V W X Y
____________________________________________________________________________________________________________________
by “1”.
8. Sec 00: (second) Input number for the accordingly second. “30” for 30 seconds. The largest number is
59. Press “Function” key once, the decimal digit adds by“1”. Press “Zero” key once, the other digit adds
by “1”.
9. Day 00: (day) Input number for the accordingly day. “0” for 30 Sunday.”1” for Monday. The largest
number is 6.
www.pce-instruments.com
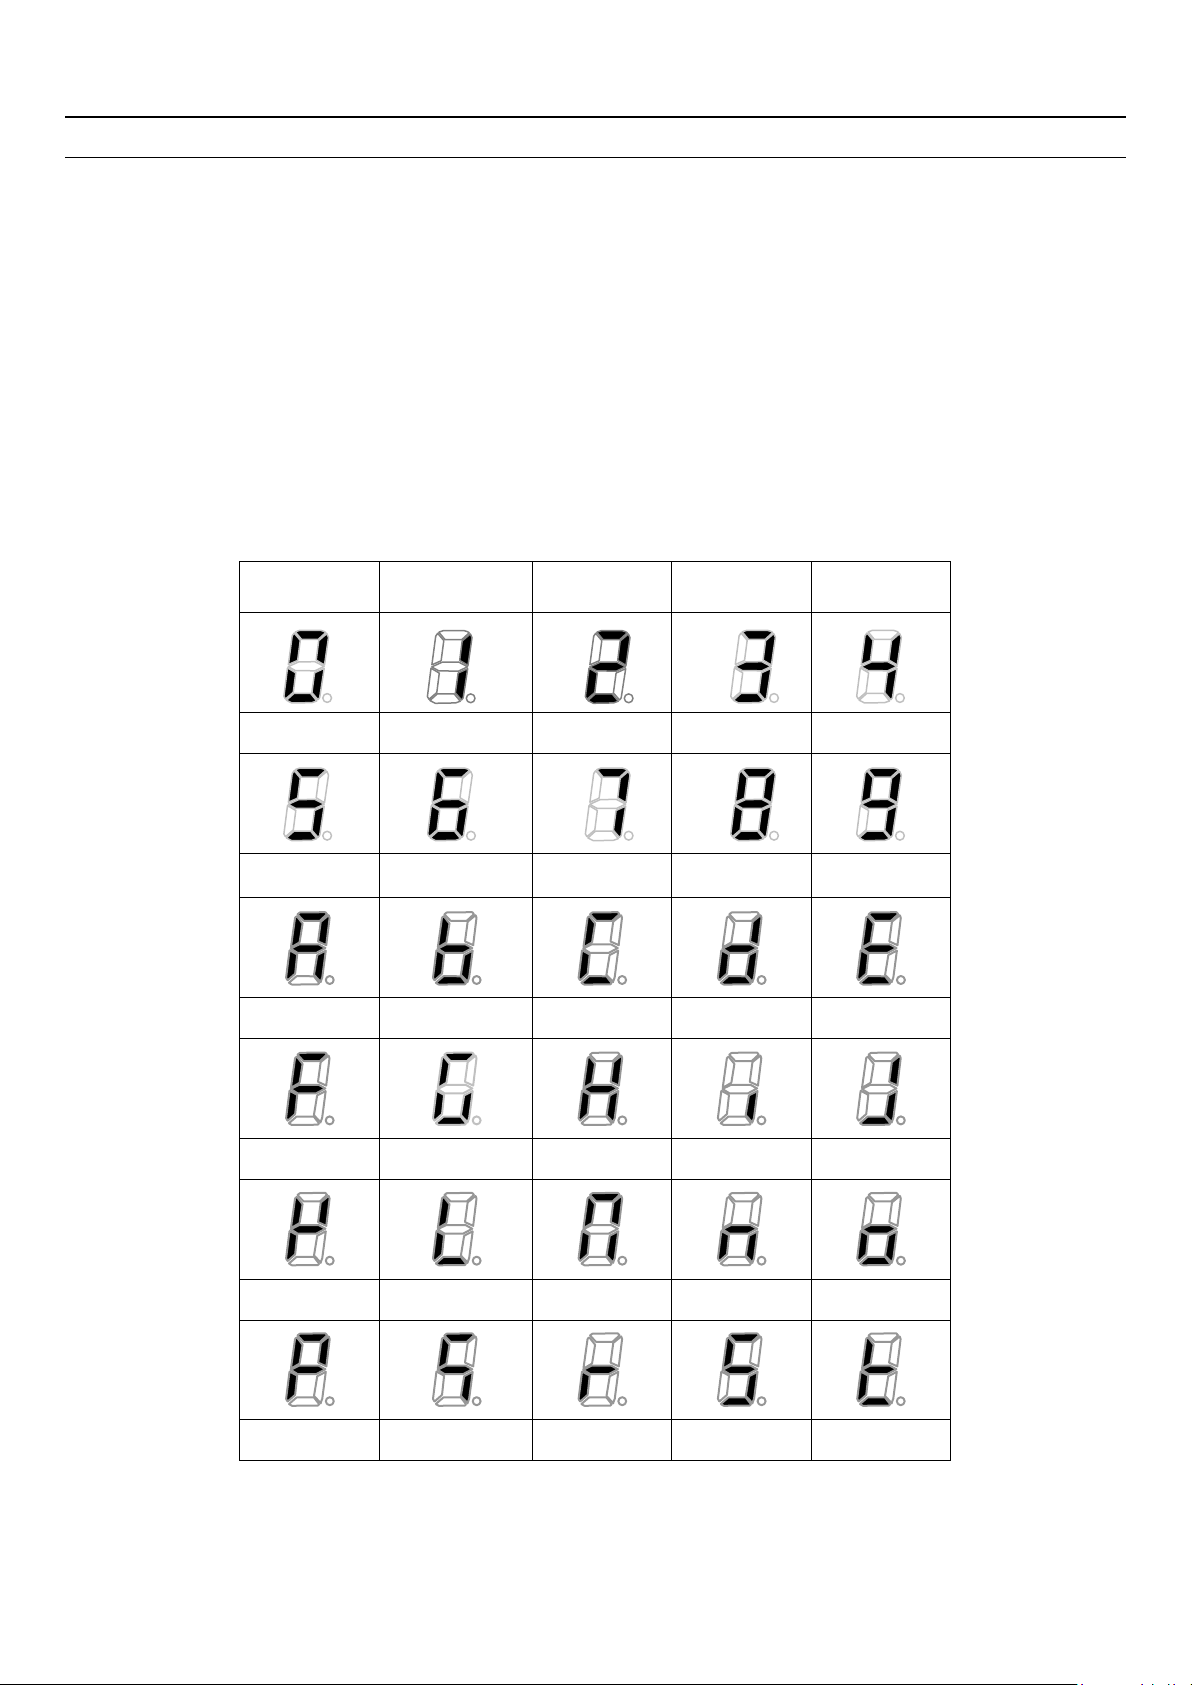
APPENDIX: Word Table
13
Page 14

OPERATING MANUAL
Z
?/Others
-
____________________________________________________________________________________________________________________
www.pce-instruments.com
14
 Loading...