


User Manual
Color Meter
PCE-CRM 40
PCE Americas Inc.
711 Commerce Way
Suite 8
Jupiter
FL-33458
USA
From outside US: +1
Tel: (561) 320-9162
Fax: (561) 320-9176
info@pce-americas.com
www.pce-instruments.com/english
www.pce-instruments.com
PCE Instruments UK Ltd.
Units 12/13
Southpoint Business Park
Ensign way
Hampshire / Southampton
United Kingdom, SO31 4RF
From outside UK: +44
Tel: (0) 2380 98703 0
Fax: (0) 2380 98703 9
info@pce-instruments.com

CONTENT
Ⅰ Product Overview .................................................................................................................... 1
1.1 Front Side ....................................................................................................................... 1
1.2 Reverse Side ................................................................................................................... 2
Ⅱ Basic Operat ion ....................................................................................................................... 3
2.1 Starting Page ................................................................................................................. 3
2.2 Home Page .................................................................................................................... 4
2.3 System Settings ............................................................................................................. 5
2.3.1 T ime Sett ing ........................................................................................................ 5
2.3.2 Power Management ............................................................................................ 6
2.3.3 Language ............................................................................................................. 7
2.3.4 Version ................................................................................................................. 7
2.4 Test Setup ...................................................................................................................... 8
2.4.1 Developer Tools ................................................................................................... 8
2.4.2 Measurement unit select ion ................................................................................ 9
2.5 Parameter descript ion ................................................................................................... 9
Ⅲ Measurement ........................................................................................................................ 10
3.1 Measure Operat ion ....................................................................................................... 10
3.2 Operation during Measuring ........................................................................................ 11
3.3Color Difference Value and Chromaticity Coordinates ................................................... 12
3.4 View Data ..................................................................................................................... 15
3.5 Maximum Measuring .................................................................................................... 17
3.6 Batch Data Processing.................................................................................................. 17
Ⅳ Attentions and Basic Maintenance ........................................................................................ 21
4.1 Attent ions in use ..........................................................................................................
21
4.2 How to clean ................................................................................................................ 22
Ⅴ Specifications ........................................................................................................................ 23

1
Ⅰ
Product Overview
PCE-CRM 40
1.1 Front Side
1 Measuring lens
2 Display Screen
3 UP key Move up
4 MAX key Maximum value
5 OK key Confirm
6 DOWN key Move down
7 MENU key Moves to the main measurement screen from other
creens and submenus.
8 BACK key Moves back one level in the menu structure.
9 POWER key Power
10 USB MICRO Interface Connected with power adapter to realize the charging,
connected with computer to realize data transmission.
11 SD slot Install SD card into this slot.

2
1.2 Reverse Side
12 Tripod jack
13 Nameplate
14 Wrist Strap Hook
15 HOLD key Press the button,the device would pause and
save the latest data, and word ‘hold’ shows
on the screen in the top left corner;
Press the button once again, and the device
would cont inue working.
16 Measuring Lens Uninstall button The button is set for manufacturer
maintenance. It is strictly prohibited to
disassemble privately in any case, avoiding
causing irreversible damage.

3
Ⅱ
Basic Operation
2.1 Starting Page
Press the power button for 1-2 seconds,after the beep, the device starts up and
shows the start ing page.
After the start ing process, the measuring page shows directly as below:
Press the button ‘MENU’ to jump into home page and operate other buttons to set up the

4
device for measuring.
2.2 Home Page

5
2.3 System Settings
Get into the system settings, the factory date has been set as Beijing Time. Power
management and language are default, users can change if necessary.
2.3.1 Time Setting
Time setting can be accurate to seconds, which has already been set in Beijing Time. No

6
need to change if not necessary.
2.3.2 Power Management
There are functions include screen backlighting time sett ing, auto-shut off time setting
and backlight brightness adjustment.
LCD backlighting time is set for 30 seconds in default, and the auto-shut off is set for 30
minutes.
Backlight brightness adjustment funct ion has 3 optional levels, corresponding to the
dark, medium and bright. It is set in f irst level in default.

7
2.3.3 Language
Device provides two operat ing languages in Chinese and English. Customers can choose
according to need.
2.3.4 Version
User can view version number and identif ication S/N code in the page.

8
2.4 Test Setup
2.4.1 Developer Tools
Developer tools are provided for developers only, the function is not open during the use
of device. The details are provided in 4.3.

9
2.4.2 Measurement unit selection
Two optional units of illuminat ion are provided, Lx and Fcd.
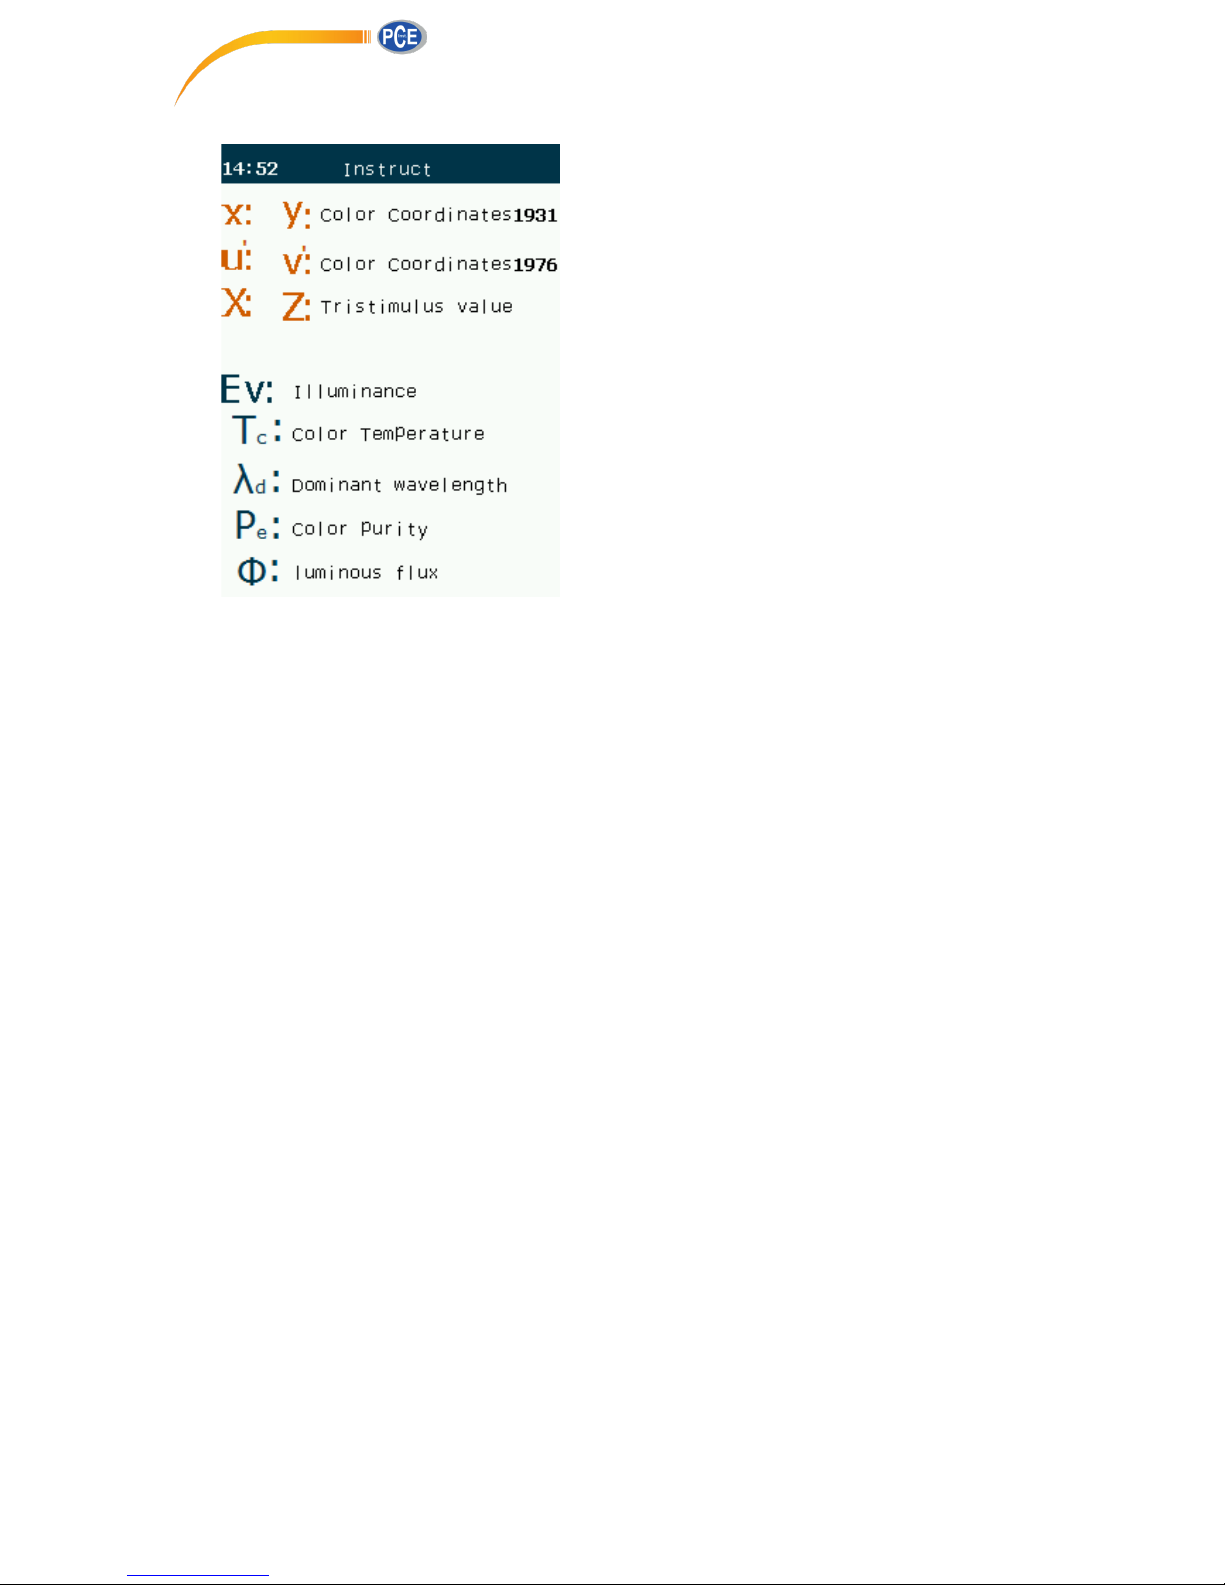
2.5 Parameter description
Select the option of parameter description, press the OK to jump into menu below.
10
The definit ion of photometric and colorimetric symbols are provided in the page for
operat ion.
Ⅲ
Measurement
3.1 Measure Operation
After the startup-setting finished, point ing the photosensitive lens at light source to be
measured directly and it starts measuring immediately.
The data shows on the display screen.

11
User would learn the parameters of light source measured intuitively from the data on
the screen.
3.2 Operation during Measuring
Press the ‘hold’ key unt il the word ‘hold’ shows on the upper right corner of the screen,
then the measuring process would end, the test data would be stored in SD card
automatically.

12
Press the ‘hold’ key again and measuring process starts again, as below:
When a device complete a set of data testing, user can press ‘MENU’ key to jump
into homepage and perform other operat ions. If press ‘MENU’ again, the page
would return to measuring page.
3.3Color Difference Value and Chromaticity Coordinates
13
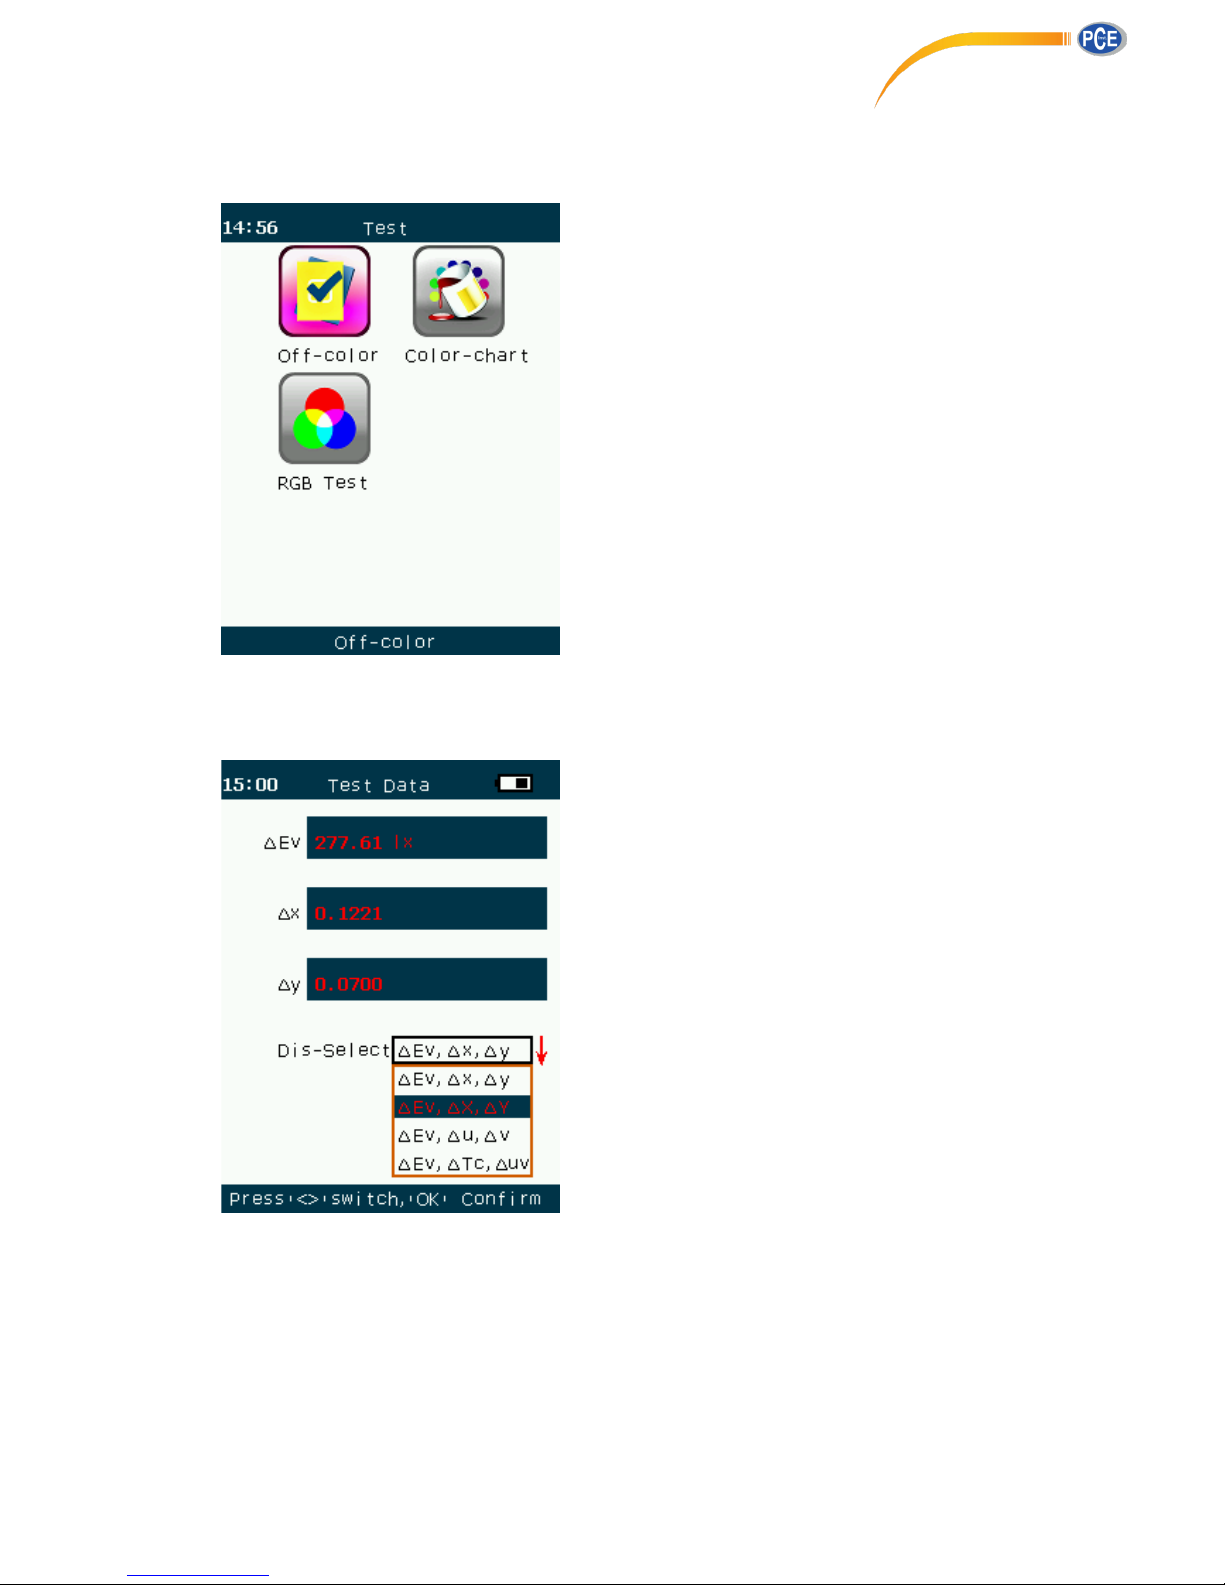
When we press the ‘ok’ key, it jumps into testing menu. User can check for color
difference value, chromaticity diagram and RGB value.
User can look up the latest one data of color difference value in the color difference
value option, including ∆(XYZ),∆(Evxy),∆(Evuv),∆Ev ∆Tc ∆uv
Chromaticity diagram is consisted with two coordinate graphs,CIE1932 and CIE1976
CIE1931

14
CIE1976
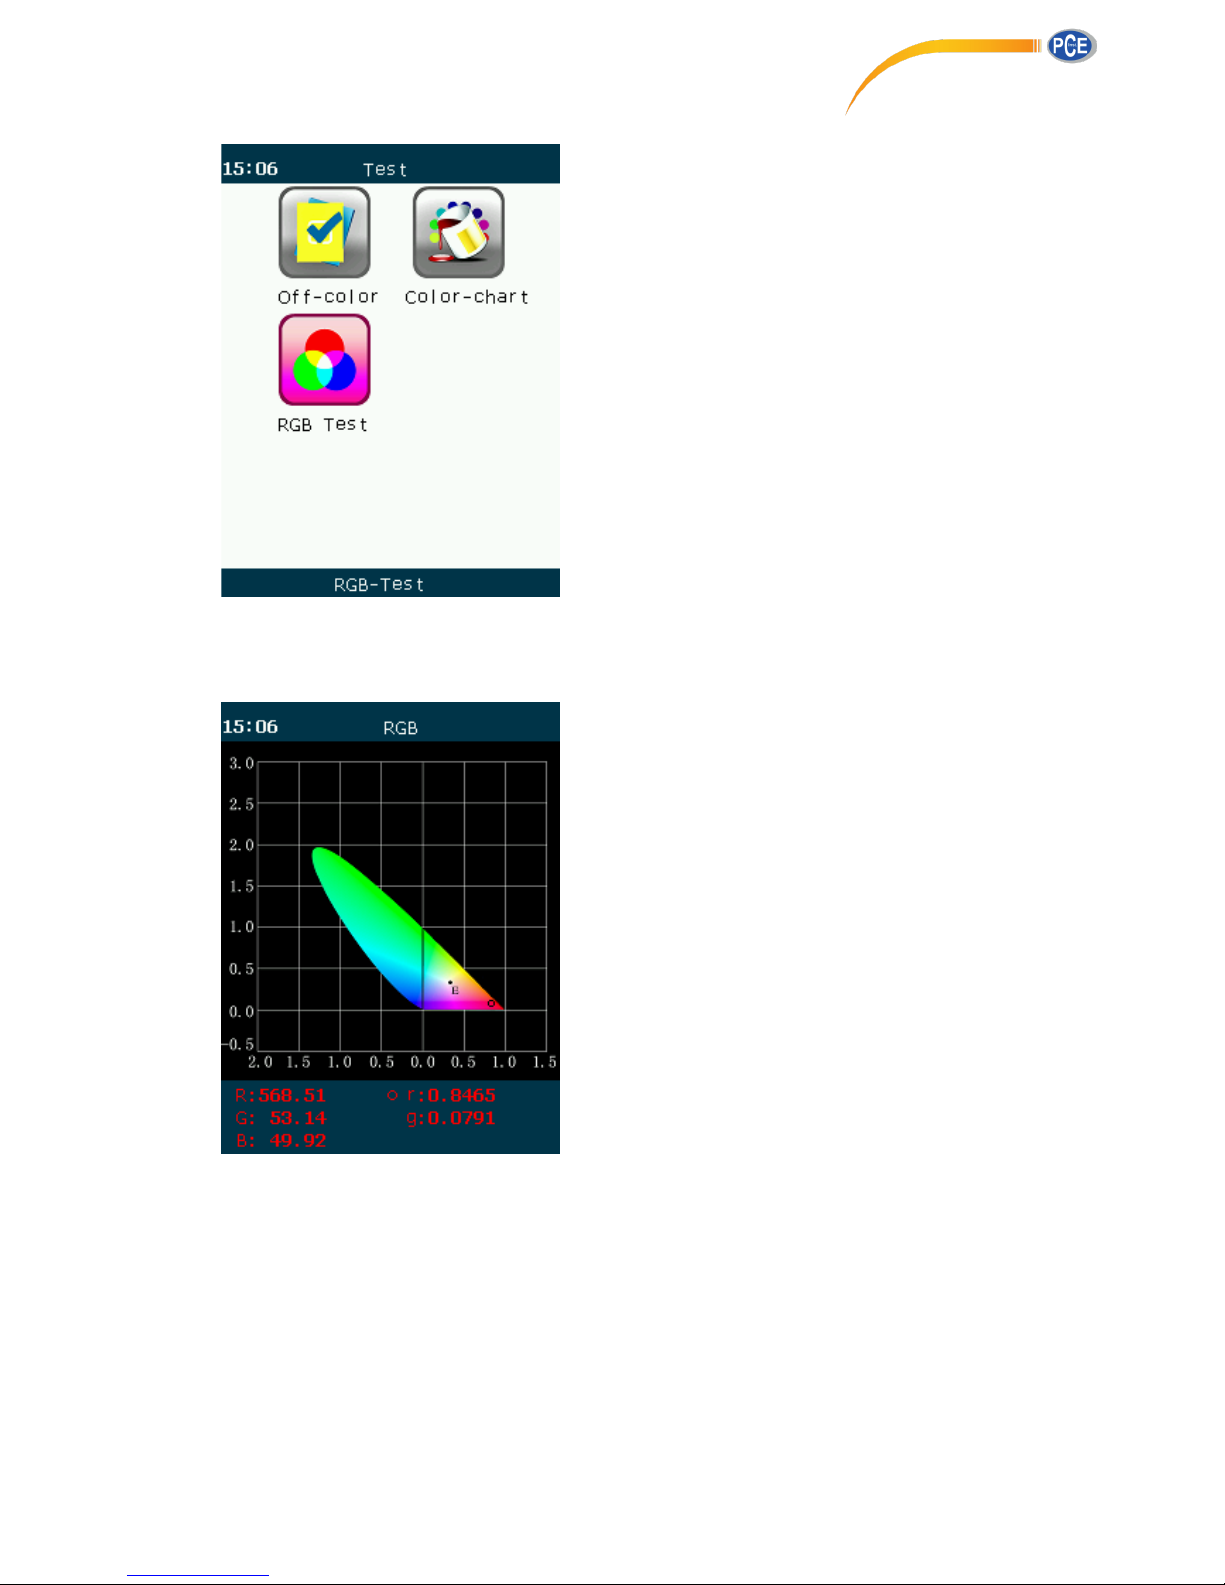
RGB Value
15
Select RGB test to view the RGB graph.
3.4 View Data
Enter the homepage, select the ‘SD store’, user can view the latest nine measurement
data.

16
Select and press ‘OK’ key to get in the list of historical data.
Data list is sorted by t ime, and device only stores latest nine dada. New data would cover
previous data automat ically.
User can view the history by selecting t ime and pressing ‘OK’ key.

17
3.5 Maximum Measuring
Press the ‘MAX’ key, keep the device still and don’t move, it starts measuring
automatically.
Device measures 10 times in 5 seconds and the maximum value shows on the screen,
In the meantime, those 10 data are stored into SD card.
Press ‘MAX’ one more time to cancel the maximum measuring mode and return to
normal measuring page.
3.6 Batch Data Processing
Either by connect ing the computer with data line or taking out the SD card in device, user
can do data batch processing. Txt file would be saved by device, and if imported into PC,
the file would show as excel format, which is benef it for data management.
Import the txt file in SD card into PC software:

18
Select file and click import, click the data of certain point of time user can view the
number of measuring times.
Select file and click export button to get the excel file of data from PC.

19

20
It is possible to modify the contents of the output file according to the
user needs.
Find the template.xls file, change the content you want and save.

21
Ⅳ Attentions and Basic Maintenance
4.1 Attentions in use
It is a high-precision instrument, must carried by hand and used carefully.
Please read this instruction thoroughly before first t ime use.
Please keep it power off before you remove or install the measuring lens.
Please protect the measuring lens carefully and keep the lens clean. Don’t wipe it and
put the cover on the lens after use.
Don’t press the screen hard and keep it out of a
ny external impact or heavy pressure.
Please use the device in the temperature between —10℃ to 40℃ , in the humidity
less than 85% (35℃).
Notice that it is normal the device would become warm if you put it under the direct
sunlight or it is surrounded by relat ive hot instrument. Please protect the device
carefully under those circumstance.
The apex of the sphere of the measuring lens is used as a lighting related plane.
It is p
ossible that strong electromagnetic field would have a strong effect on internal
microprocessor of instrument. Please turn off the power of device and AC adapter,
then power on and restart the device,
Don’t use it in the area with alt itude higher than 2000 meters.
If you want to use the AC adaptor, please make sure that you use the power supply
thar we have specified.
The instrument is set for grade Ⅱ pollut ion products, please do not use
in the area

22
with high concentrat ion of metal part icle dust.
Please put the device into the protection package after use. Keep it out of too hot,
too cold and vibrat ion.
4.2 How to clean
Please use dry cloth or silicon cloth to wipe the dust on the lens. Don’t use solvents
such as diluent and benzene.
If there are a lot of dust on the lens, please use soft dry cloth to wipe out. If the dust
cannot be wipe out or the lens has been scratched, please contact the after-sale
service center nearby immediately.
If the device is out of order, don’t disassemble it privately or try to fix it by yourself.
Please contact the after-sale service personnel immediately.
How to place
Don’t place the device in the environment with high temperature and humidity.
Don’t place the device in the rear glass or in the trunk of the car. The temperature will
rise so that the instrument can be deformed or damaged.
If you won’t use the device in 2 weeks or longer period of time, please turn off the
power thoroughly
Don’t wrap the device with cable around or the connector and the root of the cable
may be under excessive force, thereby causing the disconnection.

23
Ⅴ
Specifications
Model PCE-CRM 40
Range
Illumination:0.1-150000lx,0.01-15000 fcd
Color Temperature:1500-25000K
Range:(5lx,>0.5fcd)automatically switch in four gears
Accuracy
Ev(linear):±2% of reading
xy:±0.003 (500lx,Standard light source A)
Repeatability
Ev:±2%+1 decimal digits(2σ)
xy:±0.0005 (500lx,Standard light source A)
Correlat ive-spectral
sensitivity
Consistent with CIE standard observer curve
Test Channel
Optional mult iple channels, adapt to different light ing sources and
applicat ions; optional self-calibrat ion channel.
Cosine correct ion(f2)
Ev: <3%
Parameters
Three st imulus values:XYZ
Chroma value:Evxy;Evuv;Ev;
Correlat ive color temperature:Tc;
Chromatic aberrat ion:∆(XYZ),∆(Evxy),∆(Evuv),∆Ev∆Tc∆uv
Chromaticity coordinates:ICE1931(x,y),ICE1976(u,v);
Main wavelength:入 d
Color purity:Pe
Luminous flux:Φ
RGB Value
Other Funct ions
Mult iple channel、Mult iple standard sample、Large capacity data
storage(more than 1000 t imes);User-calibrat ion; Automatic
shutdown;Auto turn off backlight
Display Interface
One screen display:illuminat ion Ev,CIE1931(x,y),CIE1976(u,v),
Color temperature Tc,Main wavelength 入 d,Chroma purity Pe ,
Luminous flux Φ
Language
Simplif ied Chinese, English
Interface Micro USB 2.0
Power
Micro USB data line;2200mAh large capacity lithium battery
Operat ing Temperature
and Humidity Range
-10-40°C,Correlat ive humidity <85%(35°C 时),No condensation
Storage temperature and
humidity range
-10-40°C,Correlat ive humidity <85%(35°C 时),No condensation

24
Size 210*80*35mm
Weight 235g
Standard Accessories
Dust Cover,Power adapter,USB data line,
data management
software disc,Host Rope,anti-lost lens cover rope,device leather
bag,baffle。
 Loading...