

Page 1
Manual
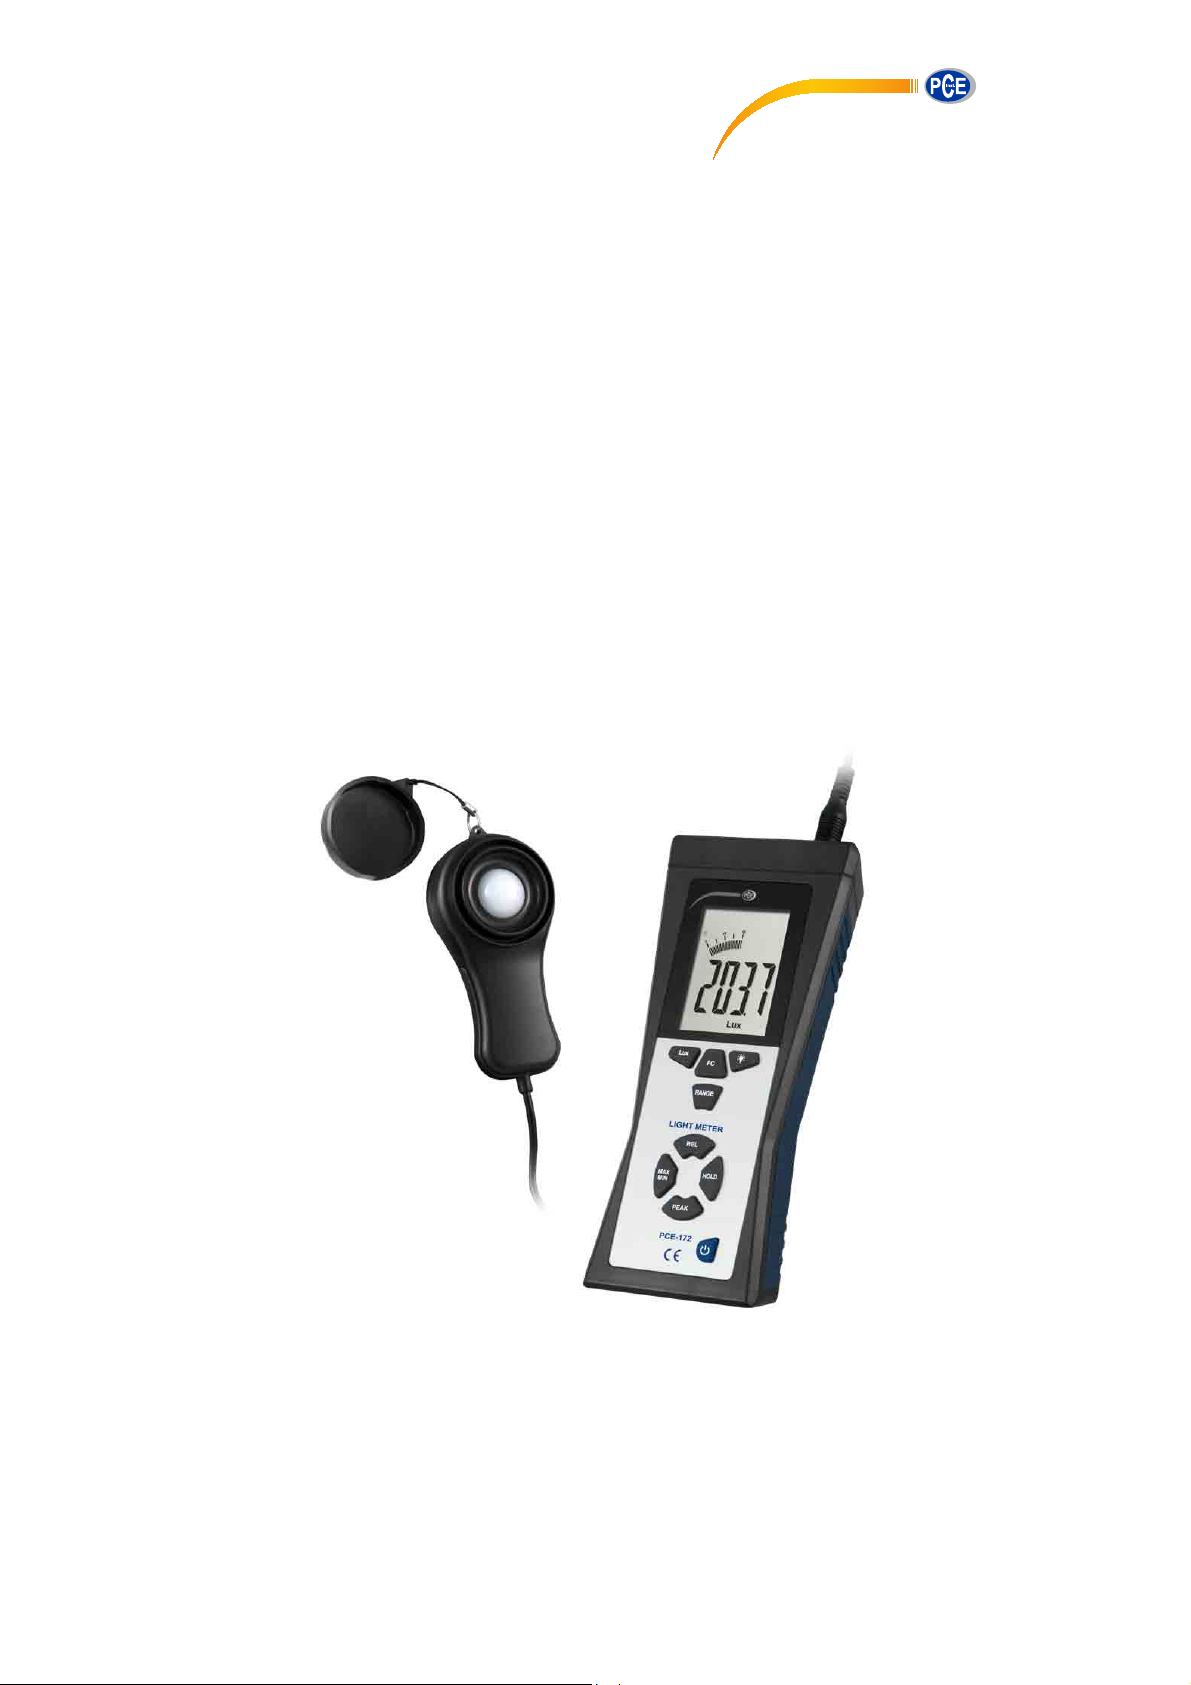
Illuminometer
PCE-172
PCE Americas Inc.
711 Commerce Way
Suite 8
Jupiter
FL-33458
USA
From outside US: +1
Tel: (561) 320-9162
Fax: (561) 320-9176
[email protected]
www.pce-instruments.com/english
www.pce-instruments.com
PCE Instruments UK Ltd.
Units 11
Southpoint Business Park
Ensign way
Hampshire / Southampton
United Kingdom, SO31 4RF
From outside UK: +44
Tel: (0) 2380 98703 0
Fax: (0) 2380 98703 9
Page 2

CONTENT
1. INSTRUCTION ................................................................................................................. 3
2. FEATURES ...................................................................................................................... 3
3. SPECIFICATIONS ........................................................................................................... 3
4. NAME OF PARTS AND POSITIONS ............................................................................... 4
5. OPERATING INSTRUCTIONS ........................................................................................ 4
6. BATTERY CHECK-UP & REPLACEMENT ..................................................................... 4
7. SPECTRAL SENSITIVITY CHARACTERISTIC ............................................................... 5
8. MAINTENANCE ............................................................................................................... 5
9. RECOMMENDED ILLUMINATION .................................................................................. 5
2
Page 3

1. INSTRUCTION
¾ The digital illuminance meter is a precision instrument used to measure illuminance (lux, footcandle) in the
field.
¾ It is meet CIE photopic spectral response.
¾ It is fully cosine corrected for the angular incidence of light.
¾ The illuminance meter is compact, tough and easy to handle owing to its constrution.
¾
The light sensitive component used in the meter is a very stable, long-life silicon photo diode and spectral
response
filter.
2. FEATURES
¾ Light-measuring levels ranging form 0.01lux~0.1klux/0.01fc~0.01kfc, repeatedly.
¾ High accuracy and rapid response.
¾ Data-hold function for holding measuring values.
¾ Unit and sign display for easy reading.
¾ Automatic zeroing.
¾ Meter corrected for spectral relative efficiency.
¾ Correction factor need not be manually calculated for non-standard light source
¾ Short rise and fall times.
¾ Peak-hold function for tracing the peak signal of light pulse with least duration 10μs and keep it.
¾ Capable of selecting measuring mode in lux or fc scale alternatively.
¾ Auto power off 30 minutes.
¾ Maximum and minimum measurements.
¾ Relative reading & Reset function.
¾ Easy to read large backlit display
s.
3. SPECIFICATIONS
¾ Display :3-3/4 digit LCD with high speed 41 segment bargraph.
¾ Measuring Range:40.00 lux,400.0 lux,4000 lux,40.00 Klux and 400.0 Klux /40.00 fc,400.0 fc,4000 fc,40.00
Kfc.
NOTE: 1fc=10.76lux,1Klux=1000lux,1Kfc=100
¾ Overrange Display: LCD will show “OL” symbol.
¾
Spectral Response: CIE Photopic. (CIE human eye response curve)
Spectral Accuracy: CIE Vλ function f1’≦
¾
¾ Cosine Response: f2’
¾ Accuracy: ±5% rdg±10d.(<10,000Lux)
±10% rdg±10d.(>10,000Lux)
¾ Repeatability: ±3%
¾ Sampling Rate: 1.5 times/sec of analog bar-graph indication; 1.5 times/sec of digit
¾ Photo Detector: One silicon photo diode and spectral response filter.
¾ Operating temperature & Humidity :
0ºC to 40ºC(32ºF to 104ºF) & 0% to 80% RH.
¾ Storage Temperature & Humidity :
-10ºC to 50ºC(14ºF to 140ºF) & 0% to 70% RH.
¾ Power Source: 1 piece 9V battery.
¾ Photo detector Lead Length: 95cm (approx.);
¾ Photo detector Dimensions: 115L×60W×20H(mm);
¾ Meter Dimensions: 206L×95W×45H;
¾ Weight: 265g.
¾ Accessories: Carry case, instruction manual and battery.
≦2%
0fc
.
6%
al display.
3
Page 4
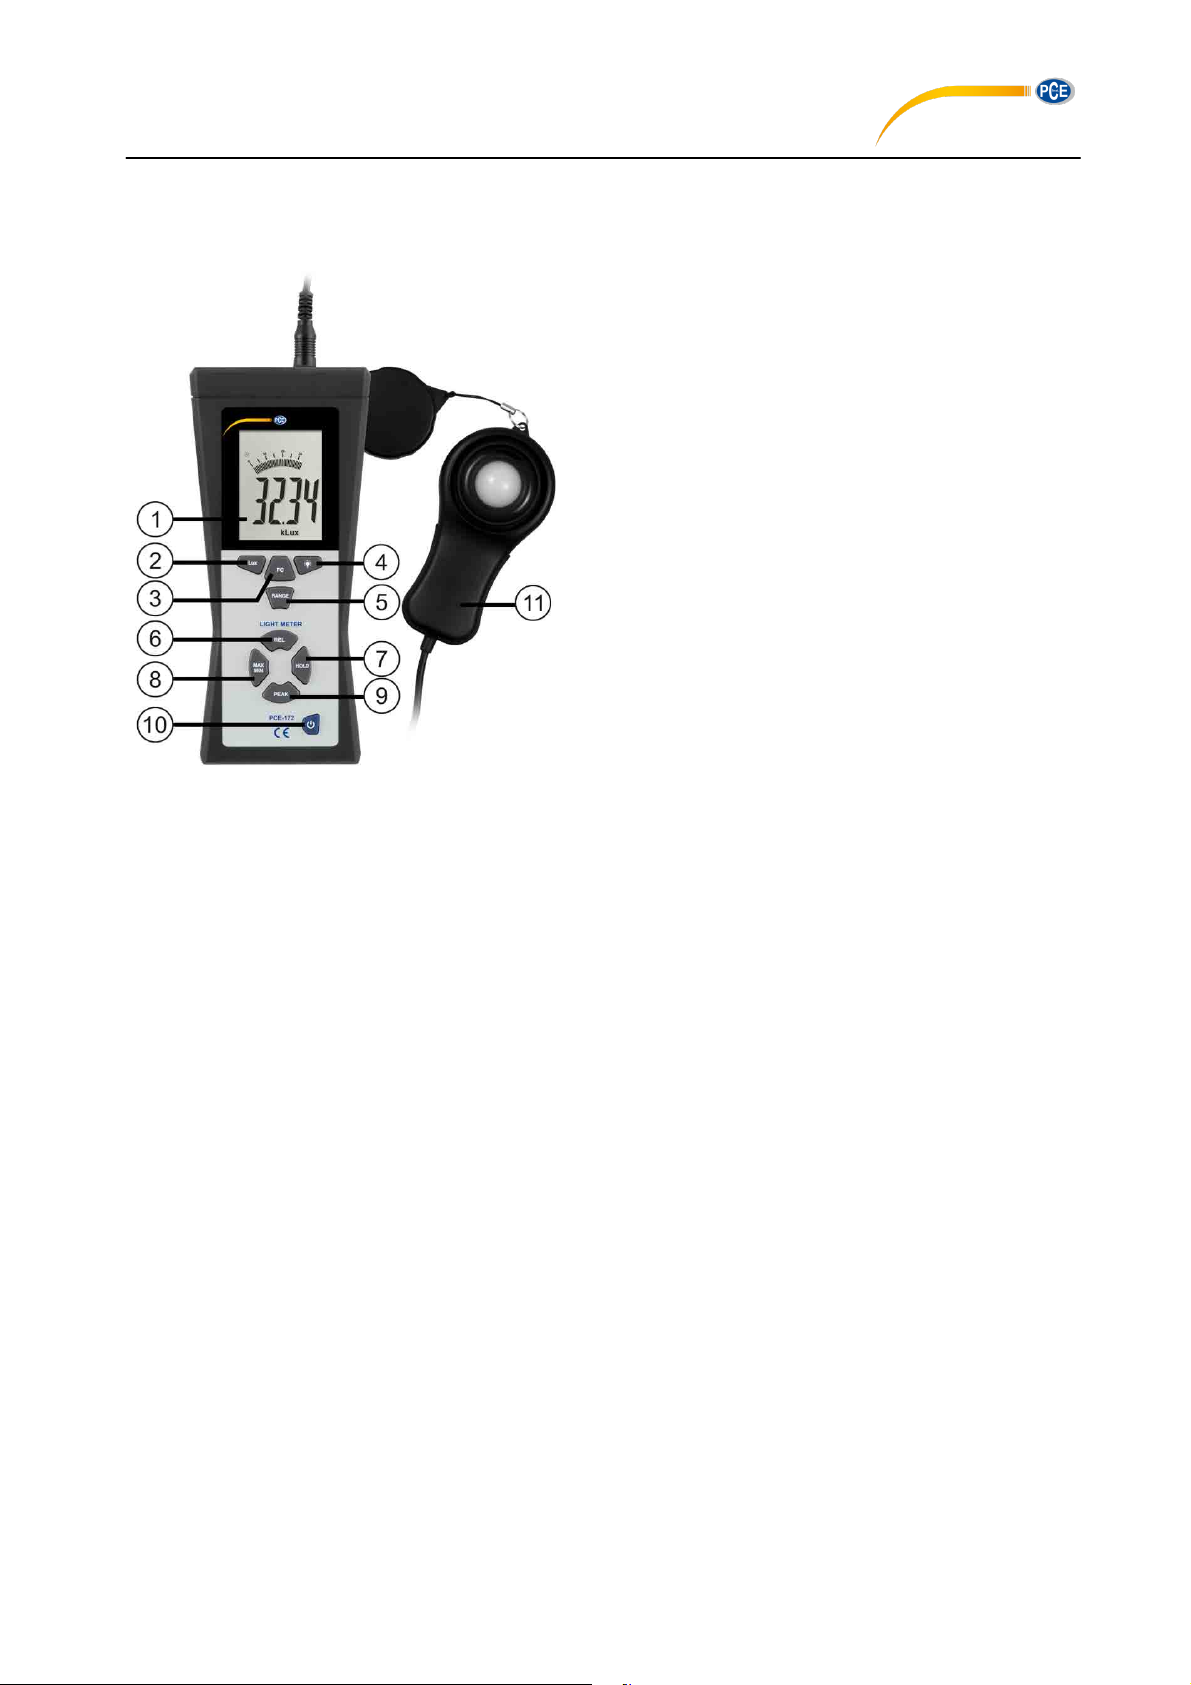
4. NAME OF PARTS AND POSITIONS
1. LCD Display: 3-3/4 digit displays with a
maximum reading of 3999, and the indicating
signs of measured values, unit function
symbols and decimal points etc are disp
2. Lux key: Pressing the lux key selects taking
measurement of illuminance in lux scale
3. Fc key: Pressing the fc key selects ta
measurement of illuminance in footcandle
scale; and, 1 footcandle= 10.76lux.
RANGE Selector key: It indicates 40.00 lux,
4.
400.0 lux,4000 lux,40.00 Klux and 400.0 Klux
/40.00 fc,400.0 fc,4000 fc,40.00 Kfc total 5
ranges for lux and 4 ranges
5. REL key: Relative reading control key.
6. MAX/MIN key: Maximum and minimum reading
recorder cont
7. PEAK Hold key: Peak Hold recorder control
key.
8. BACK-LIGHT key: Back light control key.
9. Data-HOLD key: Data Hold control key.
10. Power Control key: The power switch key turns
the illuminance meter ON or OFF.
11. Photo detector.
rol key.
for fc.
lay.
king
5. OPERATING INSTRUCTIONS
1. Power-up: Press the power key to turn the meter ON or OFF.
2. connect the photo detector.
3. Selecting the lux or fc scale: Set the range selection switch to desired lux or fc range.
4. Remove the photo detector cap and face it light source in a horizontal position.
5. read the illuminance nominal from the LCD display.
6. Overrange: If the instrument only displays “OL”, the input signal is too strong, and a higher range should be
selected.
7. Data-Hold mode: Press the hold key to select Data-Hold mode. When HOLD mode is selected, the
illuminance meter stops all further measurements. Press the HOLD key again to exit Data-Hold mode. Then
it resumes normal operatio
8. Peak-Hold recorder mode: Press and hold down PEAK key until display shown the “CAL” letter, then press
PEAK key cycle through Pmax and Pmin recorder mode, and expose the photo detector to light pulse
measuring field. Press and hold down PEAK key 2 seconds to exit PEAK recorder mode, then the meter will
resume normal operation.
9. Maximum and Minimum recorder mode: Press MAX/MIN key to cycle through Maximum(MAX) reading,
Minimum(MIN) reading and current reading(MAX/MIN blink) recorder mode. Press MAX/MIN key two
seconds to ex
10. Relative reading mode: Press REL key to enter Relative mode. The display shown zero value and the
current reading will be stored as a zero-in value. Press again to exit this mode.
11. Back-light function: Press the Backlight key to turn on. Press again to turn off.
12. When the measurement is completed, replace the photo detector cap and turn the meter off.
it this mode.
n.
6. BATTERY CHECK-UP & REPLACEMENT
1. As the battery power is not sufficient, LCD will display low battery, and replacement of one new battery is
required.
After turning off the meter, disconnect the battery cover with a screwier.
2.
4
Page 5
3. Disconnect the battery from the instrument and replace it with a standard 9V battery and go for the cover.
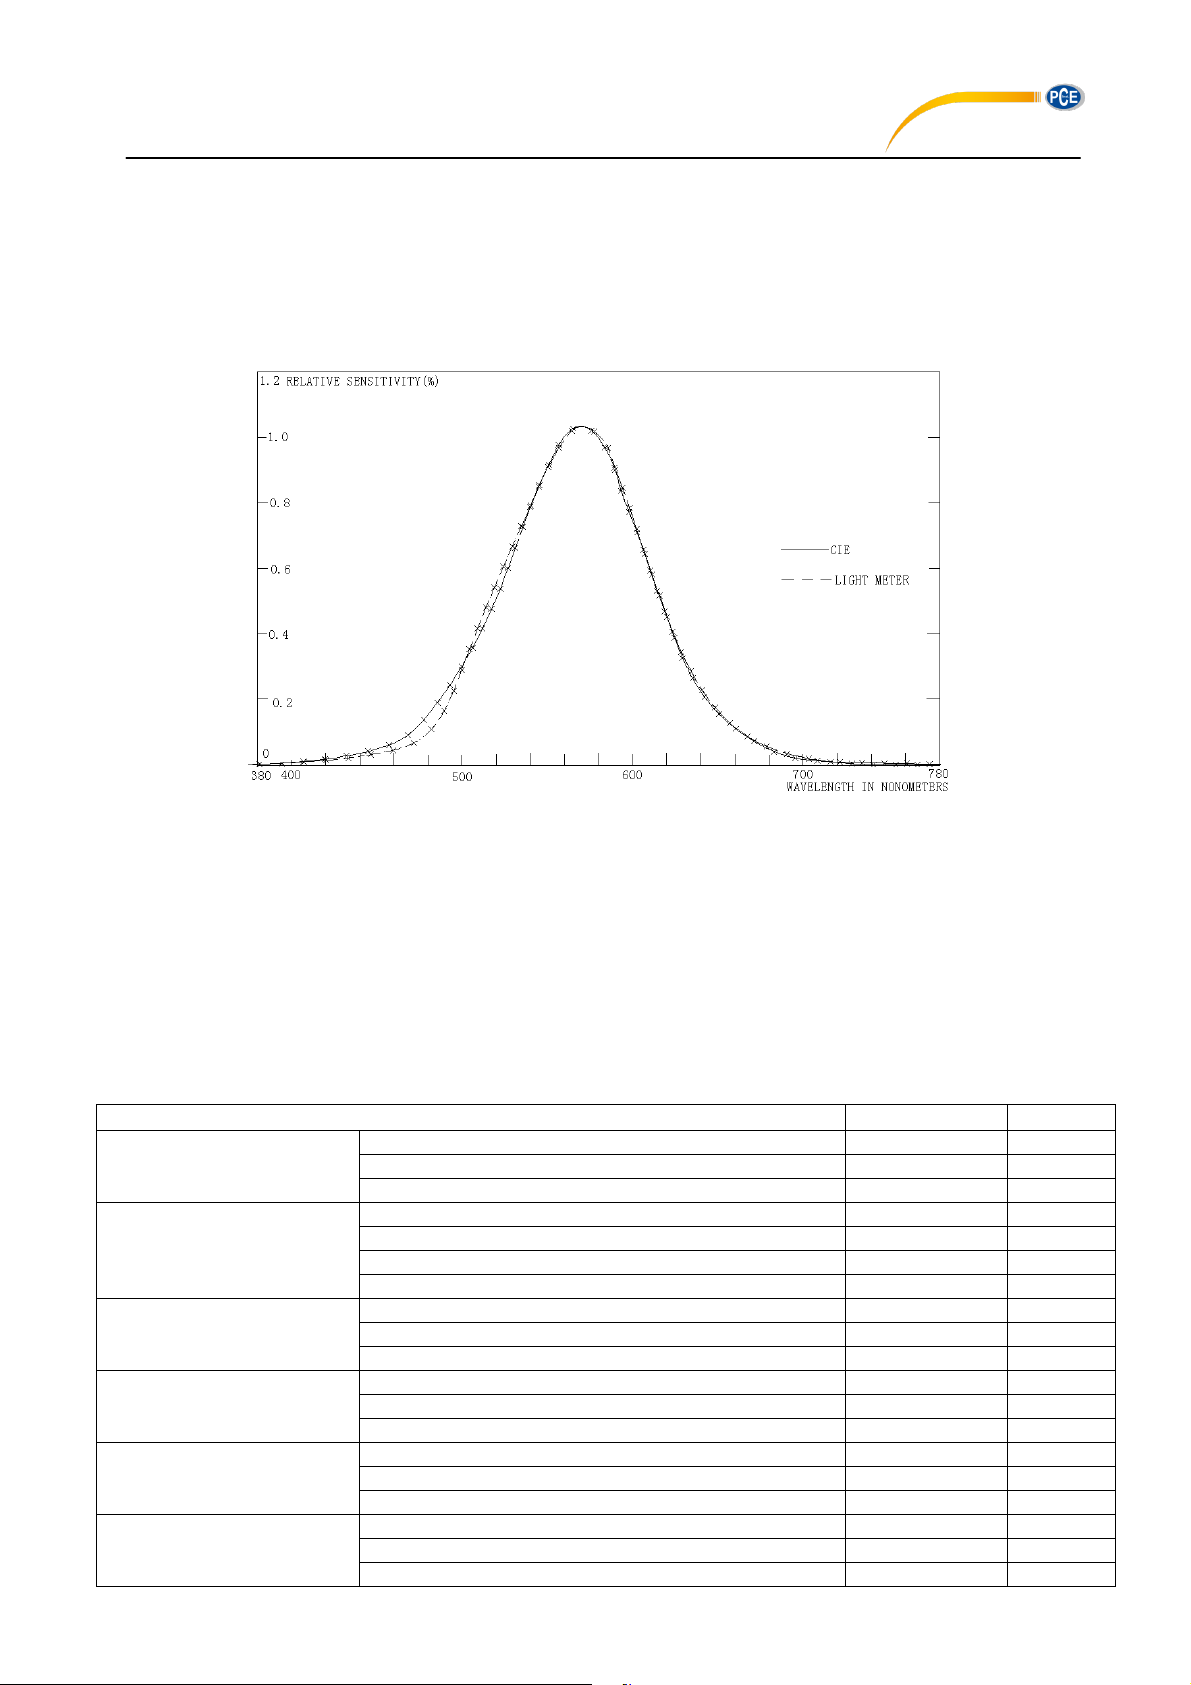
7. SPECTRAL SENSITIVITY CHARACTERISTIC
¾ To the detector, the applied photo diode with filters makes the spectral sensitivity characteristic almost
meet C.I.E.(INTERNATIONAL COMMISSION ON ILLUMINATION) Photopic curve V (λ) as the
following chart described.
8. MAINTENANCE
1. The white plastic disc on the top of the detector should be cleaned with a damp cloth when necessary.
2. Do not store the instrument where temperature or humidity is excessively high.
3. The reference level, as marker on the face plate, is the tip of the photo detector globe.
4. The calibration interval for the photo detector will vary according to operational conditions, but generally the
sensitivity decreases in direct proportion to the product of luminous intensity by the operational time. In
orde
r to maintain the basic accuracy of the instrument, periodic calibration is recommended.
9. RECOMMENDED ILLUMINATION
1fc=10.76Lux
OFFICE
FACTORY
HOTEL
STORE
HOSPITAL
SCHOOL
LOCATIONS
Conference,Reception room 200~750 18~70
Clerical work 700~1,500 65~140
Typing drafting 1,000~2,000 93~186
Visual work at production line 300~750 28~70
Inspection work 750~1,500 70~140
Electronic parts assembly line 1,500~3,000 140~279
Packing work, Entrance passage 150~300 14~28
Public room, Cloakroom 100~200 9~18
Reception 200~500 18~47
Cashier 750~1,000 70~93
Indoors Stairs Corridor 150~200 14~18
Show window, Packing table 750~1,500 70~140
Forefront of show window 1,500~3,000 140~279
Sickroom, Warehouse 100~200 9~18
Medical Examination Room 300~750 28~70
Operating room, emergency treatment 750~1,500 70~140
Auditorium,Indoor Gymnasium 100~300 9~28
Class room 200~750 18~70
Laboratory, Library, Drafting, room 500~1,500 47~140
Lux fc
5
Page 6

NOTE: "This instrument doesn’t have ATEX protection, so it should not be used in potentially
explosive atmospheres (powder, flammable gases)."
6
 Loading...