

2. Loss or removal of the red jumper connector from the underside of the keyboard will cause the keyboard to stop working.
3. The keyboard has two slots in the base for providing storageon on a wall. Holes should be drilled @ 50cm xxxxx and
screws/hooks not protruding more than 12mm into the keyboard.
4. There are 4xM4 screw holes in the back to facilitate fixing the
keyboard to a desk. Holes are at 50 x 5.5cm spacing.
PCD MALTRON
Ergonomic Keyboard Specialists
EXPANDED KEYBOARD
Keyboard
User Guide
Expanded Keyboard

PCD Maltron Keyboards
Important contact information for sales & service:
Manufacturer & Supplier
PCD Maltron Ltd
Castlefields
Stafford
ST16 1BU
ENGLAND
Tel: +44 (0) 845 230 3265
Fax: +44 (0) 845 230 3266
Email: sales@maltron.co.uk
Web: www.maltron.com
Adjustable Key Top Height
A unique feature of the Expanded Keyboard is the ability to
adjust the distance between the key guard and the key tops.
This is easily accomplished and is a useful feature to cater for
both finger (key guard raised) and knuckle (key guard lowered) users.
The keyboard is supplied in the lowered position, i.e. the
minimum distance between the key guard and key tops
(approx 2.0mm). To raise the key guard and increase the distance (to approx 4.0mm), follow these steps:
1 With a size 2 Posidrive screwdriver, or equivalent, remove
the M4 x 8csk screws holding the top plate (key guard) to
the keyboard and remove the top plate. Retain the
screws.
2 Place one of the nine tubes, now found at the top right
corner of the keyboard, over each of the eight support pillars. (The ninth tube is a spare.)
3 Replace the top plate carefully, initially placing it over the
front of the base and sliding it back until it touches the
rubber strips along the front, then lowering the back of the
key guard over the 5 LED‟s.
4 Replace the 8 screws being careful not to over tighten
them or damage their heads.
To lower the key guard, simply reverse these steps.
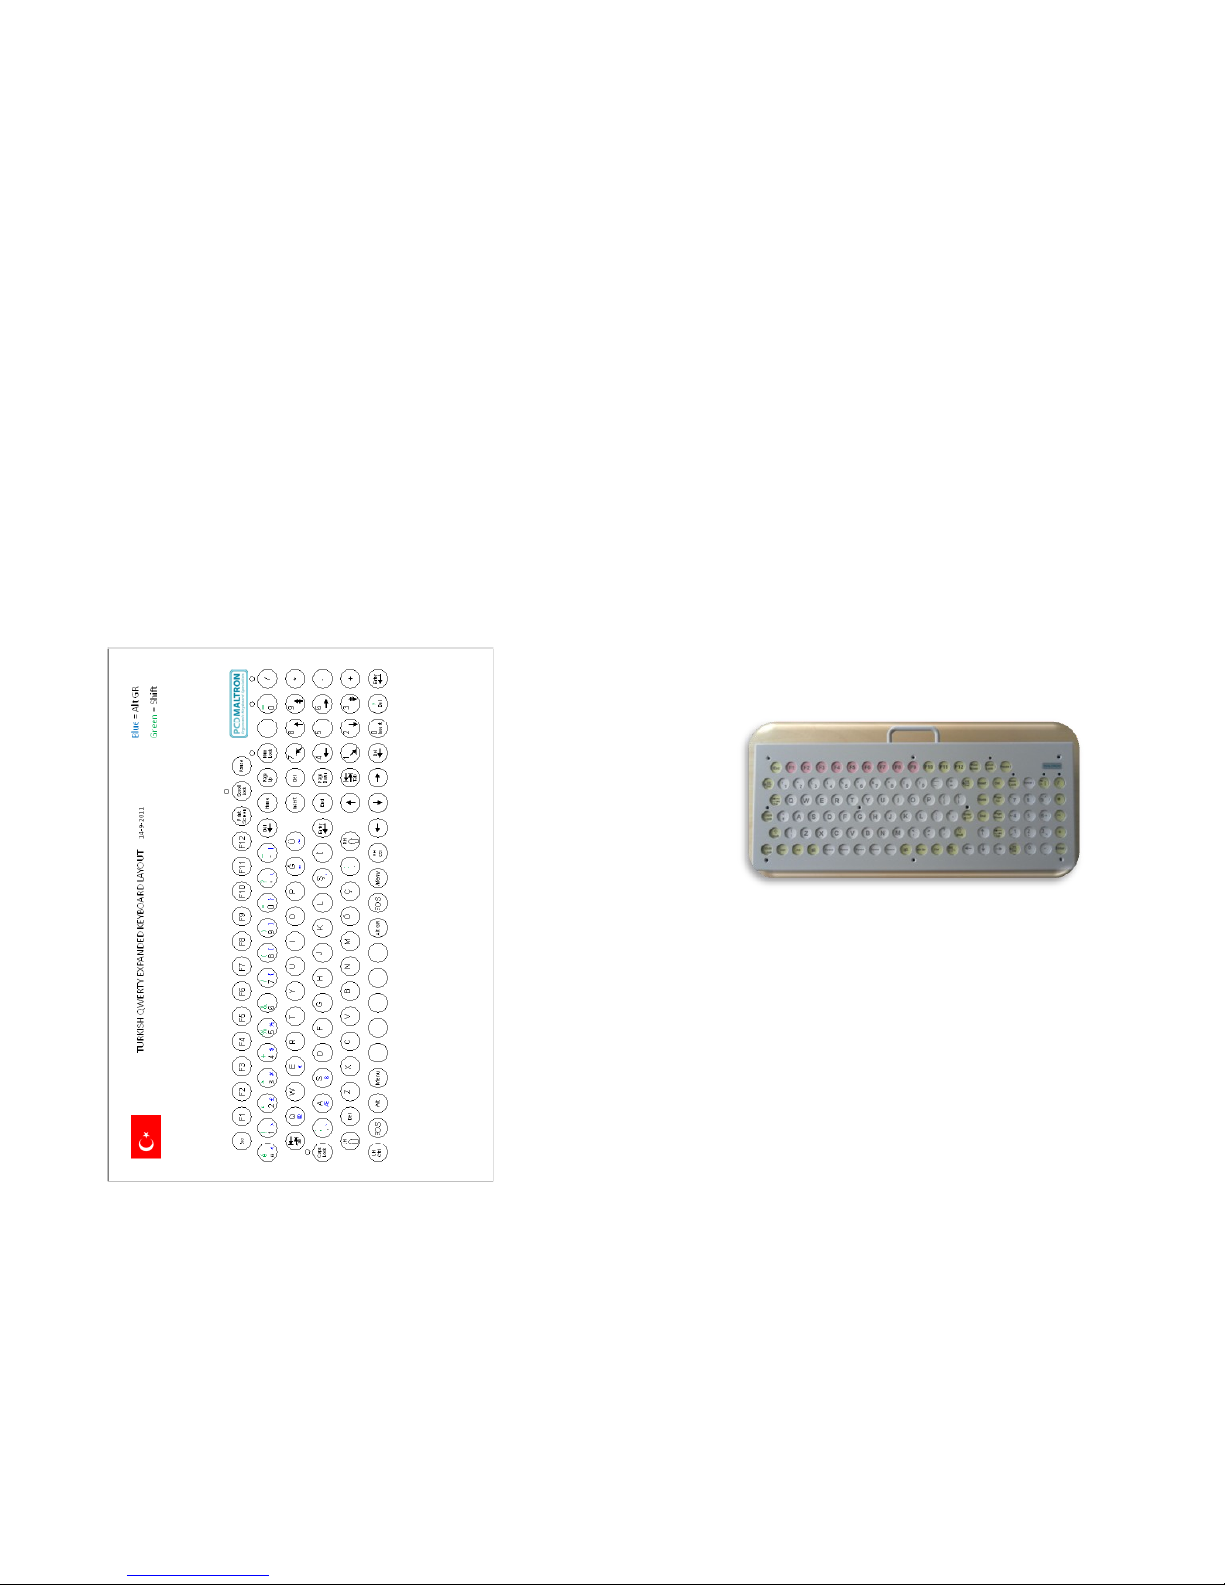
See attached key layout enclosed for the specific layout for your
keyboard.
Notes:
1. The keyboard has 3 spare switches inside on the extreme LH
side of the switch plate. Remove the top plate to locate them.

Expanded Keyboard
Operation
The keyboard is ideally suited for visual or muscular control conditions. It‟s robustly designed steel case is capable of heavy use.
Angle Adjustment
You will have been supplied with 2 angle adjusters and 6 to vary
the angle of the top face of the keyboard to suit the user.
The keyboard is designed to start with a 13-degree angle, which
can be increased in steps of 10 degrees to a total of 53 degrees by
positioning the angle adjusters as shown below.
As required, attach the Angle Adjusters to the ends of the
keyboard using the 3 screws per end provided (M4 x 12mm
pan head Posidrive).
Ensure the screws are tight before use. If the Angle Adjusters are
not required, return them and the video case supplied with each
keyboard.
43 d eg re es
23 d eg re es
53 d eg re es
33 d eg re es
Setting up your Maltron Keyboard
The USB cable supplied loose with the keyboard will need to be
connected. It has a standard USB (Universal Serial Bus) Type A
plug at each end. It should be plugged in to the socket on the keyboard. Connect the other end into a USB socket on the computer
and arrange the keyboard to suit your preferred position.
Please ensure this allows you to sit comfortably, with the keyboard
close and low enough for your upper arms to be hanging vertically
from your shoulders, and your forearms to be horizontal.
After plugging in the Maltron keyboard, switch on the computer.
The keyboard should light up with a green light – indicating that
the keyboard has power.
The keyboard is ready to use.
It is recommended before using the keyboard you study the following posture guidance information and also familiarise yourself
with our free on line training modules at www.maltron.com.
THERE ARE NO SOFTWARE DRIVERS TO INSTALL

Key Features
1. Feet flat on floor or on a foot rest
2. Backrest supporting lumbar area
3. Sufficient leg room under desk
4. Thighs parallel to the floor
5. Upper arm at right angle to lower arm
6. Neutral wrist position
7. Top of monitor at or slightly below eye level
8. Monitor at arm‟s length distance
Posture Guidance
The Expanded Keyboard
1
2 3 4 L.E.Ds
Indicators
There are 5 LED indicators grouped centrally below the number
pad on the keyboard. Theses indicate keyboard settings.
LEDs from left to right
1. Caps Lock
2. Scroll Lock
3. Num Lock
4. ?
5. ?
5

Reporting faults
If you are unable to resolve the fault please contact your I.T. support staff who in turn will contact their supplier.
Maltron keyboard Warranty
Please refer to the technical guide for assistance
Setting up your Workstation
It is important to set up your workstation correctly, and that you
are able to work in a position which is comfortable and which does
not place your long-term health at risk.
Sitting in a slumped position can cause back pain, even long-term
injury. Therefore adopt a "neutral" position to avoid placing unnecessary strain on the nerves, muscles, tendons, ligaments and
bones. You may wish to ask a colleague to check a side view as it
may be difficult to judge for yourself, especially as the correct setup may feel odd at first.
Eyes should be level with the top of the monitor screen.
Elbows should be level with the top of the keyboard, allowing arms
and hands to be horizontal.
Seat height should allow feet to rest flat while maintaining 90 º
angles at hips.
Many people have their chair too high and their monitors too low.
If after adjustment, the undersides of your thighs are compressed,
you may require a foot rest. Adjust the backrest so that it supports your lower back. Remove armrests if they get in the way.
A suitable adjustable monitor arm will allow you to alter the height
and tilt of the screen, and meet the recommended distance of
screen to eye (22-26" or 50-70cm). Closer than this will cause eye
strain. Correct tilting will help eliminate glare.
Reposition items on your desk to avoid reaching and twisting.
There should be nothing between you and the keyboard. Use a
document holder if you refer to documents while typing. This
should be positioned at the same height and distance as your
monitor.

Your mouse should be positioned close to the keyboard too and if
you have a phone on the desk place it on the non writing hand
side of the workstation.
Ensure adequate breaks are taken, don‟t sit in the same position
for long periods.
Hand and Key position information
The unusual shape of the Maltron keyboard often gives rise to
questions concerning how to place the hands to take advantage of
the strain free design. The best way to assess this is to do the following actions:
1. Either standing or seated, allow both arms to fall totally re
laxed by the sides
2. Open and close the hands 2 or 3 times and then allow them
to be totally relaxed
3. Look at the finger shape. Usually seen in the half open posi
tion the finger end directions now lie at 70-90 degrees from
the forearm axis, with the wrists still totally relaxed.
4. Keeping the hands in this position, raise the forearms to be
horizontal, and position the hands so that there is a distance
of roughly 20cms between the index fingers.
5. Opening and closing the fingers now shows that the ends
move in arcs of different radius.
6. As far as possible the keys have been positioned to fit these,
so that lowering the hands on to the keys should give com
fortable finger positions on the ASDF on the left and the JKL
keys on the right. The thumbs should be relaxed to fall on
the Space and Enter keys.
7. The back of the hands will also be tilted to give angles of
about 30 degrees to the horizontal, and a strain free wrist
position.
8. When keying, the palms should be around 1cm above the
resting pads, but at any pause for “thinking” time they should
be lowered on to the pads immediately, and the hands and
arms relaxed.
Training
We strongly recommend that anyone using a Maltron keyboard for
the first time should read and follow FREE online training module
by going to www.maltron.com and selecting the „TRAINING‟ tab.
If you are unable to access the online training, we are happy to
provide a paper based version of the training guide, this may be
freely copied. Please contact the office on the following if necessary:
Email – sales@maltron.co.uk
Service and Maintenance Information
Common Problems
1. When using your keyboard for the first time, make sure the
computer is plugged into an AC power source.
2. Make sure your keyboard is securely plugged into a PC/
Laptop, turned on and the power indicator light is lit.
Check that pressing the Num Lock key turns on the Num
Lock light. This confirms communication between the
keyboard and the computer.
3. Disconnect any other USB devices and then restart your com
puter.
 Loading...