

PC Chips A929 User Manual
1
A929 CPU instal lat ion Guide
Notice:
This machine has been test ed a nd fou nd to co mply with the st a n da r ds s et fort h by the Q u a l i t y C ontr ol. All part s
of the mach in e h ad undergone 2 4-hour reliability t e s t. This guide e xpla i n s how t o s etup the C PU and have y o ur
machine r eady for use.
Please follow th e steps below on how to install the CPU. The manufacturer will not be responsible for any
direct, indirect, specia l, incidental or consequential damag es arisin g fr o m an y d efec t and improp er installation
of the CPU.
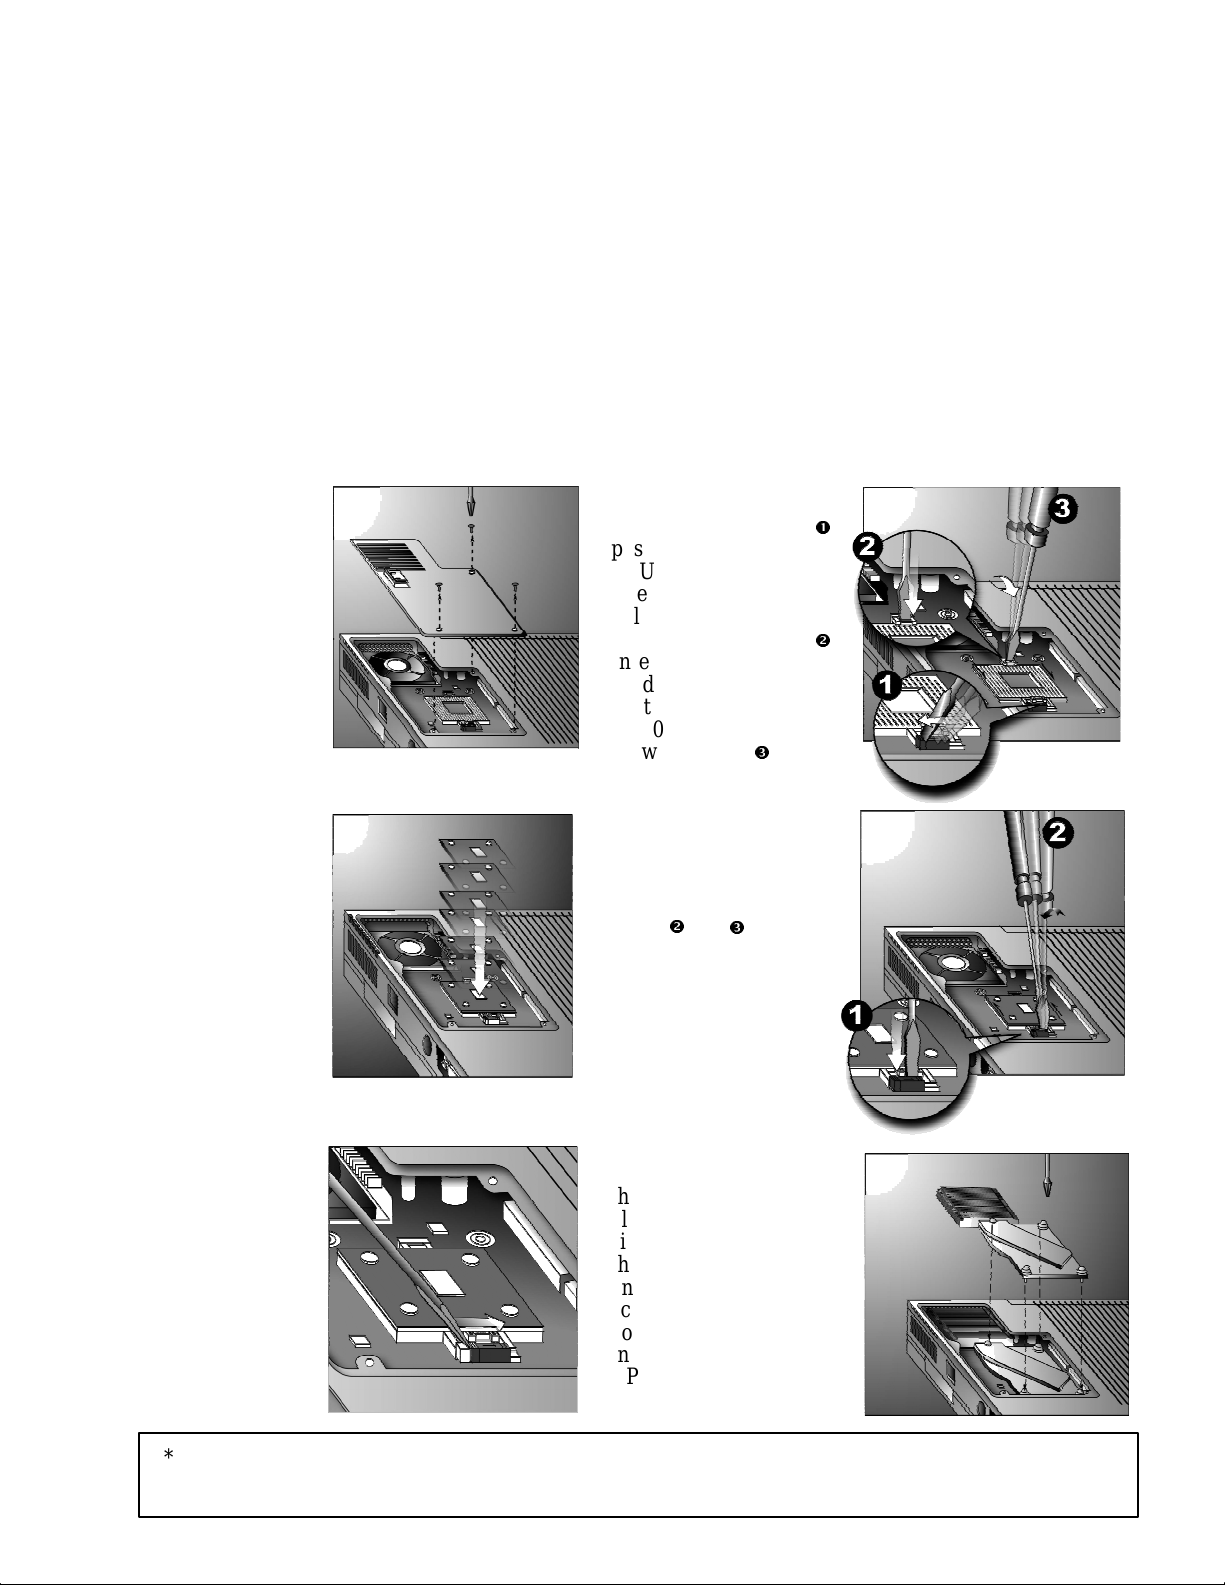
CPU Installation Procedure:
SStteepp11:
:
Before you begin, gently
place t h e ma c hin e up si de
down. Loosen the three
screws to op en the CPU
compartment:
SStteepp33:
:
Orient the CP U s o t hat
pin 1 on the chip
corresponds to pin 1
(pinhole missing) on
the CP U socket . Insert
the processor into the
socket.
SStteepp55:
:
Then, lock the CPU
socket. The figure
shows the direction
for locking the CPU
socket.
SStteepp 44:
:
For the opposite side,
repeat the procedures
indicated on
SStteepp 2
2
of
figure and
.
SStteepp 66:
:
Put the heatsink over
the CPU and tighten
all four screws on eac h
side. Then place back
the CPU compartment
and secure with three
screws. This
completes the
installation for the
CPU.
SStteepp 22:
:
Following figure
,
push t he lock clip o f the
CPU s oc ke t to r elea s e it.
Use the screwdriver to
unlock the opposite side
as shown in figure .
Insert the screwdriver
head to the gap and
gently shift the s cr ew to
a 30-degree angle as
shown in figure .
*** T he 4 screws are specially designed for the heat sink, do not u se force or over- tighten the screws a s
this may distress or damaged it.
-- Converted from Word to PDF for free at Fast PDF -- www.fastpdf.com --
 Loading...