

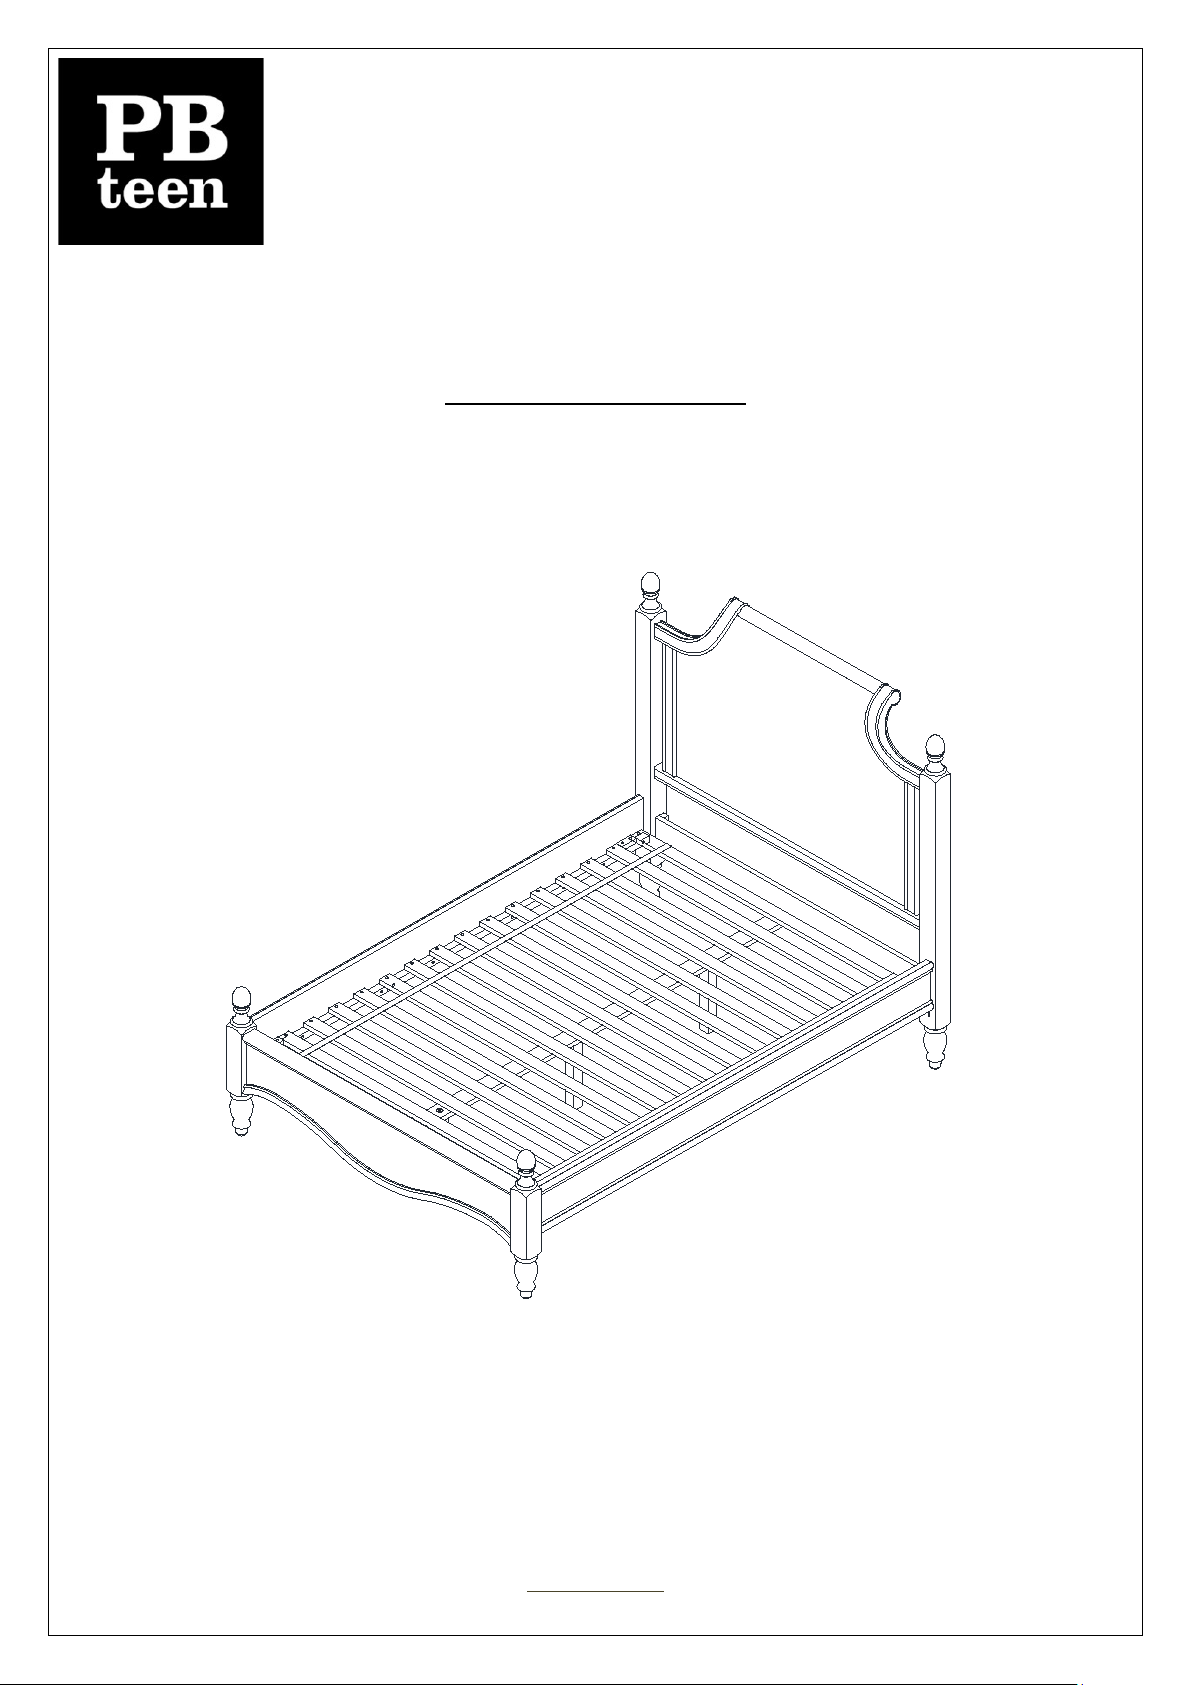
SOPHIE QUEEN BED
ASSEMBLY INSTRUCTION
Date: 2013-Aug.-17
Rev: www.pbteen.com Page 1 of 9
A C F
H B G
D C E
I
I
H
I
I
H
H J K K K
IMPORTANT SAFETY INSTRUCTIONS:
• Please read all instructions carefully before assembling this bed.
• For your safety, assembly by two or more adults is strongly recommended.
• Keep these instructions for future use.
• Use only vendor-supplied hardware to assembly this item. Using unauthorized hardware could jeopardize
the structural integrity of the item.
PRE- ASSEMBLY:
• Remove all parts and hardware from the box. Place them on a carpeted or scratch-free work surface, as this
will avoid damaging parts. The shipping box provides an ideal work surface.
• To avoid accidentally discarding small parts or hardware, please do not dispose of any contents until
assembly is complete.
• Two people are recommended for your safety and ease of assembly.
• Prior to starting this assembly, use the parts and hardware lists to identify and separate each of the pieces
included.
• The illustrations provided allow for easier assembly when used in conjunction with the assembly
instructions.
• Note: Do not fully tighten any of the bolts until all parts are in place. Failure to follow these instructions may
cause the bolts to misalign during assembly.
• Please use caution if using power tools to aid in assembly. Power tools can damage the hardware or split
the wood.
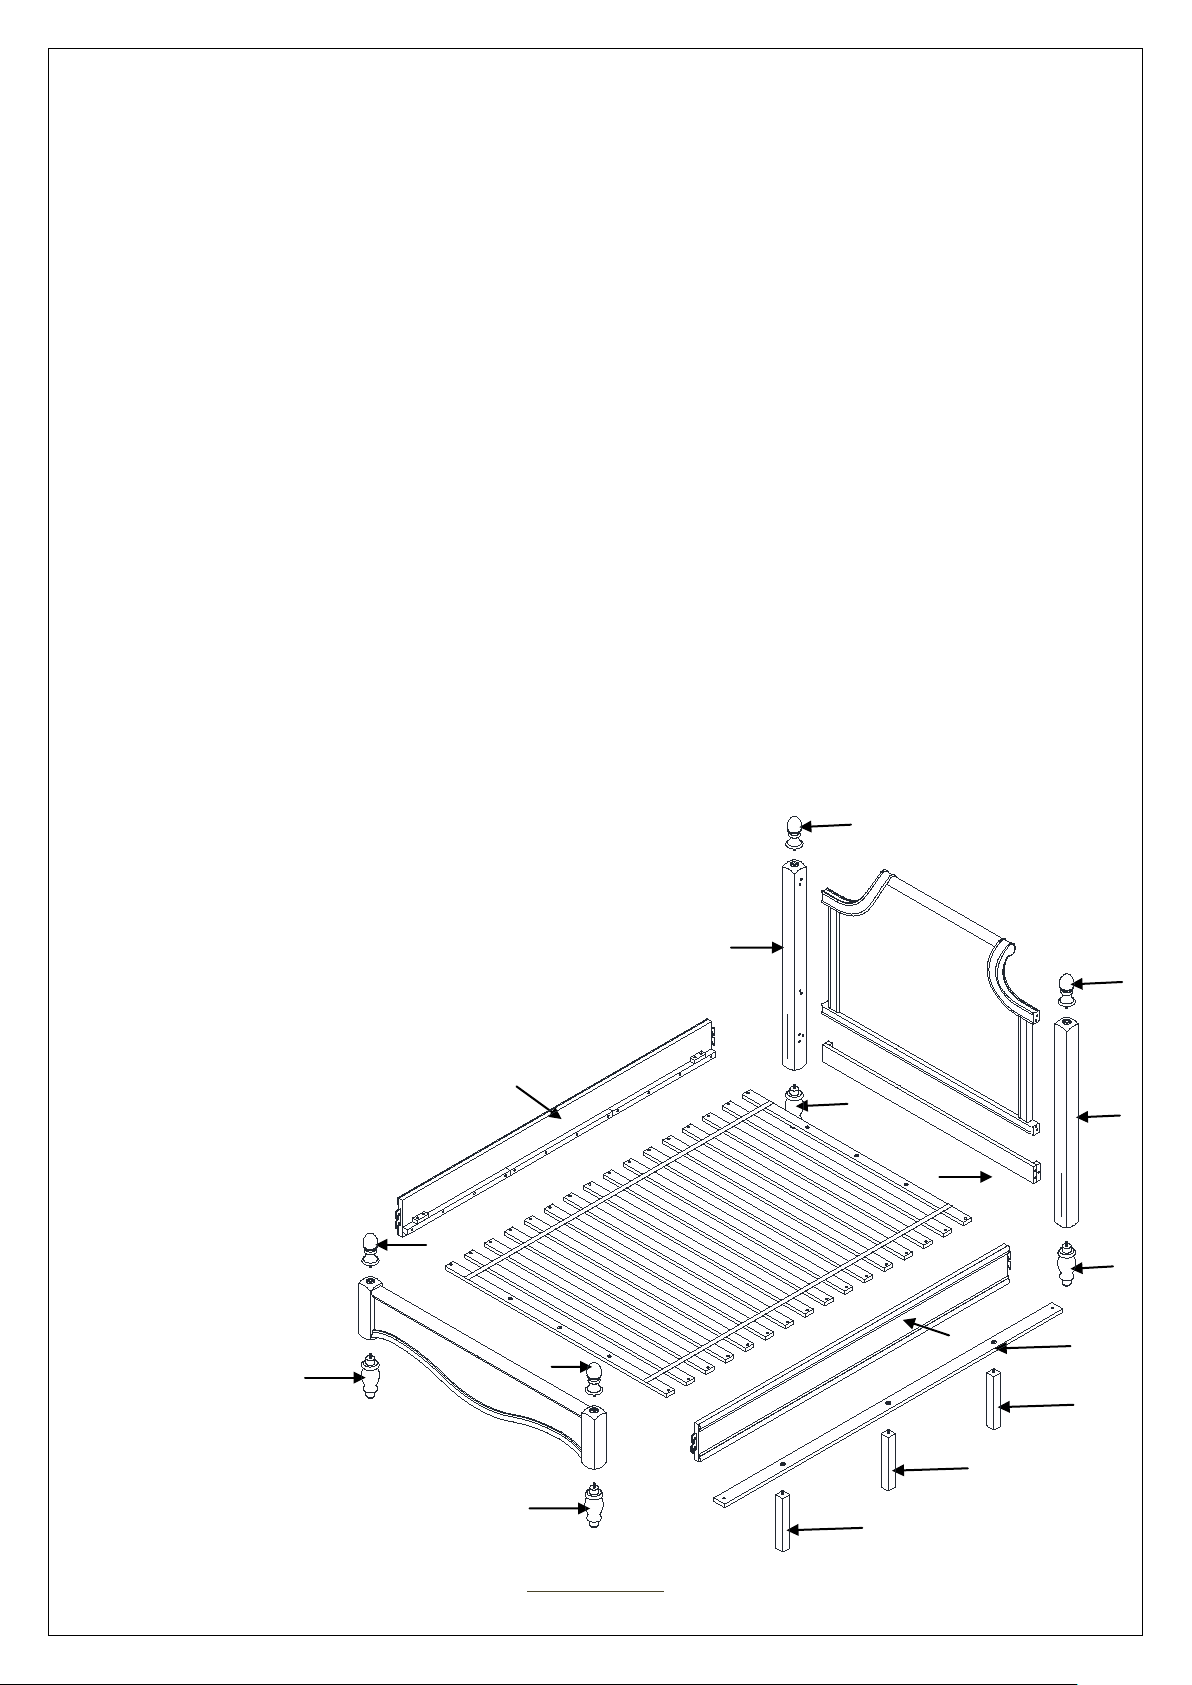
PARTS INCLUDED:
(A) Headboard Panel - 1 x
(B) Footboard - 1 x
(C) Side Rai l - 2 x
(D) Slat Roll - 1 x
(E) Left Headboard Post - 1 x
(F) Right Headboard Post - 1 x
(G) Stretcher - 1 x
(H) Bun feet - 4 x
(I) Finial - 4 x
(J) Support Rail - 1 x
(K) Support Leg - 3 x
Date: 2013-Aug.-17
Rev: www.pbteen.com Page 2 of 9
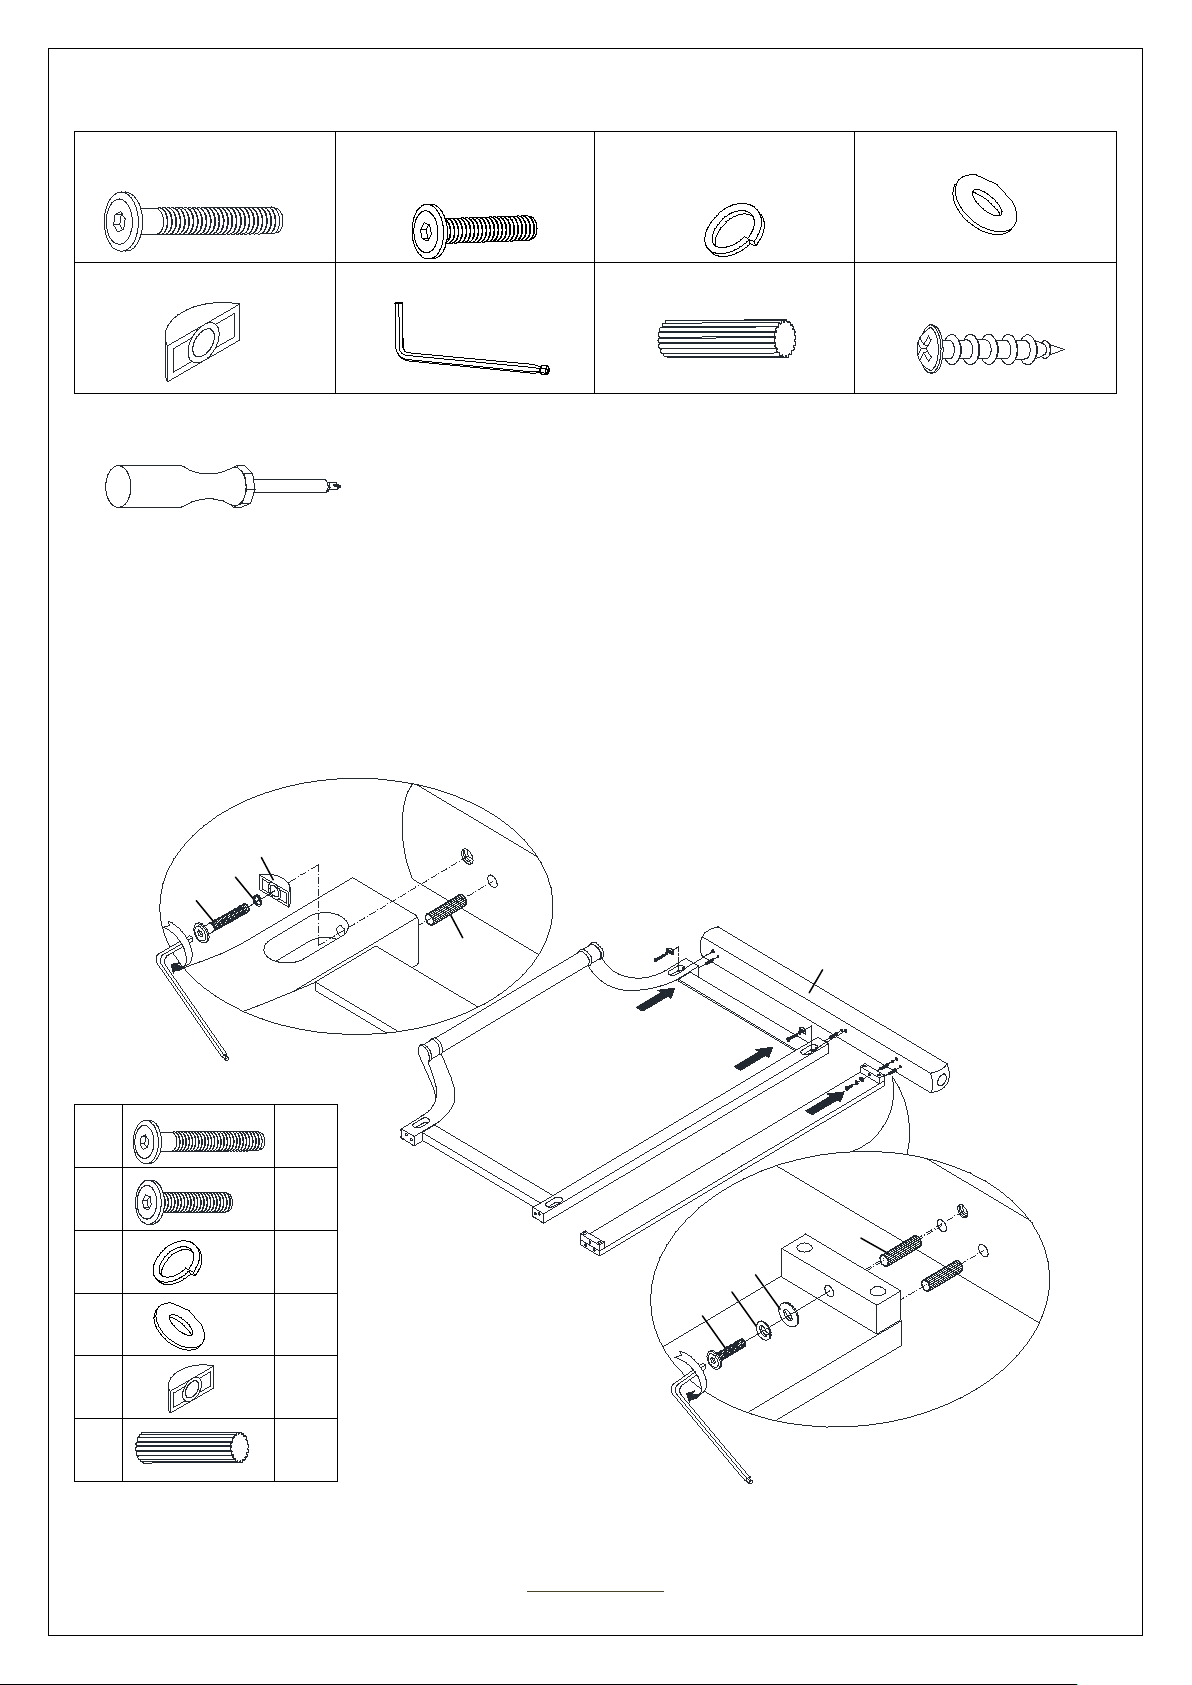
HARDWARE INCLUDED:
2x
1x
(L) Bolt M6x60mm – 4x
(O) Flat Washer – 4x
(M) Bolt M6x38mm – 4x (N) Lock Washer – 8x
(P) Half Moon Washer – 4x
TOOLS REQUIRED (NOT INCLUDED):
ASSEMBLY INSTRUCTION STEPS:
1. Put all furniture parts on a soft, scratch free surface such as a carpet or rug.
2. Attach the Headboard Panel (A) to the Left Headboard Post (E) and secure with 2 sets of: Bolt (L), Lock
Washer (N), Half Moon Washer (P), and 2 Wooden Dowels 8x30mm (R), as seen in the illustration below.
3. Attach Stretcher (G) to the Left Headboar d Post (E) and secure with 1 s et of: Bolt (M), Lock Washer (N), Flat
Washer (O), and 2 Wooden Dowels (R), as seen in the illustration below.
4. Tighten all bolts with Allen Key (Q).
L
M
N
O
P
R
Date: 2013-Aug.-17
Rev: www.pbteen.com Page 3 of 9
L
Q
P
N
2x
1x
3x
1x
2x
4x
(Q) Allen Key 4mm – 1x (R) Dowel 8x30mm – 8x (S) RH Screw 8x25mm –
32x
R
A
G
O
N
M
Q
E
R

4x
B A H H H H H
2x
1x
5. Repeat steps # 2 - #4 to assem ble the Ri ght Headb oard Post (F) to Headb oard (A), as seen in the ill ustration
below.
L
6. Thread the 4 Bun Feet (H) into the pre-fixed insert nuts found under the Headboard and Footboard Posts (A&B)
in a clock-wise direction until tight, as seen in the illustration below.
Date: 2013-Aug.-17
Rev: www.pbteen.com Page 4 of 9
R
N
P
Q
F
L
M
N
O
P
R
R
O
N
2x
1x
3x
1x
2x
4x
M
Q

7. Determine the desired loc ation of bed and then ho ld the assembled Hea dboard ( A) in a vert ical posit ion- tilted
slightly forward.
8. Attach each Side Rail (C) to the Headboard (A) by inserting the hook (pre-attached at the ends of the Side Rail)
into the corresponding slots of the Left & Right Headboard Post (E&F).
9. Push down firmly on the top of the Side Rails (C) until they sit themselves over the pins, inside the Post slots, as
shown in the illustration below. Be sure the small ledge on each Side Rail (C) is facing inward.
10. Repeat steps #8 and #9 to as sem ble the Footboard (B), as seen in the illustration below.
There are two levels for the Side Rails (C). If you plan to use a trundle, please use the higher setti n g.
A
LOWER SETTING
C
C
HIGHER SETTING
B
Date: 2013-Aug.-17
Rev: www.pbteen.com Page 5 of 9

11. Place the Slats Roll (D) onto the opening, in-between the Side Rails (C), as seen below. Make sure the ends of
the slats rest upon the small ledge inside of the Side rails (C).
D
12. Thread the 3 Support Legs (K) into the pre-drilled holes on the Support Rail (J), as seen in the illustration below.
K
K
J
K
Date: 2013-Aug.-17
Rev: www.pbteen.com Page 6 of 9

2x
13. Attach this assem bled Support Ra il (J) with Support Legs (K) to the underside of Slat Roll (D), as seen in t he
illustration below. NOTE:
not using trun dle. If using a t rundle, pleas e follo w steps #13 - #15 to assem ble the Suppor t Rai l (J) and
when
There are 3 possi ble positions for Support Rail (J). The center p ositions are used
Support Leg (K) to the pr e-drilled holes on t he opposite side of the bed to where you des ire the trundle t o be
used. This provides enough room for the trundle to not hit the Support Leg (K). See the 2 illustrations below.
14. Connect the 1
(O) through the pre-drilled hole of the 1
st
slat to the Support Rail (J) and secure with 1 set of: Bolt (M), Lock Washer (M), and Flat Washer
st
slat and into the metal inserts located on the Support Rail (J).
15. Tighten with Allen Key (Q).
16. Repeat at the other end, as seen below.
Q
M
N
O
D
J
M
N
O
2x
2x
2x
Date: 2013-Aug.-17
Rev: www.pbteen.com Page 7 of 9

2x
M
N
O
17. Secure each Slat to the Side Rail (C) using 32 Round Head Screws (S) through the hole at the end of each slat
and into the mattress support on the Side Rails (C), as seen in the illustration below.
18. To keep the whole bed level, adjust the levelers underneath each Support Leg (K), as seen in the illustration
below.
19. Periodically tighten all connections.
Date: 2013-Aug.-17
Rev: www.pbteen.com Page 8 of 9
2x
2x
2x
Q
M
N
O

32x
4x
S
32x
S
D
D
UP
DOWN
20.
Attach the 4 Finials (I) on top of each leg of the Headboard (A) and Footboard (B), as seen below.
CARE INSTRUCTIONS:
• Dust often using a clean, soft, dry, and lint-free cloth.
• Blot spills immediately and wipe with a clean, damp cloth.
• We do not recommend the use of chemical cleansers, abrasives, or furniture polish on our lacquered finish.
• Hardware may loosen over time. Periodically check to make sure all connections are tight.
Re-tighten if necessary.
I
Date: 2013-Aug.-17
Rev: www.pbteen.com Page 9 of 9
 Loading...