

The hardware included is meant for drywall or wall stud mounting.
If your walls are concrete, brick or plaster, we recommend that
hardware for your wall type.
you consult your local hardware store to determine the proper
Love Shelf NOTE: Maximum total weight capacity for this product is 75 lbs.
Assembly and Mounting Instructions Do not mount this item above a crib or bed.
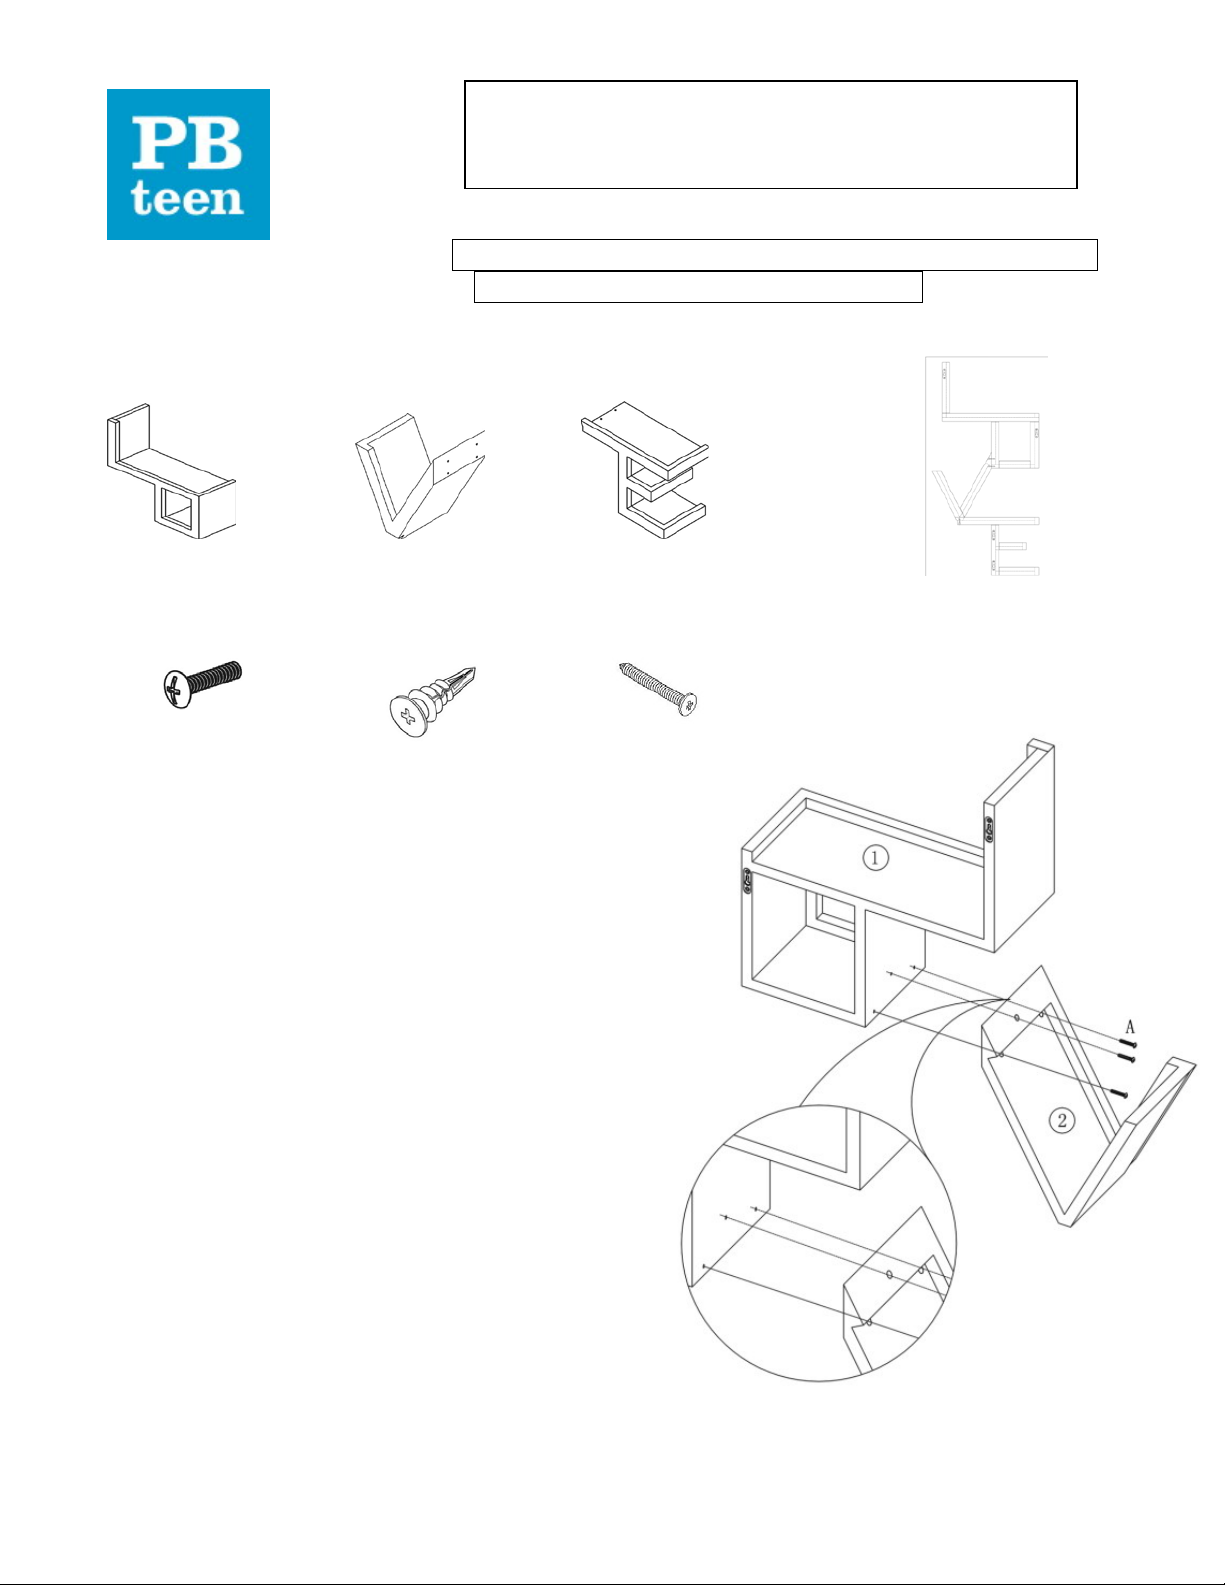
Parts Included:
(1) Shelf-LO (2) Shelf-V (3) Shelf-E
Hardware Included:
(A) Machine Screw – 5 pcs (B) Anchors - 4 pcs (C) Stud Mounting (D) Wall Hanging
Screws - 4 pcs paper template – 1pc
Tools required for mounting (Not included):
Phillips Screwdriver, Level, Pencil, Stud Finder, Tape
Assembling Instructions:
1) Position the three shelf sections horizontally
on the floor so that the front of each fac es up
and so that the Sections spell the word
“LOVE.”
2) Align the three pre-drilled holes of Shelf “V”
with the threaded holes of Shelf- “LO ” and
then secure the “LO” Shelf Section to the “V”
Shelf Section using three of the provided five
machine screws. Insert a screw into each
open hole of the “V” Shelf Section and tighten
each screw clockwise using a screwdriver.
(See Figure 1)
3) Apply Step (2) to secure the “E” Shelf Section
to the “LOV” assembled section. Align the
TWO holes of the “E” Section to the TWO
threaded holes of the “V” Section. Use the
remaining two machine screws (A) and a screwdriver to secure a screw into each open
hole. As before, rotate each screw clockwise until tight. (See Figure 2)

4) The LOVE Shelf is now
assembled. Now let’s
mount it!
Mounting Instructions:
1. Position the prov ided paper
mounting template against the
wall at a desired mounting
location. Hold the template
level (use a level here) and
then use a sharp pencil to
mark the wall at each of the
four dots shown on the
template (located at the top of
each keyhole). Set the
template aside.
2. The provided anchors cannot
penetrate wood studs.
Therefore we have to find out
if either marks of Step (4) happens to align with a wall stud (use a stud-finder to determine
this). If a mark does align, use a screwdriver to secure a provided stud screw at this
location – do not use an anchor . Rotate the screw clockwise until the screw head resides
about 3/8 inch from the wall.
3. For marks that do not align with a stud, use
the screwdriver to install an anchor into the
wall at each mark. Engage the head of the
anchor with the screwdriver and position the
anchor’s tip at one of the marks. Rotate the
anchor clockwise while pushing it firmly into
the wall. The anchor will automatically drive
itself into the wall. Continue rotating until
the wide end of the anchor becomes even
with the wall surface. Do not over-tighten.
4. Use the screwdriver to secure a screw into
each installed anchor of Step (3). Rotate
each screw clockwise until the screw head
resides about 3/8 inch from the wall.
5. With the help of another person, position the
shelf against the wall so that the four
keyholes align and engage with the
protruding screw heads. Lower the shelf so the screws support its weight. Make sure that
a screw engages EACH of the four keyholes.
Care Instructions: Wipe with a soft, dry cloth. Do not use abrasive or solvent-based cleaners.
Thank you for your purchase. Stores | catalog | www.pbteen.com 1.800.290.8181
 Loading...