


Fig.1
Emerson Full Bed
Assembly Instructions
• Please read all instructions before beginning assembly.
• For your safety and convenience, assembly by three people is recommended.
• Remove all parts and hardware from packaging and identify by comparing t o lists below. Do not discard any contents until
assembly is complete to avoid discarding any parts or hardware.
TOOLS:
(1) Open spanner Phillips screwdriver (not included)
PARTS:
(1) Headboard –A (1) Footboard- B (2) Side rail - C (1) Slat roll- D
HARDWARE:
(8) Bolt (Ø5/16”x 3.5”) -E (8) Nut (Ø5/16”) -F (8) Spring Washer (Ø5/16") - G (8) Flat Washers (Ø5/16") –H
(6) Wood screw (Ø3/16 x 1”L) -I
Assembly Instr u ctions:
1. Carefully lay headboard (A) and side rail (B) on a carpet or scratch-free surface.
2. Turn bolts (E) i nto the threaded holes on metal plate of headboard (A). Align the bolts with the hole s on end of side rail ( C),
let the bolts pass though the hole s o f side rail, followed with flat washer (H), sp ring washer (G), nut (F), tighten by open
spanner provided. Repeat this process with another side rail (C). Fig. 1
Page 1 of 2
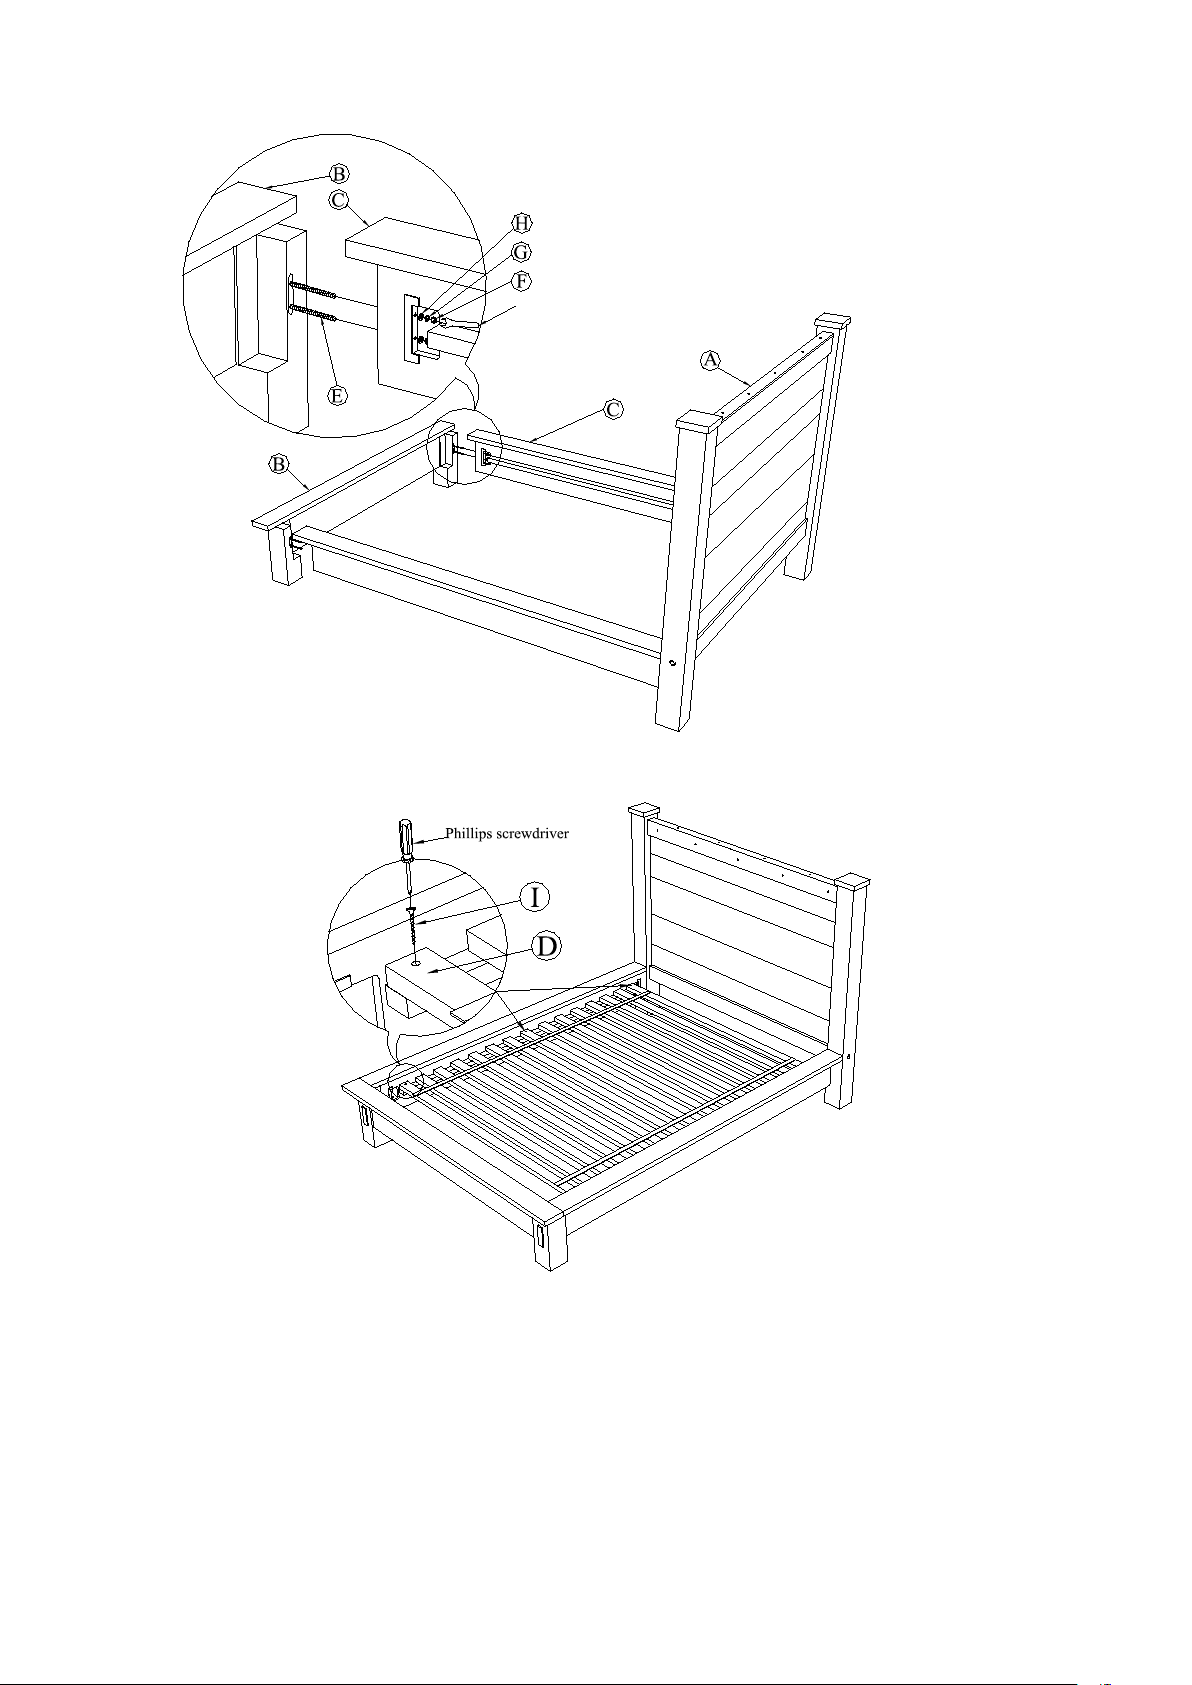
3. Turn bolts (E) into the threaded holes on metal plate of footboard (B). Keep the same procedure of set up the headboard (A)
Open spanner
Fig.2
Fig. 3
for footboard (B). Fig 2.
4. Lay slat roll (D) in place over side rail supports. Attach by insertin g the wood screws (I) through pre-drilled holes on the end
slats of slat roll (D) and ti ghtening wi th Phillips screwdriver (not included).
Fig. 3
5. Assembly is complete.
Adjusting Leve le r s:
Due to an uneven floor, the furniture may not sit level, causing it to wobble. If the piece wobbles, determine which corner does
not touch the ground correctly. With three people follow these steps:
1. Carefully lift the item slightly to provide access to the levelers attached to the bottom.
2. Turn the levelers until adequate contact will be made with the floor. Gently set down the piece and check stability.
3. Repeat s t eps until furniture sits firmly on t he ground
Care Instructions:
• Dust with a clean, soft, damp cloth and wipe dry immediately.
• Avoid the use of chemica l s and harsh cleaning age nts.
Thank you for your purchase.
store s | catalog | www.pbteen.com
Page 2 of 2
 Loading...