

PayEx ICT2 series User Manual

User guide
iCT2xx Terminals

User guide iCT2xx Page 2 of 40
Content
Content .....................................................................................................................................2
Introduction ...............................................................................................................................4
Content .....................................................................................................................................5
Content of the box .................................................................................................................5
iCT2xx Terminal ....................................................................................................................6
Connections ......................................................................................................................6
Keyboard ...........................................................................................................................7
Installation ................................................................................................................................8
Paper roll ..............................................................................................................................8
Installing paper roll ............................................................................................................8
Ordering ............................................................................................................................8
Using the terminal .....................................................................................................................9
Switching off/on the terminal .................................................................................................9
Card readers ....................................................................................................................... 10
Magnetic stripe cards....................................................................................................... 10
Chip card ......................................................................................................................... 10
Using the iCT2xx Terminal...................................................................................................... 11
Menu selection in display .................................................................................................... 11
Password protected menu selections .................................................................................. 11
Menu ................................ ................................................................................................ ... 11
Mynt application menu ..................................................................................................... 12
Start transaction ........................................................................................................... 12
2 Receipt copy ......................................................................................................... 25
3 Offline report ......................................................................................................... 25
4 Send offline trx ...................................................................................................... 25
5 Reports ................................................................................................................. 25
6 Cashier management ............................................................................................ 27
7 System .................................................................................................................. 28
8 Advanced settings ................................................................................................. 29
9 Support ................................................................................................................. 31
Special scenarios ................................................................................................................... 32
Fallback to magnetic stripe .............................................................................................. 32
Offline transactions .......................................................................................................... 32

User guide iCT2xx Page 3 of 40
Receipt examples ................................................................................................................... 33
Purchase receipt ................................................................................................................. 33
Cancellation receipt ............................................................................................................. 34
Report examples .................................................................................................................... 35
Transaction list .................................................................................................................... 35
Cashiers report – all cashiers .............................................................................................. 35
Sales report......................................................................................................................... 37
Notes ...................................................................................................................................... 38
User guide iCT2xx Page 4 of 40
Introduction
Thank you for choosing PayEx as vendor for your payment solution. We hope that you will be
fully satisfied with your new terminal iCT2xx and that the terminal will provide great value for
your company.
Read this guide to understand and make the best use of your terminal.
It presents you the necessary information about use, installation, maintenance, safety and
security recommendations.
Technical support is available Monday – Friday 08:00-19:00 and Saturdays 10:00-16:00 by
telephone +46 498207878 or by E-mail support.pos@payex.com
Best regards,
PayEx POS-team
Warning! This symbol indicates an important Warning
Advice! This symbol indicates a piece of advice.
User guide iCT2xx Page 5 of 40
Content
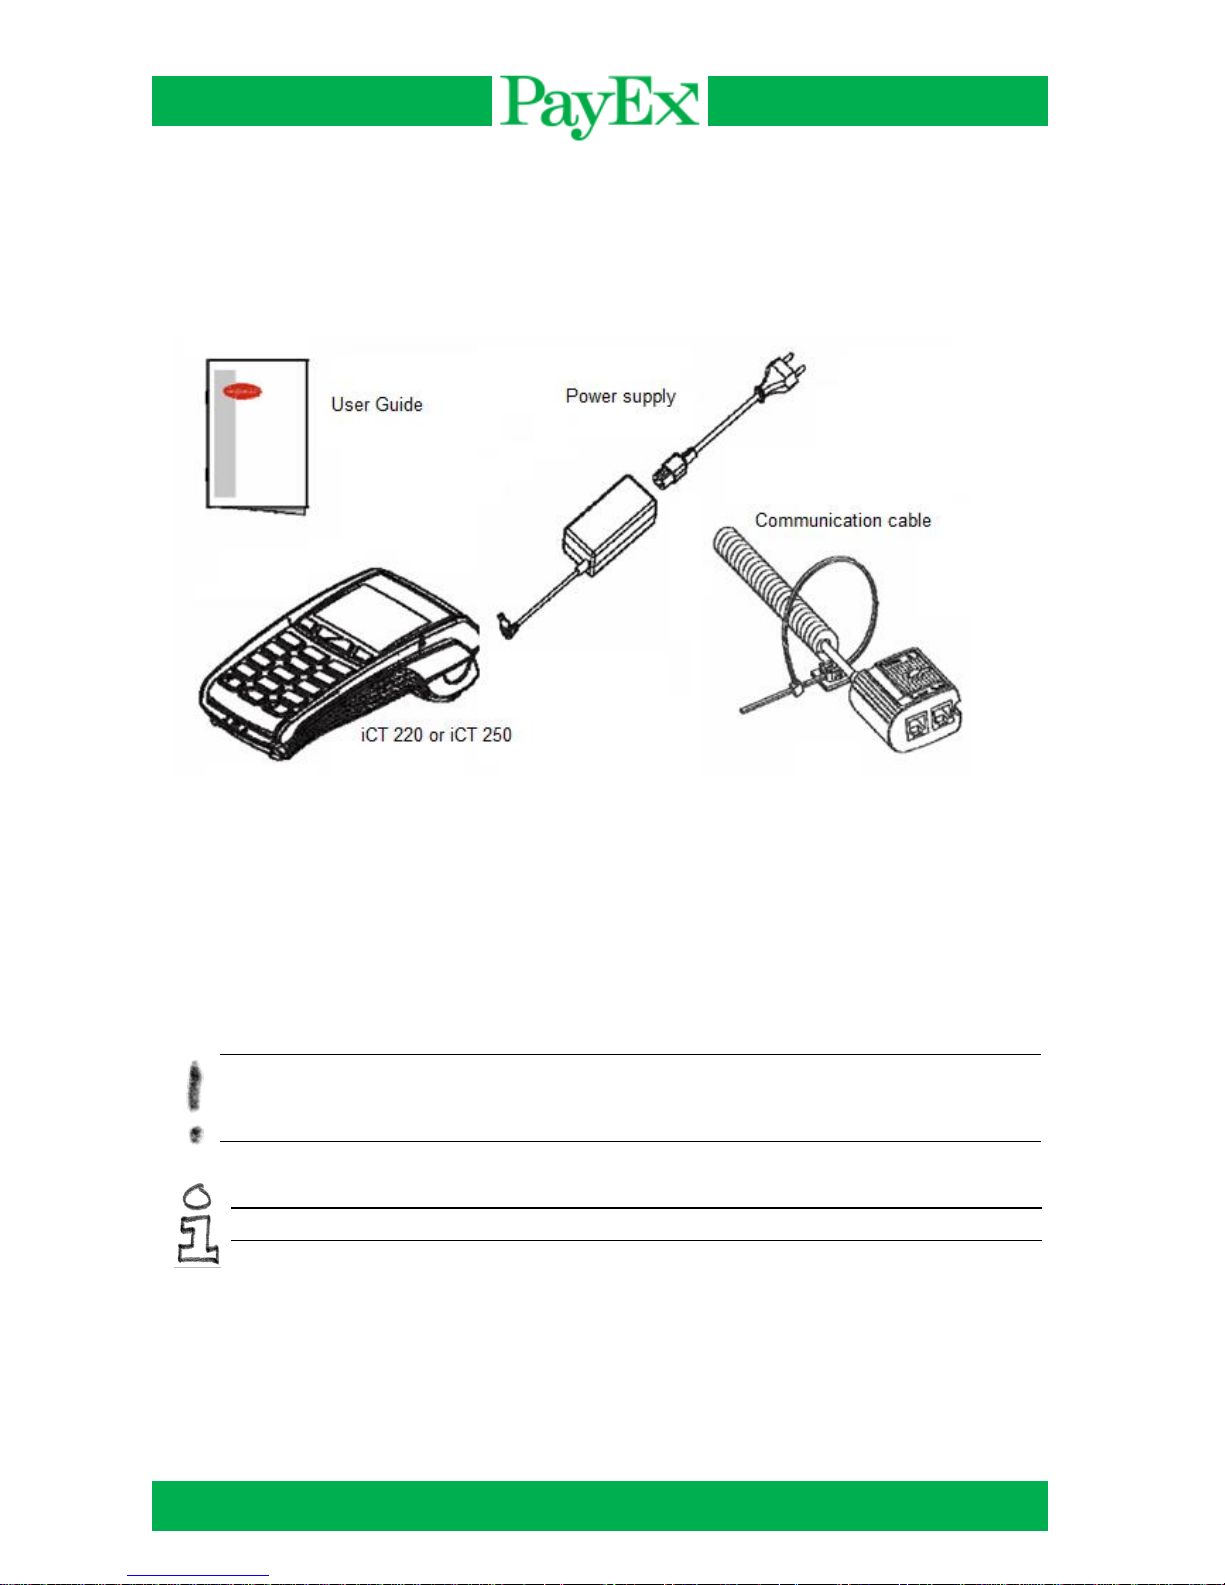
Content of the box
Verify that the delivery from PayEx contain the following:
Terminal iCT2xx
Power supply
Communication cable («Magic Box»)
2 extra receipt rolls
User guide
Warning! The power supply included in the delivery is specially designed for PayEx
terminals. Do not use any other power supply with apparently same specifications, it can
damage your terminal.
Advice! Keep the packaging. It must be re-used whenever the terminal is shipped.
User guide iCT2xx Page 6 of 40
iCT2xx Terminal
Specifications
Weight (without paper roll)
325 to 350 gram
Dimensions (L x B x H)
185 x 83 x 63 mm
Network
120-240 VAC/50-60 Hz – Class II equipment
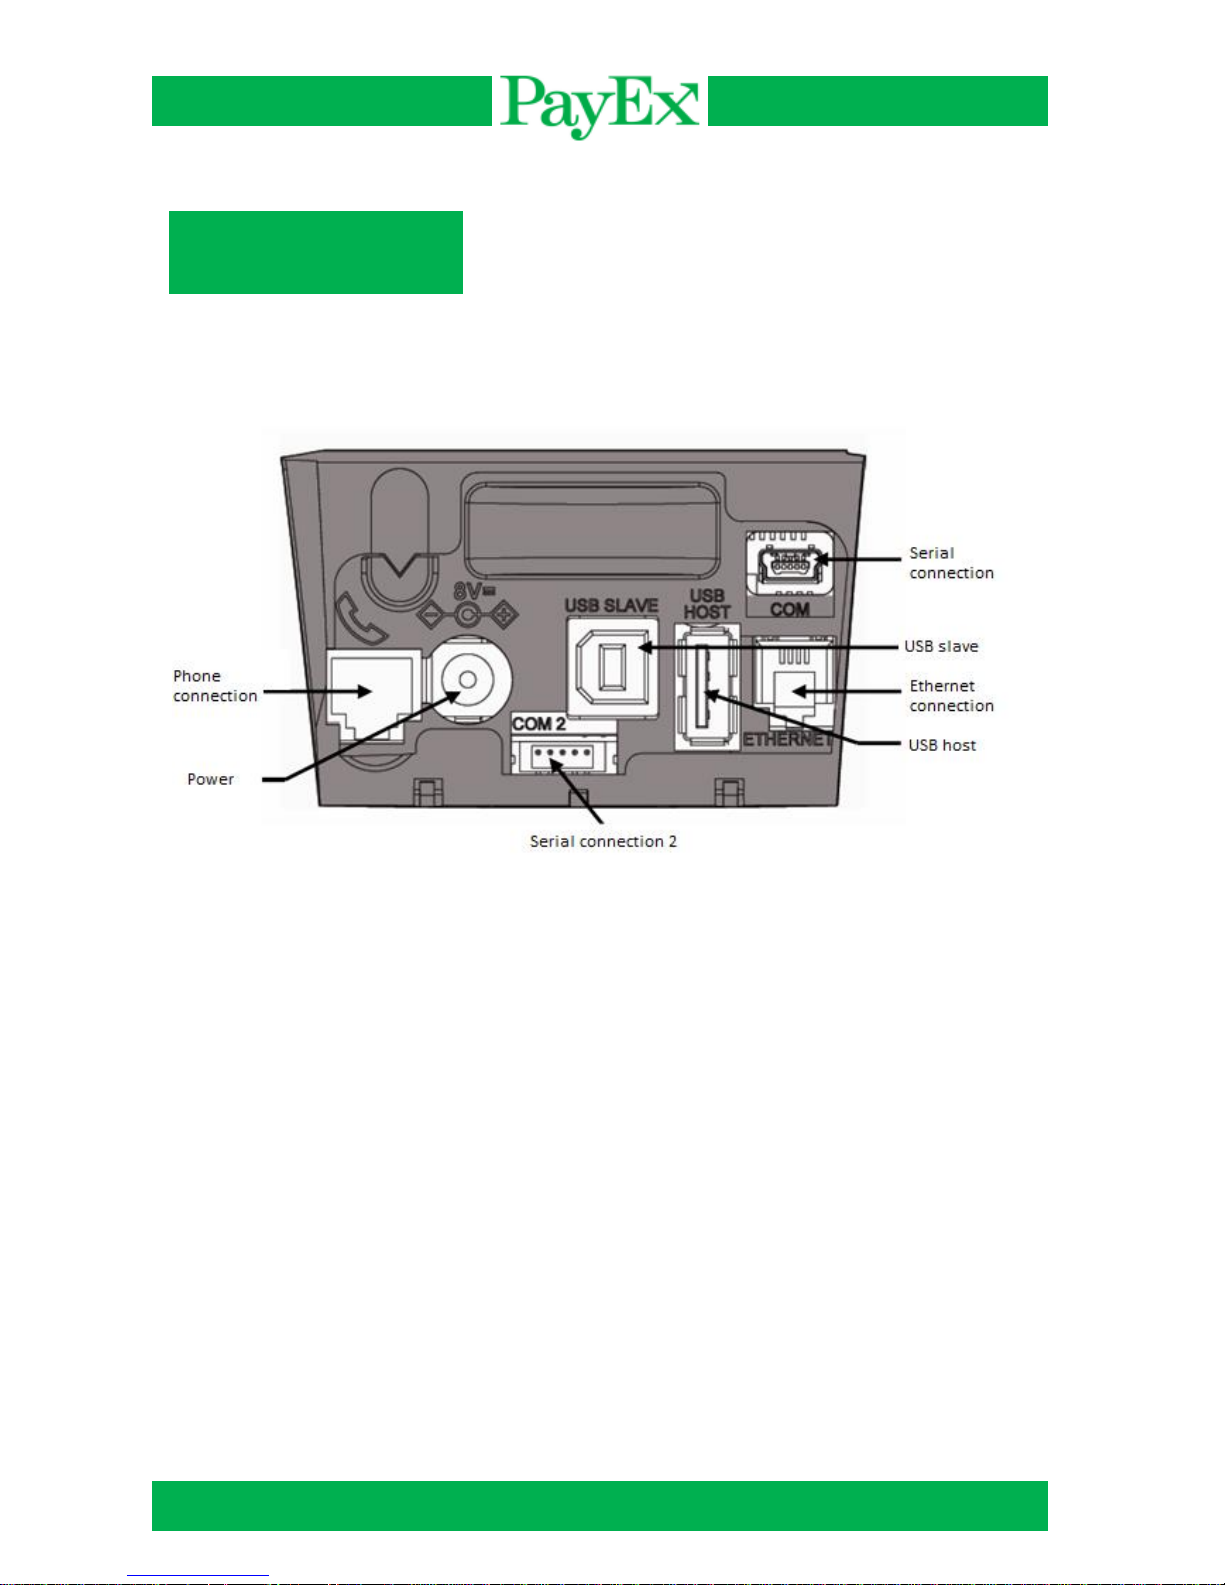
Connections
On the rear side of the terminal on the top compartment is the following connections:
User guide iCT2xx Page 7 of 40
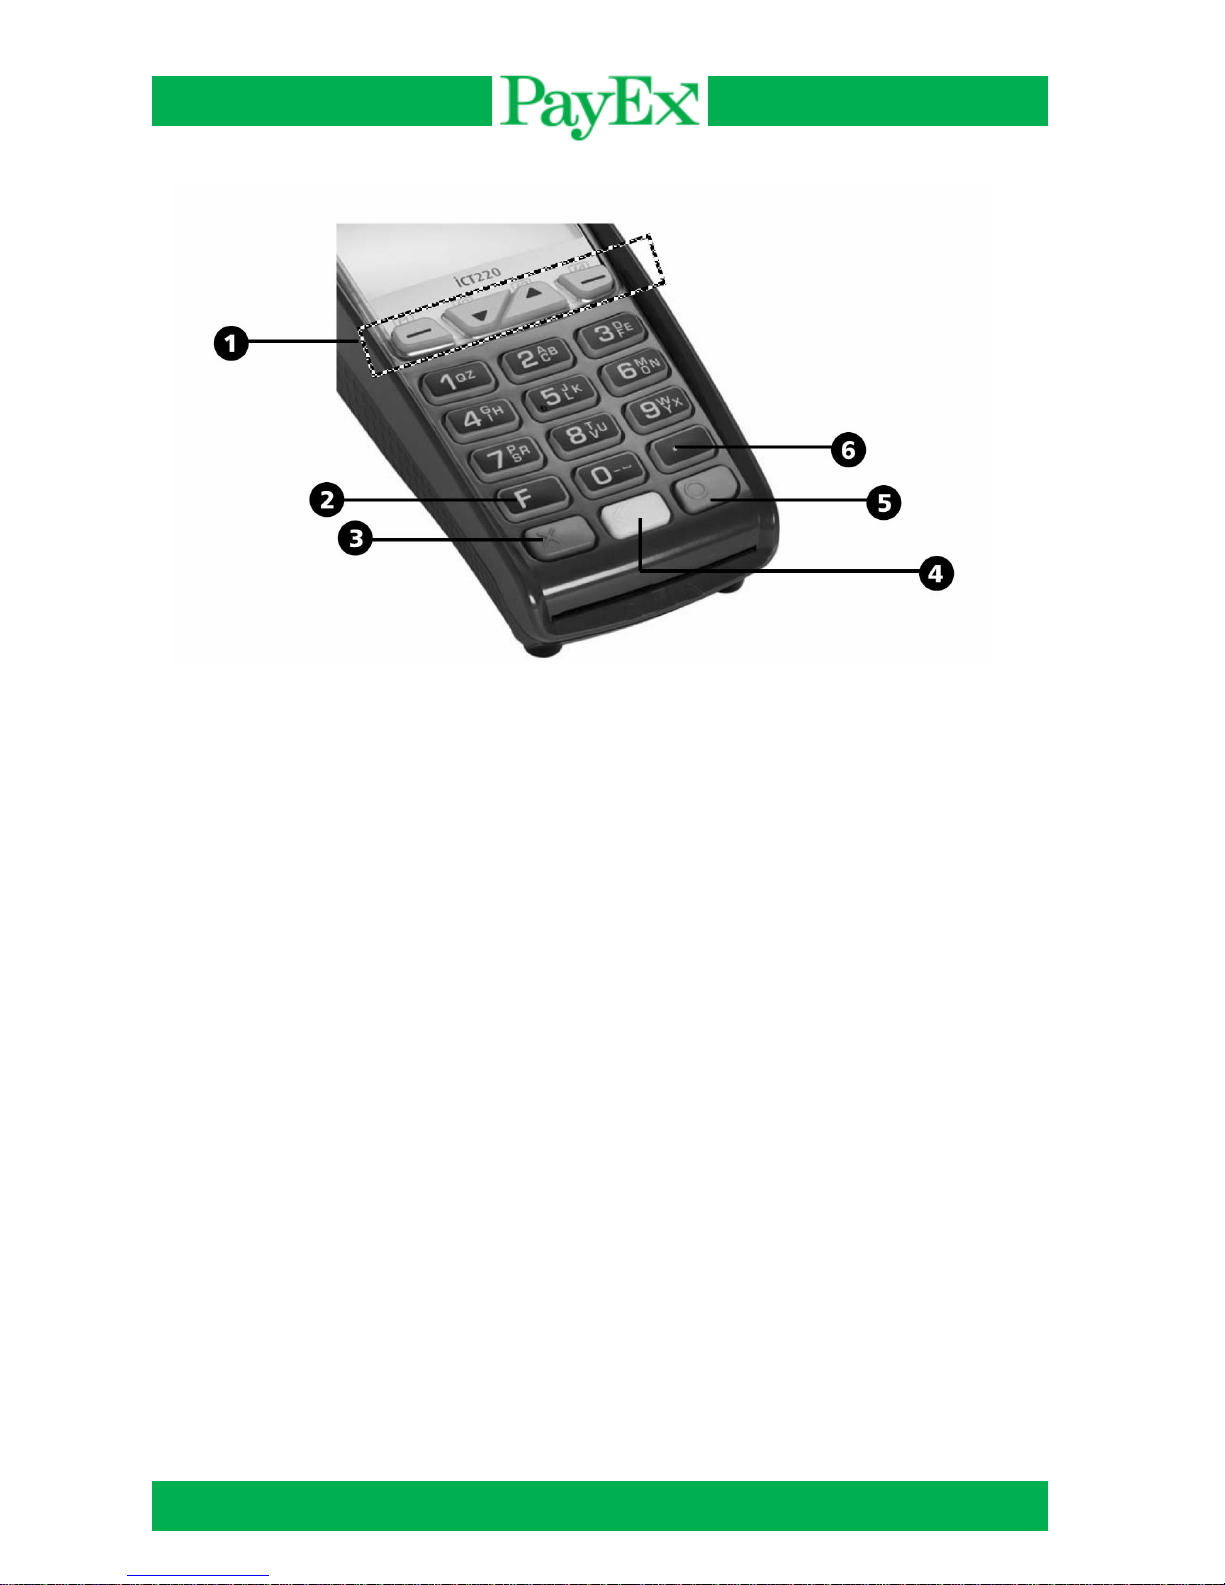
Keyboard
1) Navigation buttons for navigation in menus
2) Function key (F)
3) Stop key (X)
4) Correction key (<)
5) OK key (O) is used to confirm input
6) Dot key
Some terminals have MENU instead of F and text on the color buttons: OK (Green key),
CLEAR (yellow key), STOP (red key). All instructions described in this document is based
on those terminals that have the F key as menu button.
User guide iCT2xx Page 8 of 40
Installation
Paper roll
Installing paper roll
Follow the instructions in this chapter to replace a paper roll in the terminal.
Warning! Switch off the terminal before replacing the paper roll. Only use original paper
rolls from PayEx. If other types of paper rolls are used it can damage the printer. This is
not covered by the manufacturer’s warranty.
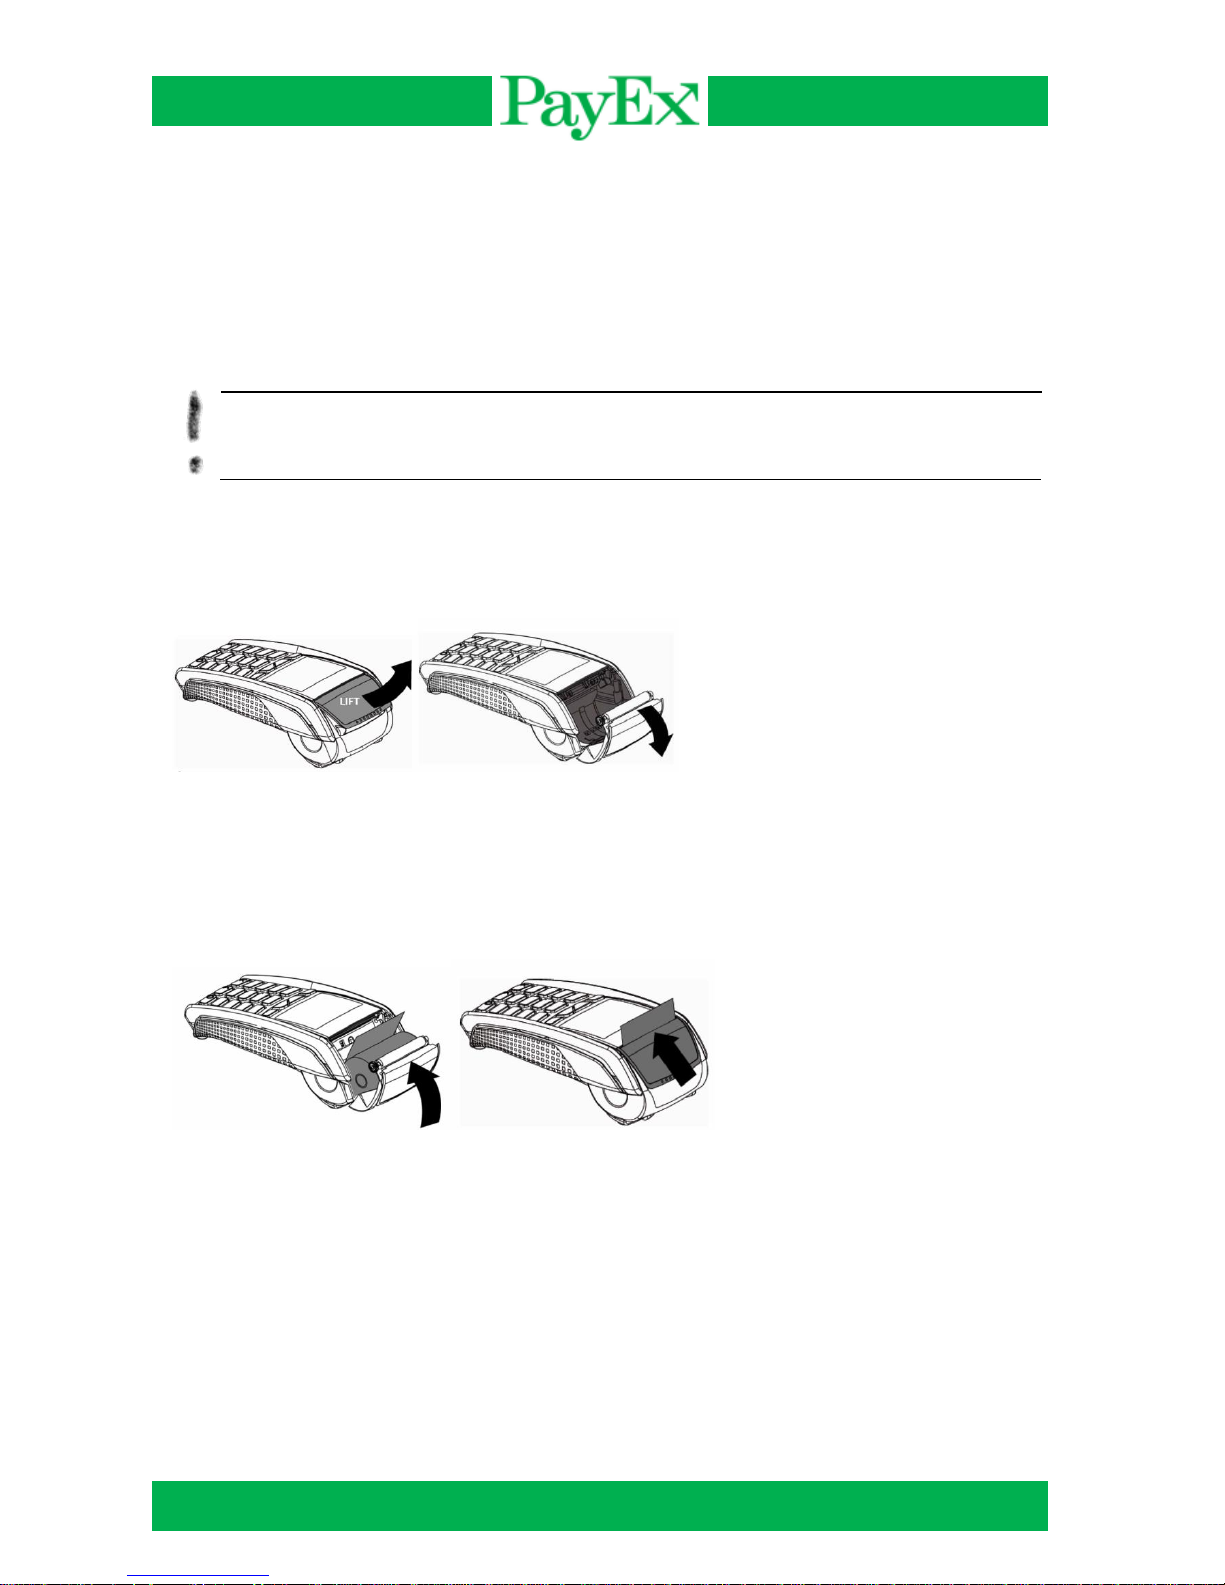
Open the paper compartment by lifting the catch located at the rear of the terminal and pull the
cover forward as shown on the picture.
Insert the new paper roll in the compartment following the directions shown on the picture. Pull
the paper up to the top of the terminal, close the cover and maintain the paper.
Ordering
Paper rolls that fulfills the requirements can be ordered from PayEx.
Telephone: +46 498207878
E-mail: support.pos@payex.com
User guide iCT2xx Page 9 of 40
Using the terminal
Advice! Before using the terminal, always check if the paper roll is present.
Switching off/on the terminal
iCT2xx terminals can be switched off by removing/disconnecting the power supply. When
reconnecting the power supply, the terminal will automatically start. The terminal can be
restarted with the following key combination:
Comma key and yellow key (<) Reboot the terminal +
User guide iCT2xx Page 10 of 40
Card readers
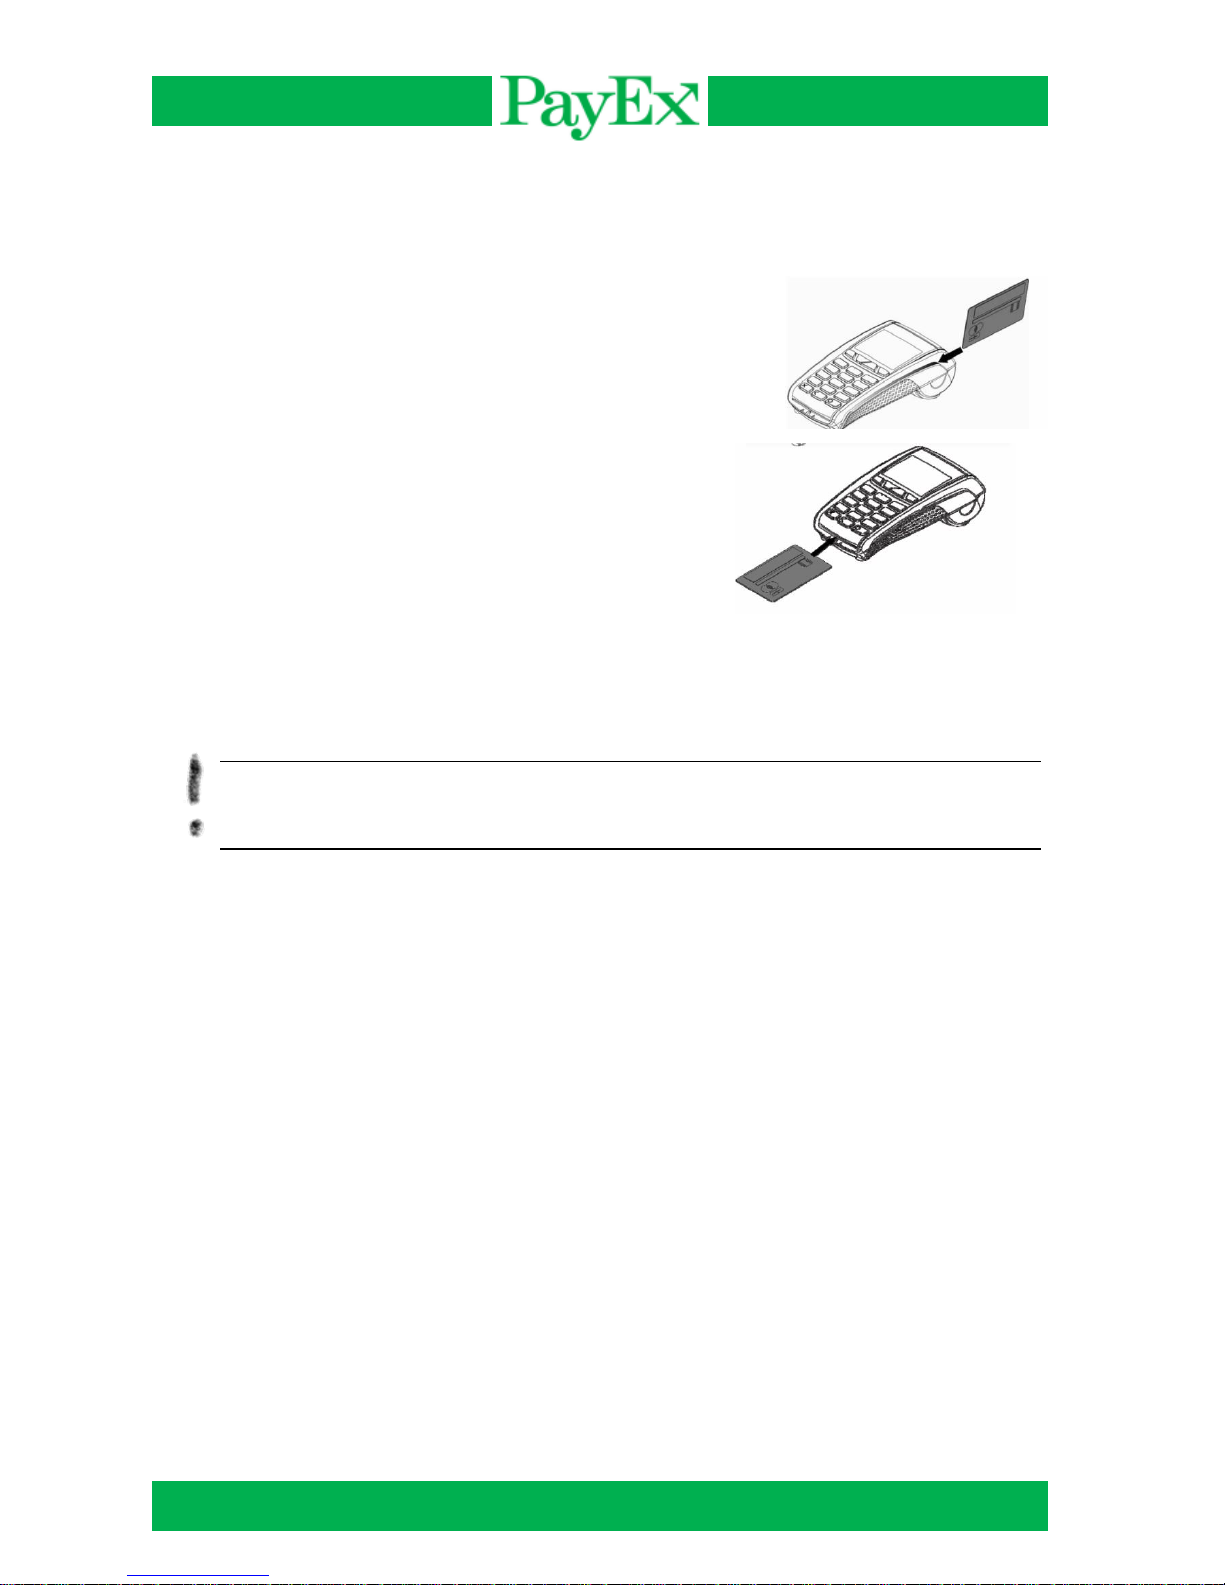
The terminal iCT2xx can handle both magnetic stripe cards and chip cards.
Magnetic stripe cards
A magnetic stripe card is read by swiping the card on the
terminal’s right side. The magnetic stripe shall face the terminal
and can be swiped either up-down or down-up. The magnetic
stripe card is best read by swiping it with a constant speed, not
too slow.
Chip card
The chip card (smart card) reader is located at the front of
the terminal. Insert the chip card horizontal with the chip
faced up.
If a card has chip, it shall always be read by the chip card reader first. If the terminal fails to
read the chip three (3) times in a row, the terminal requests “fallback”. This means that the
card must be swiped. The terminal will display “Use magstripe” in the display.
Warning! When performing a transaction with a chip card, the card must be left in the
reader during the whole transaction cycle. A message will be displayed when the card
can be removed.

User guide iCT2xx Page 11 of 40
Using the iCT2xx Terminal
The iCT2xx Terminal is delivered with preinstalled software ready to use. This chapter
describes the functions and operations that is possible to perform on the terminal.
Menu selection in display
When multiple selections are displayed, navigate to the preferred selection with the navigation
keys followed by green key, or by pressing the number on the left side of the selection.
Password protected menu selections
The terminal is delivered with standard safety codes that are necessary for performing certain
routines. These codes should be changed as soon as the terminal is deployed to prevent
unauthorized access. The Support (operator) code is default 1234 and the Administrator code
is default 1111.
Warning! If one or both safety codes are forgotten, Technical Support must be contacted
by telephone 994 01 150 or E-mail support.pos@payex.com.
Menu
The Terminal has two keys that accesses the menu from idle screen, F and F3 (Arrow up,
followed by operator code).
F: This key presents the Mynt application menu for the user.
F3: This key accesses the menu of the terminal where the manager, key injection and Mynt
application are available. By using this key to access the menu, operator code is required.
This menu displays::
0 – TELIUM MANAGER (Only support/administrator)
1 – RKI (Only support/administrator)
2 – MYNT
User guide iCT2xx Page 12 of 40
Time (hh:mm)
Mynt application menu
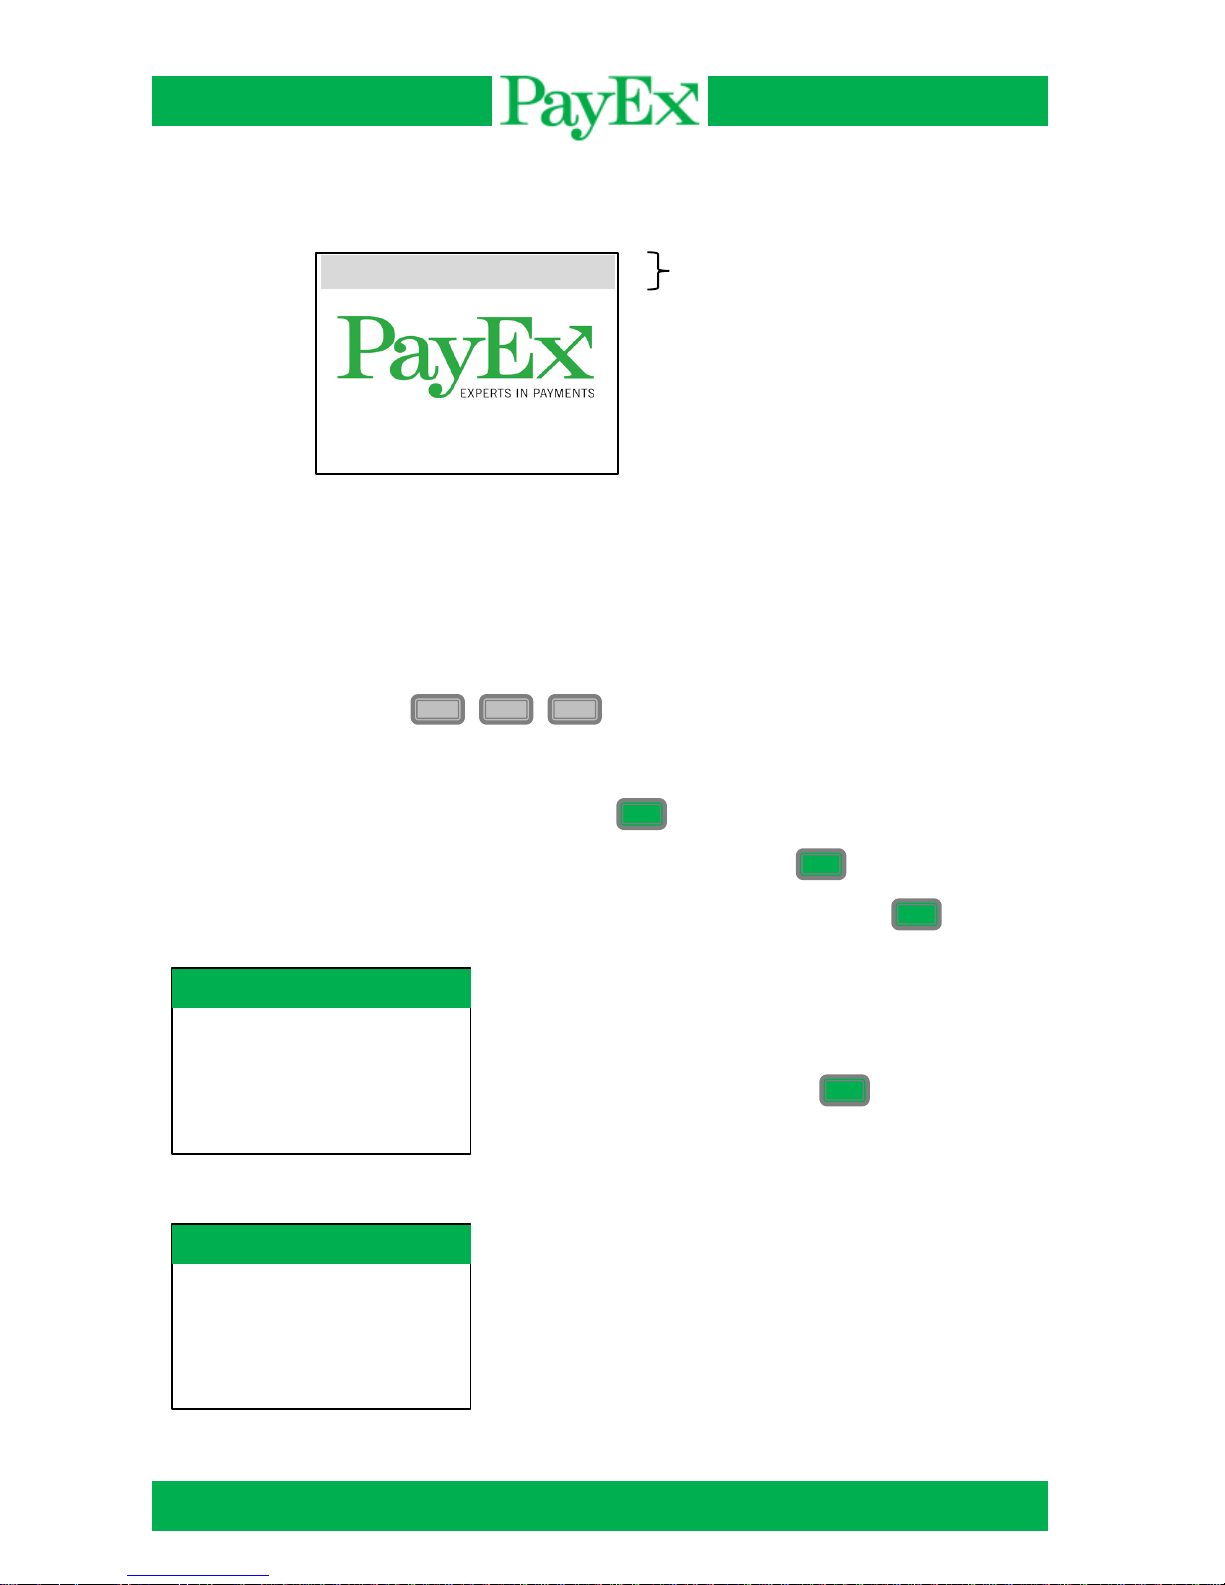
Below is the idle screen of the terminal before a transaction is initialized or menu is entered:
Start transaction
In this menu it is possible to perform transactions, i.e. purchase, purchase with cash back and
refund. This chapter shows the normal transaction flow for the most used transactions.
1.1 Purchase
Initiate a sale by pressing + +
A sale can also be initiated by:
Inputting a purchase amount followed by
Inserting a chip card, inputting purchase amount followed by
Swiping a magnetic stripe card, inputting purchase amount followed by
Input purchase amount. Based on cent
configuration, amount is inputted by either
KR (or EUR) or KR + cents. Input is
confirmed by pressing
The customer shall insert the card,
alternatively swipe magstripe card. If the card
has chip, chip shall be used.
F
1
1
O
O
O
O
Insert card
17:09
Purchase
Sale amount:
NOK 10.00
Purchase
Insert card
NOK 10.00
 Loading...