

Page 1
Conguring a Net2 Entry Premium Monitor
Overview
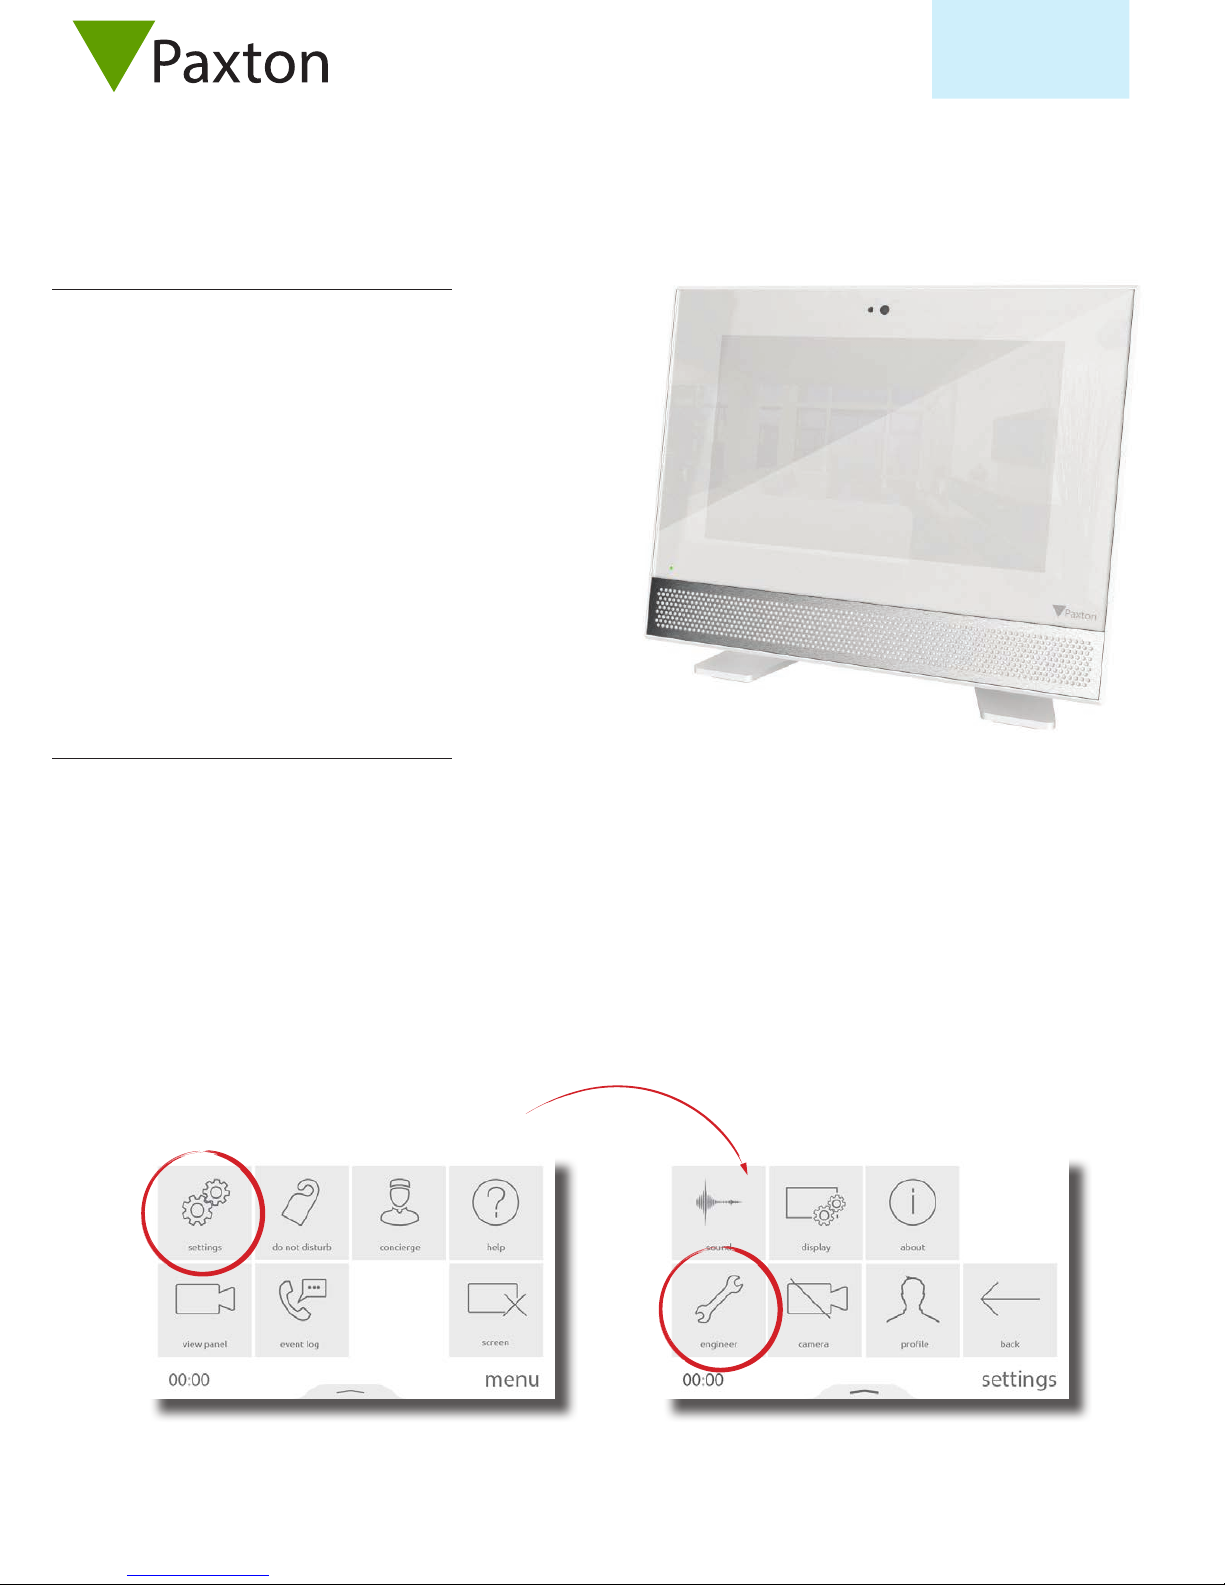
Conguration - Setting the monitor ID
The Net2 Entry Premium monitor is an audio/video monitor used
to remotely communicate with visitors, and is installed as part of a
Net2 Entry system. It is powered using Power over Ethernet (PoE)
and communicates with the other elements of the system using
IPv6, providing ‘plug and play’ installation.
The only conguration required is the allocation of a monitor ID
which the system uses to identify the correct monitor.
If used in conjunction with Net2 access control software, this must
be version 4.25 or later.
AN1172
Net2
When the monitor is rst connected to the network it will not have a Monitor ID number.
The monitor ID is the number that a visitor will call to request entry (unless they are using a text only list) so it should relate to
the location of the monitor where possible e.g. Flat Number.
From the menu, touch settings > engineer > enter the engineer code for the system (if required) > monitor id, enter a Monitor
ID number, then touch accept.
Monitors sharing the same ID will all ring when a call is made to that ID, and some conguration (name, concierge, divert mode)
will be common on all monitors.
1
Page 2
AN1172
Net2
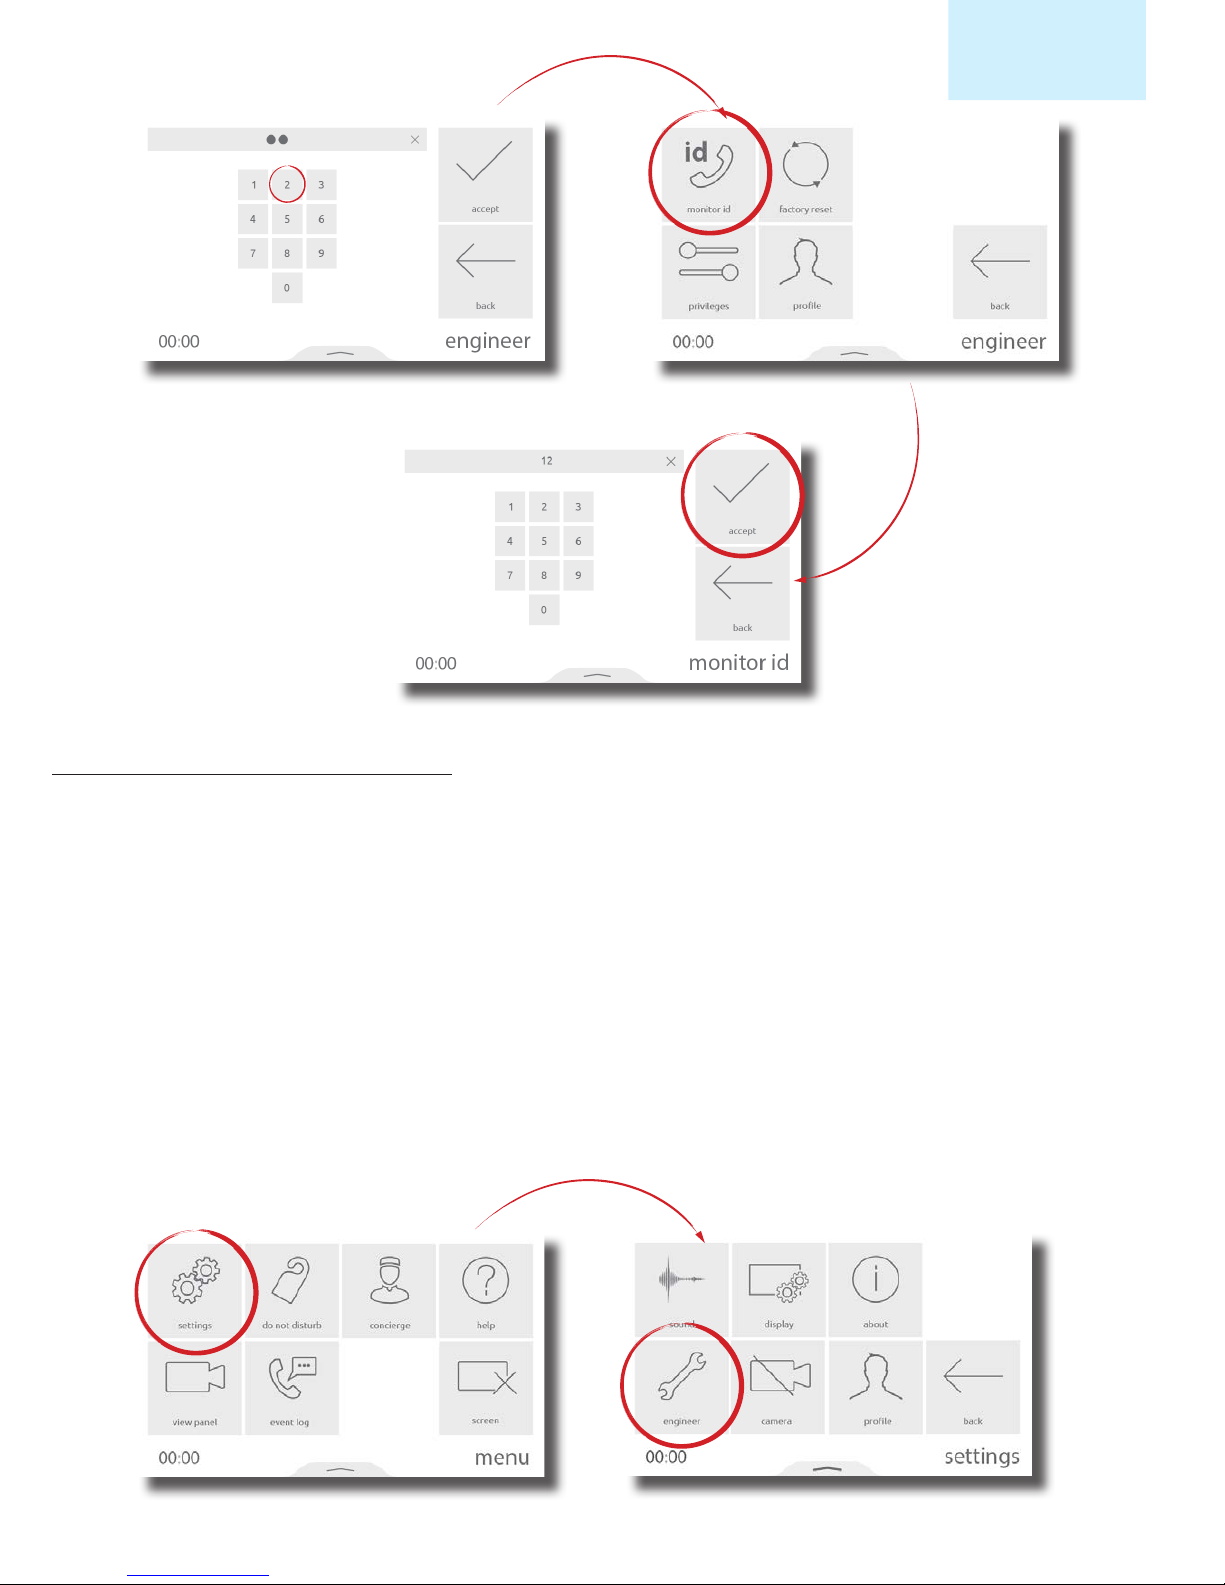
Conguration - Privileges
Privileges determine which controls and functionality will be available to the user of the monitor.
Allow messaging - When enabled, this monitor may record a new greeting to be played when a call is missed
Allow door unlock - When enabled, this monitor can unlock the door at any time via view panel
Privacy - When enabled, hands free and call back are disabled. A handset must be connected for this
operation
Set as concierge - This enables concierge functionality for this monitor ID. See AN1165 for more information
Allow calls to concierge - When enabled, this monitor may initiate direct calls and divert incoming calls to the
concierge monitor
From the menu, touch settings > engineer > enter the engineer code for the system (if required) > privileges, set as required,
then touch accept.
2
Page 3
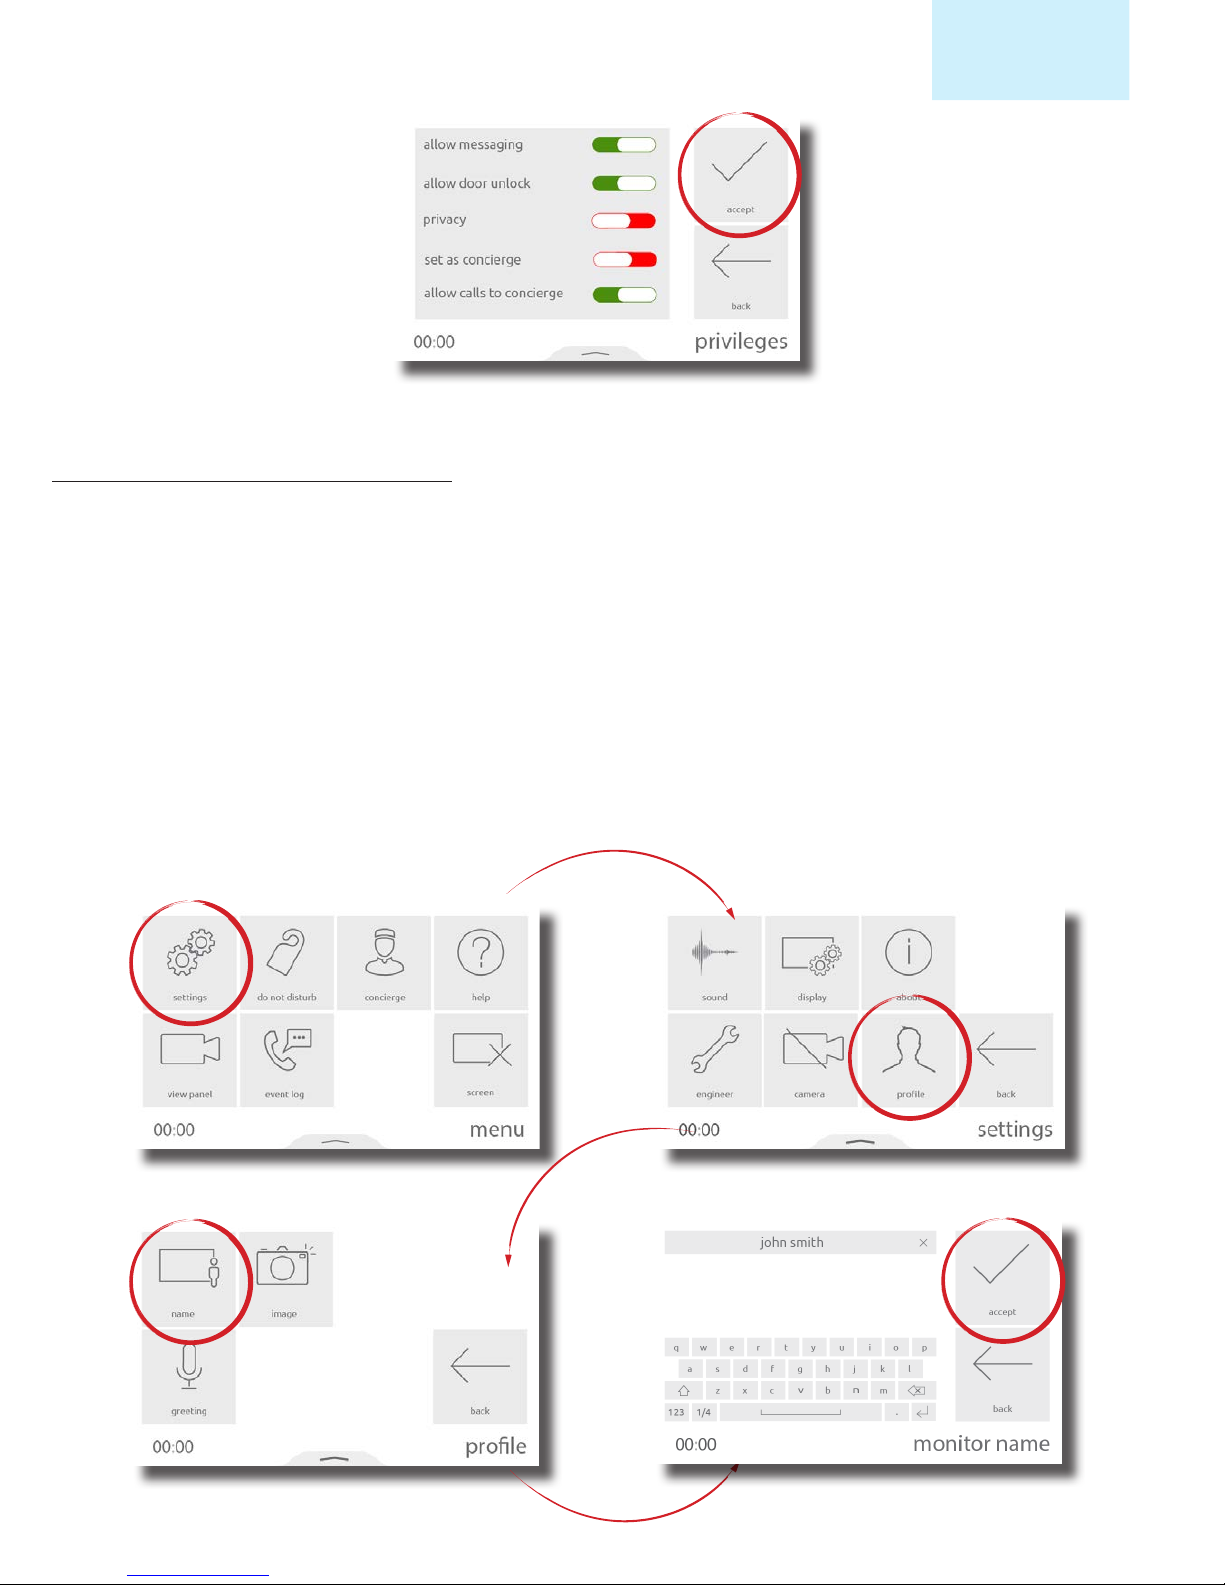
Conguration - Personalisation
Name and image
A name and image may be used to identify the monitor at the entry panel.
To edit the monitor name, from the menu, touch settings > prole > name > enter a name using the on-screen keypad, then
touch accept.
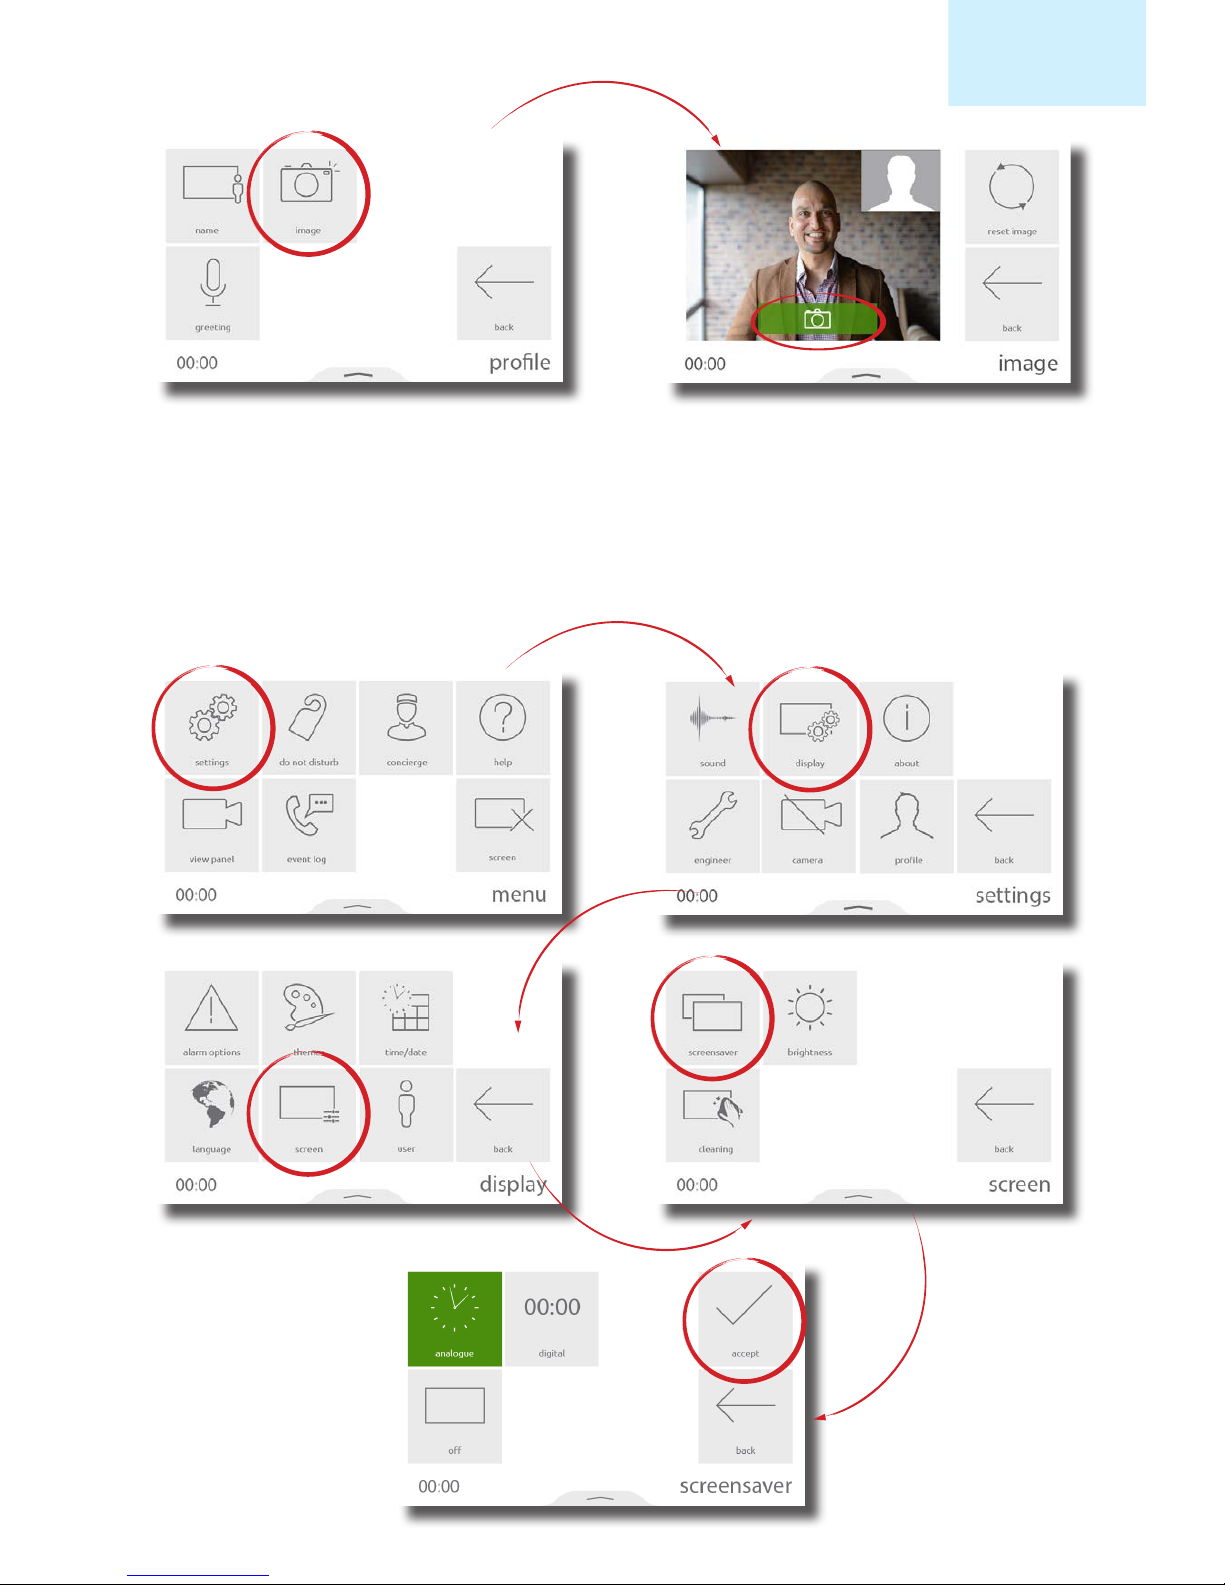
To edit the monitor image, from the menu, touch settings > prole > image > position yourself centrally in front of your
monitor, so that you are in clear view of the camera, then touch the green capture button. When happy with the image, touch
accept. Alternatively, an image can be uploaded using the Entry conguration utility.
Note: These settings may be restricted via the Entry conguration utility. When restricted, Prole will be available within the
Engineer menu.
AN1172
Net2
3
Page 4
AN1172
Net2
Screensaver
When the monitor is not in use, the screen can either display the time and date, or turn o.
To change or turn o the screensaver, from the menu, touch settings > display > screen > screensaver > select a screensaver,
or o, then touch accept.
4
Page 5

AN1172
Net2
Theme
The monitor background image and button contrast can be customised using themes.
To change the theme, from the menu, touch settings > display > themes > select a theme, then touch accept.
Ringtone and doorbell
A selection of ringtones and doorbells are available to choose from.
• The ringtone is played when the monitor is being called from a panel or concierge.
• The door bell is played when someone presses the doorbell directly at your apartment or oce (Requires a doorbell to
be wired to the door bell contacts on the monitor).
To change the ringtone or doorbell tone, touch settings > sound > ringtone or door bell > select the tone to use, then touch
accept.
5
Page 6

AN1172
Net2
Volume
Call volume and ringtone volume can be adjusted to suit the needs of the user and the environment.
To change the volume, touch settings > sound > volume > adjust the in call and ringtone volume > then touch accept.
Volume can also be changed more conveniently using the pop-up bar. Drag up from the bottom of the screen to display the
pop-up bar, then drag the slider as required to change the volume.
• When in a call, this will temporarily change the in-call volume
• When in a menu screen, this will change the ringtone and door bell volume
6
Page 7

AN1172
Net2
Voicemail
Operation - Answering a call
Enable messaging to allow visitors to leave a message when you’re unable to answer their call.
To enable voicemail, from the menu, touch settings > prole > greeting > enable messaging > then touch accept. When
enabled, your greeting will be played to the visitor upon missing their call, followed by the option for them to leave a message.
When a visitor or concierge calls, the monitor will sound its ringtone and display the incoming call on screen
Notes:
• The unlock button is only available for panels and when enabled in monitor privileges.
• Only Net2 Entry Touch panels and Premium monitors will display your image/video
Caller location
Caller image or video
Touch the video to
display auxiliary camera
(if available)
Current door status
Touch to unlock the door
and answer the call
Touch to answer without
unlocking
Touch to hang up
7
Page 8

AN1172
Net2
Operation - Do not disturb mode
Visitors can be stopped from calling the monitor by putting it into ‘Do not disturb’ mode. While in this mode, the monitor will
not respond to incoming calls or messages.
To enter ‘do not disturb’ mode, from the menu, touch do not disturb > select now, or select a timed option to only enter the
mode for a limited time > then touch accept.
To enter ‘do not disturb’ mode on a regular occurrence, every night for example to avoid sleep disturbance, from the menu,
touch do not disturb > select scheduled > select the days of the week and the time range that the monitor should be in ‘do
not disturb’ > then touch accept. The monitor will automatically enter ‘do not disturb’ mode during the time interval on the
specied days.
To end ‘do not disturb’ mode, simply touch the screen and select yes.
Operation - Viewing a camera
If enabled in privileges, the monitor can make a call to a panel to view its camera and unlock the door.
To view a panel’s camera, from the menu, touch view panel. If multiple panels exist, use the up/down arrows to select the panel
to view.
8
Page 9

Operation - Concierge
To set a monitor as concierge, see AN1165.
When a concierge exists on the system, the monitor is able to call the concierge, or divert their incoming calls to the concierge.
To call the concierge, from the menu, touch concierge > then select call.
To divert incoming calls to the concierge, touch concierge > divert calls > select now, or select a timed option to only divert
calls for a limited time > then touch accept.
To divert calls on a regular occurrence, every weekday while you’re at work for example, from the menu, touch concierge >
divert > select scheduled > select the days of the week and the time range that the monitor should divert calls during > then
touch accept. The monitor will automatically divert calls during the time interval on the specied days.
To stop diverting calls, touch concierge > divert calls > select none > then accept.
AN1172
Net2
9
Page 10

AN1172
Net2
10
Page 11

Monitor LED
Pop-up bar
The LED is used to represent various monitor and door states
Red ashing - New message
Blue ashing - Door bell
White ashing - Incoming call
Green - In call
Green ashing - Door unlocked
Red - Monitor in do not disturb or call divert mode
Red/Green alternating - Door has been forced or left open
AN1172
Net2
Swipe up from the bottom of the screen to display the pop-up bar, containing useful shortcuts and controls.
When in a menu screen:
When in a call:
Ringtone Volume
In-call volume
Shortcut to Main menu
Enable/disable mic
Shortcut to ‘do not disturb’
Enable/disable camera
Enable/disable your camera
(Red=disabled)
11
 Loading...