

Page 1
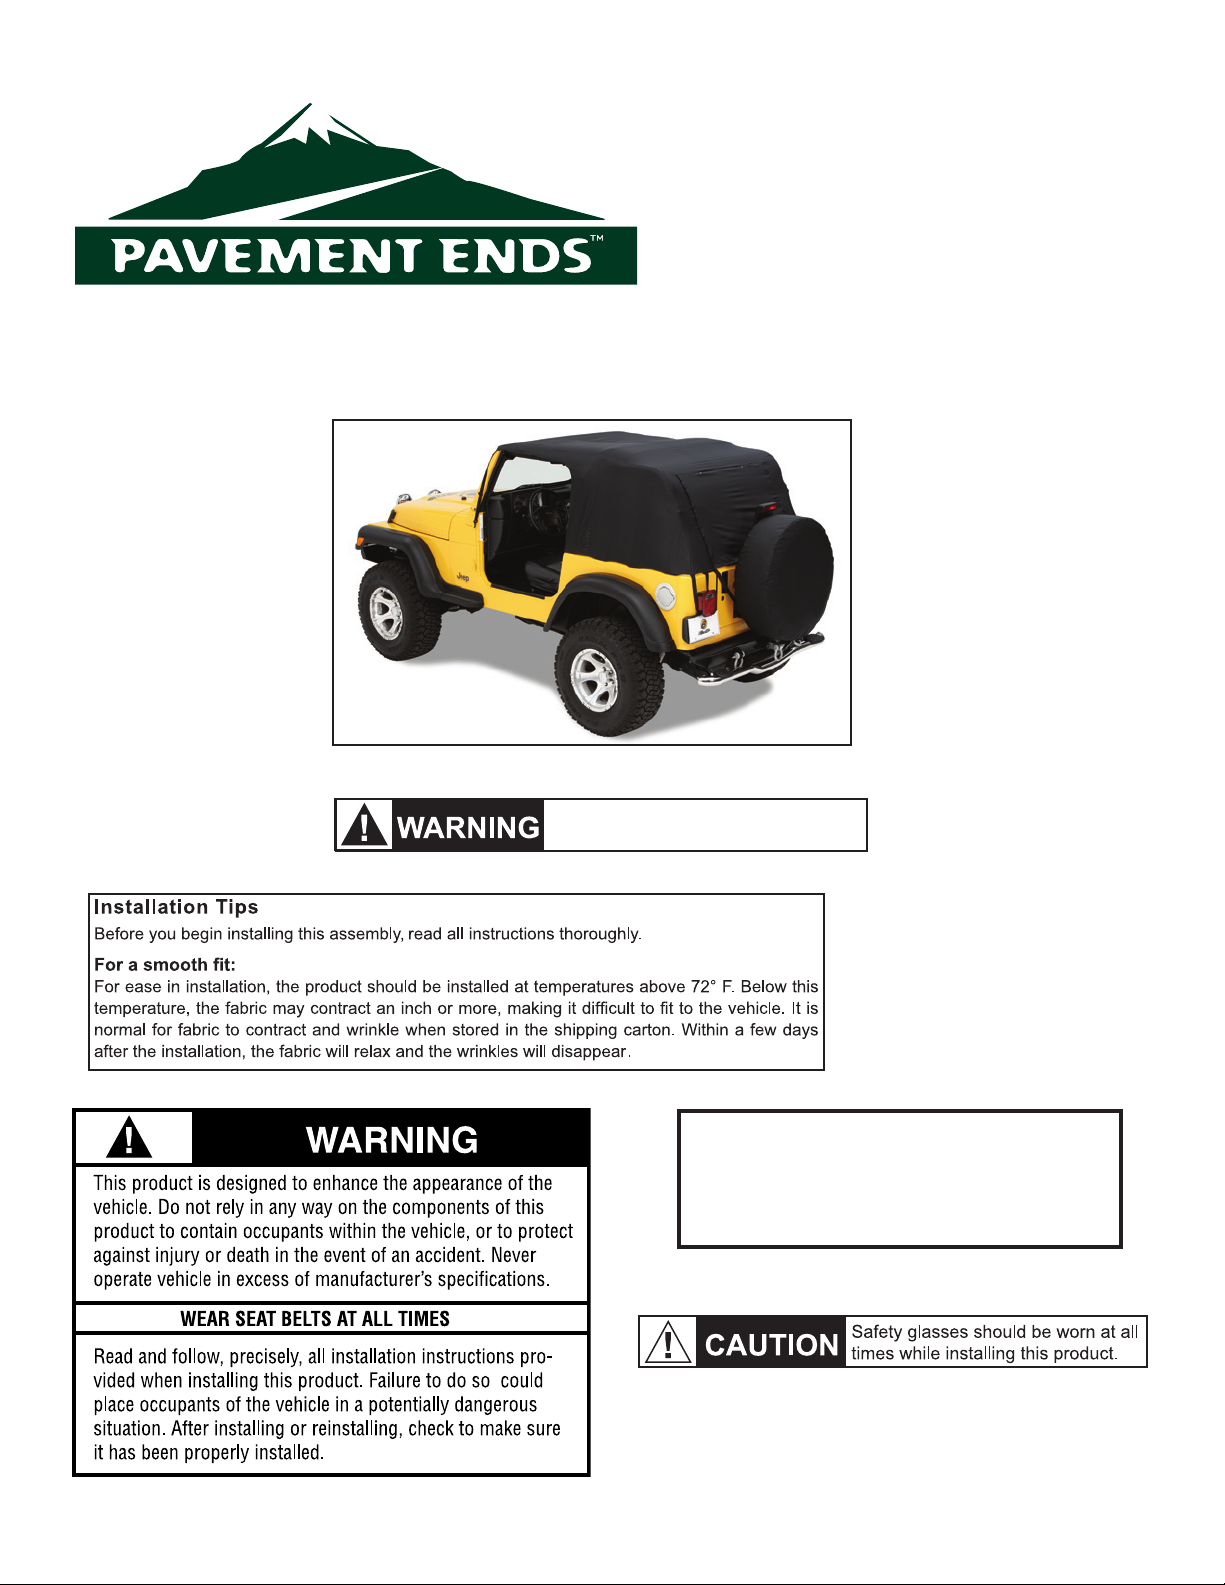
Emergency Top
Installation Instructions
For:
• Jeep CJ
1976 – 1991
Part Number: 56810
• Jeep YJ
1992 – 1995
Part Number: 56811
• Jeep TJ
1997 – 2006
Part Number: 56812
• Jeep TJ Unlimited
2004 – 2006
Part Number: 56813
• Jeep JK
2007 – Current
Part Number: 56814
• Jeep JK Unlimited
2007 – Current
Part Number: 56815
Emergency Top is meant to be used
for short, low speed trips.
Table of Contents
EMERGENCY TOP PARTS LIST ............................. PAGE 2
E
MERGENCY TOP INSTALLATION ........................... PAGE 2
MERGENCY TOP WARRANTY .............................. PAGE 4
E
56810 / 56811 / 56812 / 56813 / 56814 / 56815 pg 1
0509 Rev. B
Page 2
Step One
Parts List
Emergency Top Qty - 1
Personal Ponchos Qty - 2
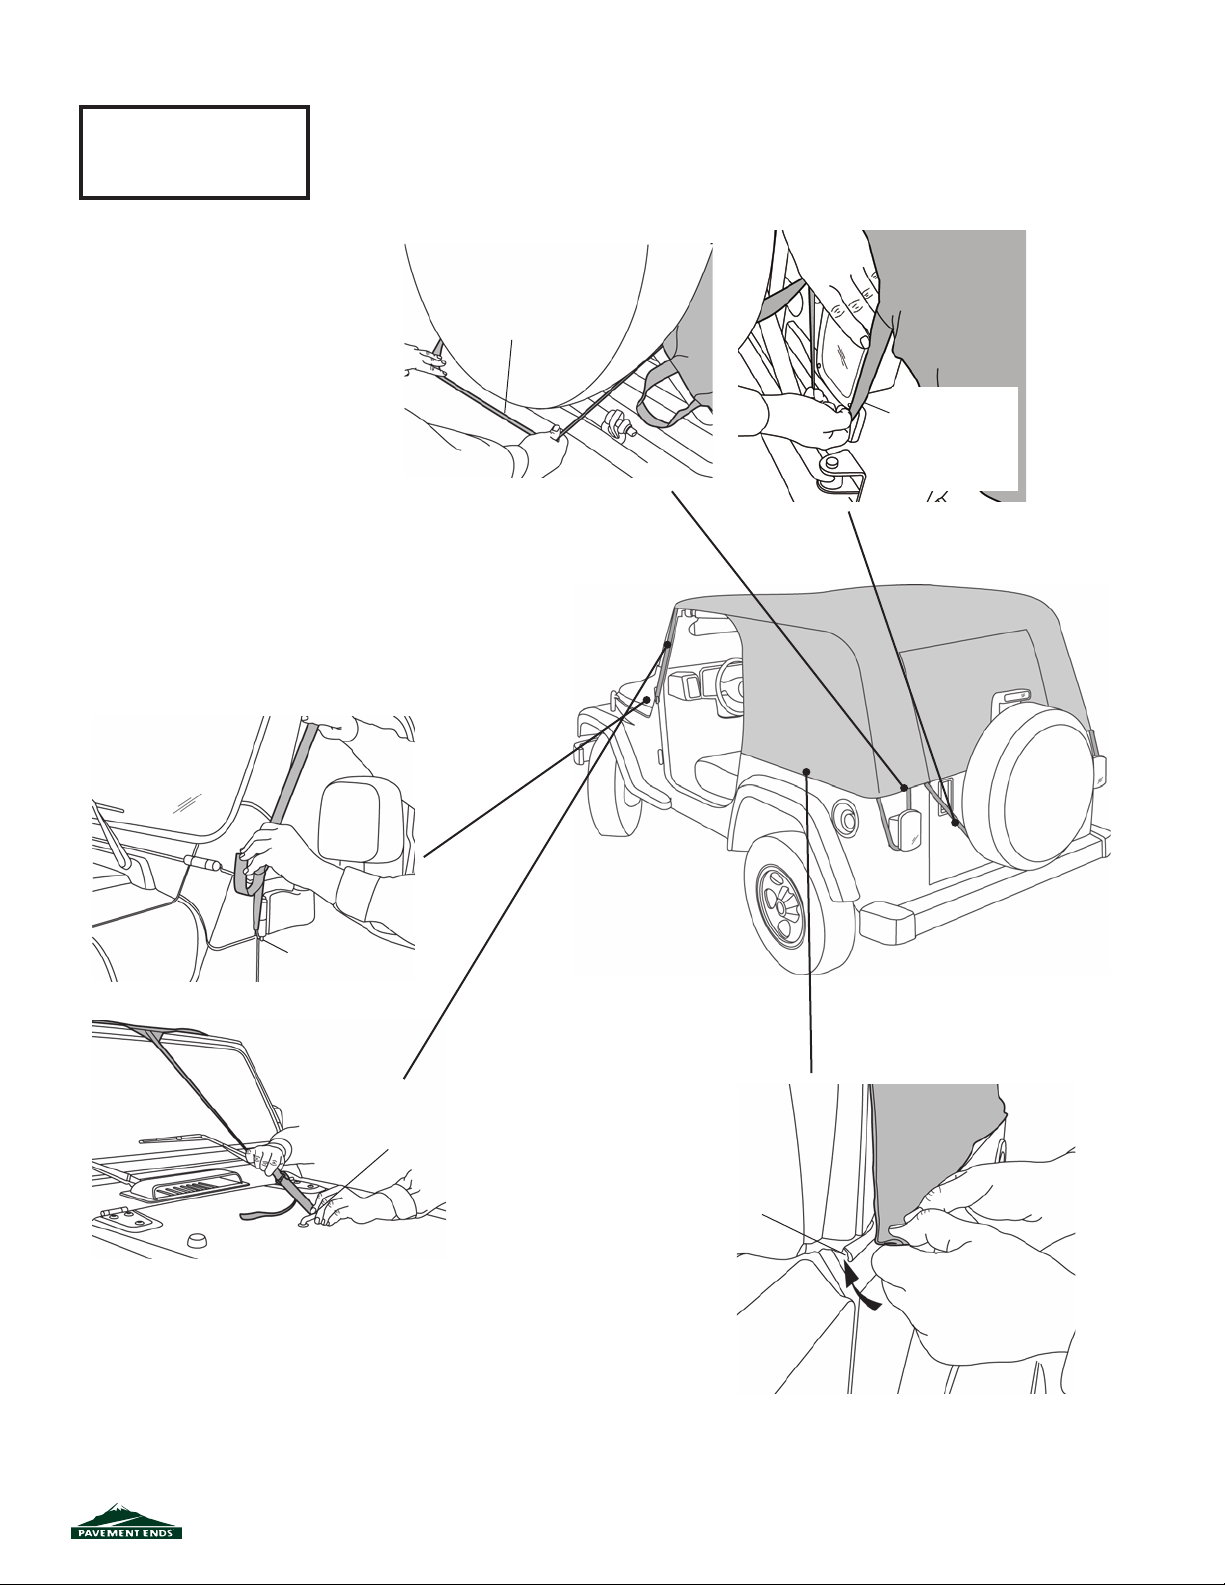
INSTALL REAR STRAPS
Orient the Emergency Top on the vehicle. Locate the three elastic straps
(one strap on JK models) sewn to the rear of the top. Hook the center
strap around the spare tire carrier and the outside straps around each
rear taillight (excluded on JK models, Part Numbers 56814 and 56815).
Spare Tire
Hook Center Strap around
Spare Tire Carrier
Step Two
INSTALL THE ADJUSTABLE STRAPS
Locate the three adjustable straps. Hook the corner
straps to the door hinge on each side of the vehicle
and the center strap to the hood loop. Do not tighten
the straps at this time.
Pull Rear Corner
Straps down and
hook over Taillights
(excluded on JK
models, 56814 and
56815)
Hook Front Corner
Strap to Door Hinge
Hook Center Strap
to Hood Loop
56810 / 56811 / 56812 / 56813 / 56814 / 56815 pg 2
Roll Plastic Strips
into Beltrails
Step Three
SECURE TOP IN BELTRAILS
Slip the plastic strips on the sides of the top into the
beltrails on the vehicle.
0509 Rev. B
Page 3
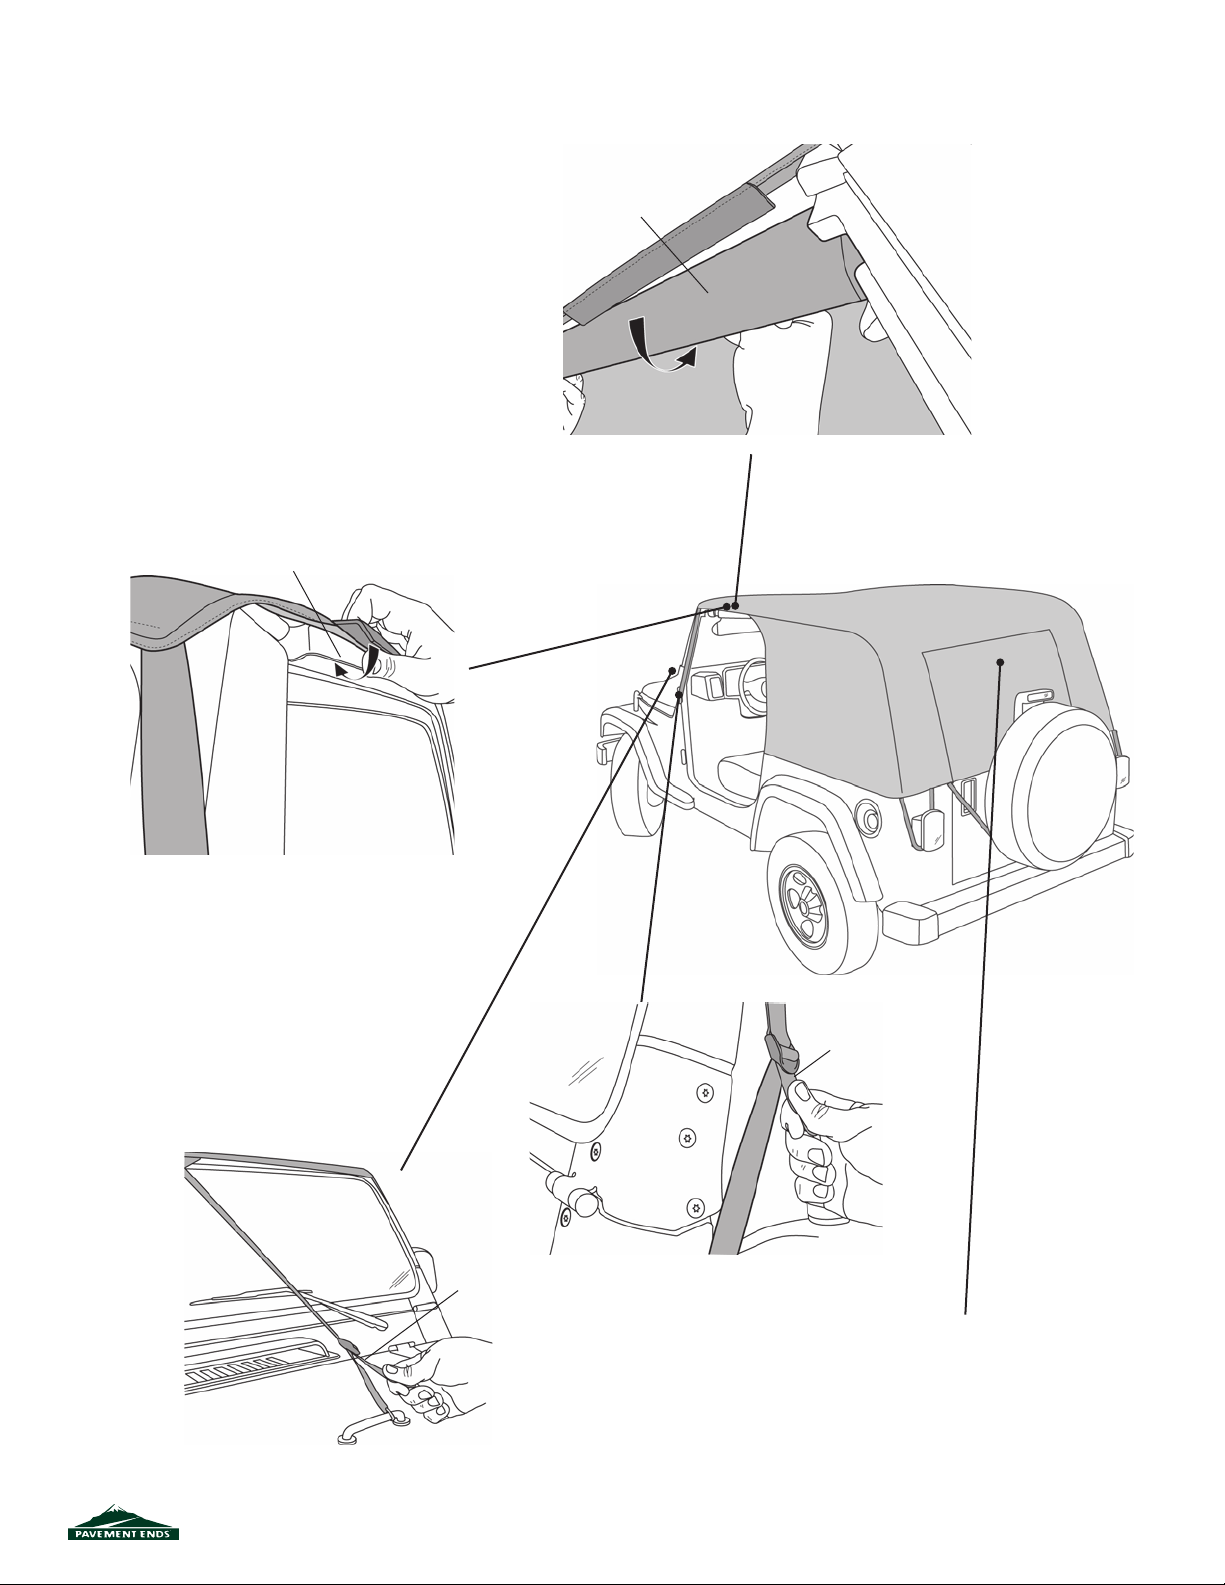
Step Four
SECURE SPORT BAR FLAPS
Wrap the fl aps above the doors around
the sport bars and fasten the hook and
loop strips to each other.
Step Five
SECURE TOP TO DOOR SURROUNDS
(1997 – CURRENT VEHICLES)
If your vehicle has door surrounds, snap the plastic
retainers into the channel in the door surrounds.
Roll Plastic Strip into
Door Surround
Front
Wrap Flap around
Sport Bar and fasten
Hook and Loop.
Door Opening
Step Six
TIGHTEN THE ADJUSTABLE STRAPS
Pull the end of each adjustable strap to
tighten them to the door hinges and the
hood loop.
Pull end of strap
to tighten
Pull end of strap
to tighten
Strap hooks to
Door Hinge
Step Seven
ROLL THE REAR WINDOW
The rear window may be rolled
up for greater visibility.
56810 / 56811 / 56812 / 56813 / 56814 / 56815 pg 3
0509 Rev. B
Page 4
Care and Maintenance of your Emergency Top
Your Emergency Top is made of the fi nest materials available. To keep it looking new and for the maximum possible
wear, it will need periodic cleaning and maintenance.
Washing: The fabric should be washed often using soap, warm water and a soft bristle brush. Rinse with clear water
to remove all traces of soap or use Bestop-recommended Bestop Cleaner and Bestop Protectant. Bestop Cleaner
and Bestop Protectant are specially formulated to provide a total cleaning and protection system. Bestop Cleaner will
not harm vehicle fi nish, is biodegradable and environmentally friendly. Bestop Protectant protects against UV-fading,
cracking and hardening.
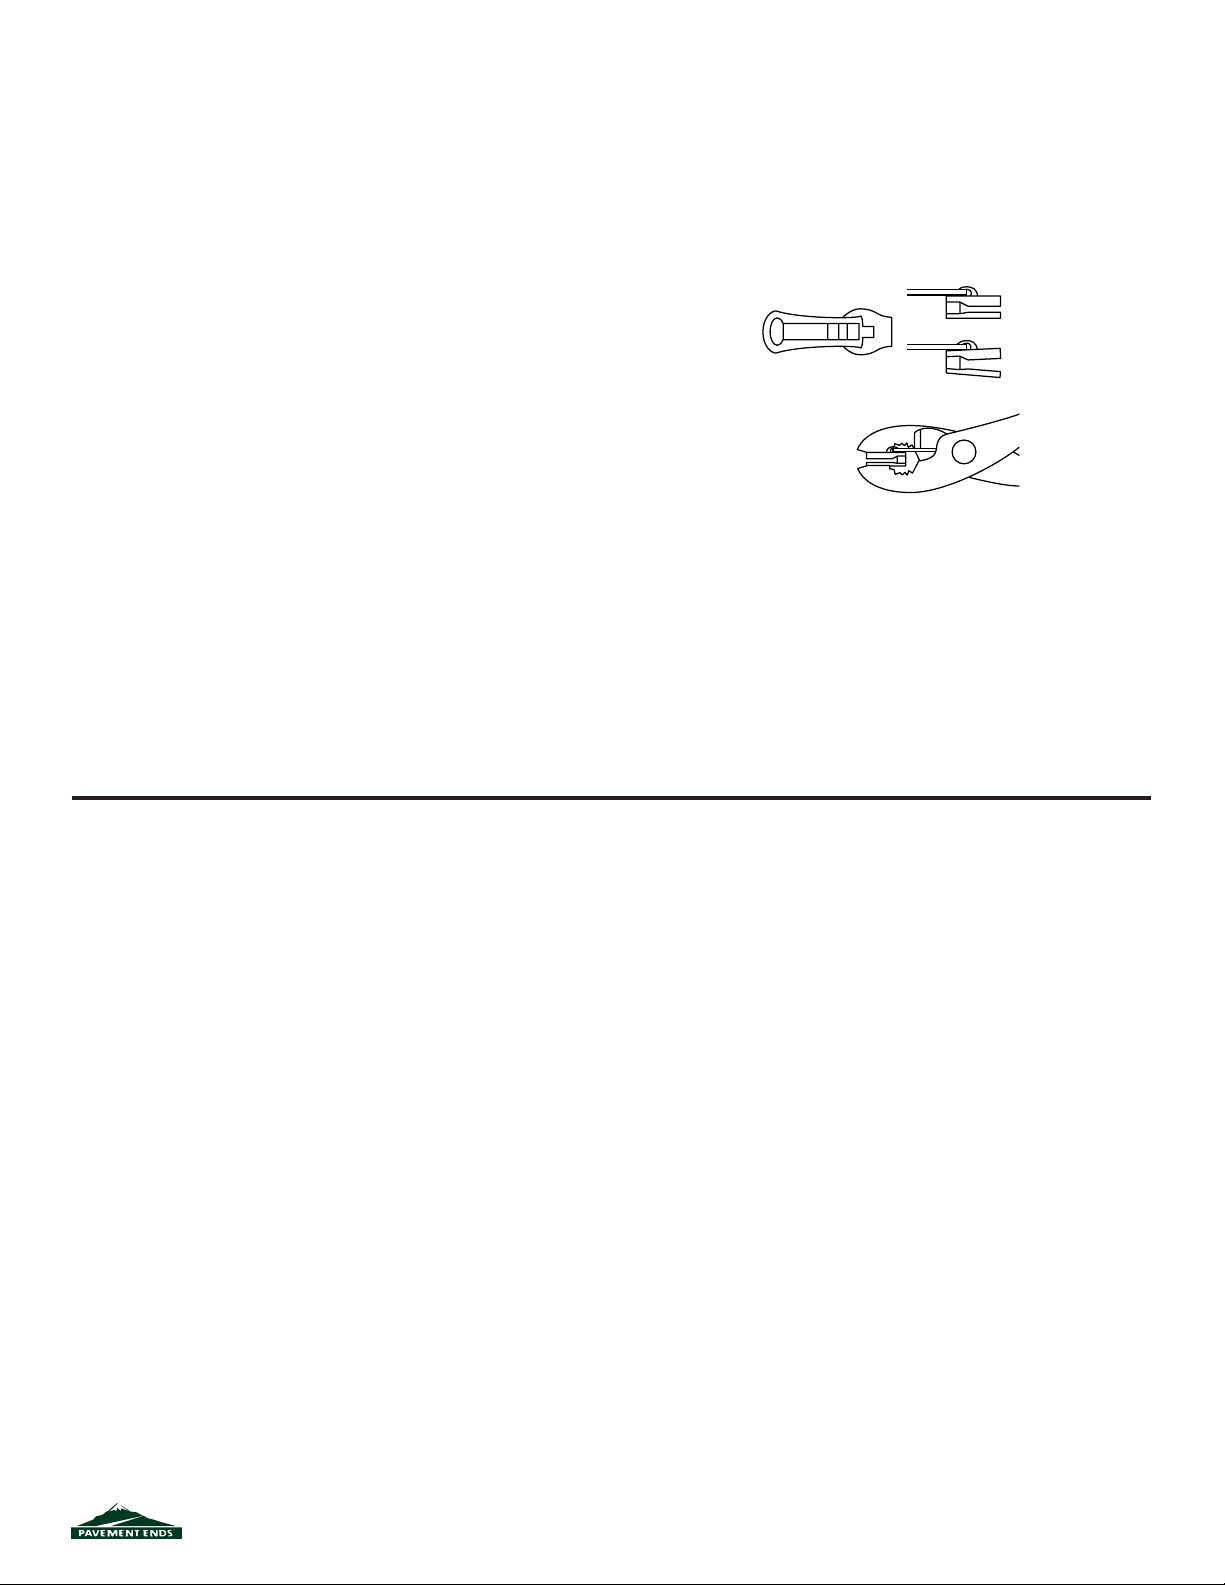
Zippers: Keeping the zipper cleaned and lubricated with a silicone lubricant will help prevent damage
and keep the zippers in a smooth working condition. If a zipper opens behind the
slider, the slider may have been spread apart. This problem can usually be repaired
by using an ordinary pair of pliers to bring the sides back into parallel. Return slider
to the end of the zipper in the normal Open position. Squeeze lightly at fi rst and test
the zipper. If the zipper continues to remain open squeeze more fi rmly with the pliers and try the
zipper again. Repeat this procedure until the zipper operates correctly.
Water: Seeping through at the seams may be stopped by applying 3-M Scotchgard® on the
inside of the seams. Rips in the fabric may be repaired with Bondex® iron on patches. Iron the
patches to the Inside of the top, carefully following the Bondex® instructions.
Normal Slider Jaws Parallel
Damaged Slider Jaws Spread Apart
(sometimes broken)
LIMITED WARRANTY
We warrant our product to be free from defects in material and workmanship, for terms specifi ed below, provided
there has been normal use and proper mainte nance. This warranty applies to the original purchaser only. All
remedies under this warranty are limited to the repair or replacement of any item or items found by the factory to
be defective within the time period specifi ed.
If you have a warranty claim, fi rst you must call our factory at the number below for instructions. You must retain
proof of purchase and submit a copy with any items returned for warranty work. Upon completion of warranty
work, if any, we will return the repaired or replaced item or items to you freight prepaid. Damage to our products
caused by accidents, fi re, vandalism, negligence, misinstallation, misuse, Acts of God, or by defective parts not
manufactured by us, is not covered under this warranty.
THE WARRANTY TIME PERIOD IS AS FOLLOWS: ALL “GOODS” MANUFACTURED BY OUR COMPANY: ONE
YEAR FROM DATE OF PURCHASE.
ANY IMPLIED WARRANTIES OF MERCHANTABILITY AND/OR FITNESS FOR A PARTICULAR PURPOSE
CREATED HEREBY ARE LIMITED IN DURATION TO THE SAME DURATION AND SCOPE AS THE EXPRESS
WRITTEN WARRANTY. OUR COMPANY SHALL NOT BE LIABLE FOR ANY INCIDENTAL OR CONSEQUENTIAL DAMAGE.
Some states do not allow limitations on how long an implied warranty lasts, or the exclusion or limitation of incidental or consequential damages, so the above limitations or exclusions may not apply to you.
This warranty gives you specifi c legal rights, and you may also have other rights which vary from state to state.
For further information, please contact: Customer Service
877-638-9509
56810 / 56811 / 56812 / 56813 / 56814 / 56815 pg 4
0509 Rev. B
 Loading...