

Page 1
Cab Curtain
Installation Instructions
For: Wrangler 1980 - 2002 Part Number: 41422
Important Note: The Cab Curtain is custom designed to attach to the leading edge of the Cargo
Cover, sold separately through your dealer, which covers folded soft top bow assemblies.
WARNING
This product is designed to enhance the appearance of the
vehicle and to shield the occupants from ordinary weather conditions. Do not rely in any way on the components of this product
to contain occupants within the vehicle, or to protect against
injury or death in the event of an accident. This top will not protect
the occupants from falling objects. Never operate vehicle in
excess of manufacturer’s specifications.
WEAR SEAT BELTS AT ALL TIMES
Read and follow, precisely, all installation instructions provided
when installing top. Failure to do so may result in a poor fitting
top and could place occupants of the vehicle in a potentially
dangerous situation. After installing or reinstalling the top,
check to make sure it has been properly installed.
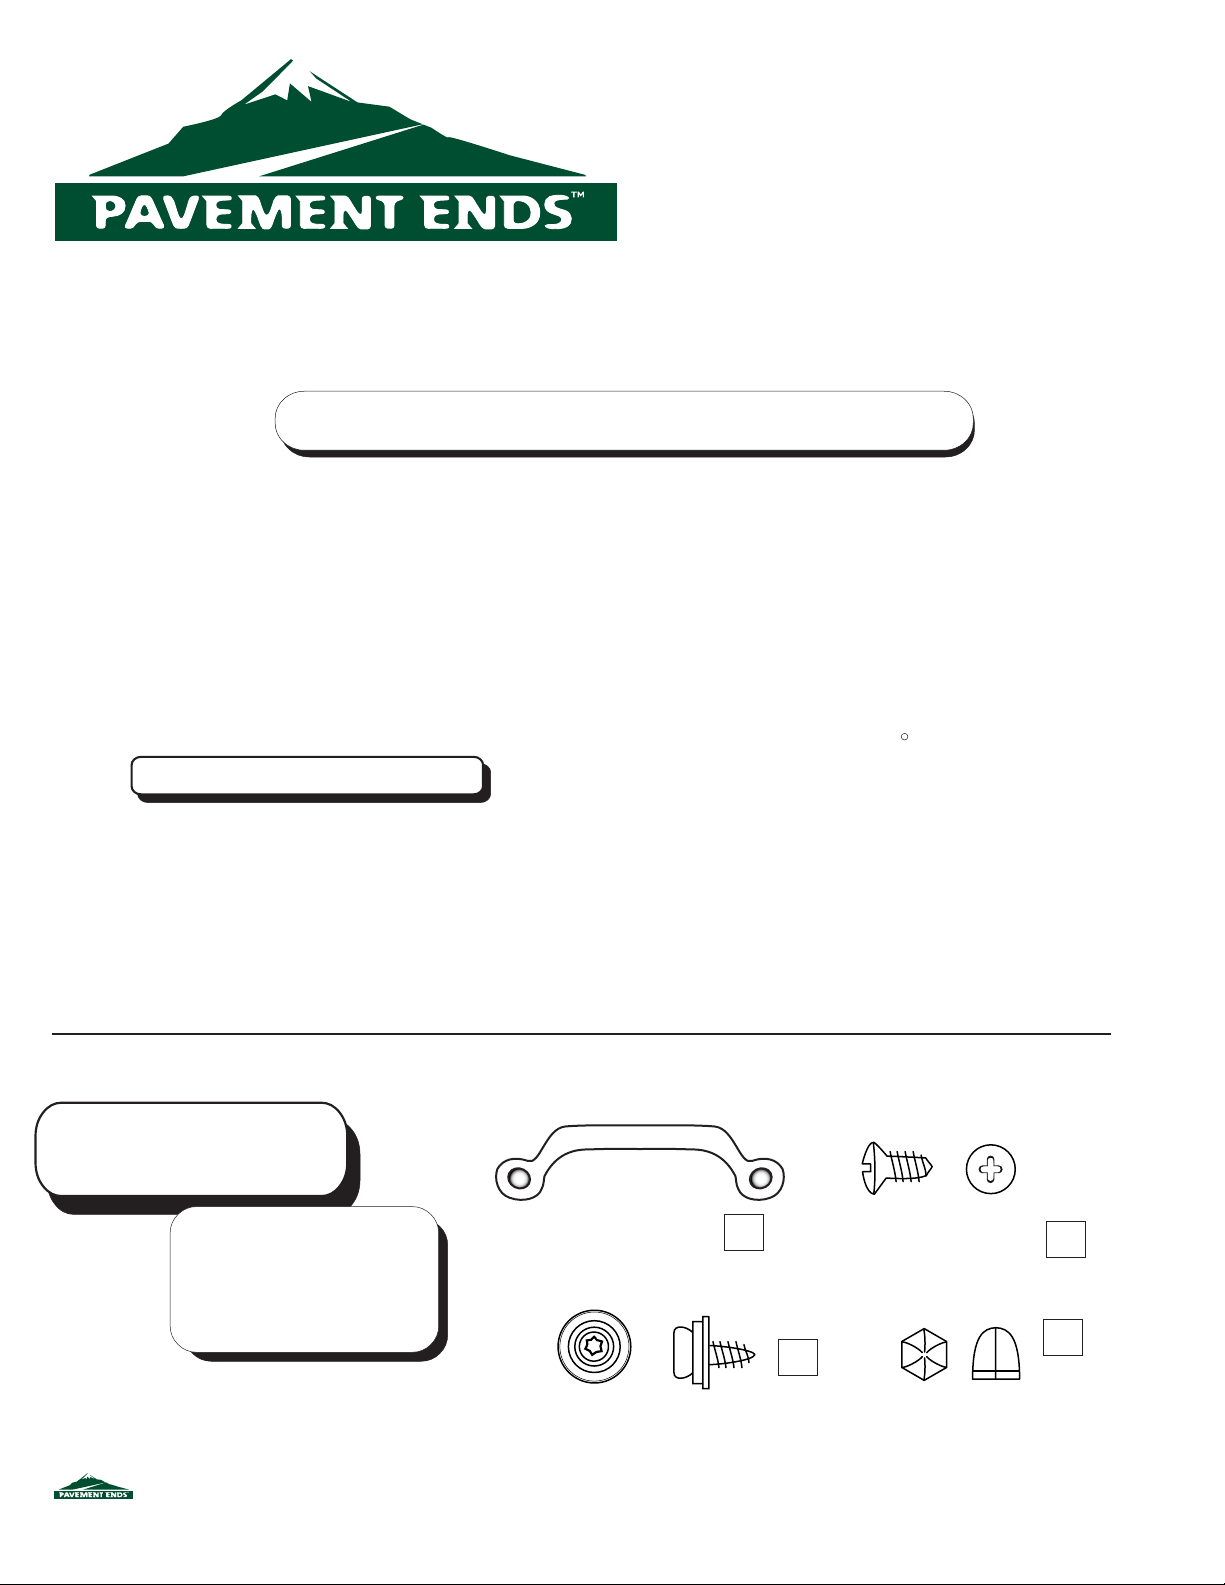
Parts List and Hardware Identification
Installation Tips
After completing the installation, keep these instructions
for future reference. Before you begin installing this Cab
Curtain, read all instructions thoroughly. Below are a
few tips to make this installation easier.
For a smooth fit:
For ease in installation, this product should be installed
at temperatures above 72 F. Below this temperature,
the fabric may contract an inch or more, making it
difficult to fit to the vehicle.
It is normal for the fabric to contract and wrinkle when
stored in the shipping carton. Within a few days after
the installation, the fabric will relax and the wrinkles will
disappear.
The Cab Curtain may be used in the winter to contain
heat in the front passenger area.
Cab Curtain Qty - 1
Footman Loop Kit Qty - 1
Small Parts Kit Qty - 1
Tools Needed
1/8" Drill Bit and Drill Motor
Phillips Screwdriver
Pencil
Silicone Sealer
41422 pg 1
Footman Loop, Qty - 2
#20 Torx Snap Head Screw, Qty - 3
#10 x 1/2" Oval Head
Phillips Screw, Qty - 4
Acorn Locknut, Qty - 3
Rev. B 0303
Page 2
Cab Curtain Installation
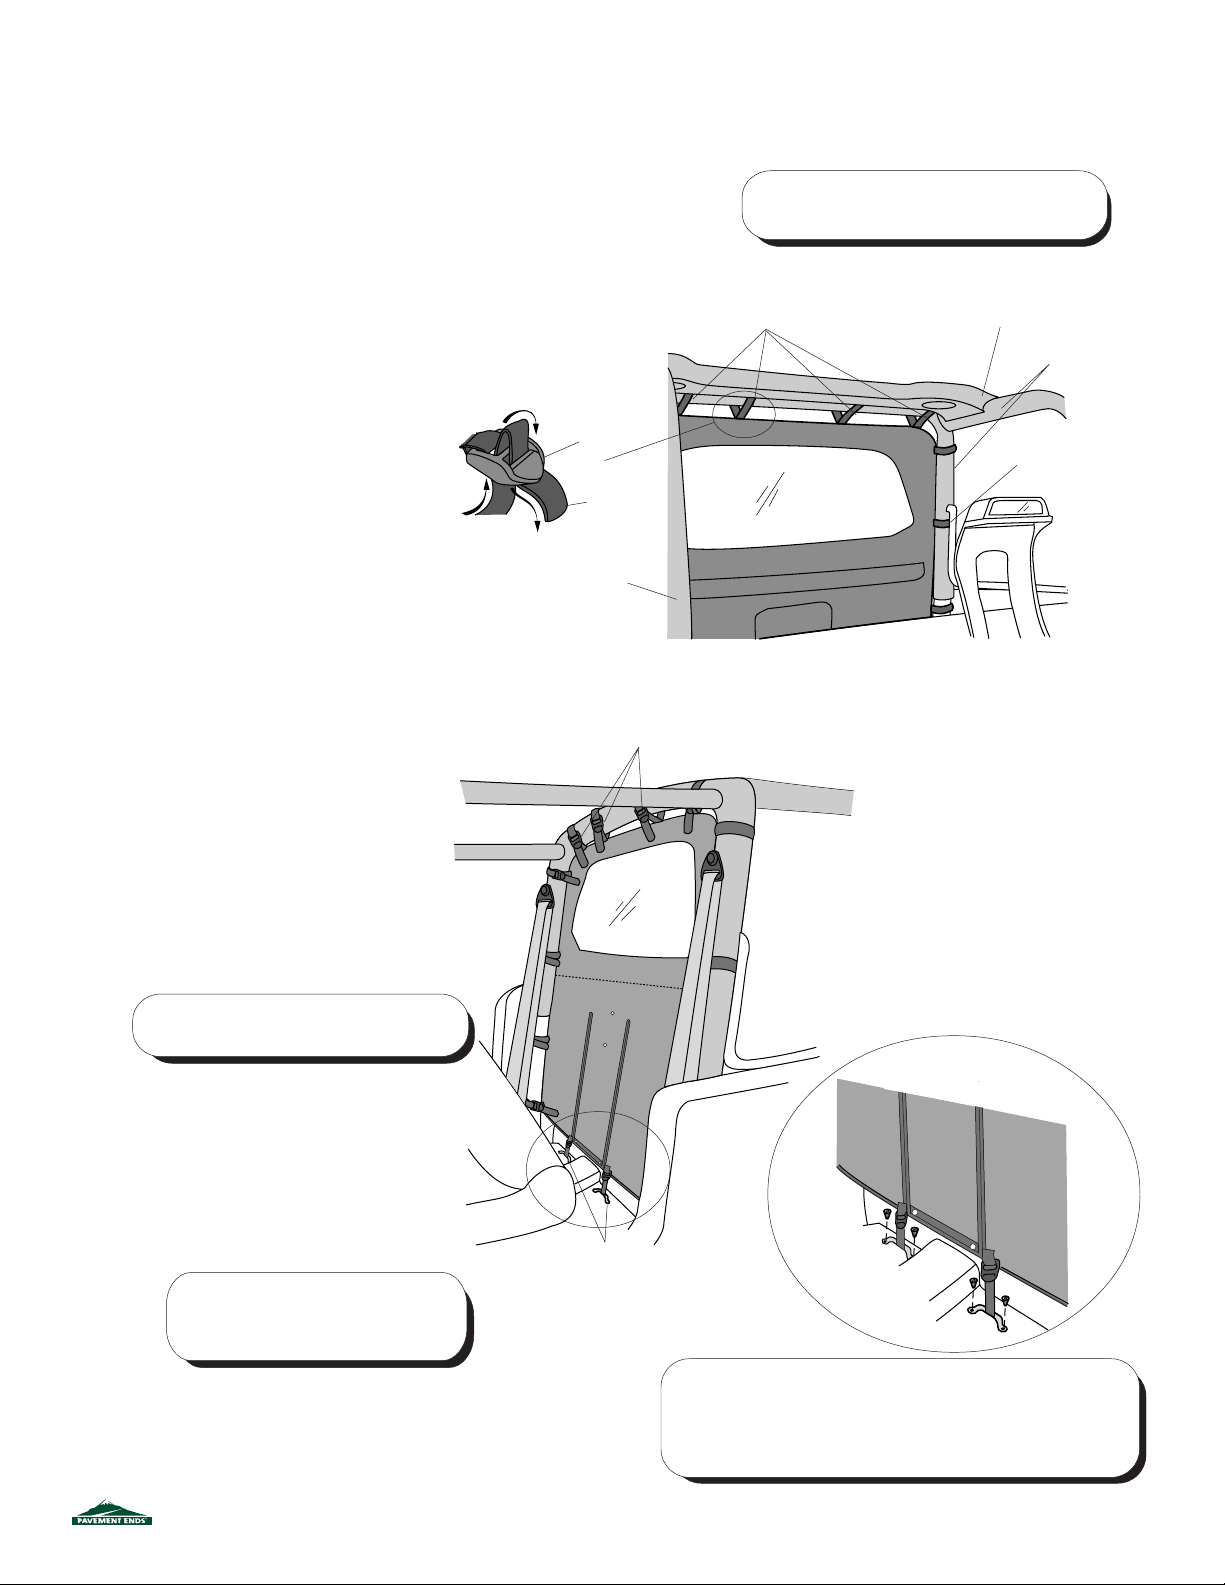
Step One
Orient the Cab Curtain with the window toward the top and with the vinyl
side out, toward the rear of the vehicle. Start at the top and wrap the four
top straps around the sport bar, between the sport bar and the Sound Bar, if
one is present. Then thread the end of each strap through each buckle.
Loosely tighten each strap to hold the Cab Curtain in position. Repeat this
procedure with the side straps. It may be necessary to lift up slightly on the
Fold Down Bow to work the middle strap underneath, in order to wrap it
around the sport bar.
Threading Strap
through Buckle
Buckle
Note: If the vehicle is equipped with a Soundbar,
the upper straps must be inserted between the
Soundbar and Pad.
Top Straps - Wrap around Sport
Bar and between Sport Bar and
Sound Bar (if present)
Sound Bar (Optional)
Work Strap under
Fold Down Bow
Sport Bars
Step Two
Fold the front seats forward and locate the
Footman Loop Kit in the parts kit. Center a
Footman Loop on the floor of the vehicle
below each of the straps sewn to the bottom
of the Cab Curtain. Use the holes in the
Footman Loops as guides to mark, center
punch and drill four 1/8" holes. Seal the edges
of the holes with Silicone Sealer. Install the
Footman Loops using the four screws from
the Footman Loop Kit.
Warning: Check for wiring and fuel
lines before drilling holes in floor.
Strap
Rear Sport Bar
Buckles
Cab Curtain
Cab Curtain
Note: After drilling the holes in the floor,
put silicone sealer on the holes before
installing the Footman Loops.
41422 pg 2
Footman Loops
(center under straps)
Warning: Do not remove the Footman Loops from
your vehicle once they have been installed. If this
is necessary, make sure the screw holes have been
covered with a sealer.
Rev. B 0303
Page 3
Cab Curtain Installation cont.
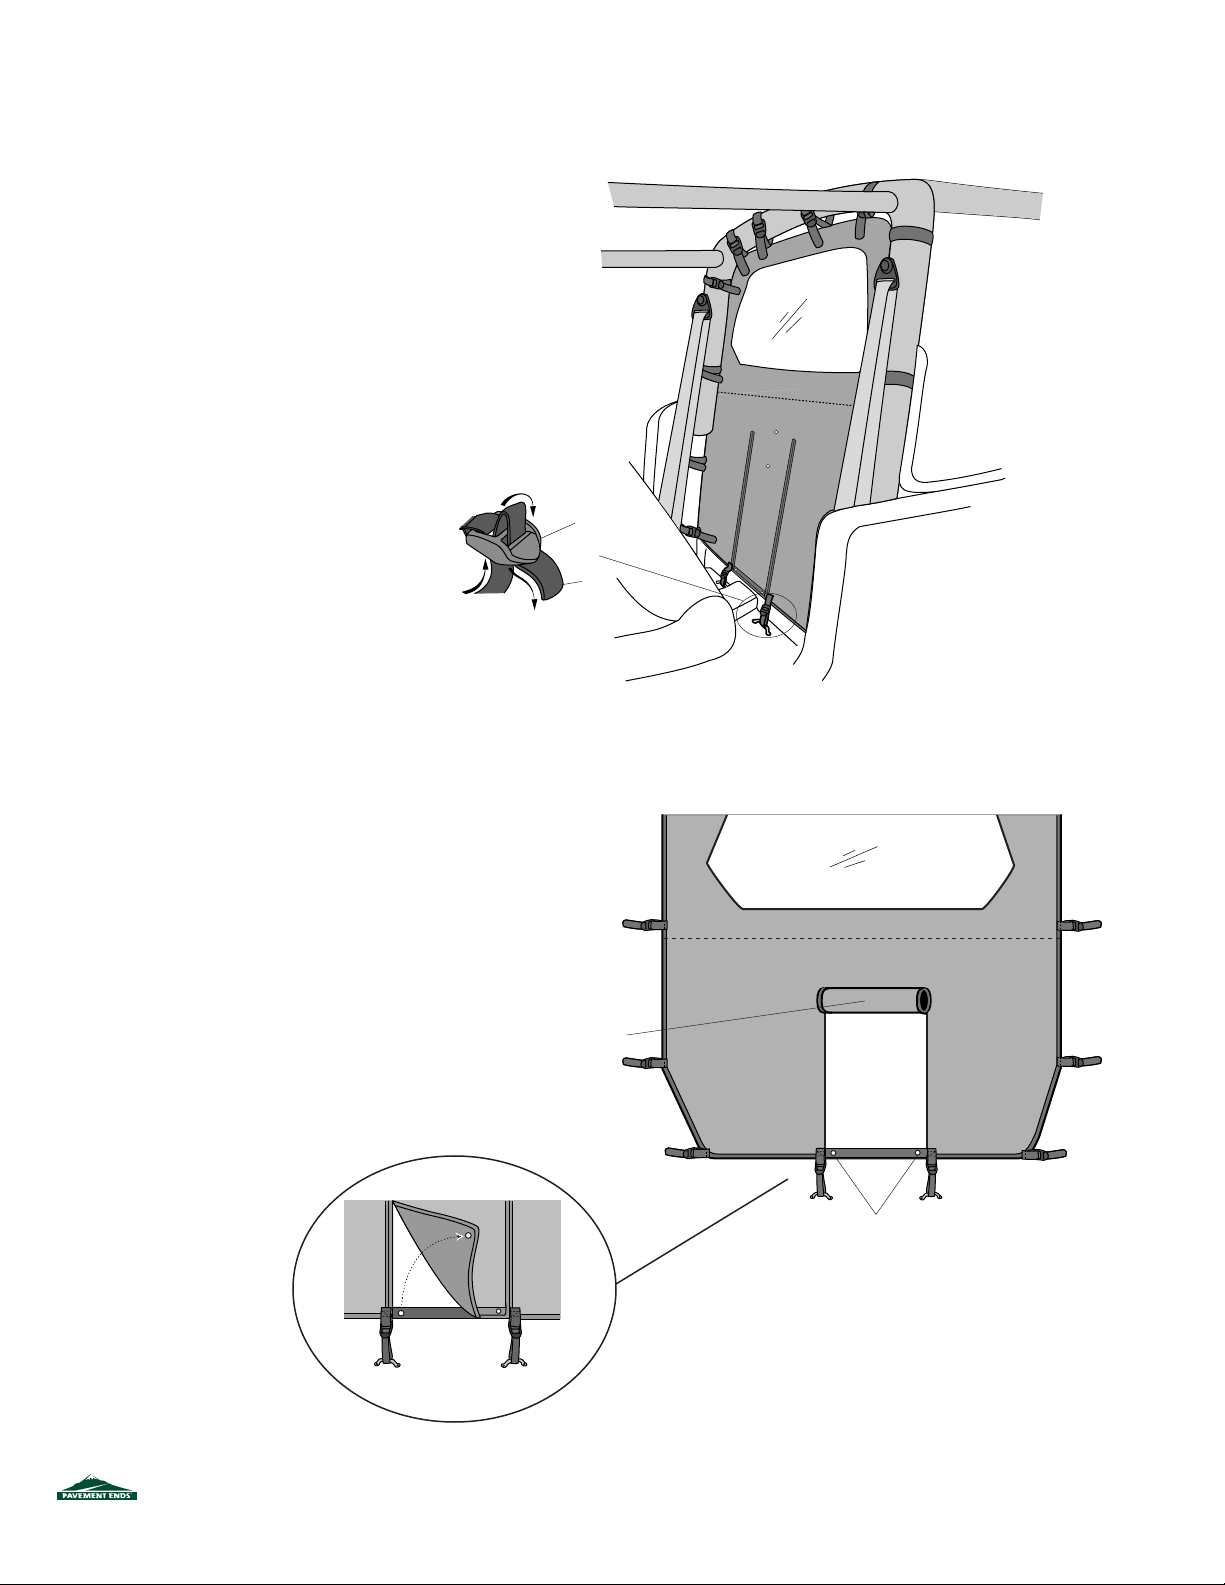
Step Three
Gently pull down on the bottom of
the Cab Curtain fabric and thread the
ends of the straps on the bottom
through the Footman Loops and back
through the buckles. Tighten all the
straps on the Cab Curtain.
Threading Strap
through Buckle
Cab Curtain
Buckle
Strap
Step Four
To open the center flap in the Cab Curtain, unsnap
the flap on each s ide. Roll the flap up, and snap it
to the stud on the vinyl side of the Cab Curtain.
To Open - R oll Flap and
Secure with Snap
Unsnap from Web S trip
Unsnap
41422 pg 3
Rev. B 0303
Page 4
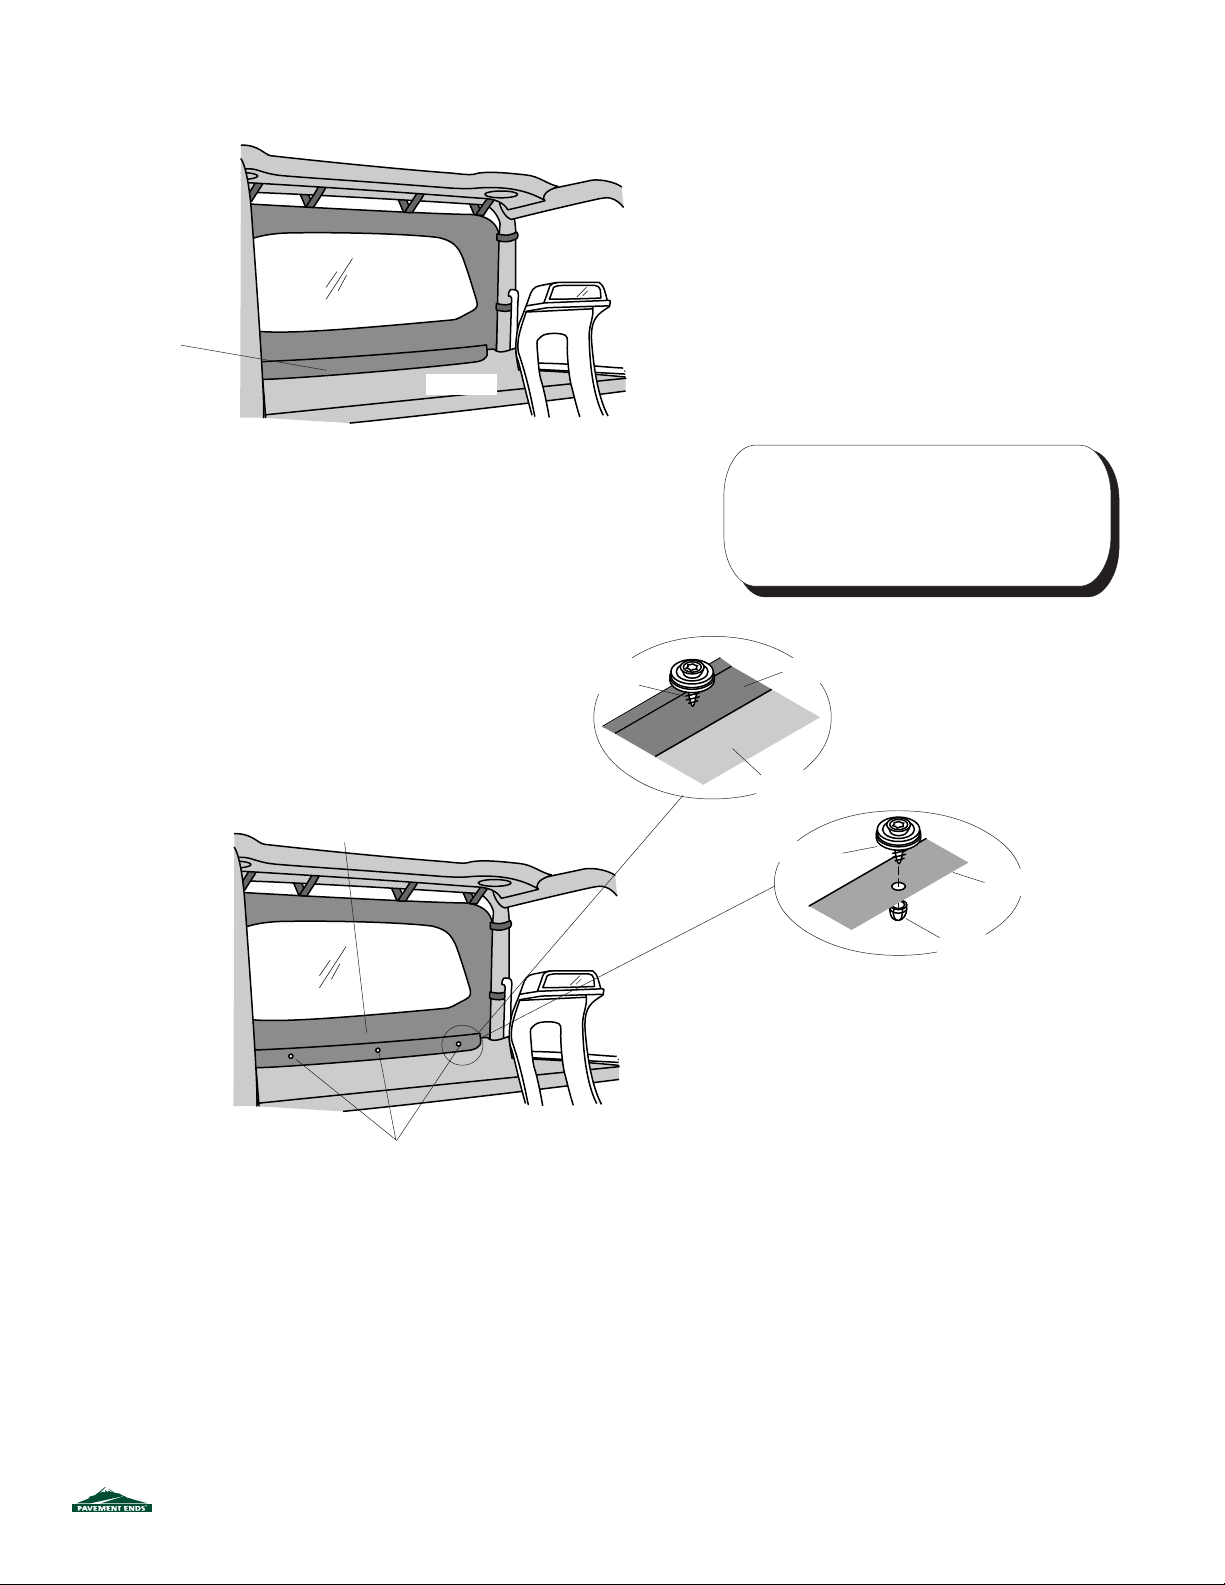
If You Have a New Cargo Cover on Your Vehicle*
Pull Flap out and
over Cargo Cover
Cab Curtain - From R ear
Cargo Cover
Step Two - Optional
Pull up on the front, reinforced edge of the Cargo Cover
and mark the locations matching the three snaps on the
Cab Curtain flap, on the webbing along the top of the
Cargo Cover.
Push Snap Head Screw
through to form a hole
Step One
Locate the flap sewn to the rear of the Cab
Curtain. Pull the flap out over the top of the
front edge of the Cargo Cover.
Note: There are two sets of snaps
located on the Cab Curtain flap.
-If you have a YJ use the upper snaps.
-If you have a TJ use the lower snaps.
Fabric R einforcement
Install Studs on Fabric Reinforced
Front Edge
Snaps - on underside of flap
* If you do not have a Cargo Cover, save the three
(3) snaps and nuts for possible future use.
Fabric - Backing Up
Snap Head Screw
Fabric - Vinyl Up
Acorn Locknut
Step Three - Optional
At the marked locations , push the sharp end of a Snap Head
Screw through the Cargo Cover from the backing side, to
make a hole. Once a hole is formed, pull the screw back out
of the hole. Then push the screw through the hole from the
vinyl side so that the snap is on top of the vinyl. Thread an
Acorn Locknut over the pointed end of the Snap Head
Screw. S nap the Cargo Cover and Cab Curtain together with
the three snaps.
41422 pg 4
Rev. B 0303
Page 5

LIMITED WARR ANTY
We warrant our product to be free from defects in material and workmanship, for the terms specified below, provided there has been normal
use and proper maintenance. This warranty applies to the original purchaser only. All remedies under this warranty are limited to the repair or
replacement of any item or items found by the factory to be defective within the time period specified.
If you have a warranty claim, first you must call our factory at the number below for instructions. You must retain proof of purchase and submit a copy with any items returned for warranty work. Upon completion of warranty work, if any, we will return the repaired or replaced item
or items to you freight prepaid. Damage to our products caused by accidents, fire, vandalism, negligence, misinstallation, misuse, Acts of God,
or by defective parts not manufactured by us, is not covered under this warranty.
THE WARR ANTY TIME PER IOD IS AS FOLLOWS: ALL “ SOFT GOODS” MANUFACTURED BY OUR COMPANY (USING PRIMARILY VINYLS, PLAS-
TICS, AND/OR FOAM): ONE YEAR FROM DATE OF PURCHASE.
ANY IMPLIED WARRANTIES OF MERCHANTABILITY AND/OR FITNESS FOR A PARTICULAR PURPOSE CREATED HEREBY ARE LIMITED IN
DURATION TO THE SAME DURATION AND SCOPE AS THE EXPR ESS WRITTEN WARRANTY. OUR COMPANY SHALL NOT BE LIABLE FOR ANY
INCIDENTAL OR CONSEQUENTIAL DAMAGE.
Some states do not allow limitations on how long an implied warranty lasts, or the exclusion or limitation of incidental or consequential damages,
so the above limitations or exclusions may not apply to you.
This warranty gives you specific legal rights, and you may also have other rights which vary from state to state.
For further information or request for warranty work, please contact: Customer Service
877-638-9509
41422 pg 5
*All or a portion of this product may be made in China.
Rev. B 0303
 Loading...