

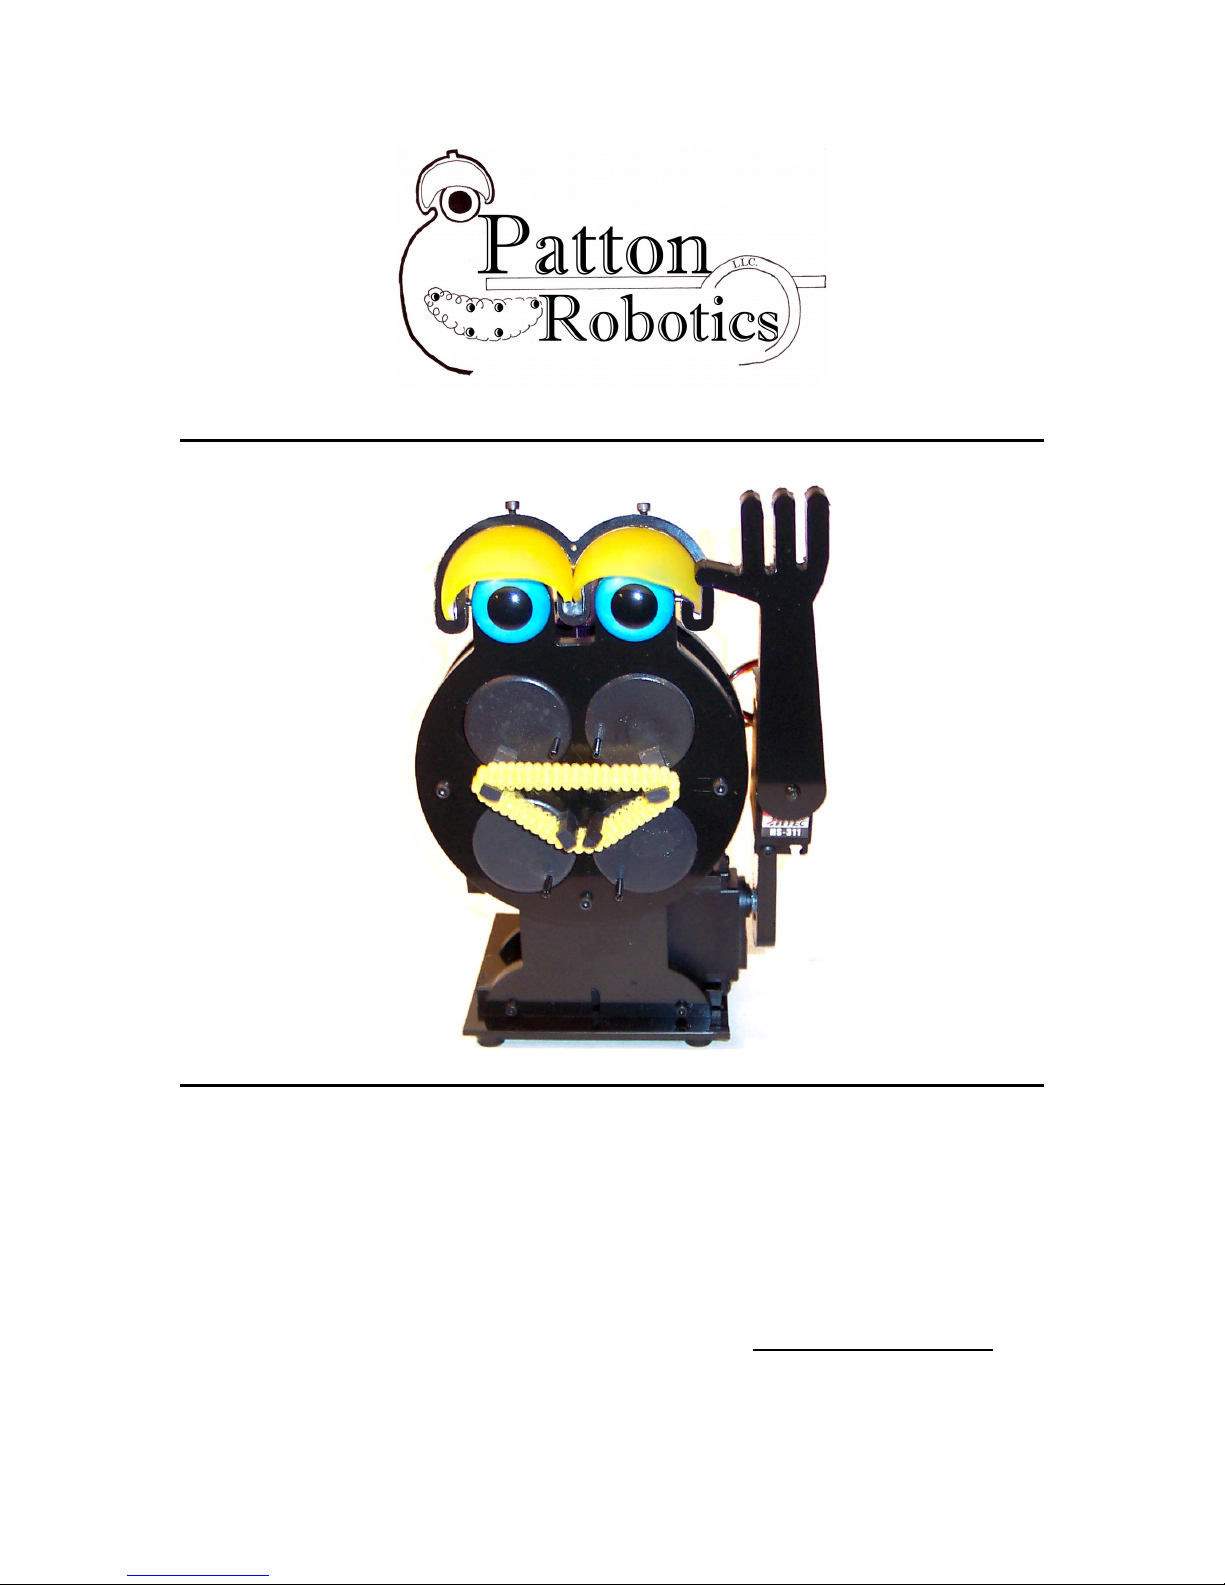
Patton Robotics ESRAII Arm Kit
Expressive System for Robotic Animation
Assembly and Operation Instructions
Patton Robotics, LLC. Phone: 609-977-5525
61 Hagan Drive Web: www.pattonrobotics.com
New Hope, PA 18938 Email: pattonrobotics @gmail.com
Copyright 2015 Patton Robotics, LLC. All Rights Reserved
Version 1.0
1
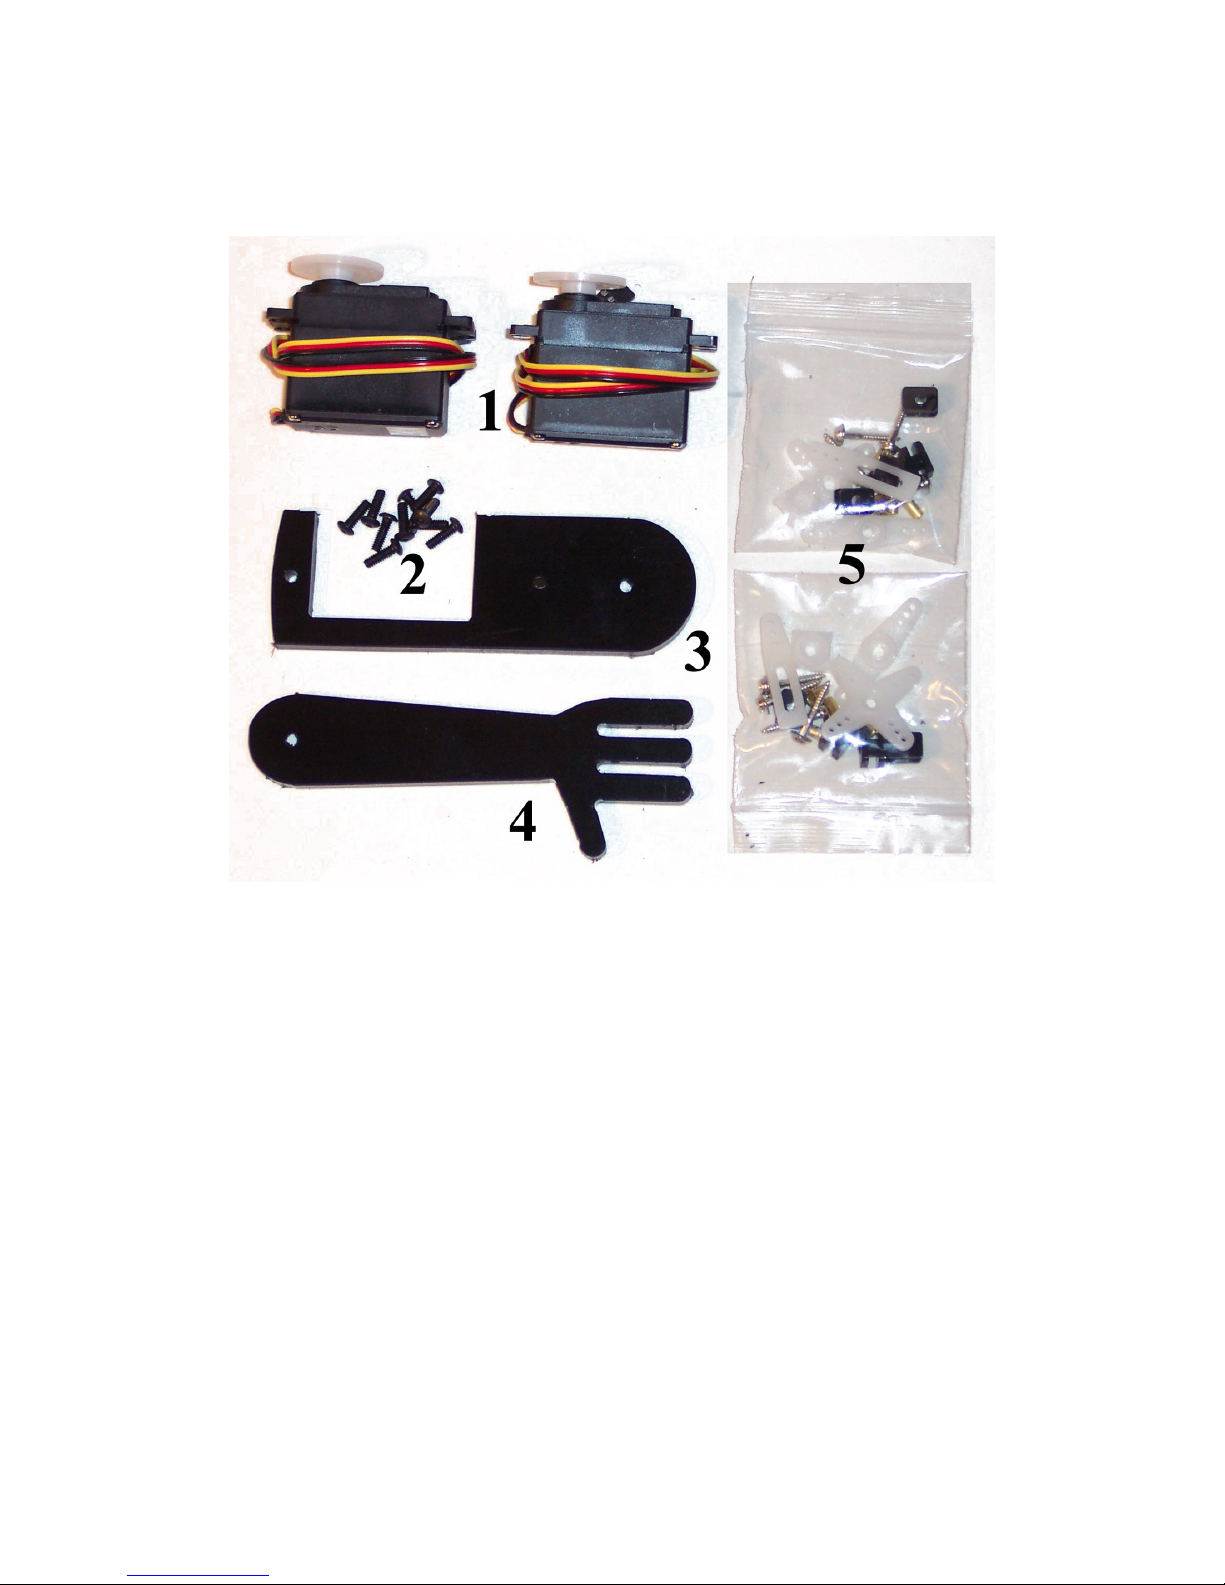
ESRA II Shoulder and Base kit contents:
1 Servos 4 Hand
2 Misc. Screws 5 Misc. Servo Parts
3 Forearm
Assembly Instructions
Be sure to look up the proper part for each step.
Some basic tool and supplies are required for assembly, including:
-Needle Nose Pliers
-Allen Wrenches
-Phillips Screwdriver
2
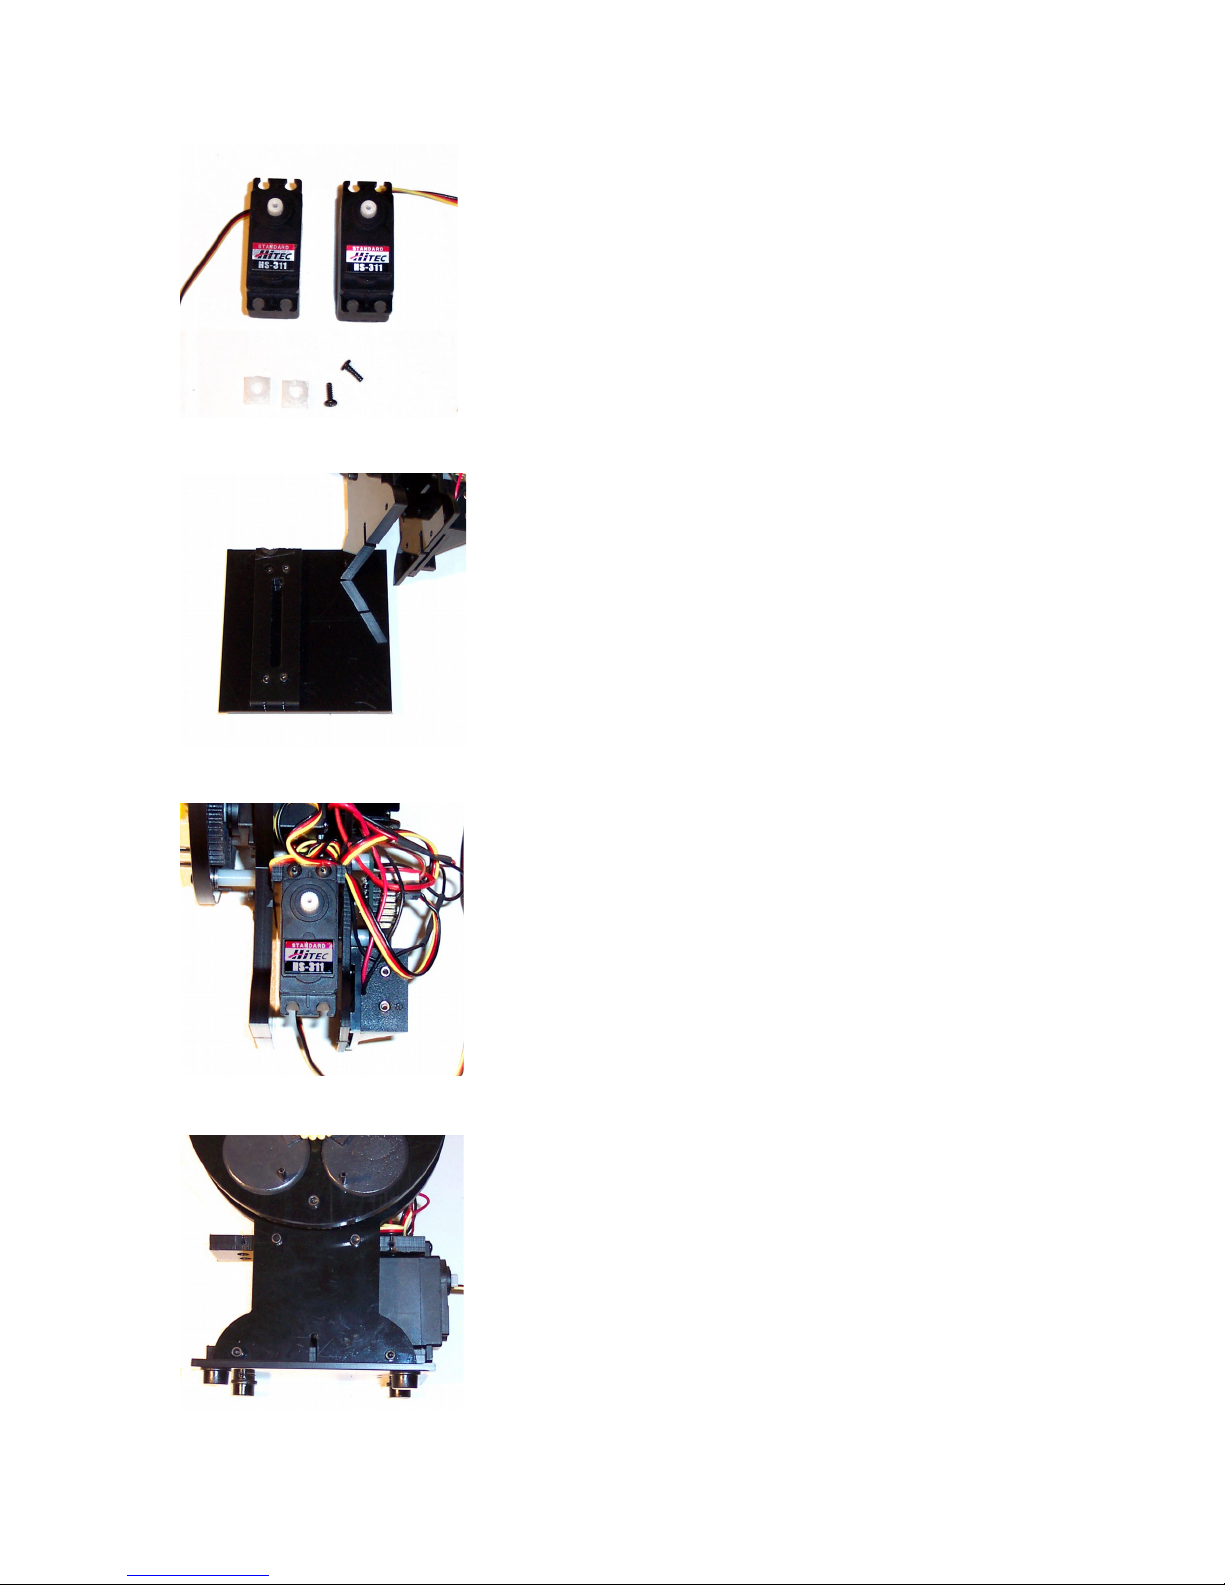
Figure 1
Remove the round hub from the Servos(1).
Locate the square hubs from the Misc. Servo
Parts bags(5).
Remove the ESRA II from its Base Plate,
leaving the lower Shoulder Plate attached to
the Base Plate.
Figure 2
Figure 3
Attach a Servo(1) with two of the included
screws(2) as shown.
Re-attach the Base Plate to the Servo Plate
and Back Plate.
Figure 4
3
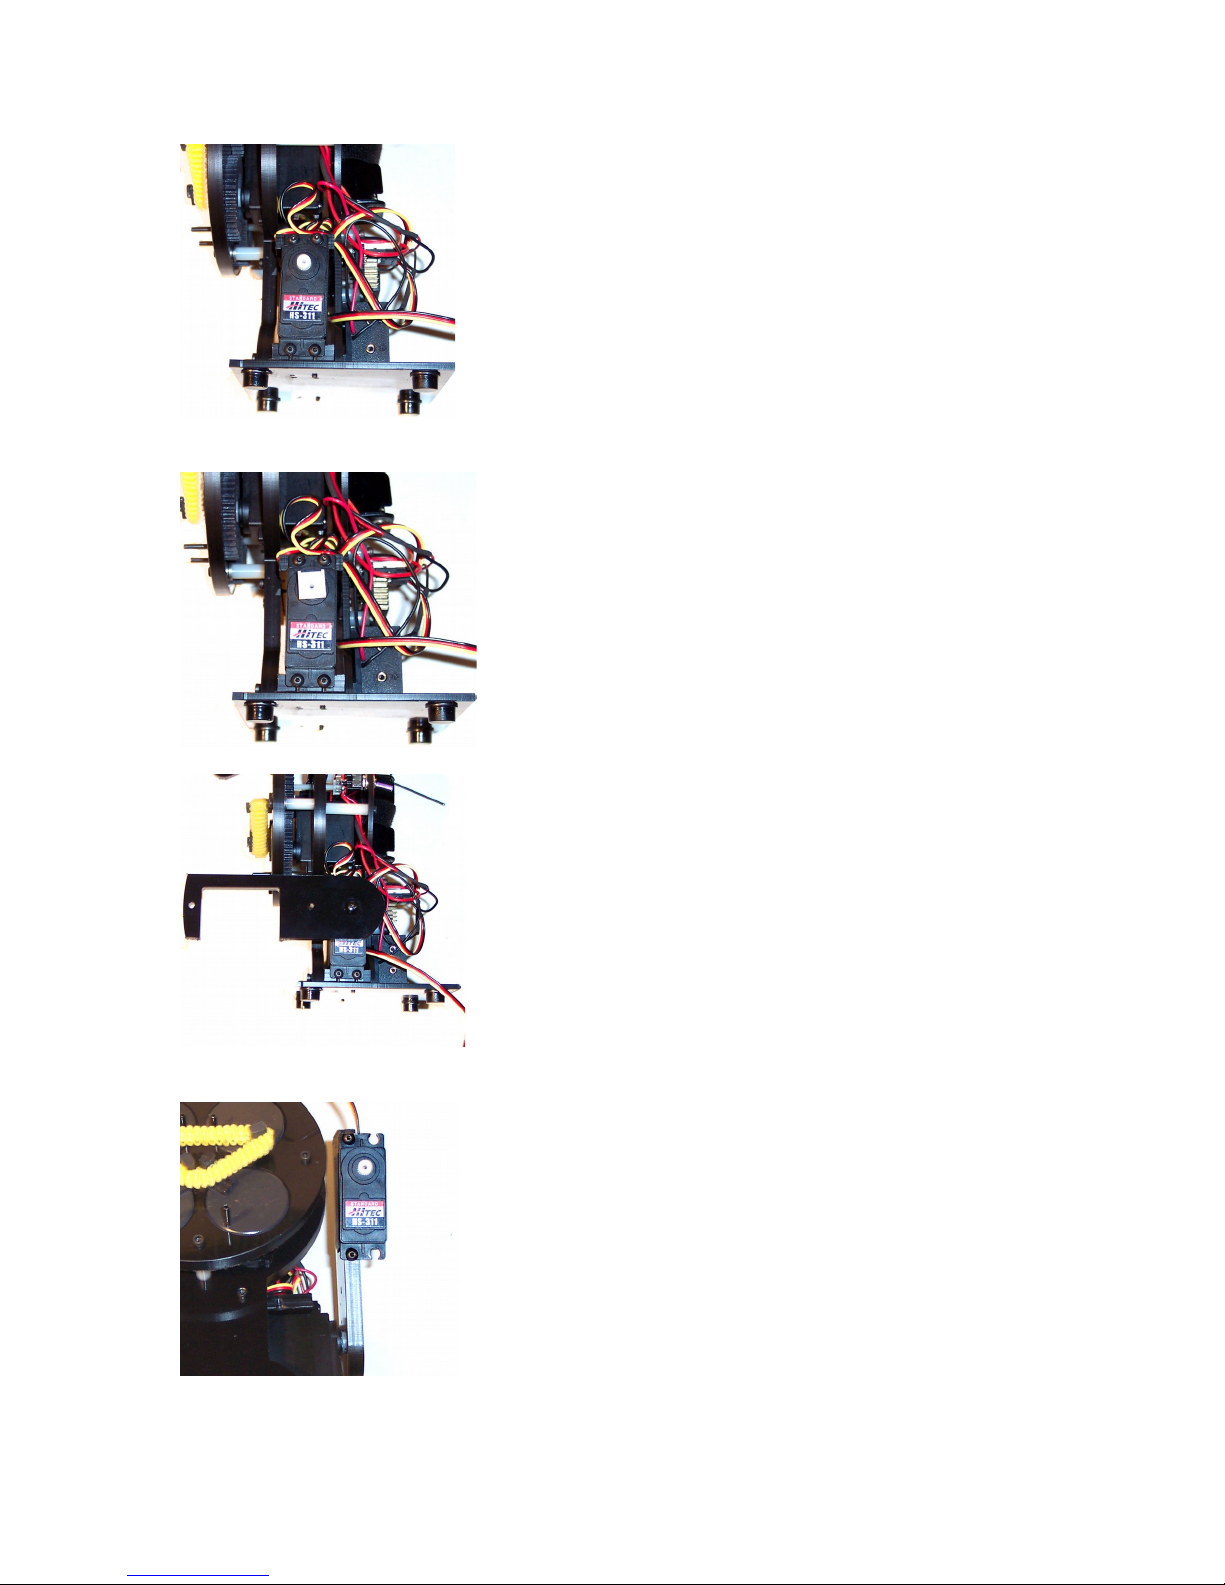
Figure 5
Attach the bottom of the Servo(1) to the lower
Shoulder Plate as shown.
Place a square hub onto the Servo(1).
Figure 6
Figure 7
Place the Forearm(3) over the square hub
and screw in the Phillips screw included with
the Servo(1). Check the range of motion of
the Forearm(3). It may be necessary to
remove and relocate the square servo hub to
get the proper range of motion.
Attach the remaining Servo(1) to the
Forearm(3) as shown.
Figure 8
Place a square hub onto the Servo(1) as
shown.
4

Figure 9
Figure 10
Place the Hand(4) over the square hub and
screw in the Phillips screw included with the
Servo(1). Check the range of motion of the
Hand(4). It may be necessary to remove and
relocate the square servo hub to get the
proper range of motion.
ESRA II with two attached arms.
5

6
 Loading...