

Page 1
For Quick
Start Installation
SIPxNano
IP-PBX Server
Getting Started Guide
Important
This is a Class A device and is intended for use in a light industrial environment. It is not intended nor approved for use in an industrial
or residential environment.
Sales Office: +1 (301) 975-1000
Technical Support: +1 (301) 975-1007
E-mail: support@patton.com
WWW: www.patton.com
Document Number: 09407U1-001, Rev. B
Part Number: 07MSIPxNANO-GS
Revised: June 13, 2007
Page 2

Patton Electronics Company, Inc.
7622 Rickenbacker Drive
Gaithersburg, MD 20879 USA
Tel: +1 (301) 975-1000
Fax: +1 (301) 869-9293
Support: +1 (301) 975-1007
Web: www.patton.com
E-mail: support@patton.com
Trademark Statement
The term SIPxNano are trademarks of Patton Electronics Company. All other trademarks presented in this document are the property of their respective owners.
Copyright © 2007, Patton Electronics Company. All rights reserved.
The information in this document is subject to change without notice. Patton Electronics assumes no liability for errors that may appear in this document.
Important Information
To use virtual private network (VPN) and/or AES/DES/3DES encryption capabilities
with the SIPxNano, you may need to purchase additional licenses, hardware, software,
network connection, and/or service. Contact sales@patton.com or +1 (301) 975-1000
for assistance.
Warranty Information
The software described in this document is furnished under a license and may be used
or copied only in accordance with the terms of such license. For information about the
license, go to www.patton.com .
Patton Electronics warrants all SIPxNano components to be free from defects, and
will—at our option—repair or replace the product should it fail within one year from
the first date of the shipment.
This warranty is limited to defects in workmanship or materials, and does not cover
customer damage, abuse or unauthorized modification. If the product fails to perform
as warranted, your sole recourse shall be repair or replacement as described above.
Under no condition shall Patton Electronics be liable for any damages incurred by the
use of this product. These damages include, but are not limited to, the following: lost
profits, lost savings and incidental or consequential damages arising from the use of or
inability to use this product. Patton Electronics specifically disclaims all other warranties, expressed or implied, and the installation or use of this product shall be deemed
an acceptance of these terms by the user.
Page 3

Summary Table of Contents
1 General Introduction....................................................................................................................................... 6
2 Setting Up the SIPxNano ................................................................................................................................9
3 Users.............................................................................................................................................................. 14
4 Devices .......................................................................................................................................................... 25
5 Features ......................................................................................................................................................... 40
6 System ........................................................................................................................................................... 56
7 Diagnostics.................................................................................................................................................... 73
8 Voicemail....................................................................................................................................................... 78
9 Contacting Patton for assistance ................................................................................................................... 83
A Session Initiation Protocol (SIP) .................................................................................................................. 86
B Firewalls and NAT ........................................................................................................................................ 95
C Configuration APIs .................................................................................................................................... 100
D Compliance information ............................................................................................................................ 111
1
Page 4

Table of Contents
Summary Table of Contents ........................................................................................................................... 1
Table of Contents ........................................................................................................................................... 1
List of Figures ................................................................................................................................................. 1
List of Tables .................................................................................................................................................. 1
About this guide ............................................................................................................................................. 2
Audience................................................................................................................................................................. 2
Structure................................................................................................................................................................. 2
Precautions ............................................................................................................................................................. 3
Safety when working with electricity .................................................................................................................4
General observations .........................................................................................................................................4
Typographical conventions used in this document.................................................................................................. 5
General conventions .........................................................................................................................................5
1 General Introduction....................................................................................................................................... 6
Welcome .................................................................................................................................................................7
Factory defaults .......................................................................................................................................................7
GUI Defaults ....................................................................................................................................................7
Hardware included ..................................................................................................................................................8
What you will need .................................................................................................................................................8
About the NanoServ................................................................................................................................................8
2 Setting Up the SIPxNano ................................................................................................................................9
Introduction..........................................................................................................................................................10
Before you begin... ..........................................................................................................................................10
Configuring and Running the Reset Script............................................................................................................11
Accessing the system..............................................................................................................................................11
Configuration Overview........................................................................................................................................12
Users ...............................................................................................................................................................12
Devices ...........................................................................................................................................................12
Features ..........................................................................................................................................................13
System Settings ...............................................................................................................................................13
Diagnostics .....................................................................................................................................................13
Voicemail ........................................................................................................................................................13
3 Users.............................................................................................................................................................. 14
Overview ...............................................................................................................................................................15
Users .....................................................................................................................................................................15
Adding Users ..................................................................................................................................................16
User IDs ....................................................................................................................................................17
Extensions .................................................................................................................................................18
Aliases .......................................................................................................................................................19
Permissions ...............................................................................................................................................20
1
Page 5

2
SIPxNano IP-PBX Getting Started Guide
Table of Contents
Editing users ...................................................................................................................................................21
Filtering users ..................................................................................................................................................21
Deleting users .................................................................................................................................................21
More Actions ..................................................................................................................................................21
User Groups ..........................................................................................................................................................22
Adding User Groups .......................................................................................................................................23
Adding Users to a User Group ........................................................................................................................23
Editing User Groups .......................................................................................................................................23
Deleting User Groups .....................................................................................................................................23
Moving User Groups ......................................................................................................................................23
Extension Pool ......................................................................................................................................................24
4 Devices .......................................................................................................................................................... 25
Overview ...............................................................................................................................................................26
Phones...................................................................................................................................................................26
Adding phones ................................................................................................................................................27
Editing phones ................................................................................................................................................28
Adding lines to an existing phone ..............................................................................................................28
Filtering phones ..............................................................................................................................................30
Deleting phones ..............................................................................................................................................30
Restarting phones ............................................................................................................................................30
Phone Groups .......................................................................................................................................................31
Adding Phone Groups ....................................................................................................................................32
Editing Phone Groups ....................................................................................................................................33
Deleting Phone Groups ..................................................................................................................................34
Moving Phone Groups ....................................................................................................................................34
Gateways ...............................................................................................................................................................35
Adding gateways .............................................................................................................................................35
Editing gateways .............................................................................................................................................36
Deleting gateways ...........................................................................................................................................37
Files.......................................................................................................................................................................38
Adding files .....................................................................................................................................................38
Editing files .....................................................................................................................................................38
Deleting files ...................................................................................................................................................39
Device Profiles.......................................................................................................................................................39
5 Features ......................................................................................................................................................... 40
Overview ...............................................................................................................................................................41
Auto Attendants ....................................................................................................................................................41
Adding auto attendants ...................................................................................................................................42
Editing auto attendants ...................................................................................................................................44
Deleting auto attendants .................................................................................................................................44
Adding auto attendants to Dial Plans ..............................................................................................................44
Setting the Special Auto Attendant .................................................................................................................47
Intercom................................................................................................................................................................48
Page 6

3
SIPxNano IP-PBX Getting Started Guide
Table of Contents
Configuring intercom .....................................................................................................................................48
Using intercom ...............................................................................................................................................48
Hunt Groups.........................................................................................................................................................49
Adding hunt groups ........................................................................................................................................49
Editing hunt groups ........................................................................................................................................50
Deleting hunt groups ......................................................................................................................................50
Call Park ...............................................................................................................................................................51
Adding Call Park Extensions ...........................................................................................................................51
Editing Call Park Extensions ...........................................................................................................................52
Using Call Park Extensions .............................................................................................................................53
Deleting Call Park Extensions .........................................................................................................................53
Recording .WAV Files (Windows OS) ............................................................................................................53
Music on Hold......................................................................................................................................................55
6 System ........................................................................................................................................................... 56
Overview ...............................................................................................................................................................57
Dial Plans..............................................................................................................................................................57
Adding dial rules .............................................................................................................................................58
Editing and deleting dial rules .........................................................................................................................58
Activating dial rules .........................................................................................................................................59
Setting up emergency routing .........................................................................................................................59
Permissions............................................................................................................................................................60
Adding permissions .........................................................................................................................................60
General..................................................................................................................................................................61
SIP Parameters ................................................................................................................................................61
Voice Mail ......................................................................................................................................................62
Call Pickup .....................................................................................................................................................63
Presence Server ................................................................................................................................................64
Logging ...........................................................................................................................................................65
Call Detail Records (CDRs) ............................................................................................................................66
Import...................................................................................................................................................................67
Importing CSV files ........................................................................................................................................67
LDAP....................................................................................................................................................................68
Configuring the LDAP server .........................................................................................................................68
Import LDAP .................................................................................................................................................69
Backup ..................................................................................................................................................................70
Performing a backup .......................................................................................................................................70
Scheduling backups .........................................................................................................................................71
Restoring the system .......................................................................................................................................71
Domain.................................................................................................................................................................72
Managing domain ...........................................................................................................................................72
Domain aliases ................................................................................................................................................72
7 Diagnostics.................................................................................................................................................... 73
Overview ...............................................................................................................................................................74
Page 7

4
SIPxNano IP-PBX Getting Started Guide
Table of Contents
Registrations..........................................................................................................................................................74
Viewing registrations .......................................................................................................................................74
Job Status ..............................................................................................................................................................75
Viewing the job status log ...............................................................................................................................75
Clearing the job status log ...............................................................................................................................75
Services..................................................................................................................................................................76
Snapshot................................................................................................................................................................77
8 Voicemail....................................................................................................................................................... 78
Overview ...............................................................................................................................................................79
Accessing the Voicemail webpage ..........................................................................................................................79
Managing Voicemail Messages ..............................................................................................................................79
Listening to messages ......................................................................................................................................80
Moving messages ............................................................................................................................................80
Deleting messages ...........................................................................................................................................80
Editing messages .............................................................................................................................................80
Editing Voicemail Preferences ...............................................................................................................................81
Manage Folders ...............................................................................................................................................81
To add a folder ..........................................................................................................................................81
To delete or edit a folder ...........................................................................................................................81
Manage Greetings ...........................................................................................................................................81
To play a greeting ......................................................................................................................................81
To make a greeting active ..........................................................................................................................81
To record a greeting ..................................................................................................................................81
Manage Distributions .....................................................................................................................................82
To add a distribution list ...........................................................................................................................82
Manage Notifications ......................................................................................................................................82
9 Contacting Patton for assistance ................................................................................................................... 83
Introduction..........................................................................................................................................................84
Contact information..............................................................................................................................................84
Patton support headquarters in the USA .........................................................................................................84
Alternate Patton support for Europe, Middle East, and Africa (EMEA) ..........................................................84
Warranty Service and Returned Merchandise Authorizations (RMAs)...................................................................84
Warranty coverage ..........................................................................................................................................84
Out-of-warranty service .............................................................................................................................85
Returns for credit ......................................................................................................................................85
Return for credit policy .............................................................................................................................85
RMA numbers ................................................................................................................................................85
Shipping instructions ................................................................................................................................85
A Session Initiation Protocol (SIP) .................................................................................................................. 86
Overview ...............................................................................................................................................................87
SIP Messages .........................................................................................................................................................87
Methods ..........................................................................................................................................................88
Response Codes ..............................................................................................................................................89
Page 8

5
SIPxNano IP-PBX Getting Started Guide
Table of Contents
Message Headers .............................................................................................................................................90
Sample SIP Message ........................................................................................................................................90
Message Flow Examples ..................................................................................................................................90
Call setup ..................................................................................................................................................91
Call teardown ............................................................................................................................................91
Successful blind transfer ............................................................................................................................91
Successful consultative transfer ..................................................................................................................92
SIP URLs ........................................................................................................................................................92
SIP Transactions....................................................................................................................................................93
SIP Sessions...........................................................................................................................................................93
SIP Calls................................................................................................................................................................93
Caller ID ...................................................................................................................................................93
System Components..............................................................................................................................................94
B Firewalls and NAT ........................................................................................................................................ 95
Working with Firewalls and NAT .........................................................................................................................96
Configure the firewall............................................................................................................................................96
Recording the external IP address ....................................................................................................................96
Opening VoIP ports .......................................................................................................................................96
Configure a Phone.................................................................................................................................................97
Identifying the external IP address ..................................................................................................................97
PHONESET_EXTERNAL_IP_ADDRESS .............................................................................................97
Setting the SIP port ...................................................................................................................................97
Setting the RTP/RTCP ports ....................................................................................................................97
Work with a Firewall with NAT............................................................................................................................98
Work with a Proxy Firewall...................................................................................................................................99
Configuring phones for a SIP firewall proxy ....................................................................................................99
Using HTTP proxy settings ............................................................................................................................99
C Configuration APIs .................................................................................................................................... 100
SIPxNano Configuration APIs ............................................................................................................................101
Install the APIs ....................................................................................................................................................101
Core classes and operations..................................................................................................................................102
Add User .......................................................................................................................................................102
Edit User ......................................................................................................................................................103
Delete User ...................................................................................................................................................104
Add Device ...................................................................................................................................................104
Edit Device ...................................................................................................................................................106
Delete Device ................................................................................................................................................107
Assign Device to a User .................................................................................................................................107
Unassign Device from a User .......................................................................................................................108
Resync data sets .............................................................................................................................................108
Send all profiles .............................................................................................................................................108
Send all profiles to a specified user ................................................................................................................109
Preparing source data...........................................................................................................................................109
Page 9

6
SIPxNano IP-PBX Getting Started Guide
Table of Contents
Sample code ........................................................................................................................................................110
D Compliance information ............................................................................................................................ 111
Compliance .........................................................................................................................................................112
EMC .............................................................................................................................................................112
Safety ............................................................................................................................................................112
Radio and TV interference ..................................................................................................................................112
CE Declaration of Conformity ............................................................................................................................112
Authorized European Representative ...................................................................................................................112
Page 10

List of Figures
1 Rear panel of the SIPxNano (Model 6075 shown) . . . . . . . . . . . . . . . . . . . . . . . . . . . . . . . . . . . . . . . . . . . . . . 10
2 SIPxNano homepage . . . . . . . . . . . . . . . . . . . . . . . . . . . . . . . . . . . . . . . . . . . . . . . . . . . . . . . . . . . . . . . . . . . . 12
3 Voice Mail . . . . . . . . . . . . . . . . . . . . . . . . . . . . . . . . . . . . . . . . . . . . . . . . . . . . . . . . . . . . . . . . . . . . . . . . . . . . 13
4 Adding a new user . . . . . . . . . . . . . . . . . . . . . . . . . . . . . . . . . . . . . . . . . . . . . . . . . . . . . . . . . . . . . . . . . . . . . . 16
5 User Groups main screen . . . . . . . . . . . . . . . . . . . . . . . . . . . . . . . . . . . . . . . . . . . . . . . . . . . . . . . . . . . . . . . . . 22
6 Configuring the extension pool . . . . . . . . . . . . . . . . . . . . . . . . . . . . . . . . . . . . . . . . . . . . . . . . . . . . . . . . . . . . . 24
7 Phones main screen . . . . . . . . . . . . . . . . . . . . . . . . . . . . . . . . . . . . . . . . . . . . . . . . . . . . . . . . . . . . . . . . . . . . . . 26
8 Adding a new phone . . . . . . . . . . . . . . . . . . . . . . . . . . . . . . . . . . . . . . . . . . . . . . . . . . . . . . . . . . . . . . . . . . . . . 27
9 List of phones . . . . . . . . . . . . . . . . . . . . . . . . . . . . . . . . . . . . . . . . . . . . . . . . . . . . . . . . . . . . . . . . . . . . . . . . . . 28
10 Adding a line to a phone . . . . . . . . . . . . . . . . . . . . . . . . . . . . . . . . . . . . . . . . . . . . . . . . . . . . . . . . . . . . . . . . . . 29
11 Phone lines . . . . . . . . . . . . . . . . . . . . . . . . . . . . . . . . . . . . . . . . . . . . . . . . . . . . . . . . . . . . . . . . . . . . . . . . . . . . 29
12 Phone Groups main screen . . . . . . . . . . . . . . . . . . . . . . . . . . . . . . . . . . . . . . . . . . . . . . . . . . . . . . . . . . . . . . . . 31
13 Adding a phone group . . . . . . . . . . . . . . . . . . . . . . . . . . . . . . . . . . . . . . . . . . . . . . . . . . . . . . . . . . . . . . . . . . . 32
14 Phone model groups . . . . . . . . . . . . . . . . . . . . . . . . . . . . . . . . . . . . . . . . . . . . . . . . . . . . . . . . . . . . . . . . . . . . . 33
15 Editing a phone group . . . . . . . . . . . . . . . . . . . . . . . . . . . . . . . . . . . . . . . . . . . . . . . . . . . . . . . . . . . . . . . . . . . 33
16 Adding a gateway . . . . . . . . . . . . . . . . . . . . . . . . . . . . . . . . . . . . . . . . . . . . . . . . . . . . . . . . . . . . . . . . . . . . . . . 35
17 Caller ID Details for SIP Trunk . . . . . . . . . . . . . . . . . . . . . . . . . . . . . . . . . . . . . . . . . . . . . . . . . . . . . . . . . . . . 36
18 Adding a device file . . . . . . . . . . . . . . . . . . . . . . . . . . . . . . . . . . . . . . . . . . . . . . . . . . . . . . . . . . . . . . . . . . . . . . 38
19 Sending profiles . . . . . . . . . . . . . . . . . . . . . . . . . . . . . . . . . . . . . . . . . . . . . . . . . . . . . . . . . . . . . . . . . . . . . . . . 39
20 Adding an auto attendant . . . . . . . . . . . . . . . . . . . . . . . . . . . . . . . . . . . . . . . . . . . . . . . . . . . . . . . . . . . . . . . . . 42
21 Adding a dialing rule . . . . . . . . . . . . . . . . . . . . . . . . . . . . . . . . . . . . . . . . . . . . . . . . . . . . . . . . . . . . . . . . . . . . 44
22 Editing the auto attendant dialing rule . . . . . . . . . . . . . . . . . . . . . . . . . . . . . . . . . . . . . . . . . . . . . . . . . . . . . . . 45
23 Setting up the holiday attendant . . . . . . . . . . . . . . . . . . . . . . . . . . . . . . . . . . . . . . . . . . . . . . . . . . . . . . . . . . . . 46
24 Activating dial plans . . . . . . . . . . . . . . . . . . . . . . . . . . . . . . . . . . . . . . . . . . . . . . . . . . . . . . . . . . . . . . . . . . . . . 46
25 Setting up the special auto attendant . . . . . . . . . . . . . . . . . . . . . . . . . . . . . . . . . . . . . . . . . . . . . . . . . . . . . . . . . 47
26 Configuring the intercom feature . . . . . . . . . . . . . . . . . . . . . . . . . . . . . . . . . . . . . . . . . . . . . . . . . . . . . . . . . . . 48
27 Adding a hunt group . . . . . . . . . . . . . . . . . . . . . . . . . . . . . . . . . . . . . . . . . . . . . . . . . . . . . . . . . . . . . . . . . . . . 49
28 Adding a call park extension . . . . . . . . . . . . . . . . . . . . . . . . . . . . . . . . . . . . . . . . . . . . . . . . . . . . . . . . . . . . . . . 51
29 Windows Sound Recorder . . . . . . . . . . . . . . . . . . . . . . . . . . . . . . . . . . . . . . . . . . . . . . . . . . . . . . . . . . . . . . . . 53
30 Properties for sound . . . . . . . . . . . . . . . . . . . . . . . . . . . . . . . . . . . . . . . . . . . . . . . . . . . . . . . . . . . . . . . . . . . . . 54
31 Sound Selection properties . . . . . . . . . . . . . . . . . . . . . . . . . . . . . . . . . . . . . . . . . . . . . . . . . . . . . . . . . . . . . . . . 54
32 Configuring Music on Hold . . . . . . . . . . . . . . . . . . . . . . . . . . . . . . . . . . . . . . . . . . . . . . . . . . . . . . . . . . . . . . . 55
33 Add dialing rule . . . . . . . . . . . . . . . . . . . . . . . . . . . . . . . . . . . . . . . . . . . . . . . . . . . . . . . . . . . . . . . . . . . . . . . . 58
34 Emergency dialing . . . . . . . . . . . . . . . . . . . . . . . . . . . . . . . . . . . . . . . . . . . . . . . . . . . . . . . . . . . . . . . . . . . . . . 59
35 Adding a permission . . . . . . . . . . . . . . . . . . . . . . . . . . . . . . . . . . . . . . . . . . . . . . . . . . . . . . . . . . . . . . . . . . . . . 60
36 SIP Parameters . . . . . . . . . . . . . . . . . . . . . . . . . . . . . . . . . . . . . . . . . . . . . . . . . . . . . . . . . . . . . . . . . . . . . . . . . 61
37 Voicemail settings in the General menu . . . . . . . . . . . . . . . . . . . . . . . . . . . . . . . . . . . . . . . . . . . . . . . . . . . . . . 62
38 Call pickup . . . . . . . . . . . . . . . . . . . . . . . . . . . . . . . . . . . . . . . . . . . . . . . . . . . . . . . . . . . . . . . . . . . . . . . . . . . . 63
39 Presence server . . . . . . . . . . . . . . . . . . . . . . . . . . . . . . . . . . . . . . . . . . . . . . . . . . . . . . . . . . . . . . . . . . . . . . . . . 64
40 Logging . . . . . . . . . . . . . . . . . . . . . . . . . . . . . . . . . . . . . . . . . . . . . . . . . . . . . . . . . . . . . . . . . . . . . . . . . . . . . . 65
41 Call Detail Records (CDR) . . . . . . . . . . . . . . . . . . . . . . . . . . . . . . . . . . . . . . . . . . . . . . . . . . . . . . . . . . . . . . . . 66
42 Importing CSV files . . . . . . . . . . . . . . . . . . . . . . . . . . . . . . . . . . . . . . . . . . . . . . . . . . . . . . . . . . . . . . . . . . . . . 67
43 LDAP Server link . . . . . . . . . . . . . . . . . . . . . . . . . . . . . . . . . . . . . . . . . . . . . . . . . . . . . . . . . . . . . . . . . . . . . . . 68
44 Import LDAP . . . . . . . . . . . . . . . . . . . . . . . . . . . . . . . . . . . . . . . . . . . . . . . . . . . . . . . . . . . . . . . . . . . . . . . . . . 69
45 Backing up system files . . . . . . . . . . . . . . . . . . . . . . . . . . . . . . . . . . . . . . . . . . . . . . . . . . . . . . . . . . . . . . . . . . . 70
46 Successful backup . . . . . . . . . . . . . . . . . . . . . . . . . . . . . . . . . . . . . . . . . . . . . . . . . . . . . . . . . . . . . . . . . . . . . . . 71
47 Managing the domain name . . . . . . . . . . . . . . . . . . . . . . . . . . . . . . . . . . . . . . . . . . . . . . . . . . . . . . . . . . . . . . . 72
1
Page 11

2
SIPxNano IP-PBX Getting Started Guide
48 Adding a domain alias . . . . . . . . . . . . . . . . . . . . . . . . . . . . . . . . . . . . . . . . . . . . . . . . . . . . . . . . . . . . . . . . . . . . 72
49 Registrations . . . . . . . . . . . . . . . . . . . . . . . . . . . . . . . . . . . . . . . . . . . . . . . . . . . . . . . . . . . . . . . . . . . . . . . . . . . 74
50 Job Status log . . . . . . . . . . . . . . . . . . . . . . . . . . . . . . . . . . . . . . . . . . . . . . . . . . . . . . . . . . . . . . . . . . . . . . . . . . 75
51 SIPxNano Services . . . . . . . . . . . . . . . . . . . . . . . . . . . . . . . . . . . . . . . . . . . . . . . . . . . . . . . . . . . . . . . . . . . . . . 76
52 Snapshot . . . . . . . . . . . . . . . . . . . . . . . . . . . . . . . . . . . . . . . . . . . . . . . . . . . . . . . . . . . . . . . . . . . . . . . . . . . . . . 77
53 Successful snapshot . . . . . . . . . . . . . . . . . . . . . . . . . . . . . . . . . . . . . . . . . . . . . . . . . . . . . . . . . . . . . . . . . . . . . . 77
54 Voicemail inbox . . . . . . . . . . . . . . . . . . . . . . . . . . . . . . . . . . . . . . . . . . . . . . . . . . . . . . . . . . . . . . . . . . . . . . . . 79
55 Sample SIP Message . . . . . . . . . . . . . . . . . . . . . . . . . . . . . . . . . . . . . . . . . . . . . . . . . . . . . . . . . . . . . . . . . . . . . 90
56 Call setup . . . . . . . . . . . . . . . . . . . . . . . . . . . . . . . . . . . . . . . . . . . . . . . . . . . . . . . . . . . . . . . . . . . . . . . . . . . . . 91
57 Call teardown . . . . . . . . . . . . . . . . . . . . . . . . . . . . . . . . . . . . . . . . . . . . . . . . . . . . . . . . . . . . . . . . . . . . . . . . . . 91
58 Successful blind transfer . . . . . . . . . . . . . . . . . . . . . . . . . . . . . . . . . . . . . . . . . . . . . . . . . . . . . . . . . . . . . . . . . . 91
59 Successful consultative transfer . . . . . . . . . . . . . . . . . . . . . . . . . . . . . . . . . . . . . . . . . . . . . . . . . . . . . . . . . . . . . 92
Page 12

List of Tables
1 General conventions . . . . . . . . . . . . . . . . . . . . . . . . . . . . . . . . . . . . . . . . . . . . . . . . . . . . . . . . . . . . . . . . . . . . . . 5
2 User IDS and SIP URLs . . . . . . . . . . . . . . . . . . . . . . . . . . . . . . . . . . . . . . . . . . . . . . . . . . . . . . . . . . . . . . . . . . 18
3 Permissions . . . . . . . . . . . . . . . . . . . . . . . . . . . . . . . . . . . . . . . . . . . . . . . . . . . . . . . . . . . . . . . . . . . . . . . . . . . . 20
4 Outbound Authorization Permissions . . . . . . . . . . . . . . . . . . . . . . . . . . . . . . . . . . . . . . . . . . . . . . . . . . . . . . . . 20
5 Default Permissions . . . . . . . . . . . . . . . . . . . . . . . . . . . . . . . . . . . . . . . . . . . . . . . . . . . . . . . . . . . . . . . . . . . . . 60
6 LDAP Mapping Fields . . . . . . . . . . . . . . . . . . . . . . . . . . . . . . . . . . . . . . . . . . . . . . . . . . . . . . . . . . . . . . . . . . . 68
7 SIP Methods and Functions . . . . . . . . . . . . . . . . . . . . . . . . . . . . . . . . . . . . . . . . . . . . . . . . . . . . . . . . . . . . . . . 88
8 Supported Methods . . . . . . . . . . . . . . . . . . . . . . . . . . . . . . . . . . . . . . . . . . . . . . . . . . . . . . . . . . . . . . . . . . . . . 89
9 Response codes . . . . . . . . . . . . . . . . . . . . . . . . . . . . . . . . . . . . . . . . . . . . . . . . . . . . . . . . . . . . . . . . . . . . . . . . . 89
10 Message Headers . . . . . . . . . . . . . . . . . . . . . . . . . . . . . . . . . . . . . . . . . . . . . . . . . . . . . . . . . . . . . . . . . . . . . . . . 90
11 SIP System Components . . . . . . . . . . . . . . . . . . . . . . . . . . . . . . . . . . . . . . . . . . . . . . . . . . . . . . . . . . . . . . . . . 94
12 Parameter settings for certain phones . . . . . . . . . . . . . . . . . . . . . . . . . . . . . . . . . . . . . . . . . . . . . . . . . . . . . . . . 98
13 Core Operations: Add User . . . . . . . . . . . . . . . . . . . . . . . . . . . . . . . . . . . . . . . . . . . . . . . . . . . . . . . . . . . . . . 102
14 Core Operations: Edit User . . . . . . . . . . . . . . . . . . . . . . . . . . . . . . . . . . . . . . . . . . . . . . . . . . . . . . . . . . . . . . 103
15 Core Operations: Delete User . . . . . . . . . . . . . . . . . . . . . . . . . . . . . . . . . . . . . . . . . . . . . . . . . . . . . . . . . . . . . 104
16 Core Operations: Add Device . . . . . . . . . . . . . . . . . . . . . . . . . . . . . . . . . . . . . . . . . . . . . . . . . . . . . . . . . . . . . 104
17 Core Operations: Edit Device . . . . . . . . . . . . . . . . . . . . . . . . . . . . . . . . . . . . . . . . . . . . . . . . . . . . . . . . . . . . . 106
18 Core Operations: Delete Device . . . . . . . . . . . . . . . . . . . . . . . . . . . . . . . . . . . . . . . . . . . . . . . . . . . . . . . . . . . 107
19 Core Operations: Assign Device to a User . . . . . . . . . . . . . . . . . . . . . . . . . . . . . . . . . . . . . . . . . . . . . . . . . . . . 107
20 Core Operations: Unassign Device from a User . . . . . . . . . . . . . . . . . . . . . . . . . . . . . . . . . . . . . . . . . . . . . . . 108
21 Core Operations: Send all profiles to a specified user . . . . . . . . . . . . . . . . . . . . . . . . . . . . . . . . . . . . . . . . . . . 109
1
Page 13

About this guide
This guide describes the SIPxNano hardware, installation and basic configuration.
Audience
This guide is intended for the following users:
• Operators
• System administrators
• Network engineers
Structure
This guide contains the following chapters and appendices:
• Chapter 1, “General Introduction” on page 6 provides information about hardware and factory defaults.
• Chapter 2, “Setting Up the SIPxNano” on page 9 contains information on setting up the SIPxNano.
• Chapter 3, “Users” on page 14 explains how to set up users and user groups.
• Chapter 4, “Devices” on page 25 provides information on setting up devices.
• Chapter 5, “Features” on page 40 contains an overview of setting up and configuring features.
• Chapter 6, “System” on page 56 contains information about system settings.
• Chapter 7, “Diagnostics” on page 73 explains diagnostic functions.
• Chapter 8, “Voicemail” on page 78 provides information about using voicemail.
• Chapter 9, “Contacting Patton for assistance” on page 83 contains information on how to contact Patton
for assistance with the SIPxNano.
• Appendix A, “Session Initiation Protocol (SIP)” on page 86 contains an overview of SIP.
• Appendix B, “Firewalls and NAT” on page 95 provides information on firewalls and NAT.
• Appendix C, “Configuration APIs” on page 100 describes Configuration APIs.
For best results, read the contents of this guide before you install the server.
2
Page 14
3
CAUTION
WARNING
SIPxNano IP-PBX Getting Started Guide
Precautions
Notes, cautions, and warnings, which have the following meanings, are used throughout this guide to help you
become aware of potential problems. Warnings are intended to prevent safety hazards that could result in personal injury. Cautions are intended to prevent situations that could result in property damage or
impaired functioning.
Note
IMPORTANT
CAUTION
WARNING
A note presents additional information or interesting sidelights.
The alert symbol and IMPORTANT heading calls attention to
important information.
The alert symbol and CAUTION heading indicate a potential hazard. Strictly follow the instructions to avoid property damage.
The shock hazard symbol and CAUTION heading indicate a
potential electric shock hazard. Strictly follow the instructions to
avoid property damage caused by electric shock.
The alert symbol and WARNING heading indicate a potential safety hazard.
Strictly follow the warning instructions to avoid personal injury.
The shock hazard symbol and WARNING heading indicate a potential electric
shock hazard. Strictly follow the warning instructions to avoid injury caused
by electric shock.
Page 15
SIPxNano IP-PBX Getting Started Guide
Safety when working with electricity
This device contains no user serviceable parts. The equipment shall be
returned to Patton Electronics for repairs, or repaired by qualified
service personnel.
WARNING
The external power adapter shall be a listed Limited Power Source. Ensure
that the power cable used meets all applicable standards for the country in
which it is to be installed, and that it is connected to a wall outlet which has
WARNING
WARNING
earth ground. The mains outlet that is utilized to power the devise shall be
within 10 feet (3 meters) of the device, shall be easily accessible, and protected by a circuit breaker.
Hazardous network voltages are present in WAN ports regardless of whether
power to the SIPxNano is ON or OFF. To avoid electric shock, use caution
when near WAN ports. When detaching cables, detach the end away from the
SIPxNano first.
4
Do not work on the system or connect or disconnect cables during periods of
lightning activity.
WARNING
In accordance with the requirements of council directive 2002/
96/EC on Waste of Electrical and Electronic Equipment (WEEE),
ensure that at end-of-life you separate this product from other
waste and scrap and deliver to the WEEE collection system in
your country for recycling.
General observations
• Clean the case with a soft slightly moist anti-static cloth
• Place the unit upright in the stand (included) to ensure free air circulation
• Avoid exposing the unit to direct sunlight and other heat sources
• Protect the unit from moisture, vapors, and corrosive liquids
Page 16
5
SIPxNano IP-PBX Getting Started Guide
Typographical conventions used in this document
This section describes the typographical conventions and terms used in this guide.
General conventions
The procedures described in this manual use the following text conventions:
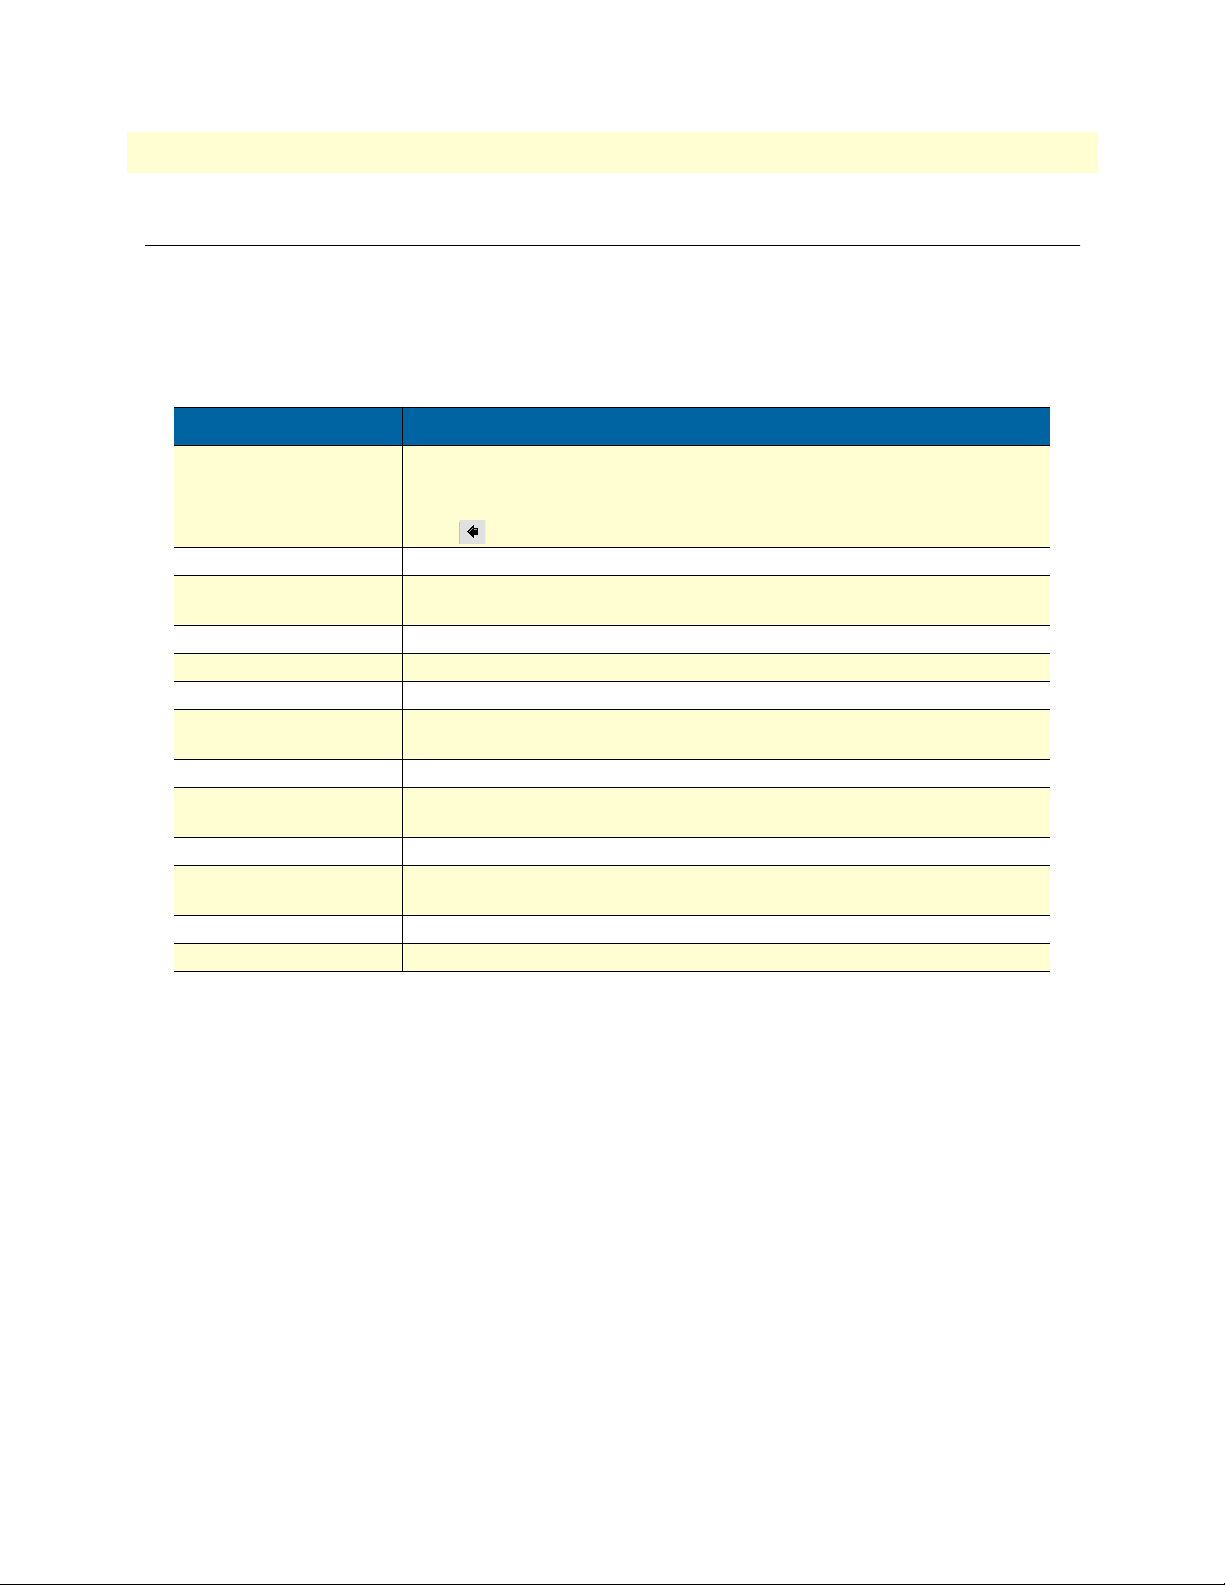
Table 1. General conventions
Convention Meaning
Garamond blue type
Futura bold type
Futura bold-italic type
Italicized Futura type
Futura type Indicates the names of fields or windows.
Garamond bold type
< > Angle brackets indicate function and keyboard keys, such as <SHIFT>, <CTRL>,
[ ] Elements in square brackets are optional.
{a | b | c} Alternative but required keywords are grouped in braces ({ }) and are separated
screen
node
# An hash sign at the beginning of a line indicates a comment line.
Indicates a cross-reference hyperlink that points to a figure, graphic, table, or section heading. Clicking on the hyperlink jumps you to the reference. When you
have finished reviewing the reference, click on the Go to Previous View
button in the Adobe® Acrobat® Reader toolbar to return to your starting point.
Commands and keywords are in boldface font.
Parts of commands, which are related to elements already named by the user, are
in
boldface italic
Variables for which you supply values are in
Indicates the names of command buttons that execute an action.
<C>, and so on.
by vertical bars ( | )
Terminal sessions and information the system displays are in
The leading IP address or nodename of a SIPxNano is substituted with
boldface italic
The leading SN on a command line represents the nodename of the SIPxNano
font.
font.
italic
font
screen font
.
node
SN
in
Page 17

Chapter 1
Chapter contents
Welcome .................................................................................................................................................................7
Factory defaults .......................................................................................................................................................7
GUI Defaults ....................................................................................................................................................7
Hardware included ..................................................................................................................................................8
What you will need .................................................................................................................................................8
About the NanoServ................................................................................................................................................8
General Introduction
6
Page 18

7
SIPxNano IP-PBX Getting Started Guide
1 • General Introduction
Welcome
Welcome to the SIPxNano! This guide provides conceptual information on the Patton SIPxNano IP voice system, which runs on the CentOS operating system.
This chapter includes:
• “Factory defaults” on page 7
• “Hardware included” on page 8
• “What you will need” on page 8
Factory defaults
When you first access the SIPxNano, the following defaults are activated. You have the option to change these
defaults when the system first boots.
• Hostname: sipx.patton.com
• IP: 192.168.200.200
• Netmask: 255.255.255.0
Note
Make sure to set the netmask to the same subnet as the PC you will
be accessing the SIPxNano webpage interface with.
• Gateway: 192.168.200.1
• Nameserver: 0.0.0.0
• Sipx Login: root
• Admin Password: superuser
• Admin Email: superuser@patton.local
• Time Zone: U.S. Eastern
• SIP Domain Name: patton.local
Note If you want to change the factory defaults, you will need to run the
reset script. For more information, refer to “Configuring and Run-
ning the Reset Script” on page 11.
GUI Defaults
• User ID: superadmin
• PIN: patton
Welcome
Page 19

SIPxNano IP-PBX Getting Started Guide 1 • General Introduction
Hardware included
The following items are included with your SIPxNano:
• NanoServ system computer
• Power adapter
• Stand for the NanoServ
• Documentation CD
• Quick Start guide
What you will need
Note The following items are NOT included, but you will still need them
to use the SIPxNano.
You will need the following items to use the SIPxNano:
• Monitor
• Keyboard
• Mouse
• Separate PC
• Ethernet cable
About the NanoServ
The NanoServ™ is a unique tiny embedded system for a wide range of applications, from industrial to office
to home.The system offers multi-server features to function as firewall, mail-server, print server, and many
other single task applications. It is suitable for a space-conscious environment, with dimensions of
17x124x38mm (Ultra-Thin System) (or 58mm - Thin System), equivalent to 4.32”x3.15”x0.96” (Ultra-Thin
System) (or 1.47” - Thin System).
For more information about the NanoServ hardware, see the NanoServ User Guide, which is available at
http://www.patton.com.
Hardware included 8
Page 20

Chapter 2 Setting Up the SIPxNano
Chapter contents
Introduction..........................................................................................................................................................10
Before you begin... ..........................................................................................................................................10
Configuring and Running the Reset Script............................................................................................................11
Accessing the system..............................................................................................................................................11
Configuration Overview........................................................................................................................................12
Users ...............................................................................................................................................................12
Devices ...........................................................................................................................................................12
Features ..........................................................................................................................................................13
System Settings ...............................................................................................................................................13
Diagnostics .....................................................................................................................................................13
Voicemail ........................................................................................................................................................13
9
Page 21
SIPxNano IP-PBX Getting Started Guide 2 • Setting Up the SIPxNano
Introduction
This chapter will help you set up the SIPxNano for the first time. The factory has already installed the CentOS
operating system, but you will need to initially configure the system the first time you use it.
Before you begin...
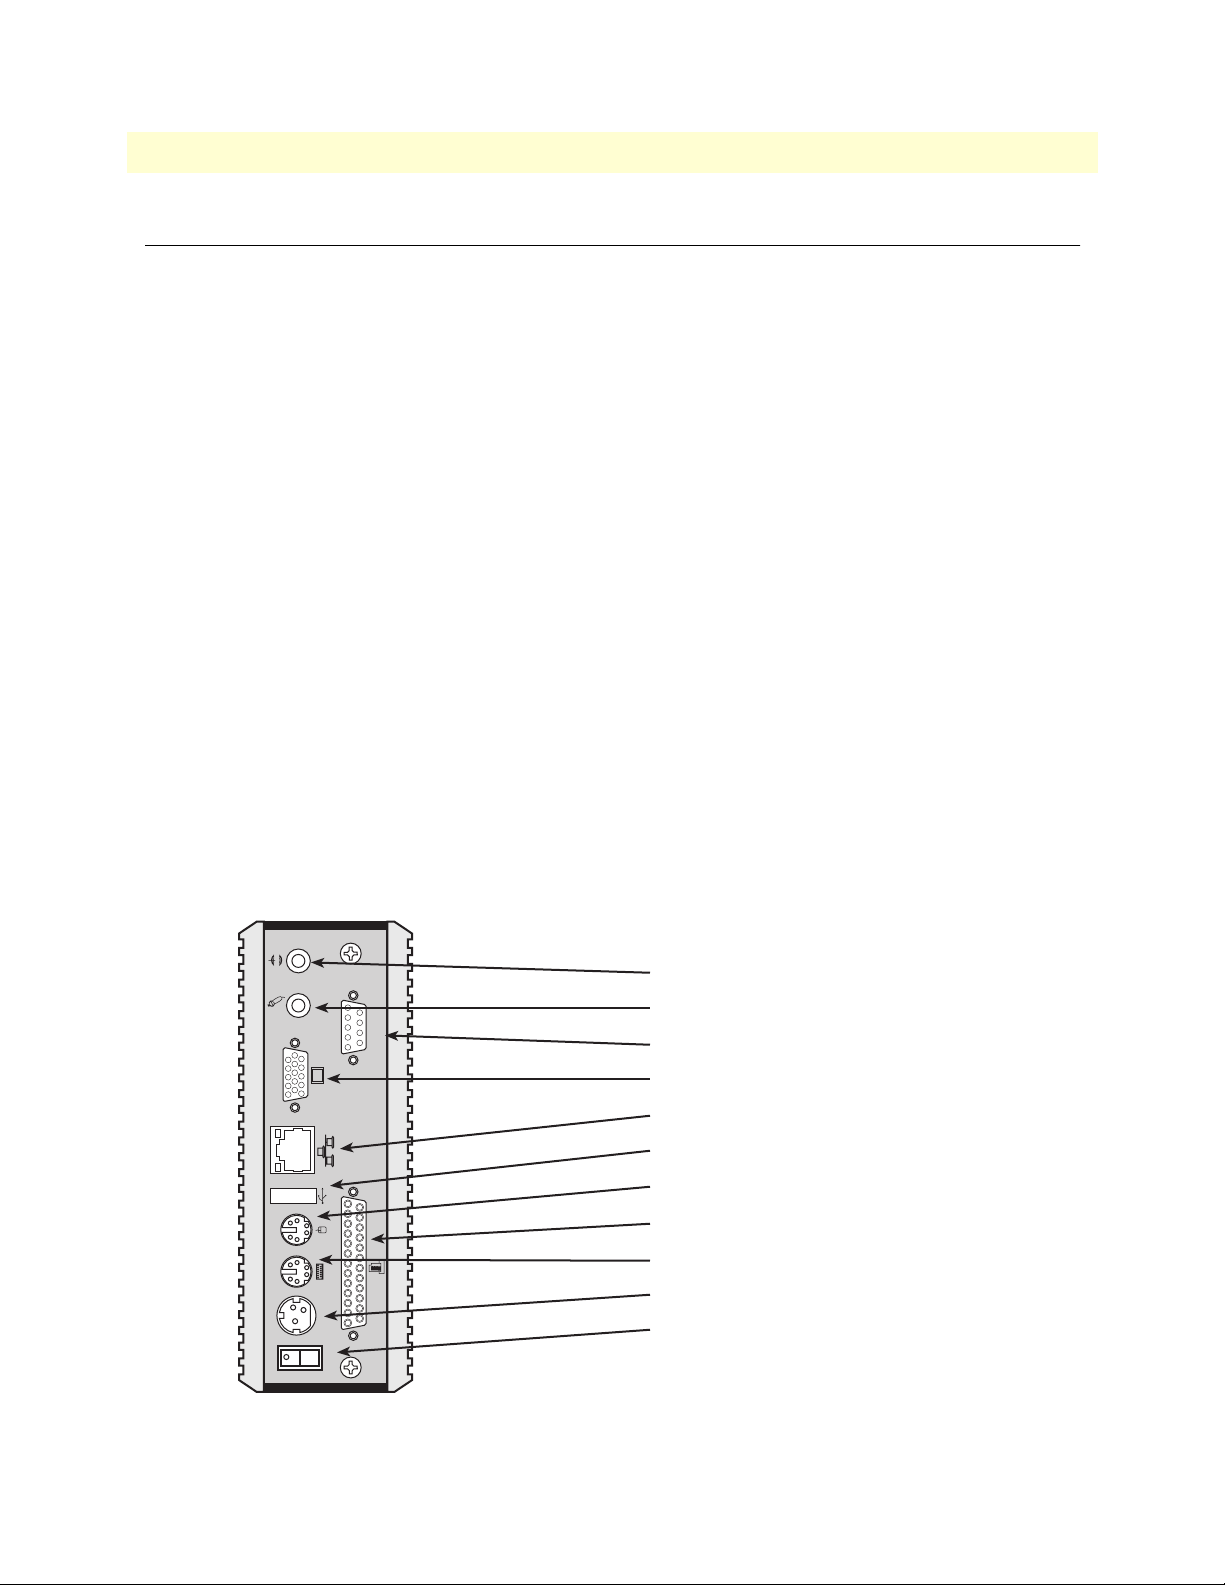
Before you turn on the SIPxNano, follow these steps (see figure 1):
Note The NanoServ chassis is within thermal and design limits but it does run
warm. For proper operation and cooling the system must have 2 cm or 1
inch of space for pen air around both side vents. In other words, it cannot be
laid down flat on a table, and it cannot be standing flat against a partition,
etc.. If mounted in some place, it must be mounted with stand off space
about 1 inch. If mounted in a closed enclosure, it will need 1 or 2 fans on the
outer enclosure for proper air flow inside.
1. Place the SIPxNano upright in the metal stand (included).
2. Attach a VGA monitor (not included) into the VGA port on the rear panel.
3. Attach the keyboard (not included) into the PS/2 port on the rear panel.
4. Attach the mouse (not included) into the other PS/2 port on the rear panel.
5. Attach the Ethernet cable (not included) into the RJ-45 port and connect the other end to the PC (not
included).
6. Attach the power adapter (included), and plug it into the closest electrical outlet.
7. Turn on the power supply switch on the rear panel.
Audio Line-Out
Mic-In
COM1
Serial Port **
VGA Port
RJ-45 10/100 Ethernet Jack
USB Port
PS/2 Mouse (6-pin)
Parallel Port **
PS/2 Keyboard & Mouse (6-pin)
DC Power Jack (3-pin)
DC-IN 5V
POWER SW
Figure 1. Rear panel of the SIPxNano (Model 6075 shown)
Power supply switch
** This feature is only
available for Model 6075.
Introduction 10
Page 22

SIPxNano IP-PBX Getting Started Guide 2 • Setting Up the SIPxNano
Configuring and Running the Reset Script
When you turn on the SIPxNano for the first time, you will need to run and configure a reset script before you
can access the webpage interface.
When you boot the system, a CLI prompt will appear asking for a login and password:
• login: root
• password: superuser
• [root@SIPxNano ~]# will appear. To run the reset script, type:
/recovery/linux/sipx_reset_cd <Press enter>.
Note Do not press “I” for Interactive Setup while running the reset script. Allow
the reset script to run without interruption.
After running the reset script, you will have the option to change the default settings such as the hostname, IP
address, netmask, gateway, nameserver, password, and timezone. (If you would like to keep the default settings,
press <enter> at each prompt). Type ‘yes’, then press <enter>. The system will reboot.
Note If you make a mistake while running the reset script or changing the default
settings, type ‘CTRL+C’ to interrupt the reset script and start over.
After the system reboots for the second time, enter the login and password you set (or the default settings, if
you did not make any changes).
Accessing the system
Enter the IP address of the SIPxNano (in this example, 10.10.200.1) into a web browser on a separate PC. Be
sure that the PC is on the same subnet as the SIPxNano.
To log into the SIPxNano:
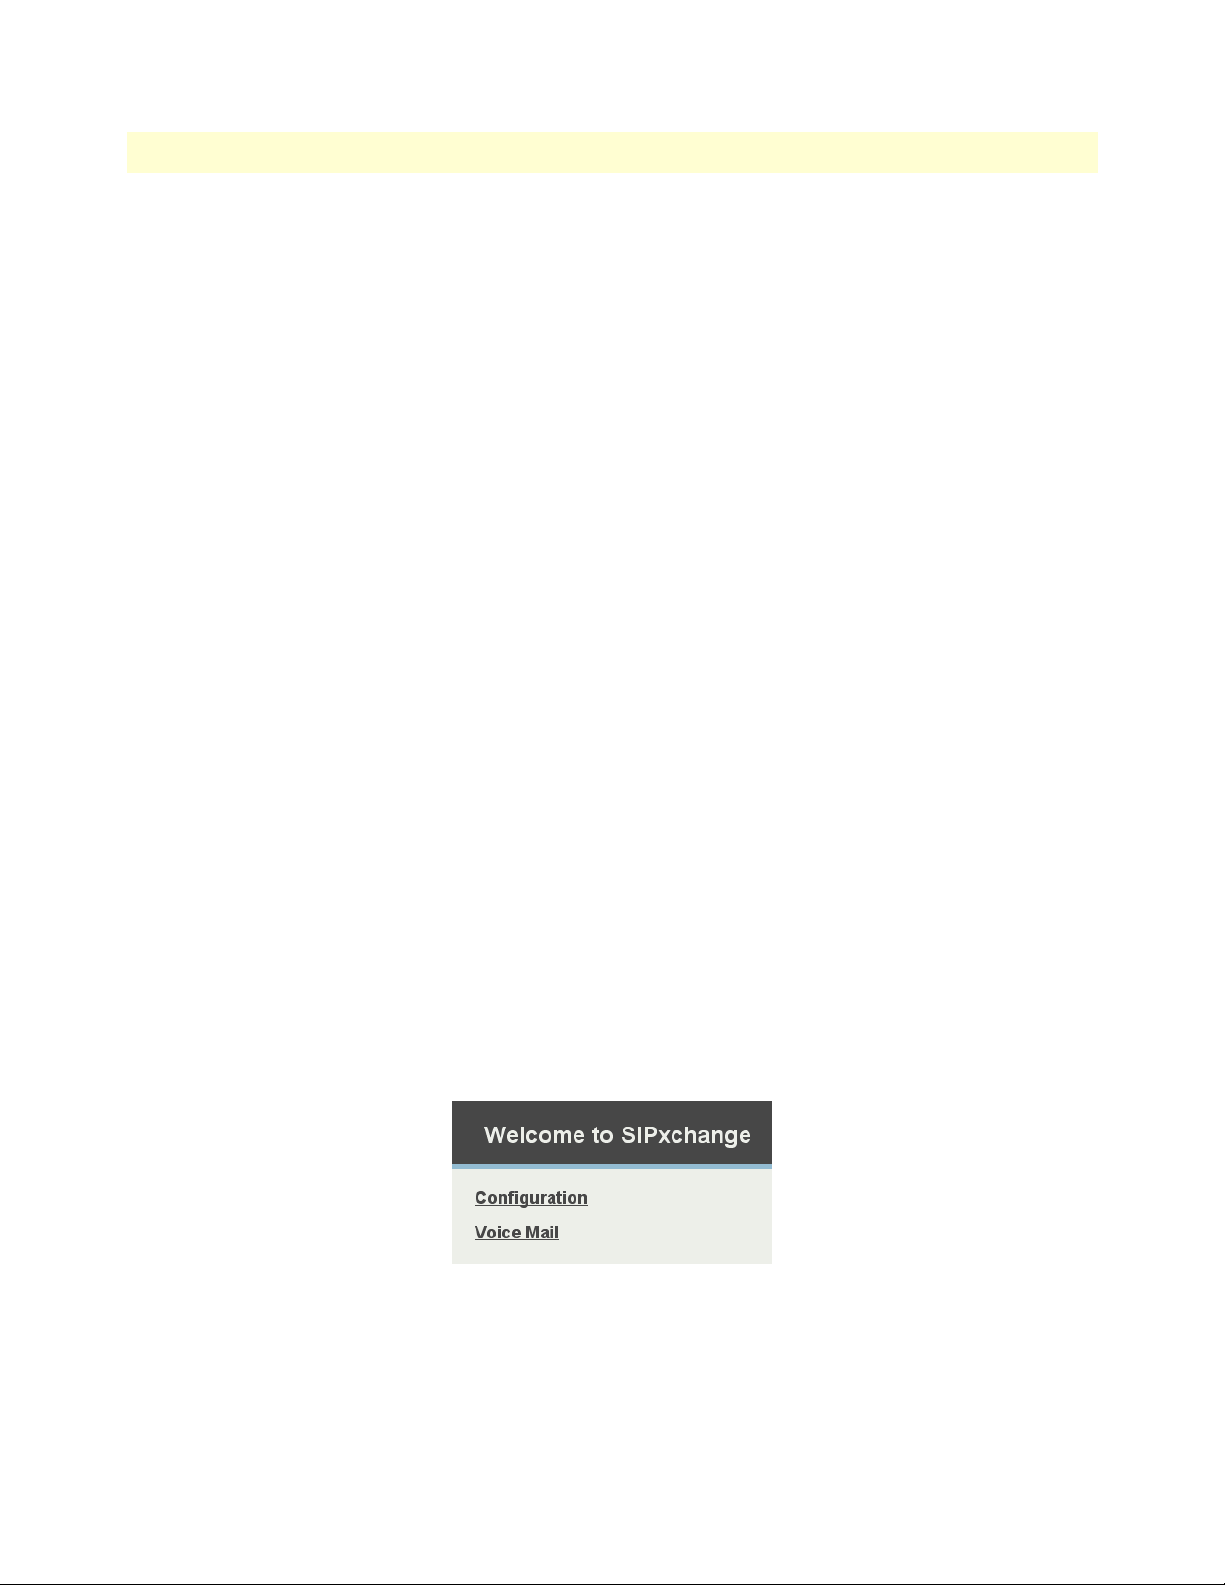
1. After typing the IP address into a web browser, a welcome screen will appear.
Click on the ‘Configuration’ link.
2. Log into the webpage interface. The default login is:
– User ID: superadmin
– PIN: patton
Configuring and Running the Reset Script 11
Page 23
SIPxNano IP-PBX Getting Started Guide 2 • Setting Up the SIPxNano
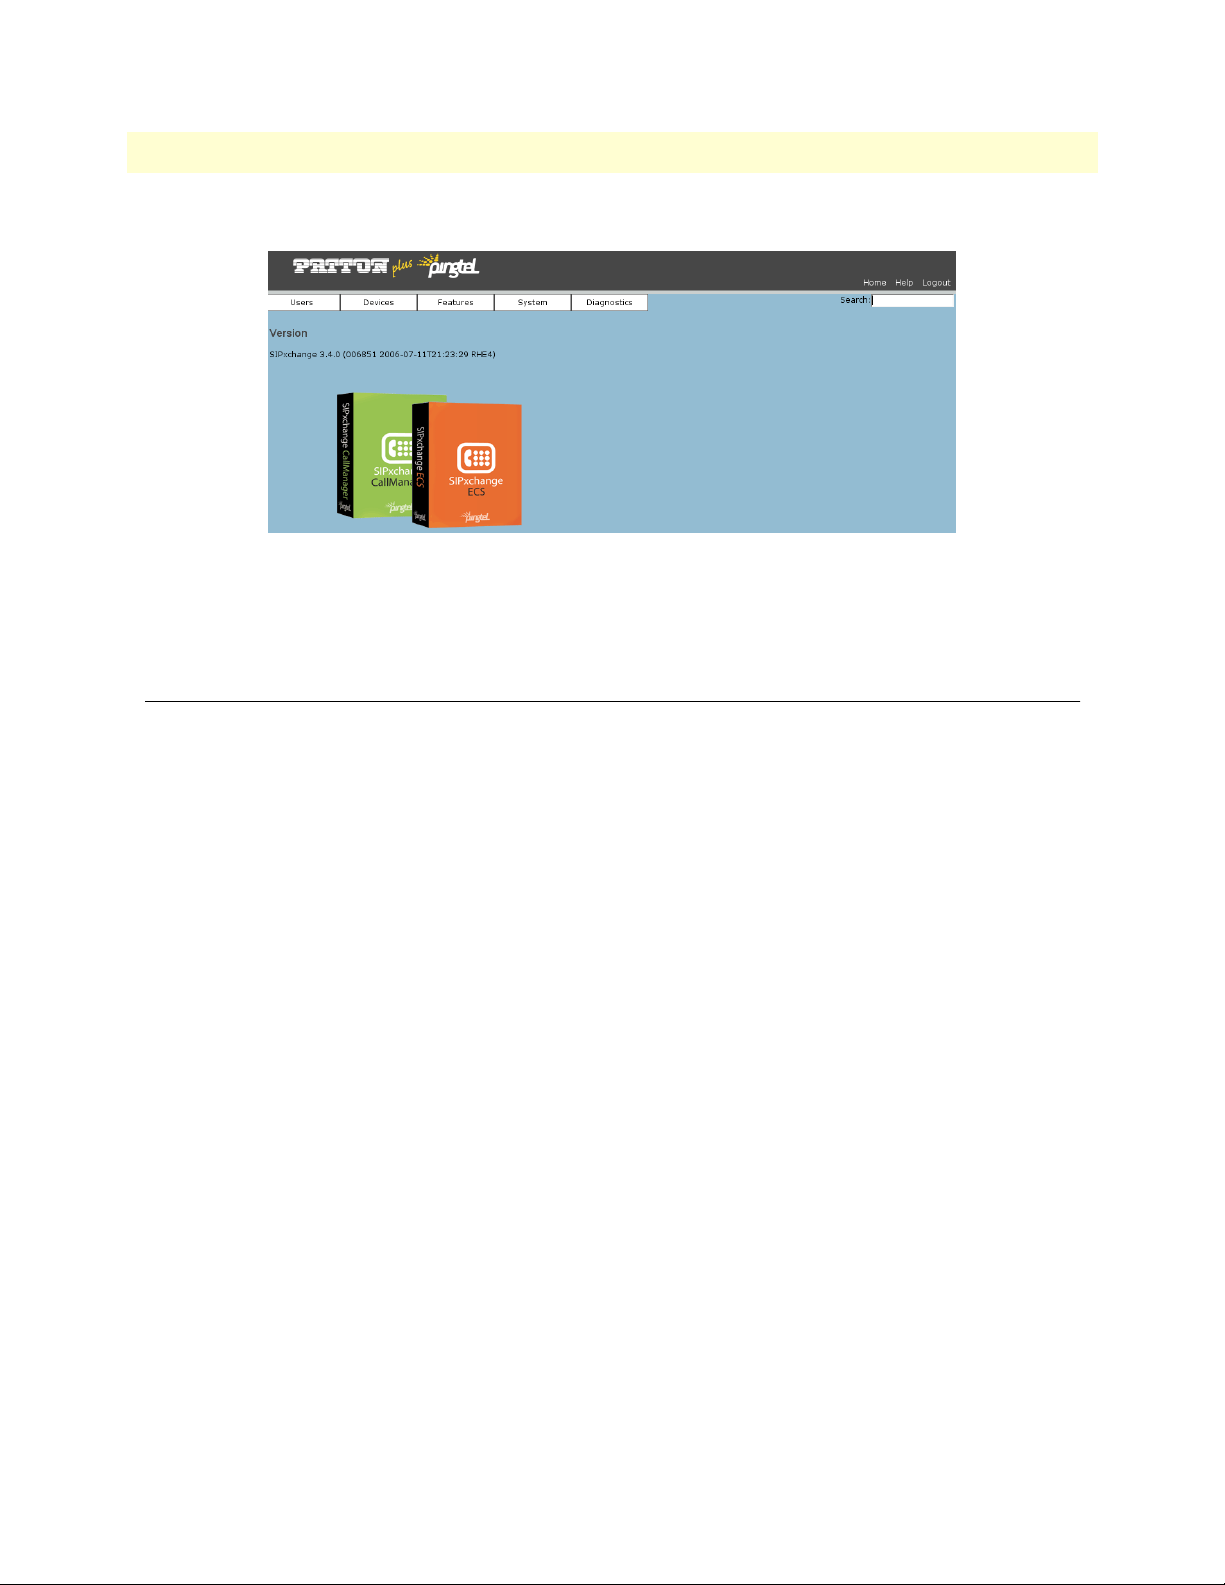
3. The SIPxNano homepage will appear.
Figure 2. SIPxNano homepage
4. From the main page, on the main navigation menu at the top, you can access the configuration pages for
setting up Users, Devices, Features, System, or Diagnostics.
Configuration Overview
The following chapters in the manual provide information on how to set up and configure users, devices, features, system settings, diagnostics, and voicemail.
Users
From the Users menu, you can:
• Add and configure settings for new users
• Add and configure user groups
• Configure the user extension pool
For more information on Users, see Chapter 3, “Users” on page 14.
Devices
From the Devices menu, you can:
• Add and configure settings for phones
• Add and configure phone groups
• Add and configure gateways
• Add and configure files for devices
For more information on Devices, see Chapter 4, “Devices” on page 25.
Configuration Overview 12
Page 24
SIPxNano IP-PBX Getting Started Guide 2 • Setting Up the SIPxNano
Features
From the Features menu, you can:
• Add and configure auto attendants
• Add and configure hunt groups
• Add and configure call park extensions
For more information on Features, see Chapter 5, “Features” on page 40.
System Settings
From the System menu, you can:
• Add and configure dial plans and dialing rules
• Configure general system settings
• Import CSV files
• Backup SIPxNano system configurations
For more information on System Settings, see Chapter 6, “System” on page 56.
Diagnostics
From the Diagnostics menu, you can:
• Refresh registrations and view the primary registrar
• View and edit the status of jobs
• Start, stop, restart, and refresh services
• Configure snapshot settings for log files, the Apache configuration, and credentials
For more information on Diagnostics, see Chapter 7, “Diagnostics” on page 73.
Voicemail
To access the voicemail page, click ‘Voice Mail’ on the main screen.
Click the ‘Inbox’ to show the login prompt for Voicemail.
Figure 3. Voice Mail
From the Voicemail screen, you can:
• Configure voicemail settings for specific users who have logged in
For more information on Voicemail, see Chapter 8, “Voicemail” on page 78.
Configuration Overview 13
Page 25

Chapter 3 Users
Chapter contents
Overview ...............................................................................................................................................................15
Users .....................................................................................................................................................................15
Adding Users ..................................................................................................................................................16
User IDs ....................................................................................................................................................17
Extensions .................................................................................................................................................18
Aliases .......................................................................................................................................................19
Permissions ...............................................................................................................................................20
Editing users ...................................................................................................................................................21
Filtering users ..................................................................................................................................................21
Deleting users .................................................................................................................................................21
More Actions ..................................................................................................................................................21
User Groups ..........................................................................................................................................................22
Adding User Groups .......................................................................................................................................23
Adding Users to a User Group ........................................................................................................................23
Editing User Groups .......................................................................................................................................23
Deleting User Groups .....................................................................................................................................23
Moving User Groups ......................................................................................................................................23
Extension Pool ......................................................................................................................................................24
14
Page 26

SIPxNano IP-PBX Getting Started Guide 3 • Users
Overview
This chapter provides information on SIPxNano user functions. Menu options include:
• “Users” on page 15
• “User Groups” on page 22
• “Extension Pool” on page 24
To help you accurately deliver configuration settings and management capabilities where they are needed in
your organization, SIPxNano distinguishes between the settings and management that:
• Apply to the operation of a specific device and its ability to function in your network
• A particular end user prefers, or is permitted to have, when using the device
Examples of device-level configuration settings include:
• The location of network servers and other entities, including a time server, SNMP stations, and SIP servers
• Activation of debugging tools, such as console output or Telnet access
• The location of hosts and ports for the device to use when receiving, or sending, data through a firewall
When you send profiles to a device, SIPxNano delivers settings only to the SIP phone associated with that
device.
Users
This section covers:
• “Adding Users” on page 16
• “Editing users” on page 21
• “Filtering users” on page 21
• “Deleting users” on page 21
• “More Actions” on page 21
For a user, you can:
• Grant or deny permissions, such as permission to dial long distance or international numbers
• Define certain configuration settings, such as activation of services for handling incoming calls, or entries in
a personal speed dial directory
• Assign devices
Note Permissions are not delivered to SIP phones. The Comm Server and Media
Server use the Permission database to authorize calls and enable features such
as voicemail for the user.
Note Settings delivery and device management, outlined in this chapter, apply to
Patton certified/managed phones, which currently include the Cisco 7900
series of phones and the Patton SIP Softphone. All other phones are man-
Overview 15
Page 27
SIPxNano IP-PBX Getting Started Guide 3 • Users
aged from the respective phone after adding user(s) and user groups to SIPxNano.
Adding Users
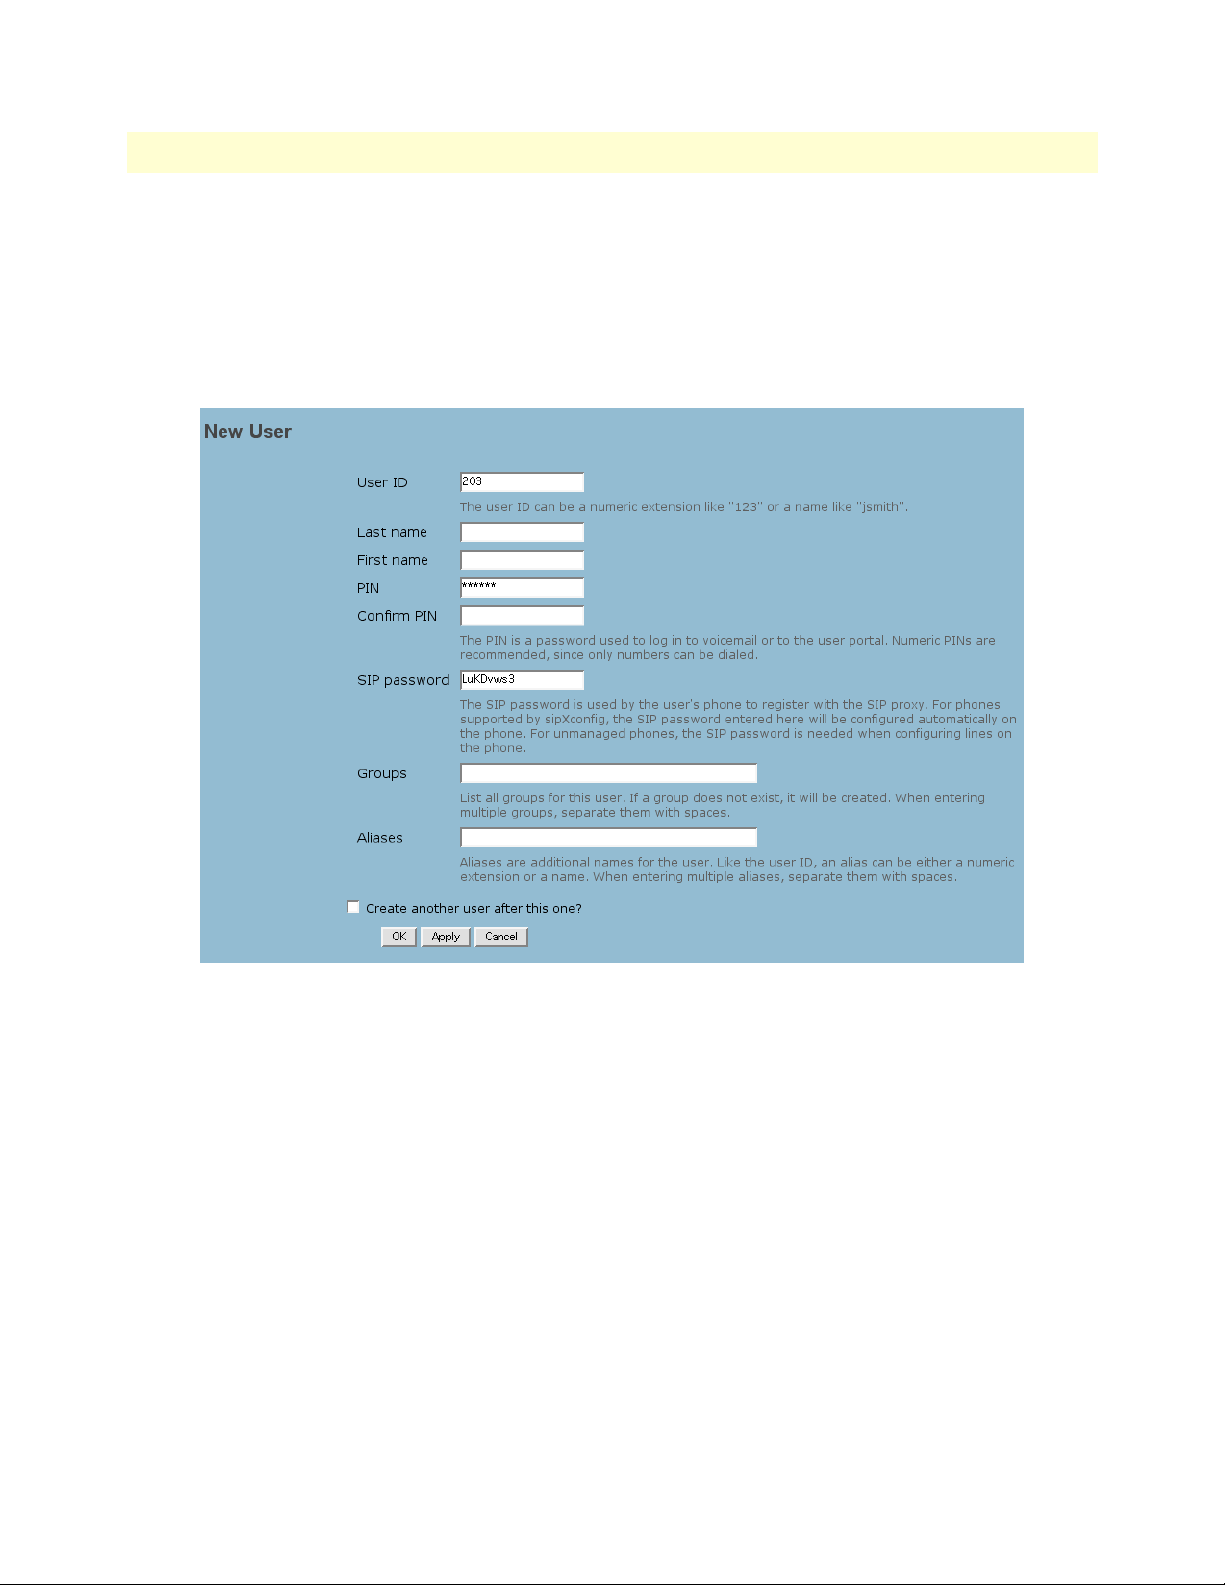
To add a new user:
1. From the main menu, click on Users > Users, then the Add User hyperlink. The New User screen appears.
Figure 4. Adding a new user
2. Enter a unique User ID. The User ID can be a numeric extension or a name. (See “User IDs” on page 17).
3. Enter the user’s Last Name. In the next field, enter the user’s First Name.
4. Create a numeric PIN for the user to access voicemail. In the next field, type the PIN again.
5. The SIP password is used by the user's phone to register with the SIP proxy. For phones supported by
sipXconfig, the SIP password entered here will be configured automatically on the phone. For unmanaged
phones, the SIP password is needed when configuring lines on the phone.
6. List any existing User Groups that the user will belong to (optional).
7. In the Aliases field, list any additional names for the user (optional). (See “Aliases” on page 19).
8. Click OK.
Users 16
Page 28

SIPxNano IP-PBX Getting Started Guide 3 • Users
User IDs
For each SIPxNano user, you must supply a unique, alphanumeric User ID. This User ID, along with a
numeric Personal Identification Number (PIN), is required for end user access to the SIPxNano interface.
Note SIPxNano requires a unique User ID for each user. Patton recommends that
you assign a unique PIN to each user, and also encourage end users to
change their PINs frequently.
In addition, you can supply a numeric extension number and one or more aliases for each user. These additional identifiers provide flexibility for both call addressing and user interface access.
You assign a numeric-only identifier to your SIPxNano users so that:
• Callers can dial numbers, rather than full SIP URLs, to address calls
• End users can access SIPxNano features, including voicemail, from the phone top
Either a user’s required User ID or the optional extension can be the numeric-only identifier. If you assign
numeric User IDs to your users, an additional extension is not needed.
Note If you use extensions, all User IDs and extensions must be unique (the same
number cannot be used as both a User ID and an extension).
You can employ an alphanumeric naming convention for your SIPxNano User IDs. For example, a User ID
can be made up of a first initial and last name (jsmith), or from first and last names (jane_smith); as a result,
end users can have the same identifier that they use for email. Alternatively, User IDs can reflect extension
numbers, Direct Inward Dialing (DID) telephone numbers, or some other numbering scheme that you
administer.
When you add a user, SIPxNano automatically sets up a user line with a SIP URL based on the new User ID so
that calls can be directed to that user. This line automatically registers with the Comm Server’s SipRegistrar
component for each SIP phone assigned to the user. SIPxNano stores all registered SIP URLs in the Registration database. For more information on Registrations, see the section “Registrations” on page 74 in Chapter 7,
“Diagnostics” .
Users 17
Page 29

SIPxNano IP-PBX Getting Started Guide 3 • Users
Extensions
In general, if you assign User IDs that include alphabetic characters you will also set up a numeric extension for
each user. If you assign numeric-only User IDs to your users, an additional extension may not be needed.
When you set up an extension or alias for a User ID, SIPxNano automatically adds them to a database of User
IDs and all of the extensions and aliases associated with each one. The components of the Comm Server use
this Alias database, as well as the lines stored in the Registration database, to help the Comm Server route
incoming calls: regardless of whether a call is addressed to a User ID, an extension number, or an alias, SIPxNano routes the call correctly to the user’s assigned device(s) (see table 2).
Table 2. User IDS and SIP URLs
User information: Dialed SIP URL:
User ID = jsmith sip:jsmith@example.com
Extension = 123 sip:123@example.com
Alias = jane_smith sip:jane_smith@example.com
SIPxNano also stores all extensions in its Extension database. If an end user logs in to a voicemail inbox from
the phone top interface with an extension number, the Media Server uses this database to confirm the log in
data.
If you use extensions to identify users, you can use extension pools to manage the set of usable extensions and
keep track of numbers that have already been assigned to users.
• Extension pools are not hierarchical, and each extension number can only be assigned to a single pool. You
might set up just one pool for your installation, or several pools to reflect different geographical locations,
departments, or other organizational structures.
• When you add a new user, you can supply an extension either by typing in an extension number, or by
choosing the next available extension from a pool. Since SIPxNano extensions must be unique to each user,
using an extension pool can help speed up the assignment and data entry process.
For information on setting up extension pools, see “Extension Pool” on page 24.
Note To prevent certain values from being assigned to users as either extensions or
User IDs, you can place numbers in the “reserved” extension pool. For
example, you can add the extensions that identify the Voicemail and Auto
Attendant applications to the reserved extension pool. If you do so, those
numbers cannot be inadvertently used to identify users.
Users 18
Page 30

SIPxNano IP-PBX Getting Started Guide 3 • Users
Aliases
Unlike User IDs and extensions, SIPxNano aliases do not need to be unique. End users cannot use an alias to
log in to the SIPxNano interface or the phone top interface.
You can set up zero, one, or more aliases for a user. Because they are not unique, you can use an alias to associate a single identifier with several different users. For example, you can assign an alias of “sales” to each of the
users in the sales department.
Note For the entity “sales” to have a dedicated voicemail inbox, you must set up a
separate SIPxNano user with a User ID of sales and a unique extension. An
end user can then use the extension to access voicemail for the sales user.
Another example of an alias is one that resembles an email address, which callers from VoIP phones may find
easier to remember than a phone number. That is, for a user with a SIPxNano User ID of 2435 and an email
address of
dial 2435; callers from SIP phones could dial the SIP URL
erman@example.com, using the correct domain for your SIPxNano server).
rsherman@example.com, you might supply an alias of rsherman. Callers from PSTN phones could
sip:rsherman@SIPxNano.example.com (or sip:rsh-
When you set up an alias for a User ID, SIPxNano automatically adds it to the Alias database. The components
of the Comm Server use the Alias database to route incoming calls.
Users 19
Page 31

SIPxNano IP-PBX Getting Started Guide 3 • Users
Permissions
With the SIPxNano interface for administrators, you authorize or prohibit access to certain system features by
enabling permissions for users or groups of users.
Table 3. Permissions
Feature: Description:
900 Dialing User can dial 900 numbers
Auto Attendant Include this user in the dial by name directory presented by the Auto Attendant
International Dialing User can dial international number
Local Dialing User can dial local numbers
Long Distance Dialing User can dial long distance numbers
Voicemail User has a voicemail inbox and can receive voicemail messages
PSTN forwarding External, PSTN numbers can be defined as forwarding addresses for this user’s
calls
System prompts When logged in to a voicemail inbox from a phone top, user can record system-
wide prompts and greetings
For example, to limit access to 900 numbers, you disable the 900 Dialing permission for most users. Whenever
an end user dials a 900 number, that user’s permissions in the Permission database are checked against the Outbound Authorization database. Only users with the required permission (900 Dialing) enabled are able to
complete calls to those numbers successfully.
The Outbound Authorization database associates permissions with dialed numbers as follows:
Table 4. Outbound Authorization Permissions
To dial: Permission needed for authorization:
911 or sos None
1900xxxxxxx. or 900xxxxxxx. 900 Dialing
1[2-9]xxxxxxxxx. or [2-
Long Distance Dialing
9]xxxxxxxxx.
numbers that start with the interna-
International Dialing
tional dialing prefix
1800xxxxxxx. or 800xxxxxxx.
Local Dialing
1888xxxxxxx. or 888xxxxxxx.
1877xxxxxxx. or 877xxxxxxx.
411
0
00
SIPxNano does not deliver permissions to phones. Instead, SIPxNano incorporates permissions into several
internal databases, including the Permission and Outbound Authorization databases.
Users 20
Page 32

SIPxNano IP-PBX Getting Started Guide 3 • Users
Editing users
After creating a new user, you can adjust certain settings such as call forwarding and permissions.
From the Users page, click on the User ID of the user you’d like to configure settings for.
1. Under Identification on the left side of the screen, there are links to Identification, Call Forwarding, and
Permissions. (You are currently on the Identification screen).
2. To edit the call forwarding settings for a user, click on Call Forwarding > Add Number.
3. Enter your desired instructions for call forwarding, and click OK.
4. To edit specific access rights for a user, click on Permissions.
From this screen, you can add or remove permissions for a specific user by checking or unchecking the
boxes.
Note To change the SIP password, you will need to click on the "Show Advanced
Settings" link to view and modify the SIP password settings.
Filtering users
You can filter users in the users list by using the Filter by... drop-down menu.
The following options are available in the Filter by... menu:
• - all -: Shows all existing users
• - search -: Shows a field where you can enter search terms to filter specific users
• Group: Shows only users in a certain group
Deleting users
To delete a user:
1. From the main menu, click on Users > Users. The user list appears.
2. Click the check box next to the user you want to delete.
3. Click on the Delete button.
4. A confirmation prompt will appear. Click OK.
More Actions
The More actions... drop-down menu is located next to the Delete button. With the More Actions... menu,
you can add users to an existing group.
To use the More Actions... function:
1. Click the check box next to the user you want to add to an existing group.
2. From the More Actions... drop-down menu, select the group you want to add the user to.
3. The page will refresh, and a confirmation message will appear at the top of the screen.
Users 21
Page 33

SIPxNano IP-PBX Getting Started Guide 3 • Users
User Groups
This section covers:
• “Adding User Groups” on page 23
• “Adding Users to a User Group” on page 23
• “Editing User Groups” on page 23
• “Deleting User Groups” on page 23
• “Moving User Groups” on page 23
SIPxNano user groups help you deliver configuration settings to users efficiently; you can create groups of users
through the SIPxNano interface for administrators. When you specify settings for a group, they automatically
apply to all of the members assigned to the group, speeding configuration and making selected features available consistently.
For example, all of the users who are customer service representatives can be grouped together.
Figure 5. User Groups main screen
Since every user in the customer service department uses the same applications, you can assign applications
once, to the Customer Service group, rather than assigning the same applications to each user who works in
that department, individually.
User Groups 22
Page 34

SIPxNano IP-PBX Getting Started Guide 3 • Users
Adding User Groups
To add a new user group:
1. From the main menu, click Users > User Groups > Add Group.
2. Enter a user group name (e.g., CustomerService) in the “Name” field.
The Name of the user group cannot contain any spaces or whitespace characters.
3. Enter a description for the group (optional).
4. Click OK.
The User Groups window displays the group or groups you added in the name column; these group names are
clickable.
Adding Users to a User Group
After adding a user group, you can add users to the group from the Users menu.
For information on how to add existing users to an existing user group, see “More Actions” on page 21.
Editing User Groups
When you add a new group, you are only creating a group - you are not configuring it.
To configure or edit an existing group:
1. From the list on the User Groups screen, click on the name of the group you want to edit.
2. The Group Settings page appears. To enable a setting, check the box next to it. To disable a setting,
uncheck the box next to it.
Note When you created the new group, the group’s settings were automatically set
to the default permissions for user groups.
3. To save your changes, click OK.
Deleting User Groups
To delete a user group:
1. From the list on the User Groups screen, check the box next to the group you want to delete.
2. Click the Delete button.
3. A confirmation prompt will appear. Click OK.
Moving User Groups
On the User Groups page, you can change the order of the user groups in the list.
To move a user group in the user group list:
1. Check the box next to the user group you want to move.
2. Click the Move Up button to move the group closer to the top (click as many times as necessary).
3. Click the Move Down button to move the group closer to the bottom (click as many times as necessary).
User Groups 23
Page 35

SIPxNano IP-PBX Getting Started Guide 3 • Users
Extension Pool
The Extension Pool link allows you to edit the range of extensions that can be used by users.
To edit the Extension Pool:
1. From the main menu, click on Users > Extension Pool.
2. Type the lowest number of the range you desire in the First pool extension field.
3. Type the highest number of the range you desire in the Last pool extension field.
4. Click Apply.
The User Extension Pool page will refresh and a confirmation message will appear at the top.
Figure 6. Configuring the extension pool
Extension Pool 24
Page 36

Chapter 4 Devices
Chapter contents
Overview ...............................................................................................................................................................26
Phones...................................................................................................................................................................26
Adding phones ................................................................................................................................................27
Editing phones ................................................................................................................................................28
Adding lines to an existing phone ..............................................................................................................28
Filtering phones ..............................................................................................................................................30
Deleting phones ..............................................................................................................................................30
Restarting phones ............................................................................................................................................30
Phone Groups .......................................................................................................................................................31
Adding Phone Groups ....................................................................................................................................32
Editing Phone Groups ....................................................................................................................................33
Deleting Phone Groups ..................................................................................................................................34
Moving Phone Groups ....................................................................................................................................34
Gateways ...............................................................................................................................................................35
Adding gateways .............................................................................................................................................35
Editing gateways .............................................................................................................................................36
Deleting gateways ...........................................................................................................................................37
Files.......................................................................................................................................................................38
Adding files .....................................................................................................................................................38
Editing files .....................................................................................................................................................38
Deleting files ...................................................................................................................................................39
Device Profiles.......................................................................................................................................................39
25
Page 37

SIPxNano IP-PBX Getting Started Guide 4 • Devices
Overview
This chapter provides information on SIPxNano devices. Menu options include:
• “Phones” on page 26
• “Phone Groups” on page 31
• “Gateways” on page 35
• “Files” on page 38
Phones
This section covers:
• “Adding phones” on page 27
• “Editing phones” on page 28
• “Filtering phones” on page 30
• “Deleting phones” on page 30
• “Restarting phones” on page 30
You can add or edit phones by accessing the SIPxNano Configuration server interface through a Web browser
and clicking Phones under Devices from the main navigation. The following screen displays:
Figure 7. Phones main screen
Note From this screen you have the ability to Send Profiles to a particular user or
users after selecting the check box to the left of the Phone column and then
pressing the Send Profiles button. Alternatively, you can press the Send All
Profiles button without selecting any checkboxes; profiles are sent to all
phones that are listed.
Overview 26
Page 38

SIPxNano IP-PBX Getting Started Guide 4 • Devices
Adding phones
To set up a phone, you supply a serial number and description, then select a phone model and associate one or
multiple groups with that phone.
To set up a phone:
1. From the main screen, click Devices > Phones > Add Phone.
Figure 8. Adding a new phone
2. Enter the phone’s serial number in the Serial Number field.
3. Enter a description about the phone (i.e., user or lines associated with the phone, phone’s purpose, loca-
tion, etc.).
4. Select a Phone Model.
Note If you cannot find the phone in the Phone Model drop-down list, the phone
is not directly managed through the Configuration Server. Select Unmanaged Phone from the drop-down list.
5. Enter a phone group or groups to associate the phone with in the groups field by choosing a group from
Existing Groups, displayed at the right of the New Phone screen, or create a new group by simply typing
its name into the Groups field on the New Phone screen; the group is automatically created and available
for other additions.
6. Click OK.
Phones 27
Page 39

SIPxNano IP-PBX Getting Started Guide 4 • Devices
Editing phones
The Edit Phone page has links to additional parameters that can be configured for a particular phone.
Note The optional links that you can edit phone settings for are:
Identification, Lines, Date/Time, User Preferences, DTMF, Sound Effects,
Voice/Codecs, Quality of Service, SNTP, RTP, Web Server, Call Handling,
Hold Reminder, Directory Resources, Keys, Basic Logging, Security,
Request, Features, MicroBrowser, SIP Servers, SIP, SIP Settings in DHCP,
Dial Plan, Messaging, and NAT.
To edit the parameters of a particular phone:
1. From the main menu, click on Devices > Phones.
2. From the list of phones, click on the serial number of the phone you want to edit.
Figure 9. List of phones
3. The Edit Phone page will display. You can edit parameters including Serial Number, Description, Phone
Model, and enter or create additional groups. You can also click links at the left-hand side of this screen
and edit additional parameters available for a particular phone (e.g., Lines, Call Handling, Dial Plan, etc.).
Defaults are always set and noted on additional parameter screens. Change parameters accordingly.
4. Click OK.
Adding lines to an existing phone
You can also add a line from the Identification screen by clicking Lines in the Quick Links section, then click
the ‘Add Line’ hyperlink at the top. The Add Line screen displays:
Phones 28
Page 40

SIPxNano IP-PBX Getting Started Guide 4 • Devices
Figure 10. Adding a line to a phone
Perform a search by entering a partial or complete user ID, first and or last name, alias, or description in the
User field and click the Search button. You can switch to an advanced search by clicking the Advanced Search
link, which then becomes the Simple Search link, allowing you to switch back to a simple search. Simple search
is for general broad-based searching or if you are unsure about the user information. Advanced Searching
allows you to quickly find what you are looking for if simple searching returns too much unnecessary information.
Associated matches appear in the table below the Search and Cancel buttons. If the search has returned the
correct user, select that user by selecting the check box to the left of the User ID column and clicking the Select
button.
The Lines page displays with the appearance of a new line for the user selected on the Add Line screen:
Figure 11. Phone lines
Adding a user to the phone adds a line appearance on that phone, managing calls for that user. You can add
users to many phones, including different phone models. Settings regarding how that user is configured on this
particular phone can be set after adding the user.
You can choose to add another line from the lines screen by clicking the Add Line link above the table. You can
add an external line for users not managed by the SIPxNano you are currently working with.
Phones 29
Page 41

SIPxNano IP-PBX Getting Started Guide 4 • Devices
Note From the Lines screen you can also edit the parameters for the associated
phone by clicking a link in the left-hand navigation on the Lines screen.
Filtering phones
You can filter phones in the phones list by using the Filter by... drop-down menu.
The following options are available in the Filter by... menu:
• - all -: Shows all existing users
• - search -: Shows a field where you can enter search terms to filter specific phones
In addition to displaying all phones in the system, you can select a particular group from the Filter by... drop
down menu above the table and display only the phones that are in that group. You can also select -search-
from the Filter by... drop down menu and search for a phone by serial number, model, or description. Addi-
tionally, you can choose to add phones to or remove phones from a particular group at the Phones screen by
selecting -all- or a particular group from the Filter by... drop-down menu, selecting the checkbox next to the
respective phone’s serial number, and selecting the group to add to or remove the phone from in the More
actions... drop down menu below the table.
Deleting phones
To delete a phone:
1. From the main menu, click on Devices > Phones. The phones list appears.
2. Click the check box next to the phone you want to delete.
3. Click on the Delete button.
4. A confirmation prompt will appear. Click OK.
Restarting phones
To restart a phone:
1. From the list of phones on the Phones page, click the box next to the phone you want to restart.
2. Click the Restart button.
3. A confirmation message will appear at the top of the Phones screen.
4. You can check the status of the restart by clicking on Job Status in the Quick Links box on the right, or by
click Diagnostics (on the main menu) > Job Status.
Phones 30
Page 42

SIPxNano IP-PBX Getting Started Guide 4 • Devices
Phone Groups
This section covers:
• “Adding Phone Groups” on page 32
• “Editing Phone Groups” on page 33
• “Deleting Phone Groups” on page 34
• “Moving Phone Groups” on page 34
Groups allow you to organize phones into logical groups. Phones can be in any number of groups. You can add
or edit Phone Groups by accessing the SIPxNano Configuration server interface through a Web browser and
clicking Phone Groups under Devices from the main navigation. The following screen displays:
Figure 12. Phone Groups main screen
From this screen you can edit existing Phone Groups within the table. You can also click the number in an
associated Phone Group Members column to view and edit the phones that are in a particular group. Select the
checkbox to the left of the Name column on the Phone Groups screen and click Delete to delete that particular Phone Group.
Phone Groups 31
Page 43

SIPxNano IP-PBX Getting Started Guide 4 • Devices
Adding Phone Groups
To add a phone group:
1. From the main screen, click on Devices > Phone Groups > Add Group.
Figure 13. Adding a phone group
2. Enter a phone group name (e.g., Support) in the Name field.
The Name of the phone group cannot contain any spaces or whitespace characters.
3. Create a description of this group in the Description field (e.g., Support Group phones).
4. Click OK to save phone group information and return to the Phone Groups screen; click Apply to save
phone group information and remain at the current screen; click Cancel to return to the Phone Groups
screen without saving any of the information you created.
Phone Groups 32
Page 44

SIPxNano IP-PBX Getting Started Guide 4 • Devices
Editing Phone Groups
To edit a phone group:
1. From the main menu, click on Devices > Phone Groups.
2. Click on the name of the phone group you want to edit.
Figure 14. Phone model groups
Note You can also edit the group parameters associated with a phone or set of
phones associated with a particular phone type from the Phone Models
screen by clicking on a specific phone type name in the displayed list.
3. Click Edit Group to edit the group name and/or description.
Figure 15. Editing a phone group
Phone Groups 33
Page 45

SIPxNano IP-PBX Getting Started Guide 4 • Devices
Deleting Phone Groups
To delete a phone group:
1. From the list on the Phone Groups screen, check the box next to the group you want to delete.
2. Click the Delete button.
3. A confirmation prompt will appear. Click OK.
Moving Phone Groups
On the Phone Groups page, you can change the order of the phone groups in the list.
To move a phone group in the phone group list:
1. Check the box next to the phone group you want to move.
2. Click the Move Up button to move the group closer to the top (click as many times as necessary).
3. Click the Move Down button to move the group closer to the bottom (click as many times as necessary).
Phone Groups 34
Page 46

SIPxNano IP-PBX Getting Started Guide 4 • Devices
Gateways
This section covers:
• “Adding gateways” on page 35
• “Editing gateways” on page 36
• “Deleting gateways” on page 37
You can define gateways that the SIPxNano will use to route outbound calls. You can specify gateways to use
for routine calls sepertaely from gateways to use for emergency calls.
To access the Gateways page, click Devices > Gateways.
Adding gateways
To add a gateway:
1. From the Add a new gateway... drop-down menu, select Unmanaged gateway or SIP trunk.
Figure 16. Adding a gateway
2. Enter details for the following options:
– Name: The name of the gateway.
– Address: IP address (example: 10.1.1.1) or a fully qualified hostname (example: gateway.example.com)
– Serial Number (Unamanaged gateway): Serial number contains 12 hexadecimal digits (0-9 and a-f), for
example: 0040214131fa. Usually the serial number is set to the device's MAC address. For an unmanaged gateway, the serial number is only displayed, not used.
– Description: A description of the gateway.
3. Click OK to save and return to the Gateways screen; click Apply to save and remain at the current screen;
click Cancel to return to the Gateways screen without saving any of the information you created.
Gateways 35
Page 47

SIPxNano IP-PBX Getting Started Guide 4 • Devices
Editing gateways
To edit an existing gateway:
1. On the Gateways screen, click on the name of the gateway in the Name column.
2. The Gateway Details screen will appear. Using the links on the left, you can edit the gateway details.
3. Configuration: Edit the name, address, and description of the gateway.
4. Dial Plan: Enter a prefix that will be added to all numbers for calls connected through this gateway.
5. Caller ID: Specify caller ID settings for calls connected through the gateway.
– Default Caller ID: Caller ID used for all the calls connected through this gateway, unless more specific
caller ID is specified for a caller.
– Block Caller ID: If checked, all calls connected through this gateway will have Caller ID blocked, unless
more specific caller ID is specified for the user.
– Ignore user Caller ID: If checked only gateway default caller ID and Block Caller ID options are con-
sider for this gateway.
– Transform extension: If checked gateway will produce Caller ID by transforming user extension. If not
checked caller ID specified on a group level will be used.
– Caller ID prefix: Optional prefix added to caller externsion to create Caller ID.
– Keep digits: Number of extension digits that are kept before adding Caller ID prefix. If caller extension
has more digits than configured here, leading digits are dropped when creating Caller ID.
Figure 17. Caller ID Details for SIP Trunk
Gateways 36
Page 48

SIPxNano IP-PBX Getting Started Guide 4 • Devices
6. Click OK to save and return to the Gateways screen; click Apply to save and remain at the current screen;
click Cancel to return to the Gateways screen without saving any of the information you created.
Deleting gateways
To delete an existing gateway:
1. On the Gateways screen, select the checkbox next to the name of the gateway(s) you want to delete.
2. Click Delete.
Gateways 37
Page 49

SIPxNano IP-PBX Getting Started Guide 4 • Devices
Files
This section covers:
• “Adding files” on page 38
• “Editing files” on page 38
• “Deleting files” on page 39
The files section pertains to various phone files for Polycom SoundPoint phones and Cisco 7940 and 7960
series phones. Device files you can upload include firmware, the directory.xml file for Polycom phones (commonly dialed numbers/speed dialing) and the dialplan.xml file for Cisco 7940 and 7960 series phones (circumvents the need to press the dial button on the phone after entering the dialed number), and ringtones that can
be uploaded into SIPxNano and then distributed to all phones associated with the device name (e.g., Polycom).
Unmanaged TFTP files can also be uploaded. Use the Unmanaged TFTP (Trivial File Transfer Protocol)
option to upload files for phones not listed in the Add files... drop-down menu. You must have a clear understanding of the particular files you can associate with your phones. Reference your phones’ manual for information.
Adding files
1. From the main screen, click on Devices > Files.
Figure 18. Adding a device file
2. Select a file type from the Add files... drop-down menu.
3. Enter the file Name and Description.
4. Click OK.
Editing files
To edit a file:
1. On the Files page, click on the name of the file you want to edit.
2. Make your changes and click OK. The main Files page will display.
3. To activate the file, click the box next to the file name and click the Activate button. Click OK.
4. To deactivate a file, click the box next to the file name and click the Inactivate button. Click OK.
Files 38
Page 50

SIPxNano IP-PBX Getting Started Guide 4 • Devices
Deleting files
To delete a file:
1. From the list on the Files screen, check the box next to the file you want to delete.
2. Click the Delete button.
3. A confirmation prompt will appear. Click OK.
Device Profiles
When you send profiles to IP phones:
• The phones store the newly updated data in configuration files
• New configuration settings do not take effect until the phone restarts
• The Job Status log records the activity (see “Gateways” on page 35)
If the target phone is in use, it will not restart until it is idle. When an idle phone receives new profiles and a
restart request, it displays a message and restarts automatically after approximately one minute.
Note You should plan to send profiles only when call volume is low.
To deliver new configuration settings to a Cisco 7900 series IP phone or a Patton SIP Softphone you send one,
two, or three profiles to that phone (profiles of device or user settings). To access the Send Profiles function:
1. Click on the device link (either Phones, Gateways, or Files) under the Devices link on the main menu.
2. Select the specific path or item from the list and click the Send Profiles button.
A confirmation message will appear at the top of the page. (In this example, the gateway device was used).
Figure 19. Sending profiles
Device Profiles 39
Page 51

Chapter 5 Features
Chapter contents
Overview ...............................................................................................................................................................41
Auto Attendants ....................................................................................................................................................41
Adding auto attendants ...................................................................................................................................42
Editing auto attendants ...................................................................................................................................44
Deleting auto attendants .................................................................................................................................44
Adding auto attendants to Dial Plans ..............................................................................................................44
Setting the Special Auto Attendant .................................................................................................................47
Intercom................................................................................................................................................................48
Configuring intercom .....................................................................................................................................48
Using intercom ...............................................................................................................................................48
Hunt Groups.........................................................................................................................................................49
Adding hunt groups ........................................................................................................................................49
Editing hunt groups ........................................................................................................................................50
Deleting hunt groups ......................................................................................................................................50
Call Park ...............................................................................................................................................................51
Adding Call Park Extensions ...........................................................................................................................51
Editing Call Park Extensions ...........................................................................................................................52
Using Call Park Extensions .............................................................................................................................53
Deleting Call Park Extensions .........................................................................................................................53
Recording .WAV Files (Windows OS) ............................................................................................................53
Music on Hold......................................................................................................................................................55
40
Page 52

SIPxNano IP-PBX Getting Started Guide 5 • Features
Overview
The Feature Management section of the SIPxNano Configuration Server interface allows you to configure and
view SIPxNano settings that directly impact users. Menu options include:
• “Auto Attendants” on page 41
• “Intercom” on page 48
• “Hunt Groups” on page 49
• “Call Park” on page 51
• “Music on Hold” on page 55
Auto Attendants
This section covers:
• “Adding auto attendants” on page 42
• “Editing auto attendants” on page 44
• “Deleting auto attendants” on page 44
• “Adding auto attendants to Dial Plans” on page 44
• “Setting the Special Auto Attendant” on page 47
The Auto Attendant feature allows you to create multiple automatic answering operators within a single SIPxNano system. When a live person is unavailable, callers need to be directed to a specific section of an organization, or there are so many calls that callers must wait in a queue. The routing rules for which menu to use for a
specific number are defined using the Dial Plan functionality of SIPxNano. An auto attendant’s dialing rules
are set within the AutoAttendant dial plan on the AutoAttendant Dialing screen, accessed by clicking Dial
Plans under System from the main navigation and then clicking AutoAttendant from the Name column in
the table on the Dial Plans screen.
Overview 41
Page 53

SIPxNano IP-PBX Getting Started Guide 5 • Features
Adding auto attendants
To set up a new auto attendant:
1. From the main screen, click on Features > Auto Attendants > Add Attendant.
Figure 20. Adding an auto attendant
2. Enter a name for the Auto Attendant in the Name field.
3. Enter a description in the Description field.
4. Select a standard prompt (i.e., autoattendant.wav, afterhours.wav) using the Prompt section’s ‘select...’
drop-down menu, or record and upload an Auto Attendant prompt using the Prompt section’s Browse...
button.
Prompts can be recorded from any phone connected to the SIPxNano voicemail system and are immedi-
Auto Attendants 42
Page 54

SIPxNano IP-PBX Getting Started Guide 5 • Features
ately selectable from the Prompt drop-down list after they are recorded. You can click Listen to listen to a
standard prompt after you make your selection or browse to upload a new prompt.
Note Prompts must be recorded in .wav file format (mono mode with
8kHz sampling rate and 16 bit PCM wave format). For more information on recording .wav files see “Recording .WAV Files (Windows
OS)” on page 53.
Note The Listen link only appears after you have made a selection from
the Prompt section ‘select...’ drop-down menu, or after you have
browsed to and uploaded a custom prompt that you recorded.
5. Set the Inter-DTMF Timeout value. The default is set to 3.
(The Inter-DTMF Timeout is the time to wait between each dialpad key before interpreting a user's
request. This value cannot be greater than the Overall DTMF Timeout).
6. Set the Overall DTMF Timeout value. The default is set to 7.
(The Overall DTMF Timeout is the total time to wait before interpreting a user's request).
7. Set the Maximum Number of DTMF tones value. The default is set to 10.
(The Maximum Number of DTMF tones is the maximum number of dialpad keys to accept before inter-
preting a user's request).
8. Enter a transfer extension in the Transfer Extension field of the Invalid Response section, and choose to
transfer calls, or not, using the Transfer the Call checkbox.
(The settings in the Invalid Response section determine what happens to a call after three invalid system
responses or when a timeout occurs while waiting for a response).
9. Create dialpad actions that are associated with the auto attendant you are creating by editing actions from
the Dialpad column drop-down lists.
You can remove a dialpad action by selecting its associated checkbox and clicking Remove. You can add
new dialpad actions by selecting an action from the drop-down list in the action column, defining a
numeric or character driven action, and clicking Add to add it to the dialpad action table.
10. Click OK to save auto attendant information and return to the Auto Attendants screen; click Apply to
save auto attendant information and remain at the current screen; click Cancel to return to the Auto
Attendants screen without saving any of the information you created.
Note Defaults for all fields in both the DTMF Handling section and the Invalid
Response section are noted to the right of the respective fields. They can also
be changed by clicking the Defaults link next to the Add Attendant link on
the Auto Attendants screen. Customized defaults are set automatically when
you create a new Auto Attendant.
Auto Attendants 43
Page 55

SIPxNano IP-PBX Getting Started Guide 5 • Features
Editing auto attendants
To edit an existing auto attendant:
1. From the main screen, click on Features > Auto Attendant.
2. On the Auto Attendants screen, click on the name of the auto attendant you want to edit.
3. From this screen, you can edit any of the settings you previously set for this particular auto attendant.
4. To save your changes, click the OK button.
Deleting auto attendants
To delete an auto attendant:
1. From the main screen, click on Features > Auto Attendants.
2. Check the box next to the auto attendant that you want to delete.
3. Click the Delete button. A confirmation prompt will appear. Click OK.
Adding auto attendants to Dial Plans
Your newly created auto attendant must be added to Dial Plans.
To add an auto attendant to Dial Plans:
1. From the main screen, click System > Dial Plans.
2. Click the Add Dial Rules link near the top of the screen.
Figure 21. Adding a dialing rule
Auto Attendants 44
Page 56

SIPxNano IP-PBX Getting Started Guide 5 • Features
3. Select Attendant from the Dialing Rule Type drop-down list and click Next.
Figure 22. Editing the auto attendant dialing rule
4. Select the Enabled check box.
5. Enter a Name for the auto attendant dial plan.
6. Enter a description for the dial plan.
7. Enter the auto attendant’s extension in the Extension field.
8. Enter any attendant aliases in the Attendant Aliases field.
9. Select a default attendant to be used when the working time attendant or holiday attendant are not appli-
cable (e.g., after normal business hours) from the Default Attendant drop-down menu.
10. Select an attendant to be played during normal business hours form the Working Time Attendant drop-
down menu. When you make a selection from this drop-down menu, a settings form displays (shown
next) where you can set the days of the week/weekends and timeframes during which the Working Time
Attendant should be played.
11. Select an attendant to be played during holidays from Holiday Attendant drop-down menu.
When you make a selection from this drop-down menu, an Add Holiday link displays. When you click
Add Holiday, a form field displays with the current date selected. You can set the current day by moving
on to step 12 or you can click the calendar icon to the right of the form field and select a different day as
well as moving on to a different month. Click Add Holiday again to add more days during which time the
holiday attendant should be played. You can delete days by clicking Delete Holiday next to a respective
form field.
Auto Attendants 45
Page 57

SIPxNano IP-PBX Getting Started Guide 5 • Features
Figure 23. Setting up the holiday attendant
12. Click OK to save auto attendant dial plan information and return to the Dial Plans screen; click Apply to
save auto attendant dial plan information and remain at the current screen; click Cancel to return to the
Dial Plans screen without saving any of the auto attendant dial plan information you created.
Note Dial plans are sensitive to order. You may want to move the AutoAt-
tendant dial plan closer to the bottom of the dial plans list.
13. On the Dial Plans screen, select your newly created dial plan for the auto attendant and click Activate in
the Dial Plan Activation section. A confirmation screen will appear. Click OK.
Figure 24. Activating dial plans
Auto Attendants 46
Page 58

SIPxNano IP-PBX Getting Started Guide 5 • Features
Setting the Special Auto Attendant
You can use the Special Auto Attendant feature to temporarily overwrite auto attendant configuration. By
default, the auto attendant is selected based on the auto attendant dialing rules. If the Special Auto Attendant
is activated, it is used to handle all calls.
To set up the Special Auto Attendant:
1. From the main screen, click on Features > Auto Attendants.
2. In the Special Auto Attendants section on the Auto Attendants screen, click on ‘Use special auto atten-
dant.’
3. Choose an auto attendant from the ‘select...’ drop-down menu.
4. Click Apply.
Figure 25. Setting up the special auto attendant
To turn the Special Auto Attendant off:
1. From the main screen, click on Features > Auto Attendants.
2. In the Special Auto Attendants section on the Auto Attendants screen, click on ‘Use auto attendant con-
figured in dial plan.’
3. Click Apply.
Auto Attendants 47
Page 59

SIPxNano IP-PBX Getting Started Guide 5 • Features
Intercom
The Intercom feature is supported only if a Polycom phone is receiving the call, while Intercom calls can be
initiated by any phone by dialing the proper intercom prefix.
Figure 26. Configuring the intercom feature
Configuring intercom
1. Create a new phone group that only contains the Polycom phones that should be configured to answer
phones automatically. (For more information on creating phone groups, see “Phone Groups” on page 31).
2. From the main screen, click Features > Intercom.
3. Enter the group name in the Groups field. Use spaces to separate multiple group names.
Note The Intercom feature is only enabled for Polycom phones at the
receiving end of the call that are members of the groups listed.
4. Check the Enabled box.
5. In the Intercom prefix field, enter the desired prefix that needs to be dialed before the extension in order
for the phone to answer the call automatically.
6. In the Ring time field, enter how many seconds the phone is going to ring before automatically answering.
To configure the phone to answer the call immediately, enter “0’ as the Ring time.
7. Click Apply.
Changes to to the Intercom page require re-activating the dial plan and re-sending configuration profiles to the
affected phones.
Using intercom
To use the intercom feature, dial the Intercom prefix, then the extension of the phone.
Intercom 48
Page 60

SIPxNano IP-PBX Getting Started Guide 5 • Features
Hunt Groups
This section covers:
• “Adding hunt groups” on page 49
• “Editing hunt groups” on page 50
• “Deleting hunt groups” on page 50
Hunt Groups allow you to set up an extension that encompasses a group of users. When a hunt group extension is dialed, such as 400, a group of users associated with this master extension fall into a call sequence. You
can dial all the users within the hunt group simultaneously or set them up in a successive format so that when
there is no response by one user, another user is dialed. You can also define the initial user to dial in the hunt
group.
Adding hunt groups
To create a hunt group:
1. From the main screen, click Features > Hunt Groups > Add Hunt Group.
Figure 27. Adding a hunt group
2. Click the Enabled box to enable the hunt group.
3. Enter a name for the hunt group in the Name field
4. Enter an extension for the hunt group in the Extension field.
5. Create the call sequence for this hunt group by clicking Add User. Use the search bar to find the user you
want to add to the hunt group. Click the box next to the user(s) you want to add, and click Select.
6. On the Hunt Groups screen, define the hierarchy of users by selecting an associated user’s check box and
clicking Move Up or Move Down. You can also delete a user from a hunt group by selecting the user’s
associated checkbox and clicking Delete.
Hunt Groups 49
Page 61

SIPxNano IP-PBX Getting Started Guide 5 • Features
7. Click OK to save hunt group information and return to the Hunt Groups screen; click Apply to save hunt
group information and remain at the current screen; click Cancel to return to the Hunt Groups screen
without saving any of the user information you created.
Editing hunt groups
To edit an existing hunt group:
1. From the main screen, click on Features > Hunt Groups.
2. On the Hunt Groups screen, click on the name of the hunt group you want to edit.
3. From this screen, you can add more users to the group, delete users from the group, or edit any of the set-
tings you previously set.
4. To save your changes, click the OK button.
Deleting hunt groups
To delete a hunt group:
1. From the main screen, click on Features > Hunt Groups.
2. Check the box next to the hunt group that you want to delete.
3. Click the Delete button. A confirmation prompt will appear. Click OK.
Hunt Groups 50
Page 62

SIPxNano IP-PBX Getting Started Guide 5 • Features
Call Park
This section covers:
• “Adding Call Park Extensions” on page 51
• “Editing Call Park Extensions” on page 52
• “Using Call Park Extensions” on page 53
• “Deleting Call Park Extensions” on page 53
• “Recording .WAV Files (Windows OS)” on page 53
The Call Park feature, when enabled by selecting the Enabled check box on the Call Park Extension screen,
provides the ability to transfer calls to call park extensions In the transfer state, the caller hears background
music while waiting for someone to pick up at the extension. Calls can be retrieved by pressing *4 followed by
the extension number. Select a music file, or upload new files to provide background music while calls are
parked.
Adding Call Park Extensions
1. From the main screen, click Features > Call Park > Add Call Park Extension.
Figure 28. Adding a call park extension
2. Select the Enabled checkbox.
3. Enter a name for the call park extension in the Name field.
Call Park 51
Page 63

SIPxNano IP-PBX Getting Started Guide 5 • Features
4. Enter an extension in the Extension field.
5. Enter a description in the Description field.
6. Select background music from the Background Music drop-down list. If there are no files to select or you
want to upload new background music, click Browse and upload new music. You can create .wav files to
upload as background music. For information on recording .wav files see “Recording .WAV Files (Win-
dows OS)” on page 53.
7. Listen to background music that you have selected by clicking Listen.
(Ensure that your headphones or PC speakers are turned on to listen).
8. If desired, click the Enable time-out checkbox. If enabled, the call will automatically be transferred back to
the extension that parked the call once the time specified in the Park time-out field has elapsed. Click the
Show Advanced Settings link to set Park time-out.
9. If desired, click the Allow multiple calls checkbox. If enabled, more than one call can be parked on the
orbit at the same time. Calls are retrieved in the order in which they were parked.
10. If desired, click the Allow transfer checkbox. If checked, callers put on park are able to transfer the call
back to the extension that parked the call by pressing 0. To configure a new Transfer key, click the Show
Advanced Settings link.
11. Click OK to save your changes and return to the Call Park screen; Or, click Cancel to return to the Call
Park screen without saving changes. Click Apply to save changes and remain at the Call Park Extension
screen.
Editing Call Park Extensions
To edit a call park extension:
1. From the main screen, click Features > Call Park.
2. On the Call Park screen, click on the name of the call park you want to edit.
3. Make any necessary edits such as selecting or uploading new background music.
Select background music from the Background Music drop-down list. If there are no files to select or you
want to upload new background music, click Browse and upload new music. You can create .wav files to
upload as background music. For information on recording .wav files see “Recording .WAV Files (Win-
dows OS)” on page 53.
Listen to background music that you have selected by clicking Listen.
(Ensure that your headphones or PC speakers are turned on).
4. Click OK to save your changes and return to the Call Park screen; Or, click Cancel to return to the Call
Park screen without saving changes. Click Apply to save changes and remain at the Call Park Extension
screen.
Call Park 52
Page 64

SIPxNano IP-PBX Getting Started Guide 5 • Features
Using Call Park Extensions
To park a call:
1. Transfer the caller to the enabled call park extension (see “Adding Call Park Extensions” on page 51).
To access a call on a call park extension:
1. Dial *4 + <Call Park Extension>. For example, if the call park extension is 401, to pick up the call that is
parked, you will dial *4401.
Deleting Call Park Extensions
To delete a call park extension:
1. From the main screen, click on Features > Call Park.
2. Check the box next to the call park extension that you want to delete.
3. Click the Delete button. A confirmation prompt will appear. Click OK.
Recording .WAV Files (Windows OS)
WAV files are recorded, uploaded, and set in SIPxNano for the following reasons:
• Auto Attendant Prompts
• Call Park Background Music
All .wav files must be recorded in mono mode with an 8kHz sampling rate and 16 bit PCM wave format.
To record .wav files using a Windows PC:
1. Select Start > All Programs > Accessories > Entertainment > Sound Recorder.
Figure 29. Windows Sound Recorder
Call Park 53
Page 65

SIPxNano IP-PBX Getting Started Guide 5 • Features
2. From the file menu, select Properties.
Figure 30. Properties for sound
3. Click Convert Now.
Figure 31. Sound Selection properties
4. Select PCM from the Format drop-down list.
5. Select 8.000 kHz, 16 Bit, Mono from the Attributes drop-down list.
6. Click Save As... and save the .wav file to a location you can navigate to from the SIPxNano Configuration
server. Browse from the Auto Attendant and Call Park sections of the Configuration server to locate .wav
files that you have recorded and upload them to SIPxNano.
Call Park 54
Page 66

SIPxNano IP-PBX Getting Started Guide 5 • Features
Note If you use another recording device to record .wav files, ensure that the files
are recorded in mono mode with an 8kHz sampling rate and 16 bit PCM
wave format, and that you save the files to a location that is accessible from
the SIPxNano Configuration server (e.g., a network location that you can
browse to).
Music on Hold
The Music on Hold feature is supported for all phones that implement the Music on Hold service IETF draft.
Figure 32. Configuring Music on Hold
To configure the Music on Hold feature:
1. From the main screen, click Features > Music on Hold.
2. Choose a .wav file from the drop-down menu, or click Browse to upload a new .wav file.
(For more information on .wav files, see “Recording .WAV Files (Windows OS)” on page 53).
3. Click Apply.
Music on Hold 55
Page 67

Chapter 6 System
Chapter contents
Overview ...............................................................................................................................................................57
Dial Plans..............................................................................................................................................................57
Adding dial rules .............................................................................................................................................58
Editing and deleting dial rules .........................................................................................................................58
Activating dial rules .........................................................................................................................................59
Setting up emergency routing .........................................................................................................................59
Permissions............................................................................................................................................................60
Adding permissions .........................................................................................................................................60
General..................................................................................................................................................................61
SIP Parameters ................................................................................................................................................61
Voice Mail ......................................................................................................................................................62
Call Pickup .....................................................................................................................................................63
Presence Server ................................................................................................................................................64
Logging ...........................................................................................................................................................65
Call Detail Records (CDRs) ............................................................................................................................66
Import...................................................................................................................................................................67
Importing CSV files ........................................................................................................................................67
LDAP....................................................................................................................................................................68
Configuring the LDAP server .........................................................................................................................68
Import LDAP .................................................................................................................................................69
Backup ..................................................................................................................................................................70
Performing a backup .......................................................................................................................................70
Scheduling backups .........................................................................................................................................71
Restoring the system .......................................................................................................................................71
Domain.................................................................................................................................................................72
Managing domain ...........................................................................................................................................72
Domain aliases ................................................................................................................................................72
56
Page 68

SIPxNano IP-PBX Getting Started Guide 6 • System
Overview
The System Management section of the SIPxNano Configuration Server interface allows you to configure and
view SIPxNano settings that impact SIPxNano behind the scenes (not directly apparent to users) and are
important to administrators for monitoring system performance status as well as providing the ability to take
precautionary measures in backing up the system. Menu options include:
• “Dial Plans” on page 57
• “Permissions” on page 60
• “General” on page 61
• “Import” on page 67
• “LDAP” on page 68
• “Backup” on page 70
• “Domain” on page 72
Dial Plans
This section covers:
• “Adding dial rules” on page 58
• “Editing and deleting dial rules” on page 58
• “Activating dial rules” on page 59
• “Setting up emergency routing” on page 59
You define system dial plans to establish how SIPxNano will route incoming and outgoing calls. SIPxNano
uses these dial plans to route calls to:
• Internal and external call routing
• Voicemail
• Auto Attendant
• Local number dialing
• International number dialing
Overview 57
Page 69

SIPxNano IP-PBX Getting Started Guide 6 • System
Adding dial rules
To add a dial rule:
1. Click System > Dial Plans > Add Dial Rules.
Figure 33. Add dialing rule
2. From the Add Dialing Rule drop-down menu, select the type of dialing rule you want to add.
3. Click the Enabled box.
Make sure that you select the Enabled check box on the associated dialing rule’s screen before saving an
added or modified dial plan.
4. Type a name for the dialing rule in the Name field.
5. Type a description of the dialing rule in the Description field.
6. Each dialing rule has different parameters that need to be set up that are specific to that type of dialing
rule. Enter your desired values for your specific dial rule.
7. If you desire, you may add a new or existing gateway by clicking on the respective gateway link.
8. Click OK.
9. On the main Dial Plans screen, click the box next to the name of the dialing rule you want to activate.
10. Click the Activate button under Dial Plan Activation.
11. A confirmation screen will appear. Click OK.
Editing and deleting dial rules
You can edit an existing dial plan by clicking on its name in the name column on the Dial Plans screen. You
can also duplicate and modify a plan (e.g., create two different local dial plans with separate parameters by
selecting the existing plan’s associated checkbox and clicking Duplicate), delete dial plans by selecting the
checkbox to the left of the dial plan name column and clicking Delete, and organize the order that your dial
plan list appears by selecting a respective dial plan’s checkbox and clicking the Move Up or Move Down buttons.
Note The order of dial rules is very sensitive. Be sure to put the primary Dial Rule
at the top of the list, and continue organizing the list of dial rules in that
manner. (For example, the AutoAttendant dial rule should be near the bottom of the list, and the Local and Long Distance dial rules should be near
the top of the list).
Dial Plans 58
Page 70

SIPxNano IP-PBX Getting Started Guide 6 • System
Note The AutoAttendant dial rule should never be at the top of the Dial Rules
list because it will catch all the other dial plans and prevent calls out.
Activating dial rules
When you have completed your dial plan configurations, select the respective dial plan’s checkbox on the Dial
Plans page and click Activate in the Dial Plan Activation section to activate the dial plan(s) or Revert to dis-
card all changes made to a dial plan.
Setting up emergency routing
You should only use this feature if your phone does not support direct forwarding. If this feature is enabled, all
emergency calls are forwarded to the default gateway. Optionally, you can configure a set of phone numbers to
be forwarded to an alternative gateway
1. From the main screen, click System > Dial Plans, and then click Emergency from the Name column on
the Dial Plans screen.
Figure 34. Emergency dialing
2. Enter the emergency number in the Emergency Number field (in the Details section).
3. Select a gateway from the Gateway list.
4. Click OK to save emergency routing information and return to the Emergency Dialing screen; click Apply
to save emergency routing information and remain at the current screen; click Cancel to return to the
Emergency Dialing screen without saving any of the routing information you created.
Dial Plans 59
Page 71

SIPxNano IP-PBX Getting Started Guide 6 • System
Permissions
To access the Permissions page, click System > Permissions.
Permissions defined on the Permissions page under System can be used when defining dialing plan rules.Built-
in permissions cannot be changed or removed. You can enable and disable permissions for User and User
Groups. (For more information on setting permissions for specific users, see “Permissions” on page 20 in
Chapter 3, “Users” ).
Table 5. Default Permissions
Feature: Description:
900 Dialing User can dial 900 numbers
Attendant Directory List user in Auto Attendant
Forward Calls External User can forward calls to external numbers
International Dialing User can dial international numbers
Local Dialing User can dial local numbers
Long Distance Dialing User can dial long distance numbers
Mobile Dialing User can dial mobile numbers
Record System Prompts User can record system prompts
Toll Free User can dial toll free numbers
Voicemail User has a voicemail inbox and can receive voicemail messages
Adding permissions
Figure 35. Adding a permission
To add a permission:
1. Click System > Permissions. Then, click on the Add Permission hyperlink.
2. Enter a name for the permission in the Name field. The Permission name is displayed on the User Cal Per-
mission screen and on the Dial Rule edit screen.
3. Enter a description for the permission in the Description field.
4. Check the Default value box to enable the new permission by default.
5. Click Apply, then OK.
Permissions 60
Page 72

SIPxNano IP-PBX Getting Started Guide 6 • System
General
This section covers:
• “SIP Parameters” on page 61
• “Voice Mail” on page 62
• “Call Pickup” on page 63
• “Presence Server” on page 64
• “Logging” on page 65
• “Call Detail Records (CDRs)” on page 66
To access the General screen, click System > General. General configuration of SIPxNano includes SIP
paramters, voicemail, call pickup, presence server, logging changes and settings, and call detail records (CDRs).
Note When you click Apply after making changes to the sections under General,
the Restart Services screen will display. You can click Continue and restart
SIPxNano services or if the work you are currently performing requires you
to continue without restarting services, you can select the Do Not Restart
Services Now checkbox. In either case, services must be restarted at some
point for the Configuration changes to take effect, but settings will be saved
until that time.
SIP Parameters
To display editable SIP Parameters, click on the Show Advanced Settings link. You can edit the following:
Figure 36. SIP Parameters
• Default Serial Fork Expiration: Number of seconds that each phone in a sequential series is allowed to ring
with no answer before the next alternative is tried. The most common case for this is a user with one phone
and a voice mailbox - the phone will ring for this many seconds and then roll over to voice mail. The default
value is 20.
• Default Expiration: Number of seconds a call is allowed to go unanswered; if this many seconds pass, the
call request is returned with an error. The default value is 180.
General 61
Page 73

SIPxNano IP-PBX Getting Started Guide 6 • System
Voice Mail
The Voice Mail section under General has configurable fields including: VoiceMail expiration (which defines
the number of days voicemail messages should remain on the system before they are deleted) and Maximum
internal extension length (which defines the longest internal extension allowed in the system dialing plan). This
is pertinent to the auto attendant prompt for determining whether a user has entered the entire extension.
For more information about Voice Mail, see Chapter 8, “Voicemail” on page 78.
Figure 37. Voicemail settings in the General menu
The settings you can configure are:
• VoiceMail expiration: Number of days voice mail messages will be kept in the system. (Default = 7)
• Maximum internal extension length: Longest internal extension in the system dialing plan. When a user is
prompted by auto attendant to enter an extension, this value is used to determine if the entire extension has
been entered. (Default = 3).
• SMTP server: IP address or DNS name of SMTP server used for Voice Mail notification. (No default).
General 62
Page 74

SIPxNano IP-PBX Getting Started Guide 6 • System
Call Pickup
Enter dialing codes for global call pickup, directed call pickup, and call park retrieve. Click Show Advanced
Settings enter the setting for Call Pickup Timeout, in seconds, that the original call will ring after the pickup
code is dialed.
Figure 38. Call pickup
The settings you can configure are:
• Global pickup code: Code to dial to pick up a ringing call on any phone. Set it to empty to disable global
call pickup. (Default = *78*)
• Directed call pickup code: Code to dial to pick up a ringing call on a specific phone. To pick up extension
123, dial this code followed by 123. (Default = *78).
• Call park retrieve code: Code to dial to retrieve a parked call. Dial this code followed by a call park exten-
sion to pick up a parked call. (Default = *4).
• Call pickup timeout (Advanced Setting): Number of seconds that the original call will ring after the pickup
code is dialed. (Default = 2).
General 63
Page 75

SIPxNano IP-PBX Getting Started Guide 6 • System
Presence Server
This server determines the code that people use to log in and out of the system at phones. The default login is
*88 and the default logout is *86, but you can change these based on your requirements.
Figure 39. Presence server
The settings you can configure are:
• Presence sign in: Code to dial to sign in to the presence monitor. (Default = *88)
• Presence sign out: Code to dial to sign out from the presence monitor. (Default = *86).
• SIP port (Advanced Setting): The IP port on which the presence server listens to SIP messages.
(Default = 5130).
• Presence server location (Advanced Setting): Presence server XML-RPC API port. (Default = 8111).
Note To view Advanced Settings, click on the ‘Show Advanced Settings’ link.
General 64
Page 76

SIPxNano IP-PBX Getting Started Guide 6 • System
Logging
Logging parameters set here determine the level of log detail for associated components, including Authorization Proxy, Proxy, Registrar, Park Server, Status Server, and the Presence Server.
Figure 40. Logging
The settings you can configure are:
• Authorization Proxy Log Level: Authorization and permission handling. (Default = NOTICE)
• Proxy Log Level: Dispatching of SIP traffic. (Default = NOTICE).
• Registrar Log Level: Handling of phones registering for calls. (Default = NOTICE).
• Park Server Log Level: Handling of calls getting parked and picked up. (Default = NOTICE).
• Status Server Log Level: Handling of SUBSCRIBE/NOTIFY messages for voicemail notification control
(MWI). (Default = NOTICE).
• Presence Server Log Level: Monitoring presence events. (Default = NOTICE).
Note If you use ‘DEBUG’, be sure to change the ‘DEBUG’ value back to
‘NOTICE’ when you are done using it. Leaving a logging parameter set at
‘DEBUG’ for an extended period of time will cause severely adverse effects
on system performance.
General 65
Page 77

SIPxNano IP-PBX Getting Started Guide 6 • System
Call Detail Records (CDRs)
Call Detail Records capture information about calls handled by your SIPxNano ECS system. They can be used
for billing and cost accounting.
Figure 41. Call Detail Records (CDR)
The settings you can configure are:
• Create CDRs Daily: Schedule the call resolver to create CDRs daily. If you enable this setting, then you
should also enable call state event (CSE) logging for the forking proxy and authorization proxy, since CDRs
are created from CSEs. (Default = unchecked)
• Log Forking Proxy Events: Log forking proxy CSEs to the CDR database. (Default = unchecked).
• Log Authorization Proxy Events: Log authorization proxy CSEs to the CDR database.
(Default = unchecked).
• Purge the CDR Database Daily: Schedule a daily purge of the CDR database. Purge both CSEs and
CDRs. (Default = checked).
• Purge Age for CDRs: If daily purging is enabled, then remove CDRs older than this (in days).
(Default = 35).
• Purge Age for CSEs (Advanced Setting): If daily purging is enabled, then remove CSEs older than this (in
days). (Default = 7).
• Call Resolver Log Level: Log level for the call resolver. The call resolver is the program that creates CDRs.
(Default = NOTICE).
• Call Direction (Advanced Setting): Compute call direction. Call direction labels calls as incoming, outgo-
ing, or intranetwork based on whether the call came from a PSTN gateway, went to a PSTN gateway, or
neither, respectively. (Default = unchecked).
General 66
Page 78

SIPxNano IP-PBX Getting Started Guide 6 • System
Import
You can generate a comma separated values file (CSV) by exporting data from your favorite spreadsheet application (e.g., Microsoft Excel).
Figure 42. Importing CSV files
Importing CSV files
1. From the main screen, click System > Import.
2. Click Browse to select the CSV file you want to import.
The CSV file should have a title line and the following fields:
– User Name
– Voicemail PIN
– SIP Password
– First Name
– Last Name
– User Alias
– User Group
– User’s Phone Serial Number
– User’s Phone Manufacturer
– User’s Phone Model
– User’s Phone Group
– User’s Phone Description
3. Click Import.
Each line from an imported file results in the creation of the phone and the user assigned to that phone. If the
user group or phone group fields are not already in the system, the user and phone groups are created when the
CSV file is imported and the associated users and phones are placed in those groups.
Import 67
Page 79

SIPxNano IP-PBX Getting Started Guide 6 • System
LDAP
Lightweight Directory Access Protocol (LDAP) can be used to import information on users and their
attributes. Currently, LDAP on the SIPxNano works only with OpenLDAP. Before you can import LDAP, you
must first configure the LDAP server.
Configuring the LDAP server
To configure the LDAP server:
1. Click on System > LDAP. Then, click on the LDAP Server link under Quick Links.
Figure 43. LDAP Server link
2. On the LDAP Server screen, enter the following information:
• Host: Enter the IP address of the name of the host on which the LDAP server is running.
• Port: Enter the port number on which the LDAP server is listening for requests.
The default port number is 389.
• User: Enter the distinguished name of the user to bind to the LDAP directory. Leave this field empty is
accessing anonymously.
• Password and Confirm Password: Enter and re-enter the password for simple authentication.
3. Click Continue.
4. On the LDAP attribute mapping configuration screen, the following fields can be mapped:
Table 6. LDAP Mapping Fields
Field LDAP Attribute Description
user id uid This field is required.
A unique user identification. A user’s extension can be used, or
other identifiers can be used.
firstname gn User’s first name.
lastname sn User’s last name.
aliases telephoneNumber Multiple attributes can be mapped to this field. Any values
that are not unique will be dropped.
Voicemail PIN - Secret personal identification number used by user to access
voice mail.
SIP Password - The password used by the phone to register with the SIPx-
Nano. You have the option to: a) map this field to the LDAP
attribute, b) set the initial value for all fields, or c) let SIPx-
Nano randomly generate a value.
Group - Multi-value attribute containing user group name.
LDAP 68
Page 80

SIPxNano IP-PBX Getting Started Guide 6 • System
Import LDAP
To setup an LDAP import:
Figure 44. Import LDAP
1. From the main screen, click System > LDAP.
2. Click Preview to see the example of the user imported from the LDAP server. Click OK.
If you receive an error, then the LDAP server is configured incorrectly and you will need to fix the server
settings. See “Configuring the LDAP server” on page 68.
3. On the Import LDAP screen, click Import. Click Job Status under Quick Links to monitor the import.
4. To enable periodic imports from LDAP, click the Enable periodic import from LDAP checkbox. Choose
the timing of the periodic imports from the drop-down menu, then click Apply.
LDAP 69
Page 81

SIPxNano IP-PBX Getting Started Guide 6 • System
Backup
This section covers:
• “Performing a backup” on page 70
• “Scheduling backups” on page 71
• “Restoring the system” on page 71
System administrators should regularly create backup copies of the SIPxNano data files so that site-specific
SIPxNano data can be readily restored in the event of a disk failure or other loss of data. Administrators can
back up configuration and profile information as well as voicemail.
Performing a backup
To perform a backup:
1. From the main screen, click System > Backup.
Figure 45. Backing up system files
2. Under Files, check the boxes next to the files you want to backup.
3. From the drop-down menu, select the Number of backups to keep.
Backup 70
Page 82

SIPxNano IP-PBX Getting Started Guide 6 • System
4. Click the Backup Now button.
A message is displayed below the Backup Now button indicating whether the backup completed successfully or not. If the backup is successful, you can download the archived data by clicking the displayed
directory path links, which can include backup-configs/fs.tar.gz, backup-configs/pds.tar.gz, and backup-mail-
store/mailstore.tar.gz.
Figure 46. Successful backup
Note SIPxNano backup files should be stored on media or a machine other than
the SIPxNano server.
Scheduling backups
In addition to performing a manual backup, you can schedule backups.
To schedule a backup:
1. From the main screen, click System > Backup.
2. Select the Schedule checkbox (next to the ‘Every day’ menu).
3. Select a specific day or every day from the ‘Every day’ drop-down menu, and enter the time you want to
backup.
4. Click OK.
Restoring the system
Before restoring the system, transfer the backup files from the media or storage machine back to the relative
folder, either backup-configs or backup-mailstore.
To restore the system:
1. In a command-line prompt, type restore-configs.sh.
This will restore files from the fs.tar.gz and pds.tar.gz files.
2. To restore voicemail data, in a command-line prompt, type restore-mailstore.sh.
This will restore files from the mailstore.tar.gz file.
Note The restore files must be started from the proper directory or you will cor-
rupt the system. For example, voicemails must be restored from the voicemail directory, etc..
Backup 71
Page 83

SIPxNano IP-PBX Getting Started Guide 6 • System
Domain
To access the Domain page, click System > Domain.
Note If the Domain Name setting is changed in a production system, all the
phone profiles have to be regenerated. Use with caution.
Managing domain
The domain name field contains the domain name for handling SIP. If DNS SRV is not configured to send all
SIP traffic to the SIP Proxy on the machine, enter the FQDN (Fully Qualified Domain Name).
Figure 47. Managing the domain name
Note This is the domain responsible for handling SIP. Enter the fully qualified
host name if DNS SRV is not configured to send all SIP traffic to the SIP
proxy on this machine. This controls how SIP addresses are built and used
through the system. For example, sip:user@old-value becomes
sip:user@new-value. Changing this value can have various side effects
depending on how your system is setup.
Domain aliases
Domain Aliases can be defined to allow the SIP server to be responsible for several domain names. The alias
can be of the form of a fully qualified name or an IP address. If DNS SRV records are present for more than
one domain name, then these domain names can also be entered as alias.
Figure 48. Adding a domain alias
To add a domain alias, click the Add Alias link, then enter a name in the Alias field and click Apply.
Click the Remove link to remove a domain alias.
Domain 72
Page 84

Chapter 7 Diagnostics
Chapter contents
Overview ...............................................................................................................................................................74
Registrations..........................................................................................................................................................74
Viewing registrations .......................................................................................................................................74
Job Status ..............................................................................................................................................................75
Viewing the job status log ...............................................................................................................................75
Clearing the job status log ...............................................................................................................................75
Services..................................................................................................................................................................76
Snapshot................................................................................................................................................................77
73
Page 85

SIPxNano IP-PBX Getting Started Guide 7 • Diagnostics
Overview
This chapter provides information on SIPxNano diagnostics. Menu options include:
• “Registrations” on page 74
• “Job Status” on page 75
• “Services” on page 76
• “Snapshot” on page 77
Registrations
From the Registrations screen, you can monitor all phones registered with SIPxNano as well as showing or
hiding primary registrar by clicking on that link in its current state.
Figure 49. Registrations
Viewing registrations
To view active registrations:
1. From the main screen, click Diagnostics > Registrations.
2. Click Refresh.
If you have high availability configured then you can display an additional Primary Registrar column. It contains the name of the registration server that handled the initial registration for a contact.
Overview 74
Page 86

SIPxNano IP-PBX Getting Started Guide 7 • Diagnostics
Job Status
When you send profiles to managed phones, the Job Status log records and displays information, including the
date and time of your request and its status.
Figure 50. Job Status log
Viewing the job status log
To view the job status log:
1. From the main menu, click Diagnostics > Job Status.
If the Configuration server is in the process of running a job, you can view its Job Name, Start Time, Stop
Time, Status, and any errors that occur.
2. To refresh the job status log, click Refresh.
Clearing the job status log
To clear the job status log:
1. From the main menu, click Diagnostics > Job Status.
2. To clear completed jobs, click the Clear Completed button.
3. To clear all jobs, click the Clear All button.
Job Status 75
Page 87

SIPxNano IP-PBX Getting Started Guide 7 • Diagnostics
Services
Services allows you to start, stop, restart, and refresh all component services of the SIPxNano server, including
CommServer, ConfigServer and ACD Server, and MediaServer. You can also start, stop, and restart parts of
SIPxNano components, such as SIPAuthProxy, SIPProxy, SIPRegistrar, and SIPStatus, all parts of the CommServer.
Figure 51. SIPxNano Services
Services 76
Page 88

SIPxNano IP-PBX Getting Started Guide 7 • Diagnostics
Snapshot
Snapshot allows you to capture Log files, Apache configuration files, and if you are diagnosing a problem that
requires real credential information, you can select the Credentials checkbox to capture password information
from the credentials file.
Figure 52. Snapshot
After selecting or deselecting the appropriate checkboxes, click Apply.
The sipx-configuration.tar.gz archive file is created and made available as a link on the Snapshot screen.
Figure 53. Successful snapshot
You can download this archive by clicking the sipx-configuration.tar.gz link and clicking Save on the File
Download pop-up window that displays.
Snapshot 77
Page 89

Chapter 8 Voicemail
Chapter contents
Overview ...............................................................................................................................................................79
Accessing the Voicemail webpage ..........................................................................................................................79
Managing Voicemail Messages ..............................................................................................................................79
Listening to messages ......................................................................................................................................80
Moving messages ............................................................................................................................................80
Deleting messages ...........................................................................................................................................80
Editing messages .............................................................................................................................................80
Editing Voicemail Preferences ...............................................................................................................................81
Manage Folders ...............................................................................................................................................81
To add a folder ..........................................................................................................................................81
To delete or edit a folder ...........................................................................................................................81
Manage Greetings ...........................................................................................................................................81
To play a greeting ......................................................................................................................................81
To make a greeting active ..........................................................................................................................81
To record a greeting ..................................................................................................................................81
Manage Distributions .....................................................................................................................................82
To add a distribution list ...........................................................................................................................82
Manage Notifications ......................................................................................................................................82
78
Page 90

SIPxNano IP-PBX Getting Started Guide 8 • Voicemail
Overview
Each existing user has voicemail access, but the voicemail page is separate from the main screen.
Note You can only access the voicemail webpage with an active User ID and PIN.
For more information about adding new users and setting up user voicemail
privileges, see Chapter 3, “Users” on page 14.
Accessing the Voicemail webpage
To access the Voicemail webpage, from the main screen, click:
- Voice Mail > Inbox
A prompt will appear asking for a user name and password.
- Enter your Extension and PIN, and click OK.
Note To logout of the voicemail page, the user must exit the web browser.
Note Online help is available for the Voicemail webpage. To access voicemail help,
click on the blue Help link at the top of the Voicemail webpage.
Managing Voicemail Messages
When you first log in to the Voicemail interface, click on the Inbox to access the login prompt.
Figure 54. Voicemail inbox
From the Inbox, you can:
• Listen to messages
• Move messages to other folders
• Delete messages
To access Voicemail folders other than the Inbox, click on the respective link under Voicemail Folders in the
left-hand menu. The Saved, Deleted, and Personal folders are defaults.
Overview 79
Page 91

SIPxNano IP-PBX Getting Started Guide 8 • Voicemail
Listening to messages
To listen to voice messages:
1. Click on the folder you’d like to access (Inbox, Saved, Deleted, or Personal).
2. Under the Play column, click on the speaker icon by the message you want to hear.
Moving messages
To move a message:
1. Check the box next to the message you want to move.
2. In the drop-down menu, select the folder you’d like to move the message to.
3. Click the Move button.
Deleting messages
To delete a message:
1. Check the box next to the message you want to delete.
2. Click the Delete button.
Editing messages
Every new voice message has the default name,“Voice Message.” To organize your messages, you may want to
rename each subject. To rename the subject of a message:
1. Click on the pencil icon in the Edit column of the message you want to rename.
2. Type the new subject.
3. Click Save.
Managing Voicemail Messages 80
Page 92

SIPxNano IP-PBX Getting Started Guide 8 • Voicemail
Editing Voicemail Preferences
Under the Voicemail Preferences section on the Voicemail webpage, the following options are available:
Manage Folders, Manage Greetings, Manage Distribution, and Mange Notifications.
Manage Folders
From the Manage Folders page, you can add, delete, and edit personal folders.
To add a folder
1. Click on the Create Folder button.
2. Type a name for the folder in Folder Name field.
3. Click Save.
To delete or edit a folder
1. Click on the Manage Folders link.
2. To edit an existing personal folder, click on the pencil icon in the Edit column of the folder you want to
edit. Click Save.
3. To delete a personal folder, click on the trash can icon in the Delete column of the folder you want to
delete. (This will delete all of the messages in that folder, along with the folder itself).
Manage Greetings
From the Manage Greetings folder, you can play a greeting or select an active greeting. The default greeting is,
“The owner of extension (your extension number or user ID) is not available.” You can change the default
greeting by recording your name and a personal greeting. You can record up to three (3) personal greetings.
To play a greeting
1. Click on the Manage Greetings link under Voicemail Preferences.
2. Click on the speaker icon in the Play column of the greeting you want to hear.
To make a greeting active
1. Click on Manage Greetings under Voicemail Preferences.
2. From the Change Active Greeting drop-down menu, choose the greeting you want to make active.
3. Click Save. The page will refresh and a check mark will appear next to the greeting you selected.
To record a greeting
1. Log in to voice mail on your phone.
2. Select voice mail options to record your name or greeting.
Editing Voicemail Preferences 81
Page 93

SIPxNano IP-PBX Getting Started Guide 8 • Voicemail
Manage Distributions
Distribution lists are used for delivering the messages to multiple parties.
To add a distribution list
1. Click on the Manage Distributions link under Voicemail Preferences.
2. Click Add Distribution to create your distribution lists.
3. Enter the mailbox address(es) in the Destinations field. Use a comma to separate addresses in the distribu-
tion list.
4. Click Save.
Manage Notifications
Notifications can be sent to your email when you receive a new voice mail.
1. Click on the Manage Notifications link under Voicemail Preferences.
2. Click Add Notification to specify your email address.
3. Enter your email address in the Email Address field.
4. If you want to attach a voice message, select the Attach voice message checkbox.
5. Click Save.
Note The Email Notification Feature must be enabled by your SIPxNano admin-
istrator in order for individual users to set up email notifications.
Editing Voicemail Preferences 82
Page 94

Chapter 9 Contacting Patton for assistance
Chapter contents
Introduction..........................................................................................................................................................84
Contact information..............................................................................................................................................84
Patton support headquarters in the USA .........................................................................................................84
Alternate Patton support for Europe, Middle East, and Africa (EMEA) ..........................................................84
Warranty Service and Returned Merchandise Authorizations (RMAs)...................................................................84
Warranty coverage ..........................................................................................................................................84
Out-of-warranty service .............................................................................................................................85
Returns for credit ......................................................................................................................................85
Return for credit policy .............................................................................................................................85
RMA numbers ................................................................................................................................................85
Shipping instructions ................................................................................................................................85
83
Page 95

SIPxNano IP-PBX Getting Started Guide 9 • Contacting Patton for assistance
Introduction
This chapter contains the following information:
• “Contact information”—describes how to contact Patton technical support for assistance.
• “Warranty Service and Returned Merchandise Authorizations (RMAs)”—contains information about the
warranty and obtaining a return merchandise authorization (RMA).
Contact information
Patton Electronics offers a wide array of free technical services. If you have questions about any of our other
products we recommend you begin your search for answers by using our technical knowledge base. Here, we
have gathered together many of the more commonly asked questions and compiled them into a searchable
database to help you quickly solve your problems.
Patton support headquarters in the USA
• Online support: available at www.patton.com
• E-mail support: e-mail sent to support@patton.com will be answered within 1 business day
• Telephone support: standard telephone support is available five days a week—from 8:00 am to
5:00 pm EST (1300 to 2200 UTC/GMT)—by calling +1 (301) 975-1007
• Fax: +1 (253) 663-5693
Alternate Patton support for Europe, Middle East, and Africa (EMEA)
• Online support: available at www.patton-inalp.com
• E-mail support: e-mail sent to support@patton-inalp.com will be answered within 1 business day
• Telephone support: standard telephone support is available five days a week—from 8:00 am to
5:00 pm CET (0900 to 1800 UTC/GMT)—by calling +41 (0)31 985 25 55
• Fax: +41 (0)31 985 25 26
Warranty Service and Returned Merchandise Authorizations (RMAs)
Patton Electronics is an ISO-9001 certified manufacturer and our products are carefully tested before shipment. All of our products are backed by a comprehensive warranty program.
Note If you purchased your equipment from a Patton Electronics reseller, ask your
reseller how you should proceed with warranty service. It is often more convenient for you to work with your local reseller to obtain a replacement.
Patton services our products no matter how you acquired them.
Warranty coverage
Our products are under warranty to be free from defects, and we will, at our option, repair or replace the product should it fail within one year from the first date of shipment. Our warranty is limited to defects in workmanship or materials, and does not cover customer damage, lightning or power surge damage, abuse, or
unauthorized modification.
Introduction 84
Page 96

SIPxNano IP-PBX Getting Started Guide 9 • Contacting Patton for assistance
Out-of-warranty service
Patton services what we sell, no matter how you acquired it, including malfunctioning products that are no
longer under warranty. Our products have a flat fee for repairs. Units damaged by lightning or other catastrophes may require replacement.
Returns for credit
Customer satisfaction is important to us, therefore any product may be returned with authorization within 30
days from the shipment date for a full credit of the purchase price. If you have ordered the wrong equipment or
you are dissatisfied in any way, please contact us to request an RMA number to accept your return. Patton is
not responsible for equipment returned without a Return Authorization.
Return for credit policy
• Less than 30 days: No Charge. Your credit will be issued upon receipt and inspection of the equipment.
• 30 to 60 days: We will add a 20% restocking charge (crediting your account with 80% of the purchase price).
• Over 60 days: Products will be accepted for repairs only.
RMA numbers
RMA numbers are required for all product returns. You can obtain an RMA by doing one of the following:
• Completing a request on the RMA Request page in the Support section at www.patton.com
• By calling +1 (301) 975-1007 and speaking to a Technical Support Engineer
• By sending an e-mail to returns@patton.com
All returned units must have the RMA number clearly visible on the outside of the shipping container. Please use
the original packing material that the device came in or pack the unit securely to avoid damage during shipping.
Shipping instructions
The RMA number should be clearly visible on the address label. Our shipping address is as follows:
Patton Electronics Company
RMA#: xxxx
7622 Rickenbacker Dr.
Gaithersburg, MD 20879-4773 USA
Patton will ship the equipment back to you in the same manner you ship it to us. Patton will pay the return
shipping costs.
Warranty Service and Returned Merchandise Authorizations (RMAs) 85
Page 97

Appendix A Session Initiation Protocol (SIP)
Chapter contents
Overview ...............................................................................................................................................................87
SIP Messages .........................................................................................................................................................87
Methods ..........................................................................................................................................................88
Response Codes ..............................................................................................................................................89
Message Headers .............................................................................................................................................90
Sample SIP Message ........................................................................................................................................90
Message Flow Examples ..................................................................................................................................90
Call setup ..................................................................................................................................................91
Call teardown ............................................................................................................................................91
Successful blind transfer ............................................................................................................................91
Successful consultative transfer ..................................................................................................................92
SIP URLs ........................................................................................................................................................92
SIP Transactions....................................................................................................................................................93
SIP Sessions...........................................................................................................................................................93
SIP Calls................................................................................................................................................................93
Caller ID ...................................................................................................................................................93
System Components..............................................................................................................................................94
86
Page 98

SIPxNano IP-PBX Getting Started Guide A • Session Initiation Protocol (SIP)
Overview
The Session Initiation Protocol (SIP) establishes a standard methodology for setting up, maintaining, and ending interactive communication sessions. To perform these tasks, SIP, like HTTP (Hypertext Transfer Protocol),
uses a request-response model in which messages are exchanged by system components.
The particular content of a session is described in, but not included with, SIP messages. Phones that use SIP to
manage the transmission of voice data during phone calls can also be used for the transmission of other types of
data, such as video, fax, and multimedia.
Note SIP messages may actually travel over different networks than the audio or
video packets they describe.
This section introduces the contents of SIP messages and describes how the messages are organized into transactions, sessions, and calls. The Internet Engineering Task Force (IETF) Request for Comments (RFC) 3261
provides the specification for the SIP protocol.
SIP Messages
SIP is ASCII-based. All SIP messages are formatted as text using HTTP syntax. SIP messages contain call control methods for requests or response codes for replies, and are exchanged to:
• Initiate a session between an originator and a target. This involves:
- Locating the target
- Determining whether or not the target is available
- Determining the media capabilities of the target
• Establish a connection between the originator and the target
• End the session by terminating or transferring the connection
Descriptions of the SIP methods and response codes, the required fields in SIP message headers, SIP URLs,
and examples of SIP messages and message flows follow.
Overview 87
Page 99

SIPxNano IP-PBX Getting Started Guide A • Session Initiation Protocol (SIP)
Methods
SIP call control methods identify the type of request that is being made. The following table lists SIP methods
and their functions.
Table 7. SIP Methods and Functions
Method Function
INVITE Invites a target to participate in a session; estab-
lishes a connection. Also used to change call state
or capabilities, such as the codec used.
ACK Confirms receipt of a final response to an
INVITE request.
BYE Indicates that either the originator or the target
wishes to end the call; terminates a connection or
declines an invitation.
REFER Indicates that the recipient should contact a third
party using provided contact information; initiates a transfer.
CANCEL Cancels a pending request; does not affect a com-
pleted request.
REGISTER Registers a user’s address with a SIP location
server; resolves a public address to a specific
address. Not related to specific session.
OPTIONS Solicits information about features supported by
SIP servers such as supported methods and media
capabilities.
NOTIFY Provides information about a state change; not
related to a specific session. Used for message
waiting communications with a voicemail server,
to indicate the outcome of transfers, and for configuration.
SUBSCRIBE Indicates the desire for NOTIFY (state change)
requests. Used for message waiting communications with a voicemail server and for configuration.
SIP Messages 88
Page 100

SIPxNano IP-PBX Getting Started Guide A • Session Initiation Protocol (SIP)
SIP Phones support these SIP methods:
Table 8. Supported Methods
Methods Initiated Methods Received
INVITE INVITE
ACK ACK
BYE BYE
REFER REFER
CANCEL CANCEL
REGISTER
OPTIONS OPTIONS
NOTIFY NOTIFY
SUBSCRIBE
Response Codes
SIP response codes indicate the status of a session. Response codes are generated and sent in outgoing messages, and accepted when received in incoming messages.
Table 9. Response codes
Code Function
1xx Informational: trying, ringing, forwarding, queuing, in progress
2xx Successful: Ok
3xx Redirection: indicate additional information for call forwarding
4xx Request Failure: indicate request errors such as missing information
5xx Server Failure: time outs, unavailable services, and other server errors
6xx Global Failures: busy, declined, not found, not acceptable
Responses with a 1xx response code are also called provisional responses, while the remaining response codes
(2xx, 3xx, 4xx, 5xx, and 6xx) indicate final responses.
Refer to Request for Comments 3261 for standard SIP status code definitions. Additional codes may also be
listed in Internet Draft draft-ietf-sip-rfc2543bis-05.txt.
SIP Messages 89
 Loading...